WordPress Block Editor – Columns Block
This tutorial is part of our series on How To Use The WordPress Block Editor (Gutenberg).
- To learn more about using the WordPress block editor interface, go here: The WordPress Block Editor – Content Area
- To learn more about using blocks, see this tutorial: How To Use WordPress Block Editor Blocks
***
Columns Block – Description
Use the Columns block to add text, media, and other types of content into columns and create grid layouts in your content.
![]()
The Columns block:
- Supports up to 6 columns.
- Lets you add a multi-column layout to your posts or pages.
- You can include other types of blocks within each column, making the Columns block quite versatile.
How To Use The Columns Block
In this section, we’ll cover:
- How to add a Columns block to your content.
- How to edit and configure your Columns block and block settings.
- How to remove the Columns block from your content.
For more details on using blocks (e.g. how to move blocks around your content), see this tutorial: How To Use Blocks.
Adding A Columns Block
To add a Columns block:
- Either:
- Click on the ‘Add Block’ tool in the Editing Toolbar section and select the Columns block (in Most Used or Design section), or
- Add the Columns block in the Content Area.
- Note: you can also add a predesigned column layout from the Block Patterns Library.
- Select and insert other types of blocks into your column structure (e.g. a Paragraph block, Heading block, Image block, Cover block, etc.)
- Use the tools in the Columns Block Editor or Block Settings section to format your Columns block.
Let’s go through the above steps.
How To Add A Columns Block From The Block Library
First, create a new post or page or open an existing post or page and either:
Click on the ‘Add Block’ tool and select a Columns block…

Or, select a Columns block using the Inserter tool in the Content Area.
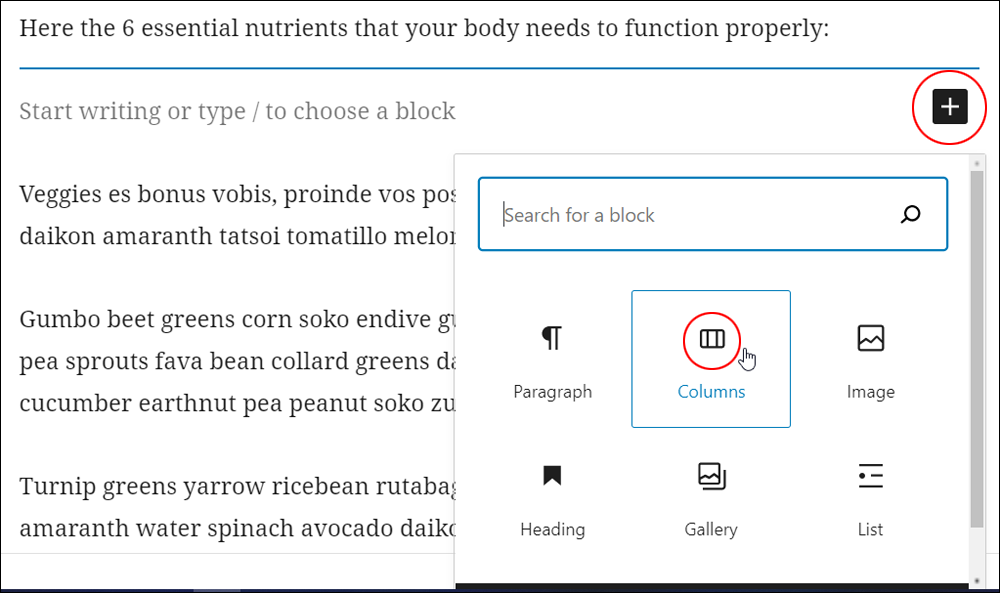
This will insert a Columns block into your content.
You are given a choice of column styles to start with. Select a variation or click the ‘Skip’ link to insert a default style and adjust your columns later.
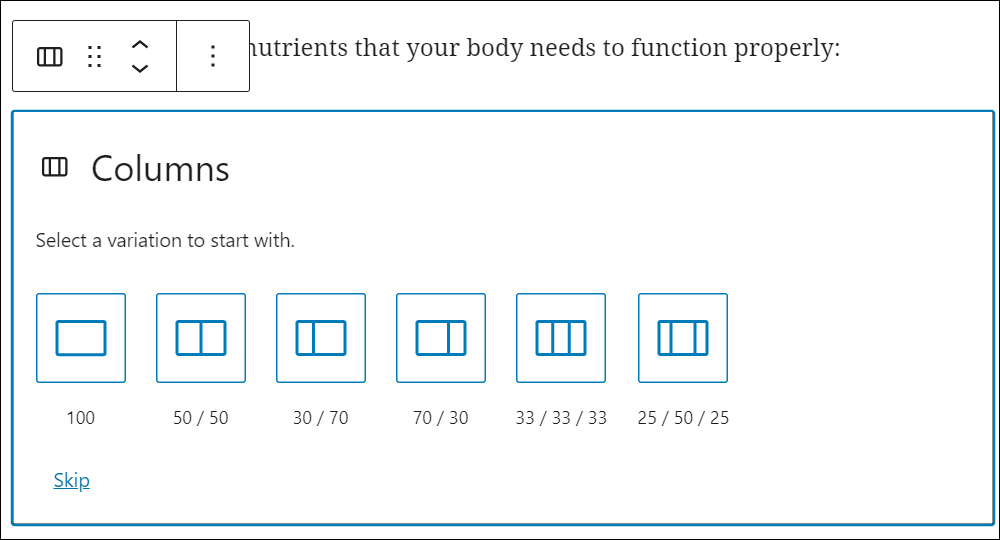
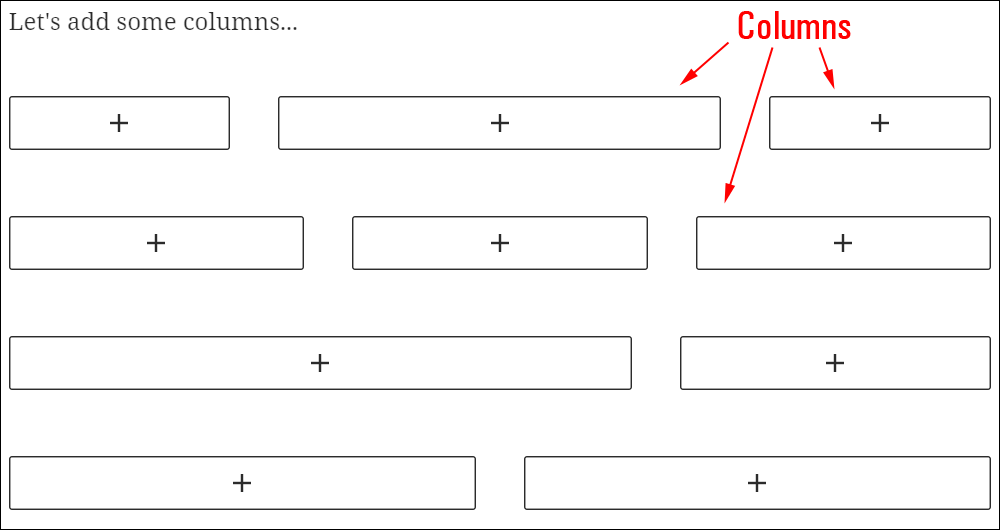
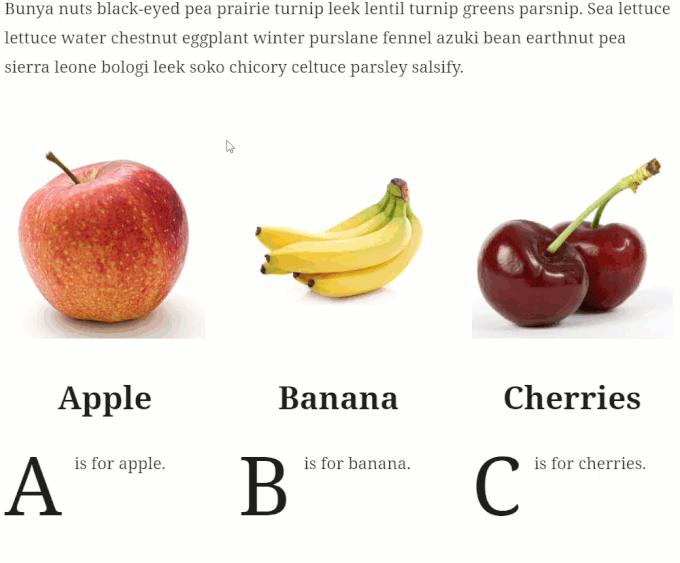
Your column containers will be inserted into your content.
![]()
You can add multiple Column blocks to create unique grid layouts using different Column variations.
How To Add A Columns Block From The Block Patterns Library
To add a predesigned Columns block pattern to your post or page:
- Click the Add Block tool.
- Select the Patterns tab.
- Select Columns from the dropdown menu.
- Select a Column style.
This will add the selected Columns block to your content.
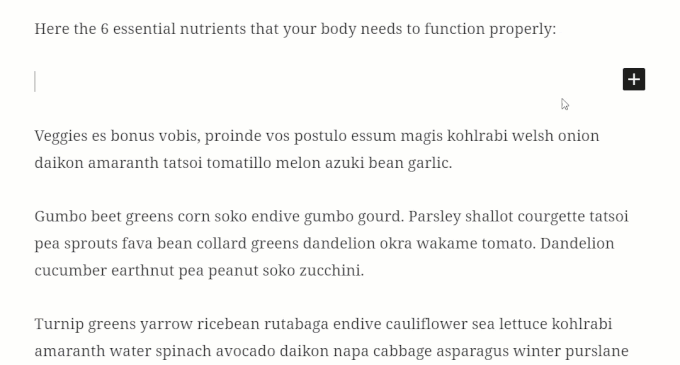
After adding a Columns block to your content:
- Click inside the Columns block to select a column.
- Insert whichever type of block you would like to add to your column structure.
- Edit the content of those blocks inside your columns.
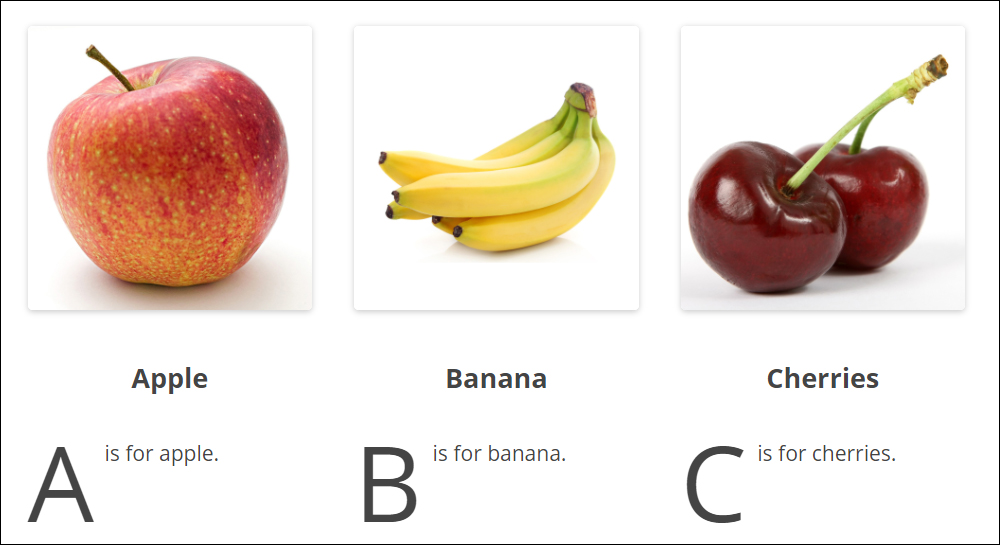
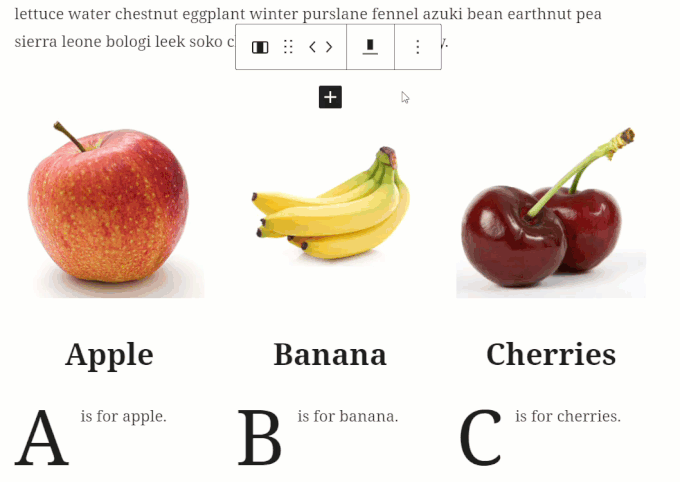
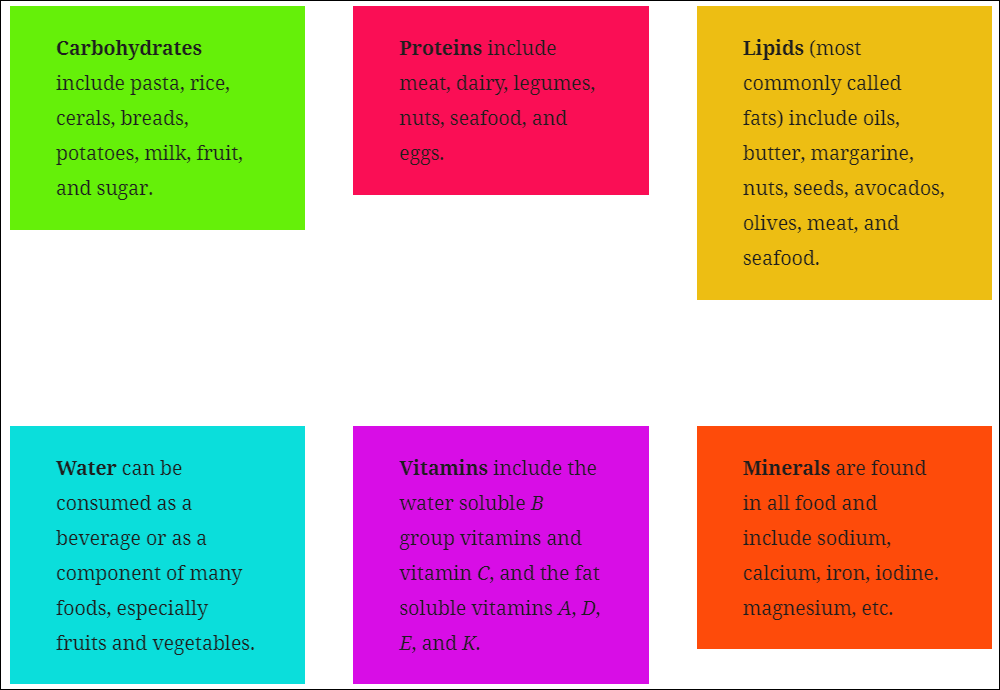
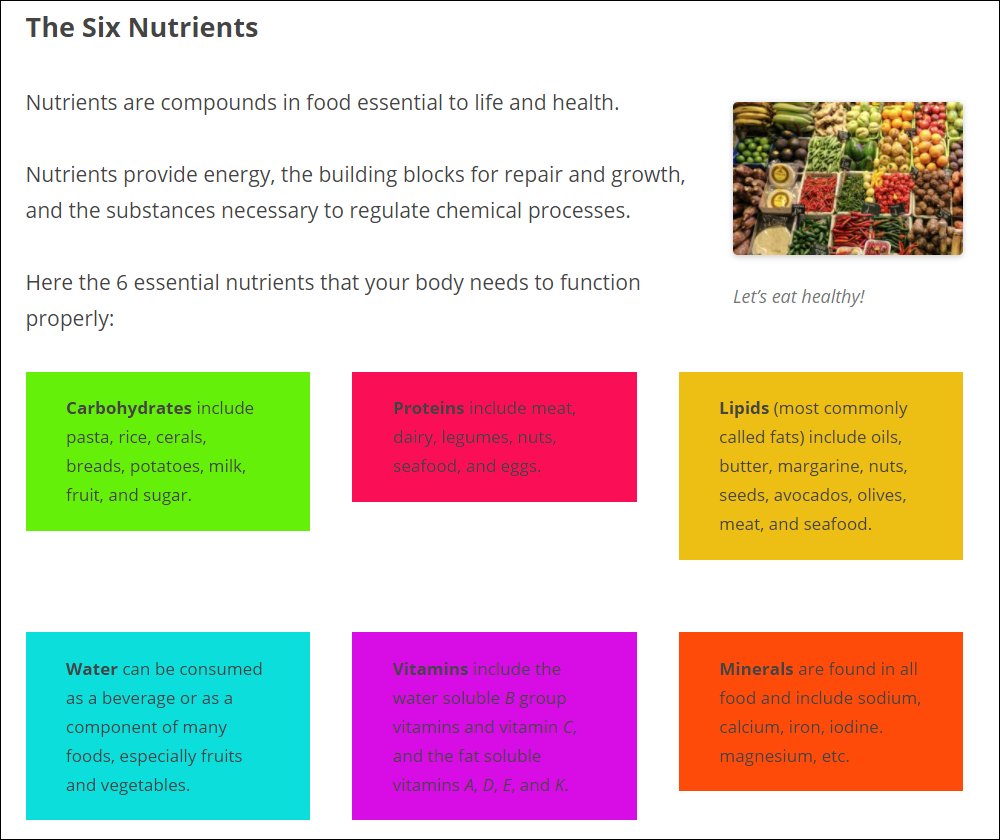
Here are some examples of what you can create using the Columns block:
Services Grid
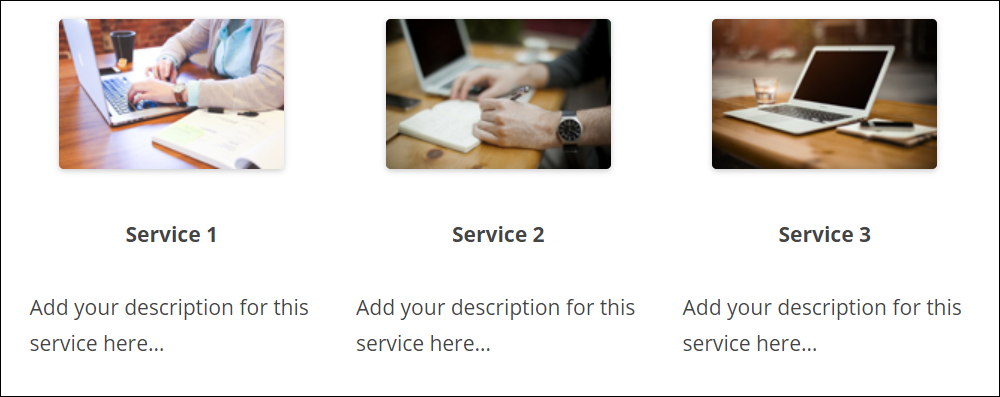
We created the above grid by adding a 3-column block to the content, then inserting and editing an Image block, Heading block, and a Paragraph block into each column.
Portfolio
Here is a 2-column portfolio created using a Columns block with an embedded Cover block.

As you can see, the Columns block provides a versatile structure for creating a wide range of text and media-based layouts in your content.
How To Edit A Columns Block
As you improve your block editing skills, you will find adding and editing content inside columns will become easier and faster.
There are three different levels to editing a Columns block:
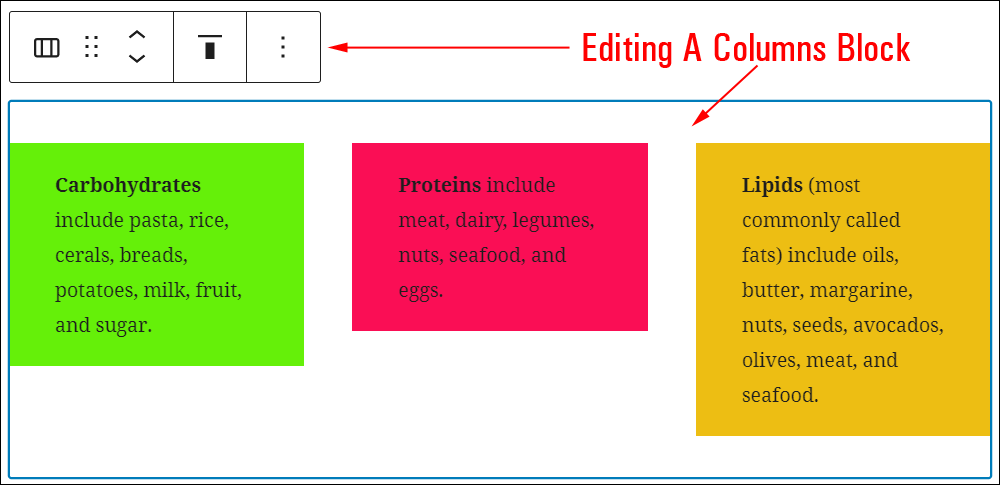
1 – Edit the Columns Block
You can edit the Columns block at the top or parent level.
To edit a Columns block:
- Click inside the Columns block to select it, then.
- Use the Block Editor tools to change your column options.
- Use the Block Settings to change your column settings.
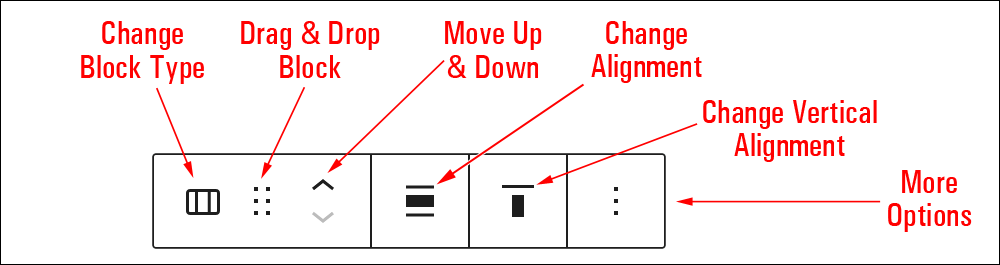
The Columns block editor lets you perform the following operations:
- Change block type or style (See ‘Code Block – Additional Info’ section below.)
- Drag block
- Move block up and down
- Change Alignment – Specify whether to display your column block in wide width (stick out on either side of normal content) or full width (stretch across the width of the entire browser).
- Change vertical alignment – Vertically align your block to the top, middle, or bottom.
- More Options – See How To Use Blocks to learn how to use this section.
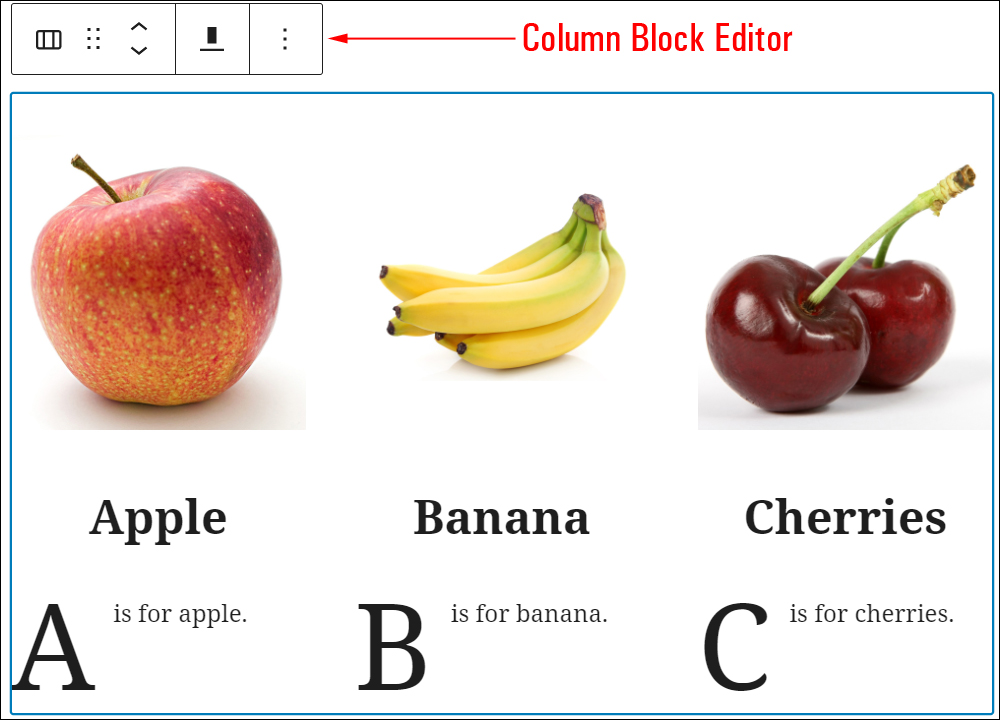
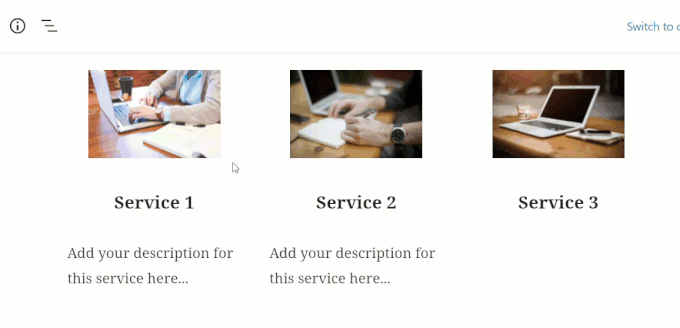
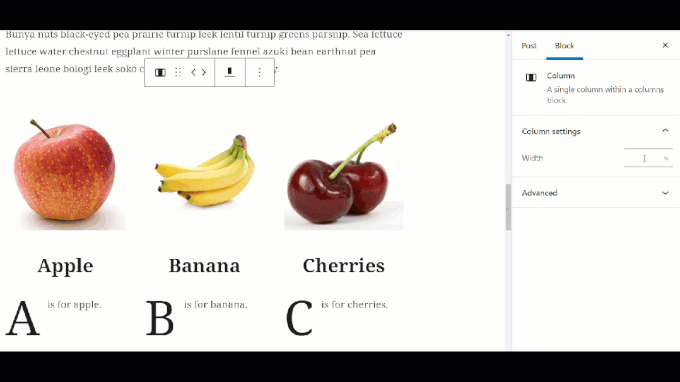
To select the Columns Block editor, click on an area of white space between columns, or click on a column and hover over the block icon to bring up the parent level block.
![]()
One way to tell which level of the editor you are working on is to look at the block icon.

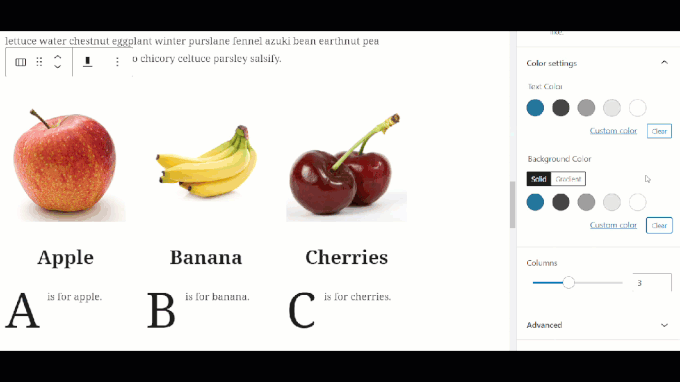
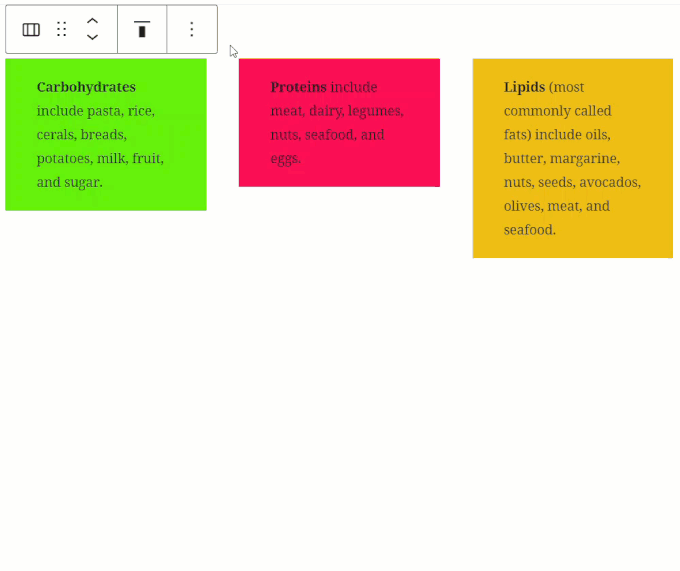
Useful Columns block settings at the top level include changing the text and background colors of the block and adjusting its number of columns (up to a maximum of 6 columns).
2 – Edit individual columns within the Columns block
You can also edit individual columns of the Columns block.
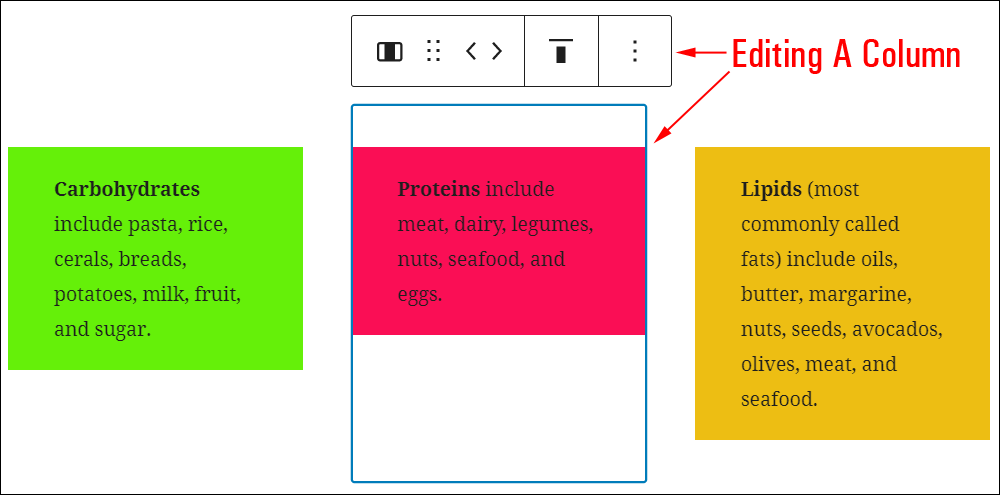
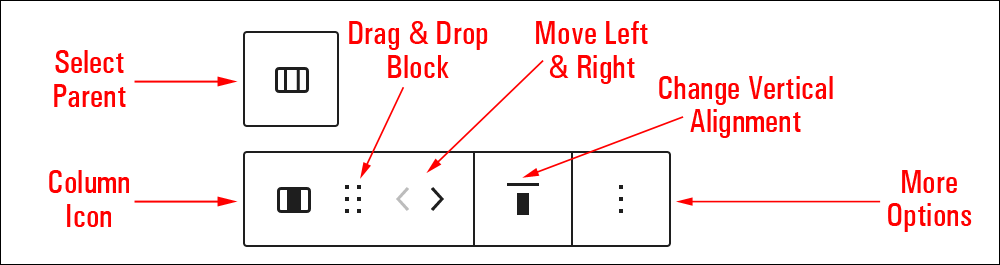
The Columns editor lets you do the following:
- Column icon – hovering over this icon brings up the Columns Block icon, which lets you select the Columns Block editor.
- Drag block
- Move block left and right – use these buttons to reorder your columns with the block.
- Change vertical alignment – Vertically align your block to the top, middle, or bottom.
- More Options – See How To Use Blocks to learn how to use this section.
You can also adjust the column width in the settings section.
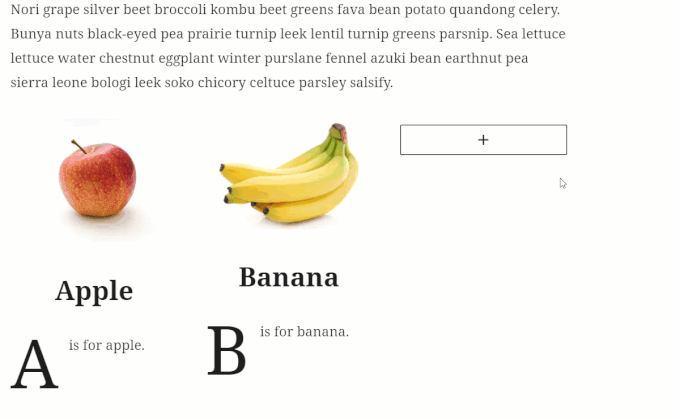
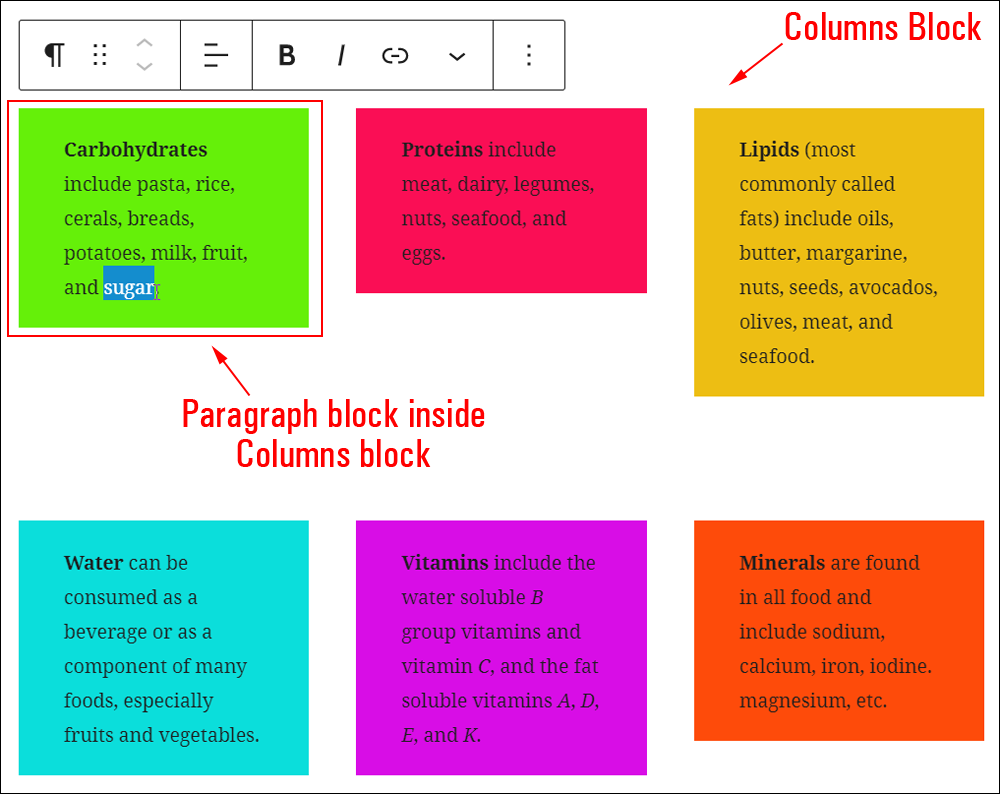
3 – Edit blocks inside columns
The Columns block essentially provides a structure that allows you to insert and work with other blocks.
So, if you insert a Paragraph block into a column, then to edit the content in that column, simply edit the Paragraph block inside the Columns block.
To learn how to edit different types of blocks, see this tutorial: How To Use Blocks
![]()
Here are some useful tips when editing a Columns block:
1 – Duplicate Columns Blocks
If adding too many columns makes the content on your post or page too narrow, consider duplicating the Columns block.
To duplicate the Columns block:
- Click inside the Columns block.
- Select ‘More Options’ > ‘Duplicate’ (or use Block Editor Keyboard Shortcuts).
After duplicating the block, just edit the content inside each of the columns.
2 – Use The Outline Tool
You can use the Outline tool in the Editing toolbar to easily view, select, reorganize, and reorder elements inside the Columns block.
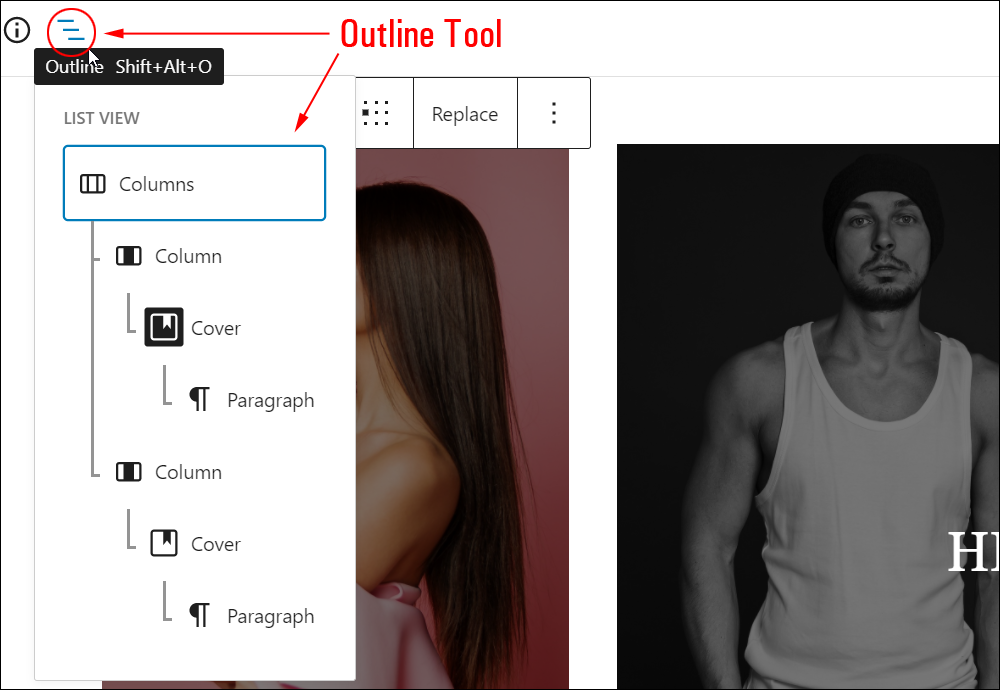
Click on elements in the Outline Tool to access editors for the Columns block, columns, and elements inside your columns.

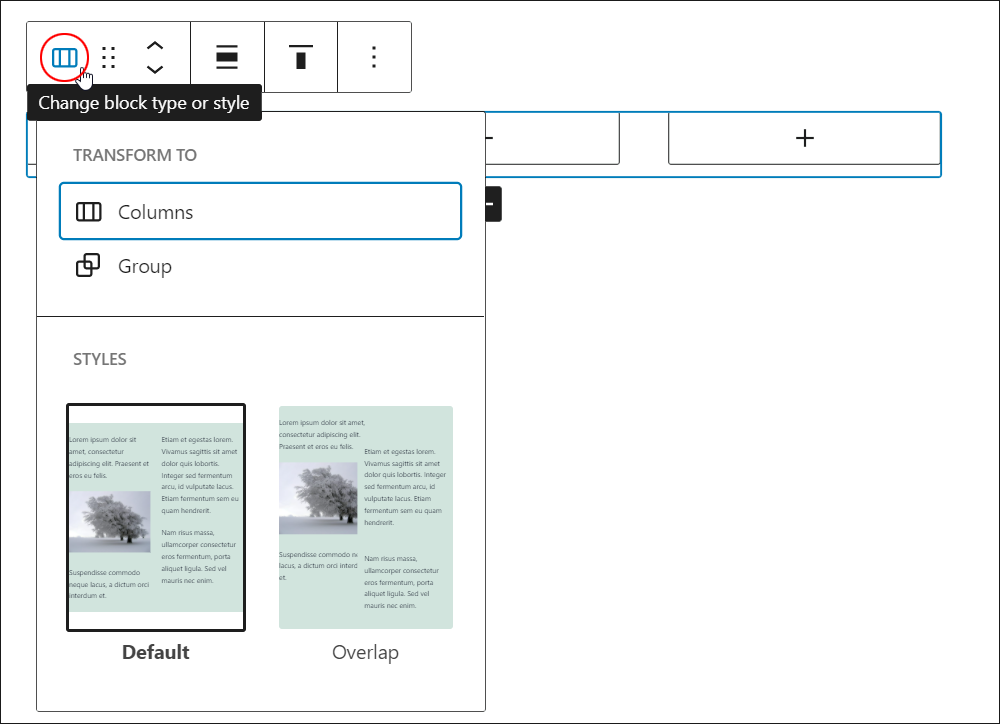
3 – Transform Multiple Blocks Into Columns
You can select multiple blocks in a row and change these into columns.
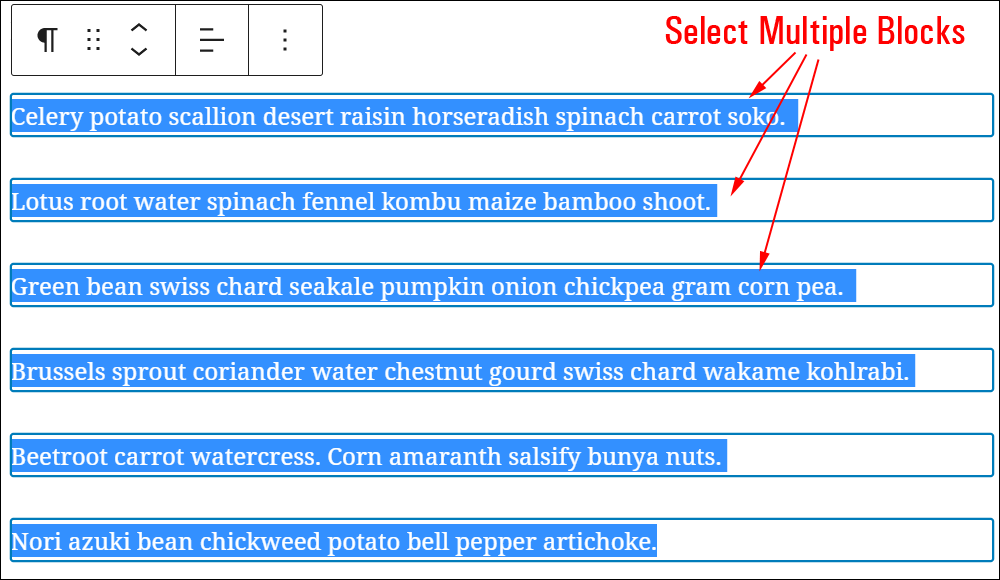
To turn multiple blocks into columns, do the following:
- Select all the blocks that you want to turn into columns by clicking and dragging.
- Click the block icon in the block editor toolbar.
- Choose Columns under the Transform to list.
Remember to save and publish or update your post or page.
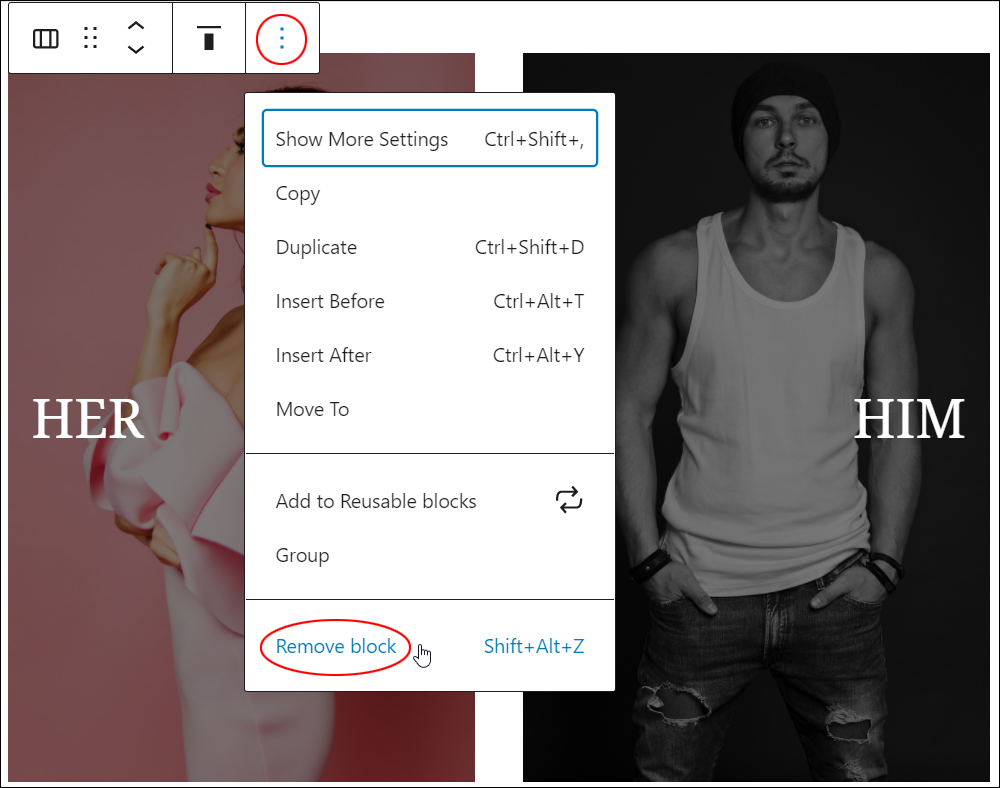
How To Remove A Columns Block
To delete or remove a columns block from your content:
- Click inside the Columns block to select it.
- Select the ‘More Options’ tool in the Block Editor.
- Click on ‘Remove Block’.
- The block will be removed from your post or page.
Additionally…
- You can reposition your block using the ‘Move Up’ and ‘Move Down’ arrows or the Drag and Drop handle tool (see this tutorial if you need help with this step: How To Use Blocks).
- You can also convert a Column block into a Reusable block.
Columns Block Tools, Options & Settings
The Columns Block includes tools, options, and settings for:
- Columns Block Editor
- Columns Block Settings
- Columns Editor
- Columns Settings
Columns Block Editor
The Columns Block Editor includes tools that let you perform the following operations:
- Change block type or style (See ‘Columns Block – Additional Info’ section below.)
- Drag block
- Move block up and down
- Change Alignment
- Wide width – makes the block stick out on either side of regular content.
- Full width – makes the block stretch over the entire width of the browser window (regular content remains within margins on either side).
- Change Vertical Alignment
- Vertically Align Top
- Vertically Align Middle
- Vertically Align Bottom
- More Options – See How To Use Blocks to learn how to use this section.
Columns Block Settings
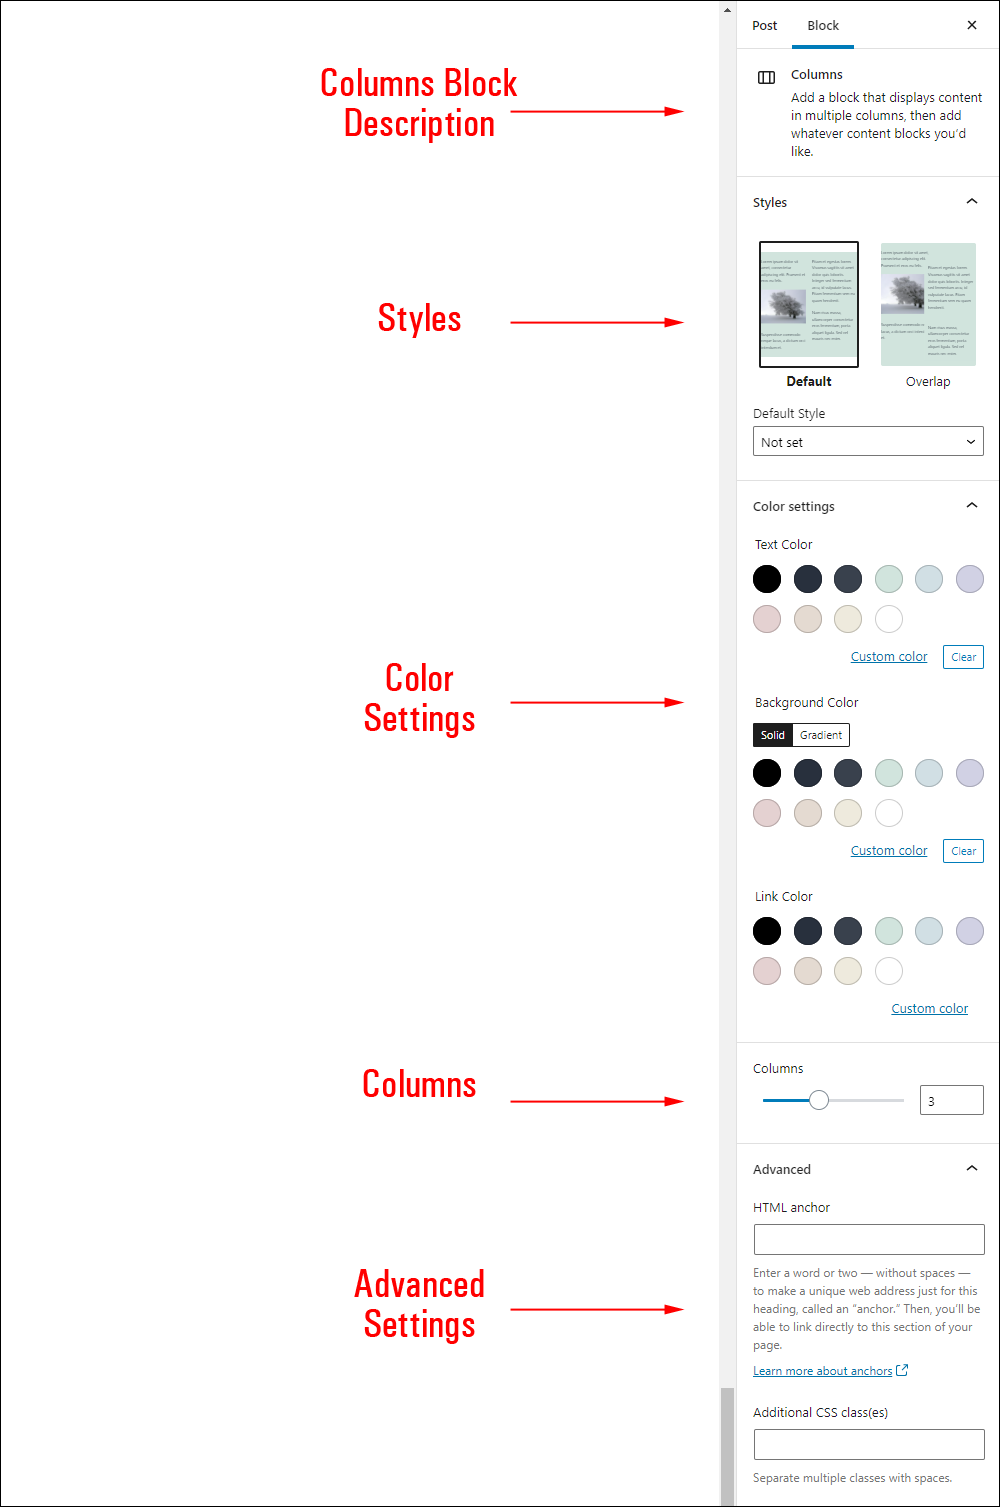
Columns Block settings include:
- Block description area
- Styles – The styles displayed in this section depend on the theme and plugins installed on your site. For example, default, overlap, etc.
- Default Style – Use the drop-down menu to select a default style for the block.
- Color Settings – Select from the preset color palette or add a custom color using hexadecimal or RGB values. Click the Clear button to restore the default text color.
- Text Color
- Background Color (Solid, Gradient)
- Link Color
- Columns
- Specify the number of columns (maximum 6) using:
- Slider – Slide left/right to increase/decrease number of columns.
- Type in a number in the ‘Columns’ box (enter a number from 1 to 6)
- Click ‘up’ and ‘down’ arrows to increase/decrease the number of columns.
- Specify the number of columns (maximum 6) using:
- Advanced Settings
- HTML Anchor – Create a unique web address to send users directly to this block using a unique jump link URL. To learn more about using HTML Anchors, see our tutorial on How To Use Blocks.
- Additional CSS Class(es) – This field lets you add multiple CSS classes to your block separated with spaces. This allows you to write custom CSS and style the block as you see fit. Note: This requires having knowledge of CSS (Cascading Style Sheets).
Columns Editor
The Columns editor includes the following:
- Column Icon – Hover to select parent (Columns Block Editor).
- Drag block
- Move column left and right
- Change Vertical Alignment
- Vertically Align Top
- Vertically Align Middle
- Vertically Align Bottom
- More Options – See How To Use Blocks to learn how to use this section.
Columns Settings
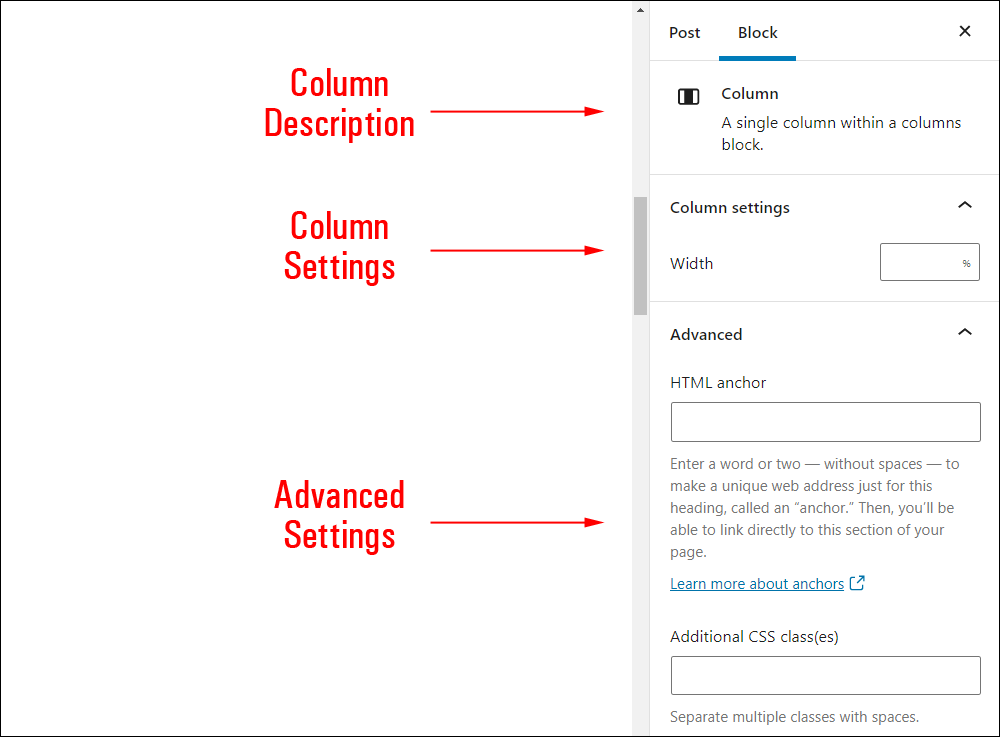
Column settings include:
- Column description area
- Column Settings
- Width (enter a percentage value)
- Advanced Settings
- HTML Anchor – Create a unique web address to send users directly to a section of your page using a unique jump link URL. To learn more about using HTML Anchors, see our tutorial on How To Use Blocks.
- Additional CSS Class(es) – This field lets you add multiple CSS classes to your block separated with spaces. This allows you to write custom CSS and style the block as you see fit. Note: This requires having knowledge of CSS (Cascading Style Sheets).
Columns Block – Additional Info
The Columns block can be converted into the following block types:
- Columns block (note: selecting this option changes the entire block into a column)
- Group block
- Reusable block
You can also select a style for your Columns block from this menu.
Additionally:
Installing plugins or themes on your site may also add new functionality, options, or settings to the Columns block.
Congratulations! Now you know how to use the WordPress content editor’s Columns block.
For tutorials on how to use other blocks, go here: WordPress Block Editor – How To Use Blocks
***

Updated: April 8th, 2023