WordPress Block Editor – Table Block
This tutorial is part of our series on How To Use The WordPress Block Editor (Gutenberg).
- To learn more about using the WordPress block editor interface, go here: The WordPress Block Editor – Content Area
- To learn more about using blocks, see this tutorial: How To Use WordPress Block Editor Blocks
***
Table Block – Description
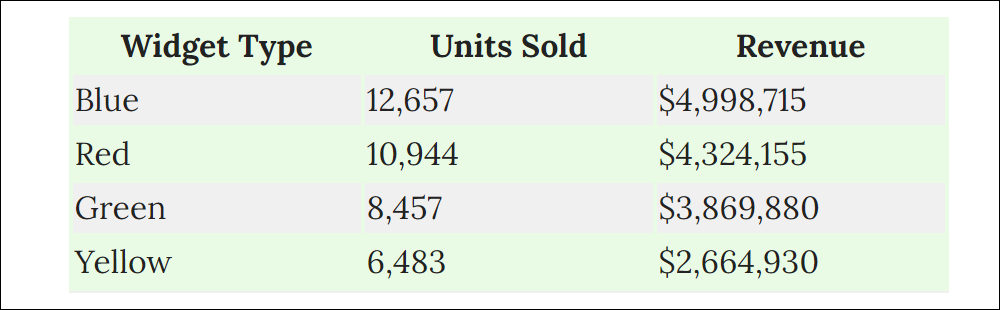
The Table block lets you add a table to WordPress with columns and rows and display data in tabular form.
How To Use The Table Block
In this section, we’ll cover:
- How to add a Table block to your content.
- How to edit and configure your Table block and block settings.
- How to remove the Table block from your content.
For more details on using blocks (e.g. how to move blocks around your content), see this tutorial: How To Use Blocks.
Adding A Table Block
To add a Table block to your content:
- Either:
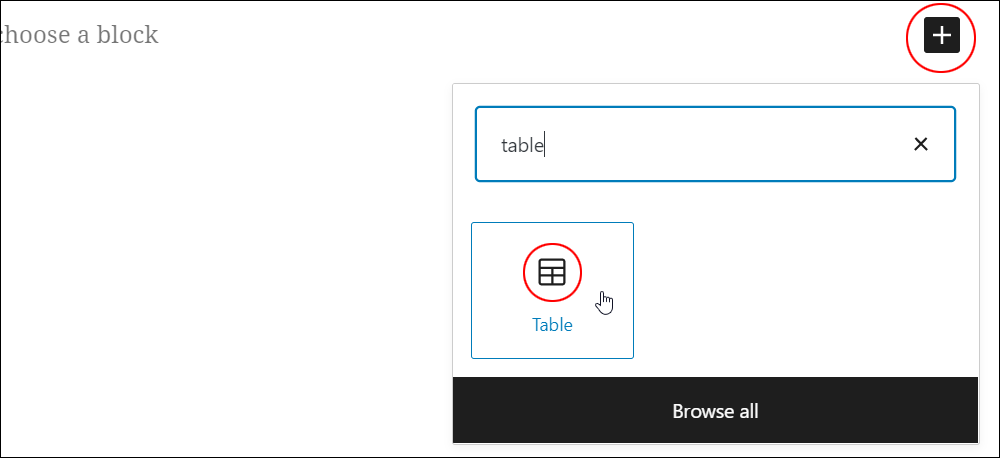
- Click on the ‘Add Block’ tool in the Editing Toolbar section and select the Table block (in Most Used or Text section),
- Add the Table block in the Content Area.
- Set the number of columns and rows for your table.
- Create your table.
- Add your table content.
- Use the tools in the Table Block Editor or Block Settings section to edit and format your Table.
Let’s go through the above steps.
First, create a new post or page or open an existing post or page and either:
Click on the Add Block tool and select a Table block…
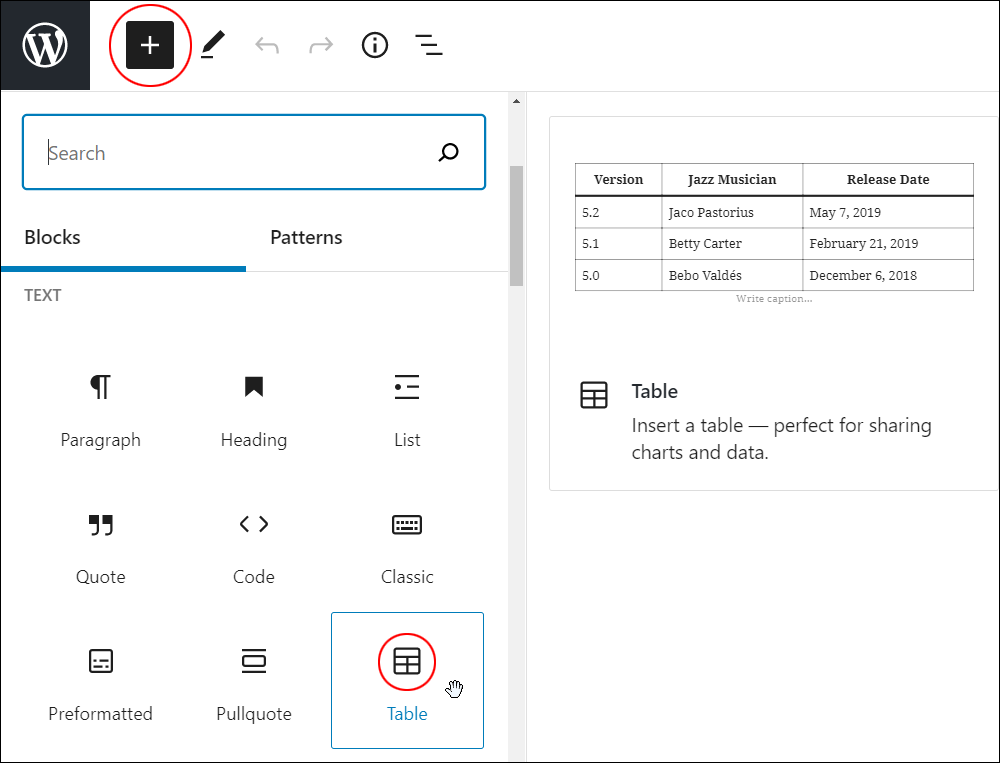
Or, select a Table block using the Inserter tool in the Content Area.
Either of the above methods will add a Table block to your content.
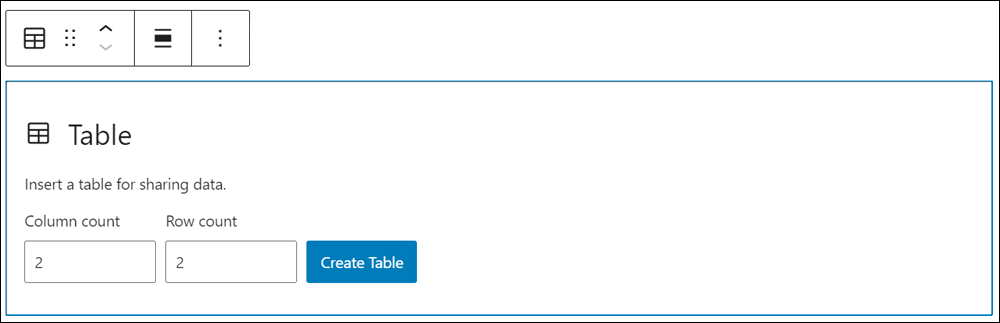
After adding your Table block, specify the number of columns and rows, and click the Create Table button.
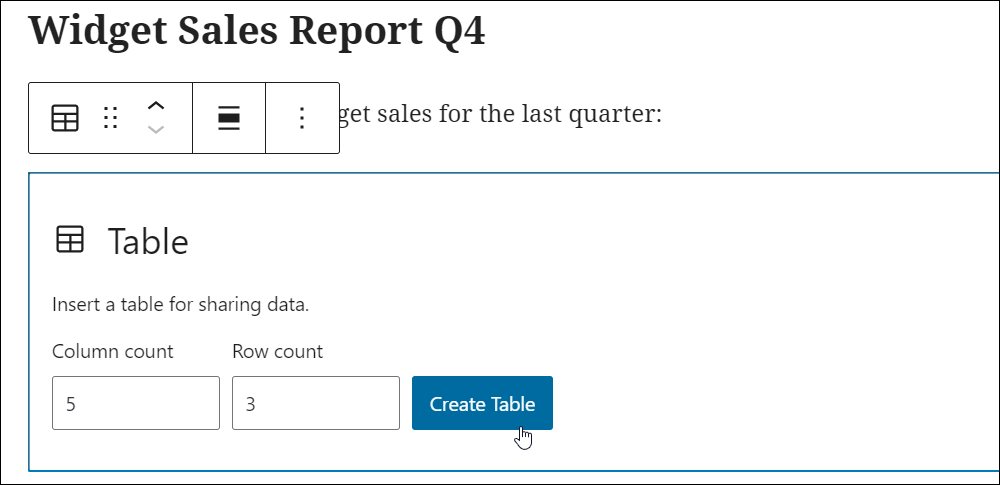
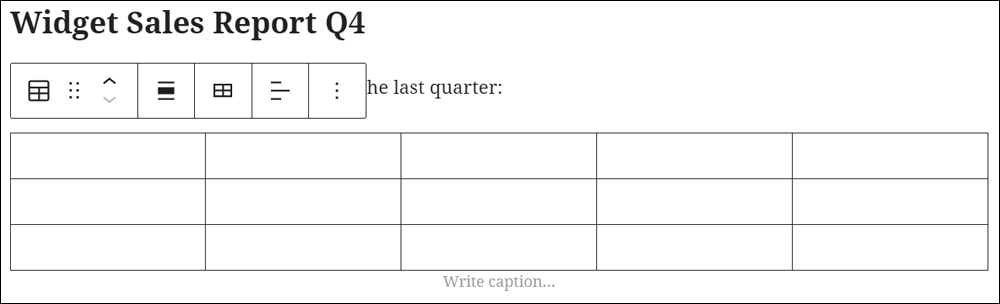
Your table will be created.
![]()
If you’re not sure how many columns and rows you will need for your table, you can start with a default table and insert or delete rows and columns later.

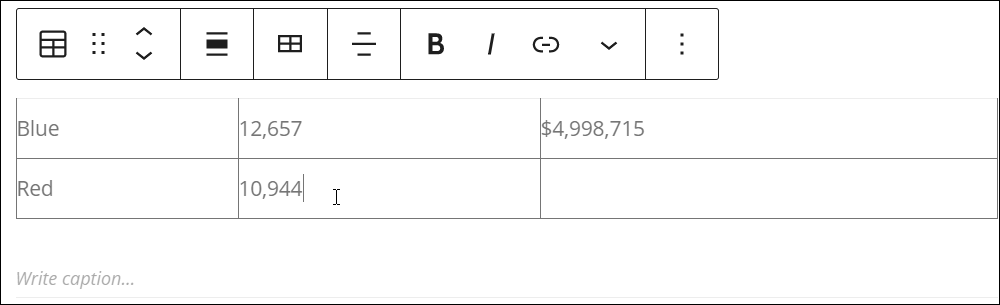
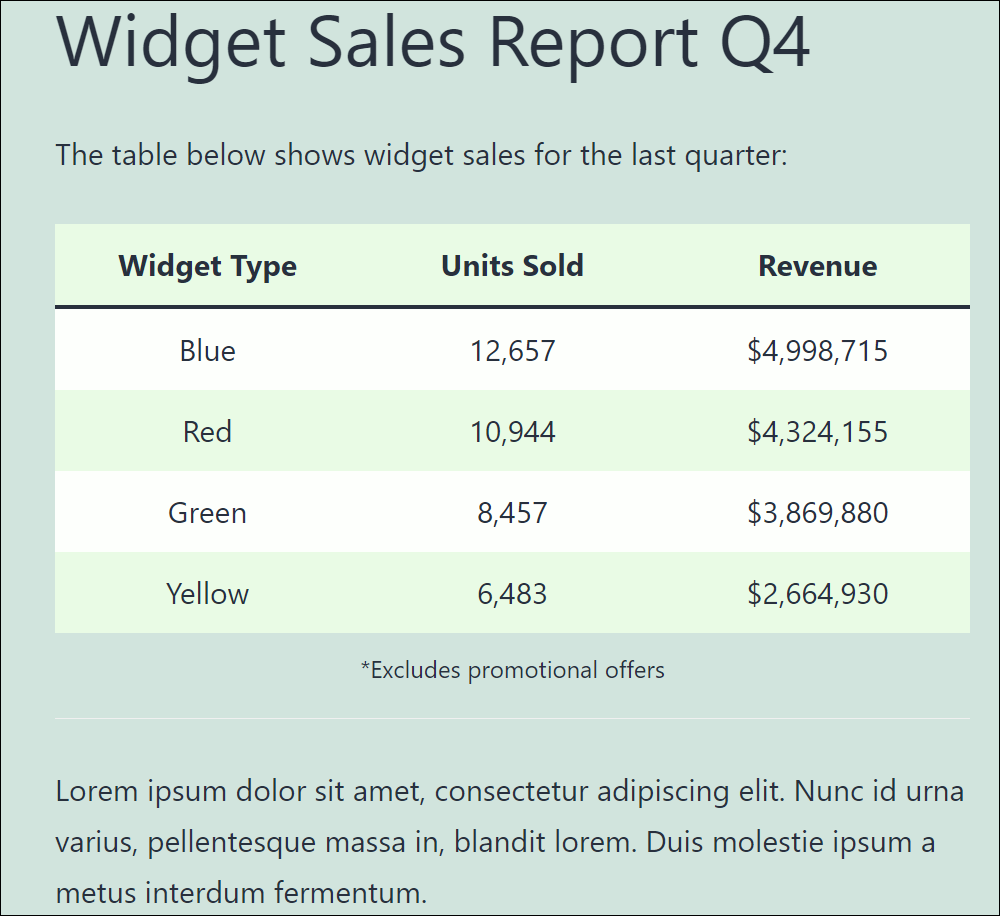
After creating a table, you can type or paste your content into the table’s columns and rows.
After adding content to your table, you can:
- Edit and configure your block’s settings,
- Save, publish, or update your post or page.
How To Edit A Table Block
To edit a Table block:
- Click inside the Table block to select it.
- Use the Block Editor tools to:
- Change table alignment (float table left, center, or right).
- Add/Remove columns and rows.
- Format table text (bold, italics, strikethrough).
- Add a hyperlink to table content.
- Use the Block Settings to:
- Change the style of the table.
- Fix table cell width.
Let’s go through some of the above options.
The Table block settings section lets you configure settings for your table, like:
- Table style (e.g. default, stripes, etc.)
- Fixed width table cells
- Add a header section.
- Add a footer section.
- Add a background color.
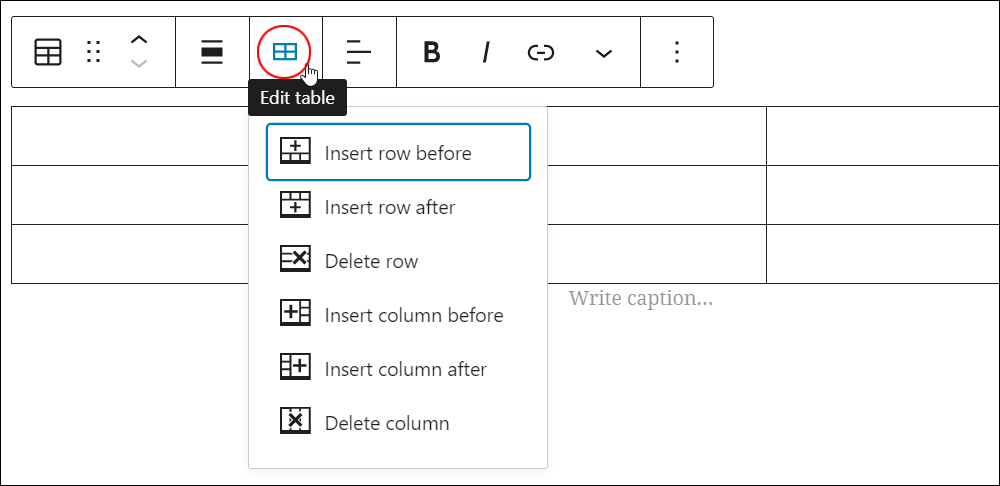
The Table block editor menu lets you configure options such as inserting and deleting rows and columns.
As mentioned earlier, you can start with a default table and adjust different settings and options for your table later.
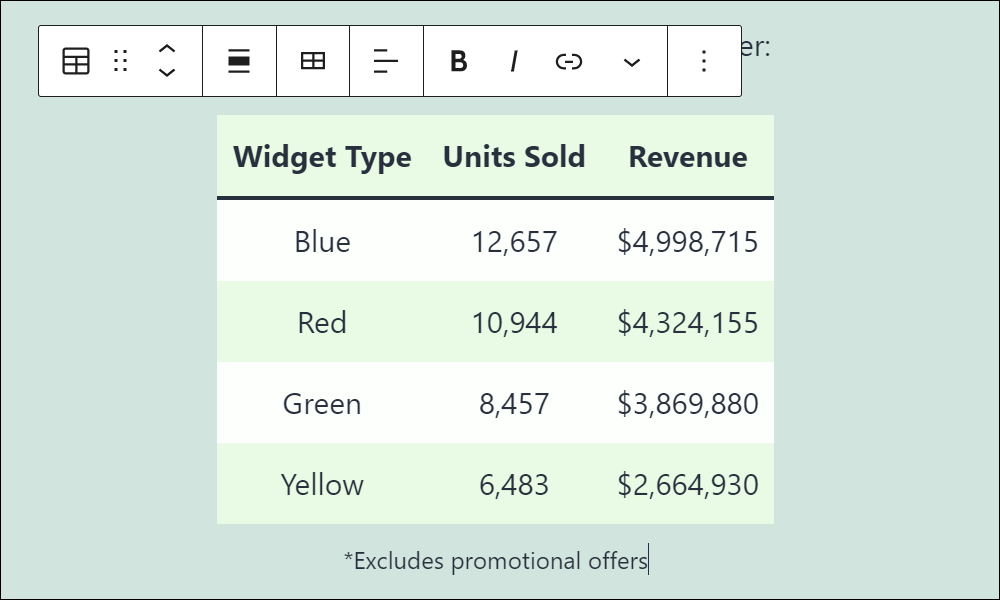
You can also use the Change Column Alignment tool to align data in your table columns (i.e. align column left, center, or right).

Additionally, you can:
- Float your table to the left or right of other content on your post or page, or center it on your page using the alignment tool.
- Wide-align (make the table stick out on either side of your regular content) or full-align (stretch the table for the entire width of your browser) your table.

![]()
Note: Your theme must support the ‘Wide width’ and ‘Full width’ options. Not all themes support these options.
You can also add and format a table caption.
Remember to update and publish your post or page to save your settings.
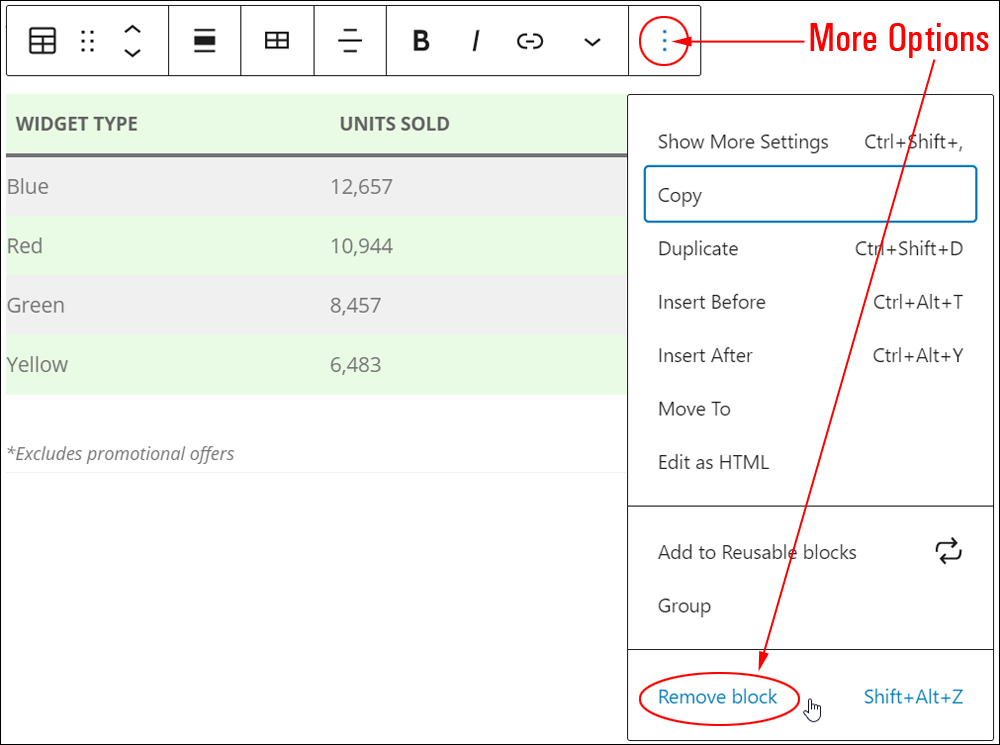
How To Remove A Table Block
To delete or remove a Table block from your content:
- Click inside the Table block to select it.
- Select the ‘More Options’ tool in the Block Editor.
- Click on ‘Remove block’.
- This will remove the Table block from your content.
Additionally…
- You can reposition your block using the ‘Move Up’ and ‘Move Down’ arrows or the Drag and Drop handle tool (if you need help with this step, see our tutorial on How To Use Blocks).
- You can also convert a Table block into a Reusable block.
Table Block Tools, Options & Settings
The Table block includes tools, options, and settings for:
- Table Block Editor
- Table Block Settings
Table Block Editor
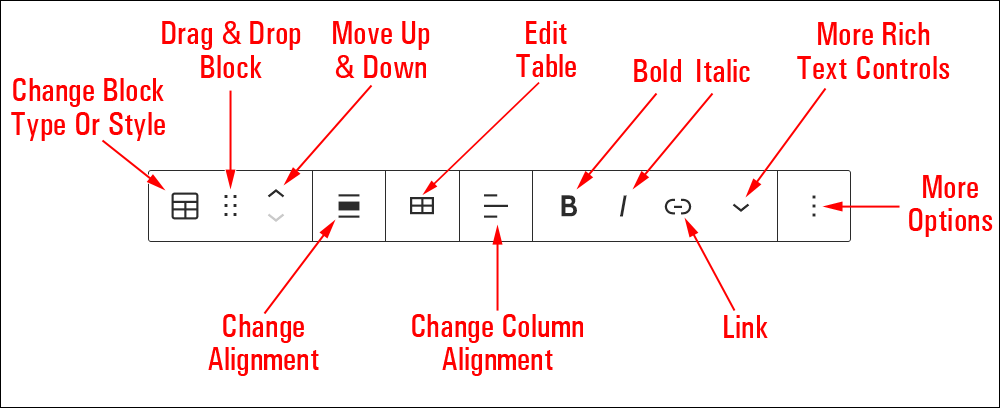
The Table Block Editor includes tools that let you perform the following operations:
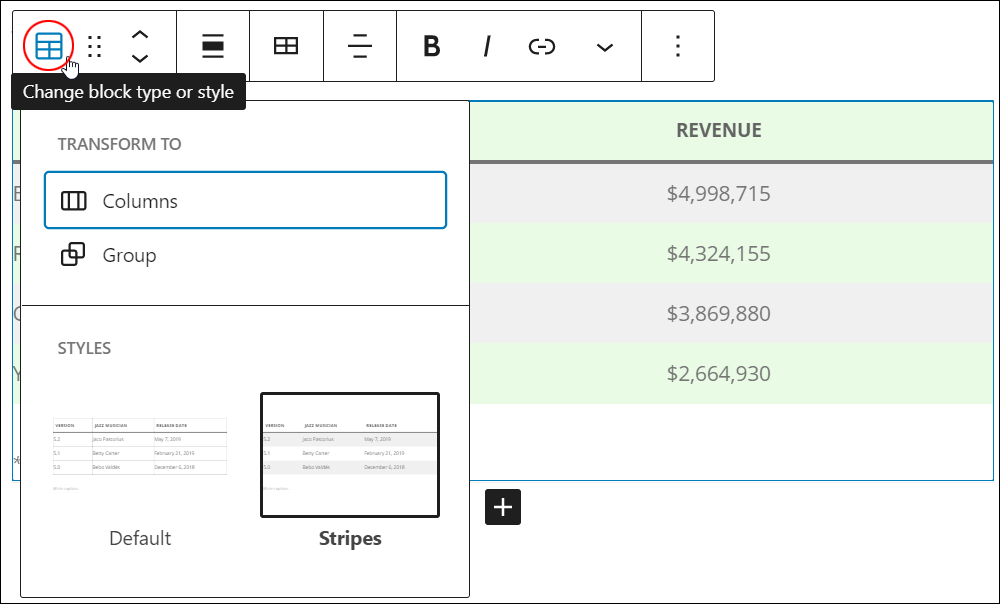
- Change Block Type (See ‘Table Block – Additional Info’ section below.)
- Drag & Drop Tool
- Move Up and Down Tool
- Change Alignment Tool
- Align left
- Align center
- Align right
- Wide width
- Full width
- Edit Table
- Insert Row Before
- Insert Row After
- Delete Row
- Insert Column Before
- Insert Column After
- Delete Column
- Bold – Add bold text formatting to your link text.
- Italic – Add italicized text formatting to your link text.
- Link Tool – Link and unlink text in your table.
- Custom URL – Paste a URL or type a search term to bring up a list of posts, pages, or custom post types on your site containing your search term.
- Clicking on the Link settings button brings up the following options:
- Open the link in a new tab (on/off).
- Apply button. Once the Apply button is clicked, your link displays the following additional options:
- View the link.
- Edit the link.
- Delete the link.
- Clicking on the Link settings button brings up the following options:
- Custom URL – Paste a URL or type a search term to bring up a list of posts, pages, or custom post types on your site containing your search term.
- More Rich Text Controls – See How To Use Blocks to learn more about using rich text control settings.
- More Options – See How To Use Blocks to learn how to use this section.
Table Block Settings
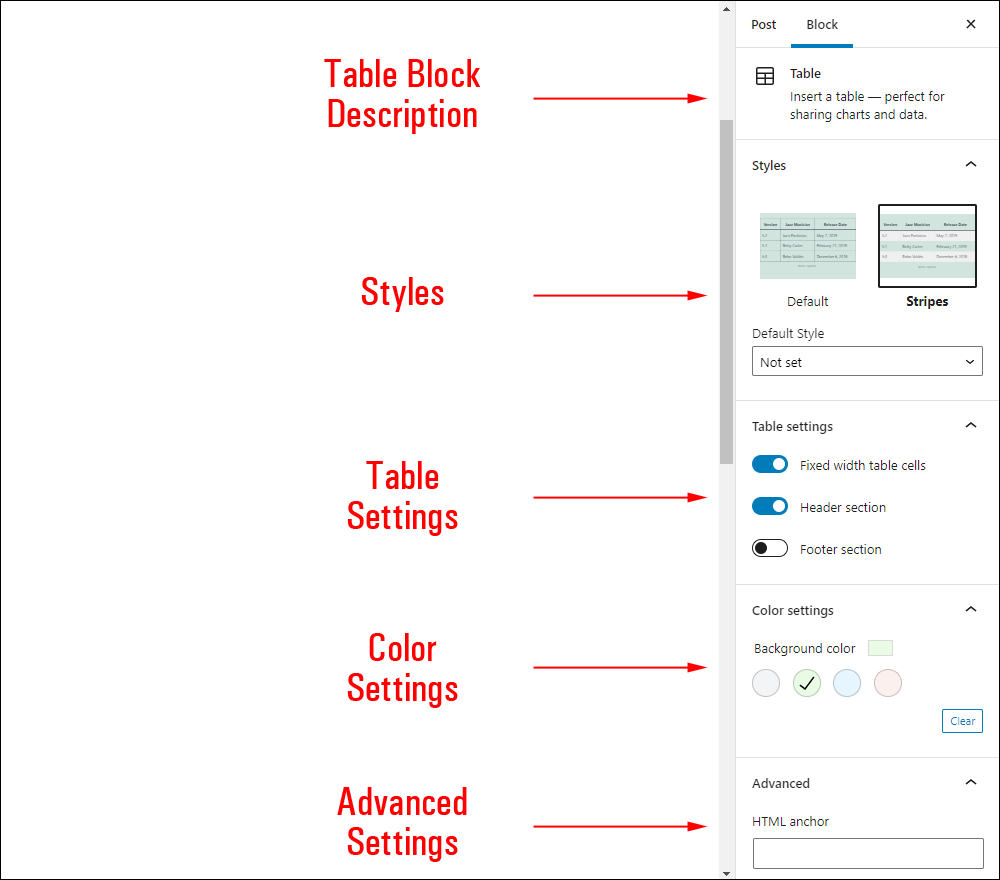
Table block settings include:
- Block description area
- Styles -The styles displayed in this section depend on the theme and plugins installed on your site. For example, Default (plain table with light-colored rows), Stripes (alternating dark and light-colored rows), etc.
- Default Style – Use the drop-down menu to select a default style for the block.
- Table Settings
- Fixed Width Table Cells (On/Off)
- Advanced Settings
- HTML Anchor – Create a unique web address to send users directly to this block using a unique jump link URL. To learn more about using HTML Anchors, see our tutorial on How To Use Blocks.
- Additional CSS Class(es) – This field lets you add multiple CSS classes to your block separated with spaces. This allows you to write custom CSS and style the block as you see fit. Note: This requires having knowledge of CSS (Cascading Style Sheets).
Table Block – Additional Info
The Table block can be converted into the following block types:
Notes:
Selecting ‘Change Block Type’ only brings up the ‘Block Styles’ menu allowing you to change the style of your table.
Additionally:
Installing plugins or themes on your site may also add new functionality, options, or settings to the Table block.
Congratulations! Now you know how to use the WordPress content editor’s Table block.
To learn how to use other blocks, go here: WordPress Block Editor – How To Use Blocks
***

Updated: April 9th, 2023