WordPress Block Editor – Editing Toolbar

This tutorial is part of our series on How To Use The WordPress Block Editor (Gutenberg).
***
The WordPress block content editor interface is divided into three main sections:
- Editing Toolbar (you are here)
- Content Area
- Settings Section
In this tutorial, you will learn how to use the Editing Toolbar section of the WordPress block editor.
For a complete understanding of how to use the WordPress Block Editor, see the other tutorials in this series:
- How To Use The WordPress Block Editor Content Area
- How To Use The WordPress Block Editor Settings Section
- How To Use WordPress Blocks
***
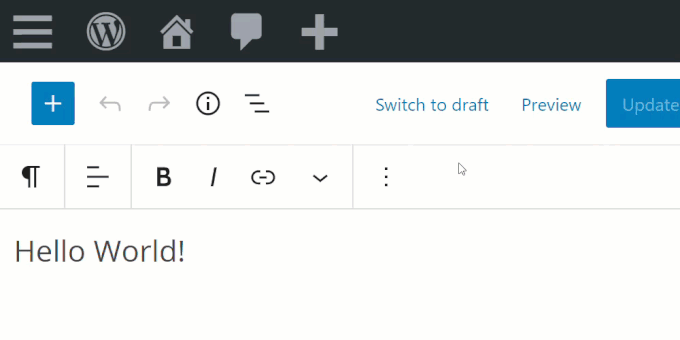
WordPress Content Editor: Editing Toolbar
The uppermost section of the WordPress block editor is called the Editing Toolbar.
The Editing Toolbar features run across the entire width of the content editor screen.

The editing toolbar allows you to perform various functions, including:
- Add a new block in your content area
- Undo/Redo changes
- View content structure information
- View block navigation information
- Save changes (and view saved and auto-saved confirmations)
- Change Post/Page status from ‘draft’ to ‘published’ and vice-versa
- Preview your post or page
- Publish/update your post or page
- Show/Hide the ‘Settings’ section
- Show ‘Options’ section
This section can also display additional information depending on how your settings are configured, such as fixing the block toolbar to the top of the screen (see ‘Options’ section below).
The section on the top left corner of the Editing Toolbar contains the following functions:
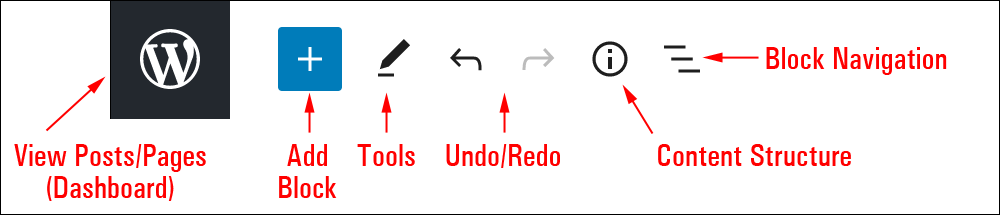
View Posts/Pages
Click on View Posts (or View Pages if working with Pages) to return to your Table of Posts (Posts > All Posts) or Table of Pages (Pages > All Pages).

Add Block
Clicking on the ‘Add Block’ [+] tool brings up a menu containing a list of all the available blocks you can use.
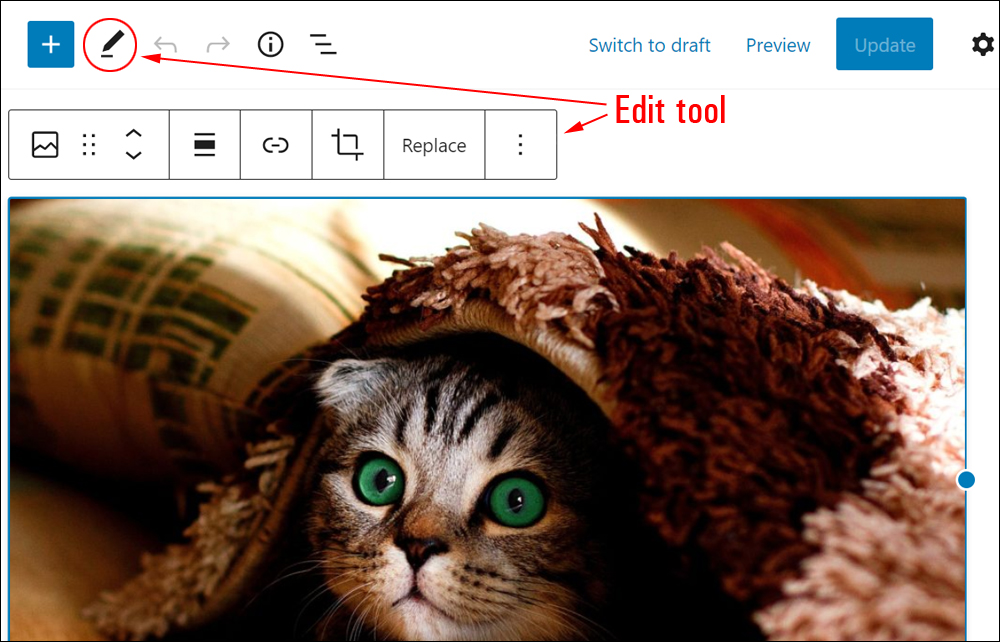
Tools
The Tools button specifies how you interact with blocks (i.e. block selection & editing).
Currently, you have the option of using two tools:
- Edit
- Select
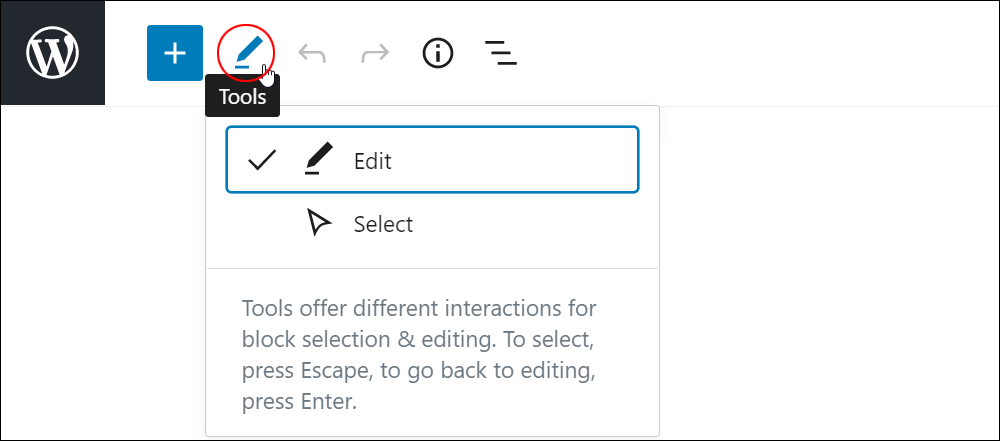
Use the Select tool to select a block. (Tip: Press the Escape key to switch to the Select tool).
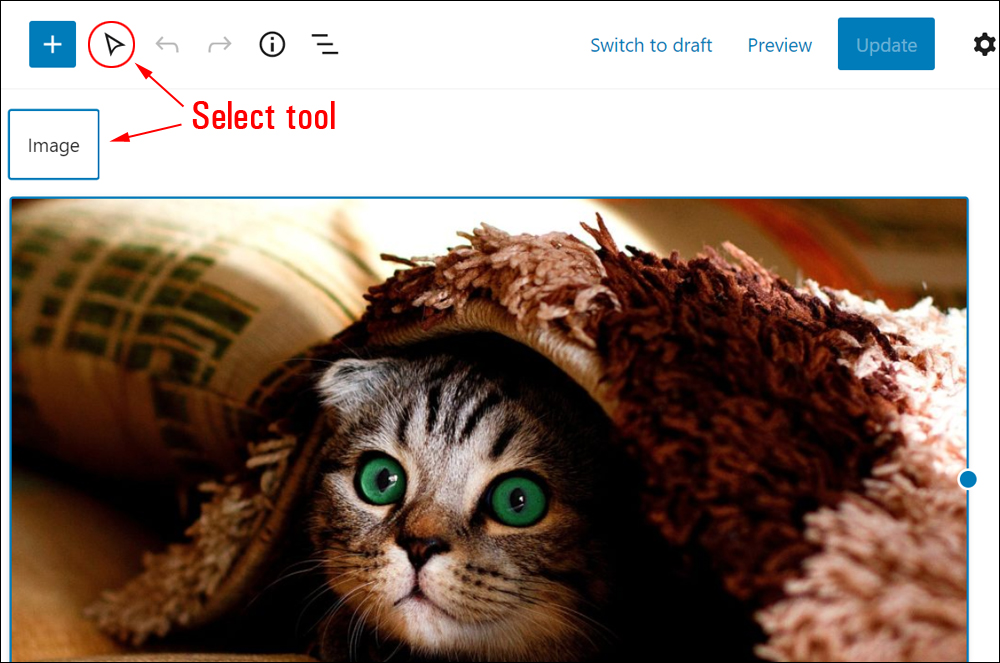
Once a Block is selected, press the Enter key to return to the Edit tool.
Undo & Redo
Clicking on the ‘Undo’ or ‘Redo’ buttons while adding or editing content before saving your changes:
- Restores previous actions when typing content.
- Restores the position of any blocks that have been rearranged.
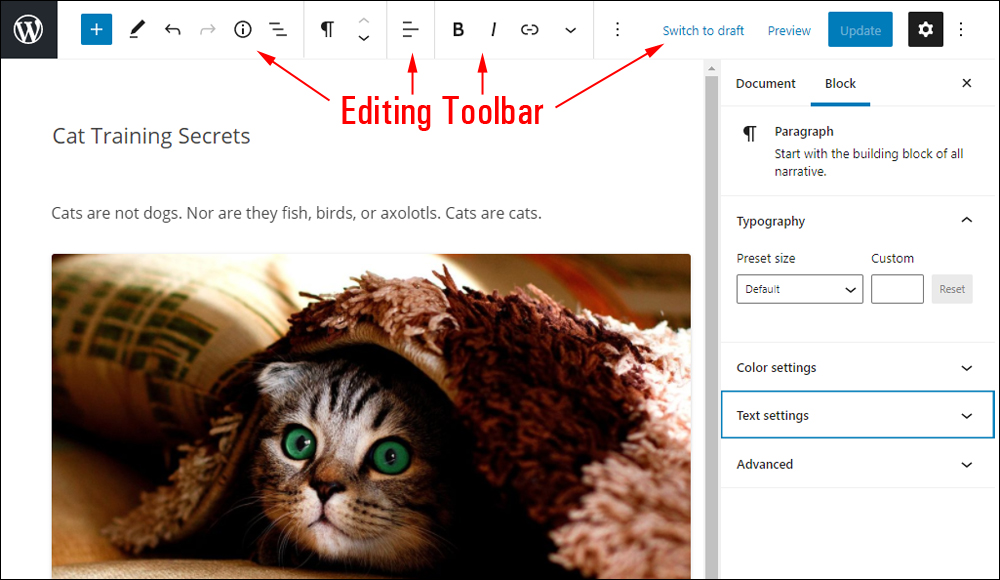
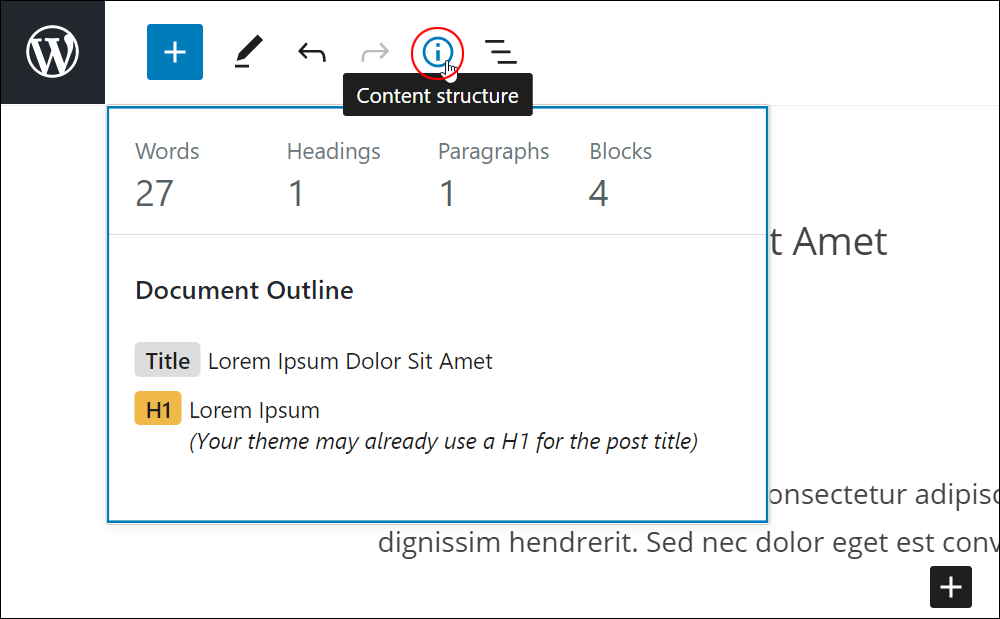
Content Structure
Clicking on the ‘Content Structure’ icon displays information about your content like:
- Number of Words
- Number of Headings
- Number of Paragraphs
- Number of Blocks
- Document Outline (like a Table of Contents)
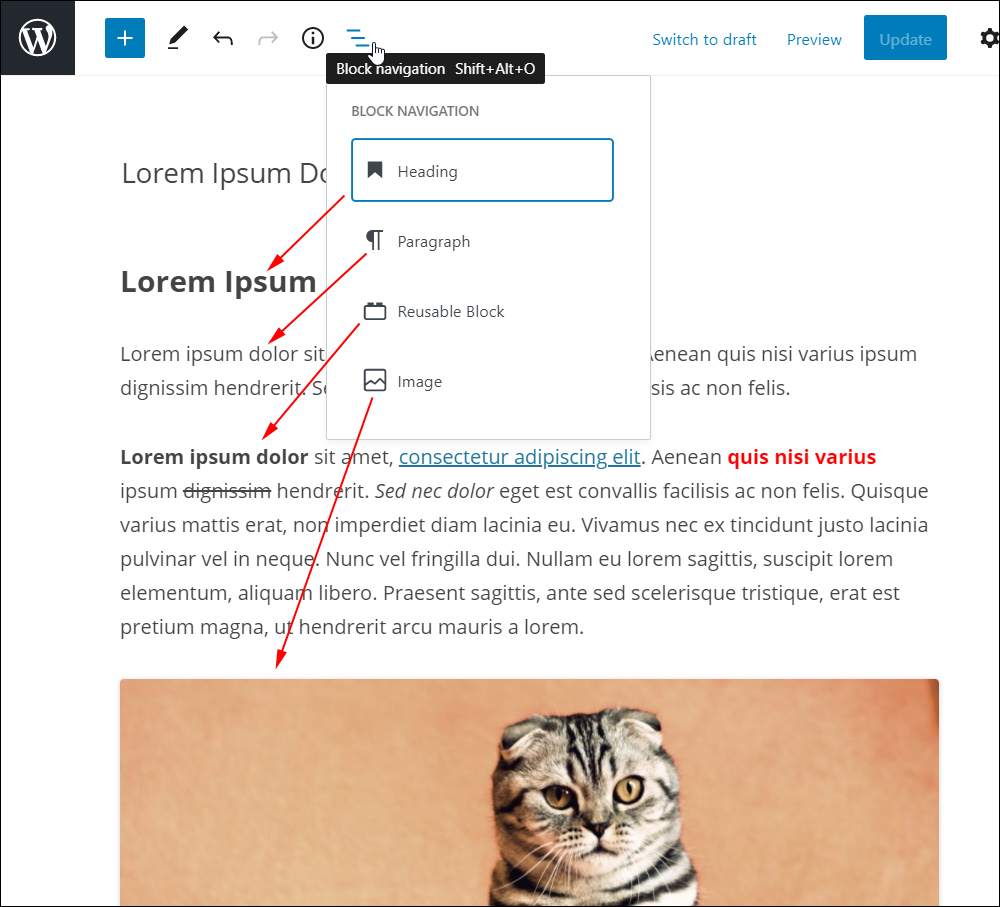
Block Navigation
Click on the ‘Block Navigation’ icon to display the structure and layout of your content blocks.
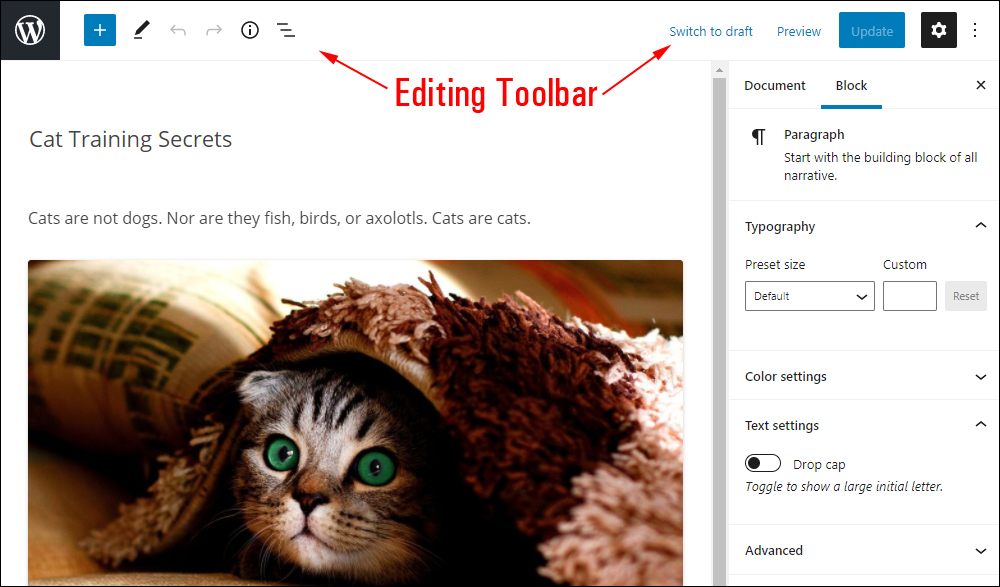
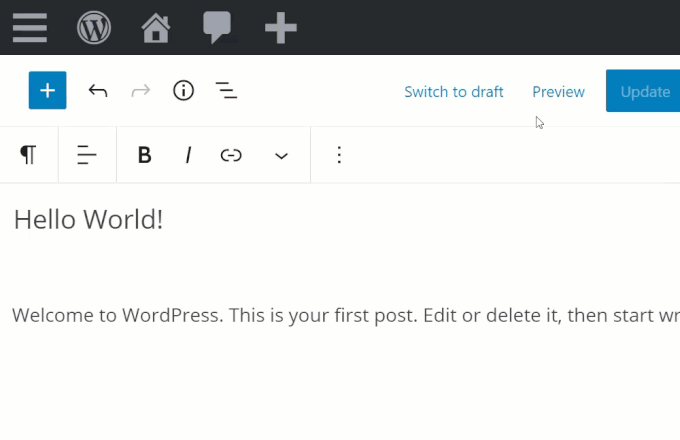
Switch To Draft
Click on the ‘Switch to Draft’ link to convert a published post or page into a draft document.
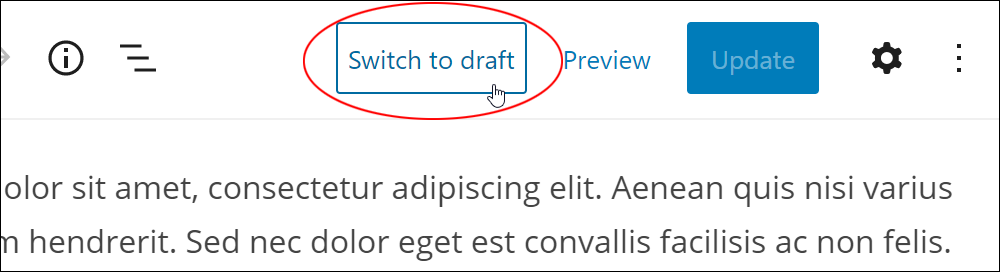
When asked to confirm your choice, click ‘OK’ to revert your published post/page to ‘Draft’ status, otherwise click ‘Cancel’ to keep the current status of your post/page.
You can switch posts/pages from ‘Draft’ to ‘Published’ status and vice-versa at any time.
Preview
To see what visitors will see when they visit your post/page, click the ‘Preview’ button.
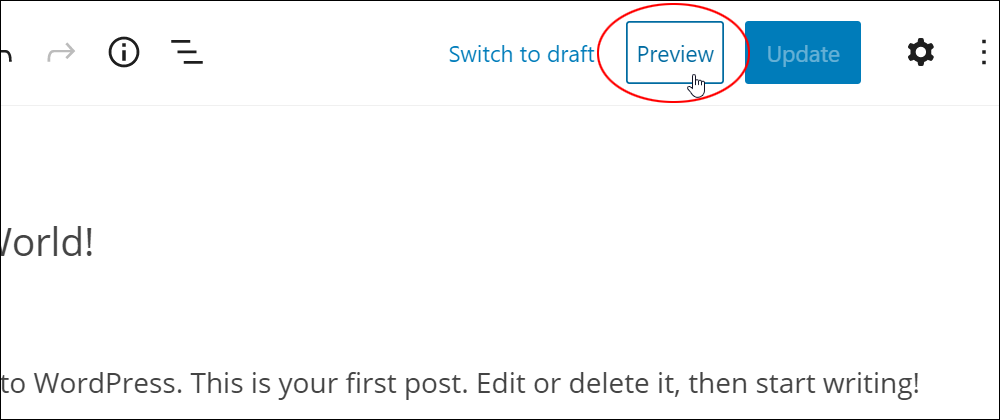
You can preview your post/page as it will display on a desktop, tablet, or mobile device screen, or open the preview window in a new tab.
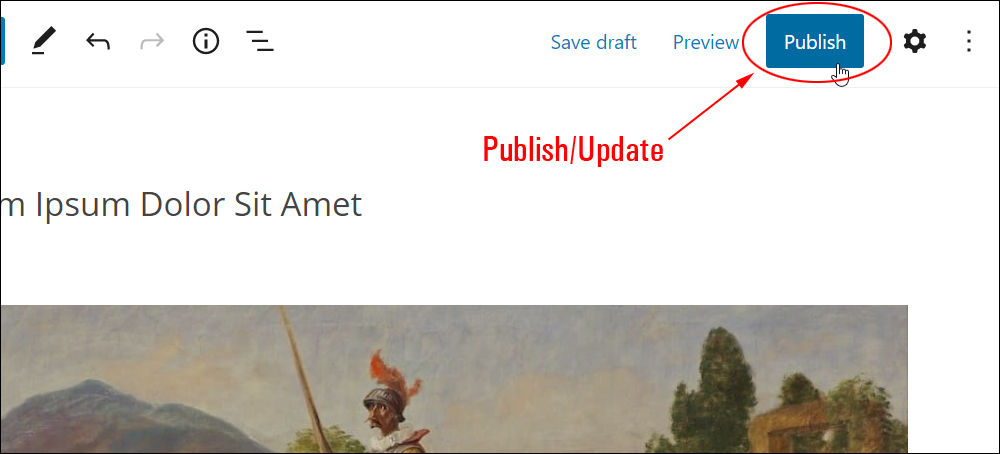
Publish/Update
The ‘Publish’ section lets you publish new posts/pages and update existing posts/pages.
To publish your post or page, click on the ‘Publish’ button (or ‘Update’ if editing an existing post or page).
The block editor provides an optional pre-publishing check function that reminds you to double-check your settings and confirm before publishing.
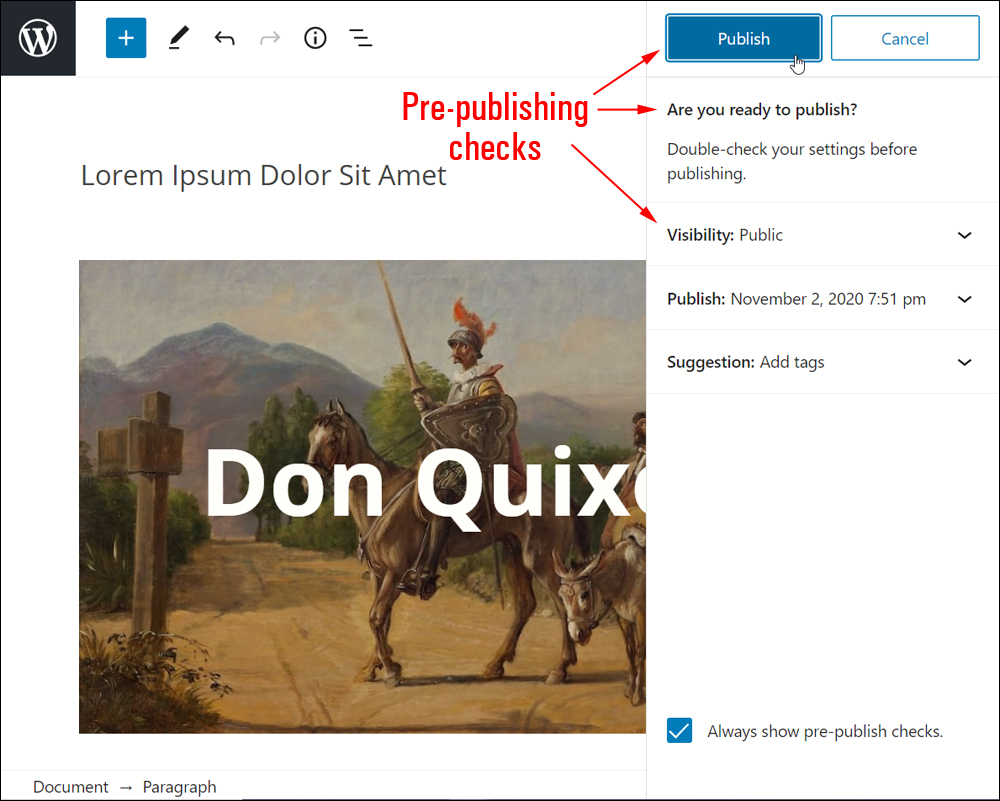
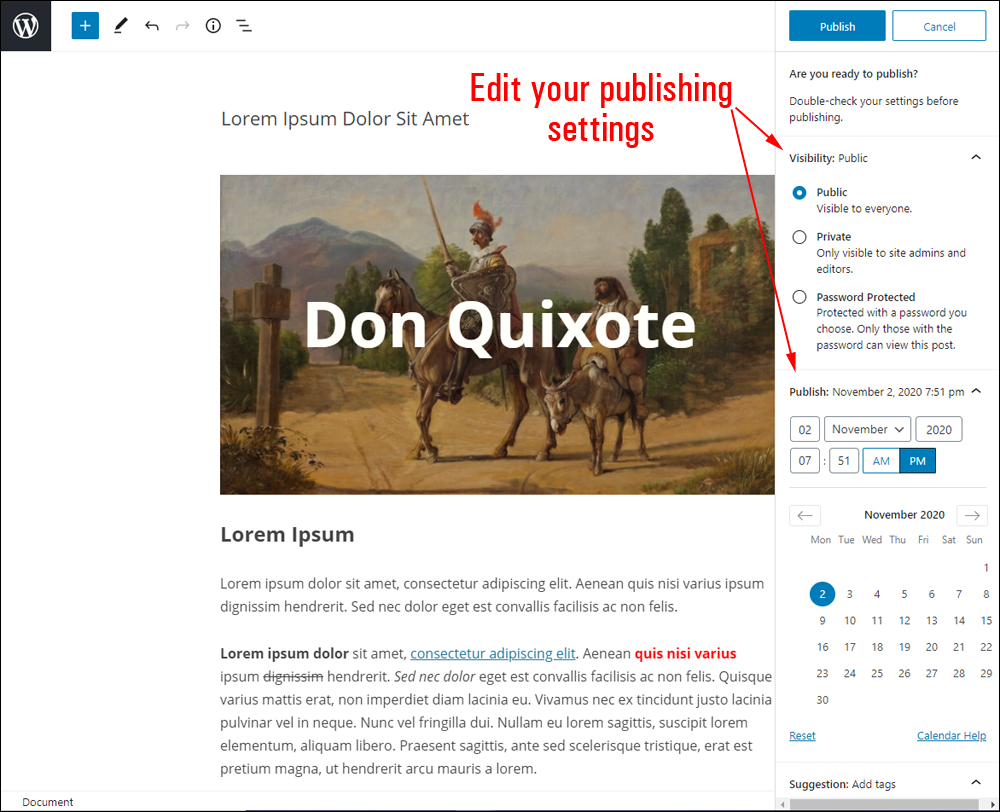
Edit your publishing settings, then click the ‘Publish’ button again to proceed.
Your post/page will be published.
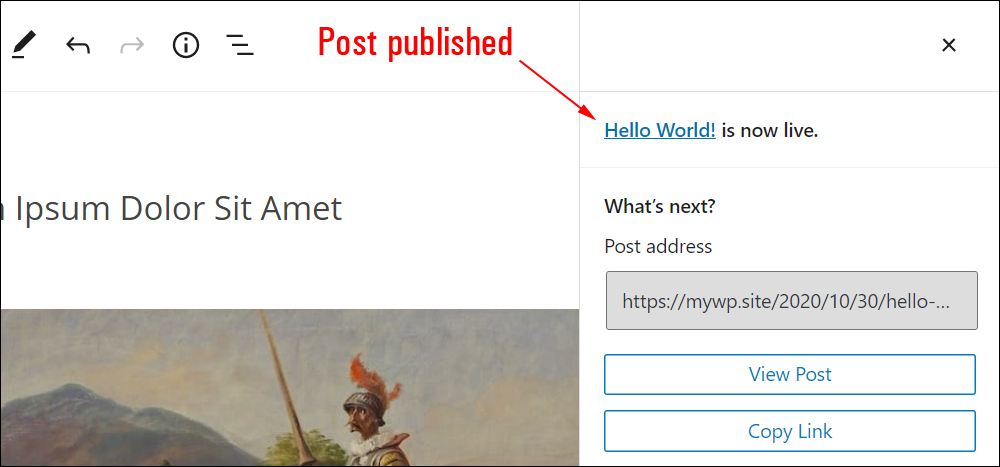
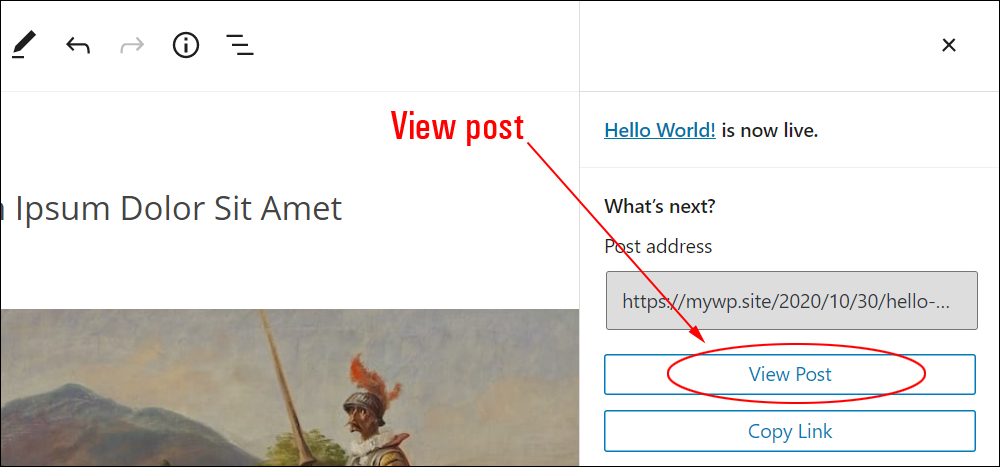
After your post/page has been published you will be given a couple of options like viewing your post/page…
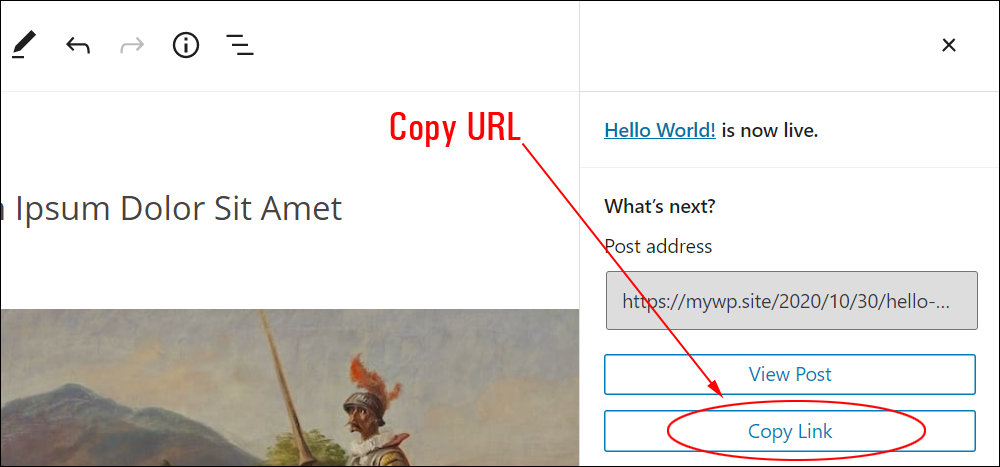
Or copying your post/page URL to your clipboard…
To turn off this option deselect the ‘Always show pre-publish checks’ checkbox.

Note: you can also deselect this option in the ‘Options’ screen (see Block Editor Settings section).
After publishing, close the panel to continue working inside the content editor.

You will return to the main content editor screen.
![]()
If you’re not sure what different post or page statuses mean, this will help you:
Page/Post Status
In WordPress, Posts and Pages can be assigned the following status:
- Published: Published posts and pages display to everyone who visits your site unless they’re set as ‘Private’ or ‘Password-Protected’ (see ‘Visibility Settings’ in the Block Editor Settings tutorial).
- Draft: A draft post is not visible to your site visitors and registered members or users unless they are a site administrator.
- Pending Review: A post marked as ‘Pending Review’ is similar to a draft post but needs to be reviewed and approved for publication by a user with a minimum permission-level of Editor.
To learn about assigning user permissions in WordPress, see this tutorial: How To Manage WordPress Users
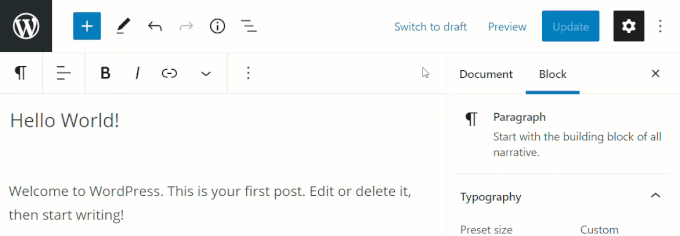
Hide/Display Settings
Click on the Gear icon to bring up your post or page Settings section.
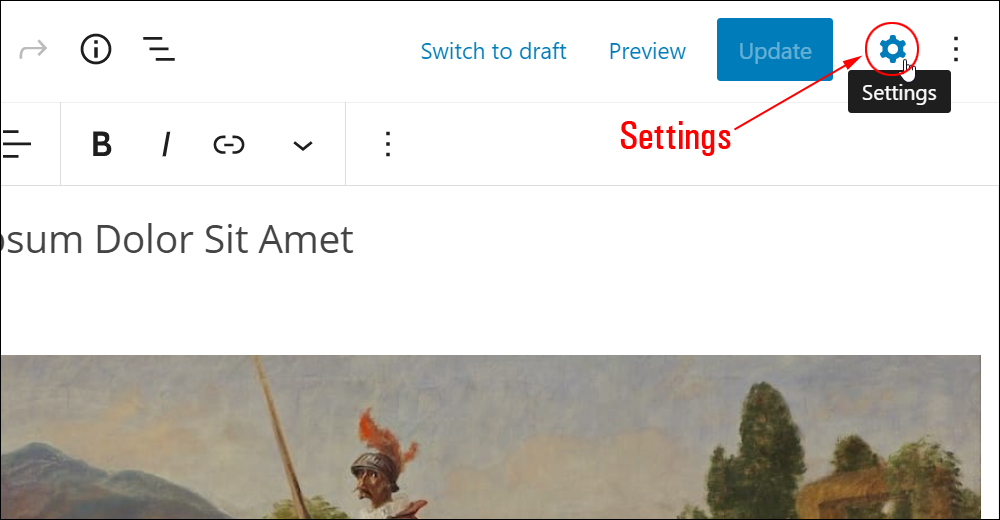
Clicking on the ‘Settings’ icon alternates between displaying and hiding the Settings section.
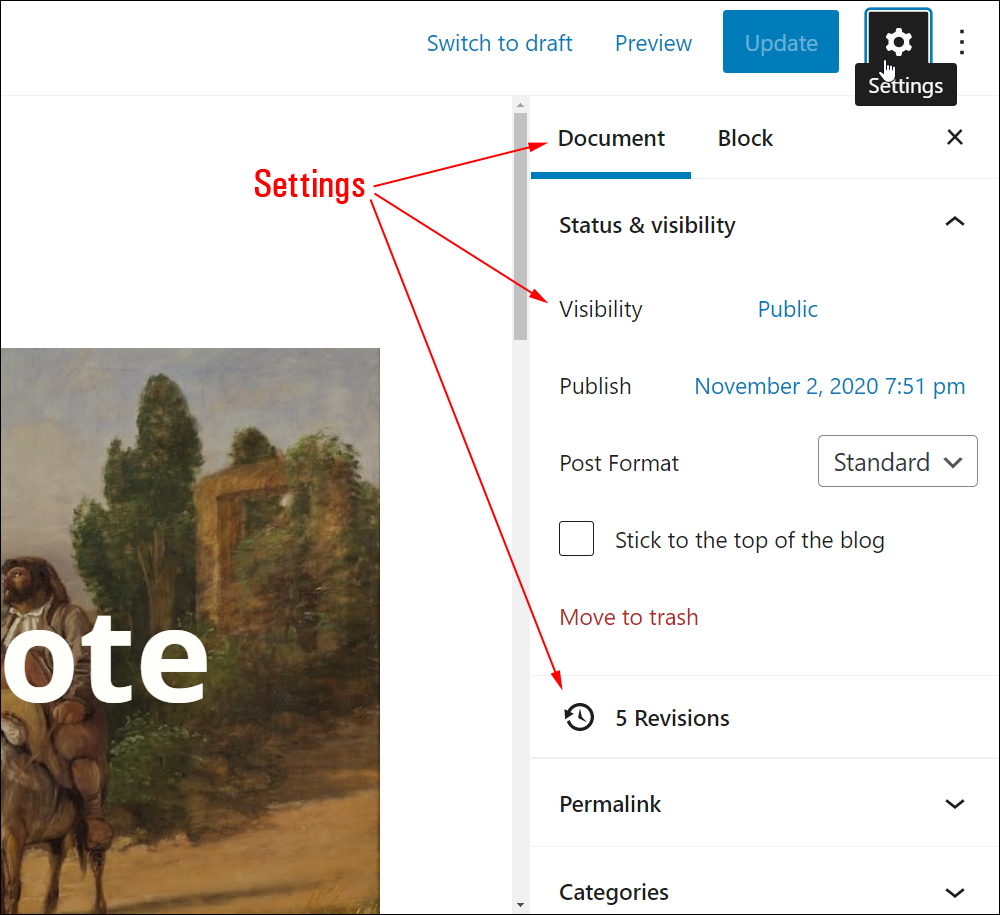
You can also hide the Settings section by closing the sidebar (X).
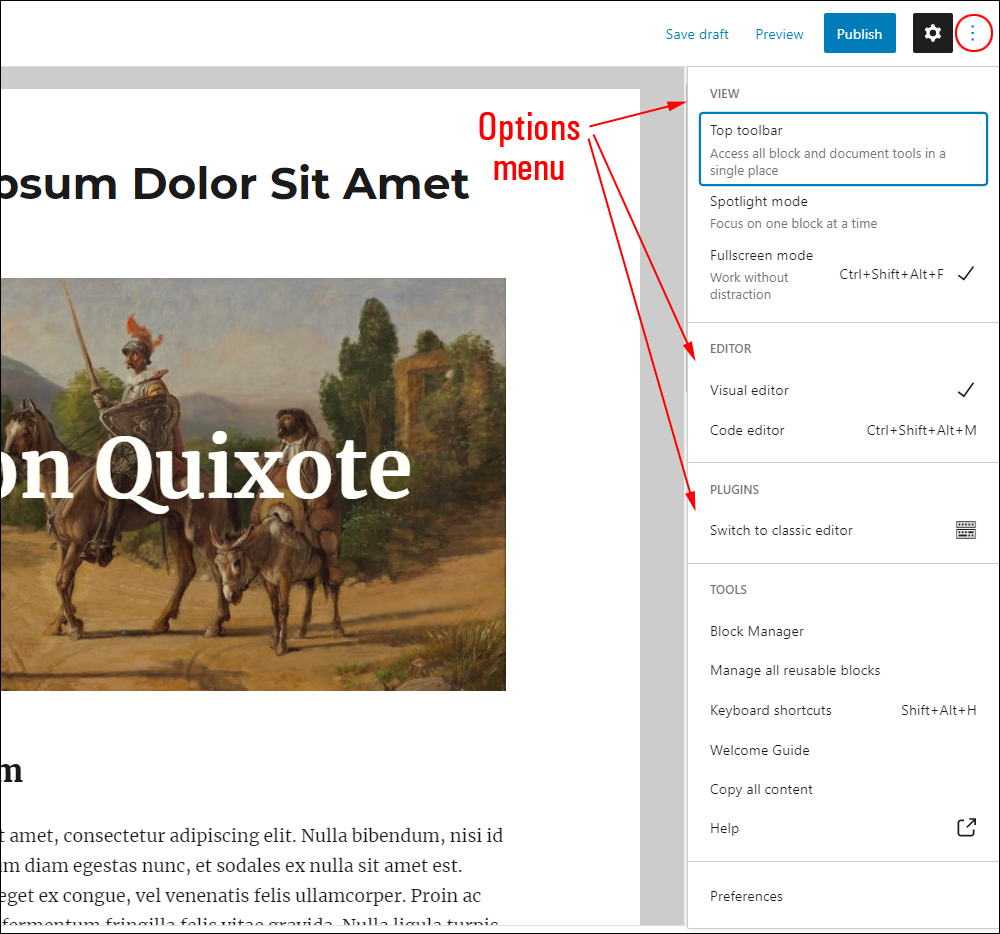
Options
WordPress has added a new feature to the block content editor called ‘Options’.
Click on the vertical ellipsis (three dots) icon to display the ‘Options’ menu.
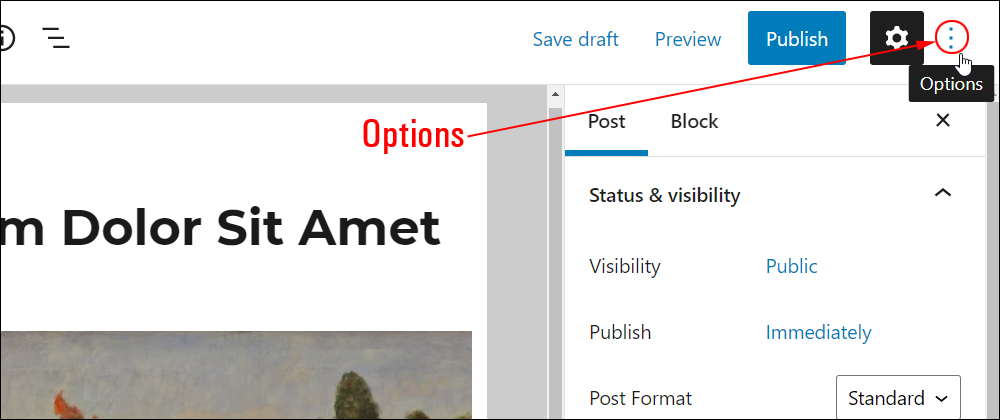
Using the Options section is covered in this tutorial: WordPress Block Editor Settings
Note: The Editing Toolbar section can display additional information depending on how your site’s settings are configured and what additional plugins you have installed on your site.
Congratulations! Now you know how to use the Editing Toolbar of the WordPress block content editor.
The next step is to learn about the WordPress block editor’s Content Area.

For more tutorials about using the block editor, go here:
-
- The WordPress Block Editor (Gutenberg)
- How To Use WordPress Blocks
- How To Use The WordPress Block Editor Toolbar (this tutorial)
- How To Use The WordPress Block Editor Content Area
- How To Use The WordPress Block Editor Settings Section
***

Updated: April 8th, 2023