How To Add An Image Gallery In WordPress
 In this tutorial, you will learn how to insert multiple images into your posts and pages using the WordPress image gallery feature.
This tutorial covers:
- Why Use An Image Gallery
- How To Add Multiple Images To Posts And Pages Using The WordPress Image Gallery
- Image Gallery Settings
- Editing Your Image Gallery
- WordPress Image Gallery Shortcodes
![]()
This tutorial explains how to add an image gallery to your posts and pages using the WordPress Classic Editor.
For a step-by-step tutorial on adding an image gallery to your content using the WordPress Block Editor, go here: WordPress Block Editor – Gallery Block
If you need help inserting single images into your content, see this tutorial: How To Add And Format Images In WordPress
***
If you are looking for a simple way to insert multiple images into your posts or pages or add a photo gallery to your site, you don’t need a plugin.
WordPress has a built-in image gallery feature that lets you easily insert multiple images into your content and display these in a professional-looking grid-like gallery view.
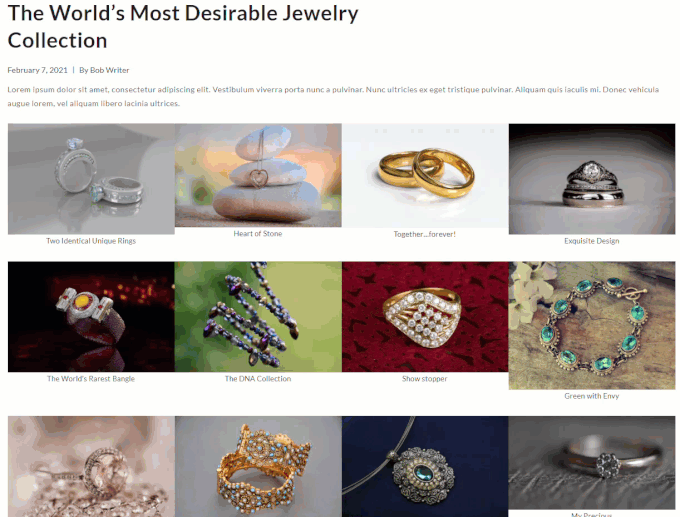
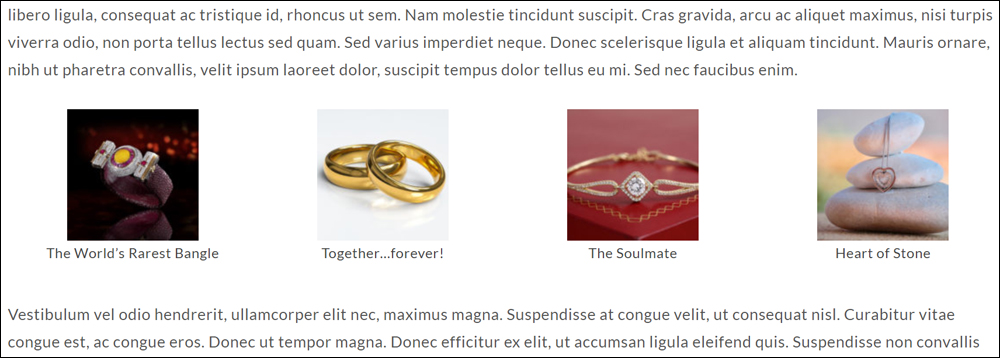
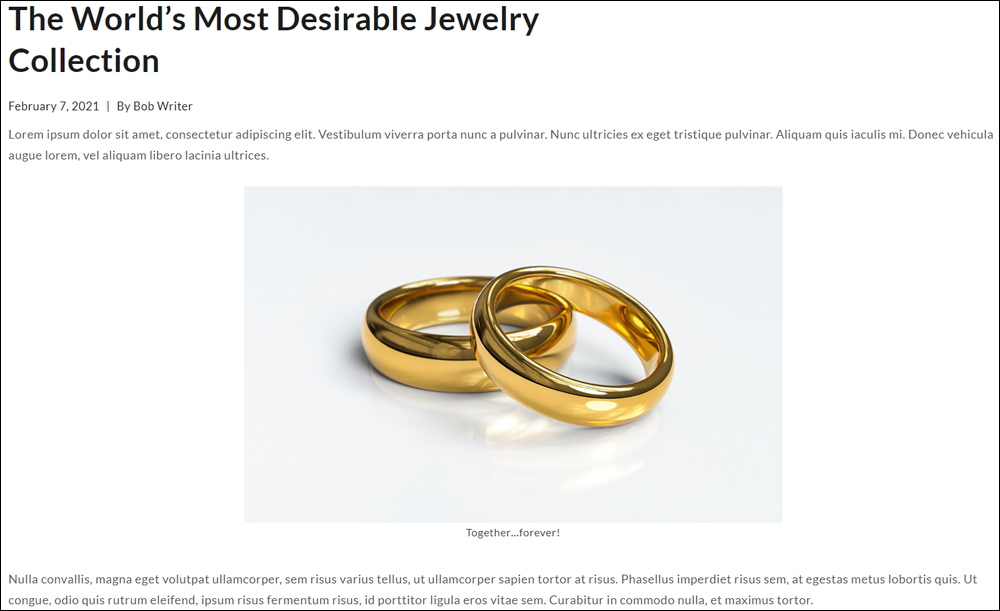
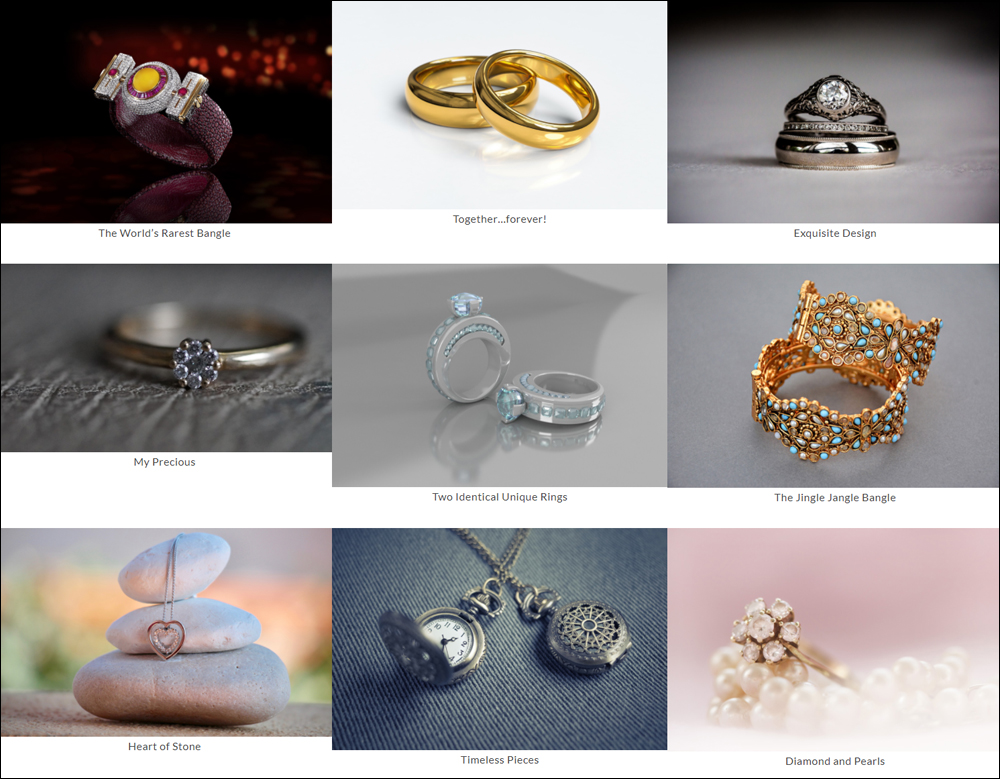
Here is an example of an image gallery created using the WordPress gallery feature.
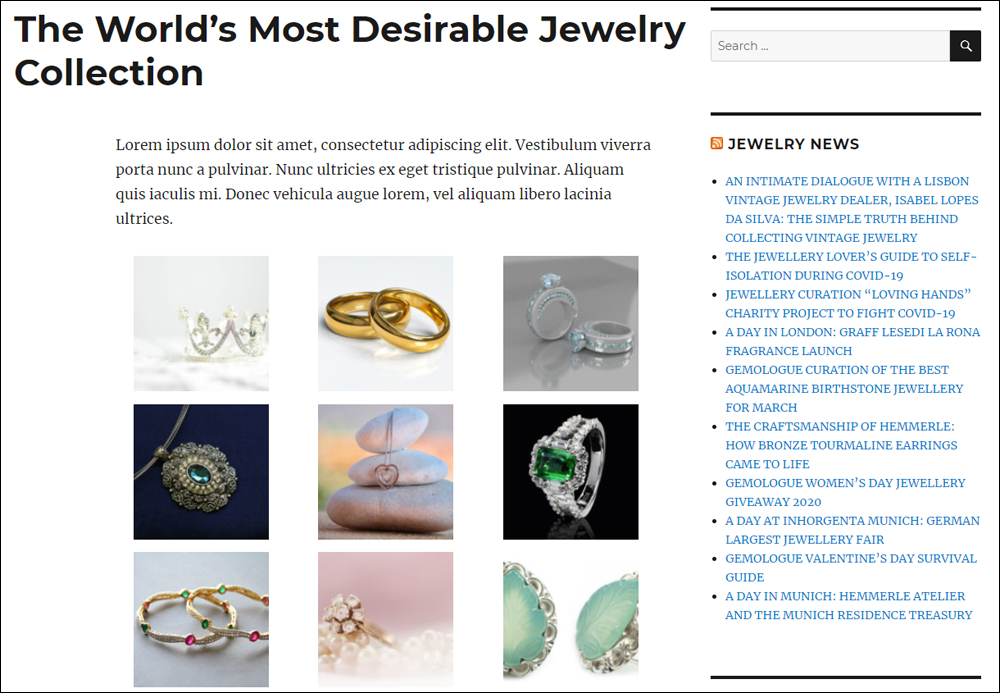
The WordPress built-in image gallery feature lets you create multiple image galleries for displaying images on your posts and pages.
Why Use An Image Gallery
By default, WordPress displays multiple images stacked above each other in your content.
If you plan to add many images to your posts or pages, this won’t look great (or feel great) to users, as they will have to do quite a bit of scrolling down the page to view all your images.
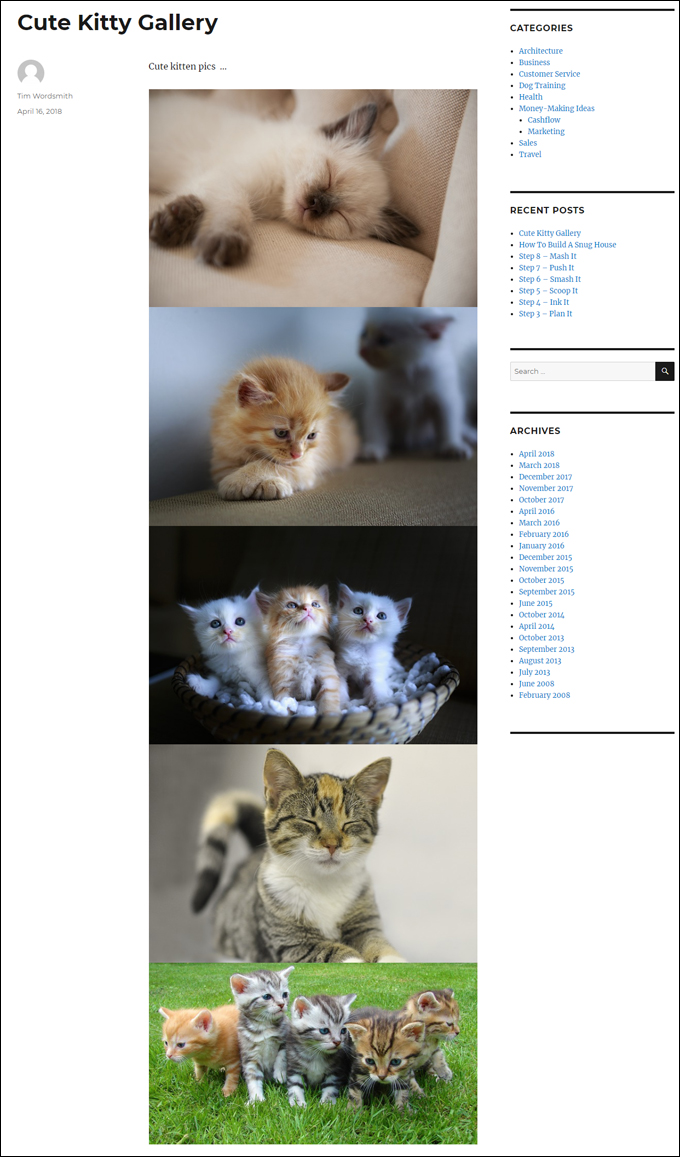
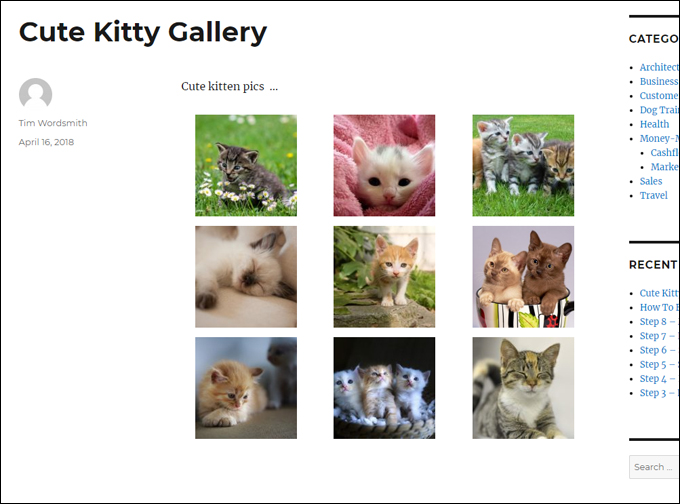
The WordPress image gallery displays thumbnail images in a grid layout, creating a better user experience.
How To Add Multiple Images To Posts And Pages Using The WordPress Image Gallery
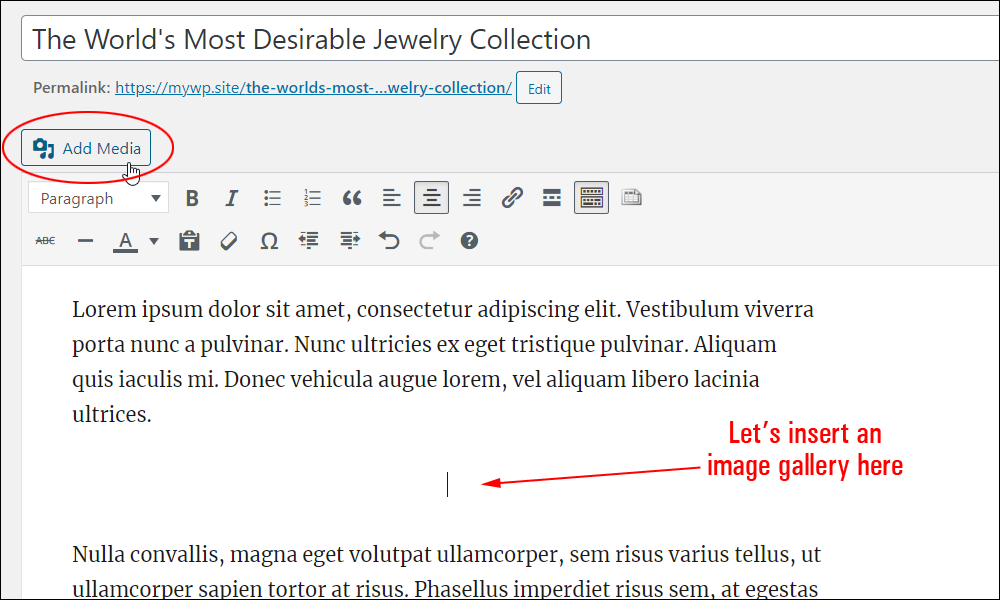
To add an image gallery to a post or page in WordPress:
- Create a new post or page or open an existing one,
- Place your cursor where you want the image gallery inserted, and
- Click on the Add Media button.
The Insert Media screen will open in a pop-up window.
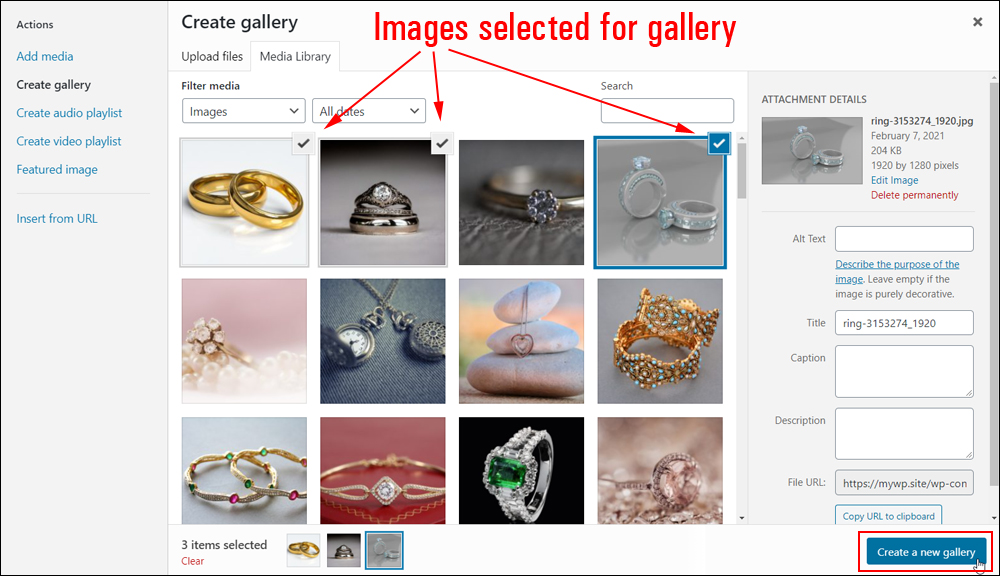
Click on the Create Gallery link as shown in the example below.

Select the images you want to include in your gallery (selected images will display a checkmark on the upper right-hand corner) and click on the button labeled Create a new gallery at the bottom of the screen.
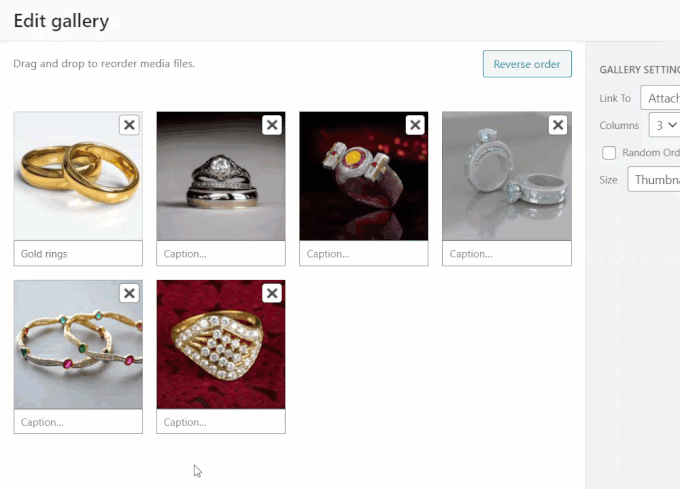
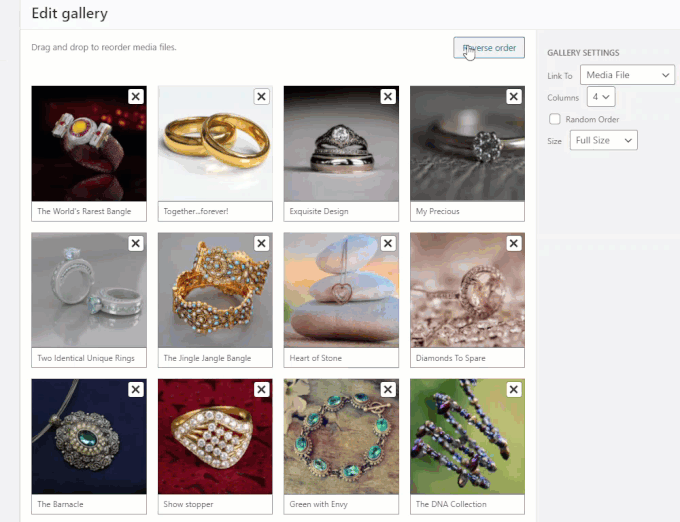
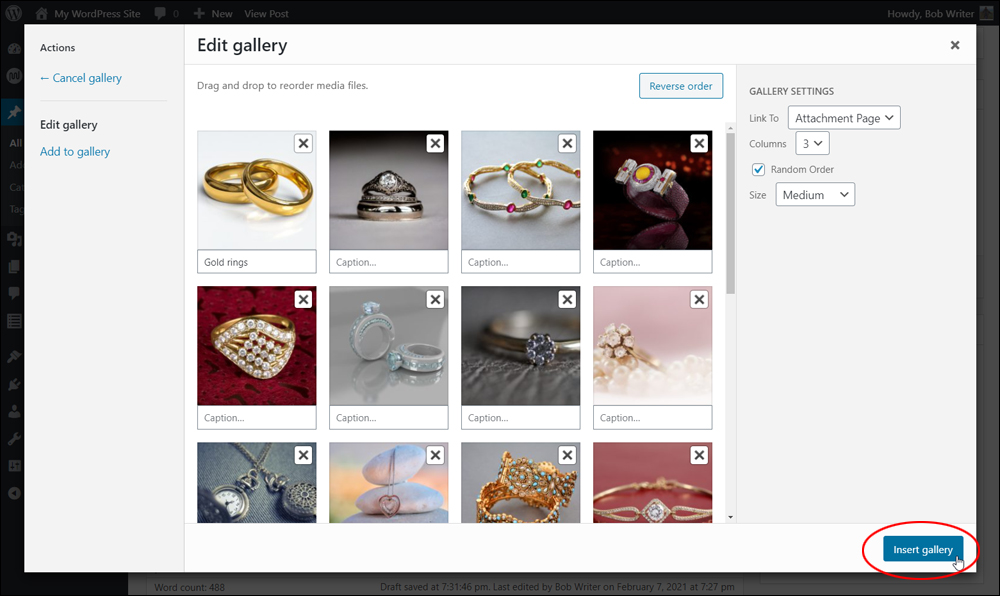
This will bring up the Edit Gallery screen.
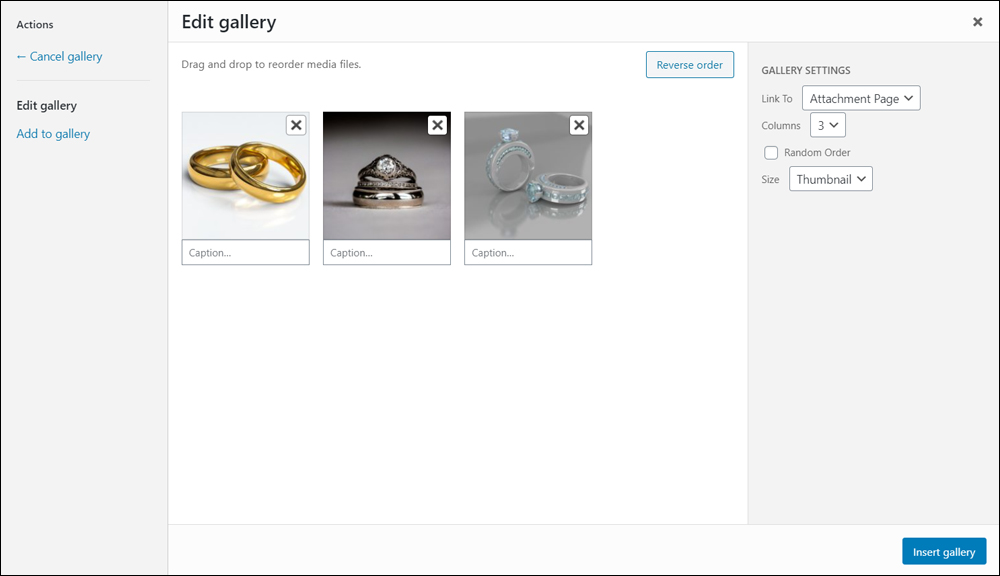
There are several things you can do on the Edit Gallery screen.
You can:
- Add images to your gallery
- Add captions to images
- Reorder images
- Reverse image order
- Remove images
Let’s go through each of the above.
Add Images To Your Gallery
You can add images to your gallery that you have previously uploaded or upload new images to your Media Library.
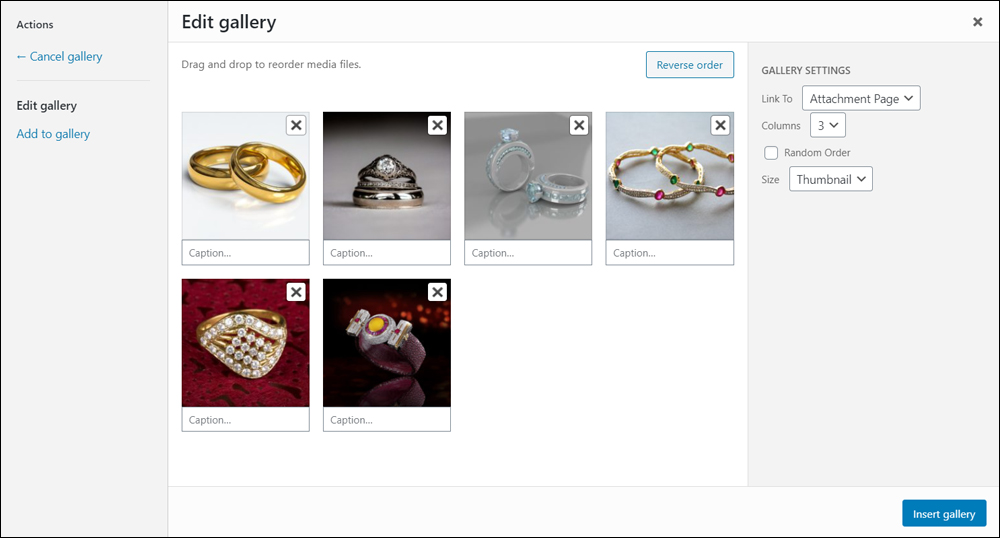
To add new images to your gallery, click on the ‘Add to gallery’ link.

Next, select the images you would like to add to your gallery. Click the ‘Add to gallery’ button when done.

The selected images will be added to your gallery.
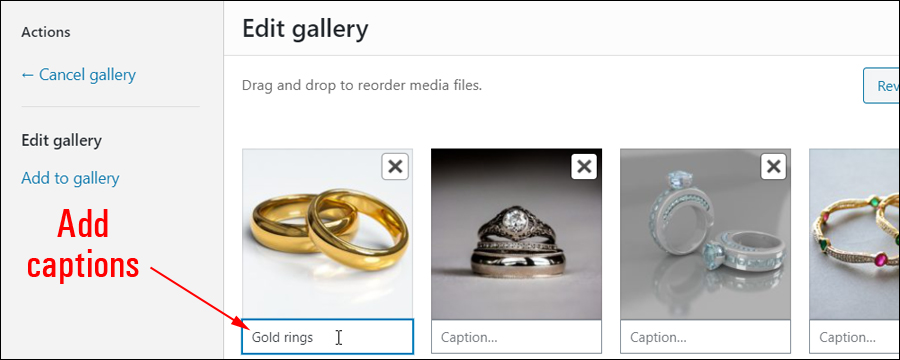
Add A Caption To Images
To add a caption to images in your gallery, click on the field below the image where it says “Caption this image …” and type in your text.
Reorder Images
You can reorder images using drag and drop.
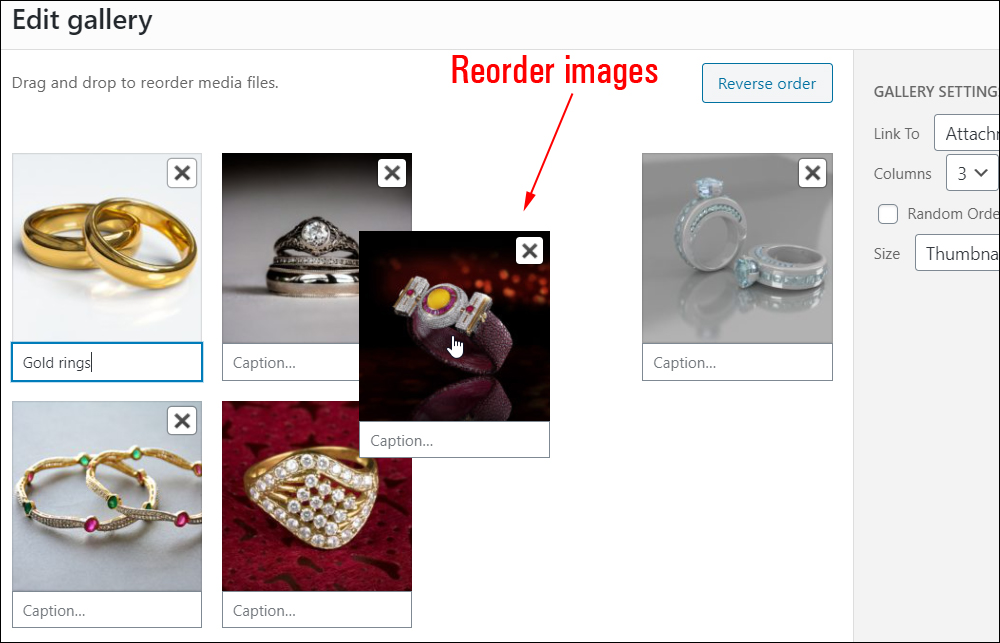
Just click on an image and drag it to a new location, then release your mouse button. Your image will be placed in the new location.
Reverse Image Order
You can also reverse the order that your images display in your gallery by clicking on the Reverse order button.
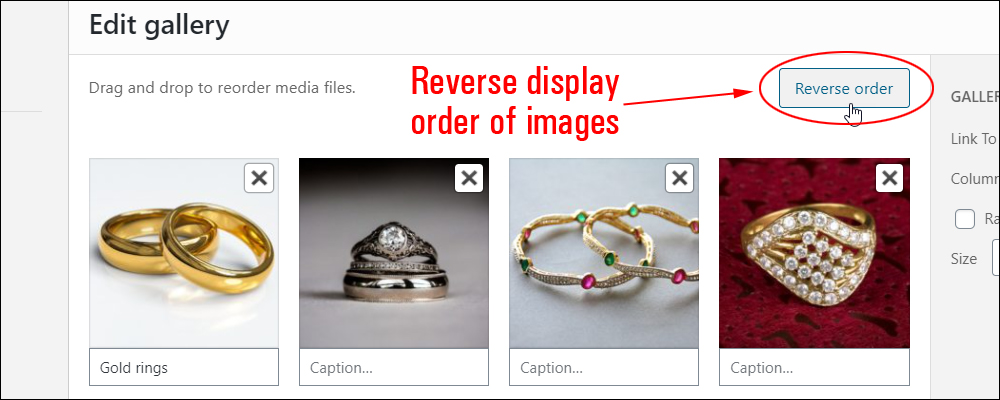
Reordering and reversing the order of your images gives you complete control over the appearance of images in your gallery.
Remove Images
You can also remove images from your gallery.
Hover over the “X” until it becomes a “minus” sign, then click to remove the image.
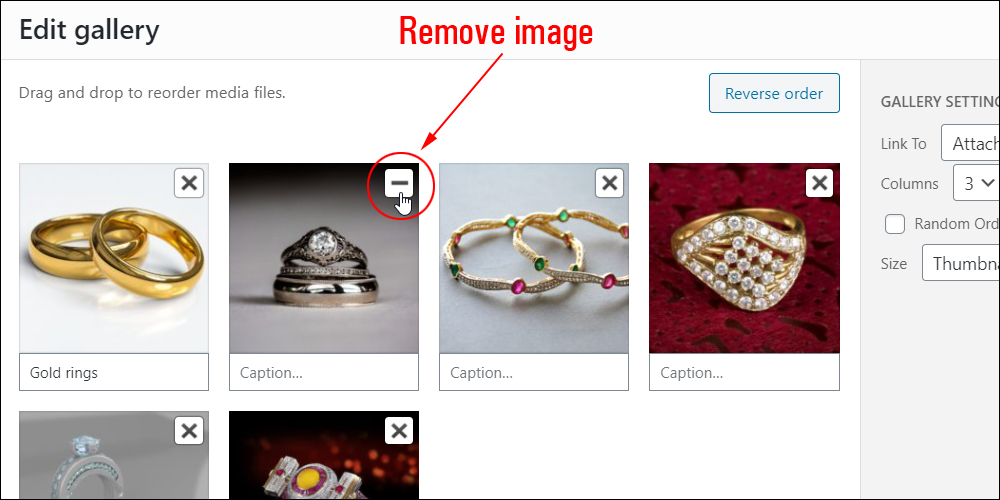
Image Gallery Settings
As well as the gallery edit options shown above, there are a few gallery settings that you can adjust.
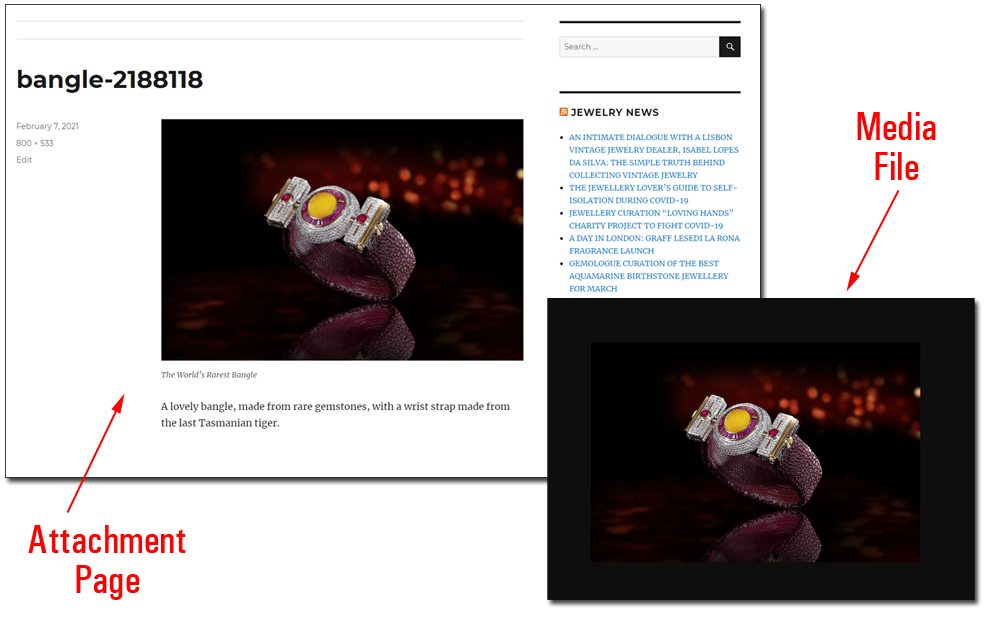
For example, you can choose whether to link your images to an attachment page, its media file, or add no link (None) by selecting an option from the drop-down menu in the Link To section.
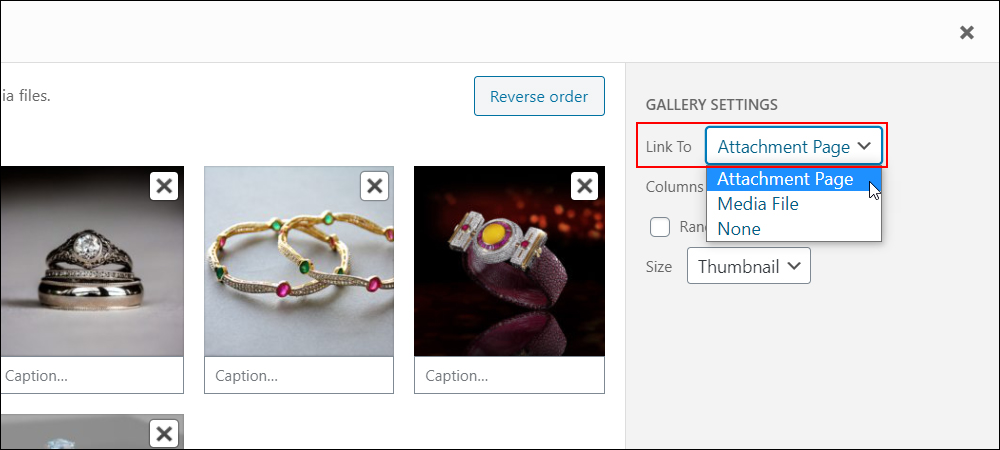
The images below show the difference between selecting the ‘Attachment Page’ and ‘Media File’ options.
Note: Selecting ‘None’ means that no images are linked, so nothing will happen if you hover over the image.
So, clicking on a gallery image…
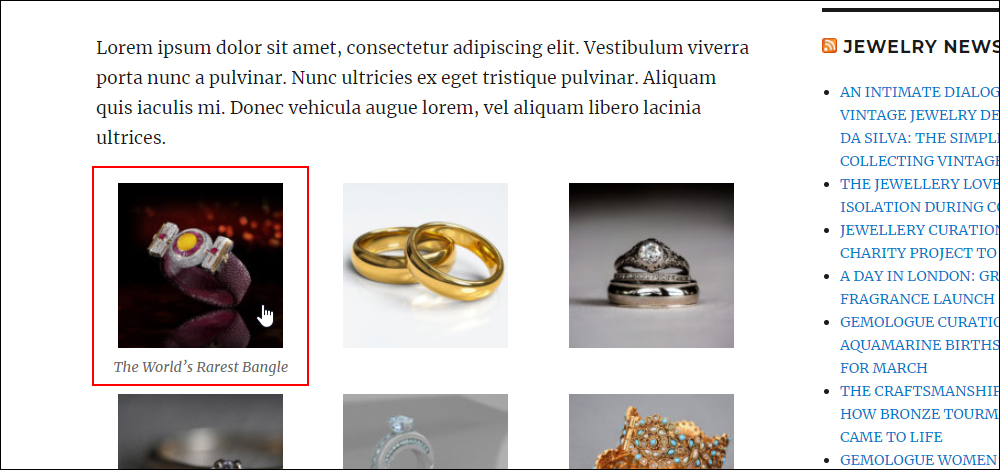
…takes you either to an attachment page (i.e. a post containing that image) or its media file location…
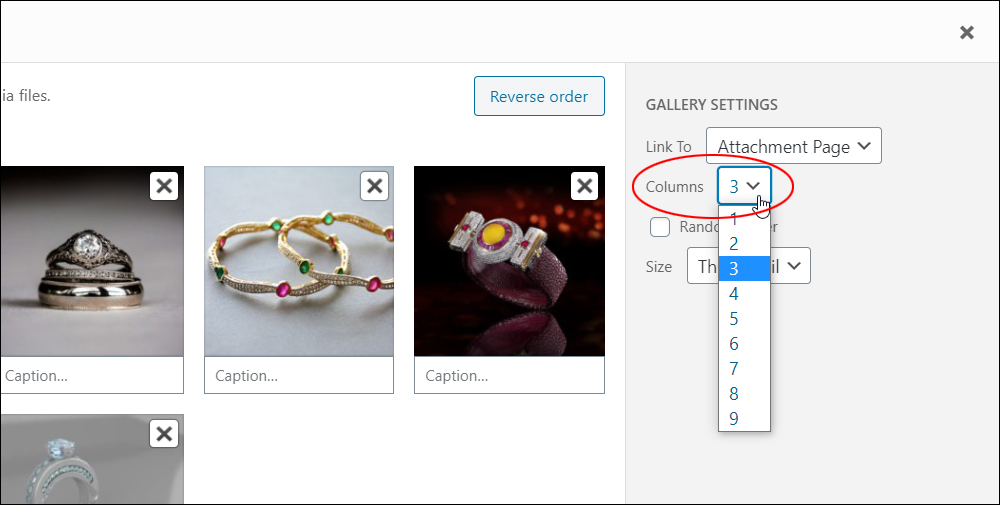
You can specify the number of columns for your gallery by selecting an option from the drop-down menu in the Gallery Settings > Columns section (up to 9 columns).
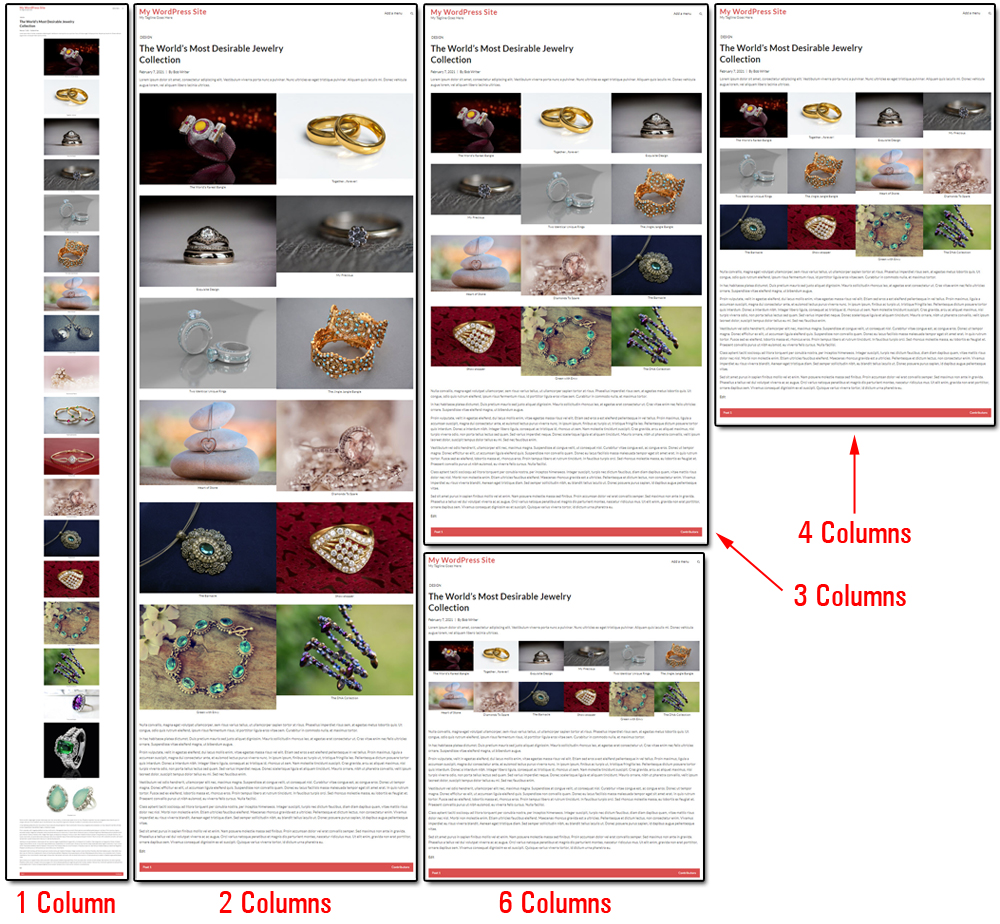
The image below shows how your gallery displays using different column settings.
You can also specify whether your images should display in random order or not by ticking the Random Order checkbox.

The image below shows how images display with the Random Order option enabled on your published post or page.
Tip: Refresh your web browser to see your gallery images display in random order.
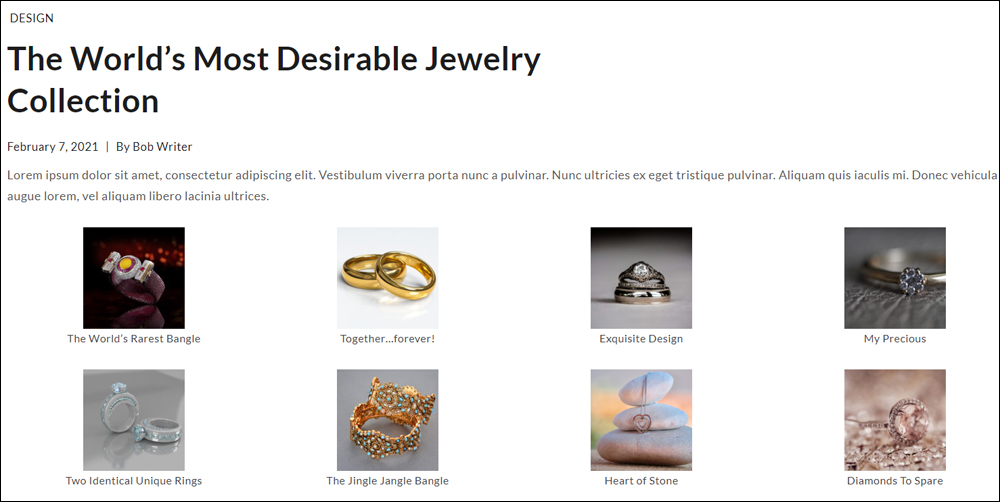
You can also specify the size of your gallery images (Thumbnail, Medium, Large, Full Size).
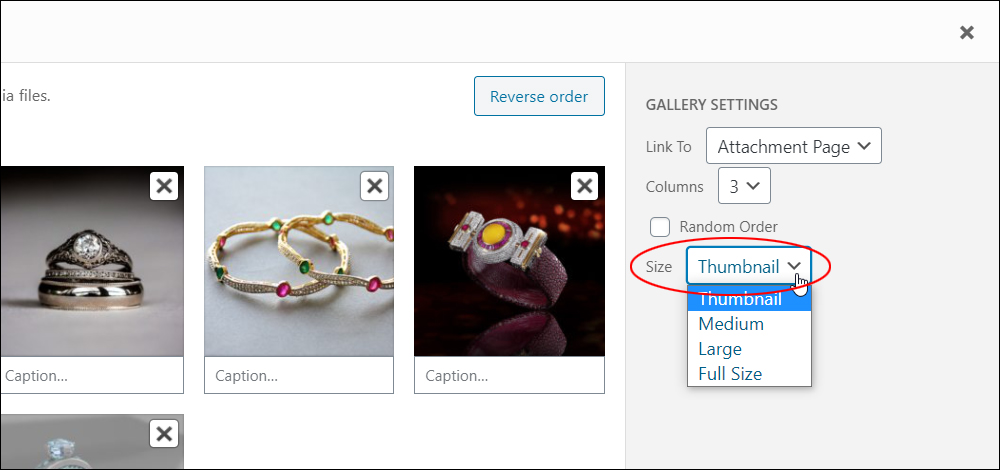
For example, here is an image gallery with the image size set to ‘Thumbnail’…
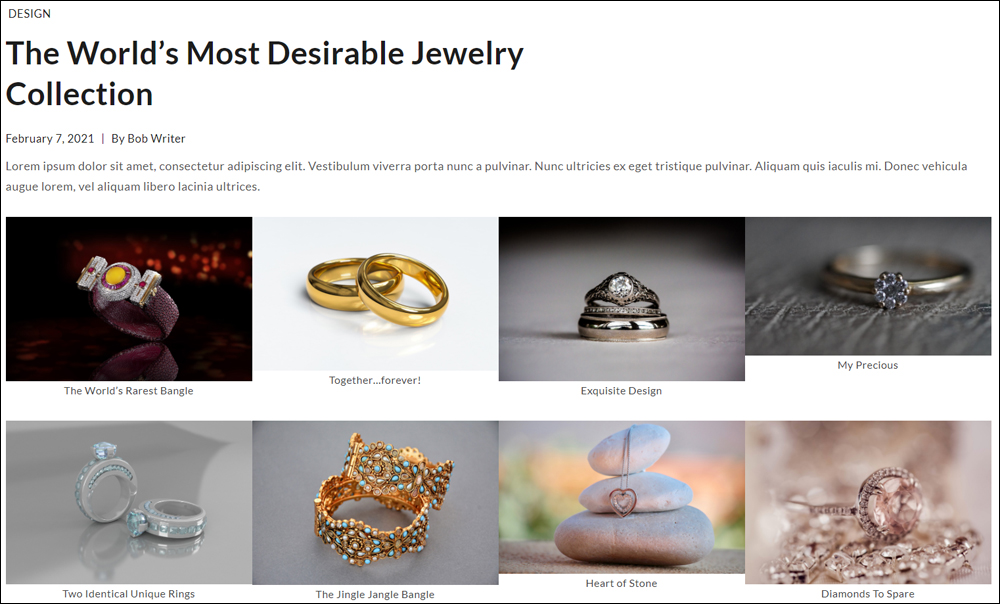
And here is the same image gallery with a different image size setting (‘Medium’).
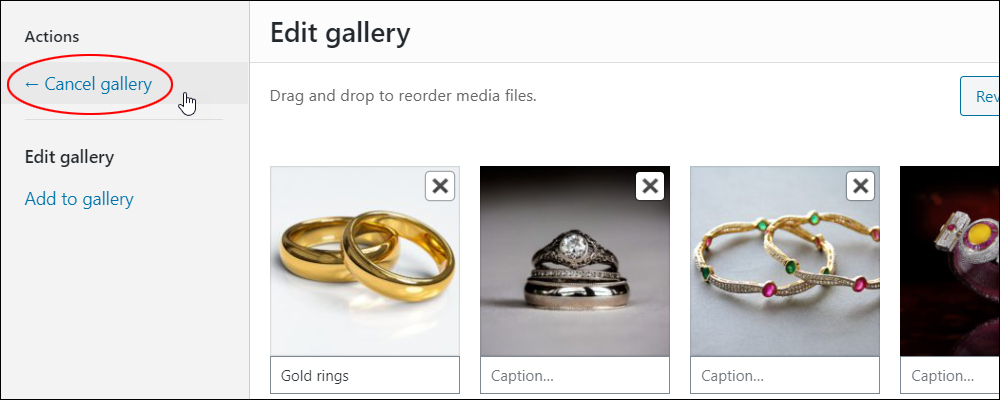
If you don’t want to create or edit your gallery, just click on the ‘Cancel gallery’ link to abort the process.
After editing your image gallery and adjusting your settings, the next step is to insert your image gallery into your post or page.
Click on the Insert gallery button at the bottom of the Edit Gallery screen…
This will insert your image gallery into your content.
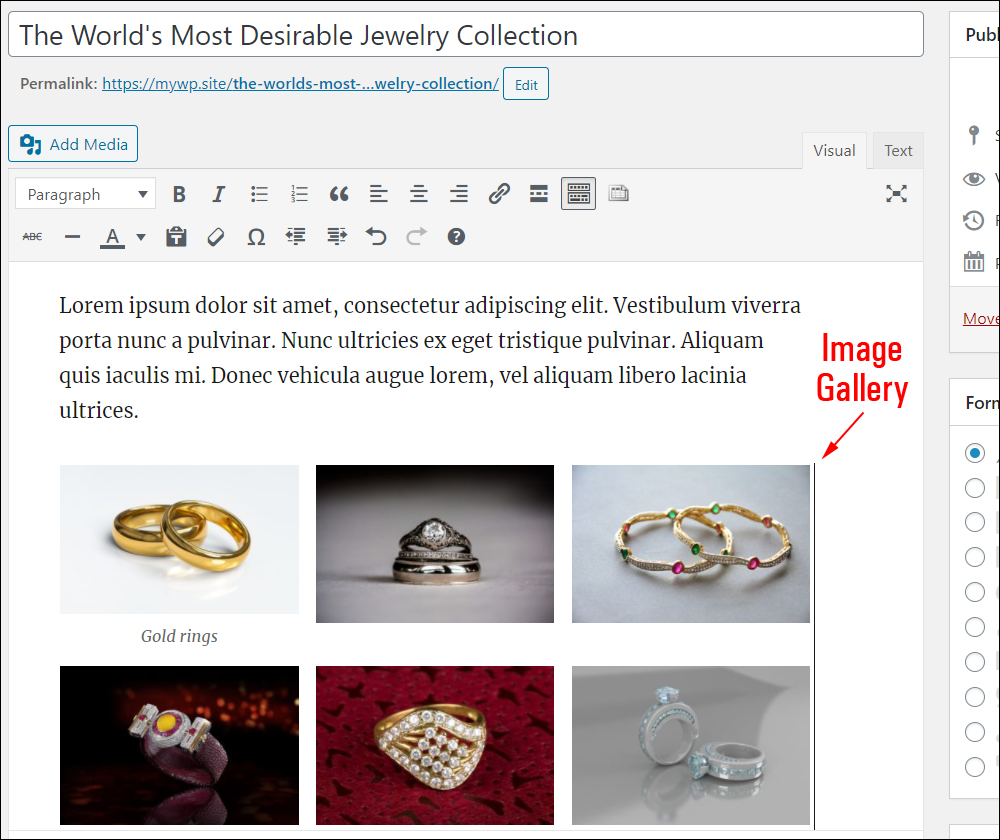
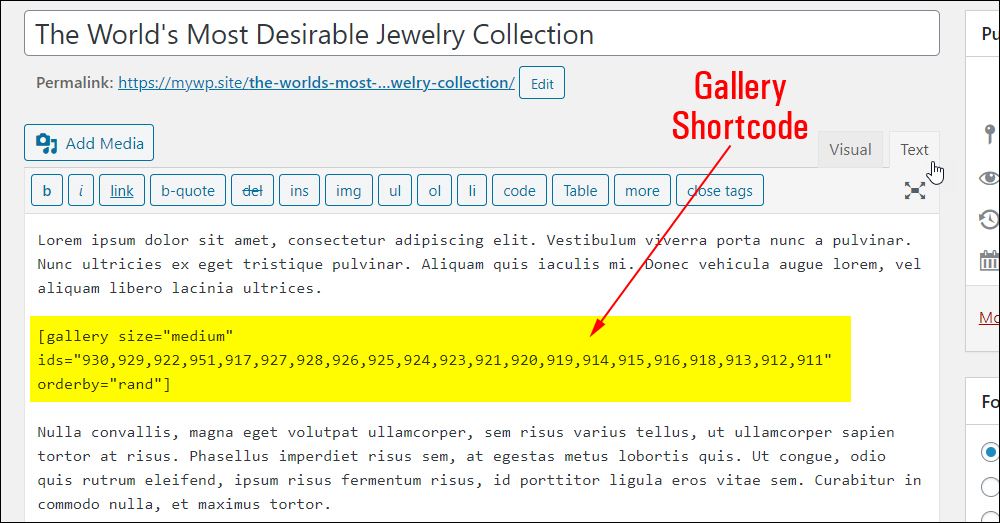
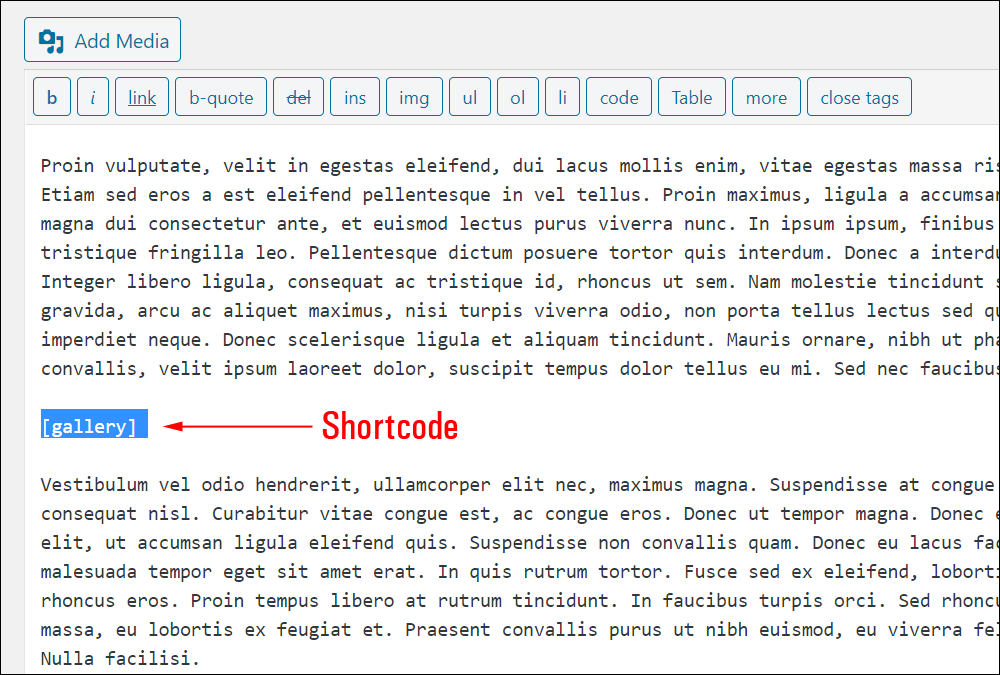
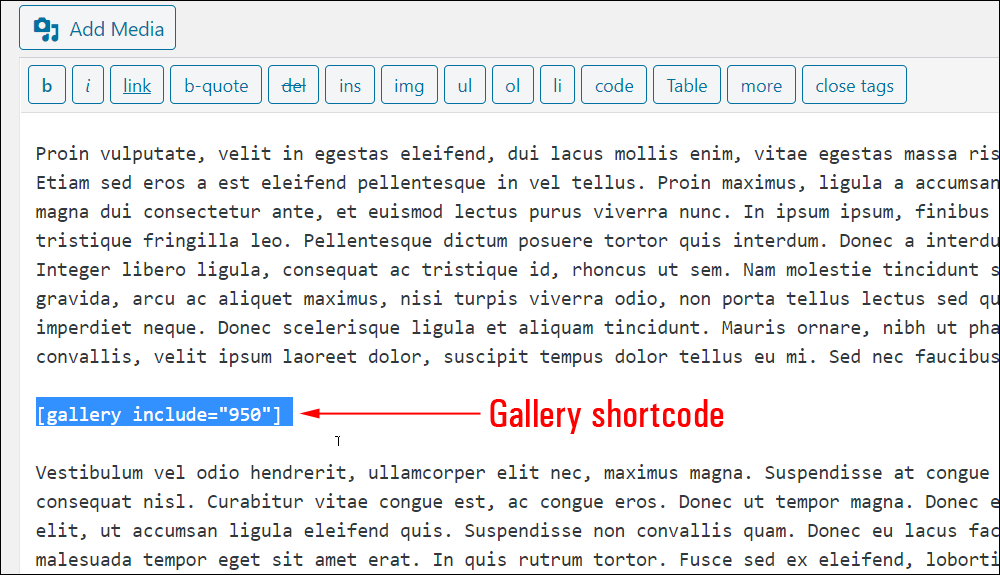
If you switch to the text editor tab, you will see a gallery shortcode inserted into the content (gallery shortcodes are explained further below).
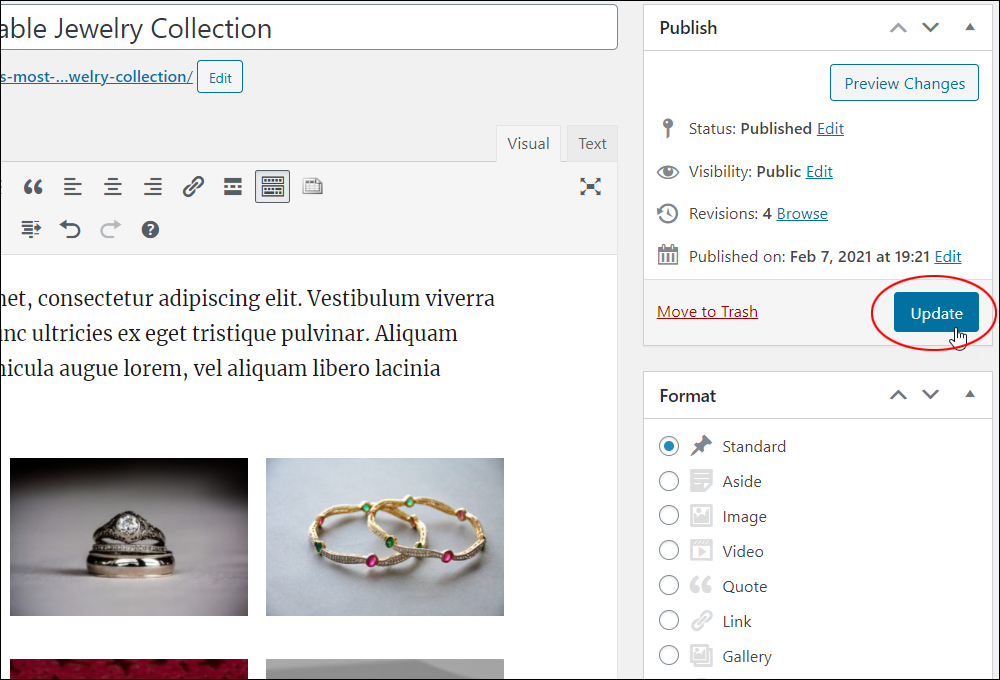
To view your image gallery, publish or update your post or page.
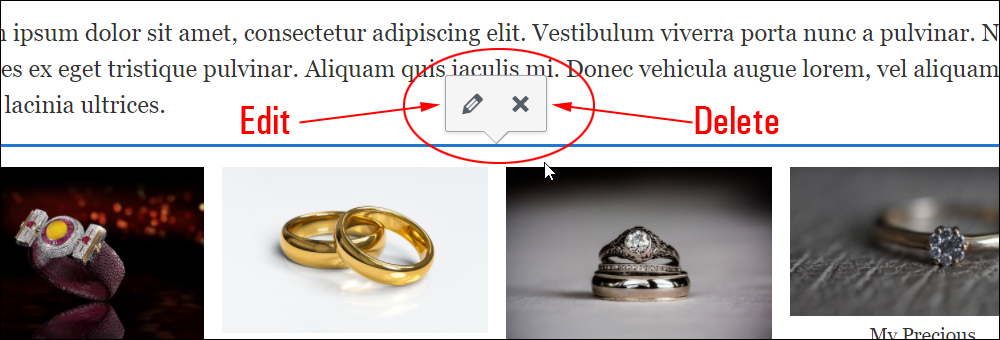
Editing Your Image Gallery
To make changes to an existing image gallery, make sure that you are in the “Edit Post” or “Edit Page” screen, and click on your image gallery.
This will display the Edit Gallery and Delete Gallery icons.
Click on the Delete Gallery icon to remove your image gallery from your content or click on the Edit Gallery icon to edit your image gallery settings.
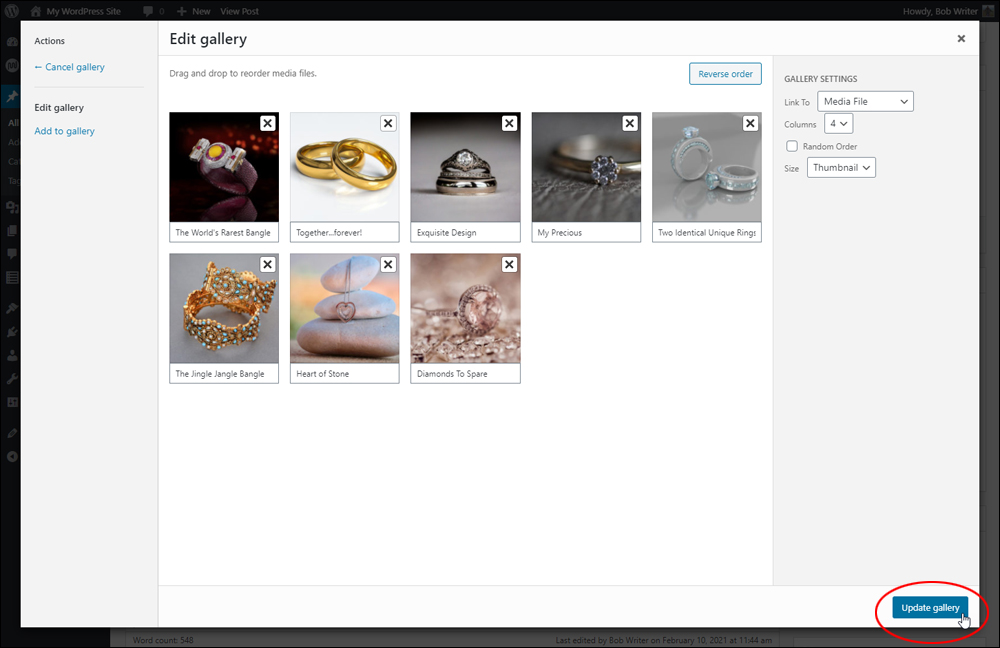
After clicking on the Edit Gallery icon, you will be presented with the choices we covered earlier:
- Add images to your gallery
- Add captions to images
- Reorder images
- Reverse image order
- Remove images
Make your changes and click the ‘Update gallery’ button at the bottom of the Edit gallery screen to update your image gallery.
Remember to click on the Update button to republish your post.
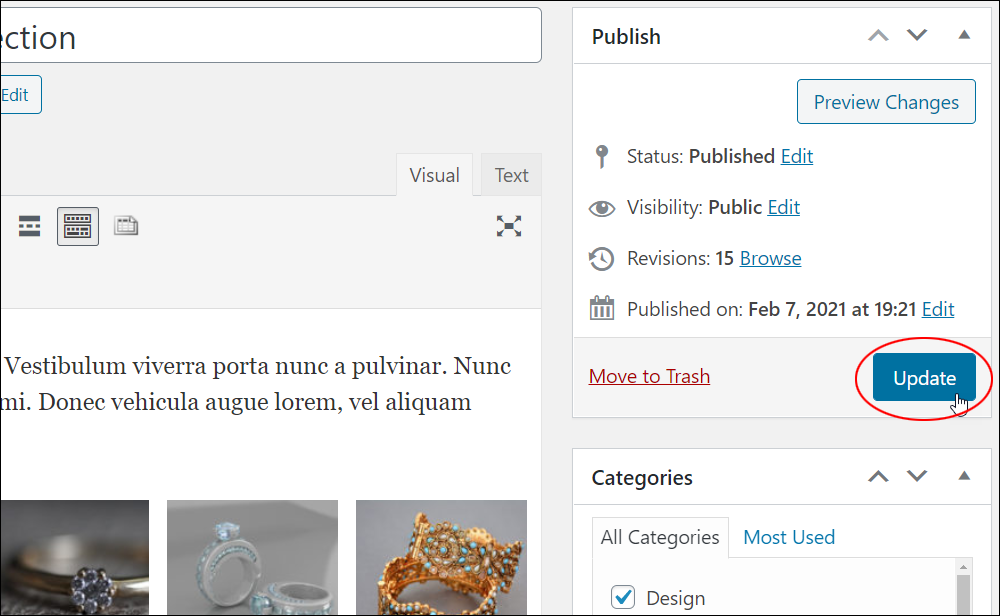
Your image gallery will update with the new settings.

WordPress Image Gallery Shortcodes
WordPress supports using various shortcodes for images and galleries. A shortcode is a single line of code that lets you insert features, functionalities, or scripts into your content that would normally require lots of complex code to pull off.
Shortcodes are typically wrapped in square brackets ( [ ] ) as shown below…

Here’s the shortcode for the WordPress image gallery.

The screenshot below shows the gallery shortcode inserted into your content via the text editor…
When you publish your post or page, the shortcode calls up the image gallery and displays it on your users’ screens.
![]()
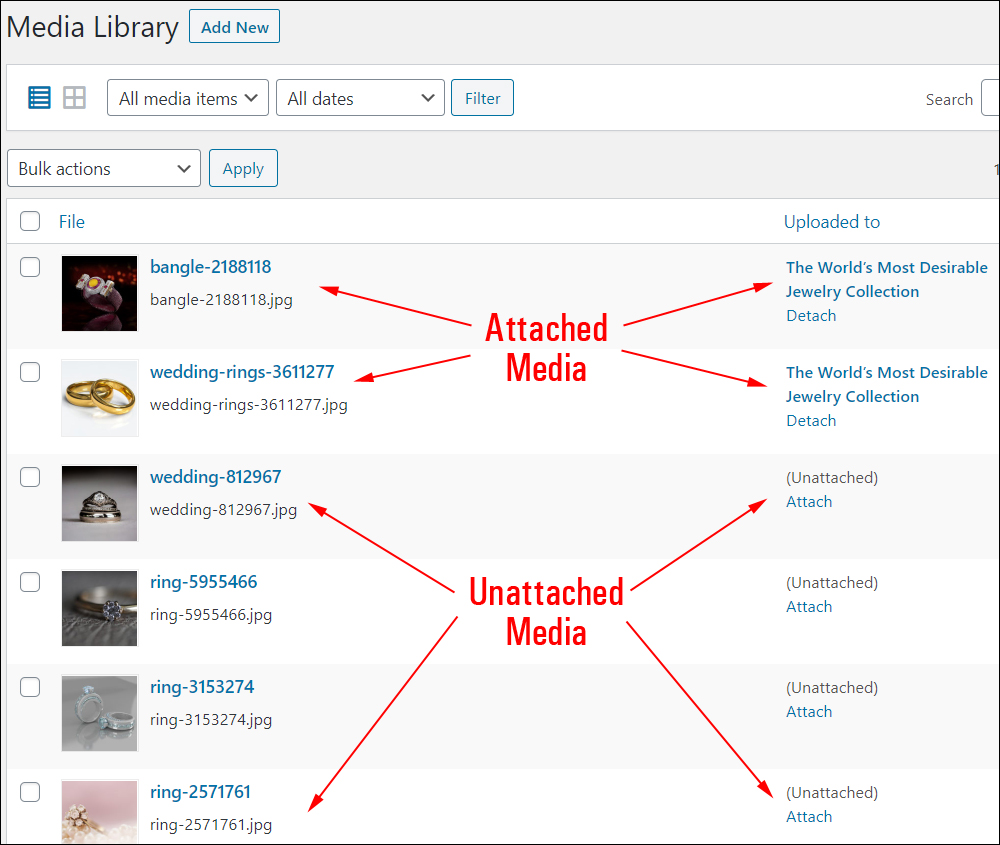
Before using any of the shortcode options described below, make sure that you have “attached” the images you want to use in your gallery to your post or page.
Unattached images will not display in your image gallery if you only use the gallery shortcode.
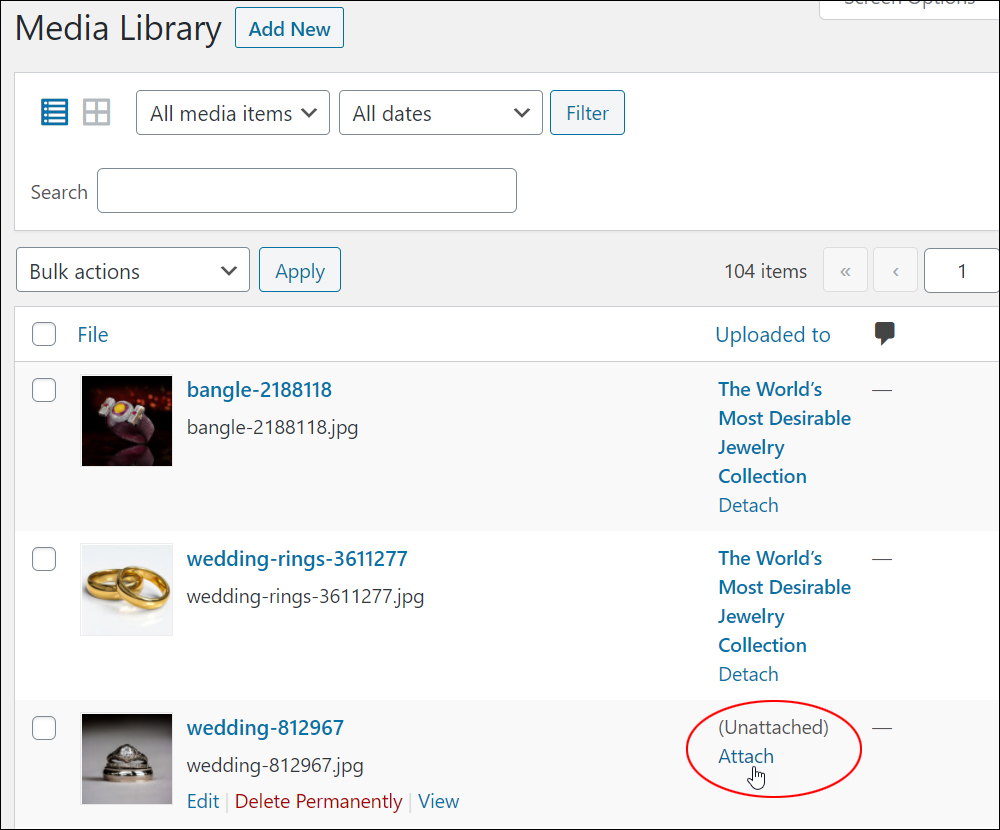
If you need help attaching images to posts or pages or understanding what this means, see this tutorial.
Gallery Shortcodes
Here are some examples of gallery shortcodes you can use to customize how image galleries display on your posts and pages:
To display a specific image using the gallery shortcode, use the shortcode below with the selected image ID.

To find your image ID, do the following:
- Go to the Media > Library
- Hover your mouse over an image
- The ID is displayed after “post=” in the status bar at the bottom of your screen, as shown below…
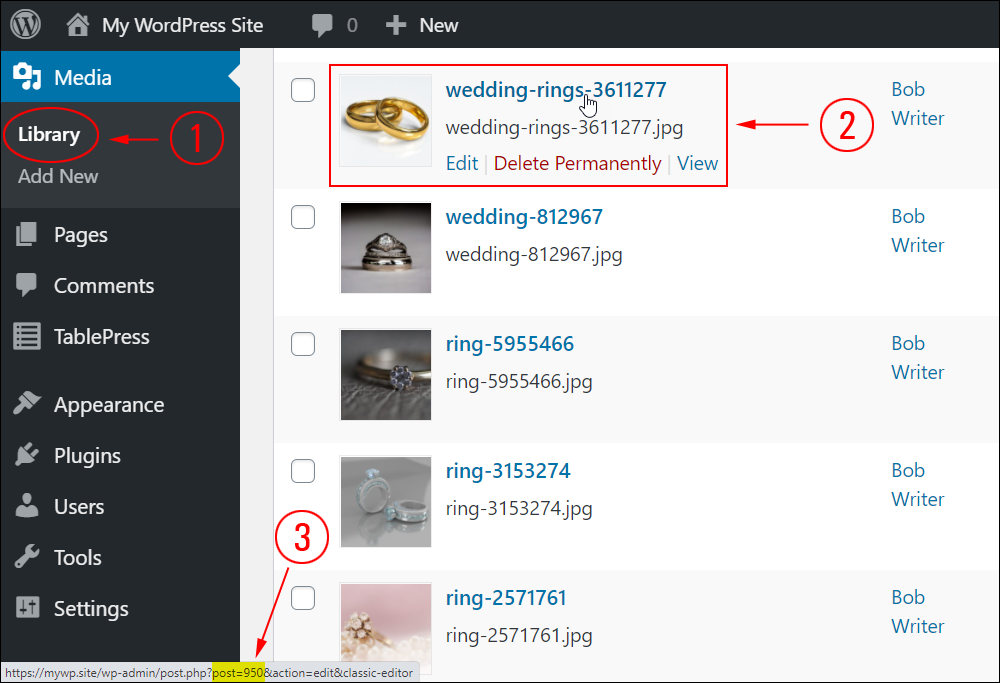
Add the shortcode where you want the image to appear in your content.
Your image will display when your post or page is published.
![]()
Notes:
- If a post exists with the ID specified in the gallery shortcode, the image gallery will display all images attached to that post.
- If the ID specified in the gallery shortcode belongs to an image and not a post, then the gallery will display the image with that ID.
In other words, the shortcode below works for posts and images (displays whichever of these matches the ID) …

Whereas this shortcode applies only to image IDs:
If publishing a single image using the gallery shortcode, remember to adjust other gallery settings (e.g. number of columns, image size, etc.)
Additional Gallery Shortcode Options
You can customize your gallery using additional shortcode options, such as:
- columns
- id
- size
- link
- include
- exclude
- order by
- order
- itemtag
- contact
- captiontag
Let’s go through some of the above gallery shortcodes using examples:
gallery columns

The above shortcode lets you specify the number of columns you want your image gallery to display on your post or page.
Simply enter the number of columns inside the quotation marks. In the above example, we want our image gallery to display images in 5 columns.
The default value for this shortcode setting is 3. If columns are set to 0, no row breaks will be included.
gallery size

You can use the shortcode above to display your images in different sizes: Thumbnail, Medium, Large, and Full Size.
Simply type in one of the options below inside the quotation marks (replacing the red text):
- thumbnail
- medium
- large
- full
gallery id

We have already covered this shortcode.
The above shortcode allows you to display all images attached to a post with the specified ID. By default, if no ID is specified, the gallery will display all images attached to the current post.
If no post ID exists but the ID is assigned to an image, then the image with that ID will display in your gallery.
In the screenshot above, the gallery would display a single image with the image ID = 123 or all images attached to a post with ID 123.
If you need help understanding post, page, or image IDs, see this tutorial.
gallery include

Use this shortcode to include multiple images in your gallery. Separate image IDS with commas.
gallery exclude

Like the “include” shortcode, you can exclude images that you don’t want to display in your image gallery by adding the above shortcode with comma-separated image IDs.
See the earlier section of this tutorial to learn how to identify image IDs in your media library.
gallery order
This lets you specify the sort order used to display thumbnails in your gallery shortcode:
- ASC (ascending)
- DESC (descending)
gallery orderby
This option lets you specify how to sort your display thumbnails.
By default, your image gallery uses “menu_order” to display images using the order you have specified when creating your gallery.
The options include:
- menu_order (note: you can reorder the images by editing your image gallery)
- title (order by image title, as specified in the Media Library)
- post_date (sort images by date/time)
- rand (display images in random order)
- ID (order images by ID)
You can combine order and orderby in a single shortcode. For example:

The above shortcode will sort images by ID in descending order.
To sort images by date/time in ascending order, enter the shortcode below into your post or page:

And to sort images by image title in ascending order, you would enter the following shortcode:

You can have precise control of your image gallery by combining different parameters.
For example, here is the shortcode for displaying an image gallery on your post or page with the following parameters:
- Images link to media file location (link=”file”)
- Image sizes display as Full size (size=”full”)
- Images display in 4 columns (columns=”4″)
- The gallery displays 7 images using their image IDs (ids=”comma-separated image ids”)
- Images display in random order (orderby=”rand”)

For more information about the Gallery shortcode, refer to the official WordPress Codex here: http://codex.wordpress.org/Gallery_Shortcode.
![]()
If you plan to add images to your posts using an image gallery, the built-in WordPress gallery feature may be more than ideal for your needs.
If you want to go beyond the default WordPress gallery, there are several plugins available that can help you create stunning image galleries.
You can either:
- Search for “WordPress image gallery plugins” inside your WordPress dashboard (Plugins > Add New), or
- Search for image gallery plugins in the WordPress free plugin directory here: WordPress Image Gallery Plugins
Congratulations! Now you know how to insert multiple images into your posts and pages using the built-in WordPress image gallery feature.
Kittens and jewelry images: Pixabay
***

Updated: April 9th, 2023