How To Add And Format Images In WordPress

As a content publisher, you will probably make extensive use of images on your site.
The WordPress content management system (CMS) lets you organize your site’s images in the Media Library.
After uploading media files to the Media Library, you can format your images before inserting them into your content.
This tutorial explains how to do this.
See the tutorials below if you need help with other aspects of using images, like:
- Preparing images for use on your site
- Sourcing free or royalty-free images for your content
- Using the WordPress Media Library
- Editing images in the WordPress Media Library
- Adding an image gallery to your content
- Using featured images in your posts and pages
![]()
The screenshots in this tutorial were created using the WordPress Classic Editor. If you use the WordPress Block Editor, refer to these tutorials on using image-related blocks:
How To Add Images From Your WordPress Media Library
You can add images to your Media Library by:
- Uploading the image from an internal or external hard drive.
- Using the URL on an image stored in an external location (e.g. a cloud storage service like Amazon S3, Dropbox, etc.).
![]()
Make sure that you have permission to use the image(s) on your site.
Image licensing companies and owners of copyrighted images will take legal action against you if you use images on your site without permission or violate the terms and conditions of your licensing agreements.
If you need free images and royalty-free images for your content, see this tutorial: Where To Find Free And Royalty-Free Images For WordPress
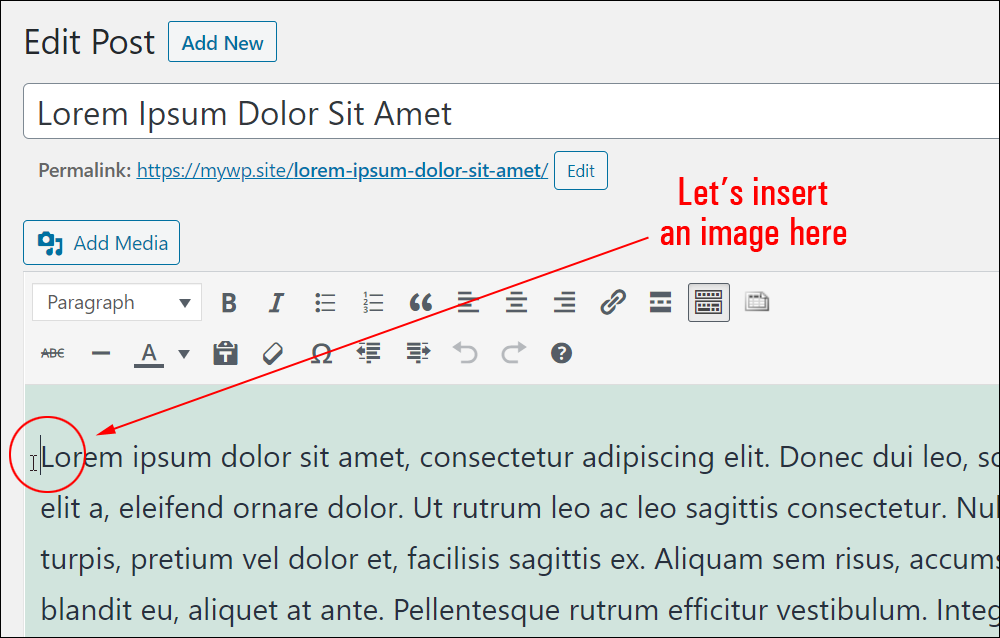
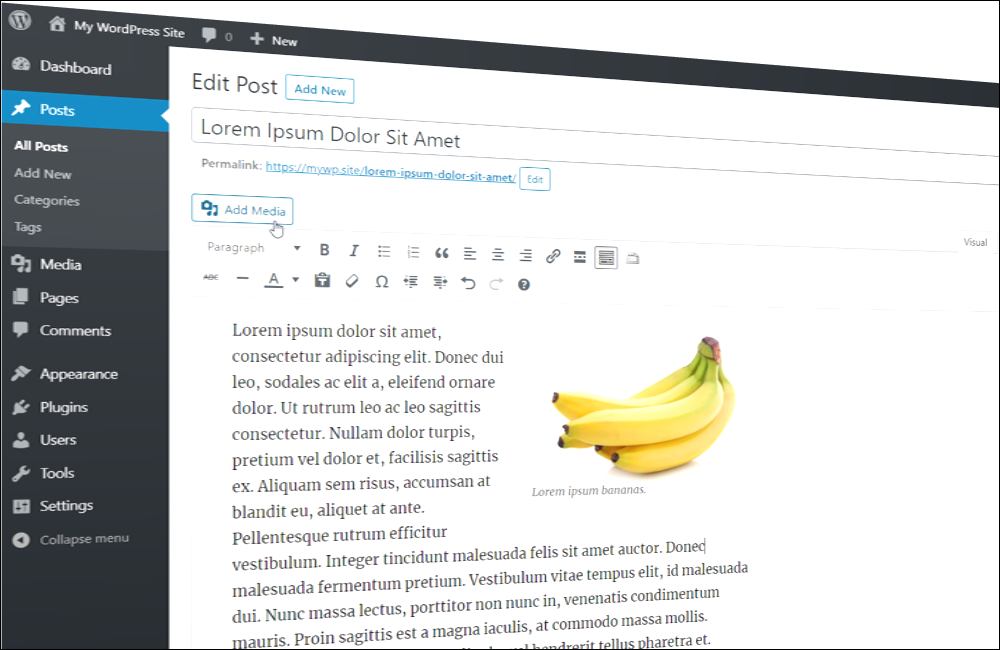
To insert an image into your content from your Media Library, create or edit a Post or Page and place your cursor in the location where you want to insert the image.
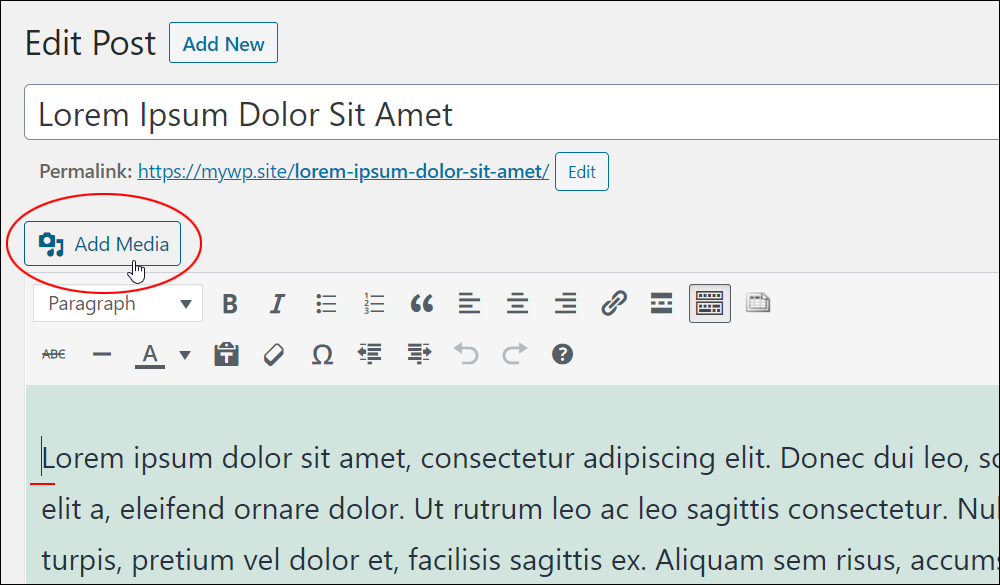
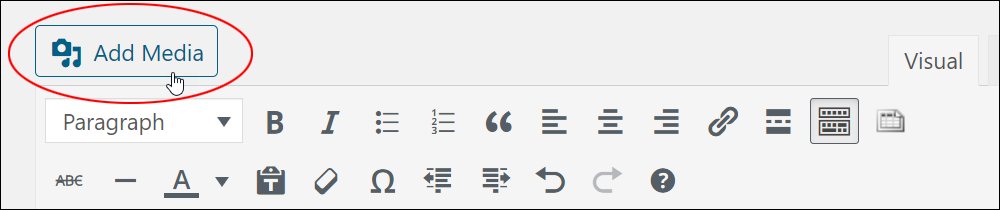
Click on the Add Media button above the content editor.
The Add Media screen will open in your browser.
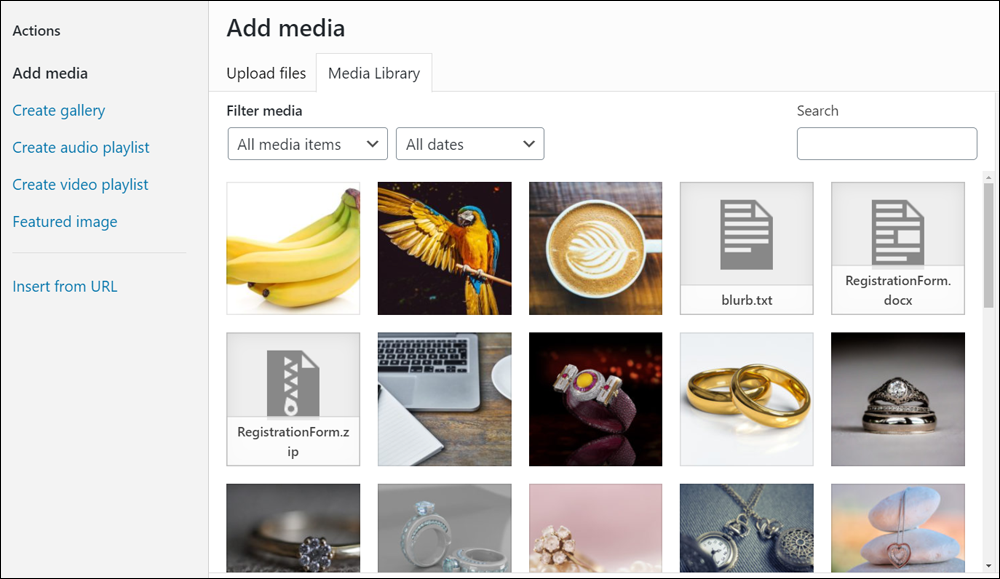
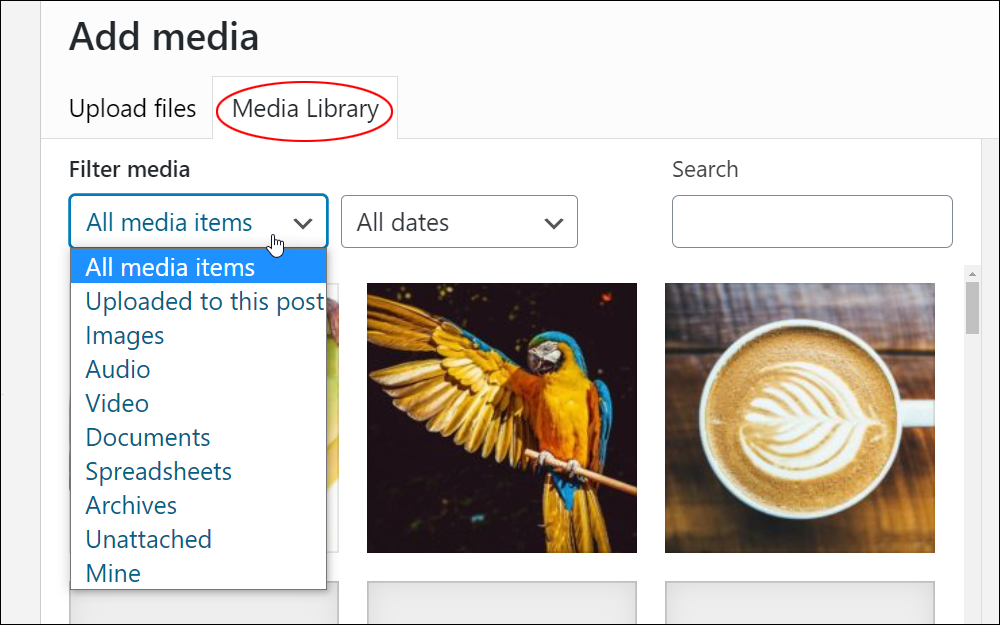
Click on the Media Library tab, then select Images from the Filter media drop-down menu to view all the images you have uploaded to the Media Library or select All media items (default option) to view all the uploaded media types and media files in your Media Library.
Notes:
- Only the media types you have uploaded to the Media Library will display in the Filter media drop-down menu (e.g. audio and video files, documents, spreadsheets, etc.).
- If you are editing a post or page that already contains images, you can select Uploaded to this post to filter only those images.
- You can also filter files that are not associated with any posts or pages (Unattached) or only the media files that you have uploaded (Mine).
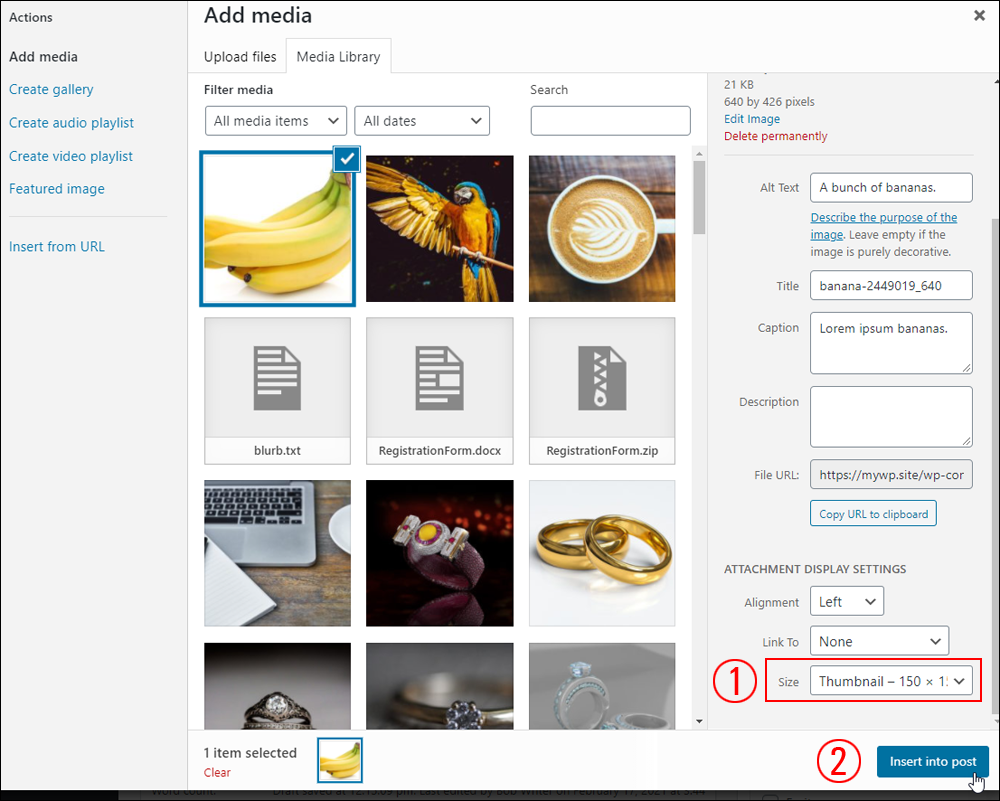
Locate and select the image you want to add to your content and click the ‘Insert into post/page’ button.
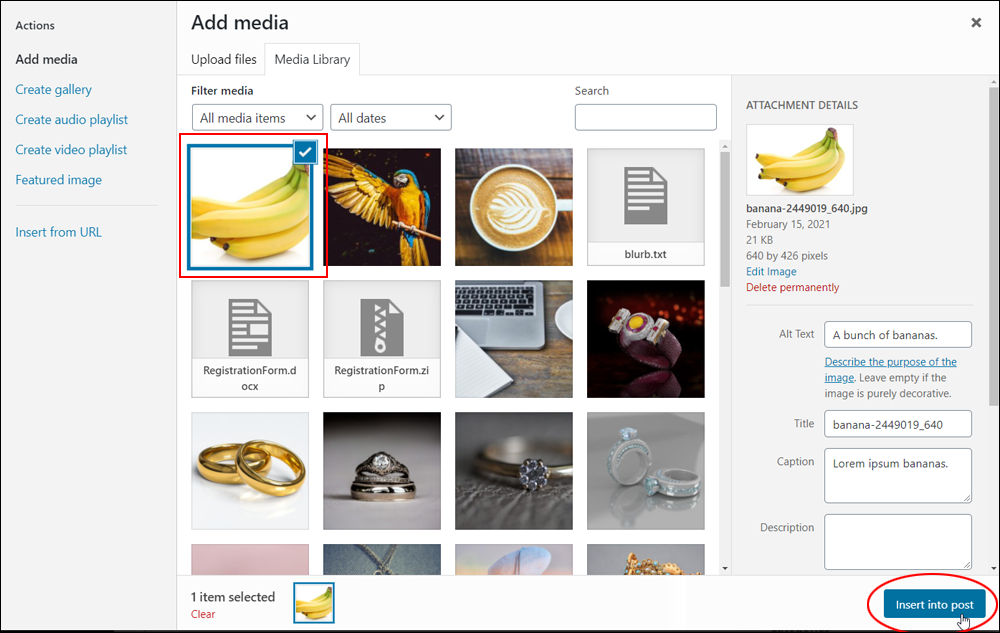
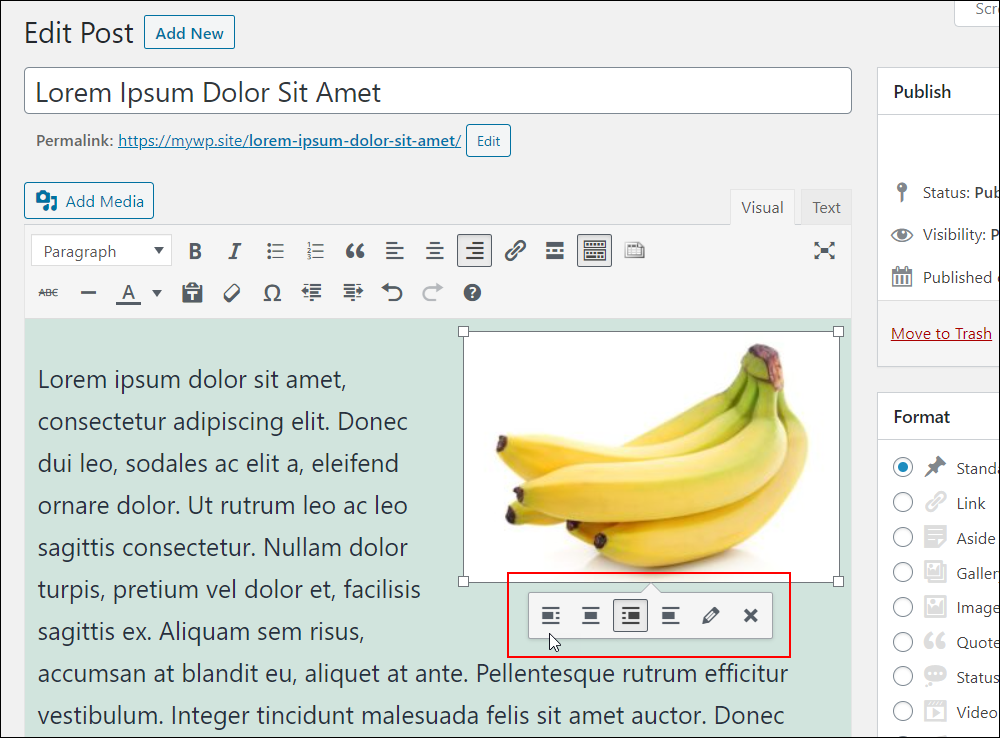
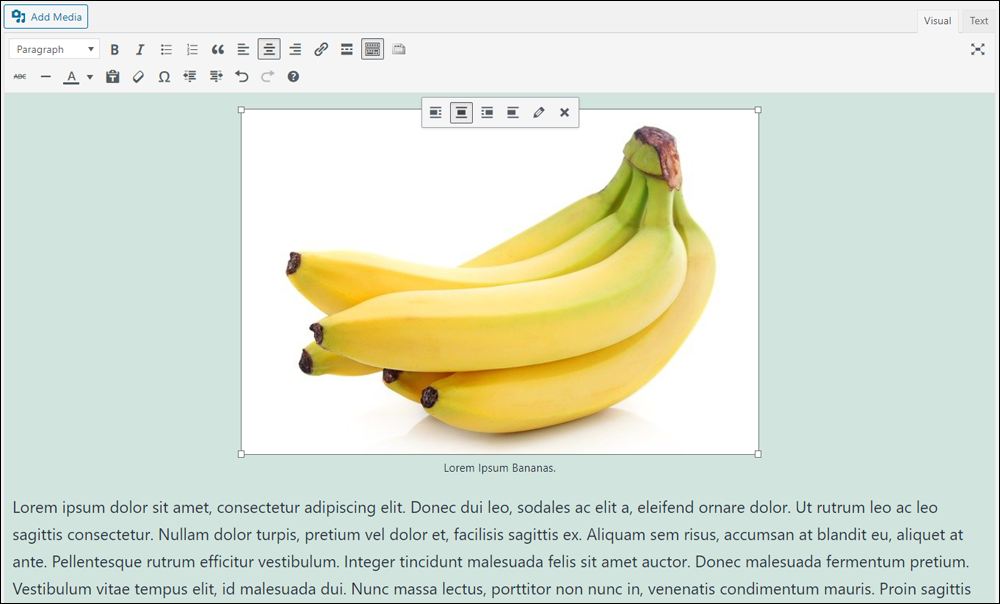
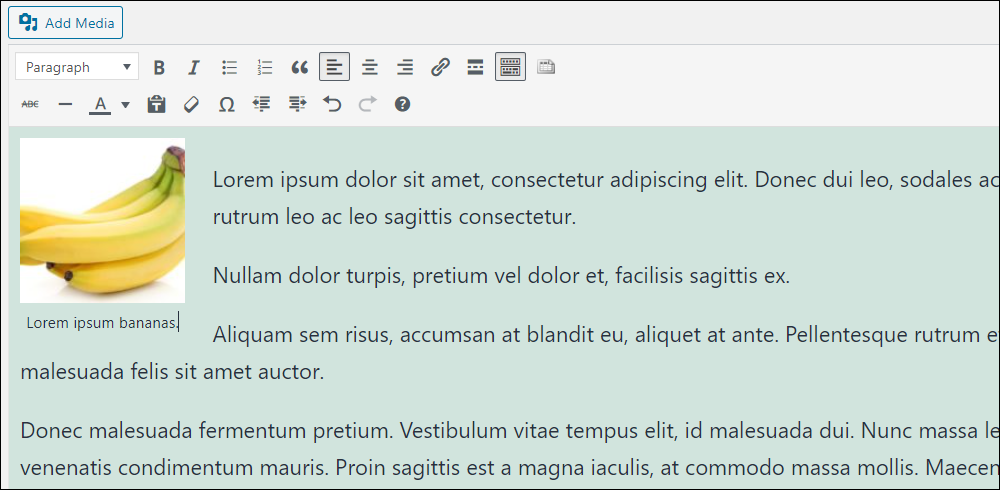
The image will be inserted into your post or page where you placed your cursor. By default, the inserted image has no alignment (i.e. the default image alignment option = None)

As you will see later in this tutorial, you can also specify how to align your image before inserting it into your post or page.
You can specify the image alignment before adding images to your content…
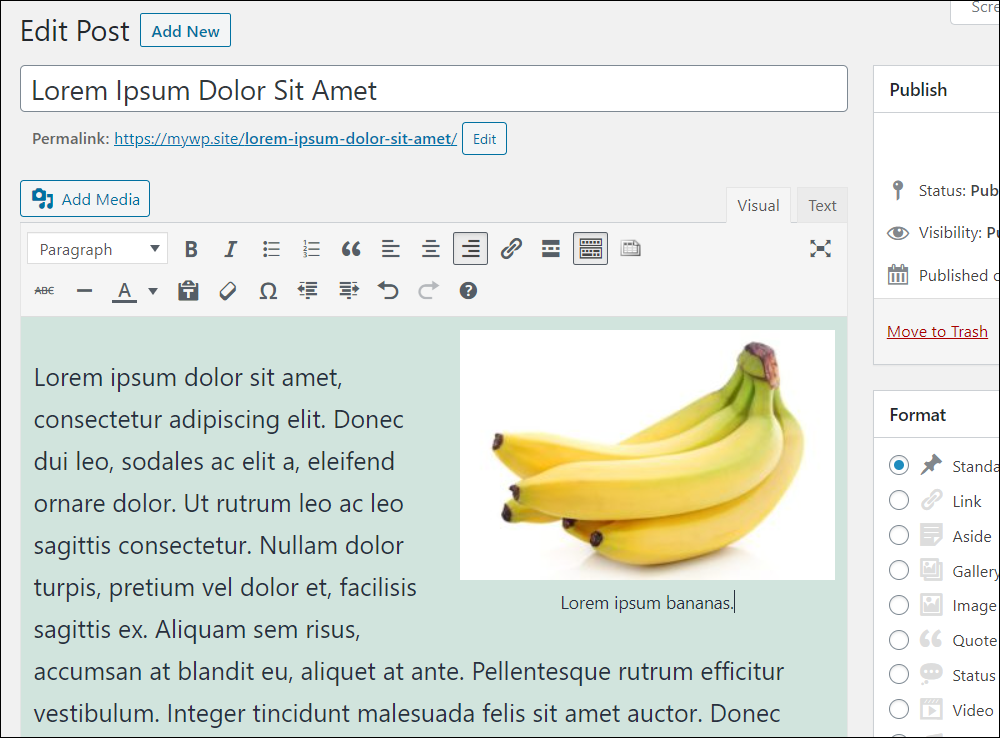
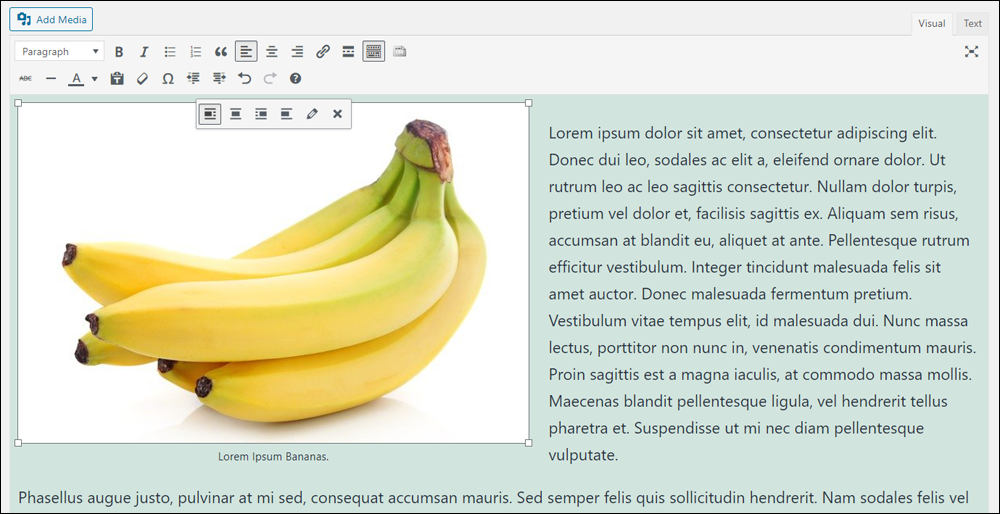
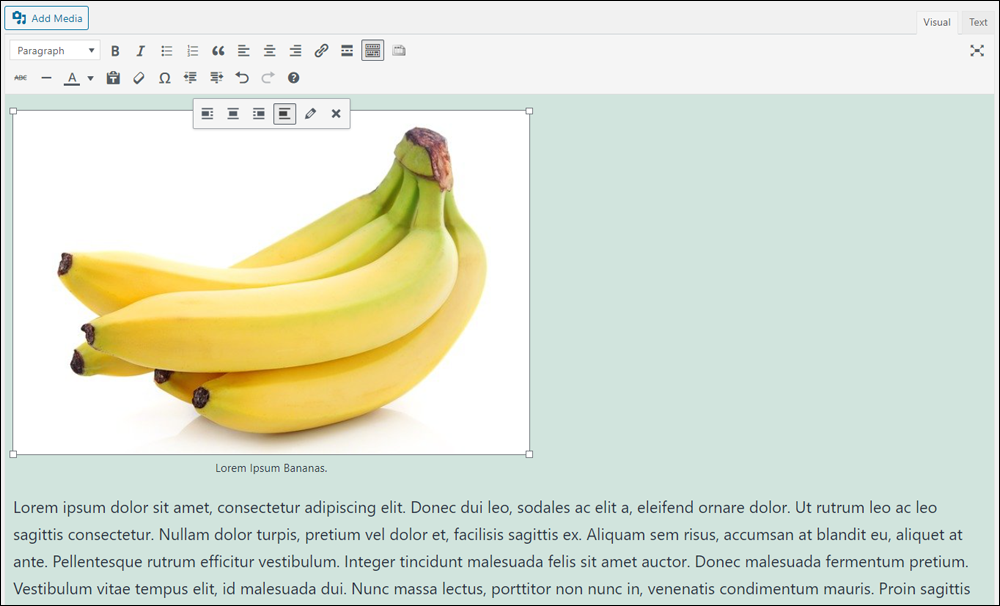
Or, you can align images after inserting them into your content by clicking on the image and selecting one of the alignment options from the image editing menu.
![]()
You can also add an image gallery from your Media Library to your posts and pages.
If you need help with this step, see this tutorial: How To Add An Image Gallery In WordPress
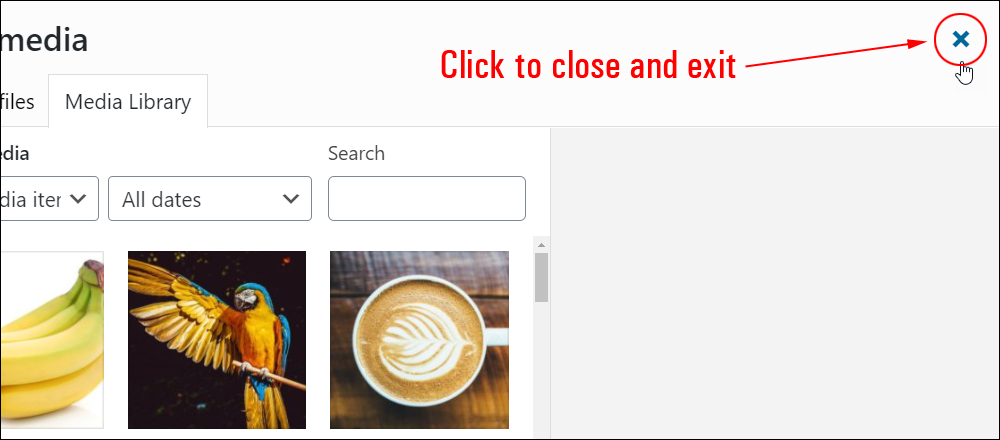
To exit the Add Media screen without performing an image action, just click on the “X” at the top of the window.
How To Upload Images From Your Hard Drive
To add images stored on your hard drive to a post or page, make sure to create your image to the correct specifications, then place it into a folder on your hard drive that you can easily locate.
Next, go to your WordPress Editor and click inside the post or page where you want the image to be added. The image will be placed wherever your cursor is flashing.
Click on the Add Media button above the content editor window.
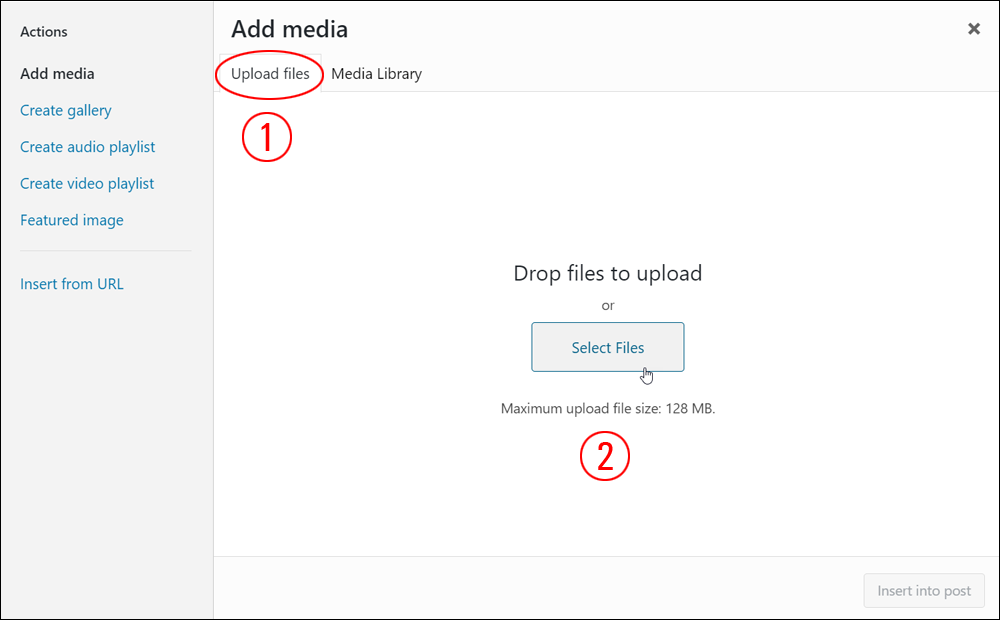
This will bring up the Add Media screen. Select the Upload Files tab [1] to display the media uploader, then either drag-and-drop your image file into the box or click on the Select Files button [2] to locate and upload your image.
![]()
For detailed step-by-step tutorials on:
Once the image has been uploaded, it will display as the selected item.
Click the Insert into post button.
This will add the image to your post or page.
How To Add An Image From A URL
![]()
Do not link to images hosted on an external server without permission – this is called hotlinking and it’s frowned upon by most webmasters and website owners, as it uses up their bandwidth and costs them money.
You can set up your own external data storage account for hosting images and files remotely using a service like Amazon S3.
To add an image from a URL into a post or page, click on the Add Media button.
The Add media screen will open on your browser window.
Click the Insert from URL link in the screen’s options menu.
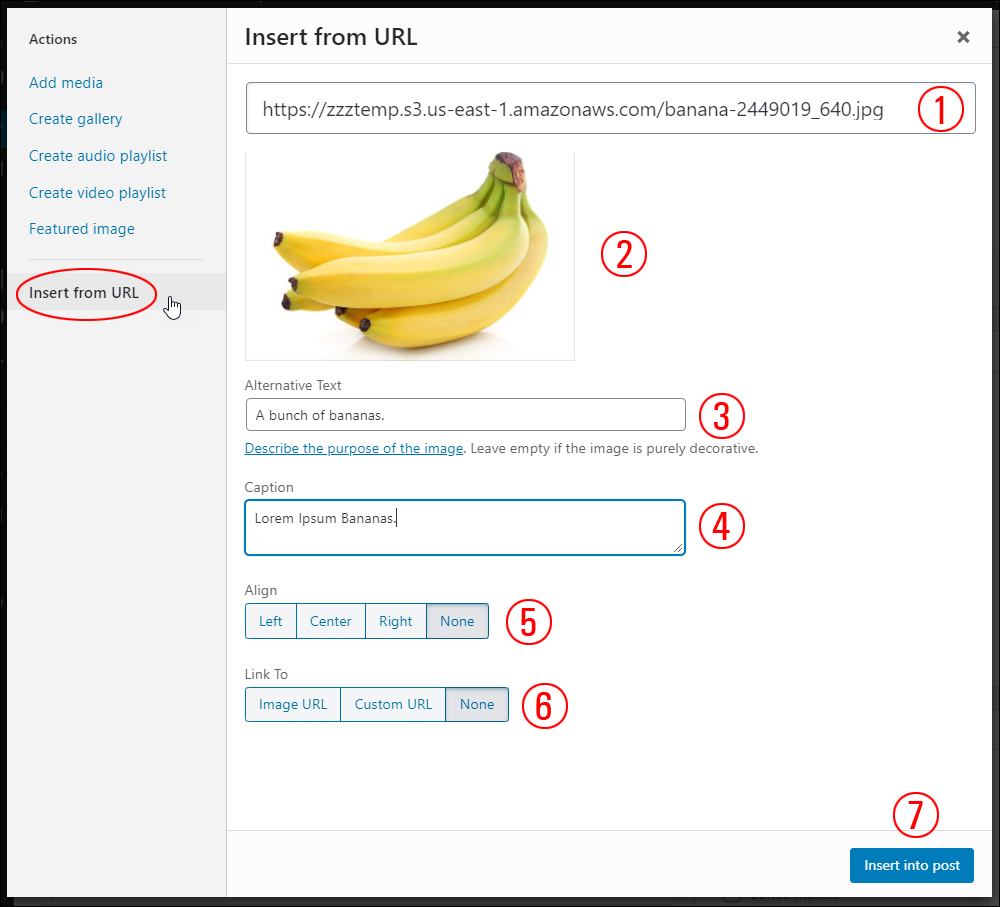
This will bring up the ‘Insert from URL’ screen.
In this screen, do the following:
- Paste in the URL of your image (i.e. where your image is stored)
- If you have entered the URL correctly, a thumbnail of the image should display below the URL (if the image doesn’t display here, make sure you have set correct access permissions in your external storage service)
- Add an alt tag to your image into the Alternative Text field.
- Add an image caption.
- Specify an image alignment (Left, Center, Right, None).
- Specify a linking option for your image in the Link To field (Image URL, Custom URL, None)
- Click the Insert into post/page button when you have finished configuring the above settings.
How To Format Images In Your Posts Or Pages
After uploading and adding an image into your post or page using one of the above methods, the next step is to format your image, so it displays correctly on your site.
How To Format Images In The Add Media Screen
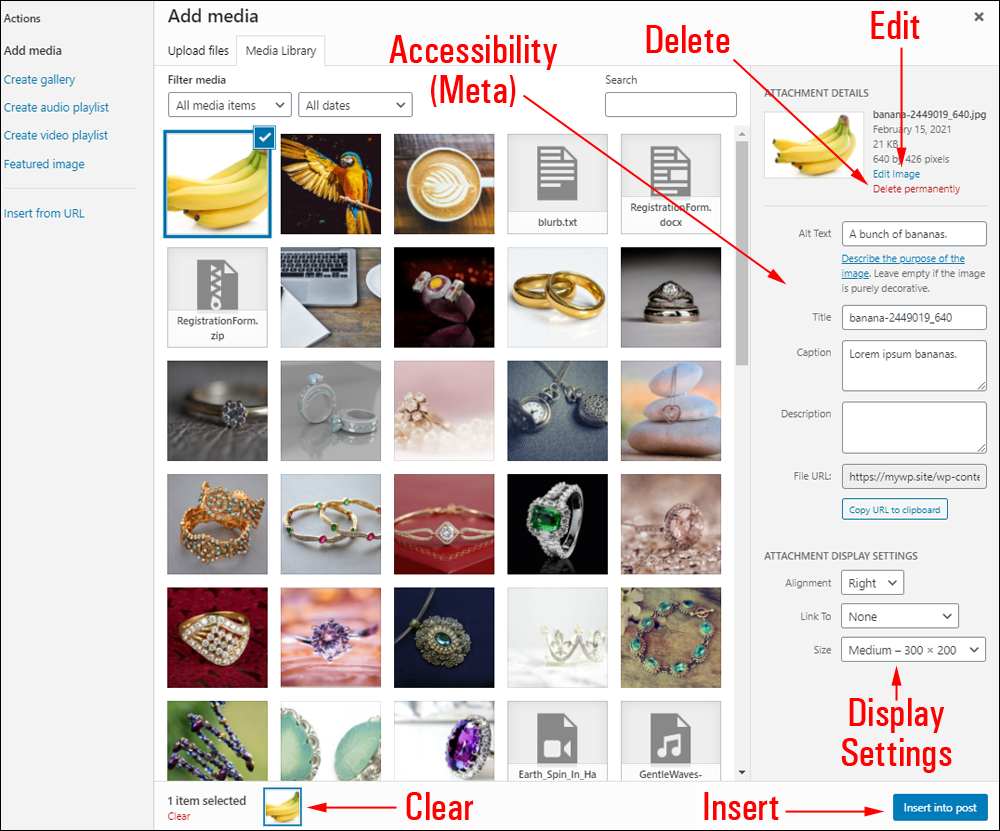
The ‘Add Media’ screen gives you options for editing and formatting your images.
These include:
- Edit image – Click this button to edit your image in the ‘Edit Image’ screen (we cover this in more detail further below).
- Delete permanently – Click on this link to permanently delete the image (i.e. remove it from the Media Library).
- Accessibility (Meta) – See this tutorial for more details on how to use these settings: How To Edit WordPress Media Library Images
- Attachment display settings – See below for more details on using this section.
- Clear image – Click on the red ‘Clear’ link to deselect the image.
- Insert image into a post or page button – Click this button to add the image to your post or page.
Attachment Display Settings
The Attachment Display Settings allow you to specify various formatting options for your image.
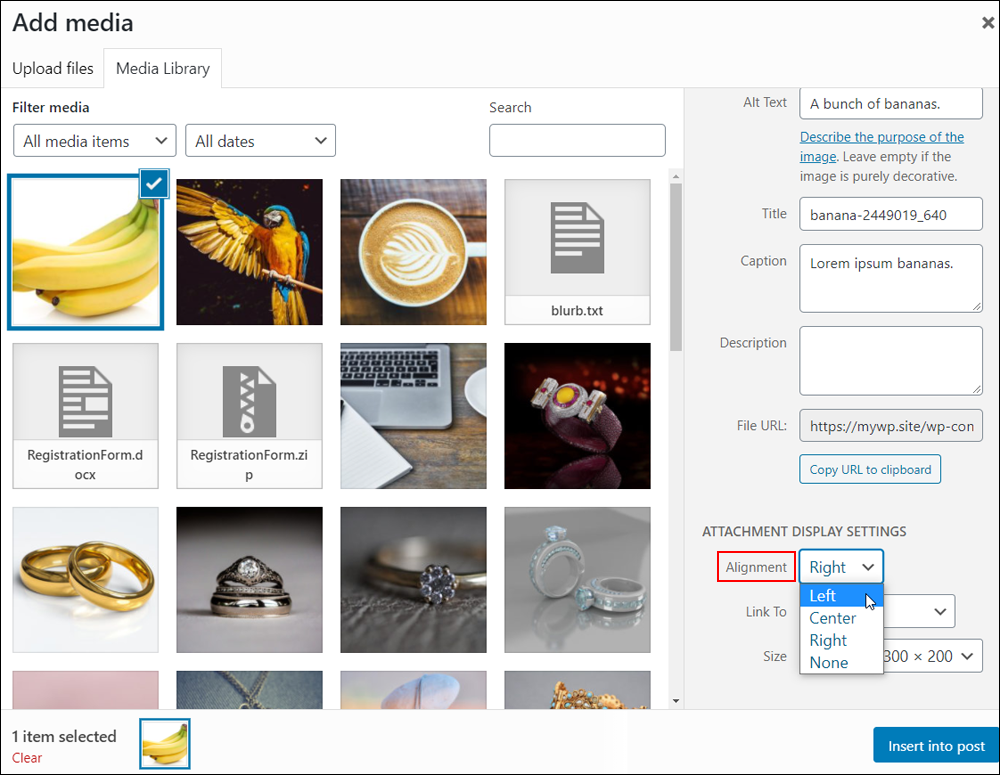
Alignment
Select an Alignment for your image from the drop-down menu options.
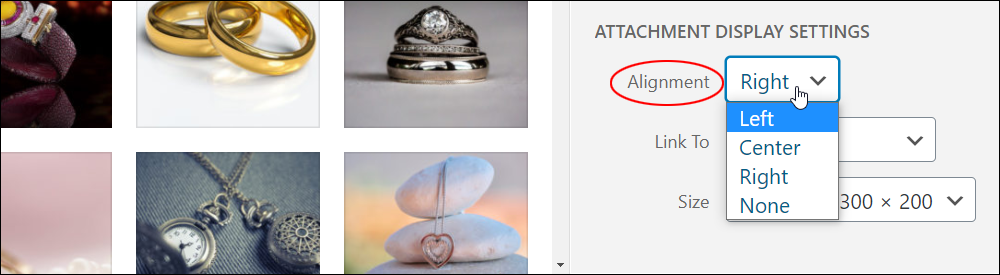
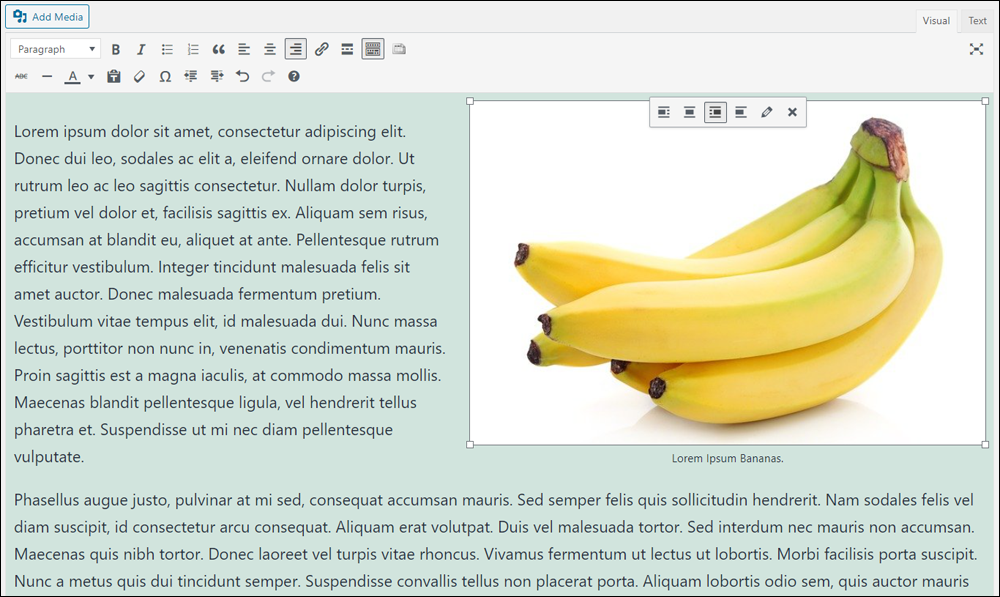
Left: Place the image on the left of your post or page content. Text is wrapped around the image.
Center: Center your image on the post or page. Text is not wrapped around the image.
Right: Place the image on the right of your post or page content. Text is wrapped around the image.
None: No image alignment. Text is not wrapped around the image.
Note: You can specify no image alignment after the image has been added to your content using the image editor menu button shown below.
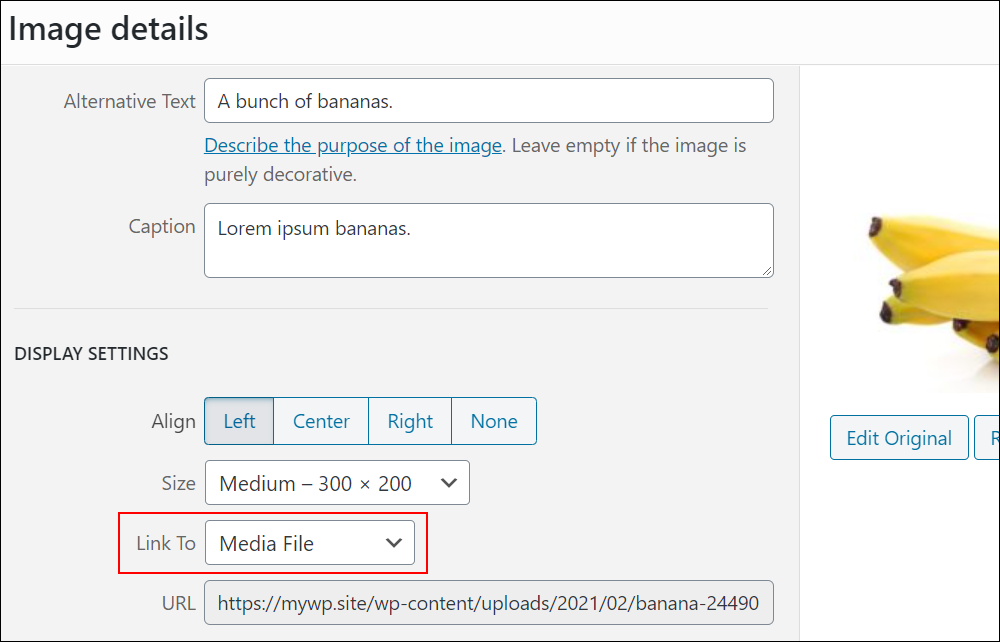
Link To
Use the Link To settings to specify a linking option for your image.
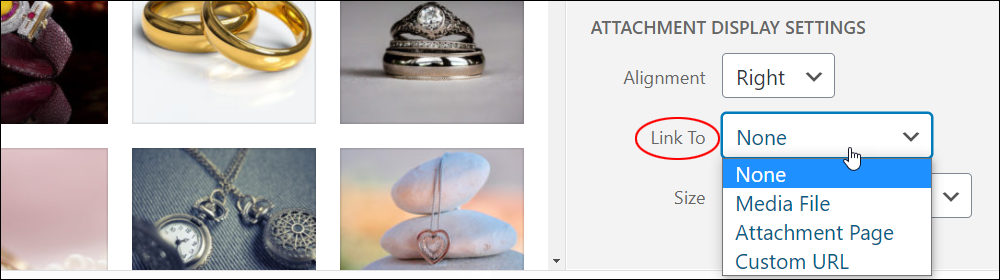
None: Select this option to remove all links to the image. When you insert an image using the Link To = None setting into a post or page, nothing will happen when users click on the image.
Media File: Select this option to link your image to the folder where your image file has been uploaded. Clicking on this image in a post or page will open up the full-size image on your visitor’s browser.
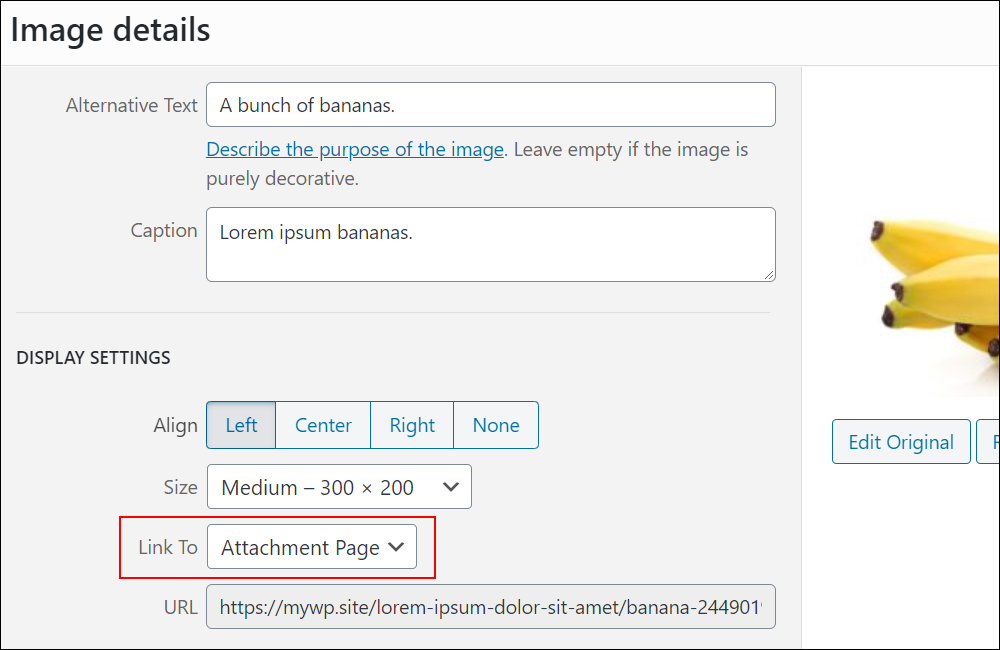
Attachment Page: Select this option to link your image to the media attachment page.
Clicking on an image inserted into a post or page with this option will open the file’s attachment page.
For more information about attachment pages, see this tutorial: How To Edit WordPress Media Library Images
Custom URL: Select this option to link your image to the URL of your choice (e.g. your home page, a product page, or an external URL). Clicking on this image in a post or page will send the visitor to the URL location specified in the Custom URL field.
Size
You can also specify the Size of the image to display in your content, e.g. Thumbnail, Medium, Full Size, etc.

Editing An Image Inserted Into Your Content
To edit an image after inserting it into your post or page, click on the image and select the Edit (pencil) icon.
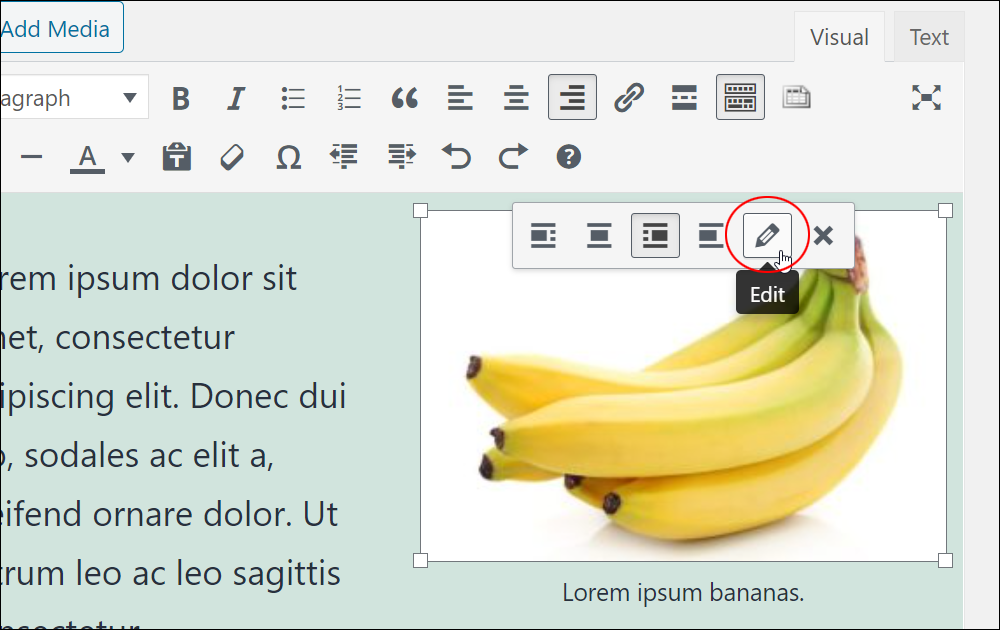
This brings up the Image details screen.
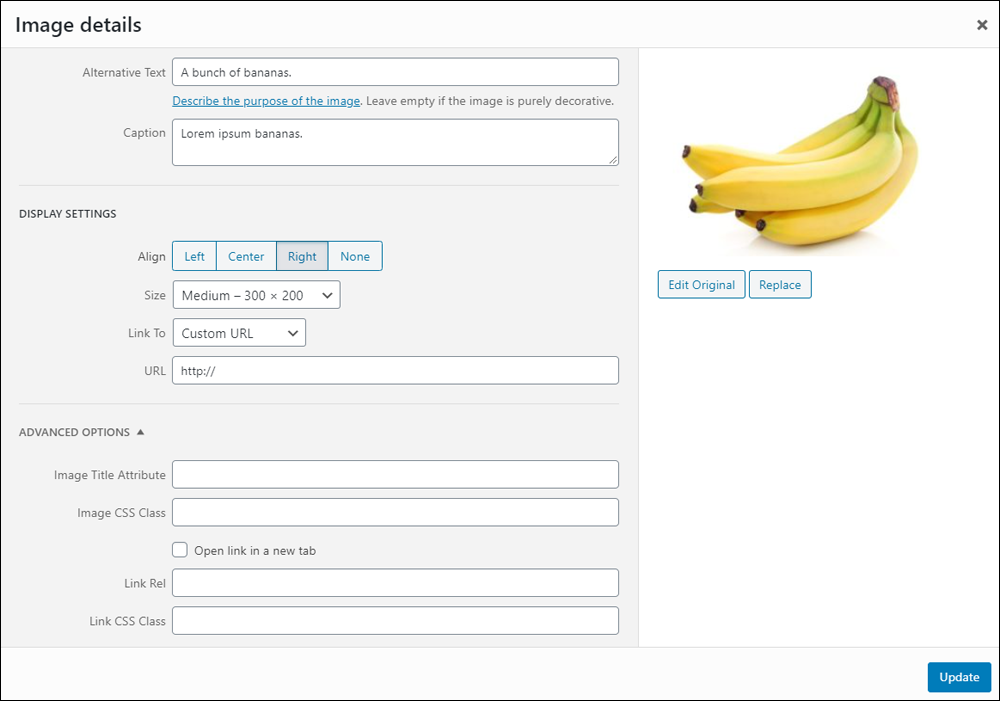
In the Image details screen, you can adjust the following:
Image Text
You can edit the following image attributes in this section:
- Alternative Text
- Image Caption
Display Settings
Align
Change the image alignment (Left, Center, Right, None).
Size
Select an image size to display in your content (e.g. Thumbnail, Medium, Full Size, etc.).
Note: Some themes allow you to enter a Custom Size.
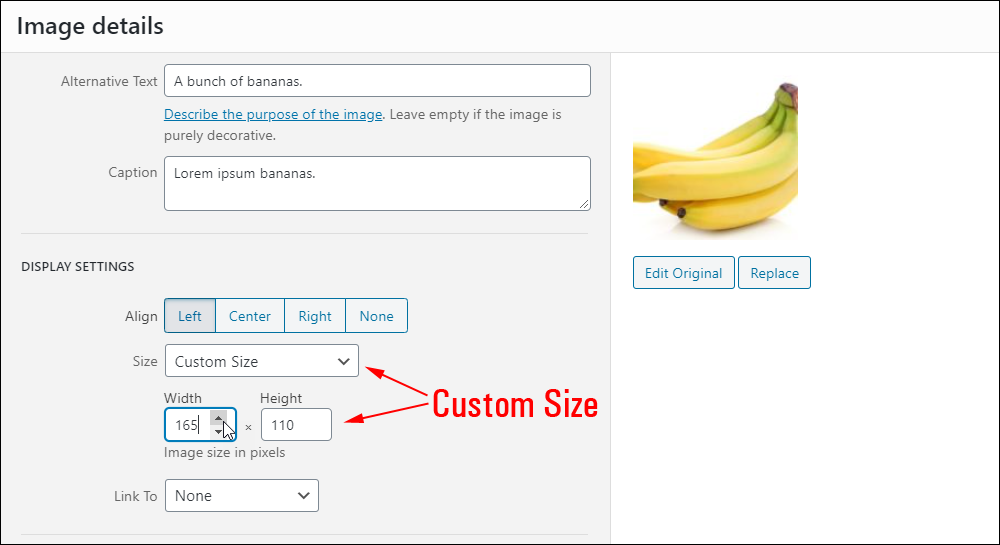
If you select Custom Size, image width and height selectors will display.
Enter an image size in pixels or adjust the image size using the up and down arrows.
Link To
Use the Link To settings to specify a linking option for your image. See the earlier section of this tutorial for a description of the linking options available.
Advanced Options
Click on the little black triangle icon to expand or collapse this section.
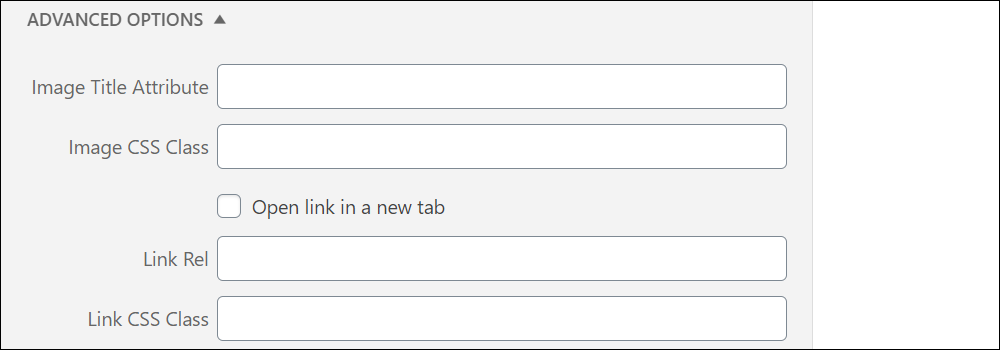
You can edit the following information in the Advanced Options section:
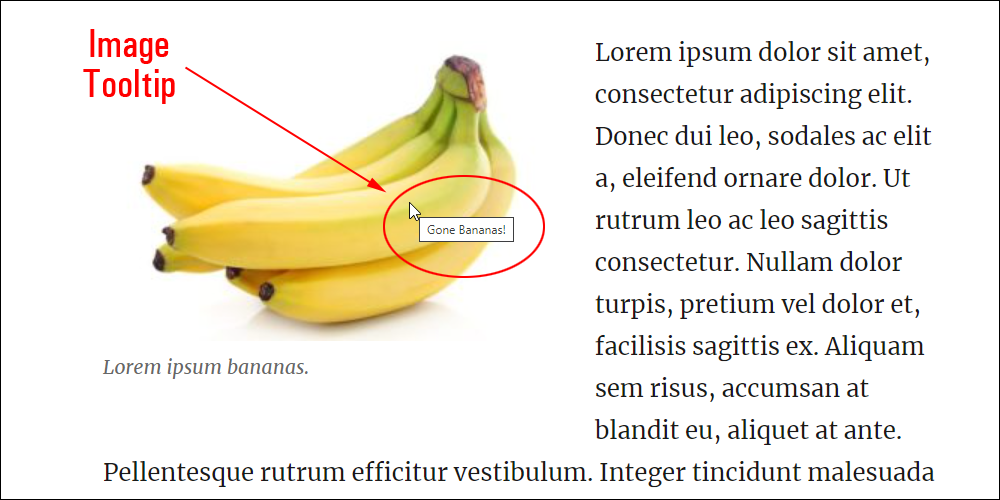
- Image Title Attribute: Enter text here to display the image title as a tooltip (the text will appear when visitors hover over your image).
- Image CSS Class: Use this field to apply CSS styles to the image.
- Open link in a new tab: Enable the checkbox to open the link in a new tab or leave it unchecked to open the link in the same tab.
- Link Rel: You can add link rel attributes to your images (e.g. “nofollow”).
- Link CSS Class: Use this field to apply a CSS class to the link.
Adding Thumbnail Images To Posts
To add a thumbnail image to your post, place your cursor where you want the thumbnail image to appear in your content and click on the Add Media button.
This brings up the Add Media screen.
Do the following:
- In the ‘Attachment Display Settings > Size’ section, select Thumbnail from the drop-down menu.
- Click on the Insert into post/page button.
Your thumbnail image will be inserted into your post where you placed your cursor.
Additionally, you can perform the following changes to your thumbnail image in the Image details screen:
- Edit your thumbnail image by clicking on the Edit Original button.
- Replace your thumbnail image by clicking on the Replace button
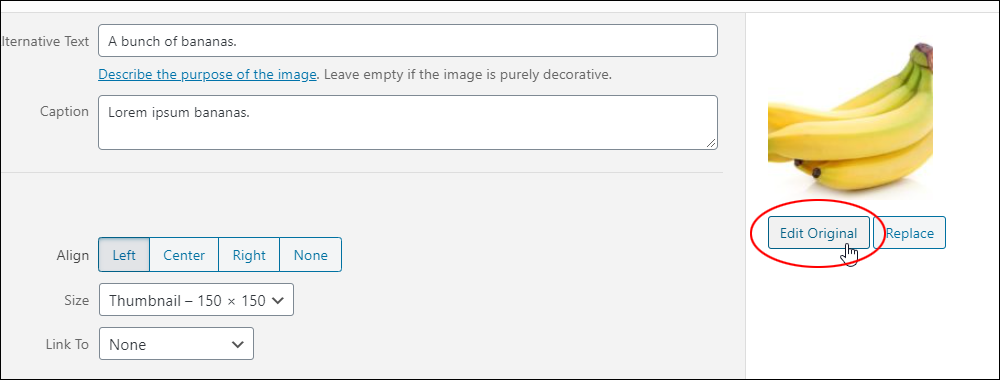
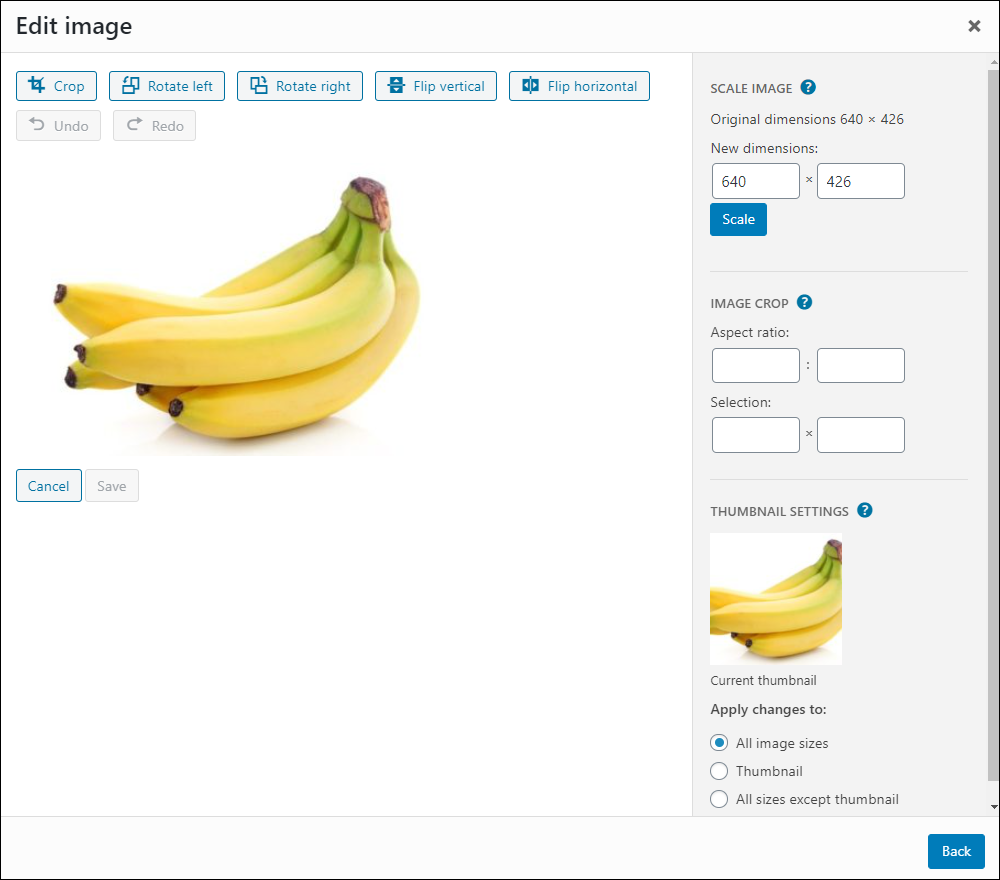
Clicking on the Edit Original button, for example, brings up the Edit image screen with additional image editing options.
![]()
You can change the default size of your image thumbnails in your WordPress Media Settings.
Adjusting Image Placement And Size
Here are some other things you can do after adding images to your content.
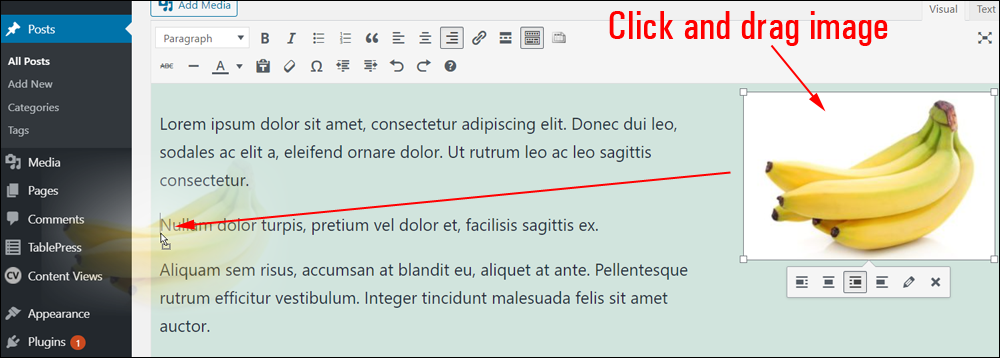
Reposition Images Using Drag And Drop
To reposition an image in your content, select it, then drag and drop it into another section of your text.
Resize Images Using In-Content Image Resizing
To resize your image directly inside the editor, click on the image, select one of the resizing handles, and drag your mouse to increase or decrease the size of your image.
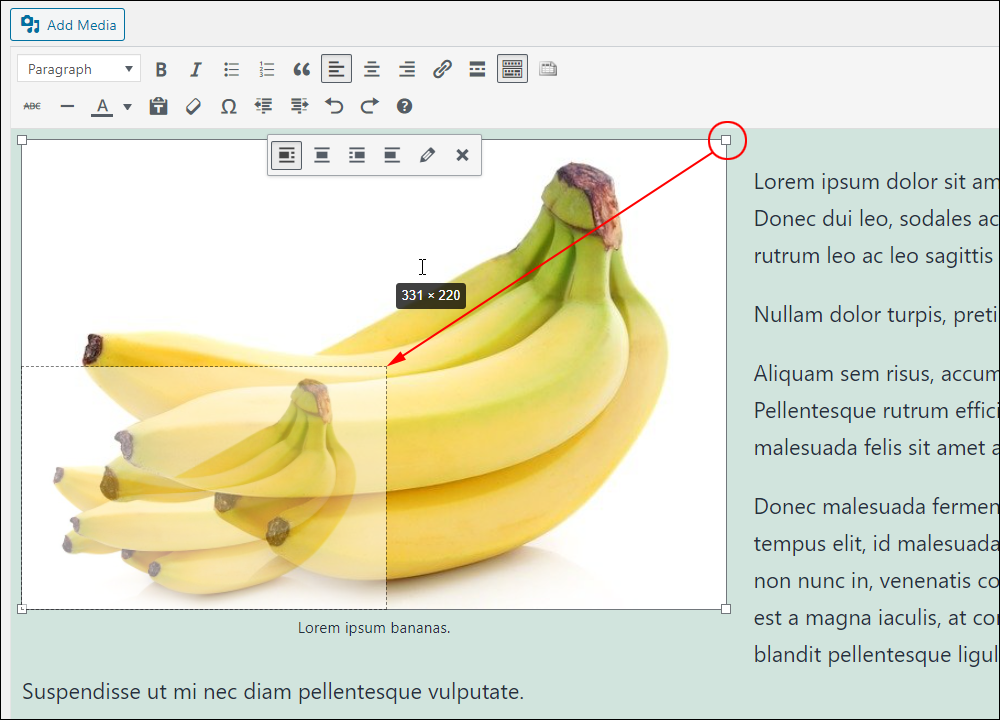
The image dimensions will resize dynamically as you drag to make the image smaller or larger.
Add Images To Your Sidebar
You can add images to your site’s sidebar section using widgets or the Image block.
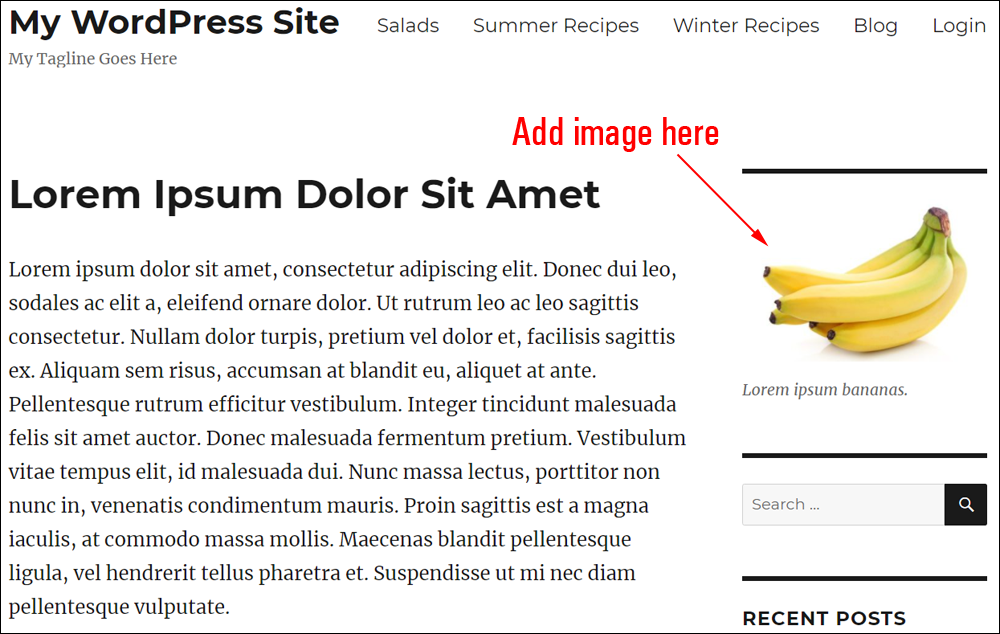
To learn how to add and display images on your sidebar, see this tutorial: How To Use WordPress Widgets
Congratulations! Now you know how to add and format images in WordPress.
***

Updated: April 9th, 2023