How To Add Videos In WordPress
 This tutorial covers:
- How to add videos to your posts and pages
- How to upload videos to the WordPress Media Library
- How to insert videos from an external URL
- How to create a video playlist
- How to edit video details in the Media Library
- How to remove videos from your content
- Expanding your site’s video capabilities:
- Adding videos to your sidebar
Videos are a powerful and proven way to market and promote your products or services online, make your content more engaging to visitors, help convert more prospects into sales, train new clients, etc.
WordPress lets you easily integrate videos into your content. You can add videos to your posts, pages, custom post types…even your sidebar menu!
![]()
Although you can upload videos directly to your WordPress website’s media library, we recommend not doing this, as WordPress is not optimized to be a video delivery platform.
Too many uploaded videos can slow down your website and cause performance issues, crash your server, and create a negative user experience.
Nonetheless, WordPress provides a range of options for embedding, integrating, and streaming videos on your site.
You can easily embed videos directly from YouTube or another video hosting site, stream videos from a remote server location (e.g. Amazon S3), and control how your videos play and display to visitors using various themes and plugins.
For this reason, we’ll also be exploring these areas in this tutorial.
Let’s begin by learning how to use the built-in WordPress video player with the WordPress Media Library.
![]()
This tutorial uses the WordPress Classic Editor.
If you are using the WordPress Block Editor, we have written a complete step-by-step tutorial on adding videos to your posts and pages here: How to Use The Video Block
Adding Videos To WordPress Posts And Pages
As stated in the official WordPress documentation site…
It’s super easy to embed videos, images, tweets, audio, and other content into your WordPress site.
WordPress uses a technology called oEmbed to embed videos into content.
Quoting again from the official WordPress documentation site…
All you need to do to embed something into a post or page is to post the URL to it into your content area. Make sure that the URL is on its own line and not hyperlinked (clickable when viewing the post). The easy embedding feature is mostly powered by oEmbed, a protocol for site A (such as your blog) to ask site B (such as YouTube) for the HTML needed to embed content (such as a video) from site B. oEmbed was designed to avoid having to copy and paste HTML from the site hosting the media you wish to embed. It supports videos, images, text, and more.
As you can see, WordPress makes it easy to add videos to your posts and pages from video hosting sites like YouTube, Vimeo, etc.
With YouTube, for example, simply copy the YouTube video URL (long or short URL) to your clipboard…

Next, paste it into your content in its own line without any formatting…
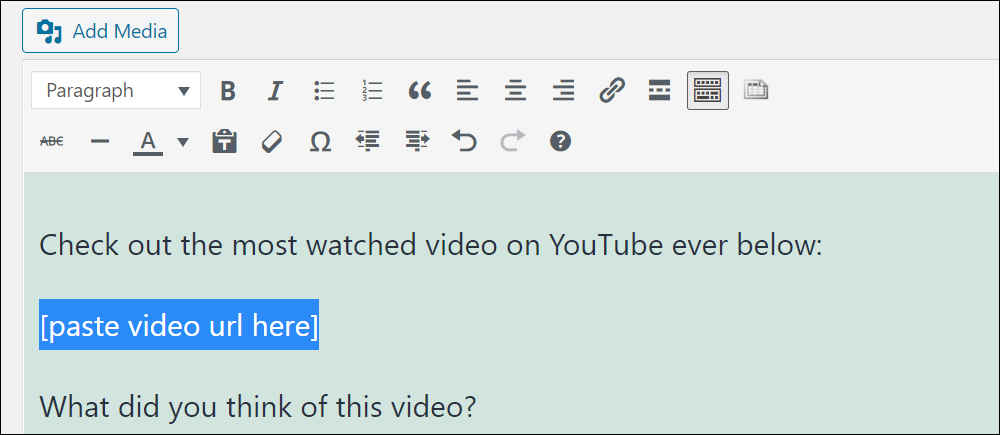
As soon as you paste the video URL into your content…
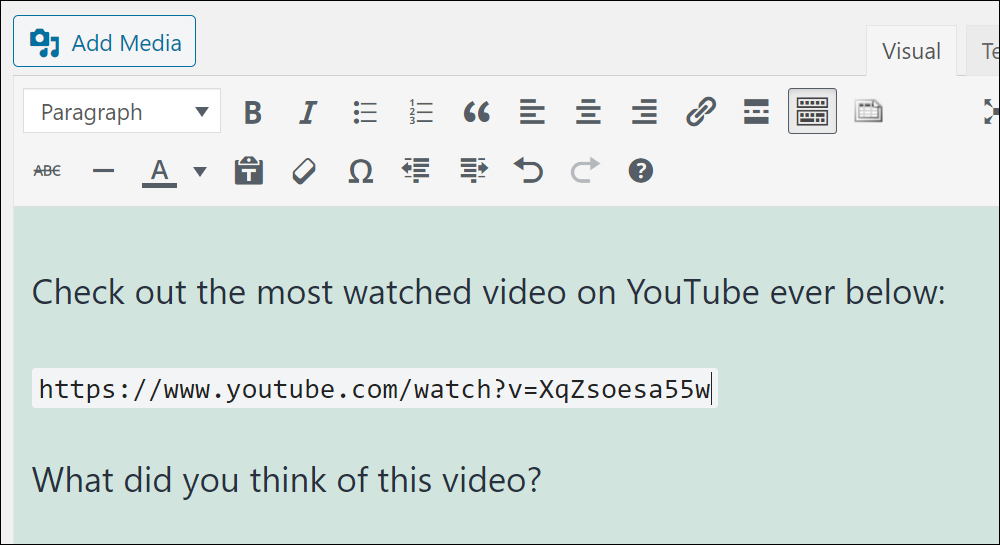
WordPress automatically converts the URL into a video using its own built-in video player.

You can also add videos from YouTube’s embed feature.
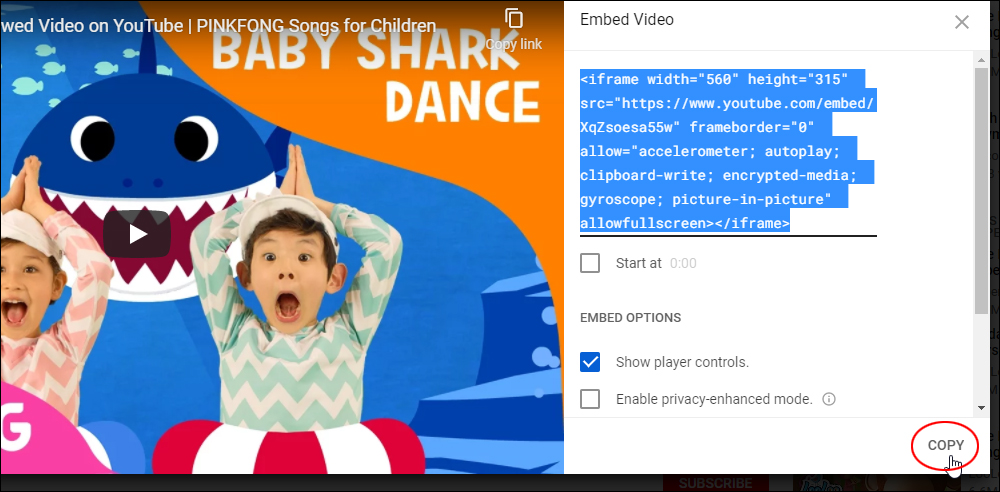
To get the Embed code, select the video, then click on ‘Share’.
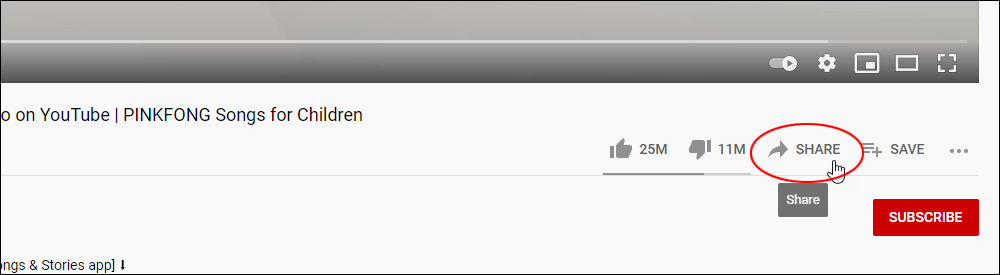
Next, click on the ‘Embed’ button.

Select and copy the video code to your clipboard.
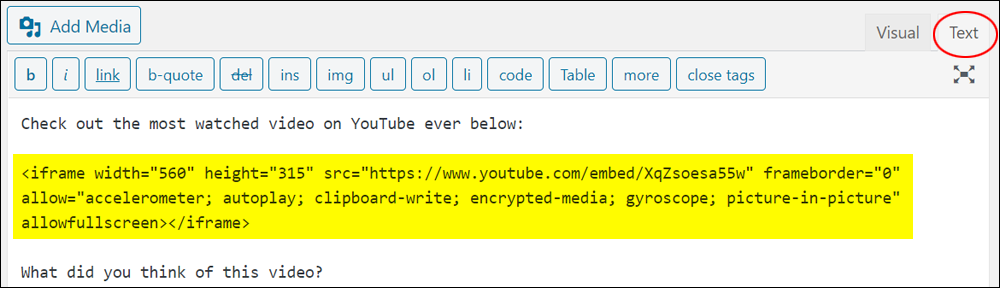
Switch to the Text tab of the WordPress Classic Editor and paste the code where you want the video to display.
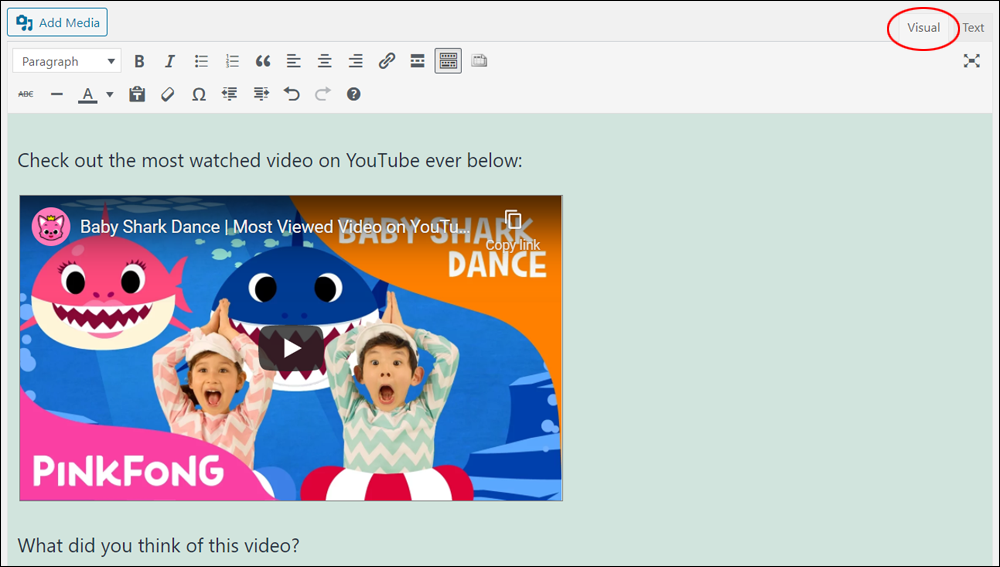
Switch to the Visual tab. If you have copied and pasted the video URL correctly, the video should display on your post or page. Remember to save to update your settings.
For more information on adding and using YouTube videos on your site, or making customizations to how YouTube videos display on your posts and pages (e.g. how to customize the video’s size and settings) go here.
Uploading Videos To The WordPress Media Library
WordPress supports uploading a number of video file types to the WordPress Media Library.
As mentioned earlier, WordPress is not an ideal platform for hosting videos.
You are better off hosting your videos on a made-for-video platform like YouTube or a cloud storage service like Amazon S3, then embedding your videos into your content and streaming these from your external video hosting services.
Now that we have made this clear, let’s show you how to upload videos directly to your site.
To upload a video to the WordPress Media Library:
First, add your video file to a folder of your internal or external hard drive that you will be able to easily locate.
Next, go to your post or page, place your cursor where you want to insert the video into your content, and click the Add Media button.
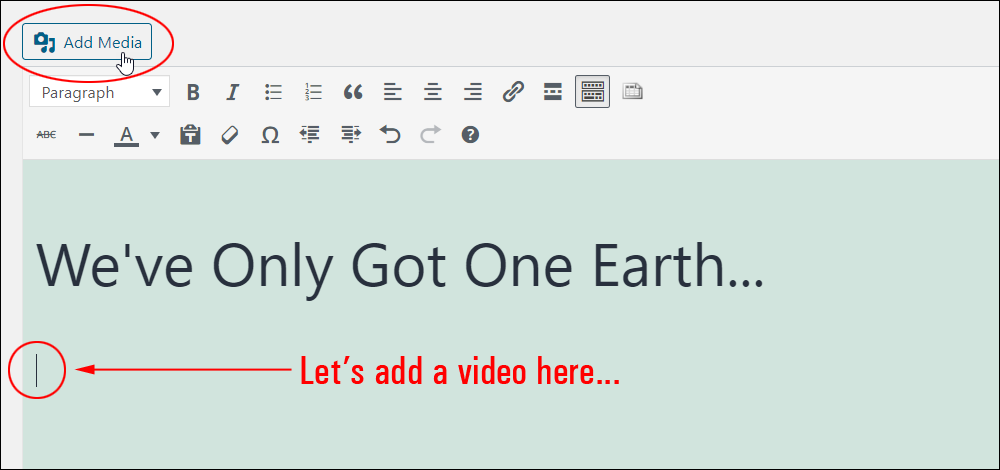
This will bring up the Add media screen.
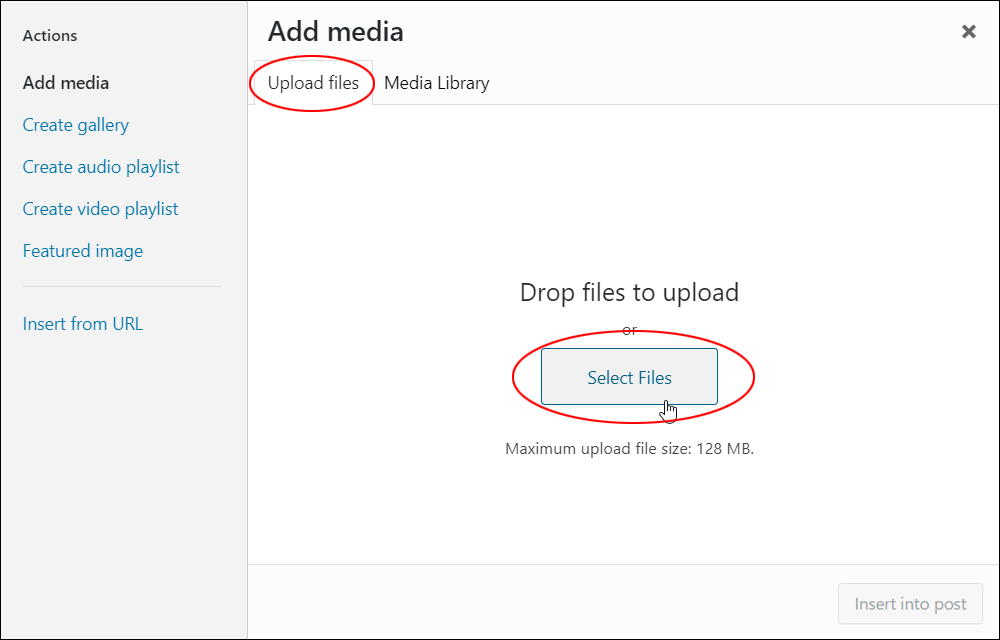
Select the Upload files tab and click on the Select Files button. (Note: you can also drag and drop the video from your stored folder location into this area).
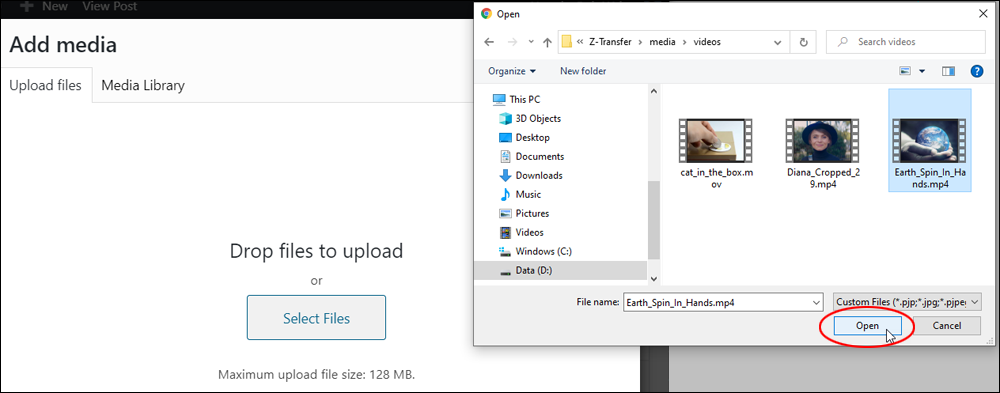
Locate the folder where you have stored your video, select the file, and click the ‘Open’ button.
This will upload your video file to the Media Library.
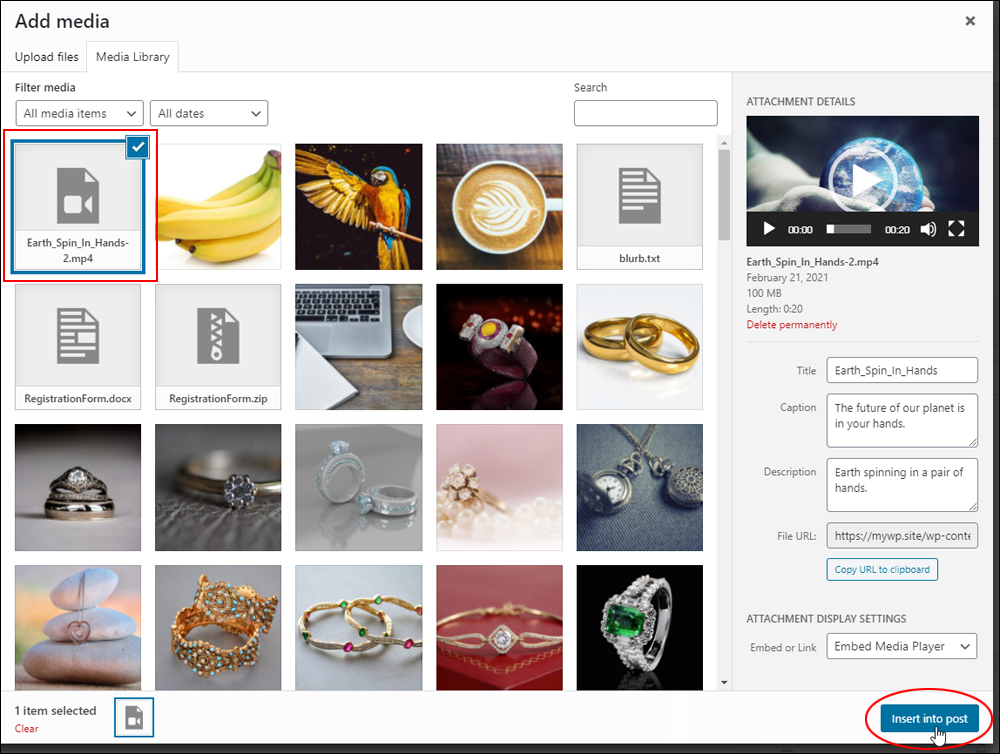
Once the video file has been uploaded:
- Add information about the video (e.g. caption and description) to help users and search engines understand what your video is about (if you need help with this section, see this tutorial.)
- Select ‘Embed Media Player’ in the Attachment Display Settings > Embed or Link section’s dropdown menu.
- Click the Insert into post (or Insert into page) button.
The video will be added to your post.
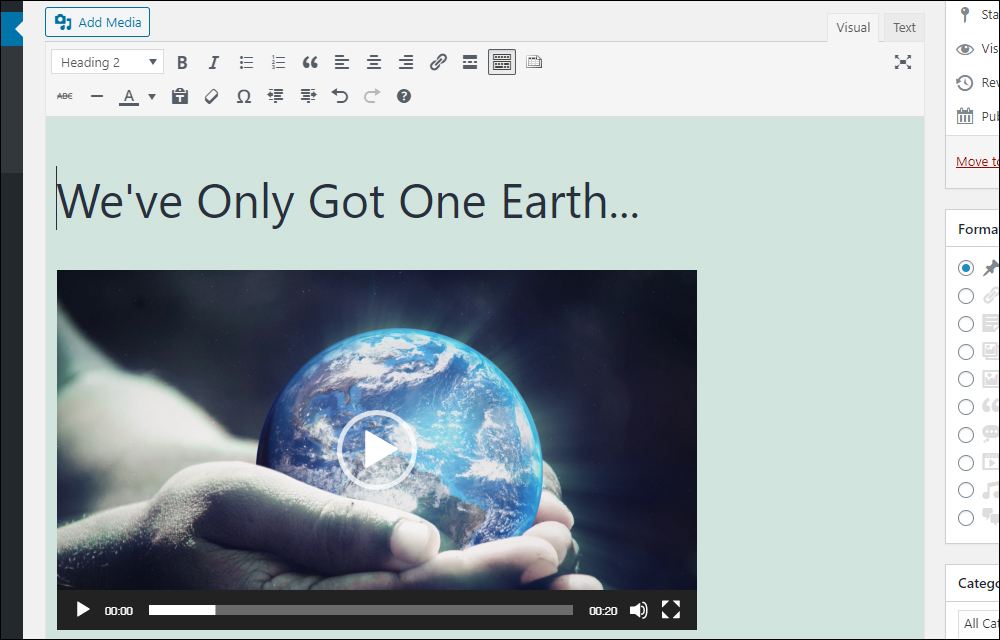
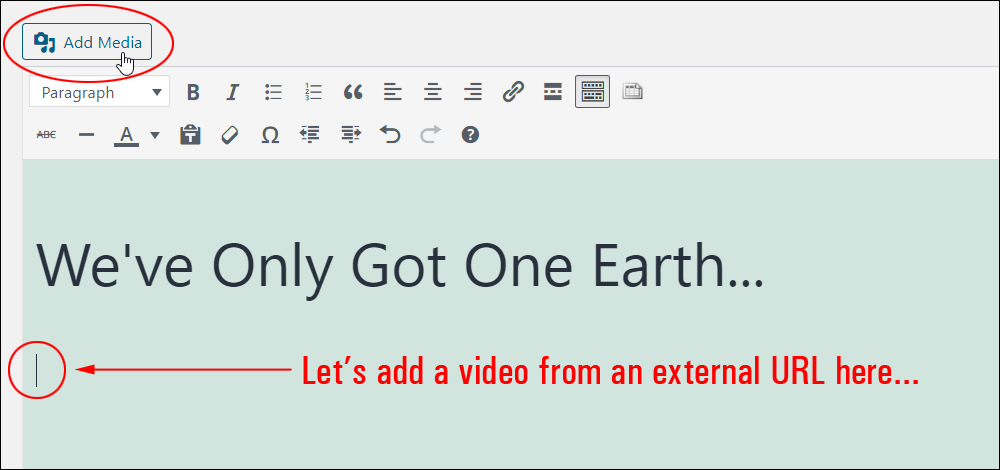
Inserting A Video From An External URL
To insert videos hosted on an external platform (e.g. YouTube, Amazon S3, etc.) into your content, do the following:
First, copy the URL of your video from its external hosted location to your clipboard, then go to your post or page, place your cursor in the location where you would like to insert the video, and click on the Add Media button.
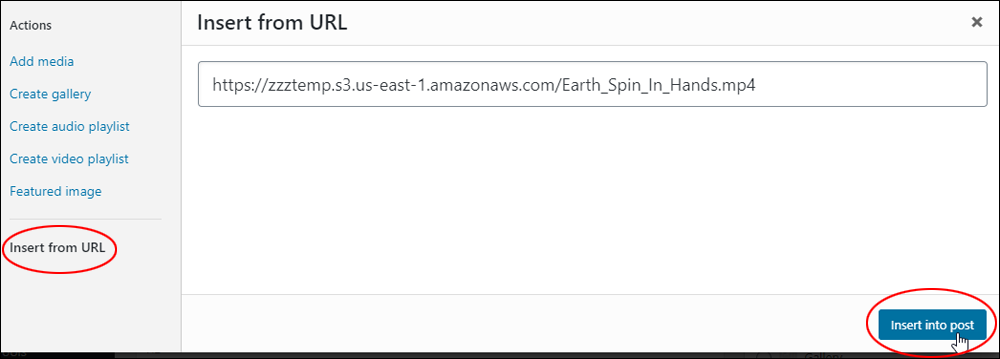
In the Add Media screen, select Insert from URL.
This will bring up the ‘Insert from URL’ screen.
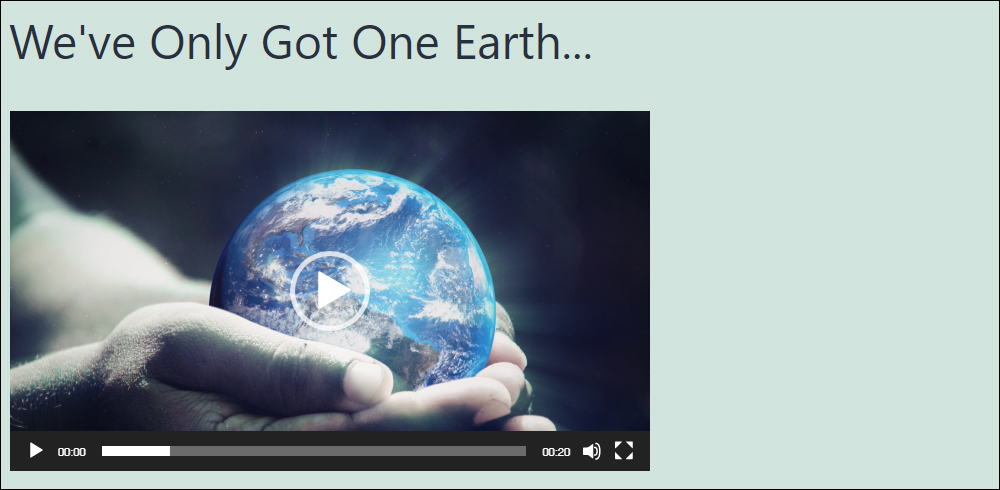
Paste the video URL from your clipboard into the field and click the ‘Insert into post’ (or ‘Insert into page’) button.
Your video will be added to your content and placed in the location you have specified.
![]()
Note: Not all videos will work with the oEmbed function and autoembedding doesn’t seem to work in all situations.
For security reasons, WordPress only allows videos from certain approved sites to be autoembedded into posts and pages.
The WordPress oEmbed library currently supports several popular video and other media services like YouTube, Vimeo, Viddler, Scribd, DailyMotion, Twitter, etc.
To see the complete list of oEmbed supported video sites, go here.
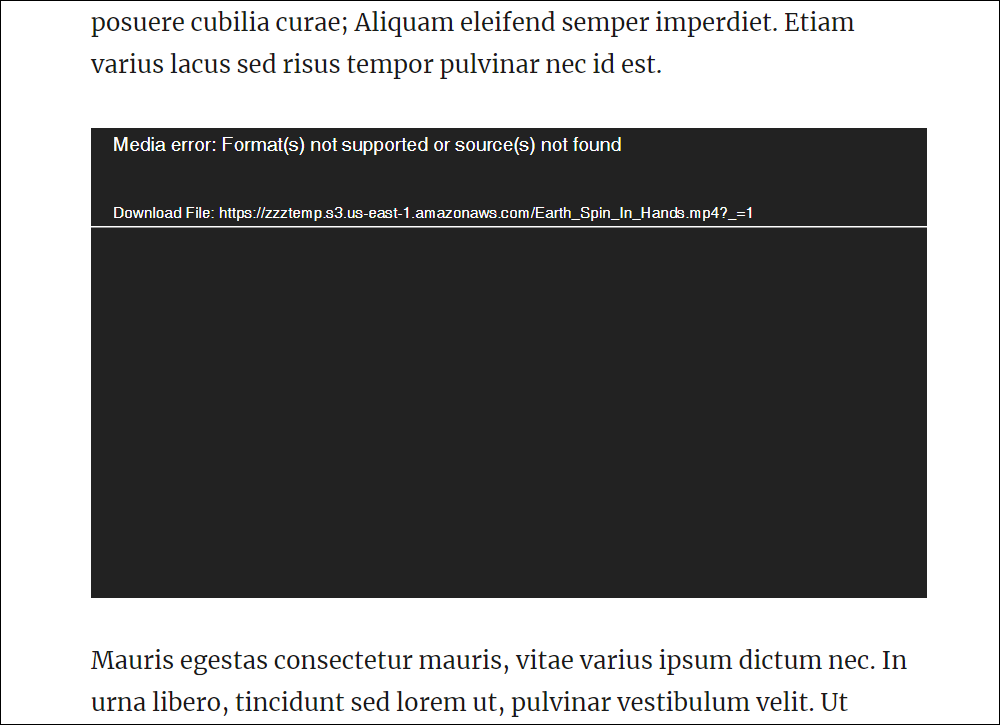
If the video you are trying to add to your content does not display after publishing your page or post, you will see the video URL displayed on the page instead of the video.
If this happens:
- Make sure you have copied and pasted the correct video or embed URL.
- Check that you have enabled the correct permissions for viewing the video.
- Make sure that the video you are trying to add is hosted on a WordPress-approved video or media services (e.g. YouTube, Vimeo, Viddler, Scribd, DailyMotion, Twitter, S3, etc.)
If none of the above options work, use one of the alternative methods shown further below to embed videos into your posts and pages.
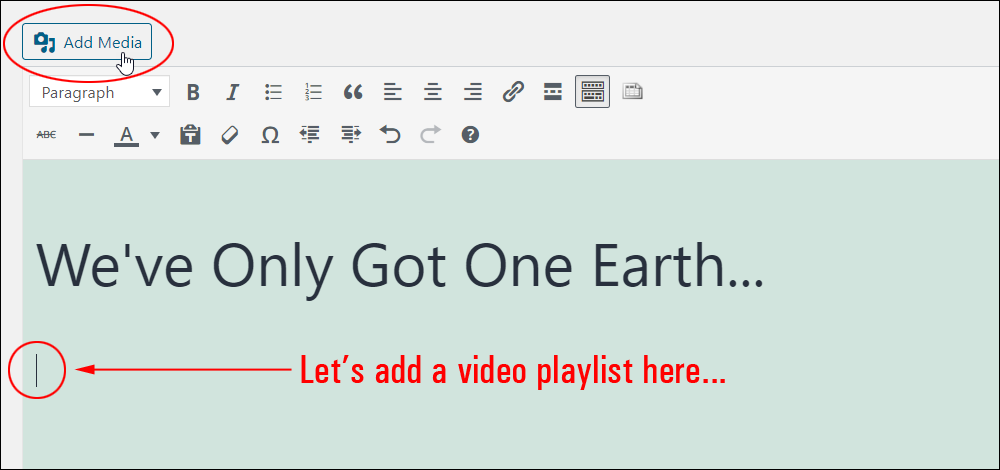
Adding A Video Playlist
WordPress has a built-in video playlist feature that lets you play a sequence of videos from one location on your post or page.
To insert a video playlist into your content, first make sure you have uploaded the videos to your Media Library.
Next, open your post or page, place your cursor in the location where you would like to insert the video playlist, and click on the Add Media button.
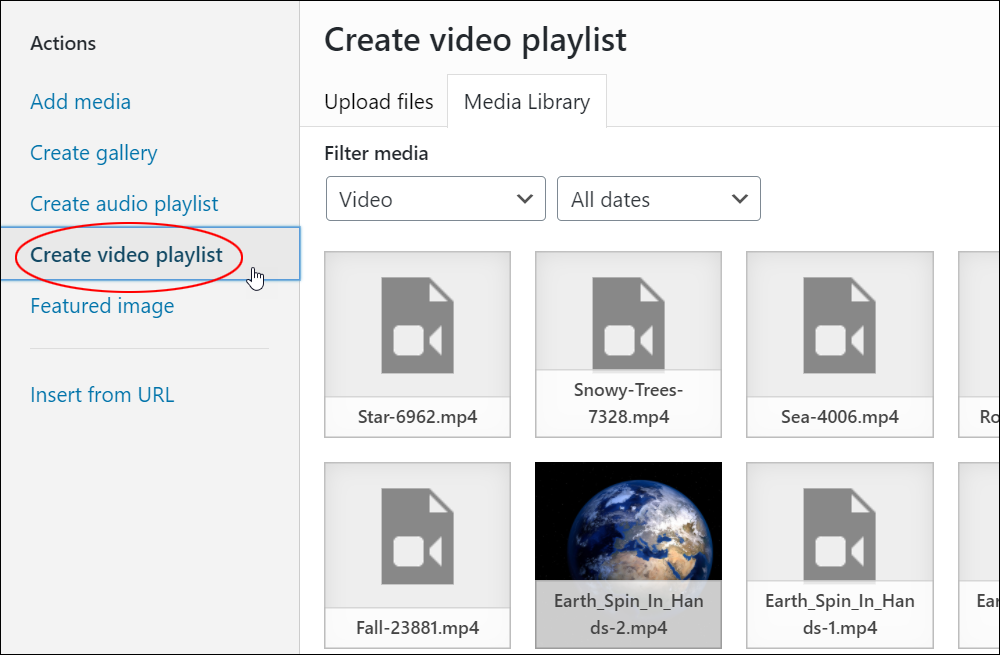
In the Add media screen, select the Create video playlist option.
This will bring up the Create video playlist screen with all the Media Library’s uploaded videos.
Select the videos you want to add to your video playlist and click on Create a new video playlist.
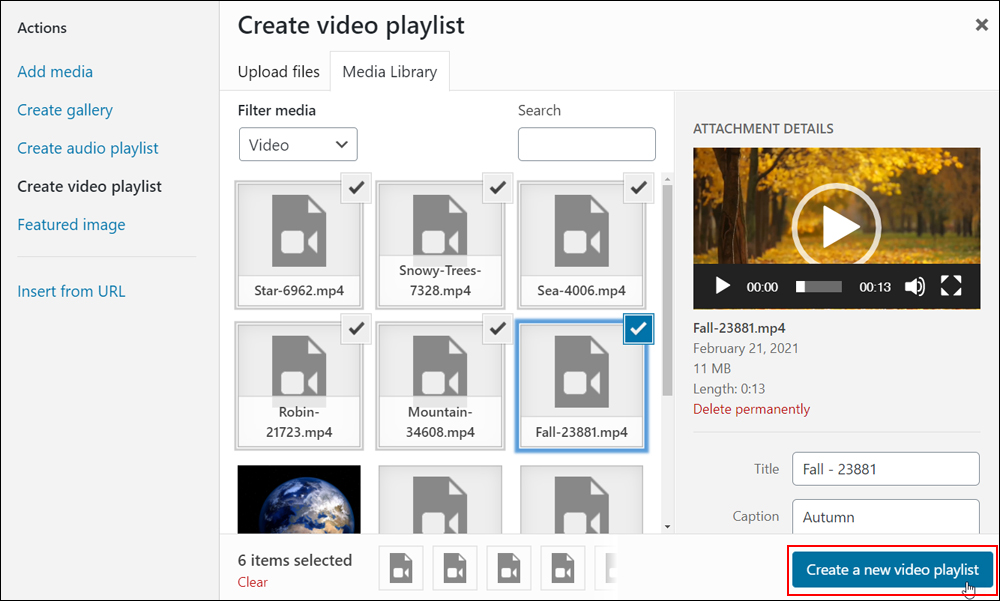
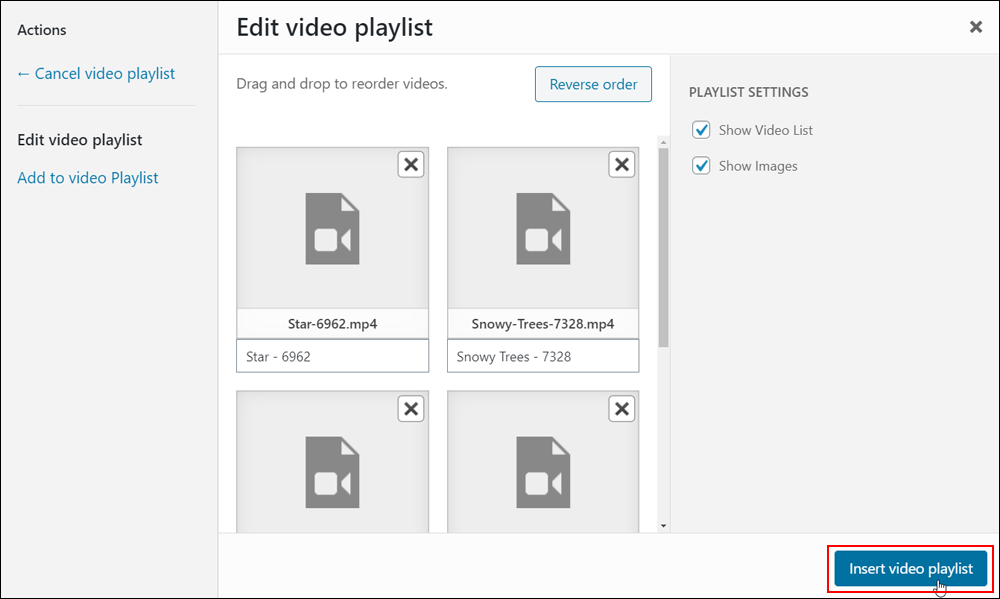
This will bring up the Edit video playlist screen.
In this screen, you can perform various editing functions to your video playlist, such as:
- Remove or add videos to your playlist.
- Drag and drop to reorder videos.
- Reverse the order of your video playlist (click on the ‘Reverse order’ button).
- Display the video list and images in your playlist settings.
- Cancel editing the video playlist.
After configuring your video playlist options, click the Insert video playlist button.
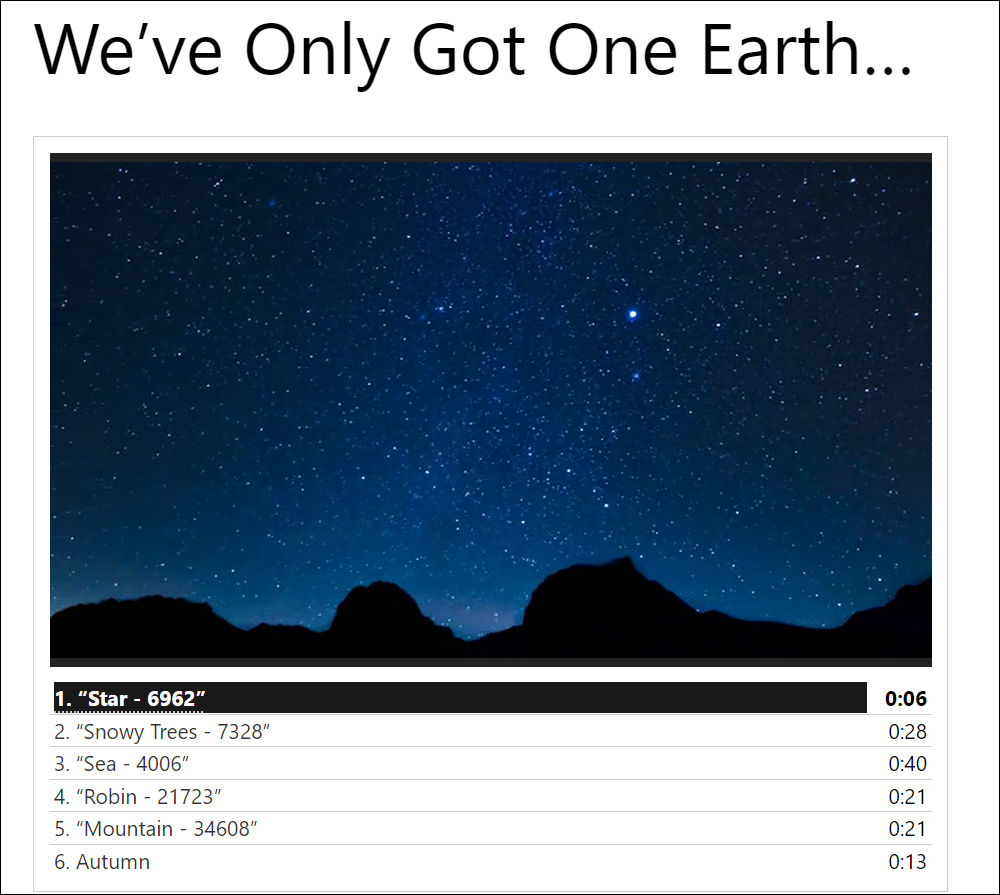
This will insert the video playlist into your content.

Update your post or page. Your site visitors can now watch videos from your playlist.
Editing Your Video Files In The Media Library
To edit your video, do the following:
Go to your site’s Media Library to view and edit details about your video files.
If there are a lot of media files uploaded to the media library, use the filter function to select and display only your uploaded videos.
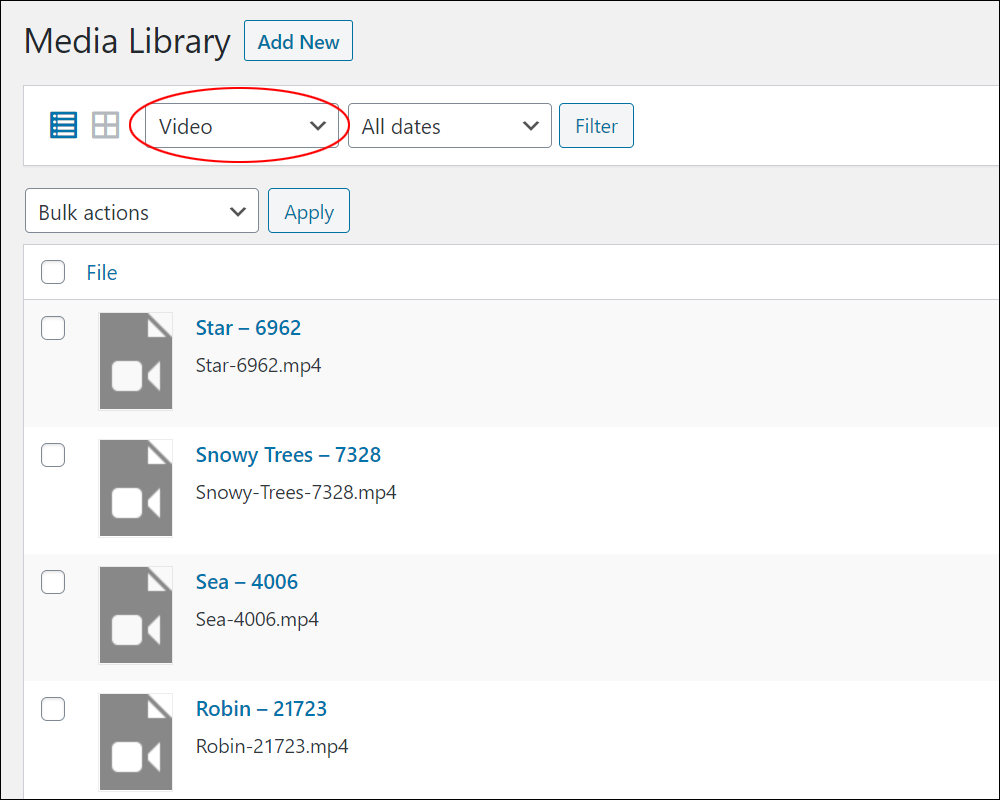
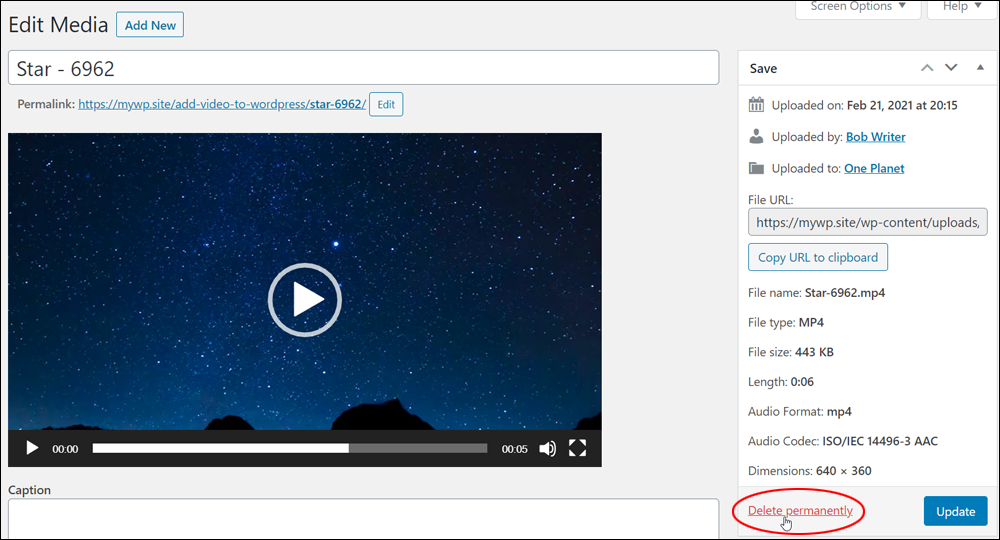
Click on an item to bring up details about the video.
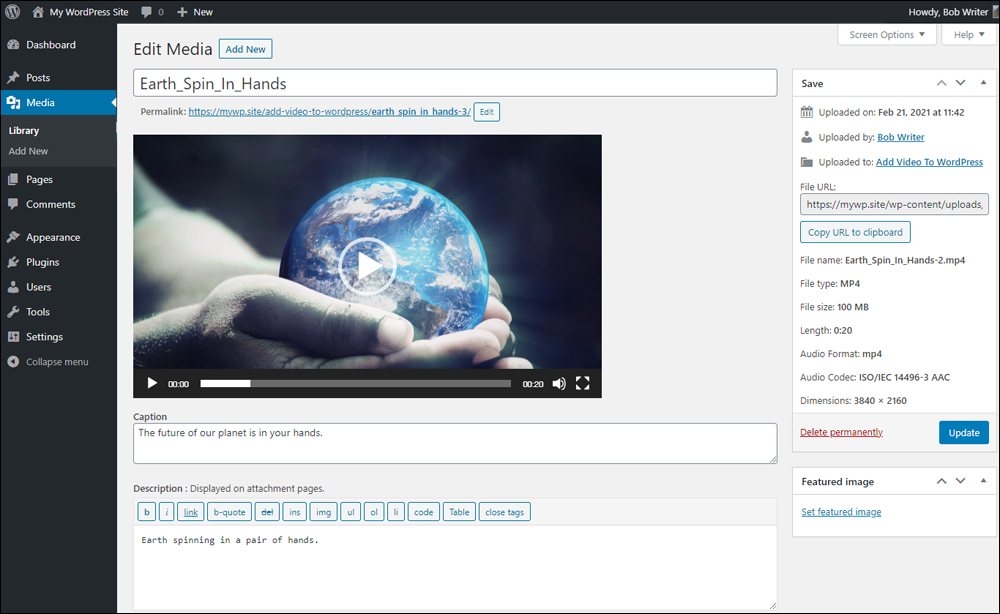
Details you can edit about your video in the Edit Media screen include the following:
- File Name – You can change the title of your video (WordPress automatically assigns a default title based on the uploaded video’s filename.)
- Permalink – Edit the video slug. Note: to edit the permalink, the video must be attached to a post or page. The permalink cannot be edited for unattached videos.
- Caption – Add a caption to your video. Note: video captions display in places like video playlists.
- Description – Displays in your video’s attachment page.
The Edit Media screen also lets you view information about your video, such as:
- Filename
- File type (e.g. .mp4, .mov, etc.)
- File size
- Video length
- Audio format
- Audio Codec
- Video dimension
If you are editing a video in a post or page, you can access the Edit Media screen by clicking on the video (or video playlist) and then clicking the Edit button (pencil icon).
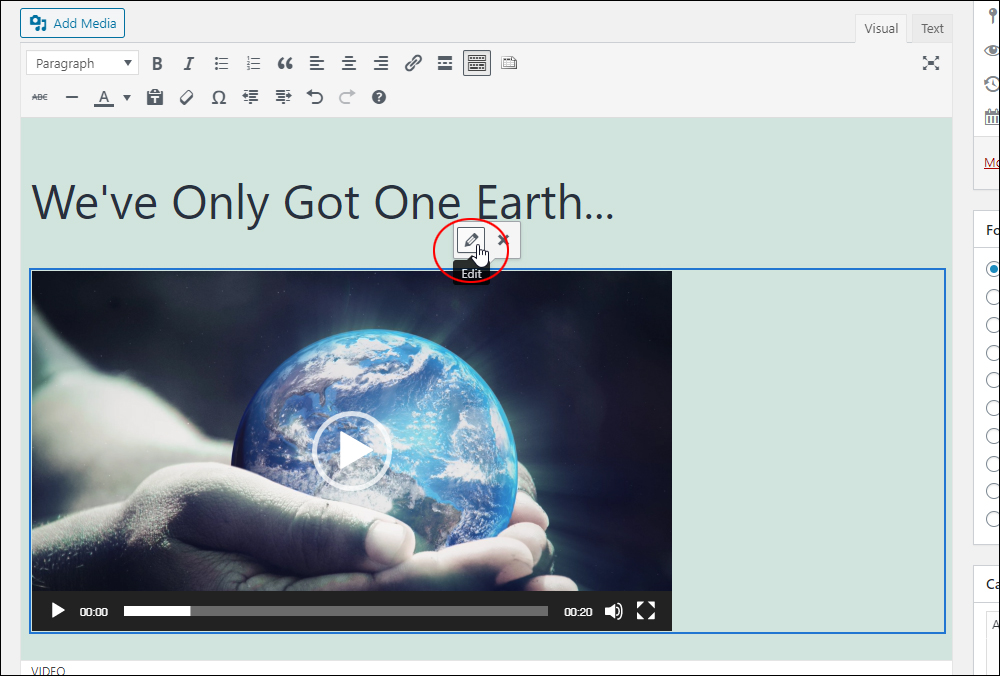
This will bring up the Video details screen.
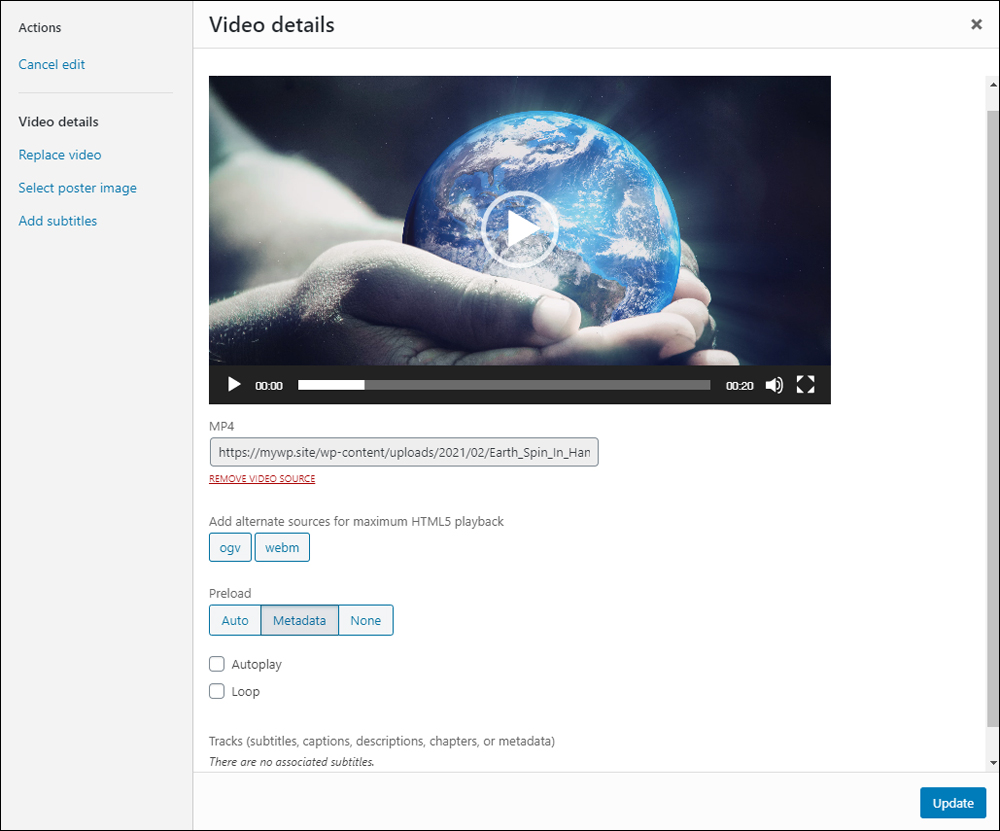
In the Video details screen, you can:
- Replace your video file.
- Remove the video source and add alternate video sources to endure maximum HTML5 playback across all browsers and devices.
- Add and remove poster images (video thumbnails).
- View subtitle file details and remove video tracks (if you have added a subtitles file to your video).
- Select Preload settings:
- Auto – This downloads the entire video file as soon as the page loads, regardless of whether the visitor clicks the Play button or not. Note: this setting has the biggest impact on your page or post’s load speed, especially with larger video files.
- Metadata – Only basic info about your video file is preloaded: dimensions, first frame, tracklist, duration, etc. Like the None option, your video file only begins downloading when someone clicks the Play button. This setting is very fast, as the only thing downloaded is text.
- None – No video preloading takes place automatically. Your video file only begins downloading when someone clicks Play. This is the fastest setting. Note: there’s not much difference between selecting Metadata and None.
- Enable/disable Autoplay – The video will begin to play as soon as the page is loaded.
- Enable/disable Loop – The video will play to the end and automatically begin playing again.
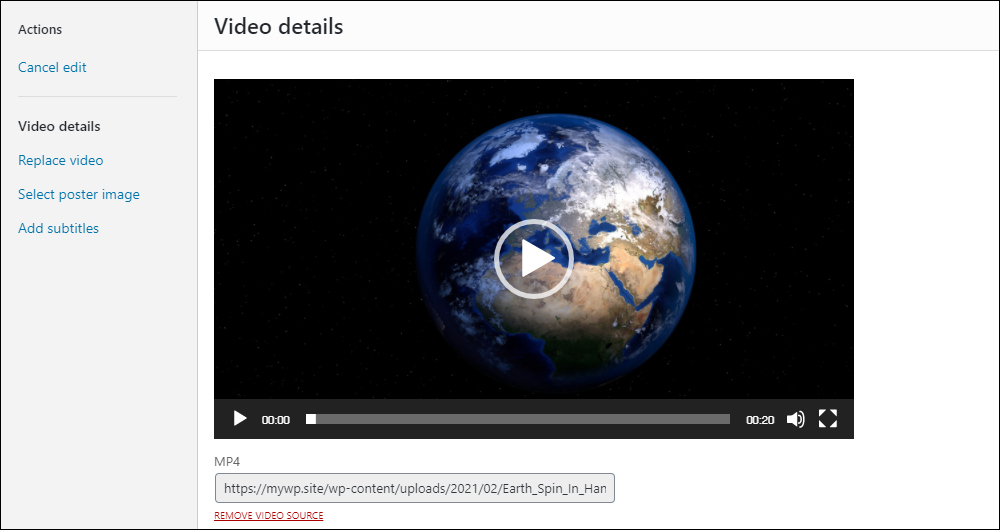
Choosing Select poster image adds a thumbnail image to your video file.

This image will display with your video inside the Media Library and when the video is added to your content.
Removing Videos From Your Content
If you are working on a post or page and want to remove a video (or video playlist) from your content, click on the video (or video playlist) and then click the Remove button (X icon).
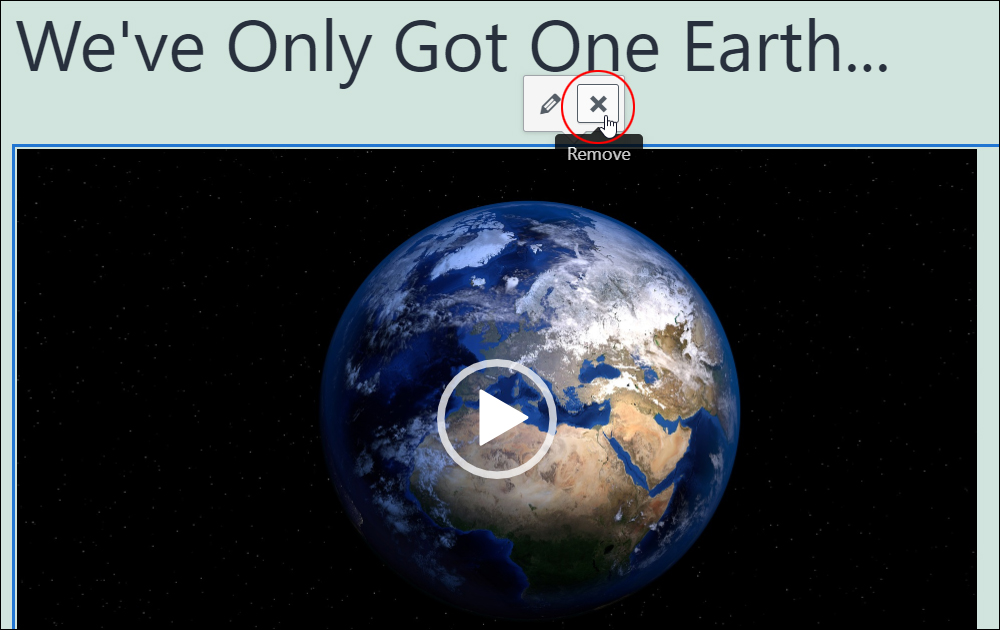
This will remove the video from your content.
![]()
To delete the video from your media library, go to the Media Library, then either:
Hover over the media item (in List mode) and click on the Delete Permanently link.
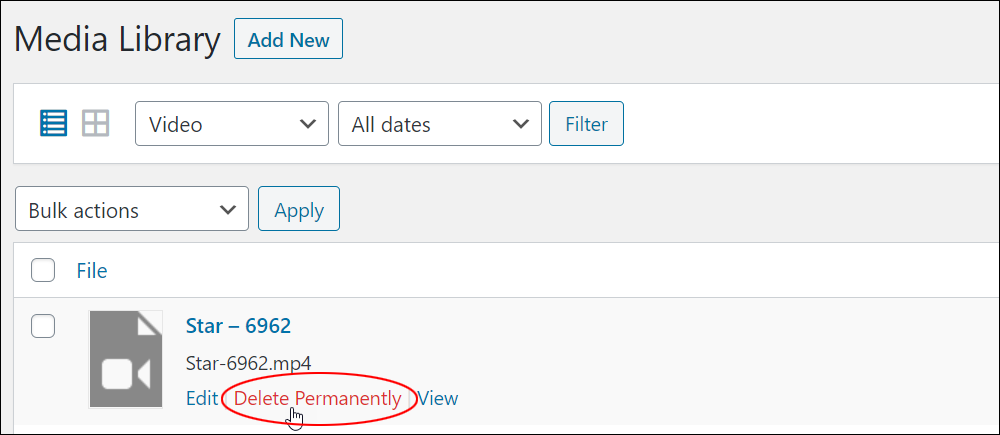
Or click on the file to bring up the Edit Media screen and click on the ‘Delete permanently’ link.
This will permanently remove the video from your Media Library.
Expanding Your Site’s Video Capabilities
Although WordPress does come with a basic built-in video player, its options are limited.
You can manually embed video code to add videos to your posts and pages as we’ve just shown you above and add certain playback options by using tags in the embedded video code.
If you plan to make videos an integral part of your site, however, you may want to go beyond the default WordPress video player and look at using video-enabled themes, external video services, or video plugins.
Let’s look at these methods.
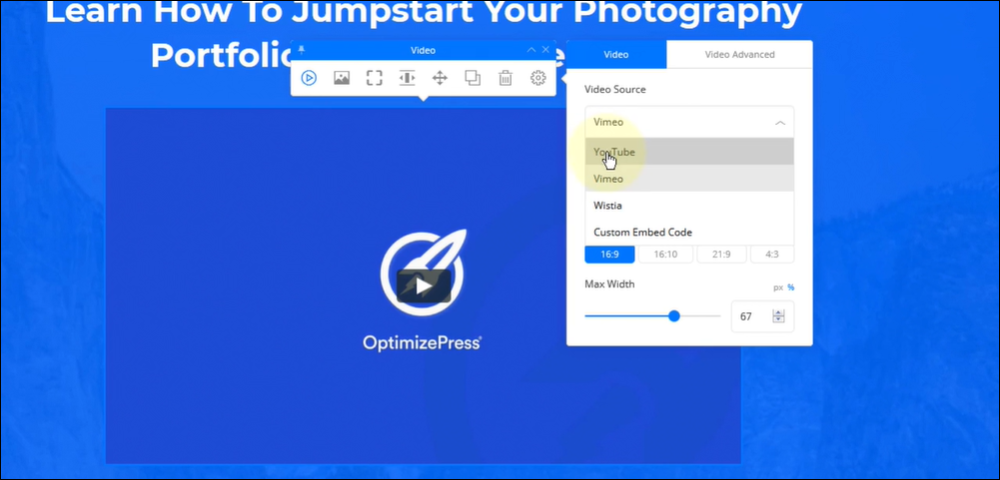
Video-Enabled Themes
Some WordPress themes already come with a built-in video player.
With OptimizePress (a popular premium theme with marketers), for example, you can host your video externally (e.g. YouTube, Amazon S3, etc.), and insert it into your sales, squeeze, and membership pages through the theme’s own Video Options section.
This section includes video elements that allow you to specify options for your video, such as video size, video preview image, video autoplay (video starts playing automatically when someone visits your page), whether to display the video control bar, add a video download link, choose the color of the video player, etc.
Some WordPress themes let you add videos that display in your site’s sidebar menu, or in a sliding image gallery at the top of your main page, or in special video pages that can showcase your videos in a gallery layout.
Most WordPress themes are designed to be fully responsive, so they will automatically resize your videos to fit the viewing devices and browsers of your site visitors.
You can search for free video themes inside your WordPress dashboard or choose one of many excellent premium themes for additional features and access to technical support.
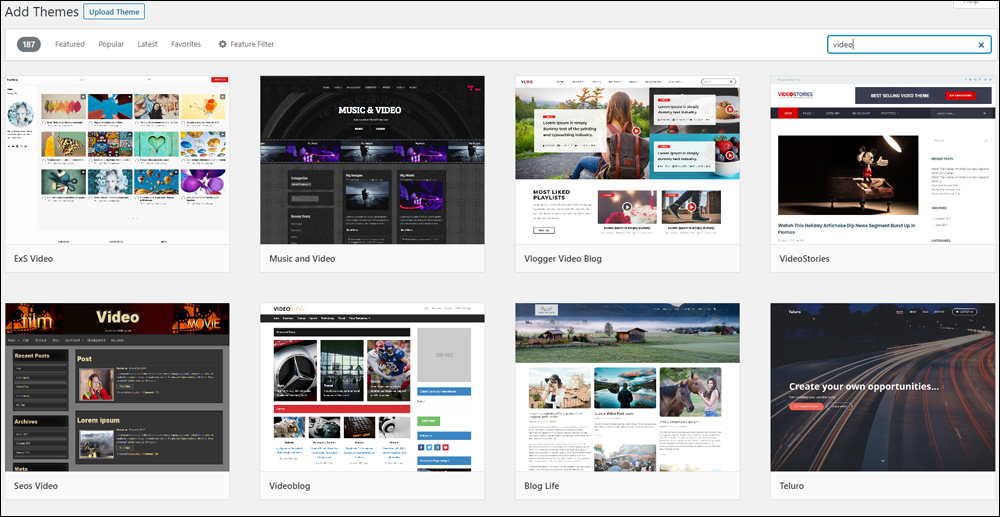
If you need help finding WordPress themes, see this tutorial: Where To Find WordPress Themes
WordPress-Compatible Video Players And Video Management Services
In addition to using video-enabled themes, there are a number of video players that you can use with WordPress to insert and display your videos.
Some video players will integrate with your WordPress site in the form of plugins, but there are also external video services you can use that let you set up and configure video settings externally and embed these into your content using code generated by the service or a shortcode.
With external video management services, you control all of your video settings from a central management dashboard, and any changes you make will automatically update on your site.
For example…
Spotlightr

Spotlightr is a web-based video hosting solution management application (SaaS) with advanced analytics and a suite of video marketing tools that lets you customize, analyze, optimize, and publish videos on your website or blog.
It works with all popular video formats, YouTube, and self-hosted videos. You integrate videos with WordPress by outputting and embedding a code snippet into your posts and pages.
This service lets you set up unlimited video players, split-tests, and video analytics. Some of its many powerful features include:
- Add unlimited clickable text overlays and buttons
- Add opt-in forms inside your videos
- Set up split tests to see what video performs best
- See average completion rate and exit points (e.g. see who watches the whole video, and at what point of the video they leave)
- Automatically redirect visitors to any URL when they finish watching the video
- Show a clickable image ad when users pause the video
- Set it to auto-pause the video when users leave your page, then continue the video when they return.
- Lock your video content at a particular time and ask viewers to share it on social sites to continue.
- And a whole lot more.
Spotlightr is designed to work not only with WordPress posts and pages, but also mobile devices, autoresponder services like Aweber and GetResponse, YouTube Video links, Amazon S3, and more.
For more details, visit their site: Spotlightr
S3 Media Maestro
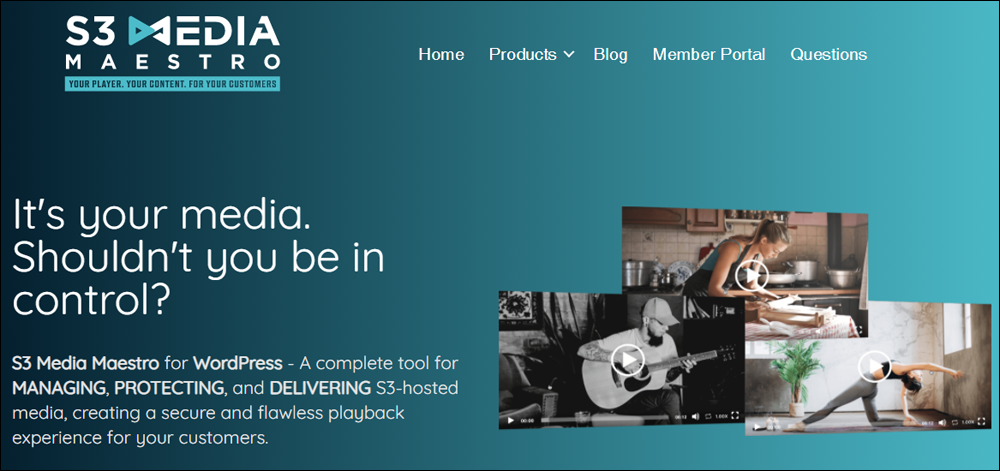
S3 Media Maestro is a flexible, clean, fast, and responsive HTML5 video player that integrates with Amazon’s S3 cloud storage server. It uses the same media player built into every WordPress website (MediaElements JS), so it plays nicely with everything else on your site.
S3 Media Maestro protects your media content from being shared around (i.e. stolen) using a unique expiring link that will only work for your customer. Anyone else who tries to use the same link to your content will be denied access.
You also have complete control over how your media loads, the player controls you want to offer, the look and size of the player, available video resolutions, playlist support, closed captioning, and more.
If you host your videos on Amazon S3, this plugin will let you manage your S3-hosted media from your WordPress Dashboard instead of the AWS console.
For more information, go here: S3 Media Maestro
Affiliate Video Pro
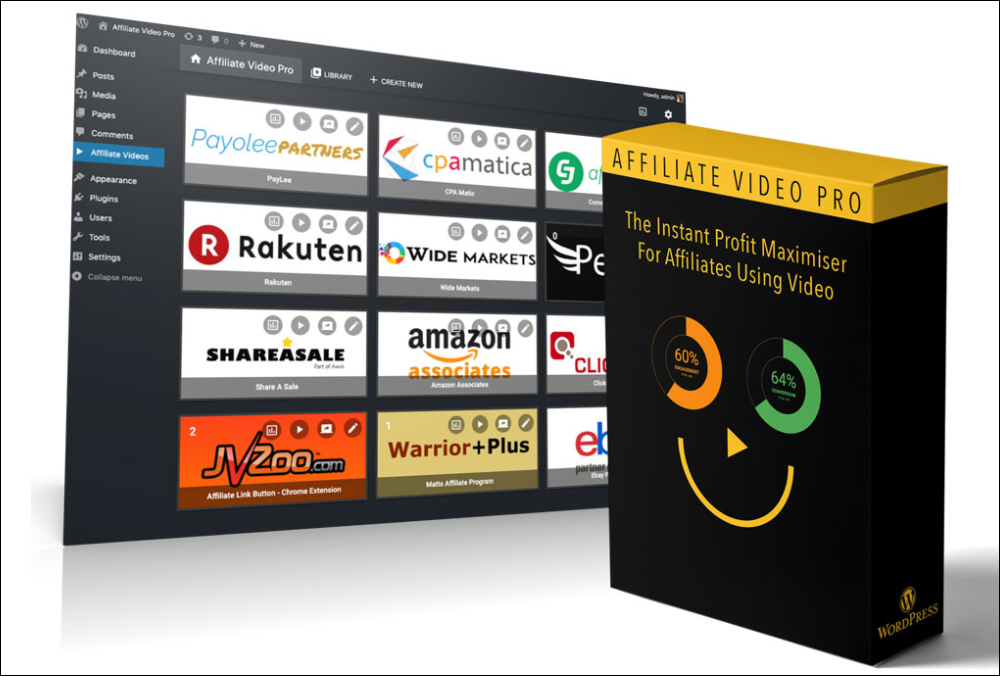
If you promote affiliate products, Affiliate Video Pro is a clever plugin for WordPress that lets you easily boost your affiliate commissions using any YouTube video.
What this plugin lets you do is find a video on YouTube about a product you want to promote. This can be a video in any niche or industry: a product sales video created by the developer, a training video … even someone else’s review video.
Add the YouTube video to the Affiliate Video Pro embed tool, trim it (to skip a long intro or a long ending and show only an enticing section of the video), add a headline, a call-to-action button, and your affiliate link. This is all very quick and easy to do and should only take you about a minute!
After setting up your video, select and paste the video shortcode into any post or page on your site. When users watch the video and want to know more about the product, they will be taken to the product offer page or a landing page via your affiliate link.
For more details, go here: Affiliate Video Pro
WordPress Video Player Plugins
Typical video customizations include adding borders, frames, and skins, inserting overlays, annotations, messages, and links, adding redirects, opt-in forms, other controls, split testing, and more.
You can easily add videos to your WordPress site from sites like YouTube.com, Vimeo, DailyMotion, and other popular video sites using free or premium WordPress video plugins.
The WordPress video plugins below allow you to add videos to your posts and pages and control how videos display on your site:
JW Player
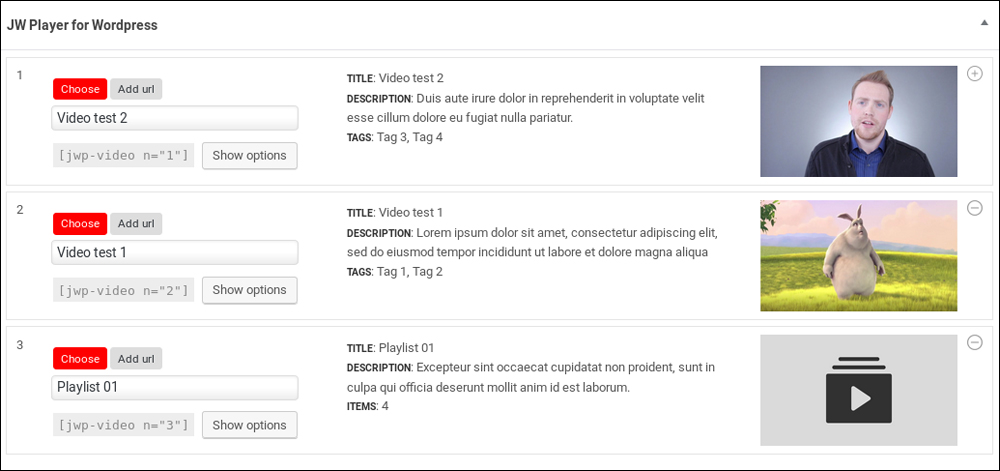
JW Player allows for easy customization and embedding of Flash and HTML5 videos in your WordPress posts. The plugin also provides support for all JW Player configuration options, including custom watermarks, HLS/RTMP streaming, and VAST/VPAID advertising.
Go here for more details: JW Player
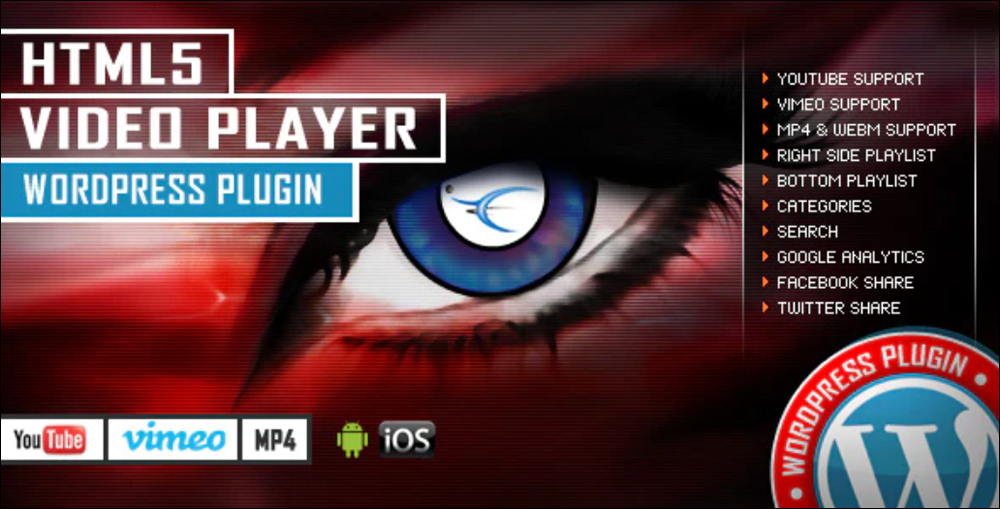
HTML5 Video Players

HTML5 Video Players plugin for WordPress works on Android. It includes 3 types of video players:
- Video Player With Right-Side Playlist
- Video Player With Bottom Playlist
- Video Player Without Playlist
For more details, visit the video plugin website here: HTML5 Video Players
Video Player
Video Player is a WordPress plugin that lets you manage the entire video player using a friendly interface. You can customize the player look & feel, playlist, and CSS file.
The plugin comes in two versions: Right Side playlist and Bottom Playlist.
Some of the plugin features include:
- Support for any type of video file that Flash Player supports: FLV/H.264 encoded video: MP4, M4V, M4A, MOV, Mp4v, F4V, YouTube, RTMP (using FMS or RED5) and RTMP live streaming.
- Ability to play audio MP3 files.
- Support for Google Analytics
- You can set this player to any size you want, changing the player width, the player height, and the playlist width.
- Ability to integrate with your posts and pages using a shortcode
For more details, go here: Video Player
Vimeo Video Player
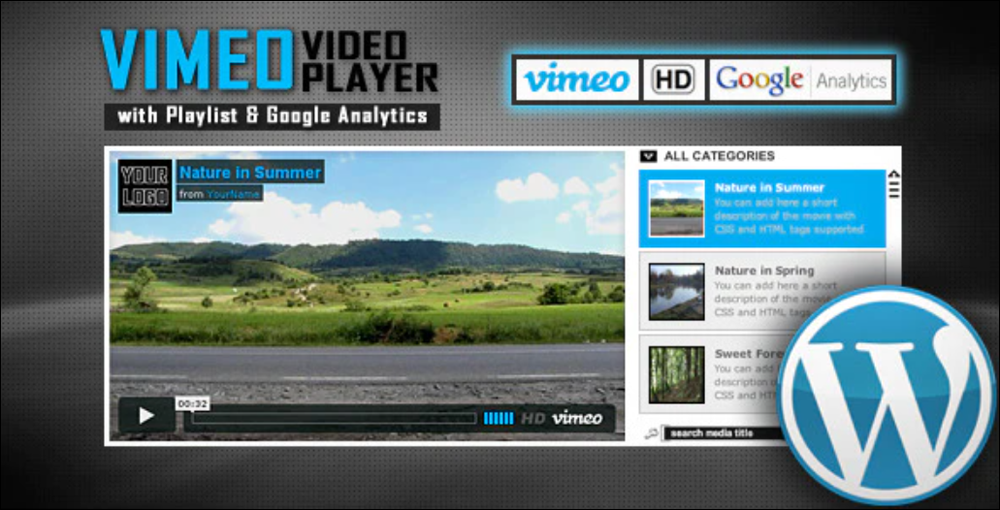
Vimeo Video Player lets you manage the entire video player using a very friendly interface. You’ll be able to customize the player look & feel, playlist, and CSS file.
Some of the plugin features include:
- Support for Vimeo videos.
- Support for Google Analytics
- Set player to any size you want, change player width, player height, and playlist width.
- Ability to integrate with your posts and pages using a shortcode
Visit the video plugin website here: Vimeo Video Player
Feeds For YouTube
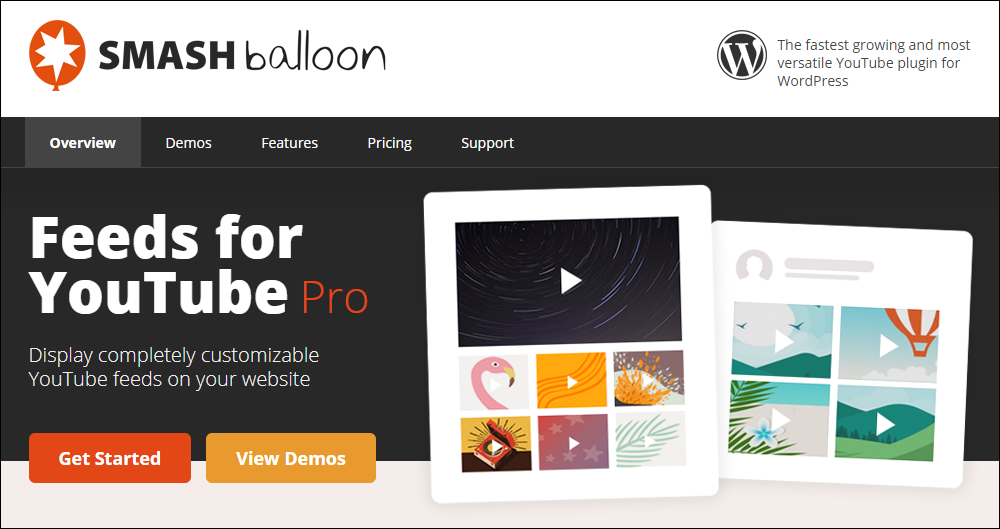
The FeedsForYouTube plugin automatically displays content from your YouTube channel on your website. Simply upload your videos to YouTube and the videos will also display on your website.
You can create a page on your site to display videos in a gallery layout, create curated content by displaying multiple feeds from multiple YouTube channels on the same page or throughout your site, and customize each feed using shortcodes.
Feeds inherit your WordPress theme’s fonts, colors, and other styles and come with loads of additional customization options, allowing you to finetune how you want to display YouTube feeds on your site.
For more details, go here: FeedsForYouTube
Adding Videos To Your Sidebar
You can also add videos from your Media Library, YouTube, Vimeo, or an external storage location to your sidebar using the Video block.
This is done via the Widgets screen.

To learn how to add and display videos in your sidebar using widgets, see this tutorial: How To Use WordPress Widgets
Using Video In WordPress – FAQs
Here are frequently asked questions about using videos in WordPress:
How do I add videos to my WordPress site?
You can add videos to your WordPress site by using the Video block in the WordPress editor. Simply click on the (+) button to add a block, search for the Video block, and then upload your video file or embed a video URL.
What video formats are supported in WordPress?
WordPress supports various video formats, including MP4, M4V, MOV, WMV, AVI, MPG, and FLV. However, it’s recommended to use MP4 format for better compatibility across different browsers and devices.
Can I embed videos from platforms like YouTube or Vimeo in WordPress?
Yes, you can easily embed videos from platforms like YouTube, Vimeo, or other video hosting services into your WordPress posts or pages. Simply paste the video URL into the Video block or use the embed code provided by the platform.
How can I customize the appearance of videos on my WordPress site?
You can customize the appearance of videos by adjusting settings such as autoplay, playback controls, loop, and more within the Video block settings. Additionally, you can use custom CSS to further style the video player to match your site’s design.
Are there any plugins to enhance video functionality on WordPress?
Yes, there are several plugins available to enhance video functionality on WordPress that offer additional features such as video galleries, responsive design, and advanced playback options.
How can I optimize videos for SEO on WordPress?
To optimize videos for SEO on WordPress, ensure you use descriptive titles, add relevant keywords in the video description, and enable video sitemaps. Additionally, consider hosting videos on your own domain or using a reputable video hosting service for better SEO performance.
***
Congratulations! Now you know how to add videos to your posts and pages in WordPress.

***
Stock video by Videezy

Updated: April 23rd, 2024