How To Create A Post In WordPress – Pt. 1

In this two-part tutorial, you will learn how to create a new post in WordPress.
This tutorial covers the following:
- Creating an effective Post in WordPress
- About WordPress Posts
- Types of content you can publish
- Post features
- Adding content to Posts – Guidelines
- Post saving options
- How to post content – Quick summary of steps
![]()
This tutorial shows you how to create a post using the WordPress Classic Editor.
We also have a tutorial that shows you how to create posts using the WordPress Block Editor.
***
Creating An Effective Post In WordPress
Creating an effective post requires:
- A content marketing strategy,
- Effective content planning, and
- Knowing how to use your WordPress site.
If your WordPress site’s settings have been properly configured, publishing content on a regular basis will help drive more visitors to your website or blog and turn it into a powerful information publishing and marketing tool for your business.
![]()
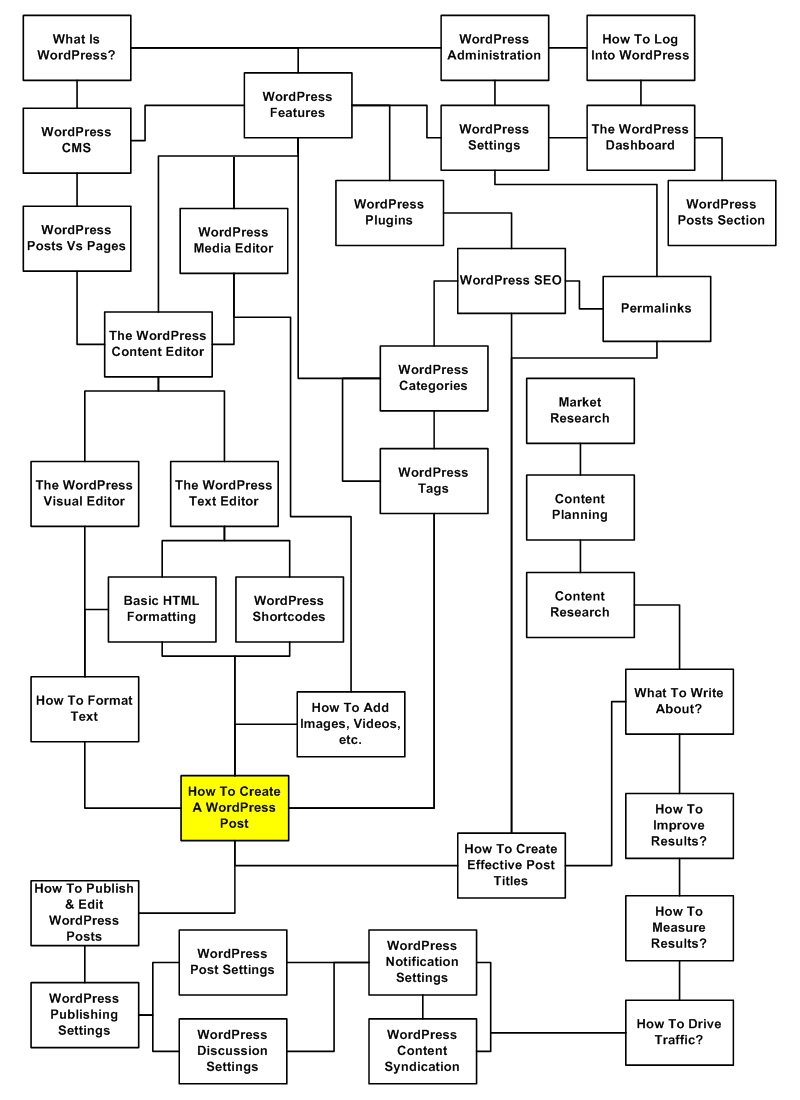
This tutorial series takes you step-by-step through the post-creation process. For best results, we recommend that you also learn how to plan and market your online content effectively and master using all the features of the WordPress CMS.
To learn more about effective content planning, we recommend subscribing to our web content creation course.
To learn about all the features of the WordPress CMS involved in creating and publishing content, refer to our other WordPress tutorials.
To learn how to convert a post to a page in WordPress, see this tutorial: How To Convert WordPress Posts Into WordPress Pages And Vice Versa
***
The more familiar you become with the content creation process and how WordPress works, the more you will discover just how easy WordPress makes publishing content.
In fact, once you master this process, getting better results online with your WordPress site will become as intuitive and easy as 1-2-3:
- Think…
- Write…
- Publish!
Once you know what to write about (following your content plan), the next step is to create or write your content (or have someone else create or write it for you), and then publish it on your website or blog.
WordPress makes this easy using Posts.
About WordPress Posts
The two main formats for publishing content in WordPress are Posts and Pages.
We explain the differences between Posts and Pages in this tutorial: Understanding The Difference Between WordPress Posts vs WordPress Pages
Posts are the content type that you will mostly use for writing and publishing new content on your site.
How To Create A New Post In WordPress – Step-By-Step Guide
Follow the steps below to create a new post in WordPress post:
If you need help logging into your site, see this tutorial: How To Log Into WordPress
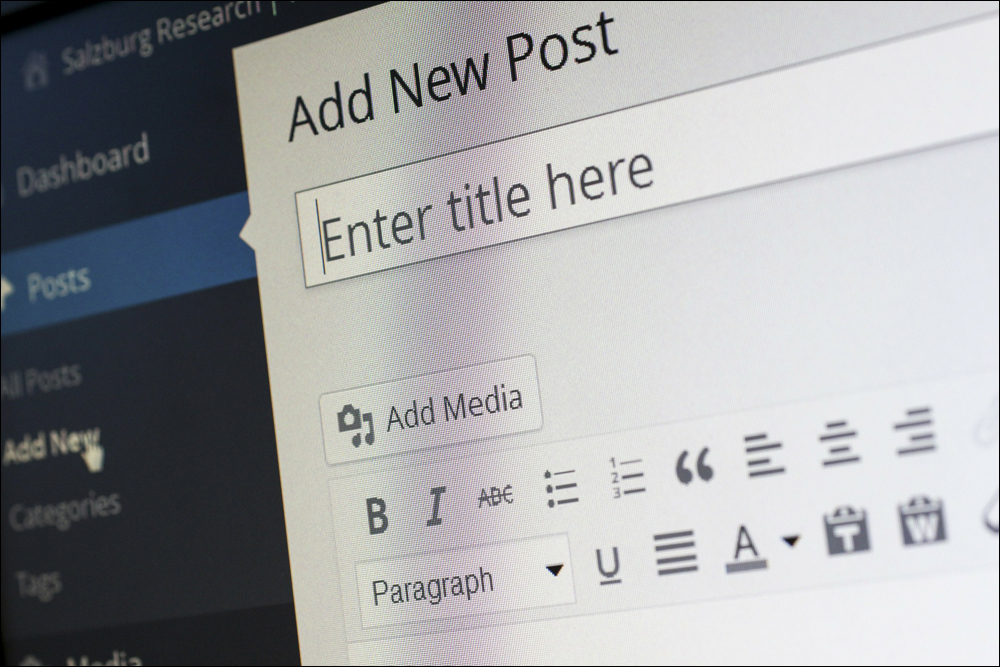
Log into your WordPress admin section, then go to the main navigation menu and select Posts > Add New.
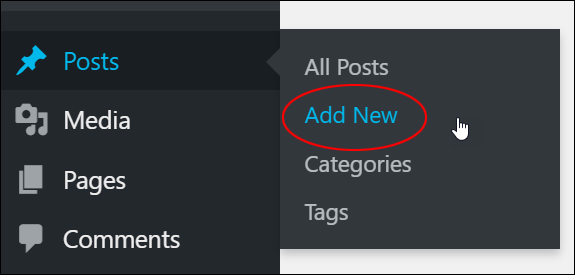
This creates a new Post in the Add New Post screen.
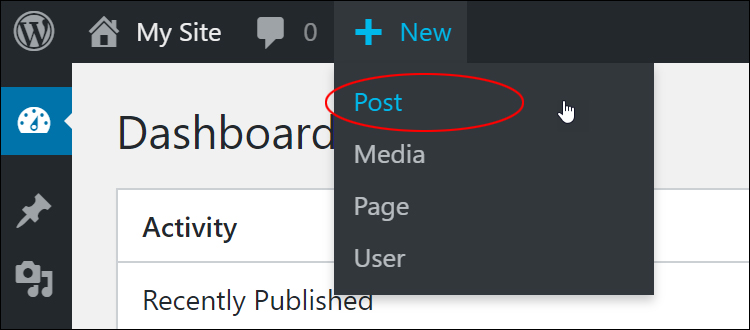
You can also create a new post from the ‘+ New’ menu in your Dashboard Admin Toolbar.
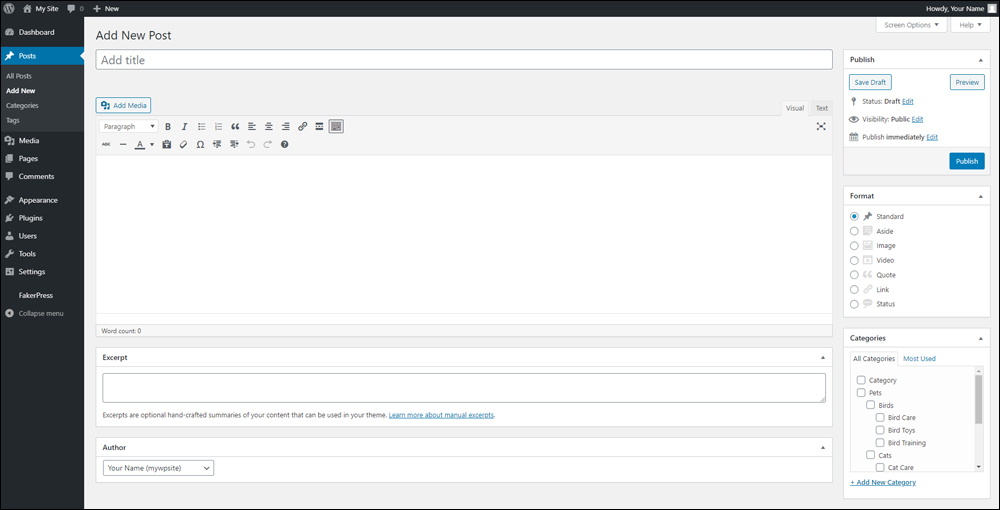
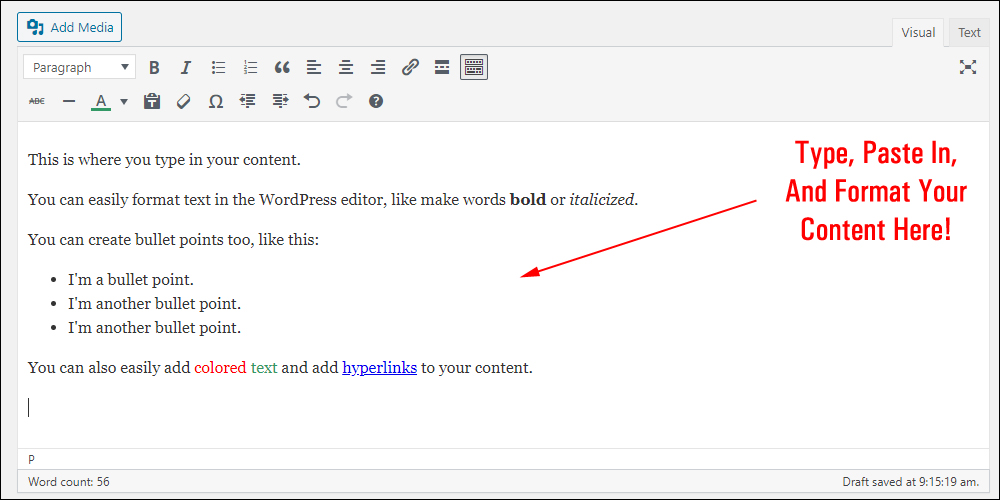
Add a title and content to your post by either typing or pasting it into the Post Title field and content editor areas.
![]()
When working on Posts, the content editor will look different depending on which type of editor you are using.
WordPress offers two different content editors:
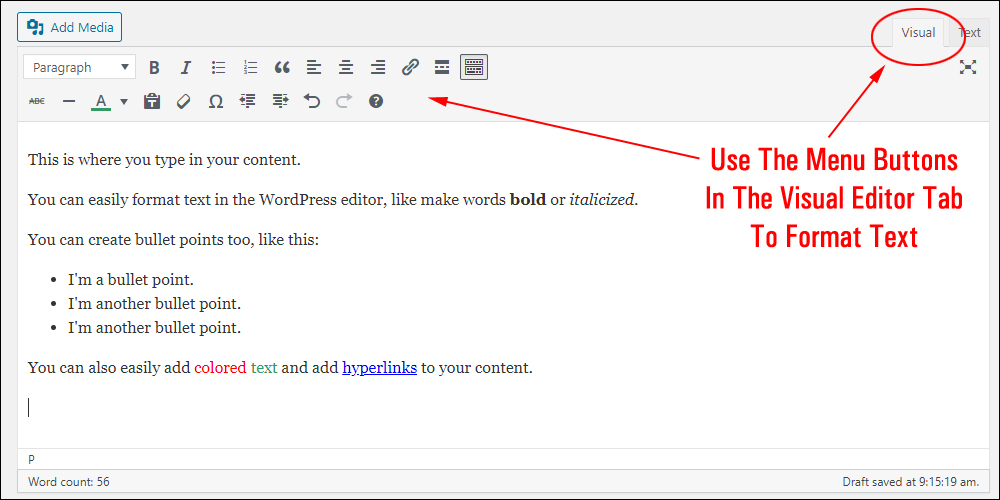
- WordPress Classic Editor – This includes both a Visual Editor (add and format text using clickable menu buttons) and an HTML Editor (add text only with HTML tags). To learn how to use the WordPress Classic content editor, go here: How To Use The WordPress Classic Editor
- WordPress Gutenberg Editor – This is a ‘block-based’ content editor. To learn how to use the WordPress Gutenberg editor, go here: How To Use The WordPress Block Editor
In the tutorial below, you will learn about the types of content you can add to posts in WordPress and how to create, edit, and publish content in posts using the WordPress Classic Editor.
Types Of Content You Can Add To WordPress Posts
WordPress lets you go well beyond adding content containing simple text and images only. You can also add media-rich content like videos, audio recordings (e.g. podcasts), downloadable files, slide presentations, animated images, interactive charts, and just about anything else you can think of sharing online to your posts.
Let’s explore some of the different types of content you can add to posts in WordPress:
Text-Based Content
You can add plain, formatted, and/or hyperlinked text to posts in a variety of fonts and styles.
The WordPress WYSIWYG (What You See Is What You Get) Editor lets you format and style your text as you go.
Depending on how your site’s settings have been configured and what plugins are installed on your site, you may be able to add SEO “meta” text into your posts (and pages) for better search engine indexing.
For example, with an SEO plugin installed, you can add and edit your post titles, keywords, and the post descriptions that will display in search results, custom post excerpts, etc.

- To learn how to create post excerpts in WordPress, go here: How To Use WordPress Post Excerpts
- To learn more about WordPress plugins, how they work, and what they do, see this tutorial: WordPress Plugins Explained
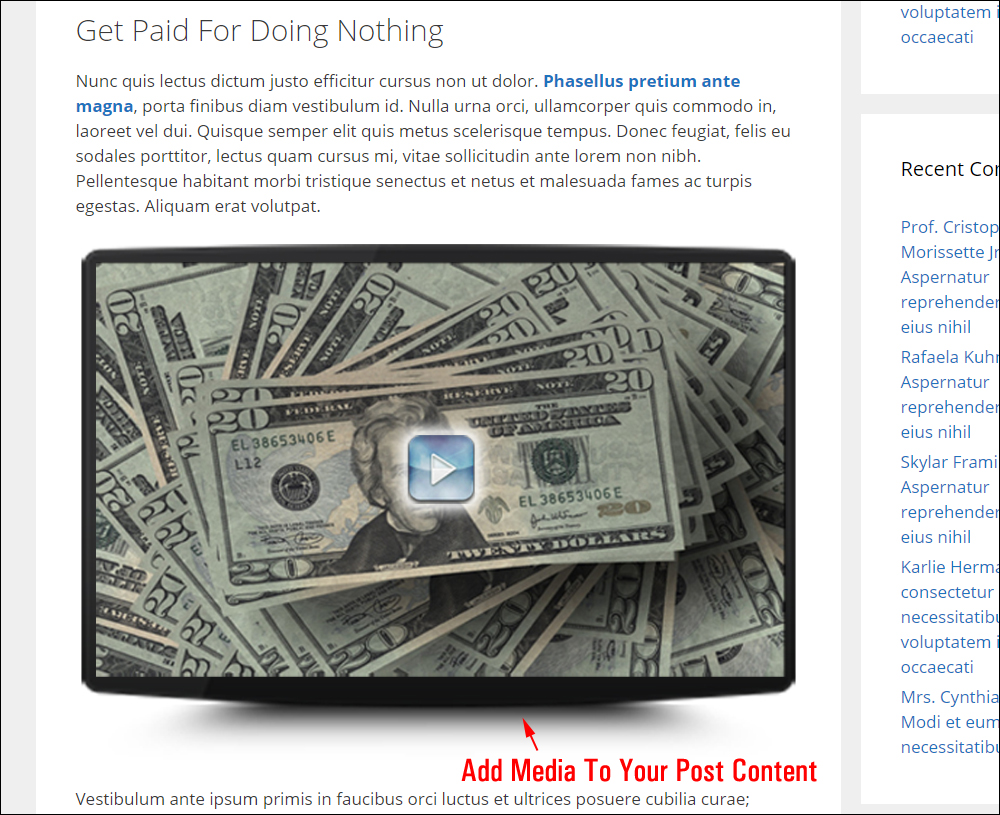
Media-Based Content
You can also easily add or embed media content into WordPress Posts (and Pages), such as videos, audio files, downloadable/shareable documents (e.g. PDF reports), images (photos, logos, graphics, banners, infographics, flowcharts, diagrams, interactive charts, etc., and more.
To learn how to add media to WordPress Posts and Pages, go here: How To Add Media To WordPress
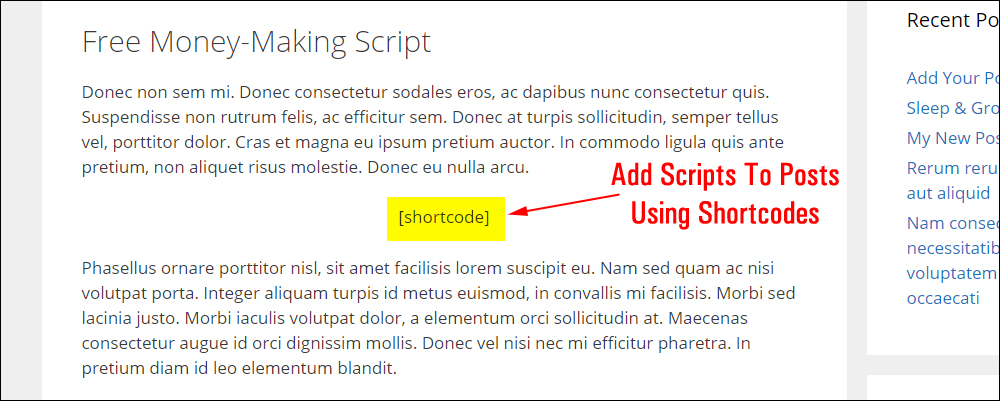
Scripts & Code
WordPress also lets you add complex or dynamic content elements such as banner ads, charts, tables, and multi-column objects directly into your posts and pages using scripts and code (e.g. JavaScript), shortcodes, and plugins.
Adding scripts to posts can be useful for managing content from an external application or remote site (e.g. managing advertising banners, subscription forms, redirection links, etc.).
You can also add scripts and codes to WordPress posts by inserting the code or script directly into your site’s file templates, although this will require having technical knowledge and skills editing code in template files or using plugins that allow you to insert code into your files.
To learn more about adding scripts or code to WordPress Posts, see these tutorials:
Now that you know what types of content you can add to posts in WordPress, let’s explore the WordPress Post screen’s options and features.
WordPress Post Screen – Options, Features, And Content Editor
WordPress will display different ‘Post’ screens depending on what you plan to do.
For example, if you plan to create a new post, you will work inside the ‘Add New Post’ screen. If you plan to edit an existing post, you will be presented with the ‘Edit Post’ screen.
Both screens contain similar options, settings, functions, and features, but with slight differences to accommodate your purpose and workflow.
Let’s start with the main features so you can better understand how to work with posts in WordPress.
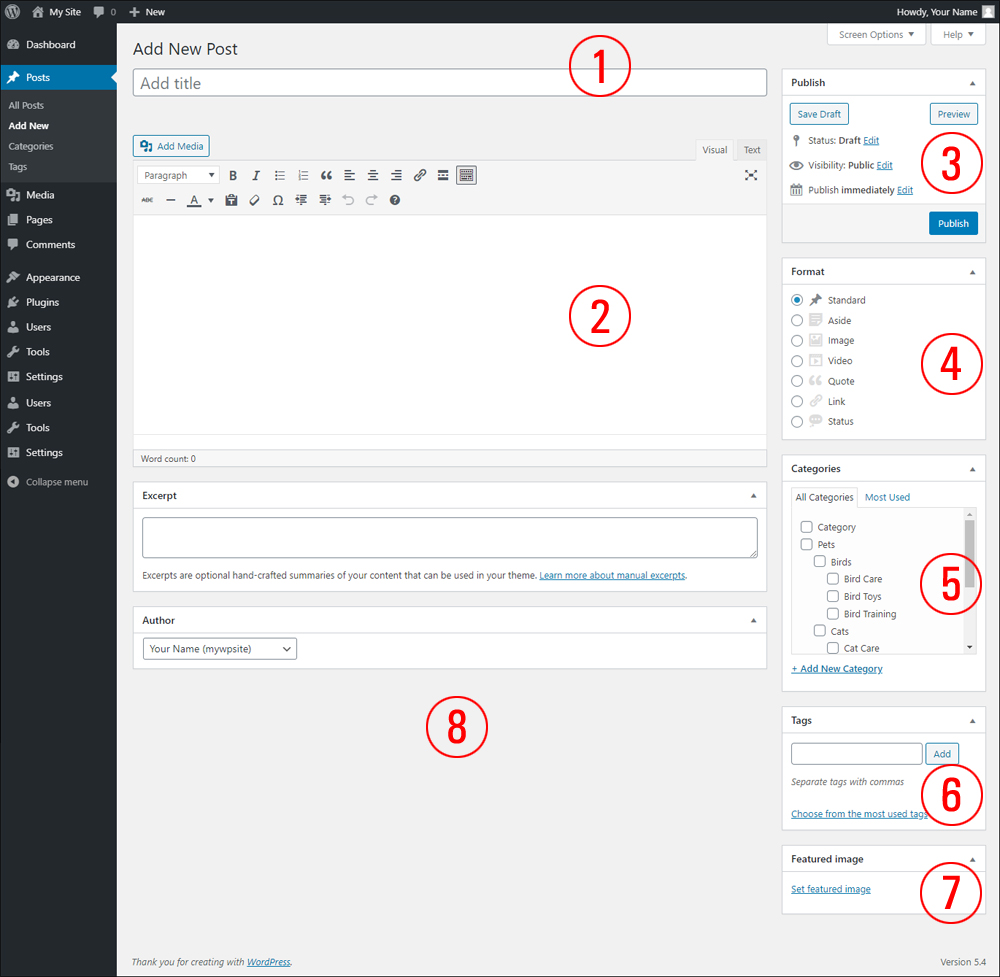
WordPress Post Features
The Post Screen contains several sections that allow you to modify and manage different post elements.
These sections include:
- Post Title
- Post Content Editor
- Post Publishing
- Post Format
- Post Categories
- Post Tag
- Featured Image
- Additional Post Functions
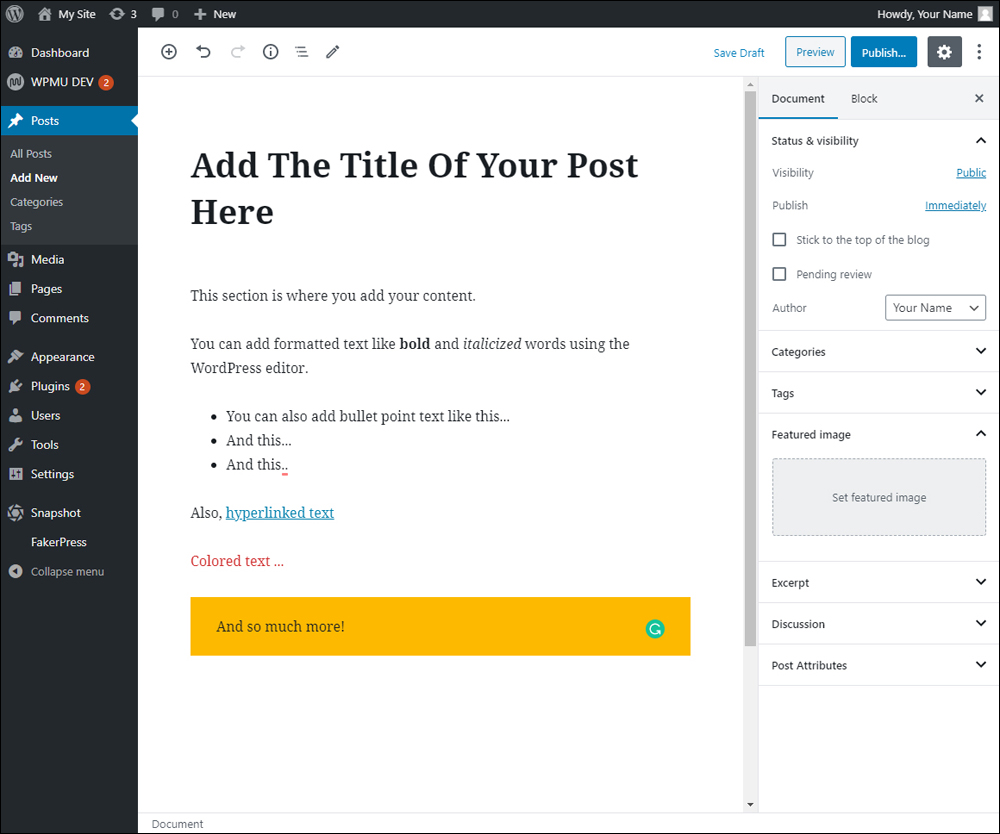
Just for comparison, here is the WordPress Add New Post screen using the Gutenberg block editor…
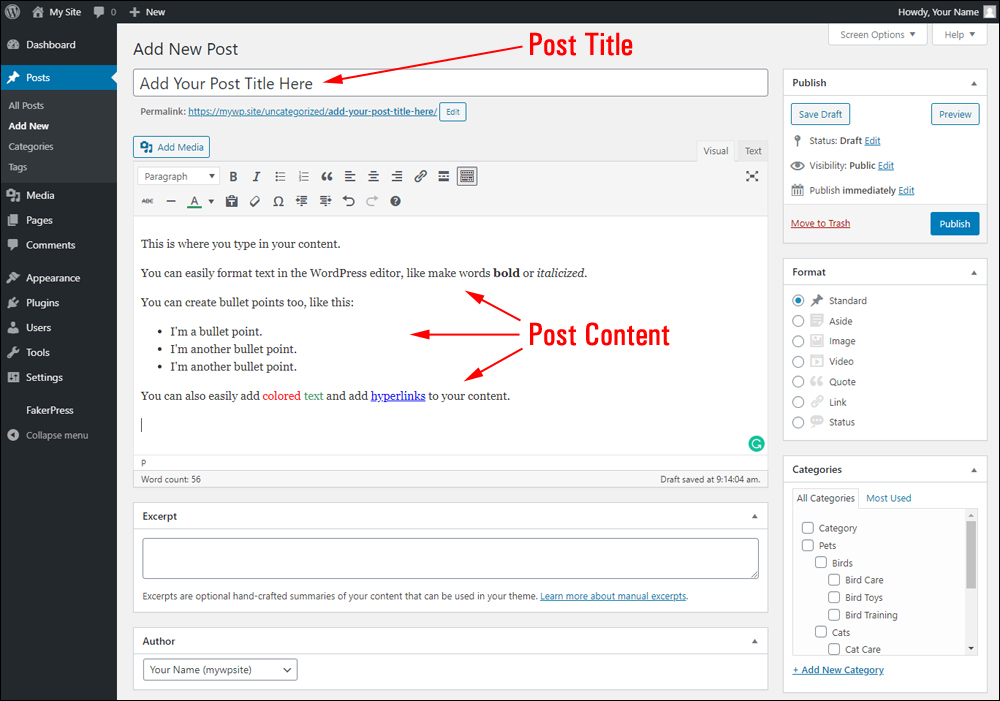
1 – Post Title
This section contains a text field where you type or paste in your post title.

![]()
Please note:
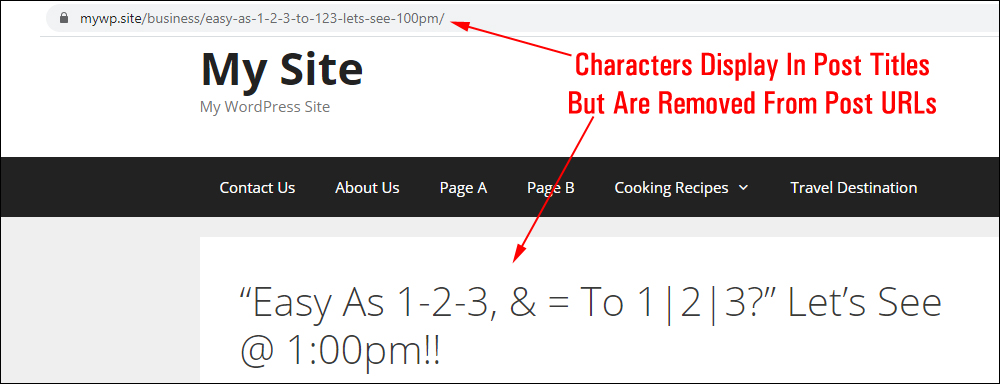
- You can use words, numbers, and symbols (e.g. hyphen, vertical pipe, comma, question mark, exclamation mark, etc.) in your post title.
- Choose a unique title for each post that you create. Using identical post titles can cause issues.
- WordPress will automatically remove common symbols like commas, apostrophes, quote marks, and hyphens from the “post slug” to display a valid URL for your post. Your post title will still display these symbols on the page to your readers, but they won’t appear in the post URL.
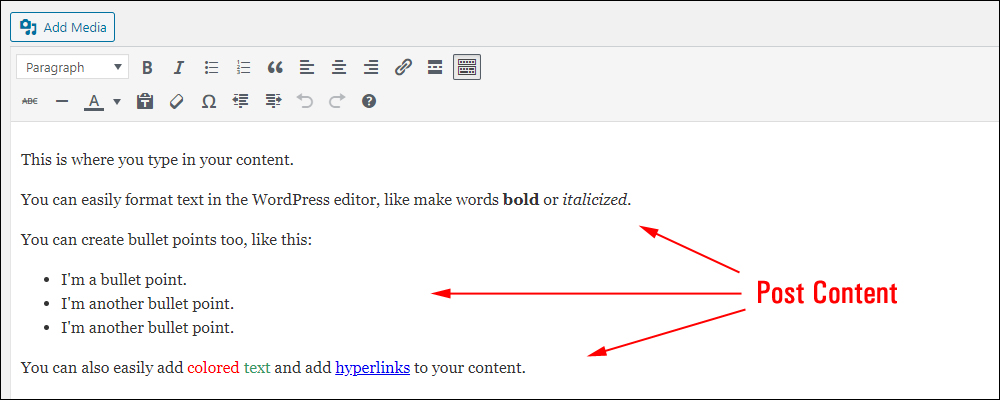
2 – Post Content Editor
The large, blank area of the WordPress post editor screen is where you type or add in your content.
3 – Post Publishing
This section is where you set your post status and visibility settings, set the publishing date, and browse your post revisions.

Post Status
- Published – Published posts can be viewed online by your site visitors either publicly or privately (see “Post Visibility Settings” section below).
- Draft – A draft post is not visible to your site visitors or registered site users (unless they are an administrator of your site).
- Pending Review – A post marked as pending review is like a draft post but needs to be reviewed and approved for publishing by a registered site user with Editor permissions.
To learn more about using Post Revisions in WordPress, see this tutorial: How To Use WordPress Autosave And Post Revisions
To learn more about user roles, permissions, and privileges and how to assign these in WordPress, see this tutorial: How To Manage WordPress Users
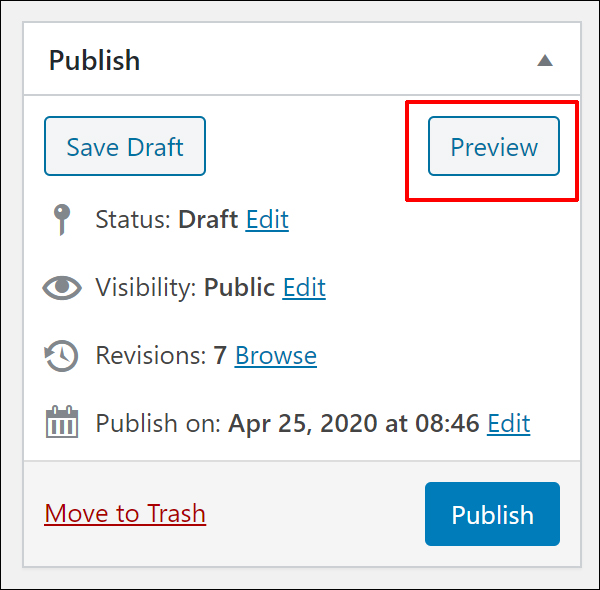
Post Preview
The Publish section also includes a Preview button that lets you preview your post content before your post goes live.
Post Visibility Settings
You can set different visibility settings for your posts.
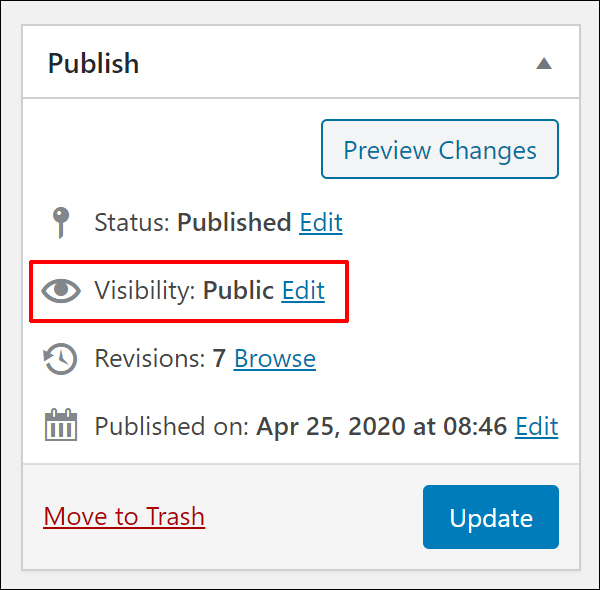
- Public – Setting a post to Public makes it visible to all website visitors after your post has been published.
- Password protected – Password-protecting a post makes your post content accessible only to users who have the password.
- Private – a Private post is only visible to you (if you are the site administrator) and/or other logged-in users with either an ‘Editor’ or ‘Administrator’ user role and permissions. You must be logged in to view a private post.
Additional settings in the Publish section allow you to edit post publishing dates (for example, you can schedule the post to be published at a later date), copy your post to a new draft, or delete your post by moving it to the trash.
Save Post Status
WordPress will autosave your post at regular intervals to ensure that your work is not lost (see the “Saving WordPress Posts” section of this tutorial), but you can also save your post manually without publishing.
![]()
Note: If your post has not been published yet, then either…
A Save Draft button will display in the Publish section if the post status is set to Draft.
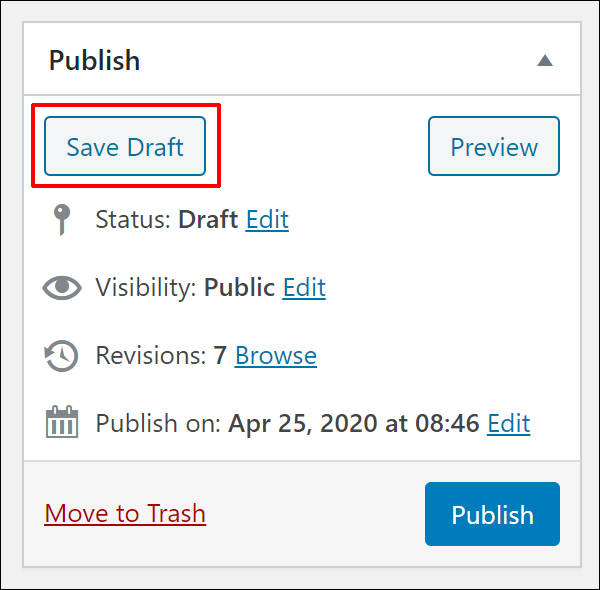
Or Save as Pending, if the post status is set to Pending Review.
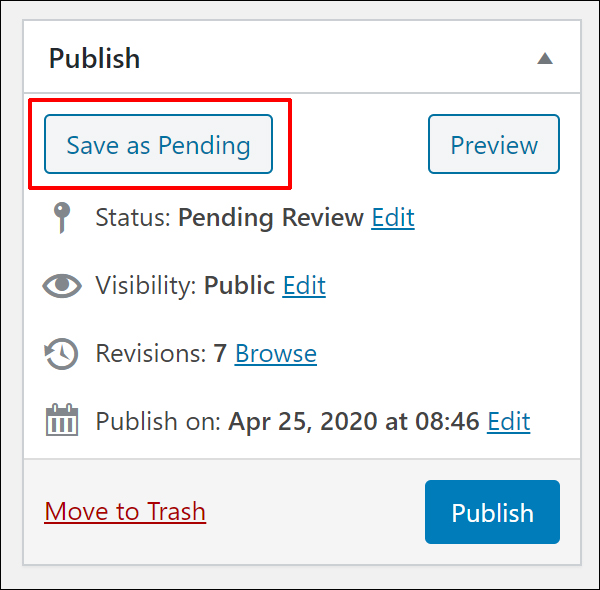
Click the button to save your post manually without publishing.
Publish Post Status
Click the Publish button to publish your post.

You can also edit when your posts get published. Click the Edit link above the Publish button and next to the ‘Publish immediately’ section, then specify the date and time to publish your post in the settings, and click OK.
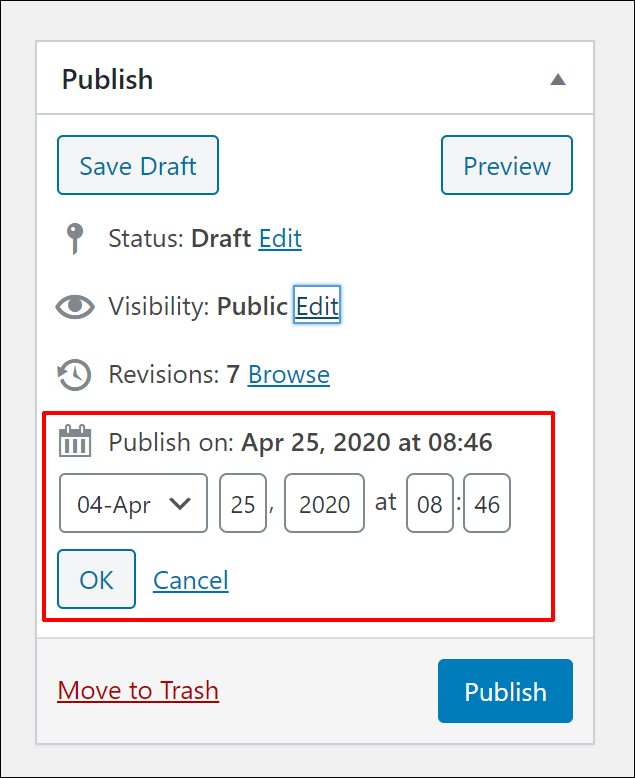
For a step-by-step tutorial on how to schedule your posts in WordPress, go here: How To Schedule Posts In WordPress
4 – Post Format
Some WordPress Themes allow you to display your post in different layouts using Post Formats.
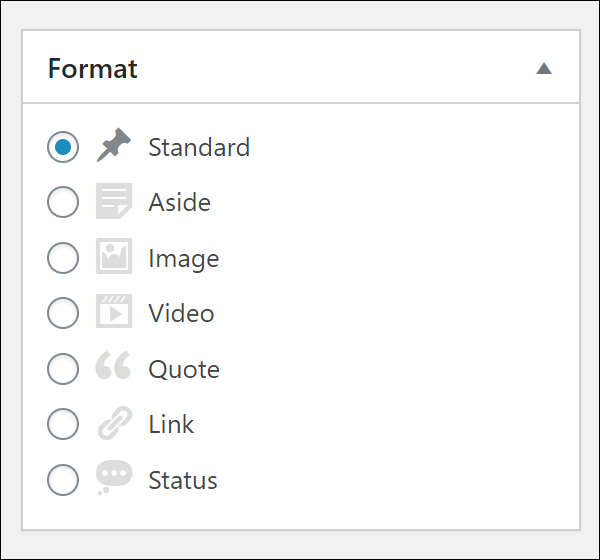
To learn more about using WordPress post formats, see this tutorial: WordPress Post Formats Explained
5 – Post Categories
Post categories help you classify your site’s posts into related topics and keep your content organized for your site visitors and users.
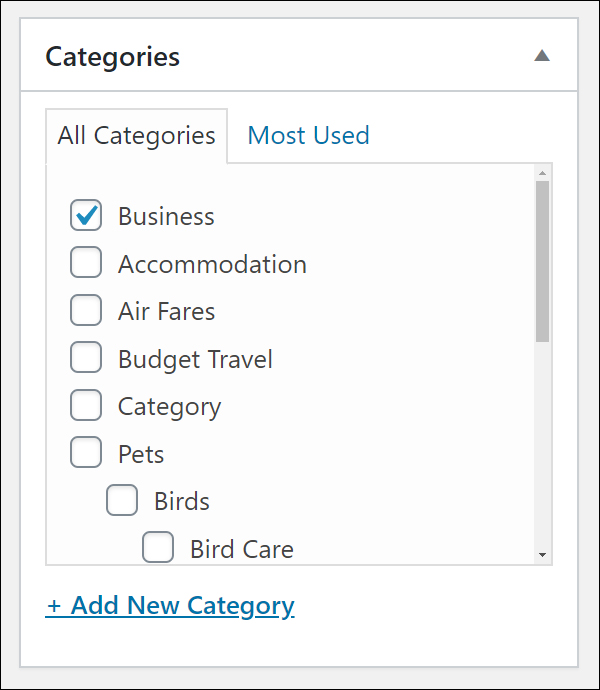
Assigning your posts to a category allows your readers to easily search, find, and browse all posts published under that topic.
You can select one or more categories while creating or editing your post or add a new post category as you work.
To add a new category while composing or editing a post, click the + Add New Category link.
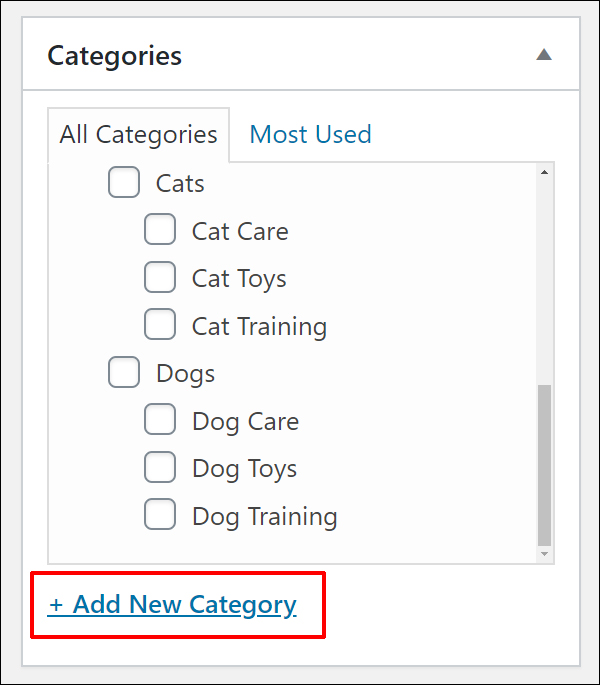
You can also manage all your categories by selecting Posts > Categories from the main dashboard menu.
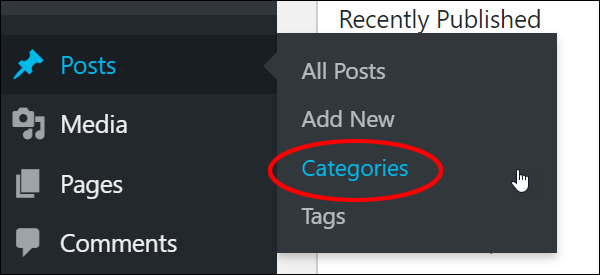
To learn more about using post categories in WordPress, go here: How To Use WordPress Post Categories
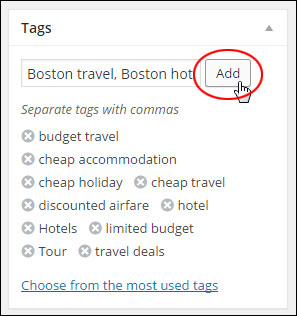
6 – Post Tags
Tags are like index entries for your content and allow you to organize your posts with more granular detail.
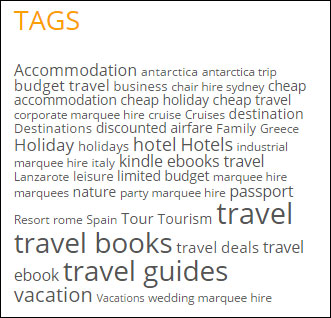
WordPress groups posts with identical tags together. This allows your site visitors to find posts with related content.
Your active WordPress theme controls where posts display on your site and their formatting or style. Depending on your theme, tags may or may not appear in your post.
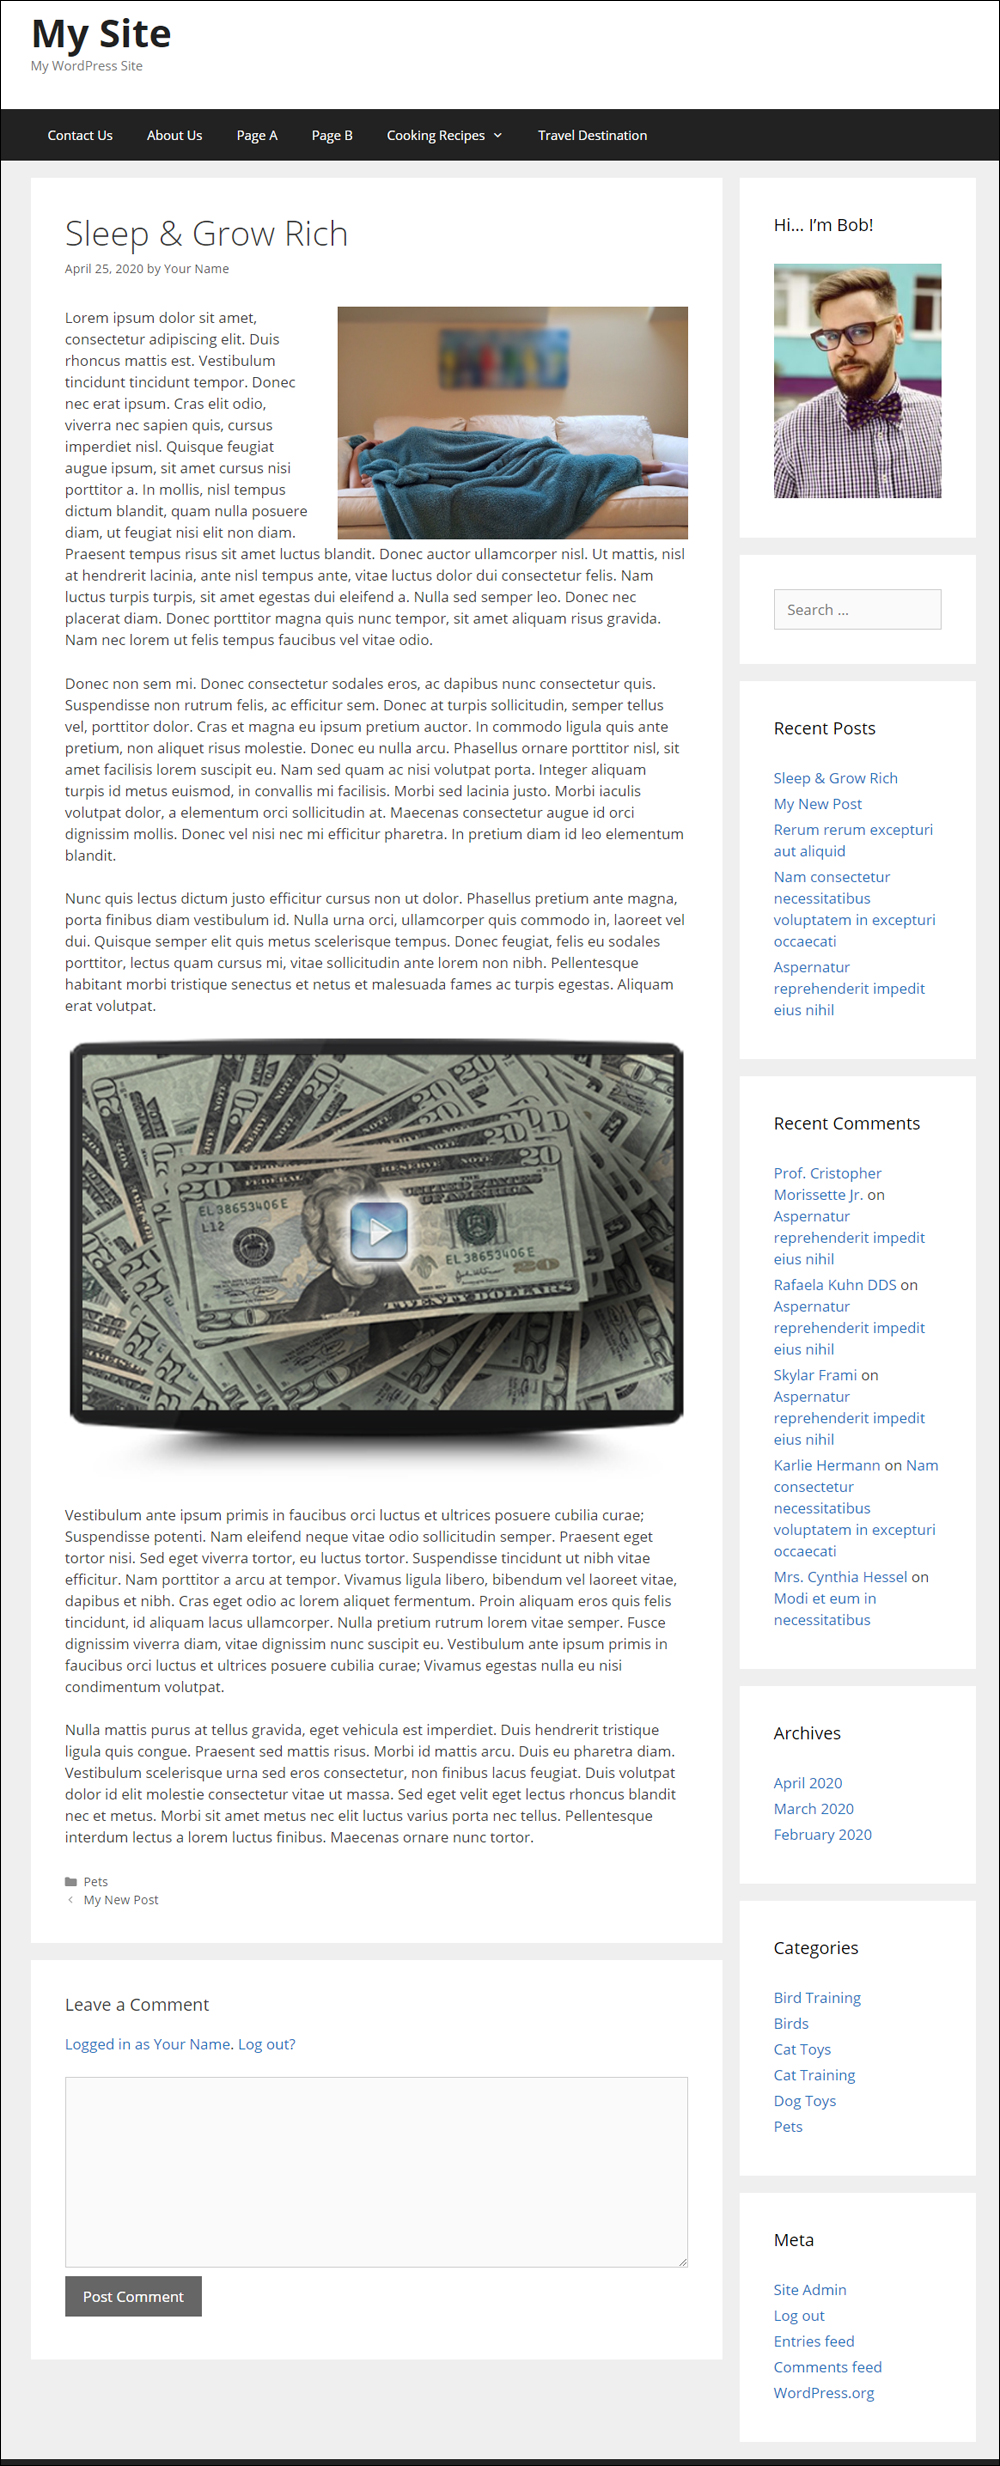
For example, many WordPress themes display tags at the end of the post…
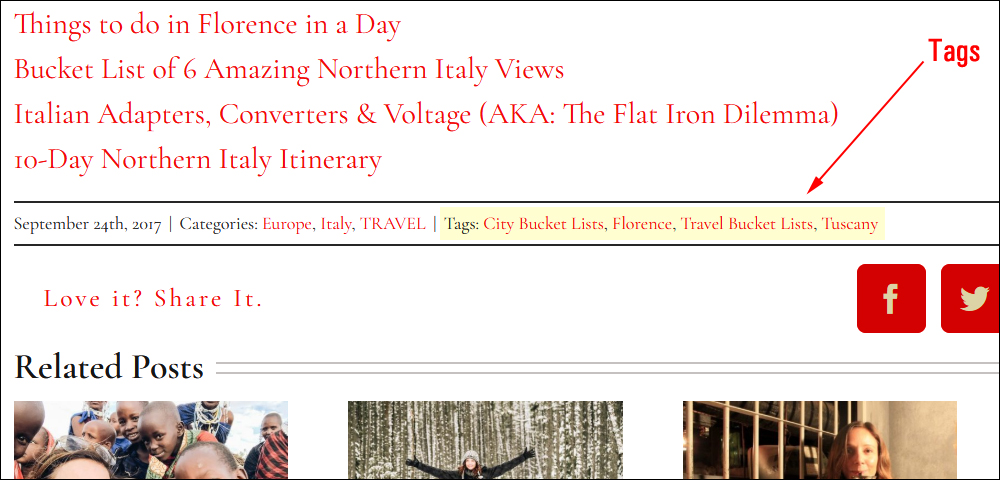
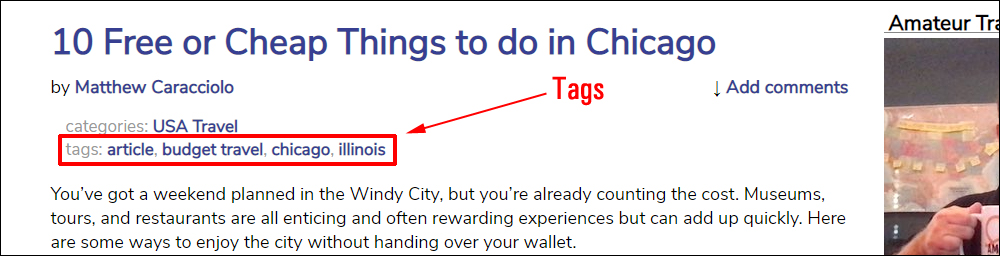
…while other themes may display tags at the top of the post (or both the top and the bottom of the post). Again, this all depends on which WordPress theme you are using for your site.
You can add new tags to your posts by typing in keywords separated by commas into the ‘Tags’ section or choosing from a list of your most used tags. After entering your comma-separated tags, click the Add button to tag your post.
For more details on how to use post tags in WordPress, see this tutorial: How To Use WordPress Post Tags
7 – Featured Image
Your active WordPress theme also controls how featured images or post thumbnails display on your posts.
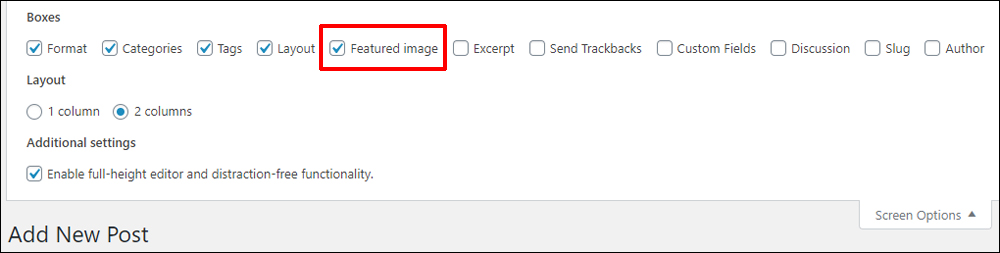
If your WordPress theme supports Post Thumbnails (most do), then the ‘Featured Image’ module should be visible in the Post Edit screen.
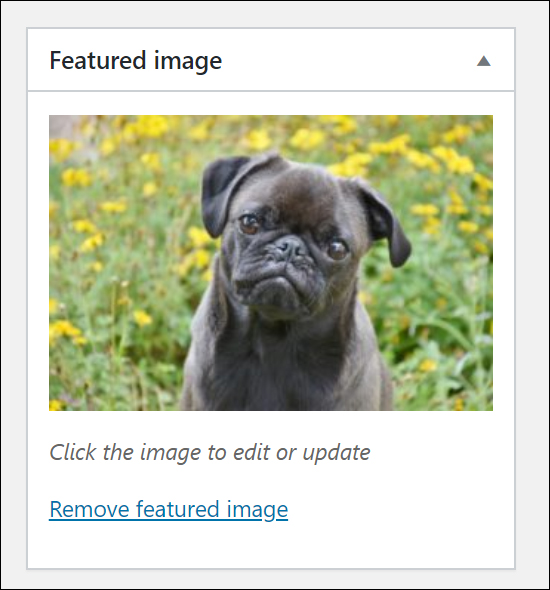
If you can’t see the Featured Image section in your Post Edit sidebar options, make sure the option has been selected in the Screen Options Tab.
Note: If you can’t see the Featured Image checkbox in the Screen Options section, then your theme may not support it.
To learn how to add featured images to posts in WordPress, see this tutorial: How To Add Featured Images To WordPress
8 – Additional Post Functions
Some Post features are hidden in Post administration screens by default. You can display these along with their options and settings by enabling their checkboxes in the Screen Options tab.
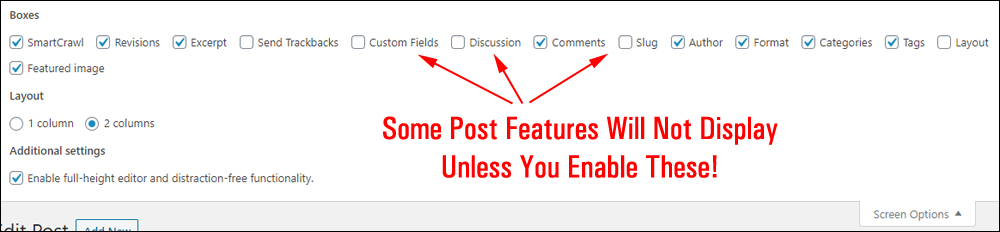
Common post features that you can enable in the Screen Options tab and view in your post screen include:
- Post Excerpt
- Send Trackbacks
- Custom Fields
- Discussion
- Post Slug
- Post Author
- Post Revisions
- Post Comments
Let’s take a quick look at each of these features:
Post Excerpt
The Excerpt post function lets you add a post summary or a custom “teaser” to your post that will display in different areas of your website, such as the post description for each blog post listed on your main blog page, post categories page, post archives page, search results pages, etc.

To learn more about using post excerpts in WordPress, see this tutorial: How To Use WordPress Post Excerpts
Send Trackbacks
Trackbacks let you notify legacy blog systems that you have linked to them in your post.
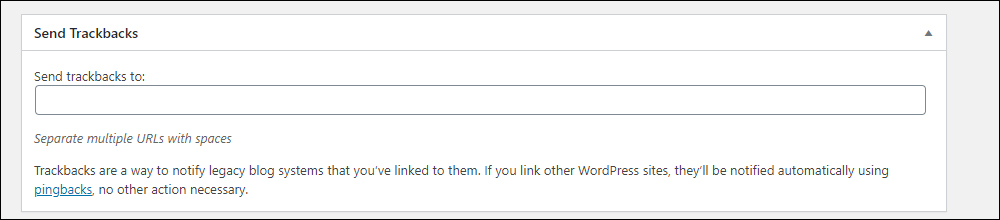
If you link to other WordPress blogs, they’ll be notified automatically using a feature called pingbacks.
For sites that don’t recognize pingbacks, you can send a trackback to the blog by entering their website address(es) in the trackbacks field (note: separate each web address with a space).
Trackbacks and pingbacks can be enabled or disabled in your WordPress Discussion settings (Dashboard Menu > Settings > Discussion).
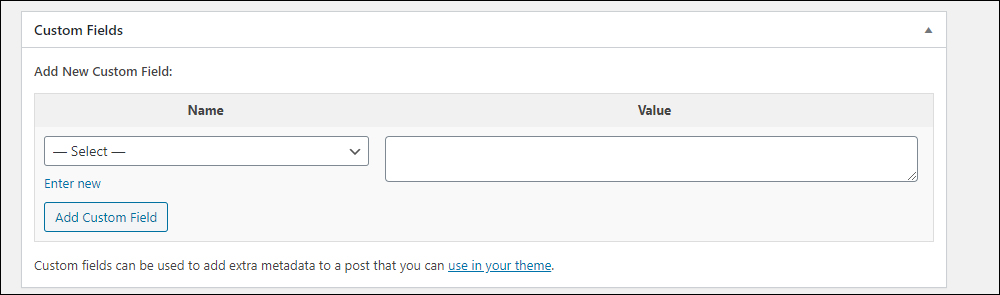
Custom Fields
As the description for the feature states, “Custom fields can be used to add extra metadata to a post that you can use in your theme.”
Custom Fields are an advanced feature of WordPress that lets you add custom information to your site and/or modify the way you display information on your posts.
For example, if you have a site about book reviews, you may want to create a post template with special tags embedded into the template code (or, most likely get a web developer to do this for you) and use custom fields to enter specific information about each book, such as genre, publisher, number of pages, ISBN number, etc. every time you create a new book review post.
The information entered into the custom field section would then be saved with your post and automatically display in your content after your post is published.
Discussion
The Discussion module allows you to turn discussion settings on/off for a specific post, overriding the global Discussion Settings on your site.

Use this module option to allow/disallow visitors to interact with your post (e.g. leave comments), or to send and receive notifications on a post-by-post basis after publishing.
- Check all boxes to Allow Comments and Allow trackbacks and pingbacks on your posts.
- If you uncheck Allow Comments, then no visitors will be able to post comments on that post.
- If you uncheck Allow trackbacks and pingbacks, then your post will not send out trackbacks or pingbacks when the post is published.
Notes:
- If you are editing a previously published post, the Discussion module will also show any comments that have been left on that.
- You can manage Post discussion options in your WordPress Discussion settings (Dashboard Menu > Settings > Discussion).
Post Slug
WordPress automatically creates a post slug from your post title when you create a new post.
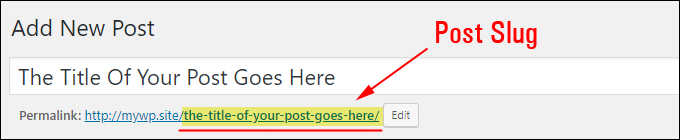
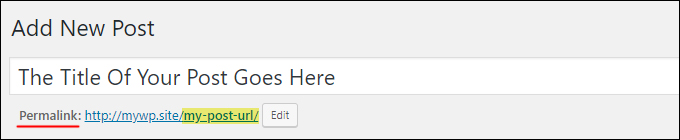
The Slug field lets you edit your post slug, so you can have a slug that is different from your Post title.

![]()
The words in your post slug form part of your post’s URL (i.e. the web address users will type to visit your post), so make sure you choose words that accurately reflect your post and will make your URLs user-friendly and search-engine friendly.
The post slug is also called a Permalink.
Notes About Permalinks and Post Slugs
- Permalink stands for “permanent link“. It is also referred to as a user-friendly URL, SEO-friendly URL, or pretty URL.
- When you set Permalinks for your post (under Settings > Permalinks), WordPress will update its database and change all internal links on your site to make sure they are pointing to the post’s correct destination URL. WordPress will try to point visitors to the correct URL if you change the post slug later, change the post category, or move a page somewhere else (e.g. to create nested pages under a different parent page). This may not always work, however, and you will then have to redirect the post URL manually using a plugin.
- WordPress automatically generates post slugs based on your permalink settings and your initial post title. If you don’t enter a post title when creating a new post, WordPress will assign the post ID as the post slug.
- WordPress removes punctuation symbols like commas, quotes, apostrophes, and invalid URL characters from post slugs. Also, spaces are substituted with dashes to separate each word in your post slug.
- Your permalink displays below the post title field as soon as you save or publish a new post.
- You can manually change your permalink URL by editing your post slug. Although WordPress creates a slug for your post no matter how long your post title is, SEO research has shown that people are more inclined to click on links that have short slugs, so make sure to use short slugs that convey the essence of your post when creating a new post.
To learn more about using permalinks, see this tutorial: How To Link Content In WordPress
Post Author
If you have multiple users on your site with authoring roles and privileges, the Post Author module will display a drop-down list of all users, allowing you to change the user assigned as the author of that post.

Learn more about assigning user roles and permission in WordPress here: How To Manage WordPress Users
Post Revisions
Every time you save your post, WordPress saves a copy of your revision in its database. This allows you to “roll back” your post to an earlier version.
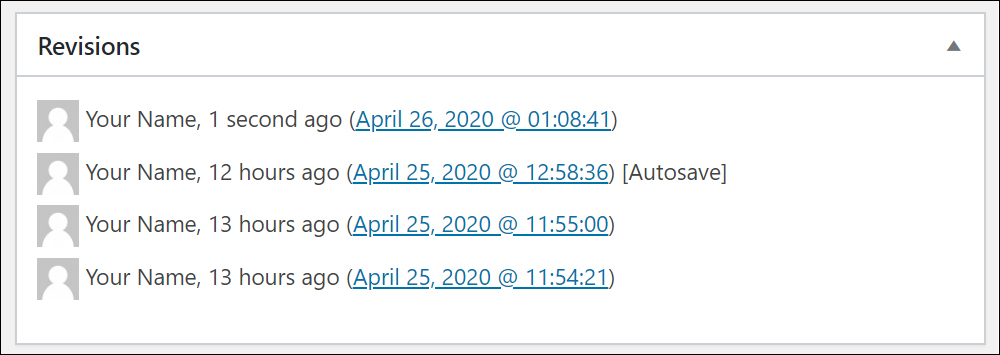
To learn more about using this feature, see this tutorial: How To Use WordPress Autosave And Post Revisions
Post Comments
This feature lets you view any comments posted by visitors about your post (if you have comments enabled in your discussion settings).
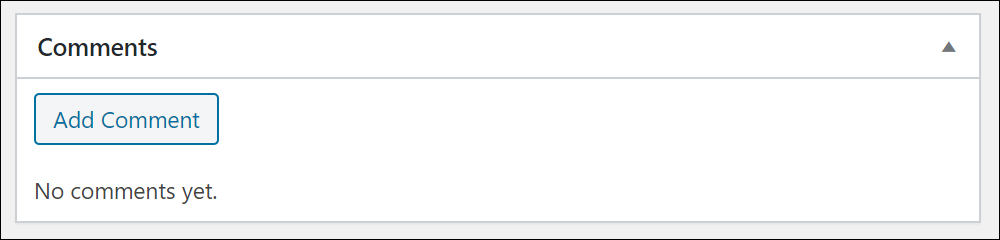
To learn more about using this feature, see this tutorial: How To Manage WordPress Comments
How To Create A Post In WordPress – Next Step
Now that we have covered the main features and functions of the WordPress Post screen, the next step is to learn how to create an effective post.
Part 2 of this tutorial will show you how to do this.
This is the end of part 1 of this tutorial
To view Part 2 of this tutorial, go here: How To Create A New Post In WordPress – Part 2
***

Updated: June 24th, 2023