
 This tutorial is part of our WordPress configuration tutorials, where we show you how to set up and configure your WordPress site or blog with no coding skills required.
***
Although a new WordPress site can be used “right out of the box” immediately after installation, there are a number of internal and external settings that you can configure to help you get the most benefit out of using WordPress.
In other tutorials, we talk about the importance of getting your WordPress site expertly configured. This is important if you plan to build a successful digital presence, as we will show you not just how to create a professional looking website, but also how to set up your WordPress website or blog to help you get better search engine results, generate more traffic, convert more visitors into leads and sales, and so much more!
![]()
Before you begin, we recommend familiarizing yourself with these modules:
In addition to the detailed tutorials in the WordPress configuration training module, we also suggest watching the videos listed in the WordPress Configuration Video Tutorials section and learning how to put your WordPress site on maintenance mode.
If you have followed our WordPress Installation Tutorials, the next step is to set up and configure your site to turn your default WordPress installation into a professional looking website or blog that will create a great first impression with visitors and help you grow your business online faster.
In this tutorial, we will begin the configuration process by learning how to clean up a new WordPress installation on your domain, then take you step-by-step through the process of configuring your WordPress settings and getting your website ready to launch.
How To Clean Up WordPress Post Installation
After your new WordPress installation is complete, log into your WordPress administration area …

(Log into WordPress)
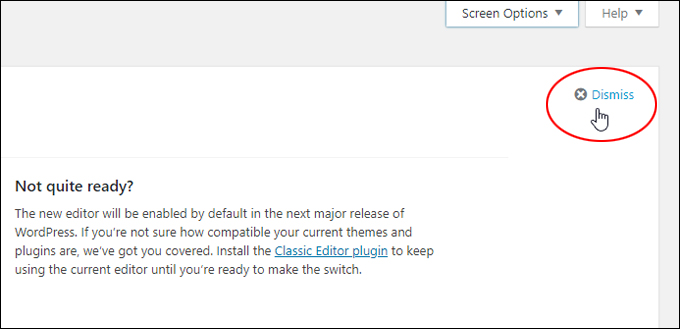
The first step of the post installation clean up is to read and dismiss any messages and notices that are cluttering your WordPress dashboard.
(Read and dismiss notices cluttering your dashboard)
![]()
The first time you log into a new WordPress site, you may be greeted by the Welcome to WordPress Screen …

(New WordPress Site – Welcome To WordPress!)
You can explore some of the suggested steps in the Welcome Screen …

(New WordPress Site – Suggested Steps)
If you want to spend a few minutes learning more about WordPress, you can visit the official WordPress site for an overview of their recommended “Getting Started” process.
![]()
If you are installing and configuring your own WordPress site, we recommend ignoring the “get started” suggestions presented in the default WordPress installation notices and following our step-by-step tutorials instead. We have designed our tutorials in logical and sequential order to help reduce your learning curve and get you up and running without having to “backtrack” important steps later.
To dismiss the welcome screen for subsequent logins, click on the ‘Dismiss’ link …

(Dismiss The WordPress Welcome Screen)
If for any reason you need access to the WordPress welcome screen again, just click on the ‘Screen Options’ tab at the top of your WordPress dashboard screen and tick the ‘Welcome’ checkbox …

(Screen Options – Welcome)
The ’Welcome to WordPress’ screen will be restored to your dashboard screen and greet you next time you log in …

(Welcome screen is back!)
To learn more about the WordPress Dashboard, see this tutorial:
WordPress Sample Content
When a new WordPress installation is performed, sample content is automatically added to your blog so you can visualize what your site will look like …

(Sample content added in new WordPress installation!)
This sample content is added regardless of the version of WordPress you are installing, or the default theme used in the installation …

(Sample content is added to all new WordPress installations!)
If you have never used WordPress before, we recommend spending a few minutes browsing through the sample content prior to commencing the configuration and setup process. After familiarizing yourself with these sections, it’s best to then completely delete the sample content from your site, as you will soon be replacing these with real content of your own.
How To Clean Up A New WordPress Blog Installation – Tutorial
Go to your Dashboard screen …

(you don’t need this content!)
You will see that WordPress has automatically added the following sample content to your site after the installation:
- 1 x Post
- 1 x Page
- 1 x Category
- 1 x Comment
Cleaning Up WordPress – Deleting The Sample Comment
Let’s begin to clean up your new WordPress installation by deleting the comment from Mr. WordPress displayed in the “Recent Comments” section.
Position your mouse cursor over the comment and a menu will appear under the comment. Click on the ‘Trash’ link …

(Recent Comments – Trash)
The comment will be moved to the Trash folder. If you want to restore it, just click on the Undo link next to the Comment by xxx moved to the Trash message …

(Sample comment deleted)
To permanently delete the comment in your trash folder, click on the Trash link …

(Let’s permanently delete this sample comment!)
You will be taken to the WordPress ‘Comments’ screen …

(WordPress Comments section)
You can permanently delete the comment by hovering over the item and clicking on the ‘ Delete Permanently’ link …

(WordPress Comments area – Delete Permanently)
You can also select the checkbox next to the comment you want to permanently delete, and click on the Empty Trash button …

(WordPress Comments screen – Empty Trash)
The sample WordPress comment will be permanently deleted …

(Sample comment is now permanently deleted!)
We provide step-by-step tutorials about managing WordPress comments in the WordPress Management Tutorials module.
After deleting the sample comment, the next step is to delete the sample post.
Cleaning Up WordPress – How To Delete The Sample WordPress Post
Log into your WordPress admin section, then go to the admin navigation menu and select Posts > All Posts …

(Posts – All Posts)
This brings you to the Posts section …

(Posts page)
Place your mouse over the sample post title (Hello world!) and a menu will display. Click on Trash to delete the sample post …

(WordPress Posts – Trash)
The sample WordPress post will be moved to the Trash folder. If you want to restore it just click on the Undo link next to the post moved to the Trash message …

(WordPress Sample Post Deleted)
The post will be removed, but not permanently deleted.
To learn how to permanently delete the post, see the tutorial below:
After deleting the sample WordPress post, the next step is to delete the sample page.
Cleaning Up WordPress – Deleting The Sample WordPress Page
A sample WordPress page is added to your new installation …

(WordPress Sample Page)
Unless removed, this sample will continue to display on your website, even if you decide to change your WordPress theme …

(The WordPress Sample Page will remain on your site even if you change WordPress themes unless deleted.)
You could just keep the sample page and replace the content with real content, but you would then have to change other settings (like the post slug) and miss out on some valuable opportunities to instantly notify search engines and attract new visitors when you publish new content (we’ll show you how to configure WordPress to do this later in this tutorial module).
As you will be adding real pages to your site shortly, let’s just simply delete this page.
To delete the sample page, go to your Admin menu and click on Pages > All Pages …

(Pages Menu – All Pages)
This opens the WordPress ‘Pages’ screen …

(WordPress Pages panel)
Place your mouse below the “Sample Page” entry and a menu will display. Click on Trash to delete the sample page …

(WordPress Pages – Trash)
The sample WordPress page will be moved to the Trash folder. If you want to restore it just click on the Undo link next to the Item moved to the Trash message …

(WordPress Page Deleted)
The sample page will be removed, but not permanently deleted.
To learn how to permanently delete pages, see this tutorial:
After deleting the sample page, the next step is to delete the sample WordPress page.
Now that you have deleted the sample page, the next step is to delete unnecessary WordPress plugins.
Cleaning Up WordPress – Deleting Unnecessary Plugins
As part of our recommended WordPress maintenance routine, it’s best to remove any unused and unnecessary plugins from your system.
WordPress automatically adds a non-essential plugin called “Hello Dolly” during the installation process. Let’s remove this plugin while we’re cleaning up our new WordPress installation.
In your dashboard menu, click on Plugins > Installed Plugins …

(Plugins – Installed Plugins)
This takes you to the WordPress ‘Plugins’ area …

(WordPress Plugins page)
To remove the “Hello Dolly” plugin, click Delete …

(Click ‘Delete’ to remove the plugin)
Confirm that you want to delete this plugin and delete all associated plugin files …

(Delete Plugin files)
The “Hello Dolly’ plugin will be deleted …

(Goodbye ‘Hello Dolly’)
![]()
WordPress installs another plugin by default called Akismet. Leave the Akismet plugin in the plugins section for now. We show you how to configure and use WordPress antispam plugins in other tutorials.
To learn more about plugins, see this tutorial:
After deleting all of the default and/or unnecessary content that WordPress automatically adds with every new installation, go back to your WordPress Dashboard. You will see that the Dashboard is empty and that the only items left are the information panels (e.g. At a Glance, Quick Draft, etc …

(Dashboard info panels)
Event these panels are optional and can be rearranged or removed from your WordPress dashboard …

(Completely empty WordPress dashboard!)
There’s no need to remove the information panels from your dashboard. Just leave things as they are, or reorganize some of the panels to suit your preferences.
To learn how to edit your dashboard, see this tutorial:
![]()
One last thing to keep in mind with all new WordPress installs is that a category called ‘Uncategorized’ is automatically created for your posts …

(WordPress ‘Uncategorized’ Category)
We will not be deleting this category. The reason for this is that WordPress doesn’t allow you to have a site with no categories. All WordPress posts must be assigned to a post category, so the default ‘Uncategorized’ category cannot be deleted.
In other tutorials, we show you how to set up categories and how to optimize the default WordPress category for SEO.
Congratulations! Now that you know how to clean up a new WordPress installation, the next step is to begin configuring your WordPress settings.

(Source: Pixabay)
Click the link below to continue configuring your WordPress settings:

***
"I love the way your email series "Infinite Web Content Creation Training Series" is documented and presented. It is very absorbing and captivating. The links and tutorials are interesting and educational. This has motivated me to rewrite my content following the concepts I am learning from the email series." - Mani Raju, www.fortuneinewaste.com