 In another blog post, we provide a detailed explanation of what WordPress plugins are all about and how you can use these to easily extend your site’s capabilities.
To view this article, go here:
In this step-by-step tutorial you will learn the importance of keeping all plugins up-to-date, how to easily update and uninstall your WordPress plugins, and discover some tools to help you better manage your plugins if you plan to manage multiple WordPress sites.
How To Update And Delete WordPress Plugins
Why Many WordPress Plugins Need Updating
New WordPress versions are constantly being released (about every 3-4 months) to fix bugs and address security issues and vulnerabilities found in older software versions, as well as to improve existing features or introduce new ones.
Depending on how many plugins you use on your site, you can expect to see at least some new updates for plugins each time a new version of WordPress is announced.
The reason for this, is because most WordPress plugins are created by external developers, so sometimes code in the newly-released WordPress version conflict with plugins that were created and tested to work with a previous version. When this happens, conflicts can sometimes occur.
Fortunately, most WordPress plugin developers (and the WordPress developer community itself) are quite proactive when it comes to making sure that plugins get updated when a new version of WordPress is released (if needed). All you have to do on your end, is keep your plugins up-to-date, which, as you will soon learn, is really simple to do.

Keeping your plugins up-to-date and deleting old plugins you no longer need is part of good WordPress site management and helps to avoid any potential errors and problems.
The WordPress step-by-step tutorial below explains how to automatically update and delete plugins without coding knowledge or skills needed.
Upgrading And Deleting Plugins Safely – Tutorial
WordPress uses a number of different ways to notify users when plugins need to be updated.
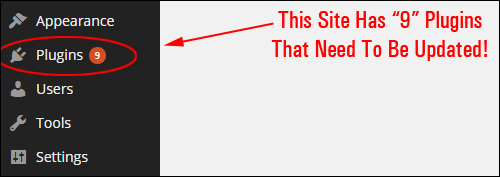
For example, you can immediately see how many plugins are out-of-date as soon as you log into your Admin area by looking at the “Plugins” menu.
For example, in the screenshot below, you can see that 9 WordPress plugins have older versions that need to be updated …
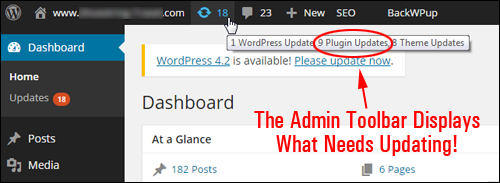
You can also view how many plugins need updating from your WordPress Notification Toolbar (as shown below, several plugins have to be updated) …
The Plugins section (Plugins > Installed Plugins) also tells you what plugins need to be updated …
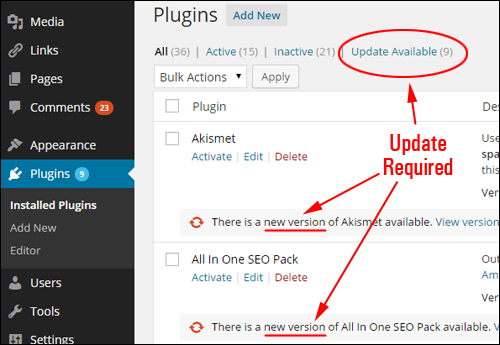
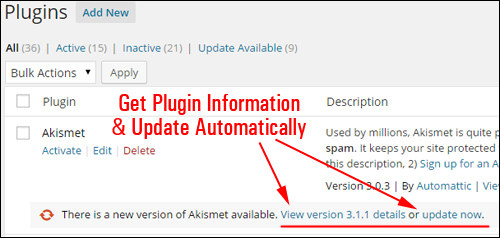
In addition to providing information about plugins that have updates available, the Plugins section provides links to the plugin developer sites and gives you the option to update the plugin individually or in bulk …
Let’s start by showing you how to update one WP plugin at a time.
Upgrading WordPress Plugins Individually

Always make a backup of your website before upgrading your blog or website.
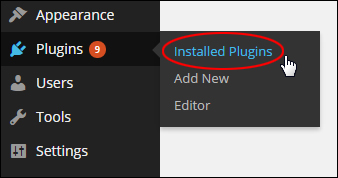
From your admin menu, select Plugins > Installed Plugins …
The “Plugins” screen will display in your browser. The table of plugins can go down your page for a while, depending on the number of plugins you have added to your blog …
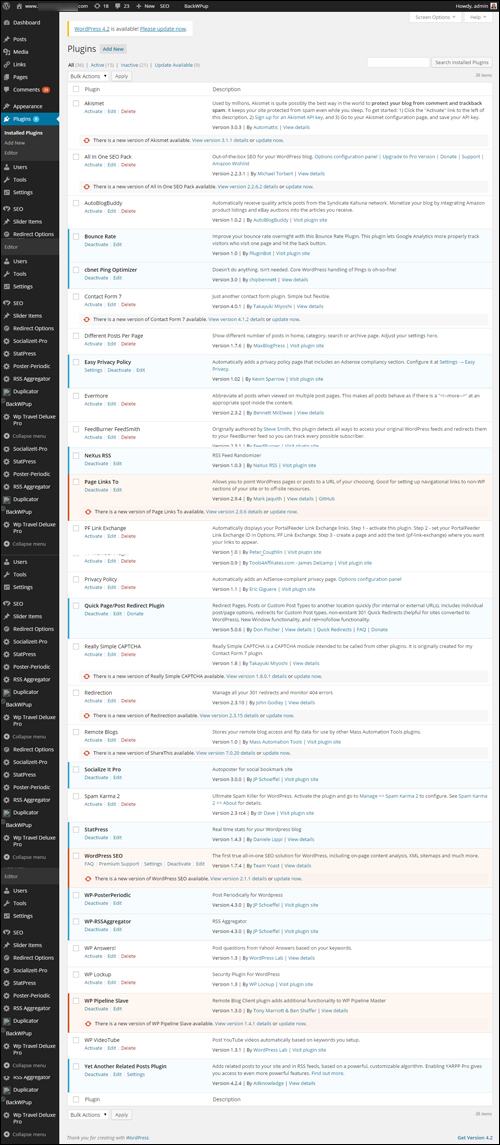
(WordPress Plugins Screen)

Useful Information:
If you have too many plugins installed and would like to reduce the number of plugins displaying on the screen, then click on the Screen Options tab at the top of your Plugins area and type in a smaller number of items per page (all plugins show up on the page by default), then click the ‘Apply’ button …
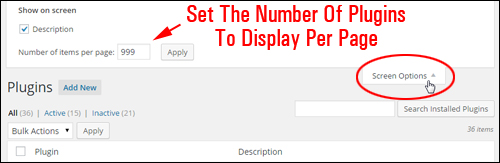
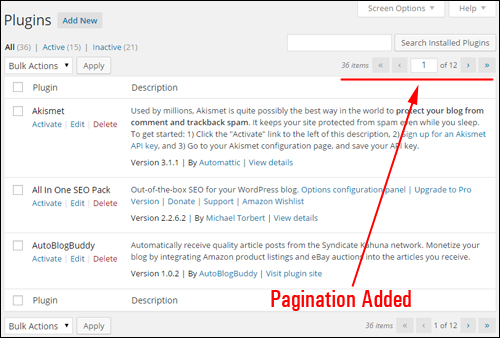
Your Plugins section will now be made more manageable with a pagination feature added. You can find an installed plugin by scrolling through the pages or using the “Plugin Search” feature …
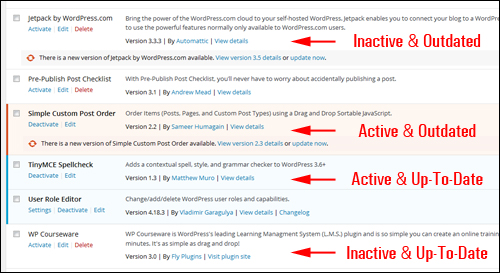
WordPress displays plugin information in different backgrounds depending on the status of your plugins (inactive vs. active and up-to-date vs. out-of-date) …
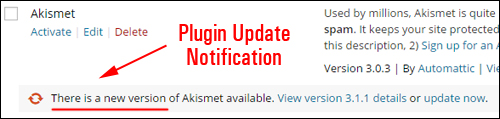
Plugins in need of upgrading have a distinctive notification message: “There is a new version of [Insert Plugin Name] available” …
Find the plugin that needs updating and click on the update now link …
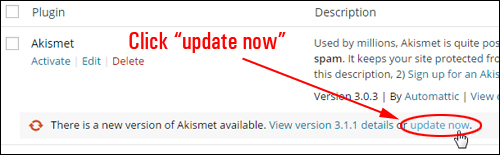
WordPress provides smooth & simple plugin updates, so that the process of updating your plugins takes place “behind the scenes” without leaving your Plugins area …
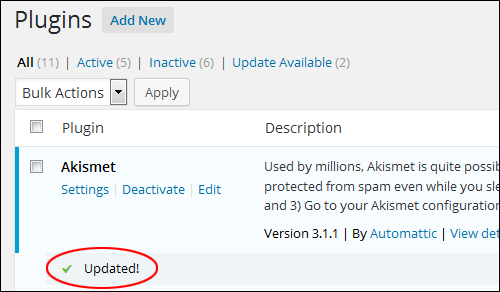
Repeat the above process for any other plugins on your site that need to be updated, or refer to the section below if you have many plugins that are out-of-date and would like to upgrade them all in bulk.
***
Now that you know how to upgrade individual WordPress plugins, let’s show you how to update a bunch of plugins simultaneously.
Bulk-Updating WordPress Plugins
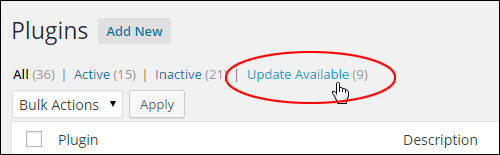
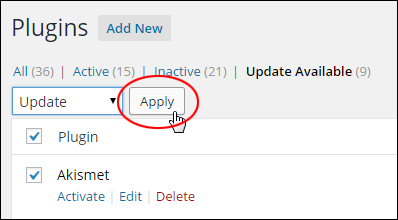
To upgrade multiple WP plugins in a single operation from your admin area, go to the “Plugins” section and click on the Update Available link on the menu at the top of the page …
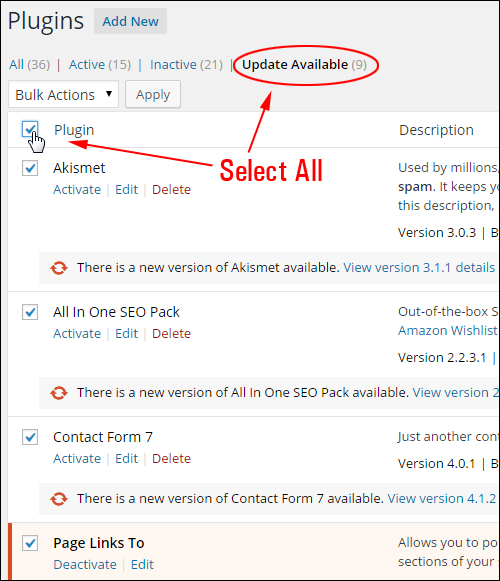
Tick the check box next to the Plugin column header to select all plugins at once, or select each plugin you want to update by checking their individual boxes …
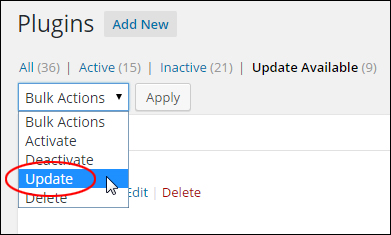
In the Bulk Actions dropdown menu above the plugin table, select Update …
Click Apply …
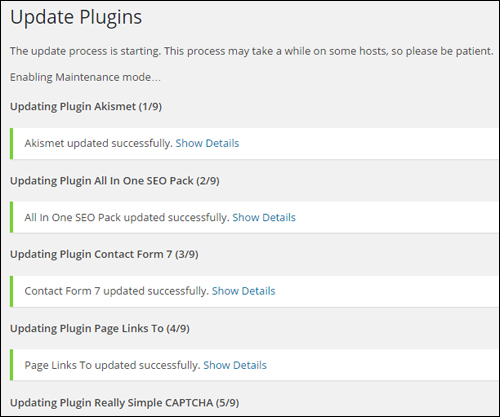
The plugins you have selected will begin the update process …
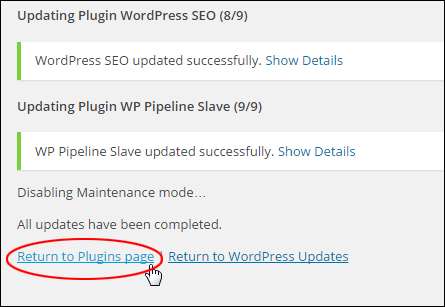
Once all plugin updates are finished, you can click on the Return to Plugins page link to return to your Plugins area, or choose another option from the WP dashboard menu …
Once your plugins are all up-to-date, the update reminders will disappear (i.e. the “at-a-glance” indicators and “There is a new version of XYZ plugin available” notices no longer display on your screen, toolbar and menus) …
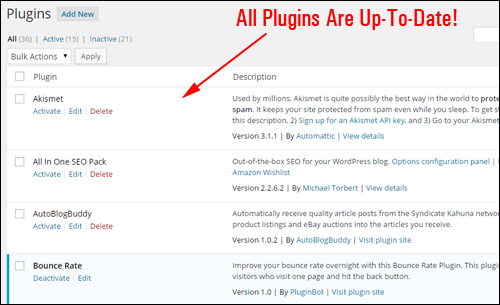
You have updated all plugins on your site to their latest version!
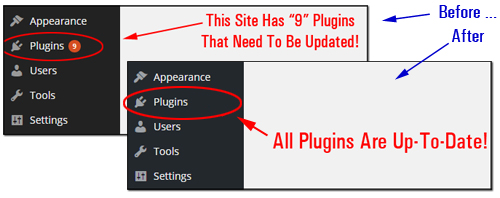
(When your plugins are all up-to-date, update notices no longer show)
Now that you know how to upgrade plugins, let’s show you how to safely delete plugins from your site or blog.
Deleting Plugins
At times, you may want to remove WP plugins that you no longer need or are no longer using on your site. This helps to conserve resources on your server and eliminates causes of some problems.
In this section, we show you how to safely uninstall unused plugins from your blog or site.
Always create a full back up of your site before installing, upgrading or deleting plugins, in case something goes wrong and you need to recover data or restore your site.
To remove a plugin, go to your dashboard menu and choose Plugins > Installed Plugins …
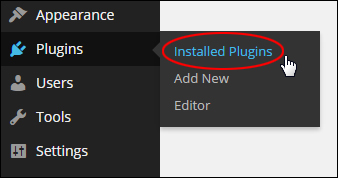
In the Plugins area, locate the plugin you want to delete and make sure it is deactivated.
Hint: Inactive plugins have a different colored background than active plugins and display an “Activate” link below the plugin name …
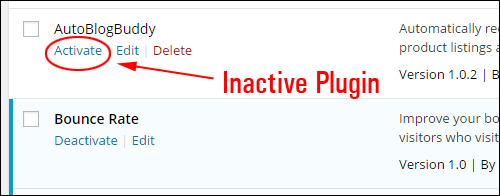
If the plugin is active, then click on Deactivate before proceeding with your plugin deletion …
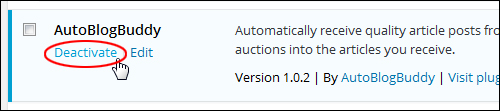
Next, click Delete …
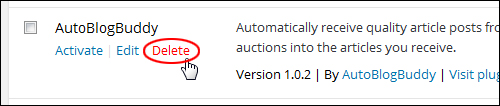
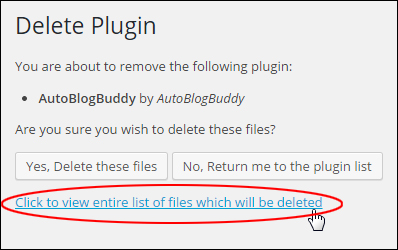
If you would like to have a look at all the files that will be deleted before going ahead, then click on the “Click to view entire list of files which will be deleted” link in the “Delete Plugin” screen …
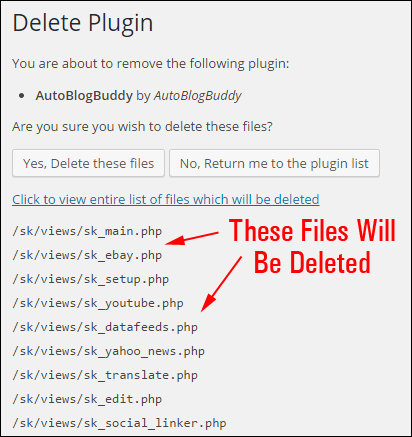
The entire list of files associated with the plugin that you are about to remove will be listed on your screen …
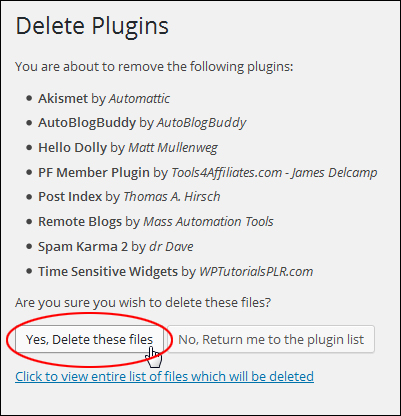
If you are absolutely certain that you want to go ahead and delete these plugin files, click on the Yes, Delete these files button …
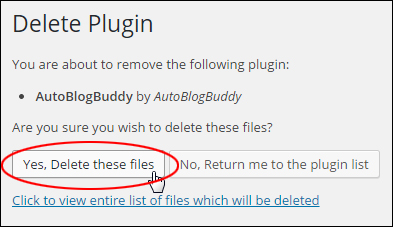
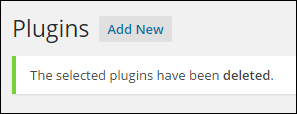
The selected plugin(s) will be deleted …
How To Safely Delete Multiple Plugins Simultaneously
You can delete all inactive plugins at once, or select a combination of active and inactive plugins to be removed.
Note: To delete any plugins that are currently active, you first need to deactivate them.
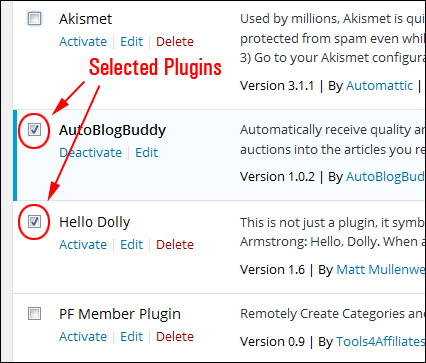
Go to the “Plugins” section and select all of the active plugins that you want to delete by either placing a tick next to their check box, or selecting the checkbox next to the Plugin column header to select all plugins (warning: this will deactivate all plugins) …
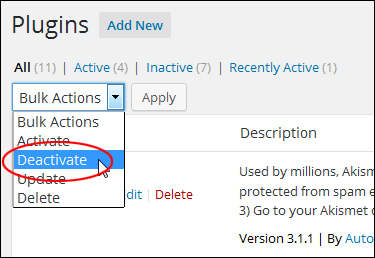
Next, select Deactivate from the Bulk Actions dropdown menu …
Click Apply …
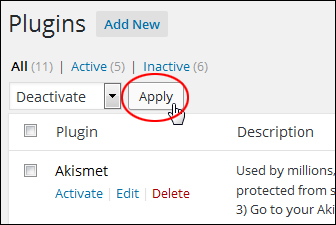
All selected plugins will be deactivated …
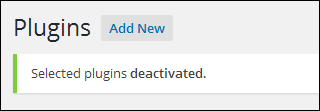
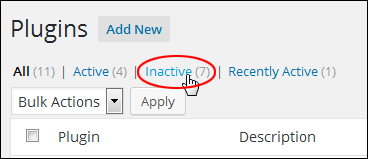
Once you have deactivated these plugins, click on the Inactive link on the menu at the top of the page …
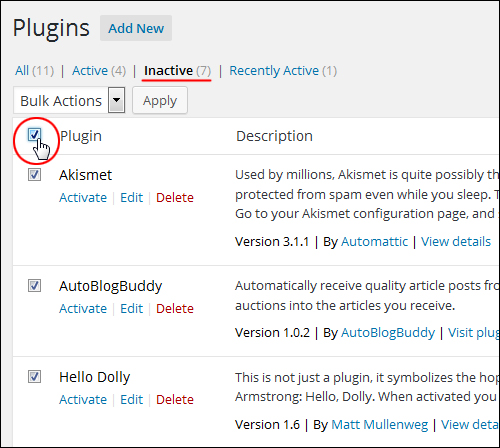
Select all of the plugins you want to delete by either placing a tick next to their checkbox, or click on the check box next to the Plugin column header to select and delete all inactive plugins …
Once you have selected all the plugins that you want deleted, choose Delete from the Bulk Actions drop-down menu …
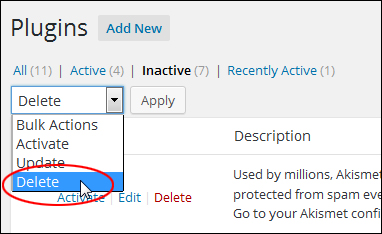
Click Apply …
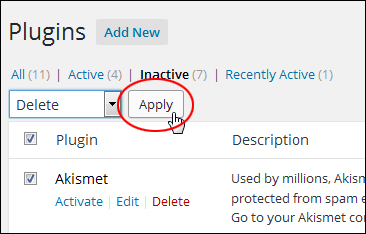
A list of all selected plugins will show up in the Delete Plugins screen. Click on “click to view entire list of files which will be deleted” to review all the plugin files that you are about to delete, or click on the Yes, Delete these files button if you are absolutely certain that you want to go ahead and delete all of the selected plugins …
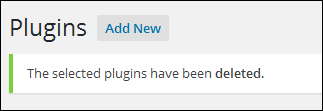
The plugins will be deleted …
WordPress Tools For Managing WordPress Plugins
As well as the methods shown above, you can install other WordPress plugins that help you manage your WordPress plugins.
Health Check & troubleshooting
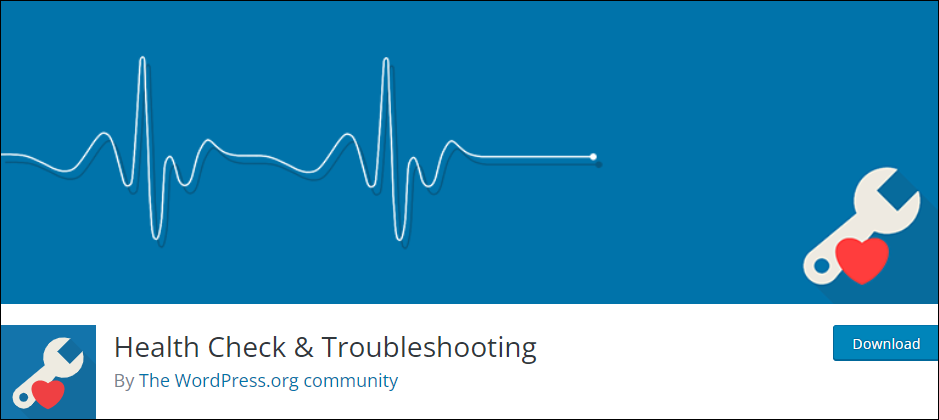
This plugin provides comprehensive checks for your WordPress installation to detect common configuration errors and known issues. It also enables plugins and themes to add their own custom checks.
The debug section allows you to easily gather information about your WordPress and server configuration, which can be shared with support representatives for themes, plugins, or on the official WordPress.org support forums.
The troubleshooting feature allows you to initiate a clean WordPress session, where all plugins are disabled and a default theme is used, but only for your user account until you choose to disable it or log out.
The Tools section offers the ability to check for file tampering in WordPress, test email-sending functionality, and verify plugin compatibility with future PHP version updates.
For more details, go here: Health Check And Troubleshooting
Managing WordPress Plugins On Multiple Sites
As discussed earlier, when plugin updates are released, the best practice is to update the plugin as soon as possible to its latest version.
What if you run multiple WordPress sites using the same plugin?
Typically, you would need to log in to every site individually and update the plugin manually from the site’s admin dashboard.
If you manage or plan to manage multiple sites, this process can become very time-consuming, especially as plugins get updated quite often.
If you manage multiple WordPress sites, you can install, update, and delete multiple plugins on all your sites automatically and simultaneously using WordPress site management tools, like the one below:
WPMU DEV’s The Hub
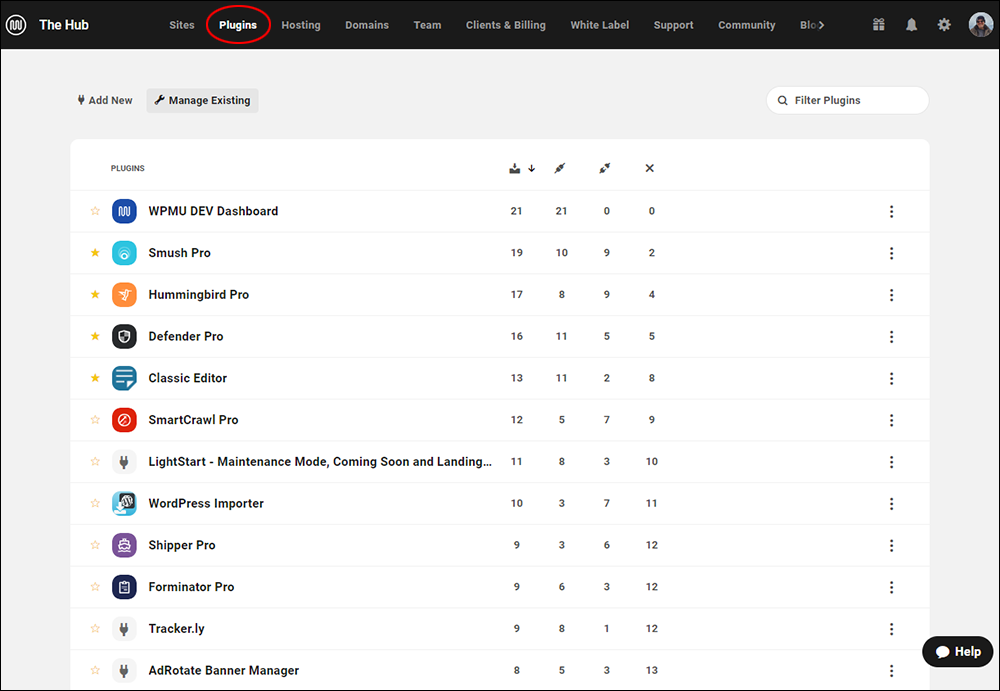
The Hub lets you manage unlimited WordPress sites easily and effectively from one central command center.
The Updates section of The Hub shows you exactly what needs updating on each of your managed site(s), including plugins, themes, and core software updates.
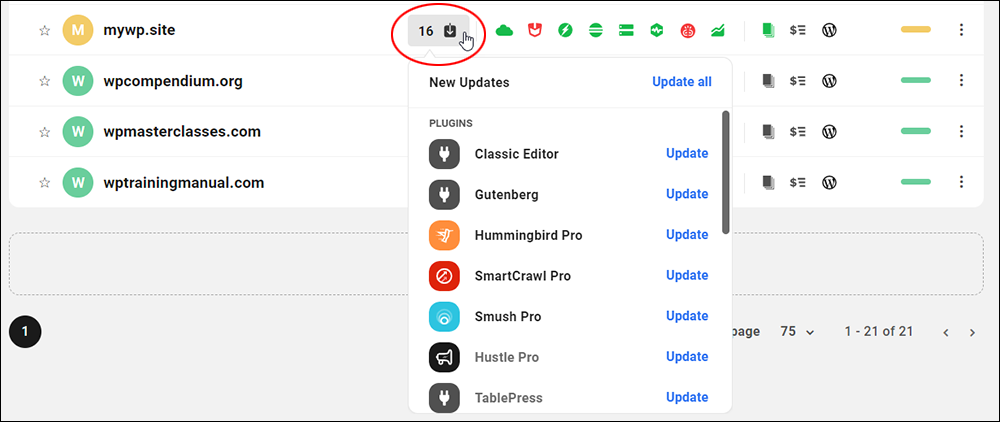
The Hub’s Updates features display how many outdated components need updating on your site(s).
You can choose to either update all your plugins at once or update them individually with just a few clicks. Best of all, you don’t need to log into every site separately to perform your plugin updates.
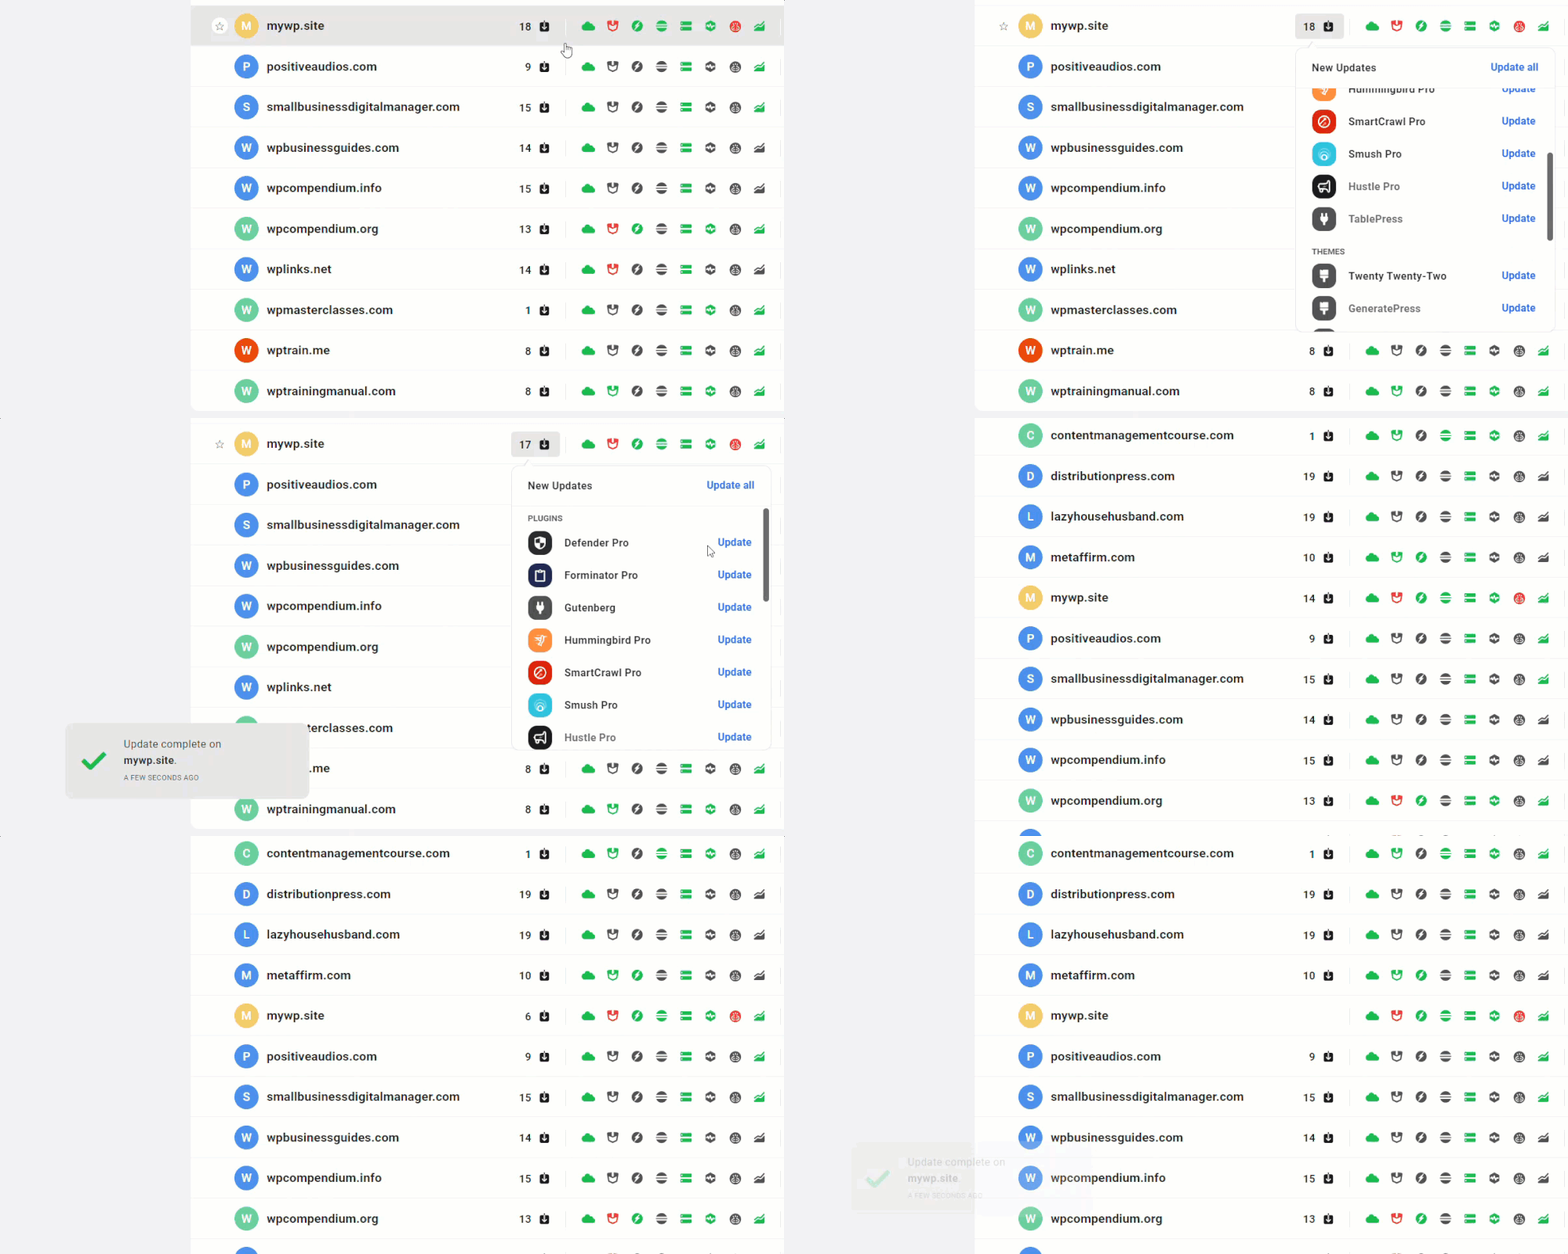
Update everything at once or perform individual updates directly in The Hub with a few clicks.
This can be a real time-saver when managing multiple WordPress sites, especially when WordPress releases a new version and you have to update many plugins and themes to prevent potential issues from happening.
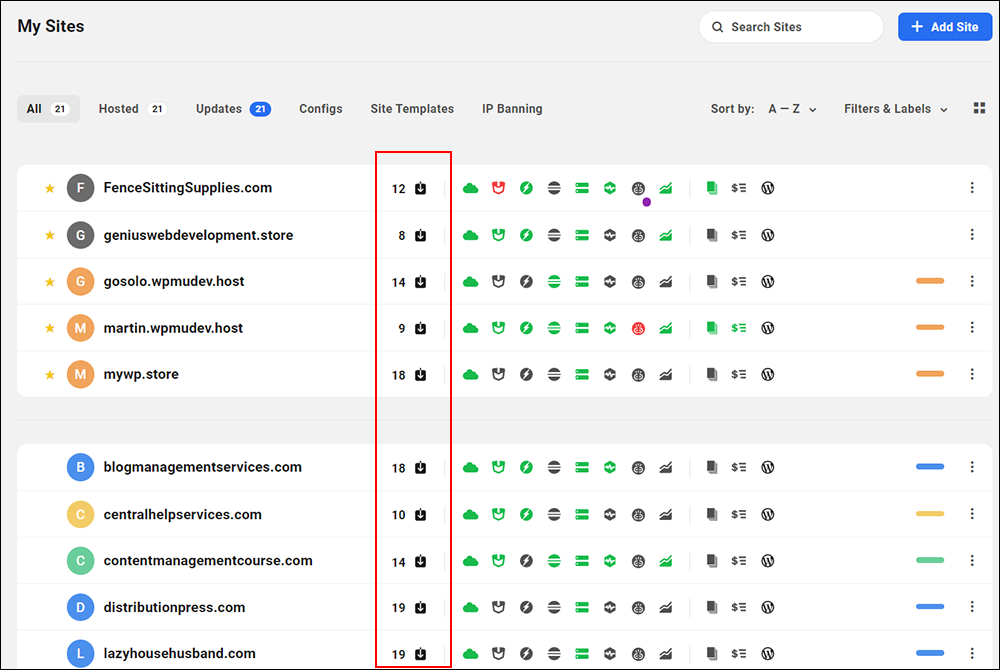
You can read our comprehensive article on managing multiple sites effectively using the Hub or visit WPMU DEV to learn more and try The Hub for free.
***
"Your training is the best in the world! It is simple, yet detailed, direct, understandable, memorable, and complete." Andrea Adams, FinancialJourney.org