 This tutorial is part of our WordPress configuration tutorial series, where we show you how to set up and configure your WordPress site or blog with no coding skills required.
***
After configuring your WordPress General Settings, the next step is to configure your WordPress Writing Settings.
This section controls a number of options and settings related to creating and editing. This includes your site’s default Post Category and the default Post Format, the Post via email feature and the update services that WordPress notifies whenever new content is published on your website.
Complete the tutorial below to learn how to configure your WordPress Writing Settings.
Configuring WordPress Writing Settings – Step-By-Step Tutorial
Select Settings > Writing in your dashboard menu …
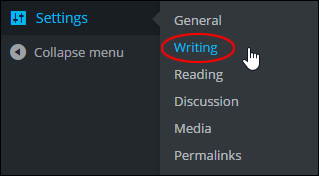
(WordPress Settings – Writing Settings)
This brings up the ‘Writing Settings’ screen in your browser …
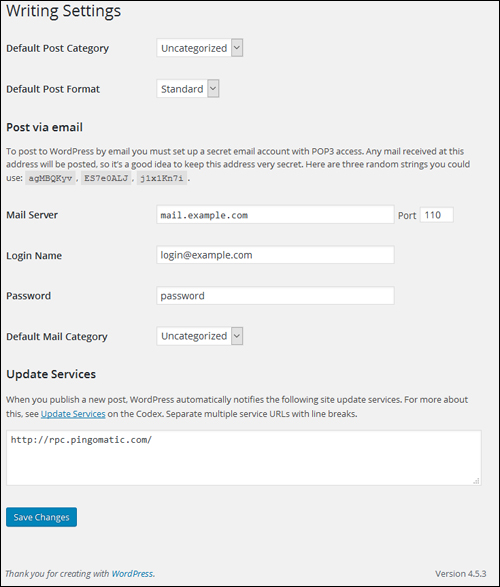
(WordPress – Writing Settings)
WordPress Writing Settings
The first couple of options in the ‘Writing Settings’ screen affect your Post/Page editor, while the rest of the settings in this section controls external publishing methods.

(Writing Settings – Default Post Category & Format Settings)
Default Post Category
Use the drop-down menu in this section to select the default Post Category. The default Post Category is the category that WordPress will assign to a new post if you do not assign a specific category when writing the post.
Note: If you delete a Category, any posts that were assigned to that Category will be reassigned to the default post Category.
To learn more about WordPress Post Categories, see the tutorial below:
![]()
After WordPress 4.3, the ‘Formatting’ section is no longer being added to new WordPress installations. The feature is still there, but it is not visible on the ‘WordPress Writing Settings’ screen …

(Writing Settings – Formatting)
WordPress automatically converts all of the emoticons in your posts into graphical smilies.
To learn more about using emoticons in WordPress (including how to disable this feature), see the tutorial below:
Default Post Format
Use the drop-down menu in this section to select the default Post Format. Post Formats are used by themes to create different styling for different types of posts …
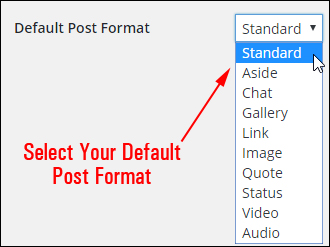
(Default WordPress Post Format)
Note: This setting will only be visible if the currently activated theme supports Post Formats.
To learn more about using Post Formats, see the tutorial below:
Post via email
This option lets you set up your site to publish emails as posts. The way this works is that you send an email to a specific address you’ve set up for posting content to your WordPress site via email, and WordPress adds the content of your email as a new post …
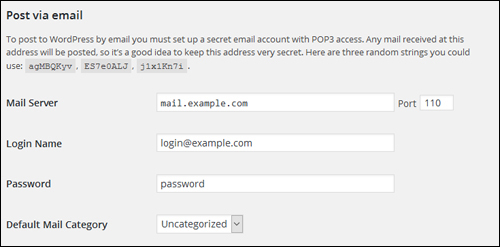
(Post via email)
The following message is displayed at the beginning of the Post via email section:
“To post to WordPress by email you must set up a secret email account with POP3 access. Any mail received at this address will be posted, so it’s a good idea to keep this address very secret. Here are three random strings you could use …”
To enable the post by email feature, you will need to complete the following fields:
- Mail Server – A mail server receives emails on your behalf and stores them for retrieval. Your mail server will have an address like mail.example.com.
- Port – Servers typically use port 110 to receive requests related to emails. If your mail server uses a different port (see your webhosting provider for this), then use that port number into this field.
- Login Name – If, for example, the email address that you will be using for posting by email is remote@example.com, then ‘remote’ is the Login name.
- Password – Enter the password for the above email address into this field. WordPress generates three random example passwords that you can use at the beginning of this section.
- Default Mail Category – WordPress will assign the category you specify here to all posts published via the Post by email feature. You can also create a new post category specifically for posts that you plan to publish via email.
![]()
To learn how to set up and use the post by email feature, see this tutorial:
Note: The Post via email feature is optional. You don’t need to use this feature to post content to your WordPress site. Just add content normally as described in this step-by-step tutorial: How To Create A New WordPress Post.
Update Services
As explained in our WordPress Traffic Automation Blueprint, one of the most powerful features of using WordPress is its ability to notify external services like directories and search engines whenever new content gets published on your site …
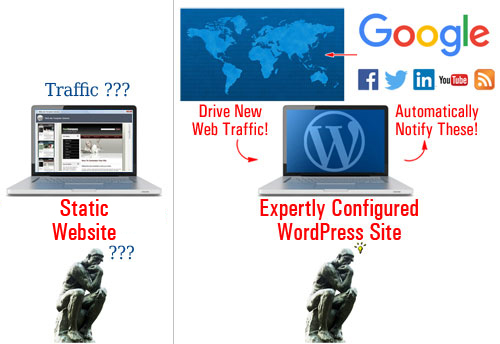
(WordPress can automatically notify directories and search engines when new content gets published on your site!)
When you publish a new post, WordPress automatically notifies the update services of the sites listed in the Update Services box …
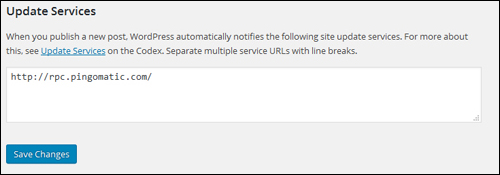
(Update Services)
By default, WordPress only adds one service to the ‘Update Services’ box with a new installation (http://rpc.pingomatic/).
To take full advantage of this powerful feature, however, you will want to add more update services as described below.
Go to Settings > Writing> Update Services and paste your list of ping service URLs (one per line) into the Update Services area …
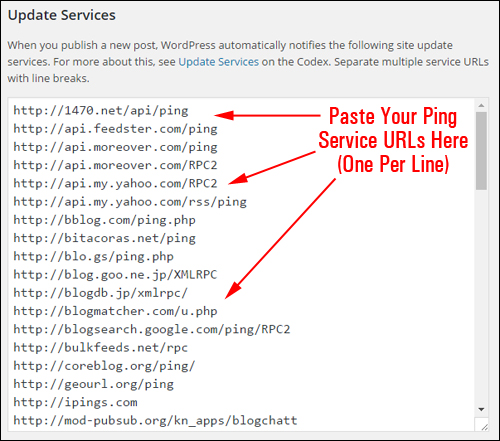
(Paste your ping service URLs in this box)
When entering your Ping service URLs, remember to separate multiple entries with line breaks.
![]()
We have prepared a comprehensive list of reliable and authoritative ping services for your WordPress site or blog. Copy and paste the URLs (one per line) from the zipped file below into the “Update Services” box inside your Writing Settings screen …
![]()
Note: If you block your WordPress site from displaying to search engines, the message “WordPress is not notifying any Update Services because of your site’s visibility settings.” will display instead of the update services list …

(Update Services will not display if you prevent search engines from indexing your site.)
Click Save Changes to update your settings …
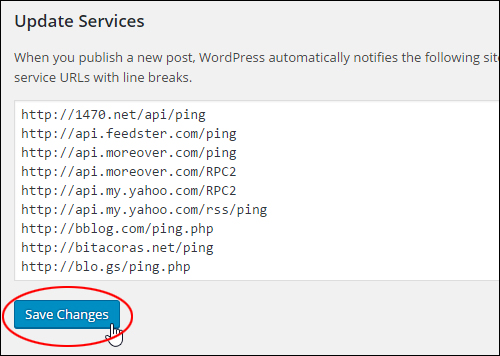
(Save your changes to update your settings)
WordPress Writing Settings – Additional Notes
Installing plugins and themes on your WordPress site can add new settings to your WordPress Writing Settings section …
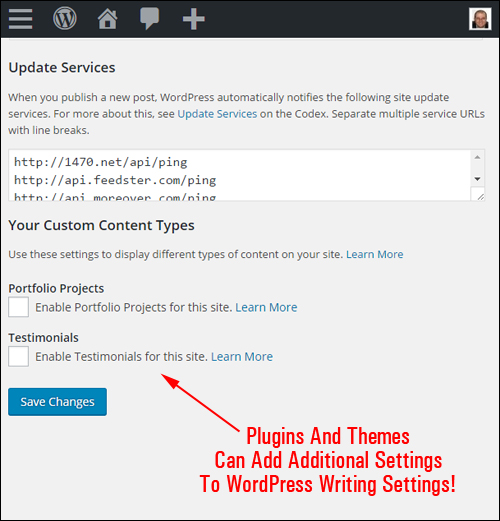
(Plugins and themes can add additional options to the WordPress Writing Settings section)
Congratulations! Now you know how to configure your WordPress Writing Settings. The next step, is to configure your WordPress Reading Settings.
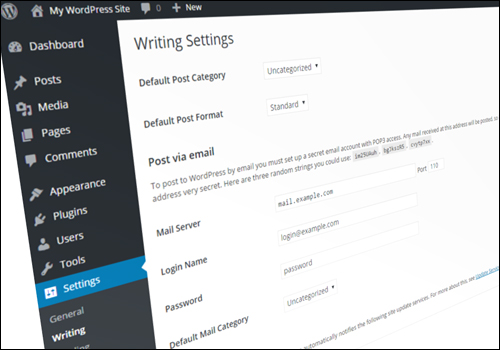
Next Step: Configure Your WordPress Site: Reading Settings
***
"I was absolutely amazed at the scope and breadth of these tutorials! The most in-depth training I have ever received on any subject!" - Myke O'Neill, DailyGreenPost.com
***