 This tutorial was created using an earlier version of WordPress and may contain outdated information. Please bookmark this page as we will be updating this tutorial soon! To be notified of updates to our content, subscribe to our updates list (see sidebar), or Like our Facebook page.
***
WordPress Content Management
This tutorial is part of our WordPress Management tutorial series. In this tutorial, you will learn how to delete unwanted content (like comment SPAM) and unnecessary data from your site before performing your file backups and installation upgrades.
Depending on how your WordPress site has been configured, you may find that comment spam is regularly being posted to your posts or pages. Even with anti-spam filters installed, it’s hard to stop spam altogether. You may also find that there are inactive plugins or old posts or pages with obsolete information that you don’t need on your site anymore.
Every time you perform regular maintenance of your WordPress site, it’s a good idea to go through and delete all comment spam and get rid of unnecessary data from your site before you back up your database. Deleting these from your site before backing up your MySQL database not only helps to reduce your backup file size but more importantly, if you have to restore your data, you won’t be reimporting things like spam and unnecessary things into your site.
Deleting SPAM & Unwanted Data – Step By Step Tutorial
Preventative Measures
One of the best ways to reduce unnecessary data like comment SPAM from your WordPress site is to install plugins like Akismet that effectively prevent many of the more common Spam methods from getting through to your site in the first place.
To learn more about installing and using plugins like Akismet to help prevent comment spam, see the tutorial below:
Deleting Comment Spam
Log into your WordPress site administration area and go to your dashboard section. The summary section of your dashboard shows if there is any comment spam on your site.
To delete spam, either click on “Spam” in the summary view box of your dashboard …

Or click on “Comments” in your site’s admin navigation menu …

You will be taken to the Comments section …

You have a number of options to delete Spam in the comments section:
1 – To let WordPress decide what is and isn’t spam, click on “Empty Spam” …

This will delete all entries in the Comments > Spam section …

2 – If you want to delete most, but not all of the entries in this section, first select all entries, then uncheck any individual items that you do not want to delete.
To manually select and delete all entries, click the checkbox next to “Author” in the column heading, then select “Move To Trash” from the drop down menu and click on “Apply”.

3 – To manually select and delete individual entries, click the checkbox next to the entry or entries you want deleted. Select Move To Trash from the drop-down menu and click on “Apply”.
If you have moved any entries to the Trash, you will have the option to either restore your entries to the “Comments” section or delete them permanently …

Deleting Plugins
To delete or remove a plugin from your site, make sure that the plugin is inactive (deactivated).
Go to the plugins section of your site by clicking on the Plugins section of your WordPress administration menu …

Find the plugin you want to remove from your site and make sure it’s deactivated …

You now a number of options for deleting the unwanted plugin from your site:
Deleting Plugins Inside WordPress
If your hosting/server configuration allows you to delete WordPress plugins directly from within your WordPress administration area, then simply click on the Delete link below the plugin name in the “Plugins” section …

If you cannot delete a plugin from inside your WordPress admin area, then delete the plugin using either the FTP or cPanel procedures as shown below:
Deleting Plugins Using FTP
To delete an inactive plugin from your WordPress site using FTP (File Transfer Protocol), launch your FTP application …

(image above shows FireFTP add-on for Firefox browser)
Navigate to the “plugins” folder in your server (located inside the “wp-content” folder), and locate the plugin you want to delete …

Delete the plugin from the server (in the example shown below, this was done by right-clicking with the mouse on the plugin folder and selecting “Delete” from the menu – this may work differently for you depending on your FTP application) …

The plugin will be removed from your site.
Deleting Plugins Using cPanel
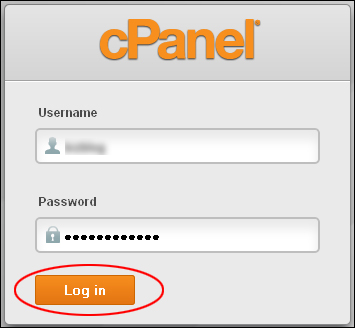
To delete an inactive plugin from your WordPress site using cPanel, log into your cPanel account …

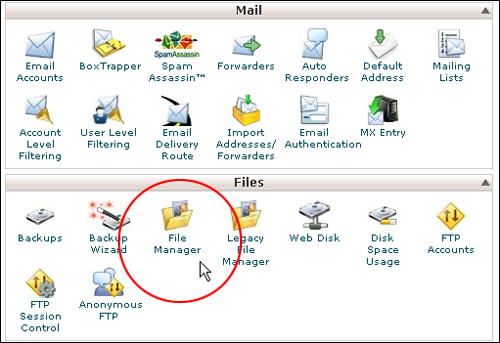
Double-click on the “File Manager” folder inside your cPanel administration to open it …

Navigate to the “plugins” folder in your server (located inside the “wp-content” folder) and locate the plugin you want to delete. Click once on the filename to select it …

Delete the plugin from the server by clicking on the “Delete” button, then clicking the Delete File(s) button when a confirmation pop-up window appears …

The plugin will be removed from your site.
To learn more about deleting plugins, see the tutorial below:
Deleting Posts And Pages
Deleting posts and pages that you no longer want or need is a straightforward operation.
To delete a post, log into your WordPress administration area and click on Posts in the main navigation menu …

Select the post you want to delete and click on the Trash button to delete the item …

Repeat this process to delete any other unwanted posts from your site.
To delete a page, log into your WordPress administration area and click on Pages in the main navigation menu …

Select the page you want to delete and click on the Trash button to delete the item …

Repeat this process to delete any other unwanted pages from your site.
To learn more about deleting unwanted posts and pages, see the tutorials below:
Managing Your WordPress Content – Additional Steps
As well as performing the maintenance tasks listed above, there are some additional steps you can take to eliminate unwanted or unnecessary content from your site:
Clean Up Your WordPress Installation
If you didn’t clean up your WordPress installation during the WordPress Configuration stage, then do it now.
To learn how to clean up your WordPress installation, see the tutorial below:
Check For Dead Links
Over time, some links on your posts or pages pointing to external sites, pages, and/or resources may become obsolete. This can happen for a number of reasons, e.g. site owners move or delete their pages, terminate their sites, change domain names, etc.
As you have no control over this, it’s a good idea to check for dead or broken links on your site every few months or so. You can also automate this process using plugins.
To learn more about finding and fixing broken links, see the tutorial below:
Delete Post Revisions
WordPress automatically saves your post revisions every time you add a new post or page or edit an existing one. After a while, this can add a lot of unnecessary data to your site. Depending on how often you add content to your site, deleting excess post revisions can help to remove unwanted data and reduce the size of your WordPress database.
To learn more about deleting excess post revisions, see the tutorial below:
Clean Up Your WordPress Database
All data from your WordPress site is stored in a database on your server. Over time, the continuous process of adding, editing, and deleting data, installing and removing plugins, themes, images, etc. to your WordPress database can affect its performance. Cleaning up, backing up, and maintaining your database optimized can help to improve your site’s performance.
Cleaning up your WordPress database and making WordPress database backups is covered in detail in the next section of this tutorial module.
Next Step:
Now that you know how to keep your site free from spam and other unwanted data from your site, the next step is to learn how to clean up your database and perform MySQL data backups.
To learn how to perform MySQL data backups, see the tutorial below:

(Source: Pixabay)
***
"If you're new to WordPress, this can stand on its own as a training course and will stay with you as you progress from beginner to advanced and even guru status." - Bruce (Columbus, Ohio)
***