Typically, when purchasing premium WordPress themes, you will download a zip file containing the theme that requires uploading to your WordPress installation directory before you can activate and use it.
In this step-by-step tutorial, you will learn how to upload and install WordPress themes manually on your website or blog.
To learn more about using WordPress themes and the benefits and advantages of choosing WordPress themes over traditional web design templates, see the tutorial below:
To learn how to upload and install a WordPress theme using the WordPress Dashboard, see the tutorial below:
How To Install WordPress Themes Manually: Step-By-Step Tutorial
Before installing a theme on your WordPress site, download the theme’s zip file to your hard drive.
You can download Premium WordPress themes from commercial theme developers, or visit the WordPress Theme Directory to download free themes to your hard drive …

![]()
We recommend creating a folder on your hard drive to store all of your WordPress-related files (e.g. updates, plugins, themes, etc …). This will help you keep things organized and save you time managing your site.
If you need a compression utility to download and extract zip files, go here:
***
Download the theme you want to install into your WordPress Themes folder …

After the zip file has downloaded, extract the theme files into your WordPress Themes folder …

You should now have two versions of your theme files:
- The original zipped (compressed) files
- The unzipped (uncompressed / extracted) files

In the section below, you will learn two different methods to install WordPress themes manually to your site, which require using either the compressed or the compressed theme files, depending on which installation method you choose …

The first method described below shows you how to use FTP to upload your theme files to your server. The second method is faster and uses cPanel File Manager.
Note: If you need help understanding how to use FTP or cPanel to upload files to your server, please see this tutorial.
How To Upload A WordPress Theme Using FTP
Open up your FTP client and select the theme folder you want to upload to your site …

With your theme folder still selected, connect to your server and do the following:
(1). In your server window, navigate through the folders until you find the “themes” folder inside the “wp-content” directory. Select this folder as the destination directory
(2). Click the upload button to
(3) begin transferring files from your computer hard drive to your server …

Now that your theme files have been uploaded to your server, the next step is to log into your WordPress admin area to make sure that your theme has been installed correctly and to activate your new theme.
Skip the section below if you are using FTP to upload your files and go to the section titled “Verify That Your WordPress Theme Has Been Uploaded” at the bottom of this page to continue …
How To Upload A WordPress Theme Using cPanel
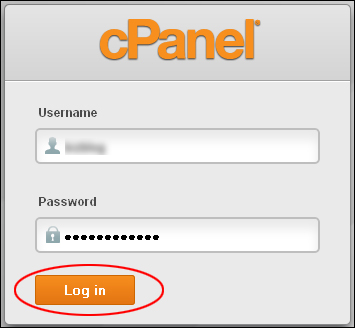
Log into your cPanel account …

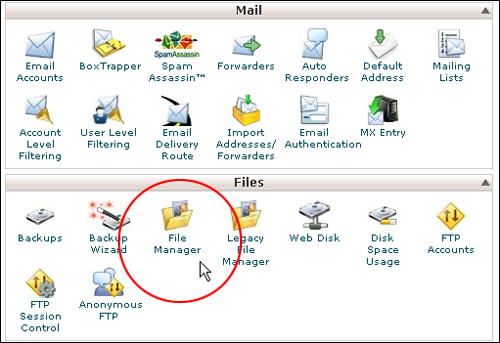
Go to Files, and click on File Manager …

Drill down to the “themes” folder and click the Upload button in the File Manager menu …

Click Browse to locate your file …

Locate and select the compressed (zipped) version of your WordPress Theme and click Open to begin importing the file into your server …

After the file has finished uploading, click Reload to refresh your screen …

You should see your uploaded zip file listed in the File Manager window. Select the file you have just uploaded and then click Extract …

When the “Extract” screen pops up on your browser, click Extract File(s) …

After all of your files are extracted, click Close to exit the “Extraction Results” window and return to the main File Manager screen …

The zipped file containing your uploaded theme is no longer required. Select the .zip file in the File Manager list and click Delete to remove the file from your server …

Now that your file has been uploaded to your server, the next step is to log into your WordPress admin area and make sure that your theme has been uploaded and installed correctly.
Verify That Your WordPress Theme Has Been Uploaded Correctly
Log into your WordPress administration area …

In your WordPress dashboard menu, select Appearances > Themes …

Your newly uploaded theme will show up in the “Available Themes” section of the Manage Themes tab …

Click Activate to make your newly uploaded theme your site’s current active theme …

Congratulations! Now you know how to manually upload and install a WordPress theme on your website or blog.
***
"I have used the tutorials to teach all of my clients and it has probably never been so easy for everyone to learn WordPress ... Now I don't need to buy all these very expensive video courses that often don't deliver what they promise." - Stefan Wendt, Internet Marketing Success Group