![]()
*** Important ***
WordPress introduced a new content editor in version 5.0 called Gutenberg.
For tutorials on how to use the new Gutenberg content editor, go here:
***
When you upload media files to WordPress like images, videos, audios, documents, etc., these can be managed from your Media Library and inserted into your site’s content.
You can perform a number of basic image edits in WordPress, including rotating, cropping, and resizing of images.
In this tutorial, you are going to learn how to edit images in the WordPress Media Library.
Editing Images In The WordPress Media Library: Tutorial
Once an image is uploaded to the WordPress Media Library, you can perform a number of basic editing functions, as you will see shortly.
To edit an image immediately after it has been uploaded to your Media Library, click on the Edit link next to the image …

You can also edit an image by hovering your mouse over an image in the Media Library table and clicking on the Edit link …
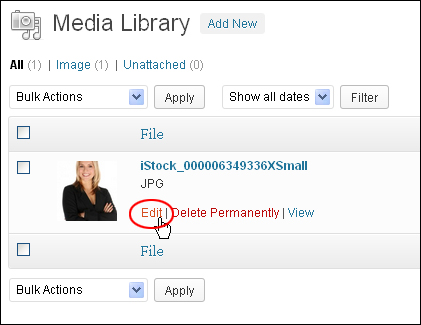
This opens up the Edit Media screen …
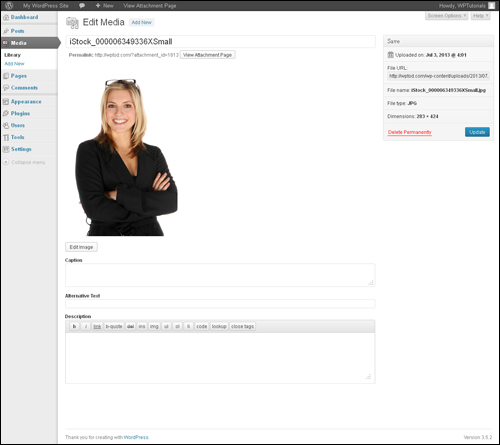
The Edit Media screen allows you to manage all of the information associated with your media.
Just to summarize, you can reach the Edit Media screen from:
- The Media Library by clicking the Edit link next to the item you want to edit.
- The Edit link when adding new media to your site, or
- When inserting media into your pages or posts.
Editing Image File Attributes
In the Edit Media screen, you can perform the following basic edits:
- Change the title of your image
- Edit the Permalink of your media file attachment page.
- View the Attachment Page associated with the file
- Edit your image further (see next section below)
- Add a caption to your image
- Add an alternative text (alt text) to the image
- Add an image description

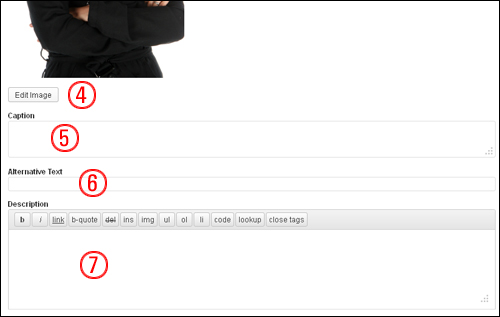
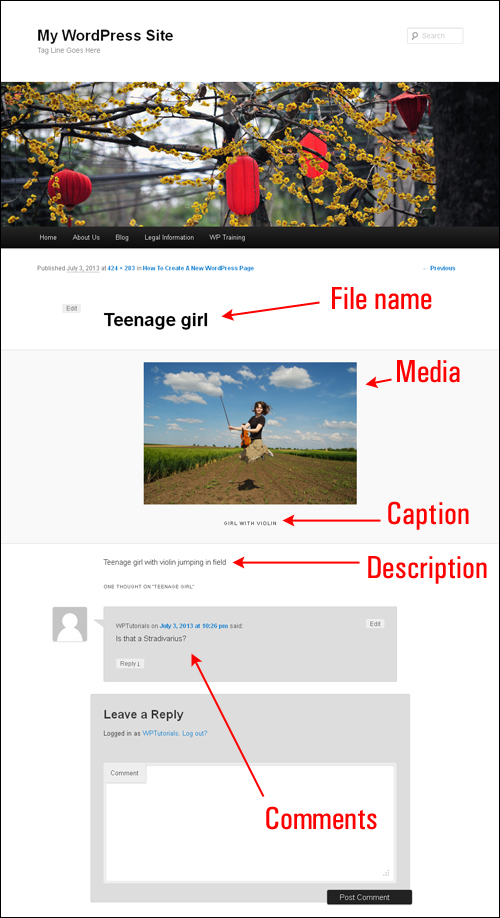
To help you get an idea of what the above fields do, have a look at the example screenshot below:
When you edit an image in the Edit Media screen and add the information below …
 This is what the above will look like when you view the file’s attachment page …
![]()
Note: Comments added to media files can be managed in the Comments section …

Also, see the More Edit Media Options section further below for additional options relating to using comments in your media files.
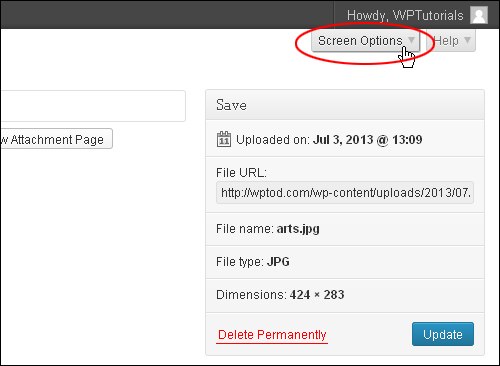
Another important section of the Edit Media screen is the Save meta box. The Save meta box displays information about your media, such as the file upload date, file URL, the actual file name (i.e. not the file title), file type, and image dimensions …

This section also allows you to Delete Permanently or Update any changes you have made to your image …

Editing Image Files
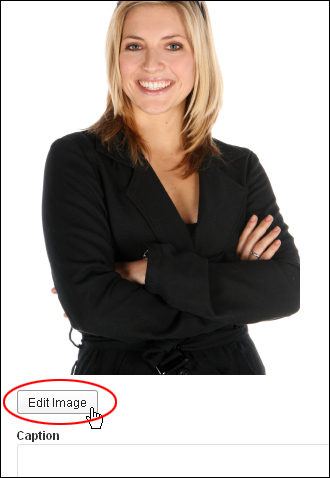
In addition to editing image file attributes such as the title, caption, description, etc., you can also make some basic edits to the image file itself. To edit an image file in the Edit Media screen, click on the Edit Image button below the image …
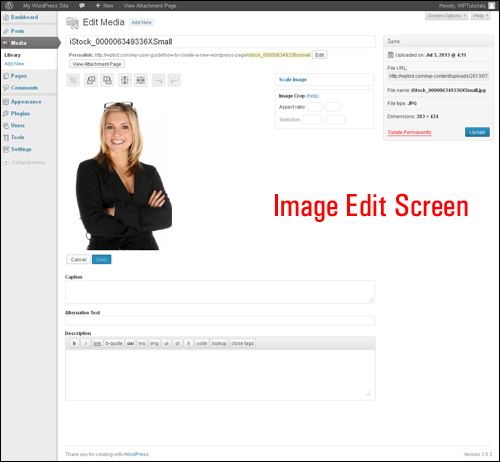
The Image Edit screen will appear …
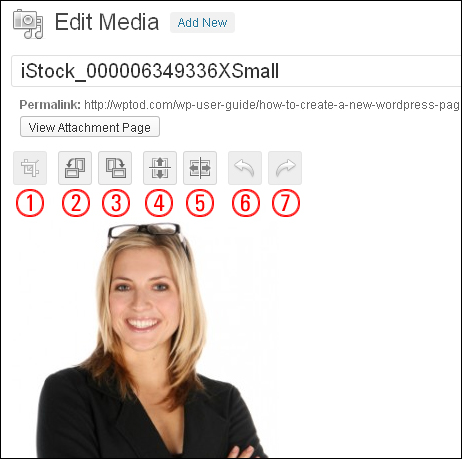
Above the image, you will see a row of buttons giving you access to several useful image editing controls …
Note: The edits you make to your image in this section are non-destructive — you can restore the image to its original (uploaded) specifications at any time.
Image Editing Controls
Here are the various controls available to you in Edit Image mode:
- Crop Image Tool: Click directly on the image and drag while holding the left mouse button down to draw a selection box around the area you want to crop. You can use your mouse cursor to grab the selection box and fine-tune its shape, as well as use keyboard shortcuts to fine-tune your crop selection. When you are happy with your selected area, click on the Crop icon to crop your image.
- Rotate Image Counter-Clockwise: Click this icon to rotate your image counter-clockwise.
- Rotate Image Clockwise: Click this icon to rotate your image clockwise.
- Flip Image Vertically: Click this icon to flip your image vertically.
- Flip Image Horizontally: Click this icon to flip your image horizontally.
- Undo Edit: Click this icon to undo your last edit.
- Redo Edit: Click this icon to restore your last edit.
Note: Clicking the Undo / Redo buttons successively steps you through previous edits.
Scale Image
Click the Scale Image link …
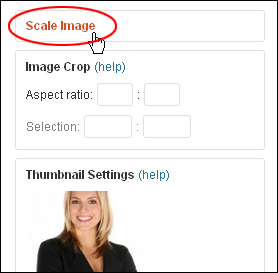
You can proportionally scale the original image by changing one of the input fields (width or height), and then clicking on the Scale button …

Notes:
- For best results, the scaling should be done before performing any other operations on it like crop, rotate, etc.
- If you make the image larger than the original, your image may become fuzzy.
- The original dimensions (e.g. 1024×768) are displayed above the input fields for entering new dimensions.
After clicking Scale, your image will be saved and scaled to the new dimensions …
 After scaling an image, a Restore Original Image link appears under the Scale Image link. Click this link if you would like to restore your image to its original dimensions …
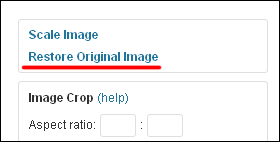
A button will then appear below the link. You can discard any changes you have made and restore the original image by clicking on the Restore image button. Note: any previously edited copies of the image will not be deleted …

Image Crop
You can use this feature in combination with the Crop Image Tool button by first drawing a desired crop selection box around the image, then using the Image Crop tool to make the following precise adjustments.
- Crop Aspect Ratio: Specify the crop selection aspect ratio then hold down the Shift key while dragging to lock it. You can use values like 1:1 (square), 4:3, 16:9, etc. If there is already a crop image selection over the image, then specifying the aspect ratio will automatically adjust the selection.
- Crop Selection: Once the selection process has started, the selection can be adjusted by entering new values (in pixels) into these fields. Note: these values are scaled to approximately match the original image dimensions. The minimum selection size equals the thumbnail size as set in your WordPress Media Settings.
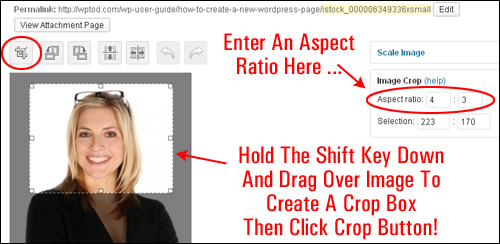
If you need help with this section, click on the (help) link …

Additional information about the Image Crop section will be displayed. To close this information panel, just click on the (help) link again …
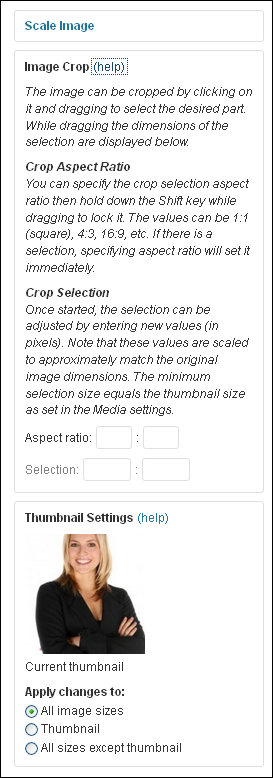
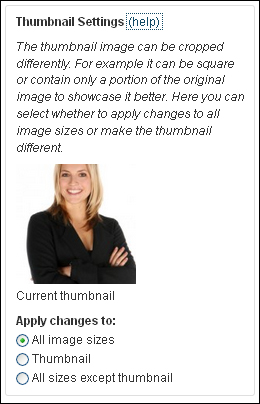
Thumbnail Settings
You can select whether your image edit applies to one of the following:
- All image sizes
- Thumbnail
- All sizes except thumbnail
If you need help with this section, click on the (help) link …

Additional information about the Image Crop section will then be displayed. To close this information panel, just click on the (help) link again …
When you have finished editing your image, click on Save to save your changes and return to the Edit Media screen, or click Cancel if you don’t want to apply any of the changes you have made …

After making changes to your image file, you can view its attachment page by either:
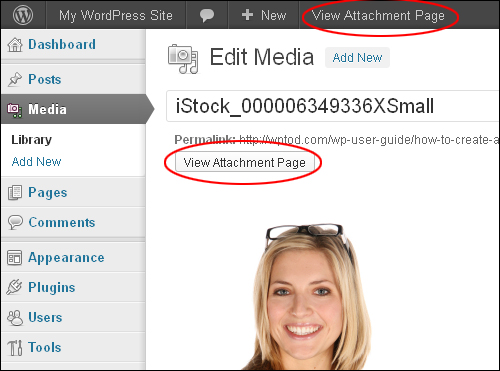
Clicking on the View Attachment Page buttons in the Edit Media screen …
Or clicking on the View link associated with the image in your Media Library …

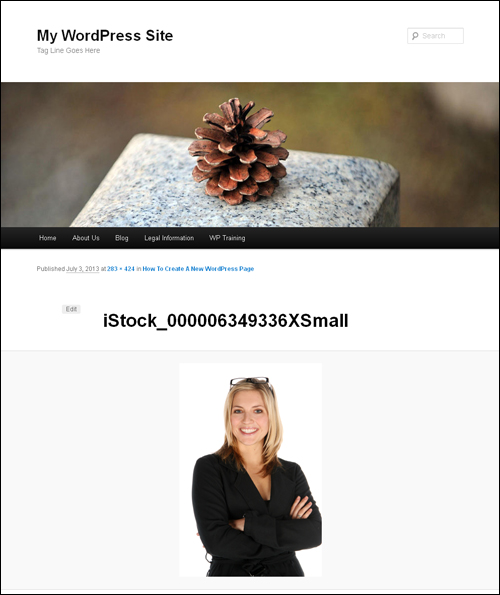
The attachment page will then load in your browser with your image displayed …
More Edit Media Options
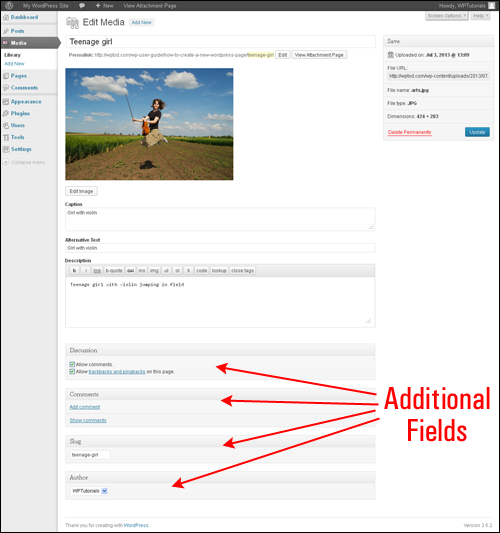
Some additional options for editing media in the Edit Media screen are not visible by default.
To enable these, click on the Screen Options tab at the top right-hand of the Edit Media screen …
You will see a number of additional options:
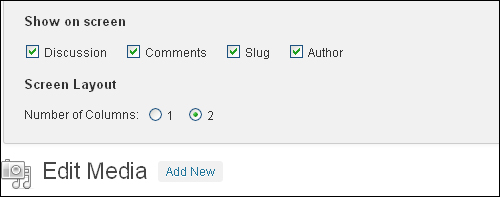
- Discussion: Controls the ability to leave comments and/or trackbacks and pingbacks on the media attachment page. Tick the checkbox to enable an option, uncheck to disable.
- Comments: Displays current comments on the media attachment page. You can add a new comment or show existing comments.
- Slug: Allows you to edit the slug for attached media items.
- Author: Allows you to change the Author for attached media items by selecting a new author from the drop-down menu.
To automatically enable and make one or more of these options visible on the page, simply check the box next to the item in Screen Options > Show on screen (note: unchecking the box hides the item) …
When enabled, the selected options become visible below your main edit area …
Remember to click the Update button after making any changes that you would like saved.

![]()
Useful Tips
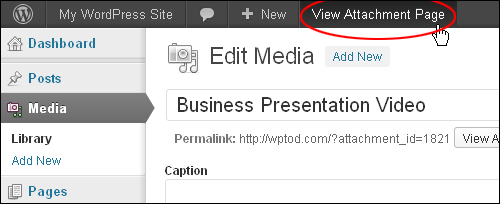
Tip #1: Viewing Attachment Pages You can view attachment pages for your media files by clicking on View Attachment Page in the admin toolbar …
Tip #2: Keyboard Shortcuts When cropping your image, the keyboard combinations below can help you fine-tune the size of the crop frame.
Note: The arrow key can be any of four arrow keys: up arrow, down arrow, left arrow, or right arrow:
- Arrow: move by 10px
- Shift + arrow: move by 1px
- Ctrl + arrow: resize by 10px
- Ctrl + Shift + arrow: resize by 1px
- Shift + drag: lock aspect ratio
Congratulations! Now you know how to edit images in the WordPress Media Library.
***
"I was absolutely amazed at the scope and breadth of these tutorials! The most in-depth training I have ever received on any subject!" - Myke O'Neill, DailyGreenPost.com