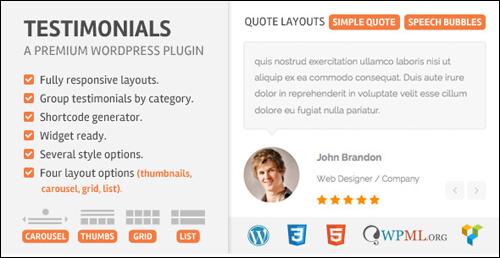
How To Add Testimonials To WordPress

Sharing positive recommendations from satisfied customers of your products or services is one of the best ways to attract new customers.
Testimonials provide social proof that your business can deliver great value and service to customers. It is also a powerful and inexpensive marketing resource that can help boost your business credibility and improve sales conversions.
Sometimes, a great testimonial is all it takes to convince someone to choose your business over someone else’s.
In this tutorial, you will learn how to create a ‘Testimonials’ page and how to add rotating testimonials to your site using WordPress testimonial plugins.
Add A Testimonials Page
If you’re not displaying testimonials from customers on your site, you’re missing out on great opportunities to attract more customers and make more sales.
Step 1 – Create A New WordPress Page
The first step is to create and add a testimonials page to your site.
Unless your theme provides an existing testimonials page template, all you need to do is create a new WordPress page and name it something like “Testimonials,” or “Customer Testimonials,” or “Our Clients,” etc. …

(Add A ‘Testimonials’ Page)
If you need help creating WordPress pages, see the tutorial below:
![]()
We also recommend adding a ‘Testimonials Disclosure’ page to your site …
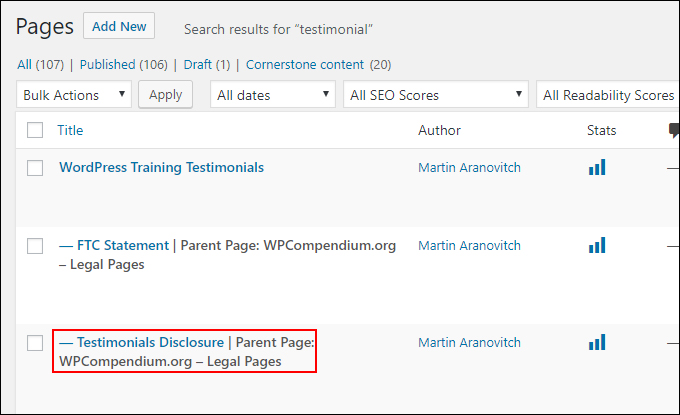
(Add A ‘Testimonials Disclosure’ Page)
If you need help adding legal pages to WordPress, see the tutorial below:
Step 2 – Add Testimonials
After creating your ‘Testimonials’ page, the next step is to add testimonials to this page.
Depending on your theme, you can add testimonials:
- Manually
- Using shortcodes
- Using page builder elements
Add Testimonials Manually
You can manually enter testimonials into your page by copying and pasting these into your WordPress Content Editor …
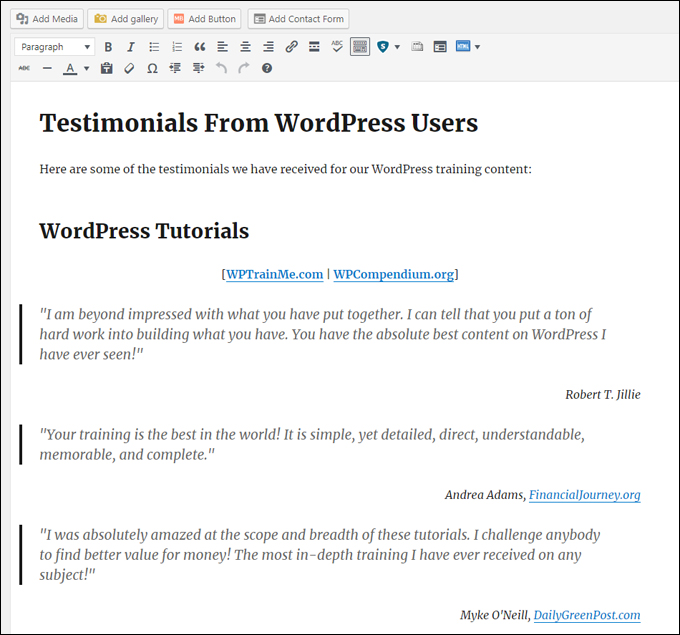
(Add testimonials manually)
In the above example, the testimonials were formatted using the blockquote feature of the WordPress content editor.
Adding testimonials manually to your ‘Testimonials’ page is fine, but if you really want to get the most benefit out of using testimonials on your site, we recommend using the other methods shown below.
Add Testimonials Using Shortcodes
Most of the testimonial plugins described further below use shortcodes to display testimonials on your site …

(Add testimonials using shortcodes)
This allows you to create, edit, and manage your testimonials from a central location and add these wherever you like on your site (e.g. in other posts, sidebars, etc.)
Add Testimonials Using Page Builder Elements
If you use a versatile WordPress theme like Avada, for example, you can add testimonials to your site using the theme’s built-in page builder.
Avada uses drag and drop page-building elements to add special features to your pages, like testimonials, sliders, pricing tables, videos, maps, widgets, etc.
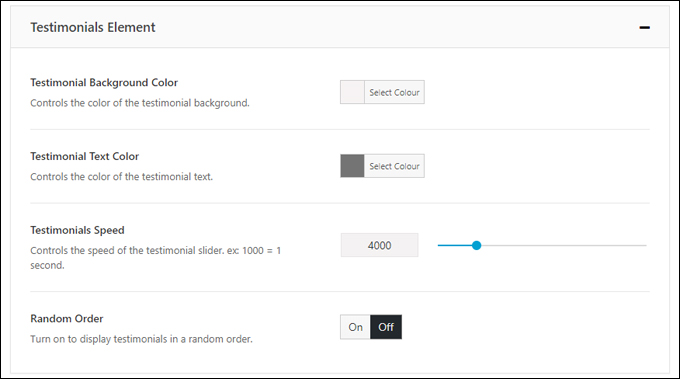
The theme lets you style how your Testimonials will display on your site by configuring options for the Testimonials Element in its global settings page …
(Avada’s Testimonials Element settings)
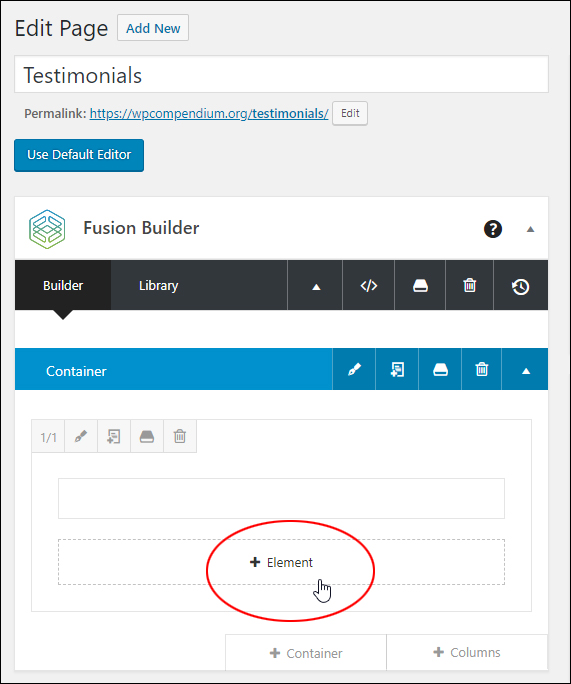
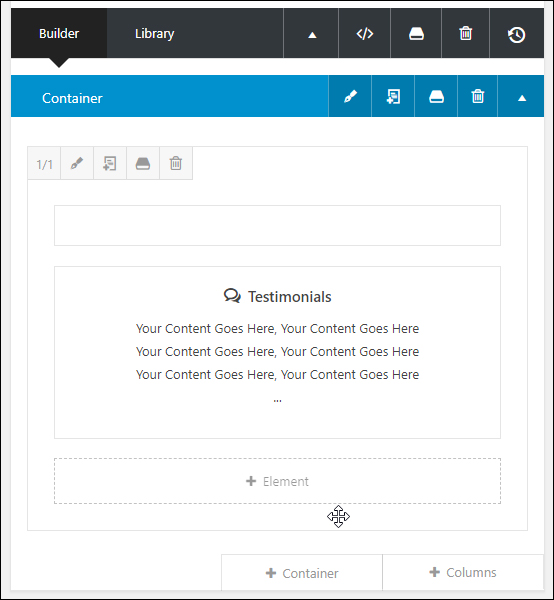
To add testimonials using Avada’s page builder, click on the ‘add element’ button …
(Add Element)
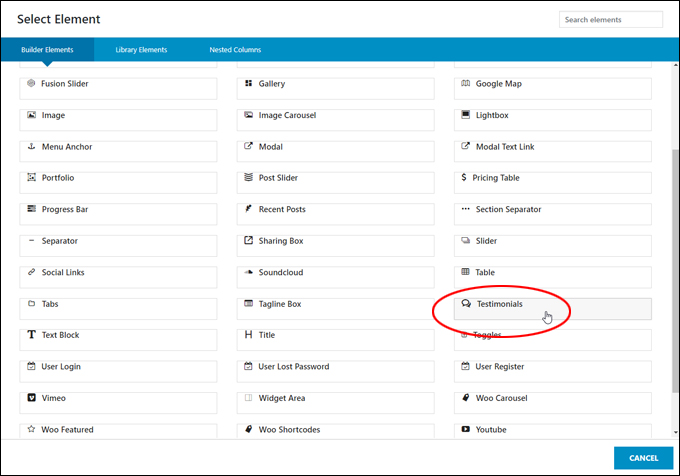
Select the ‘Testimonials’ element …
(Select the ‘Testimonials’ element)
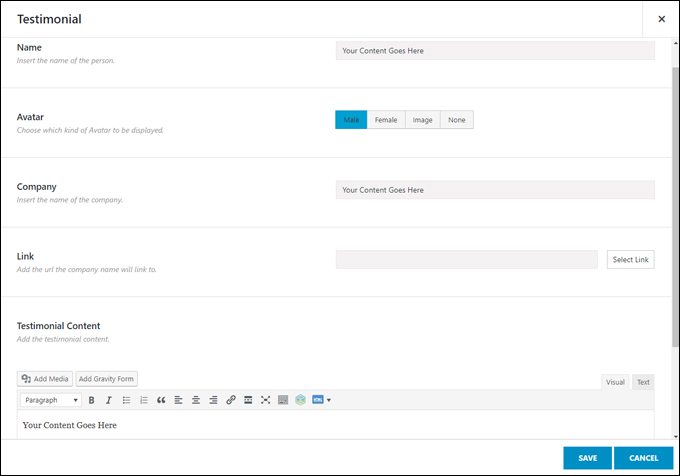
Fill in the ‘Testimonial’ template by adding details like the person’s name, selecting an avatar or image (or no image), company name, URL, and the testimonial content, and clicking ‘Save’ …
(Testimonial template)
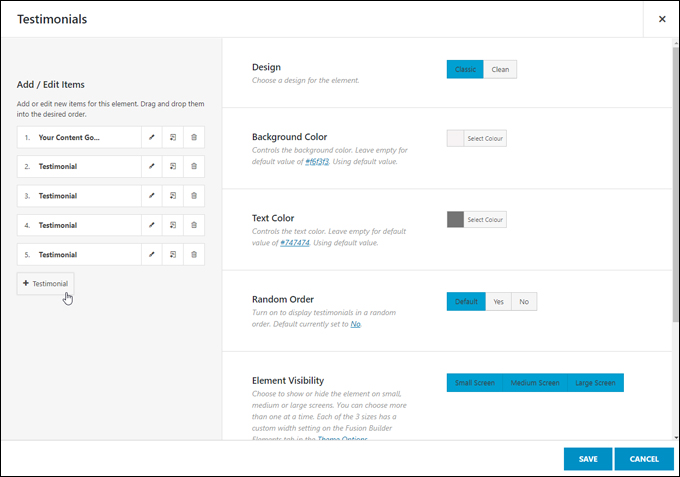
You can easily add multiple testimonials to your ‘Testimonials’ page by clicking on the ‘+ Testimonial’ button and then dragging and dropping individual items to reorder how the testimonials will display on your page …
(Add multiple testimonials and drag and drop to reorder)
After adding elements to your page like testimonials, simply publish or update the page as normal …
(Testimonial added to page)
Your testimonial will now display to visitors on your ‘Testimonials’ page …
(Customer testimonial)
To learn more the Avada theme, go here: Avada
Add Testimonials Using Banner Ad Plugins
Another way to add testimonials to your site is using banner ad plugins …
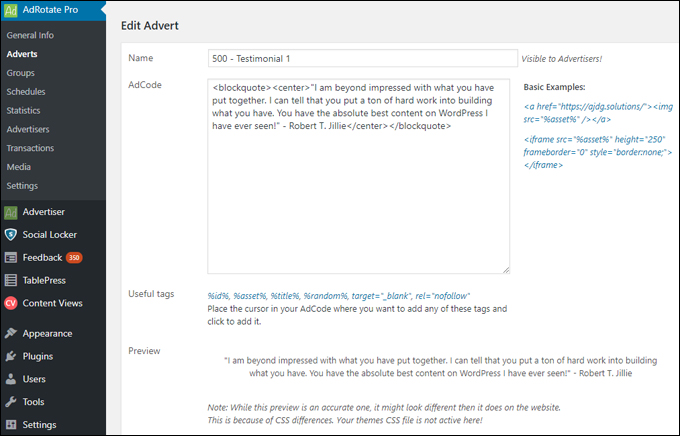
(Add testimonials using banner ad plugins)
This method is useful for displaying rotating testimonials in different sections of your website (see next section below).
Many banner ad plugins let you insert ‘text’ ads into your posts and pages, so you can set up ad groups using testimonials instead of text ads.
For more information on using banners and adding banner ads to WordPress, go here:
Step 3 – Display Testimonials On Your Site
If you have great testimonials from happy customers, it’s a good idea to display these in different areas of your website, such as:
- Before or after posts
- On your sidebar
- On your ‘About Us’ page
- On your ‘Products’ page
- On your ‘Checkout’ page
- Etc.
You can do this using plugins, shortcodes, banner ads, etc.
Now that we’ve looked at how to add testimonials to WordPress, let’s go through some WordPress testimonial plugins you can use …
WordPress Testimonial Plugins
Flexi Quote Rotator
(Flexi Quote Rotator WordPress plugin)
Plugin URL
https://wordpress.org/plugins/flexi-quote-rotator/
Plugin Description
Flexi Quote Rotator provides an easy and simple way to add and manage content, images, and links to your site. The plugin lets you add quotations and testimonials to your site using shortcodes and PHP snippets in theme templates, as well as a widget. The plugin also adds a settings panel to your site’s admin area and provides additional styling flexibility.
You can use this plugin to display quotations or testimonials, or other rotating snippets of content on your web site. Quotations and testimonials will rotate with a fade transition on each changeover.
Plugin Installation
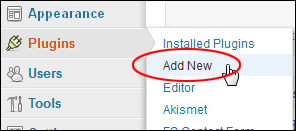
Log into your WP admin area and click on Plugins > Add New …
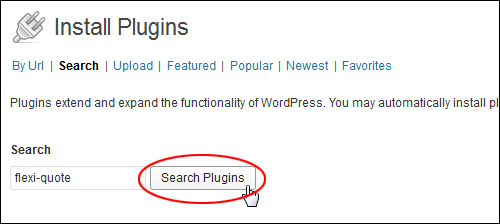
In the Search Results tab, enter “flexi-quote” into the search field and click Search Plugins …
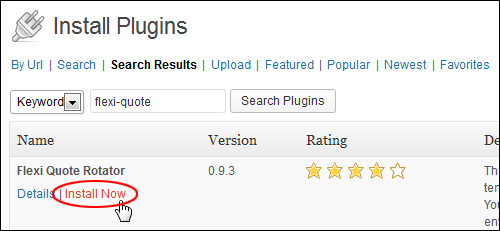
Locate the Flexi Quote Rotator plugin in the search results, and click Install Now to install the plugin …
Make sure to activate the plugin after installation …

Plugin Configuration
To configure the settings for this plugin, go to Settings > Quote Rotator …

This brings you to the Flexi Quote Rotator Options screen …

In the Flexi Quote Rotator Options screen, enter the following details:
- Title: This adds a header above the quote area. Leave this field blank if you don’t want to display a header.
- Delay (in seconds): Enter the rotational delay time in seconds (the time each quotation displays on your site before it is replaced by the next item).
- Fade in duration (in seconds): Enter the number of seconds for your quotation fade-ins.
- Fade out duration (in seconds): Enter the number of seconds for your quotation fade-outs.
- Open Quote Symbol: Enter an open quote symbol (e.g. “), or an optional text you would like to display before the quote (e.g. Unsolicited Testimonial:). Leave this field blank to display no symbols or optional text.
- Close Quote Symbol: Enter a closed quote symbol (e.g. ”), or an optional text you would like to display after the quote (e.g. – Product Name). Leave this field blank to display no symbols or optional text.
- Height override (overrides CSS): Enter a height in pixels if you want to override the default height set by the plugin’s stylesheet.
- Width override (overrides CSS): Enter a width in pixels if you want to override the default height set by the plugin’s stylesheet.
- Random? Select whether to display your entries in random or sequential order.
- Stylesheet: You can select one of the plugin’s preset stylesheets from the drop-down menu or add your own stylesheet (see below).
Click Save Changes to save your settings…

![]()
Note #1: The plugin allows full styling flexibility using CSS to control how the quotations are displayed on your web site …
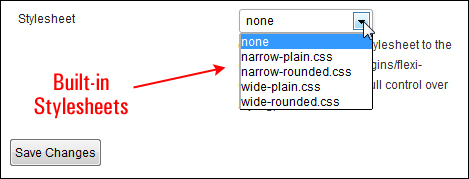
A few example stylesheets are included in the styles folder (/wp-content/plugins/flexi-quote-rotator/styles/). These stylesheets can be selected in the settings admin panel, then copied and modified to create a new look, and saved in the styles folder where it will become available for selection in the settings admin panel. You can also modify the plugin’s Photoshop source file background images.
Note #2: If you only plan to use the plugin to display quotations on your site’s sidebar menu, then just enter the Delay settings in seconds and leave everything else blank, as you will be configuring the settings in your sidebar widget…

Plugin Usage
To add content to the plugin (e.g. quotations or testimonials), go to your WP admin navigation menu and select Tools > Quotes …

Enter the body of your quotation or testimonial in the Quote: field (note: you can use HTML to format the content, add line breaks, etc). Also, enter information about the author (you can add a link to the author’s site if you want) in the Author: field, then click Add Quote to save your entry …

Your testimonial will be added to the Quotes section …

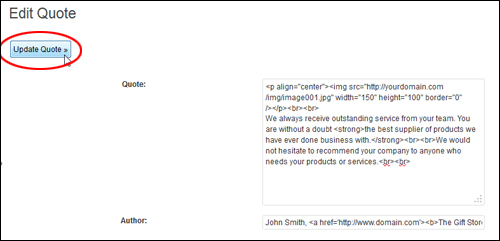
As mentioned above, you can add HTML code to your testimonials to add formatting, images and links to your content. Below is the sample text used to create the example testimonial used in this tutorial …

If you need help with this step, see the tutorial below:
Repeat the above process to add additional quotations and testimonials …
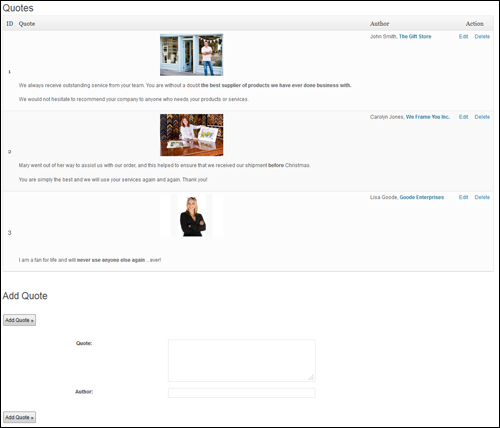
To manage your quotations, go to Tools > Quotes and click on either Edit or Delete under the Action column…

If you edit your content, remember to click the Update Quote button in the Edit Quote screen to save your changes …
After adding quotations or testimonials, the next step is to display these on your site.
How To Display Testimonials On Your Site
To display content added to the plugin on your site you have 3 options:
- Add a shortcode to your page or post
- Use the Flexi Quote Rotator widget
- Insert a template tag into a template file
Let’s go through each of these options:
1. Add A Shortcode To Posts And Pages
You can insert testimonials or quotations anywhere in your post or page content using a shortcode.
The plugin shortcode uses the structure below:

Settings entered directly into the shortcode override the settings saved in the plugin administration settings.
You don’t have to use all of the shortcode options. For example, you can simply add the shortcode below …

To a page like this …

And your testimonials will rotate on the page when published, using the default options you have specified in the plugin settings …

To override the default plugin settings, enter values into the shortcode, like the example below …

The above shortcode example looks like this when added to a page …

Publish the page and your testimonials will display as specified in the shortcode options …
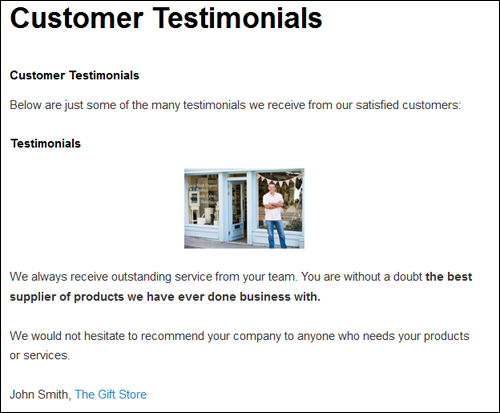
Note: in the example above, the headings repeat on the page, because they were added both as content and also in the shortcode, as shown below …

A little planning, therefore, is required when adding content in order to avoid displaying repeating titles and headings on your site’s pages. For example, if you are going to add a section of text to your page that contains a heading (e.g. “Customer Testimonials”), then leave the title out of the shortcode.
2 – Use The Widget
To display the quotations on your site’s sidebar menu, go to Appearance > Widgets …

Add the Flexi Quote Rotator Widget to your sidebar …

Click on the widget title bar to expand the widget. Configure the plugin settings and click Save when done …

Your testimonials will display on your sidebar, using the settings you have entered into the widget …
If you are using the widget then edit settings in the widget. Adjust the settings until you are happy with the length of duration, fade ins, fade outs, etc.

If you need help configuring sidebar widgets, see the tutorial below:
![]()
The Delay in seconds entered into the widget settings must be the same as the Delay time you entered into the Flexi Quote Rotator Options settings screen. If you find that your content is rotating too quickly, check the Delay settings in the widget and the settings screen to make sure that they match (i.e. same value entered into both fields).
3 – Add A Template Tag To Your WordPress Template Files
![]()
This option requires some knowledge of adding and editing PHP code in your WordPress template files. Always back up your site before making changes to your files, and if you are not comfortable editing code, ask a professional for help.
This option is useful if you want to customize your WordPress site to display testimonials on all pages or posts throughout your site, or areas of your site other than your sidebar menu (use the widget for displaying testimonials on all posts via your sidebar).
Essentially, for this option to work, you will need to add a PHP tag containing code that calls functions such as the ones shown below to one or more template files …

The code you will need to add looks something like this …

With additional parameters specified for the plugin’s settings, your PHP tag will look like this …

![]()
Note: Settings entered into the PHP template tag override the settings saved in the plugin administration settings.
To add a template tag like the example above to your files, select Appearance > Editor from your WP admin menu …
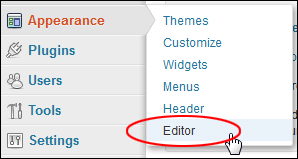
Load the file(s) you want to insert the tag into, then find the section where you want WordPress to display the contents of your plugin, paste in your template tag and save the file to update your settings …

The plugin will now display rotating testimonials on all files where the template tag has been added …

If you need plugin support or have additional questions regarding this plugin, contact the plugin developer by visiting the plugin site: Flexi Quote Rotator
More WordPress Testimonial Plugins
Here are some more testimonial plugins you may want to look into (tip: choose paid/premium plugins to receive plugin support) …
Thrive Ovation – Set & Forget Testimonials
(Thrive Ovation – Set & Forget Testimonials WP Plugin)
Plugin URL
Plugin Description
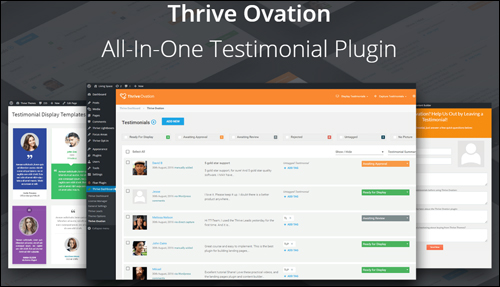
Thrive Ovation is a complete all-in-one, “set & forget” testimonials management plugin for WordPress. It allows you to transform comments left on your WordPress site into testimonials with one-click, integrates with Facebook and Twitter to help you leverage the power of social testimonials, and lets you collect testimonials on auto-pilot.
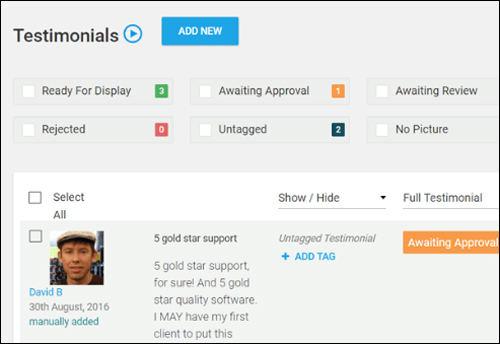
Thrive Ovation also provides a time-saving testimonial management dashboard, giving you a complete birds-eye overview of user-submitted, WordPress comments, social media and imported testimonials in one testimonial library, as well as allowing you to see which testimonials are ready for display, waiting for approval or review, have been rejected or are missing a photo …
(Thrive Ovation – Testimonial Management Dashboard)
Additional plugin features include:
- Insert testimonials anywhere you like using shortcodes.
- Testimonials update throughout your site dynamically from one central location.
- Includes a library of fully customizable, professionally designed testimonial templates.
For more details, go here: Thrive Ovation
Testimonials Widget
(Testimonials Widget WP testimonials plugin)
Plugin URL
http://wordpress.org/plugins/testimonials-widget/
Plugin Description
Testimonials Widget plugin allows you to display random or selected portfolio, quotes, reviews, showcases, or text with images on your WordPress site …

The plugin integrates with the WordPress Dashboard, giving you at-a-glance information about the number of published and pending testimonials awaiting approval …

You can insert Testimonials Widget content via shortcodes, theme functions, or widgets with category and tag selections and choose multiple display options such as random or specific ordering. The plugin also features a built-in review schema for improved search engine results.

The Testimonials Widget plugin also offers comprehensive configuration settings, allowing you to control and manage all aspects of your testimonials …

Some of the options available for configuring the Testimonials Widget plugin include:
- Slide Images – responsive image slideshow
- Slide Videos – video slideshow
- Slide Text – useful for rotating testimonials
- Slide Mixed Content: slideshow having video slides, images slides, and text slides. Each individual slide can also have mixed content.
- Shortcode compatible – slide content that is rendered using shortcodes. i.e. stock WordPress Galleries and Gravity Forms.
- Widget ready.
- Shortcode ready
- Random display
- Fade and slide transitions
- Filter slideshow content by WordPress’ built-in categories, tags, or post-ID.
The Testimonial Widgets plugin also has an incredible array of features, including custom styling and categorical display.
As stated on the plugin’s website …
Through categories and tagging, you can create organizational structures based upon products, projects and services via categories and then apply tagging for further classification. As an example, you might create a Portfolio category and then use tags to identify web, magazine, media, public, enterprise niches. You can then configure the Testimonial Widget to show only Portfolio testimonials with the public and enterprise tags. In another Testimonial Widget, you can also select only Portfolio testimonials, but then allow web and media tags.
The single testimonial view supports image, source, title, location, email, company and URL details.
Additionally, you can upgrade to the Premium version, and access additional features like caching, excerpts, filters, read more links, more selection options, and advanced capabilities like using custom post types as testimonials. The Premium version also supports ratings and users can submit their own testimonials via a front-end form shortcode or widget.
If you are looking for a feature-rich testimonials plugin for WordPress that gives you complete control over the management and display of your testimonials, then consider using the Testimonials Widget plugin.
Plugin info: Testimonials Widget
Easy Testimonials
(Easy Testimonials)
Plugin URL
http://wordpress.org/plugins/easy-testimonials/
Plugin Description
Easy Testimonials is an easy-to-use plugin that allows users to add testimonials to the sidebar, as a widget, or to embed them into a Page or Post using a shortcode.
The plugin also allows you to insert a list of all testimonials or output a random testimonial. You can also include an image with each testimonial. This is a useful feature if, for example, you want to add a photo of the testimonial author …

(image sourced from plugin site)
Easy Testimonials allows you to do the following:
- Add random testimonials to your sidebar
- Add random testimonial to your pages
- Output a list of testimonials
- Display images with your testimonials
- Use custom options to link your testimonials to a custom page (e.g. a product page)
- Easily manage, edit, create, and delete testimonials on your site.
- Set a “read more” URL to direct visitors to a product info page.
- The plugin inherits the styling of your theme, so no customization is required.
Additionally, by upgrading to the paid version of the plugin (Easy Testimonials PRO), you can allow visitors to submit testimonials from your website (and approve or reject these before they are published on your site), rotate testimonials on your site with a fading effect, choose from a large selection of pre-made templates and color schemes, receive lifetime updates and more …

Plugin info and installation instructions: Easy Testimonials
Testimonials Showcase
(Testimonials Showcase)
Plugin URL
Plugin Description
Testimonials Showcase is a premium WordPress plugin that lets you easily edit, manage, and display testimonials on your WordPress site with just a few simple clicks.
This plugin lets you display testimonials from your clients, reviews of your product or service, a list of quotes, and link case studies.
Plugin features include:
- Grid or Slider Layouts
- More than 15 layout customization options
- Star Rating System
- Front-end submission form available
- Translation Ready
This plugin helps you easily manage the adding, editing, and deleting of testimonials on your WordPress site.
Plugin info: Testimonials Showcase
Testimonials WordPress Plugin
This is a premium WordPress plugin that provides many great features right out of the box, including:
- Responsive design that resizes to display correctly on any device or browser.
- Display your testimonials in a widget or as sliders, slideshows, grid layout, list layout, etc. by adding a shortcode
- Styling options (display image at the top, bottom, or side of testimonials, display testimonials in a speech bubble, customized font and background colours, font types and more.
Plugin info: Testimonials WordPress Plugin
You can search for more Testimonials plugins inside your WordPress dashboard (Plugins > Add New), or the WordPress Free Plugin Directory …

(WordPress Plugin Search – Testimonials)
Search the WordPress Plugin Repository for testimonials plugins below:
For more information on using testimonials on your website, see the tutorial below:
Congratulations! Now you know how to add testimonials to WordPress.

***
"This is an awesome training series. I have a pretty good understanding of WordPress already, but this is helping me to move somewhere from intermediate to advanced user!" - Kim Lednum
***
