How To Insert Special Characters Into WordPress Posts And Pages

When creating a post or page for your website, you may find that you need to add symbols or special characters into your content, like © ® ™, etc.
Many keyboards don’t include special keys for these symbols or character keys, so this tutorial will show you how to insert these into your content using the WordPress Classic and Block editors.
We’ll also provide information on plugins and additional resources that you can use to add symbols, special characters, emoticons, and emojis to content in WordPress posts and pages.
If you need help using the WordPress content editor, see these tutorials:
How To Insert Symbols And Special Characters Using The WordPress Content Editors
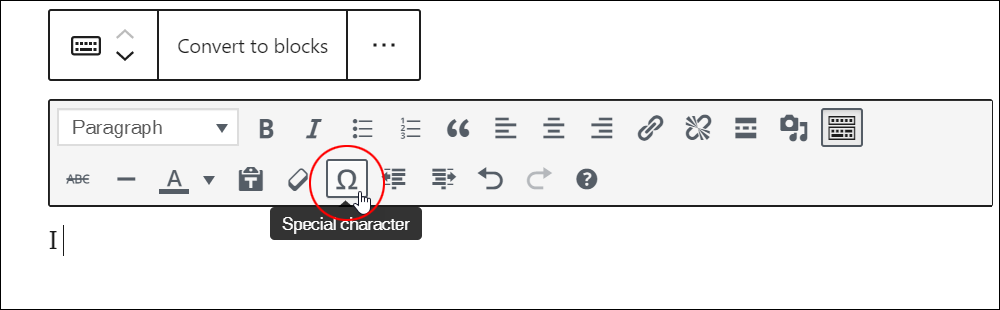
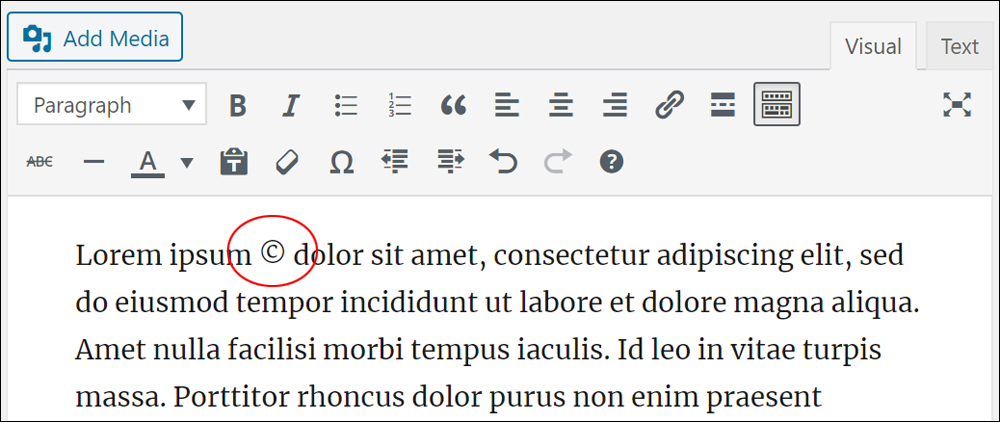
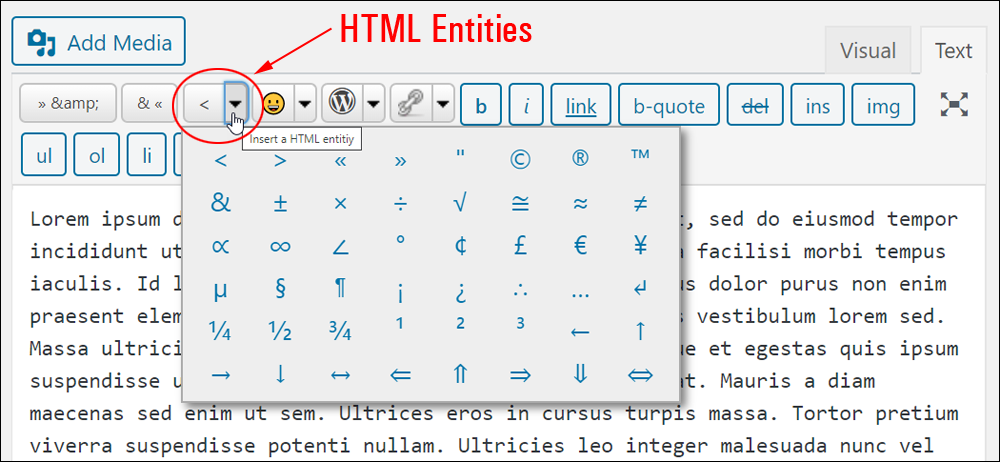
To insert special characters and symbols like © ® ™ etc. into your content using the WordPress Classic editor, open up a new or existing Post or Page, make sure you’re in the Visual tab, then place your cursor in the location where you would like to add the symbol or character into your content and click on the Special Character menu button.

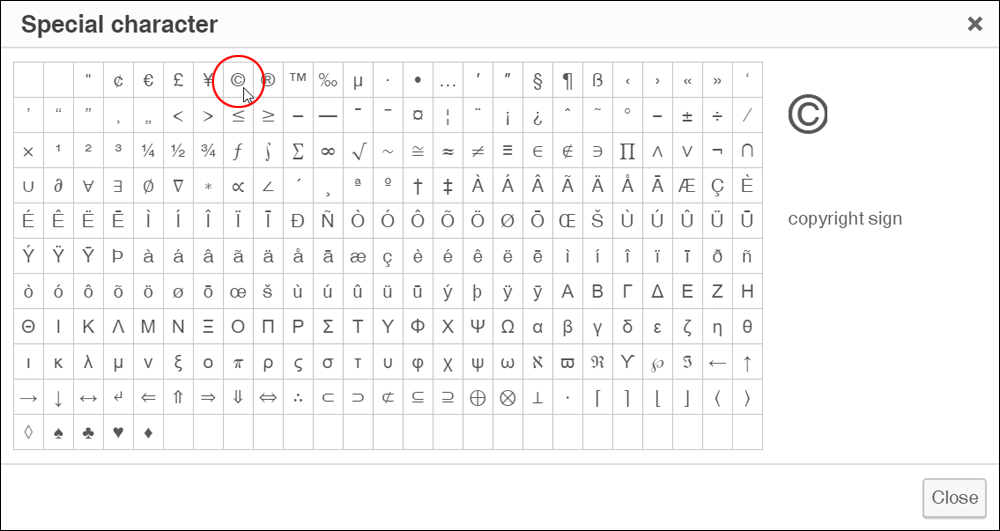
Select the symbol or character from the Special character pop-up chart.
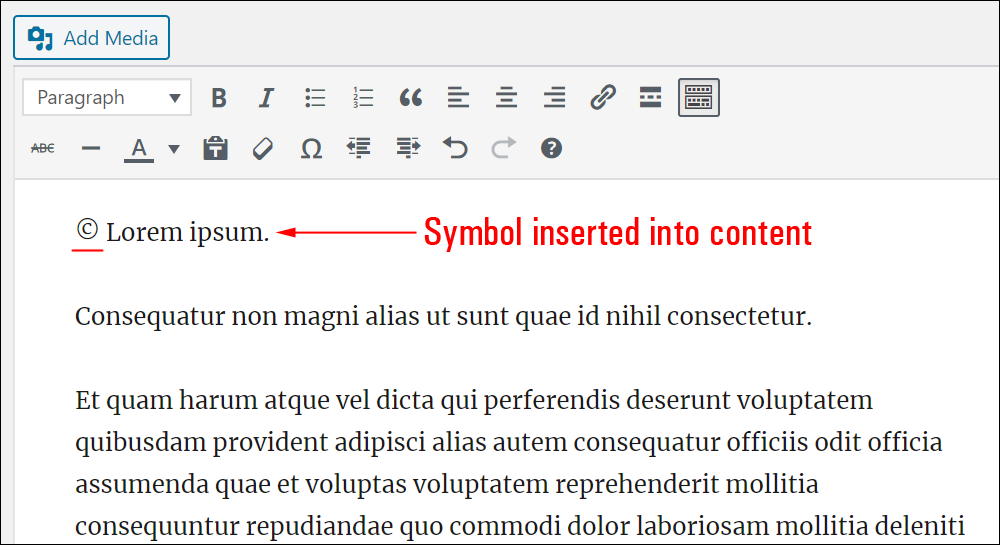
The symbol or character will be inserted into your content.
To insert special characters or symbols into your content using the WordPress Block editor, follow the same steps as above and choose the Classic block for the sections of text that require adding symbols or special characters.
How To Add HTML Characters Using The WordPress Text Editor
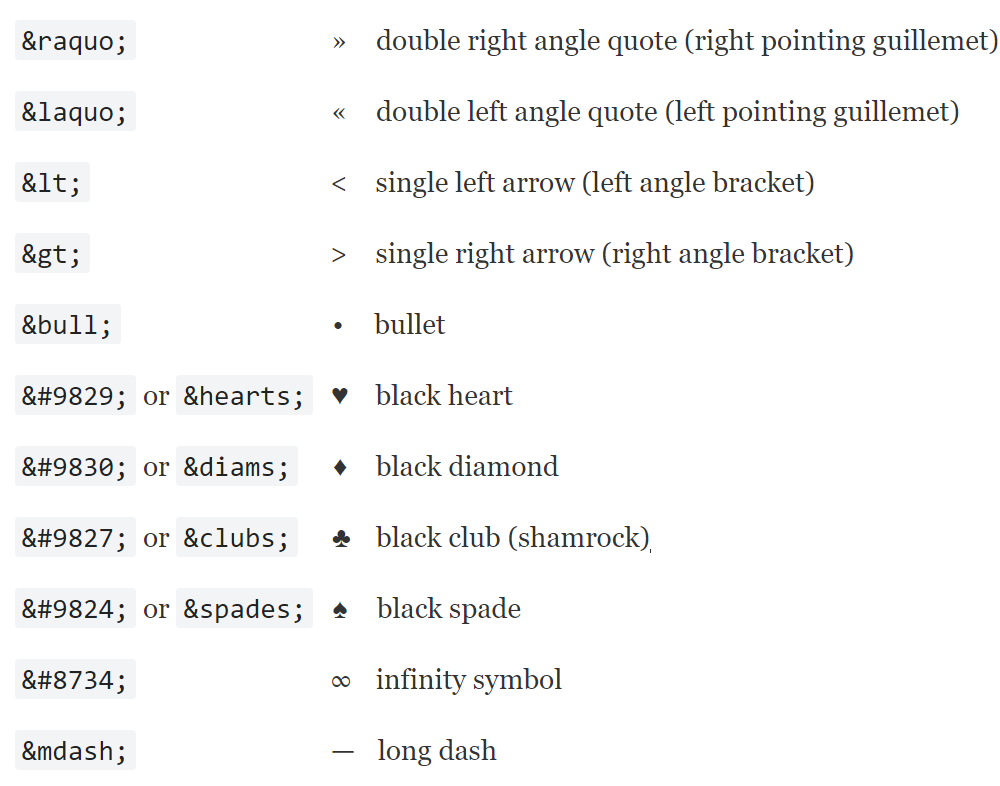
These symbols and special characters are called HTML character entities or extended characters. They are created by typing a combination of characters into your content, which are then converted into special symbols by web browsers.
Here are examples of some commonly-used HTML character entities:
Notes:
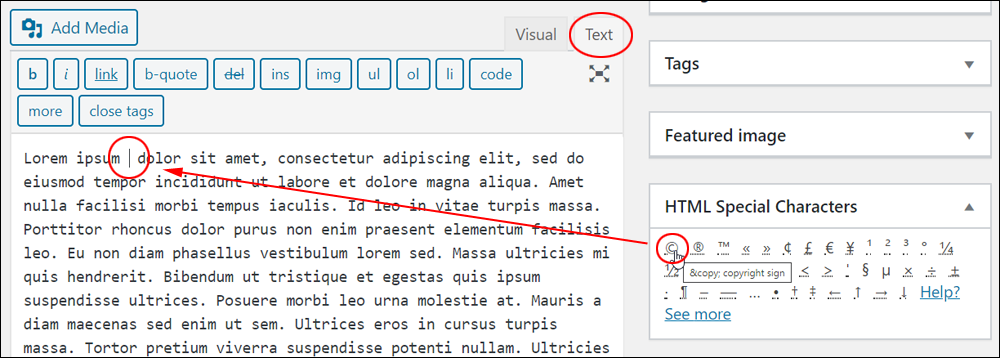
- When you click on the Select custom character symbol in the Visual Editor, WordPress places the character entity code for you into your content. If you’re working in Text Editor mode, you can also add a character entity just by typing in the code directly (or using a plugin).
- Links to useful resources and additional information about the code used to create special symbols and characters are provided at the end of this tutorial.
How To Add Emoticons To Your Content In WordPress
Smilies (emoticons) can also be used to convey emotions in your writing. You can use them to brighten up your posts, express disapproval, confusion, sadness, anger, etc. 🙂
You can create text smilies by typing two or more punctuation marks. For example:
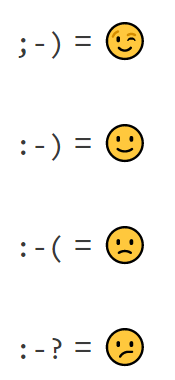
By default, WordPress automatically converts text emoticons to graphic images. So, if you type ;-) in your post, you will see 😉 when you preview or publish your post.
Note: You can turn off this feature using plugins (see below), so that when you type ;-) in your post, you will see ;-) instead of ;-).
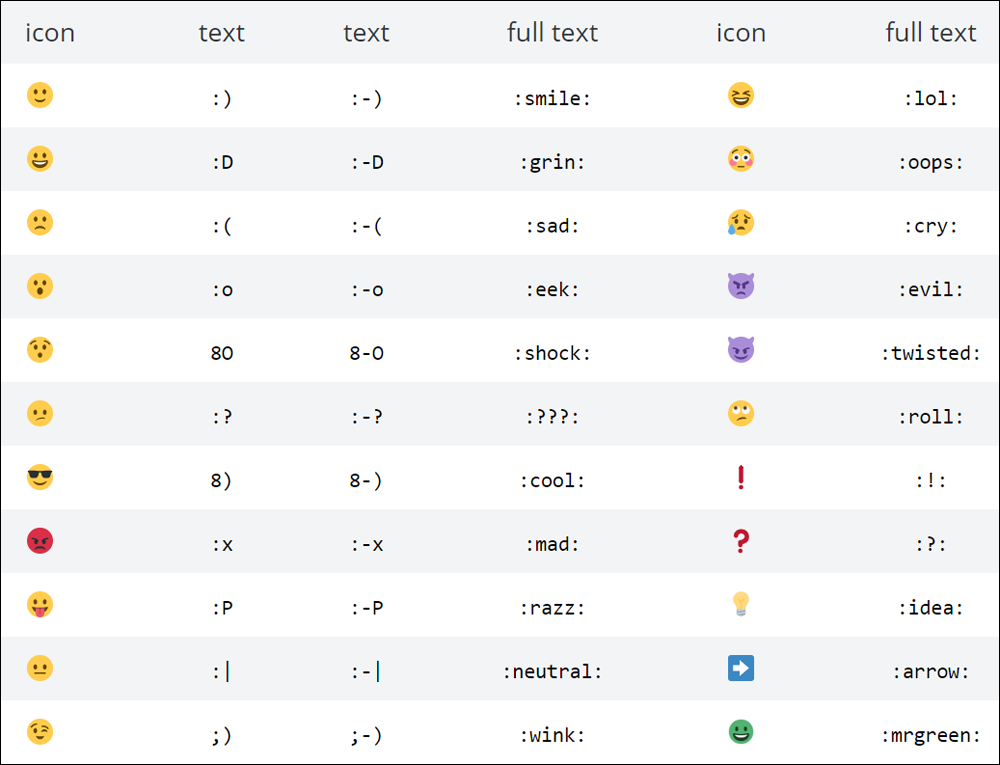
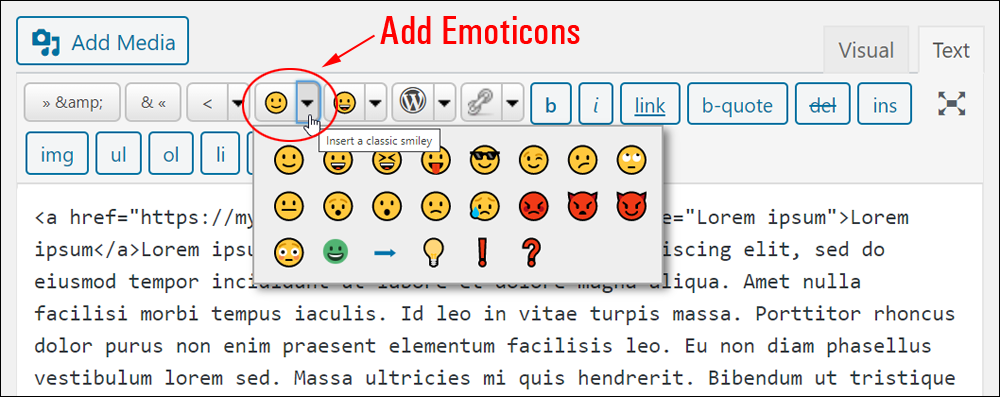
The screenshot below shows some of the smilies you can use in your content and the characters used to create these (note: emoticons can be created using different text combinations ;))
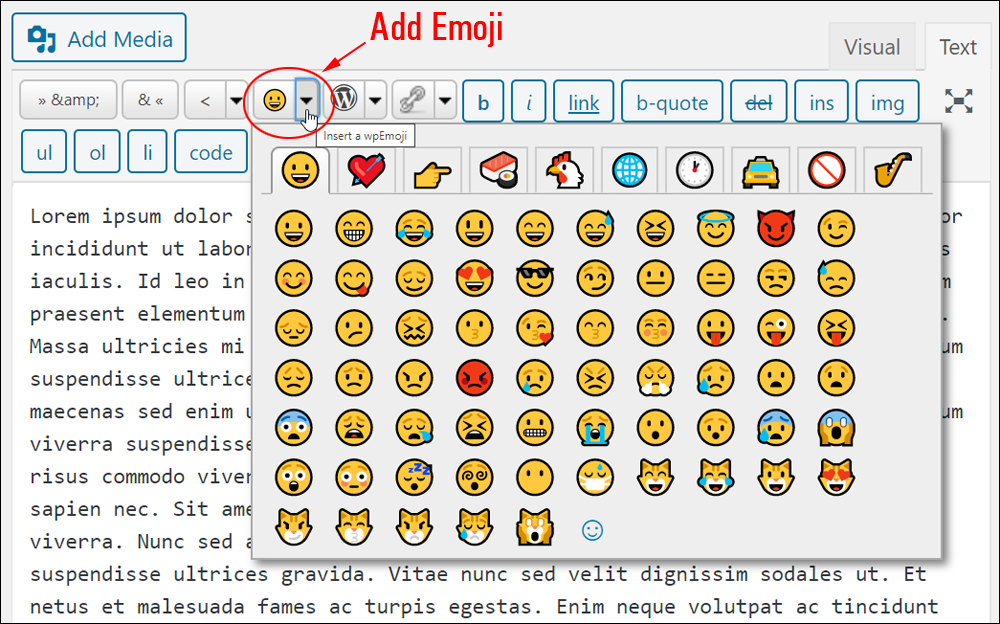
How To Add Emoji To Your Content In WordPress
Smileys are not Emoji. Although smileys (emoticons) and emoji can both display smiley faces, emoji are a newer development, can display a wider range of images, and are also created differently.
WordPress supports the use of emoji from all devices and operating systems, so you can insert them from your keyboard.
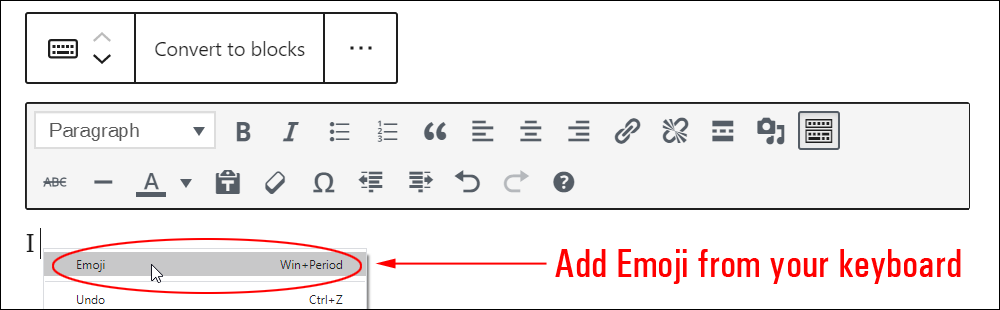
For example, if using a desktop or laptop computer running on Windows, you can right-click in the content editor and select Emoji from the menu.
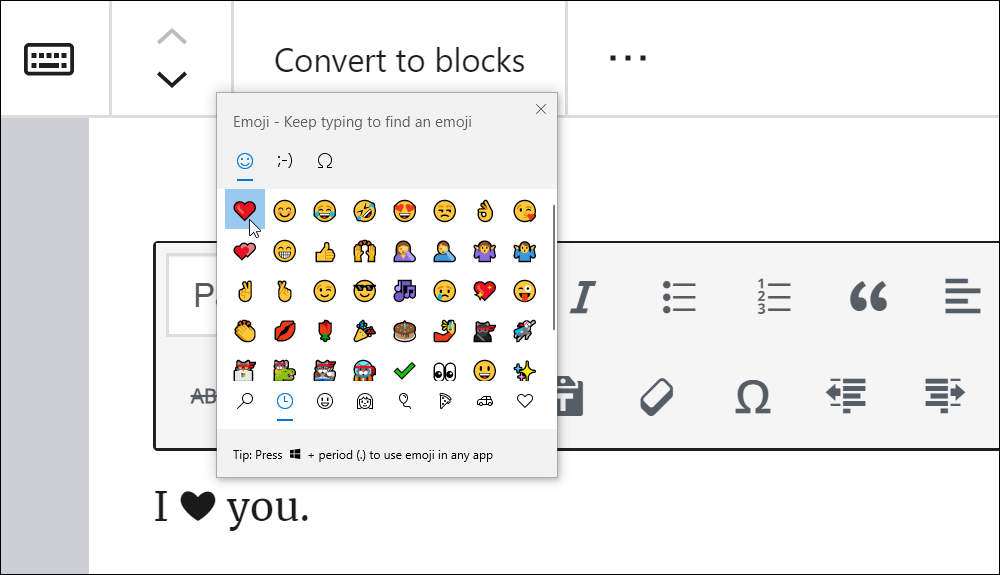
This brings up a screen where you can select the emoji you would like to insert into your content.
To learn how to add emoji in WordPress from different devices or operating systems, see this article on WordPress.org.
How To Add Symbols And Special Characters Using Plugins
Here are some useful plugins you can use to add symbols and special characters to your content.
HTML Special Characters Helper
HTML Special Characters Helper is a free plugin for WordPress that can be very useful if you frequently use the WordPress Text editor and need to add symbols and characters to your content.
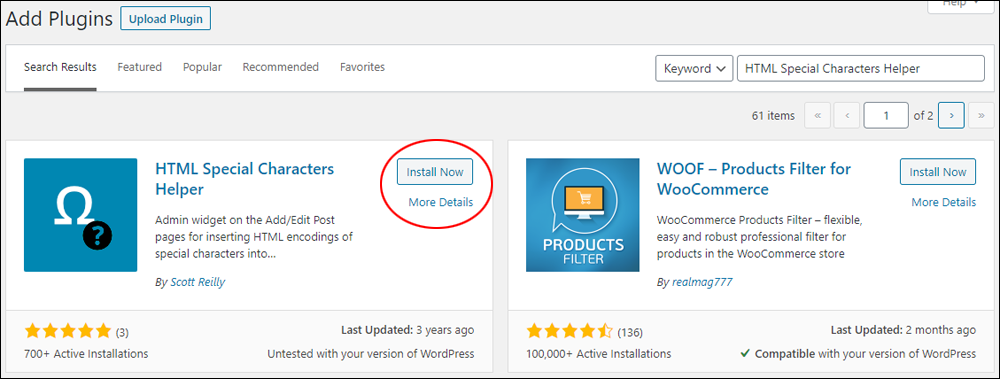
You can download the plugin from the free WordPress plugin directory or go to Plugins > Add New and search for “HTML Special Characters Helper” to install the plugin from your WordPress admin area.
After installing and activating the plugin, a new HTML Special Characters widget will display in your Add/Edit Post and Add/Edit Page screens.
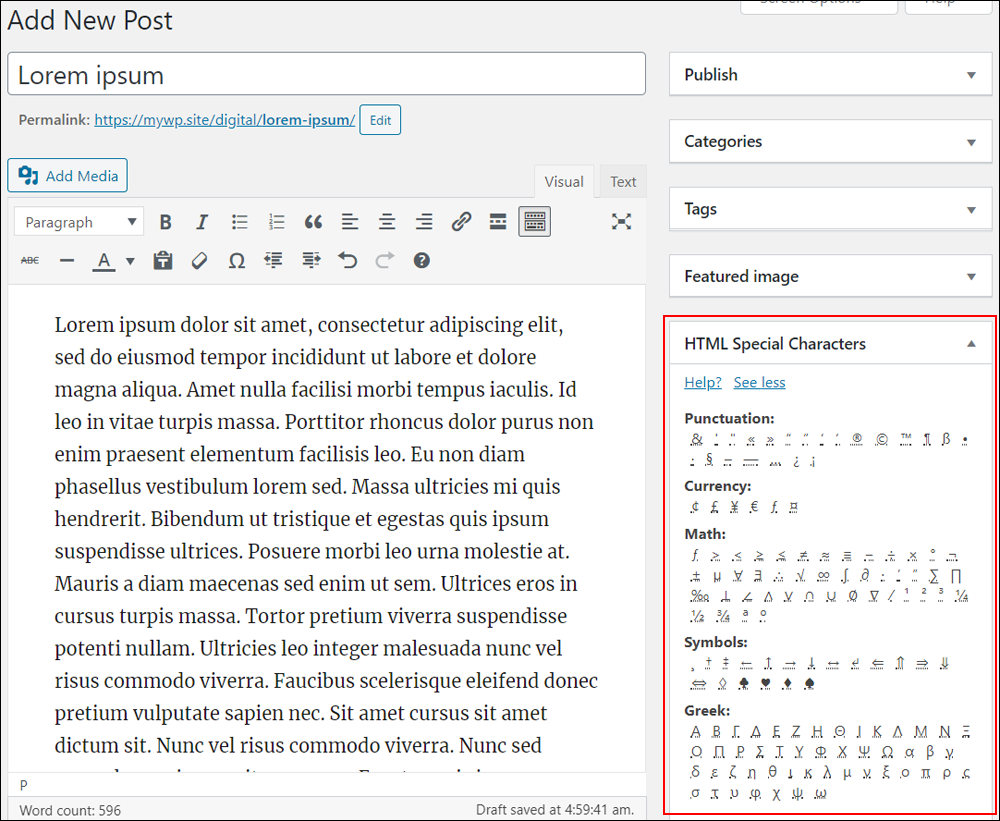
To view more symbols and characters, click on the See more link at the bottom of the widget.

The entire table of HTML Special Characters is displayed with characters organized into different sections.
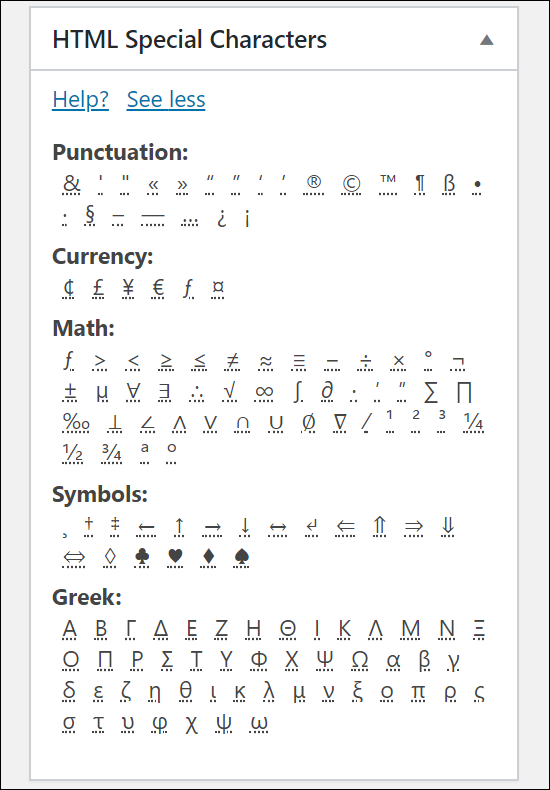
Make sure you are in the Text tab, then place your cursor on the spot where you would like to insert your character. Hovering over any of the symbols displays the HTML entity encoding for the character and its name. Click on the symbol to insert it into your content.
If you’re working in Text editor mode, this plugin can be very handy because it allows you to insert a special character without having to keep switching back to Visual Editor mode.
Just click on any symbol in the widget and the encoded character will be inserted into your post body at the current cursor location.

When used in the Visual editor tab, the symbol itself is added to your post text.
Also, keep in mind that the Visual editor has its own special characters tool, which is accessible via the built-in toolbar. If you only plan to use the Visual editor, then this plugin is redundant.
Install this plugin only if you plan to work in Text mode and want to avoid switching to the Visual Editor when adding special characters.
Note: when we last checked and tested, this plugin hadn’t been updated for a while, but it still worked fine.
For more details, visit the plugin page here: HTML Special Characters Helper
HTML Entities Button

The HTML Entities Button plugin is another free plugin that you can install on your site if you plan to work in Text mode and would like to add special characters to your content without having to keep switching over to the Visual editor tab.
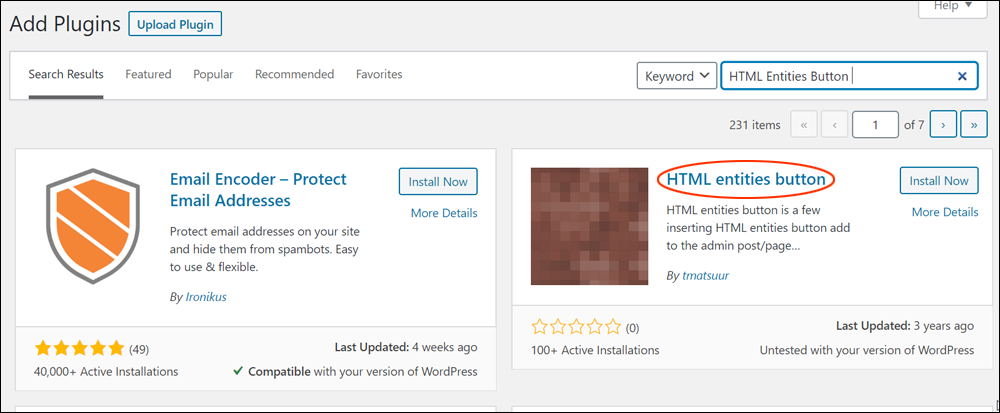
You can download the plugin from the free WordPress plugin directory or go to Plugins > Add New and search for “HTML Entities Button” to install the plugin from your WordPress admin area.
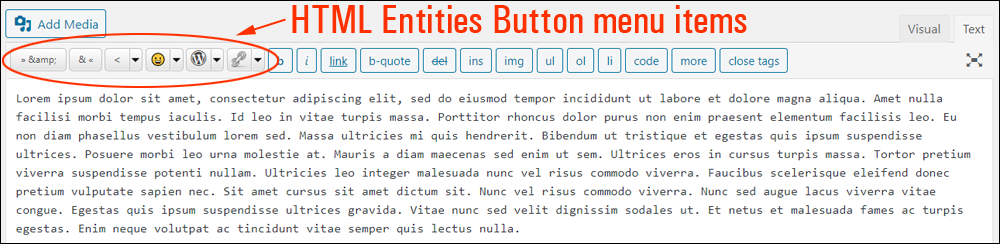
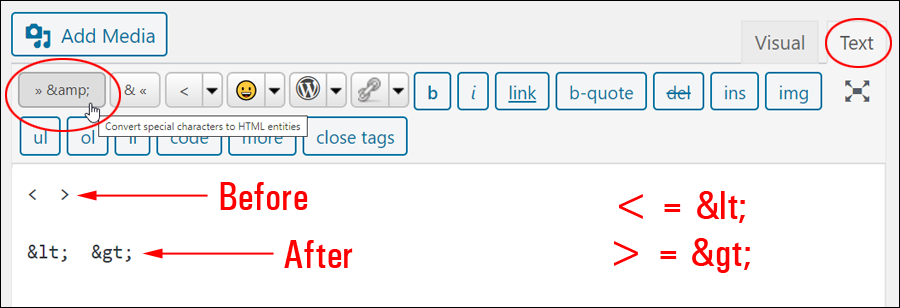
After installing, activating, and configuring the plugin (Settings > html entities button), you will see a row of new buttons displayed in the Text editor toolbar menu in your Add/Edit Post and Add/Edit Page screens.
This plugin allows you to convert special characters to HTML entities.
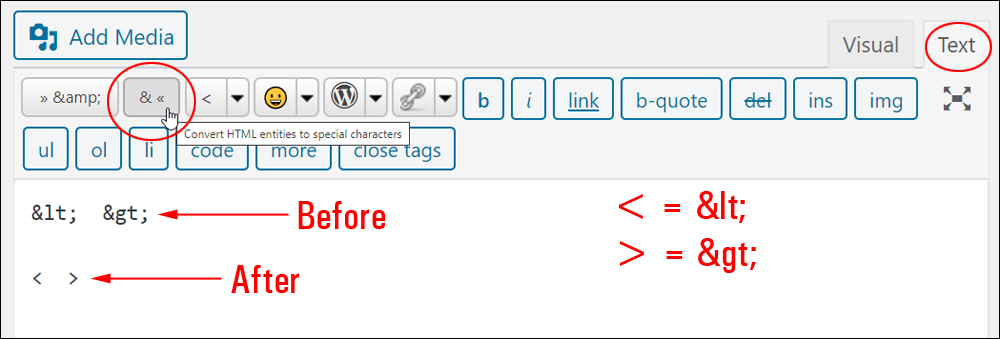
Or vice-versa (i.e. convert HTML entities to special characters).
Add HTML entities while you work in the Text editor.
Add emoticons to your posts and pages.
Add Emoji to your content.
And you can add WordPress dashicons too.
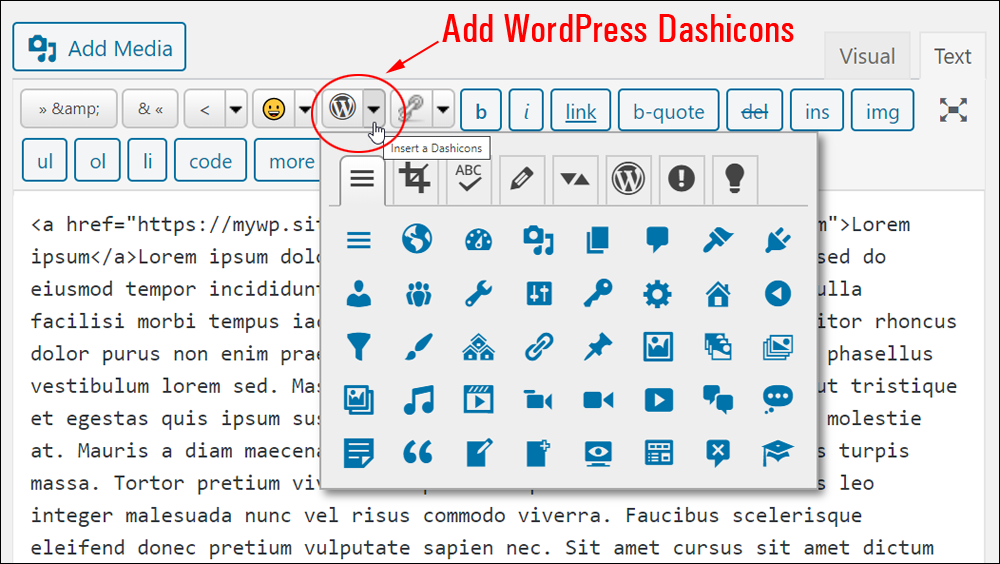
This plugin includes an extensive library of emoticons, emojis, and dashicons to choose from.
Note: when we last checked and tested, this plugin hadn’t been updated for a while, but it still worked fine.
For more details, visit the plugin page here: HTML Entities Button
How To Disable Automatic Conversion Of Special Characters
What if you don’t want your WordPress site to automatically convert text characters into smilies or emoji?
Well, with WordPress you can!
Here are some plugins that can disable this functionality…
Keep Emoticons As Text
Prior to WordPress version 4.3, WordPress included an option in the ‘Formatting’ section of its Writing Settings (Convert emoticons like :-) and :-P to graphics on display) which instructed WordPress to convert all of the emoticons in your posts into graphic images (e.g. smilies). This checkbox was enabled by default and allowed users to turn off the feature by unticking the box.
After the release of version 4.3, WordPress removed the “Formatting” section from the Writing Settings section. This plugin does the same thing as deselecting the “convert to smilies” option that used to be available in those settings.
Note: when we last checked and tested, this plugin hadn’t been updated for a while, but it still worked fine.
For more details, visit the plugin page here: Keep Emoticons as Text
Here is another plugin you can use to disable WordPress from automatically converting Emojis from displaying on your site…
Disable Emojis
This plugin disables the new WordPress emoji functionality, removes the extra code bloat used to add support for emoji in older browsers, and complies with GDPR requirements. Emoticons will still work and emoji will still work in browsers that have built-in support for them.
For more details, go here: Disable Emojis
Additional Plugins For Adding Special Characters To WordPress Content
In addition to the plugins described above, you may want to explore the following plugins:
Insert Special Characters (Gutenberg Block)
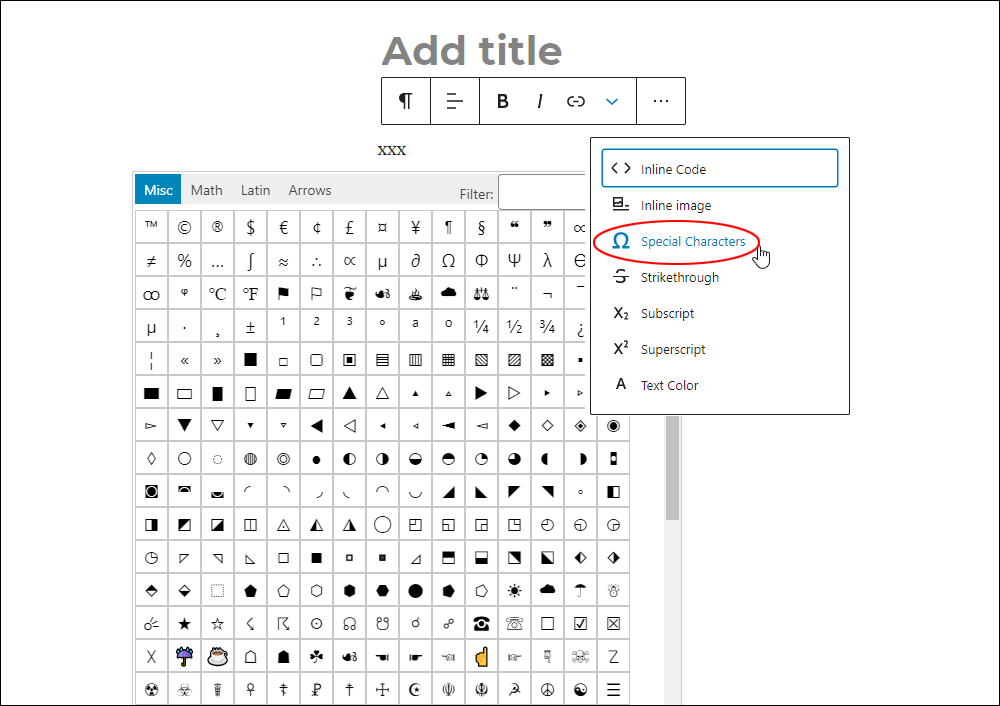
Insert Special Characters adds a ‘Special Characters’ option to the rich control menu section that lets you insert symbols while working in the WordPress block editor (Gutenberg).
For more details, visit the plugin page here: Insert Special Characters
Cyr to Lat
Cyr-To-Lat lets you convert Cyrillic characters in post, page, and term slugs to Latin characters. It also includes Russian, Belorussian, Ukrainian, Bulgarian, Macedonian, Serbian, Greek, Armenian, Georgian, Kazakh, Hebrew, and Chinese characters.
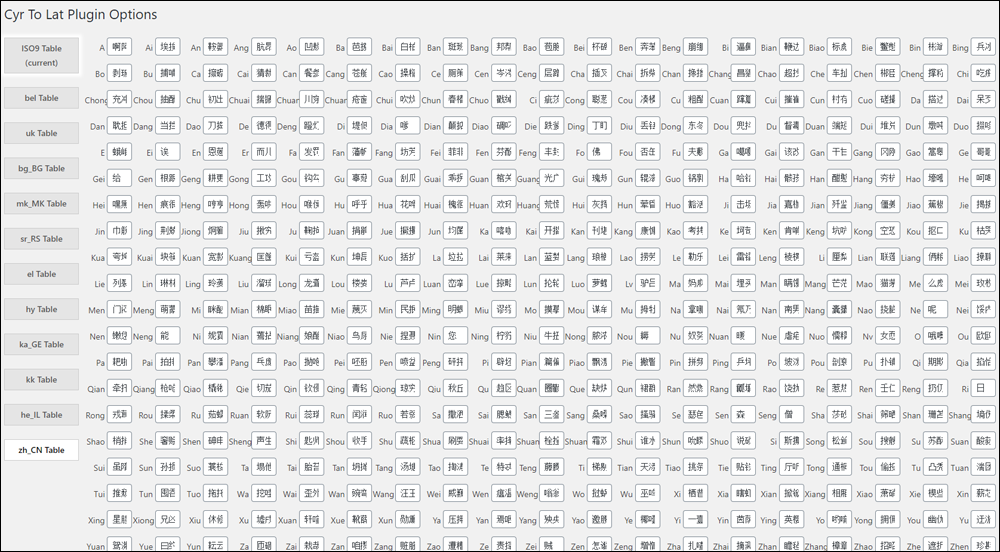
For more details, visit the plugin page here: Cyr-To-Lat
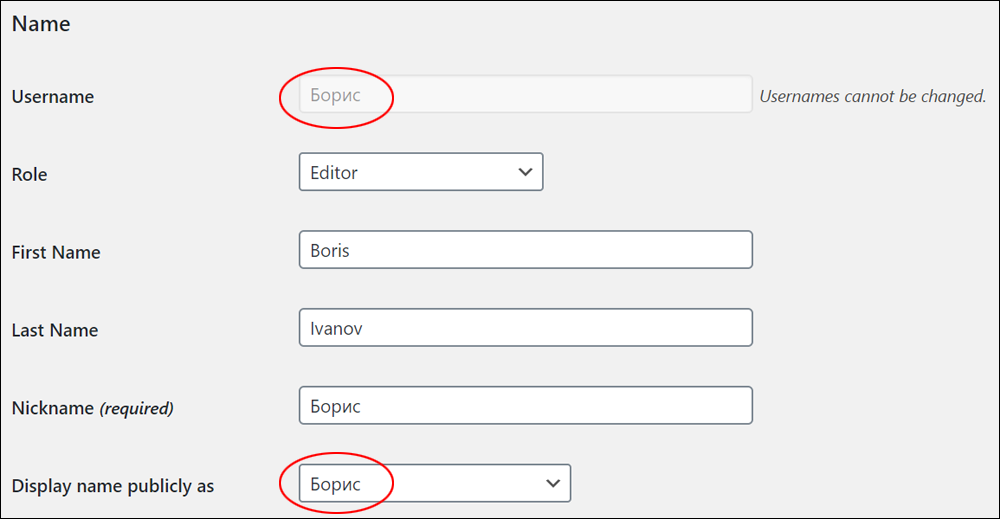
WordPress Special Characters in Usernames

By default, WordPress does not allow you to use special characters in usernames. Non-Latin characters are filtered out and users cannot create accounts containing Cyrillic (Russian) or Arabic letters. WordPress Special Characters in Usernames enables usernames containing special characters (Russian, Cyrillic, Arabic …) on your WordPress site.
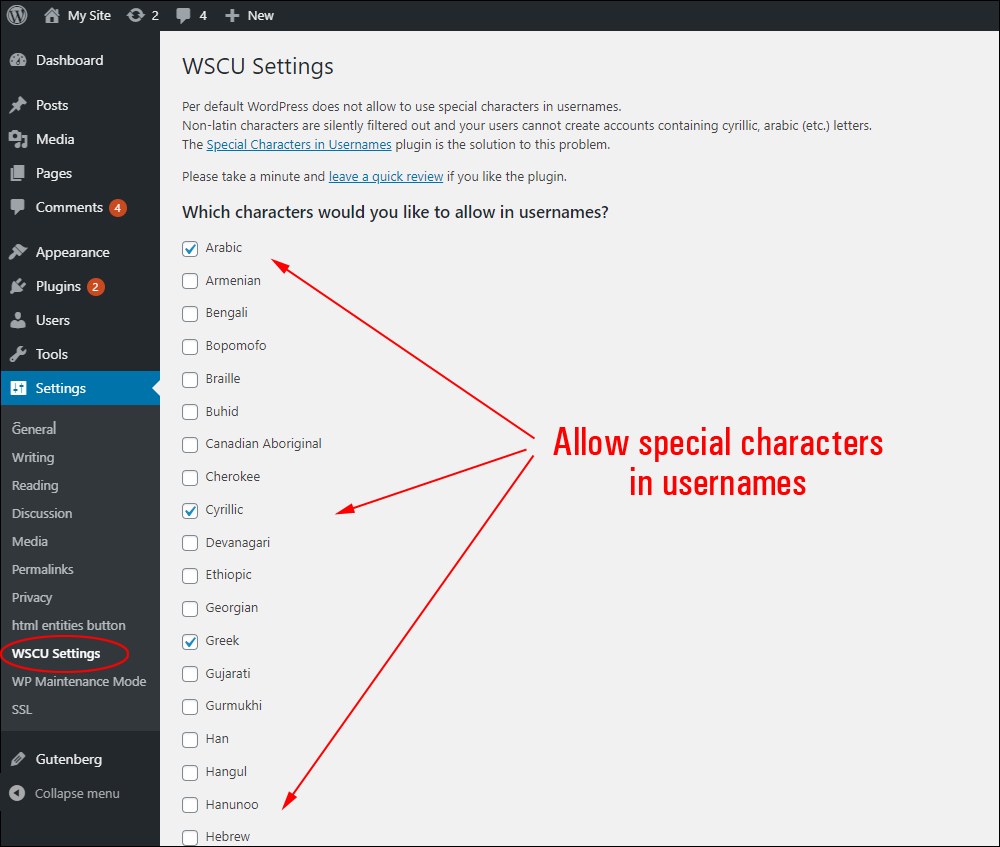
Once the plugin has been installed, activated, and configured, users will be able to use special characters in their usernames when registering on your site.
Special Characters – Additional Resources
The sites below provide additional resources and information about using special characters:
- ASCII HTML Character Codes
- HTML Character Codes: A-Z
- HTML Entity Codes
- HTML Character Entity Reference Chart
- Emoticons
- Emoji
Congratulations! Now you know how to insert symbols and special characters into your WordPress posts and pages.
Images: Pixabay
***
***
"Your training is the best in the world! It is simple, yet detailed, direct, understandable, memorable, and complete." Andrea Adams, FinancialJourney.org
We are not affiliated, associated, sponsored, or endorsed by WordPress or its parent company Automattic. This site contains affiliate links to products. We may receive a commission for purchases made through these links.