 Always backup your WordPress site before making changes to important files and make copies of any files that you are about to modify.
If you don’t want to edit WordPress files yourself, ask an experienced person to help you.
***
Are you getting a message in your WordPress Media Uploader that you don’t have sufficient memory to upload certain files to your WordPress site?
In this tutorial, you will learn what the cause of this issue is, and how to increase the maximum file upload size in WordPress in order to eliminate those errors and help get your files uploaded to your site.
How To Increase WordPress File Upload Size
Check Your Webhosting Settings
Depending on your web hosting setup and server configuration (and especially on shared hosting accounts), you may experience problems trying to upload some files like audios and videos, to your WordPress site using the Media Uploader function.
Often, problems arise because not enough memory has been allocated to your WordPress Media Uploader …
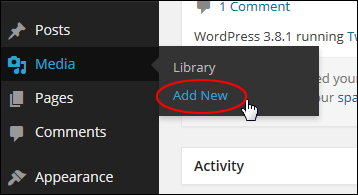
(Media Menu – Add New)
In the screenshot below, for example, you can see that the Maximum upload file size assigned to your hosting account by your webhosting provider is only “2MB” …
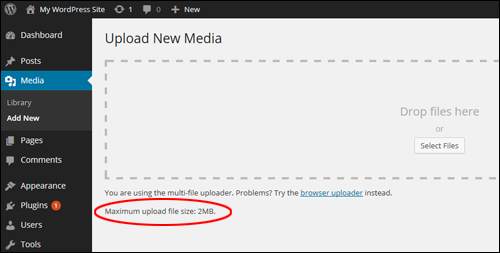
(Upload New Media – Maximum Upload File Size)
While a limit of 2MB is fine for most images, it is clearly not enough memory to upload media files like videos, audios, etc.
If you try to upload a file that is larger than the upload file size limit, you will get an error message like the one shown in the screenshot below …
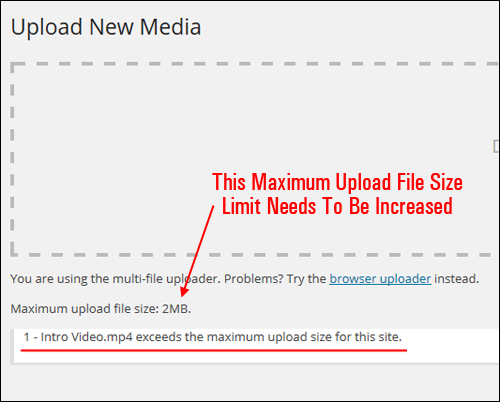
(Maximum Upload File Size Limit Needs To Be Increased)
The solution, clearly, is to increase the maximum upload file size limit for your site. The easiest way to do this is to ask your web host to increase your limit. If you want to increase the maximum upload file size limit yourself, however, then follow the tutorial below.
Change The Settings In Your Server’s PHP Configuration Settings
The maximum upload file size limit setting is controlled by your server’s ‘PHP Configuration Editor’.
To change this setting, log into your cPanel account, then scroll down to the ‘Software/Services’ section and click on ‘PHP Configuration’ …
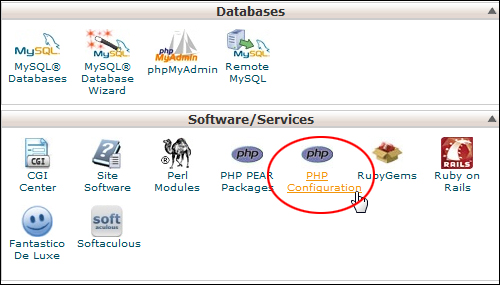
(cPanel Software / Services – PHP Configuration)
You will see a message informing you that your PHP configuration settings are customizable by the server administrator (not the user) …
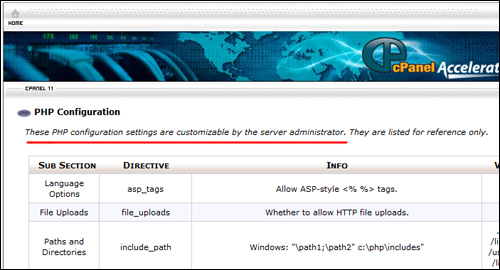
(cPanel – PHP Configuration)
To increase the maximum upload file size limit without modifying any code in your files, you will need to have access to your server’s Web Hosting Manager (WHM) account.
![]()
Having access to your server’s WHM (Web Hosting Manager) account is not the same as having access to your cPanel user account.
WHM is the administrative console for cPanel-based internet web hosting servers.
Basically, cPanel and WHM is the same software, but “cPanel” refers to the user interface and is accessed by the user to control certain aspects of their webhosting account (e.g. set up emails, edit files, view databases, etc.), and “WHM” refers to the administrator interface, and is accessed by the administrator who manages the server and who needs to set up, control, and manage the Cpanel user accounts and logins within the server.
If you are hosting your WordPress site on a “shared hosting” server plan, then you probably don’t have access to WHM – only cPanel.
If your site is hosted on a “dedicated” server (i.e. where no one else shares your server – the server is only for you), then you should have access to your WHM account.
If so, then log into your WHM account …
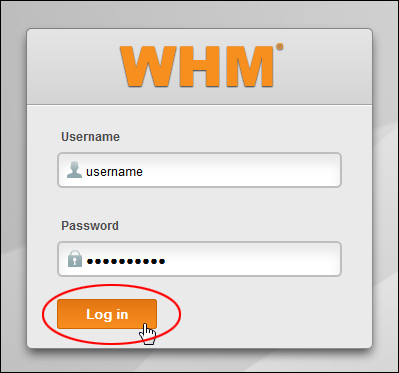
(Web Hosting Manager Login)
This will bring you to the WHM control panel …
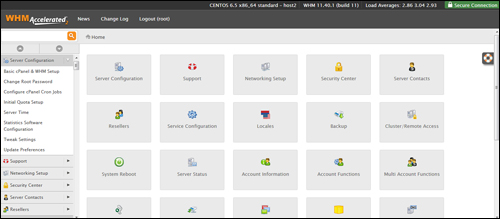
(WHM Control Panel)
Click on the WHM icons, or scroll down the main menu to locate the ‘Service Configuration’ section, and then click on ‘PHP Configuration Editor’ …
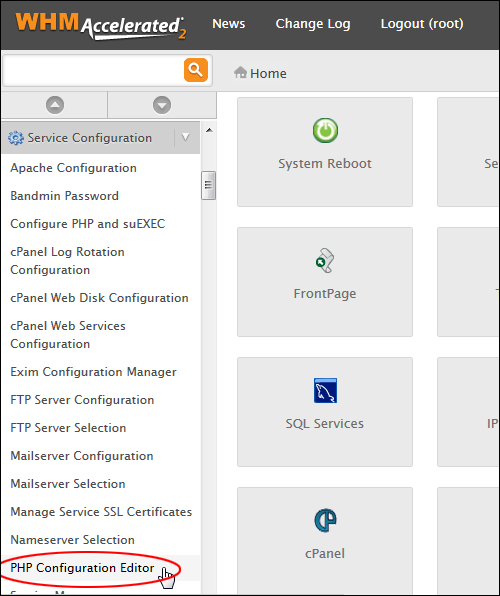
(WHM – PHP Configuration Editor)
In the ‘PHP Configuration Editor’ screen, select ‘Advanced Mode’ …
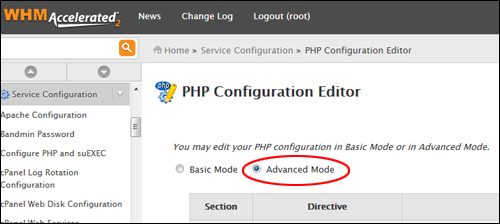
(PHP Configuration Editor – Advanced Mode)
Scroll down the settings page until you find this function …

“post_max_size” is the function that controls your maximum upload file size …

(‘post_max_size’ value limit set too low)
Change this setting to a higher limit (e.g. 10MB, 32MB, 64MB, 128MB), etc …

(‘post_max_size’ value limit increased)
Scroll down to the bottom of the ‘PHP Configuration Editor’ page and click the ‘Save’ button to update your settings …

(Save your PHP configuration settings)
Your previous settings will be overwritten by the new upload file size limit in the server’s ‘php.ini’ file …
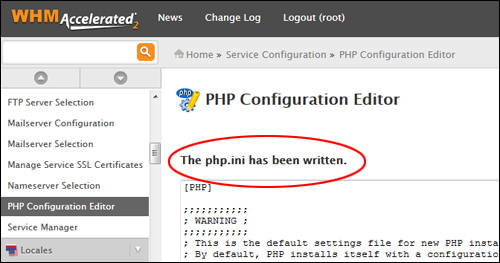
(Your previous settings will be overwritten in the ‘php.ini’ file)
You should now see the new upload size limit in your Media Uploader section …
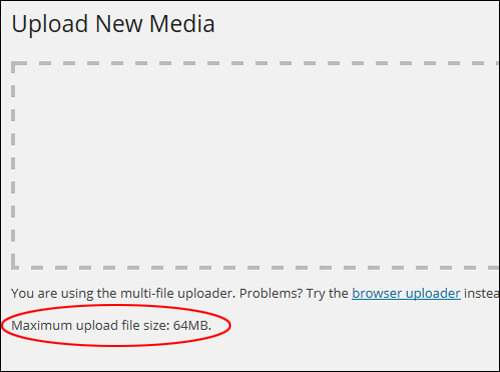
(Your maximum upload file size limit has been increased!)
Note: Setting the limit to 64MB – 128MB should be more than sufficient to upload most types of media files.
![]()
The methods listed below require modifying server files, and may not work for you if you are on a shared hosting plan. The simplest thing to do in this case is to contact your web hosting company and request them to increase your file upload size limit.
Create Or Edit An Existing PHP.ini File
The ‘php.ini’ file is the PHP configuration file containing instructions to your server about how to handle PHP functions based on your hosting account’s PHP settings. The php.ini file is where you declare changes to your PHP settings. You can use the default settings for the server, change specific settings by editing the existing php.ini file, or simply create a new text file and name it php.ini.
If you are on a shared hosting plan, then you will probably not see a ‘php.ini’ file in your directory.
If you can’t see a file called php.ini, then create a new text file and save your file as php.ini (select ‘Save as type: All Files’) …
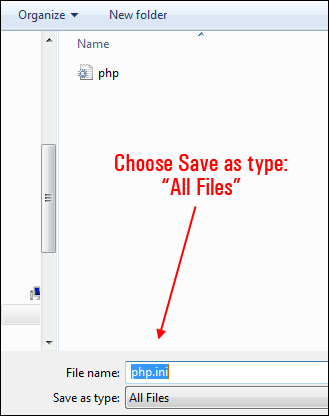
(php.ini)
In your new php.ini file add the following code, as shown below …
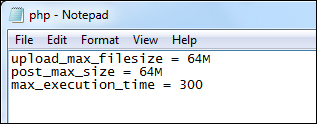
(Add this code to your ‘php.ini’ file)
Resave the file and upload it to your ‘wp-admin’ folder (or root folder depending on your host), using FTP or cPanel.
If you need help uploading files to your server using FTP or cPanel, see the tutorial below:
This file will now instruct your server to allocate the settings you have specified to your site.
![]()
Notes:
Depending on your hosting setup, you may need to rename your php.ini file php5.ini in order for this method to work.
If you experience issues with this method, try readjusting the settings in your php.ini file. For example, you may not have 64MB available to assign to your Media Uploader. In this case, try 32MB, or 10MB (or consider upgrading your hosting plan).
.htaccess File Method
If the php.ini method does not work for you, then try adding the following lines of code to your ‘.htaccess file’, and reuploading the file to your root directory …

(.htaccess file)
To learn more about your .htaccess file, see the WordPress training module below:
![]()
If you plan to upload large media files to your site, it’s probably a good idea to consider using a CDN (Content Delivery Network), or remote cloud storage facility like AmazonS3 or Dropbox to store your large files, and display their content on your posts and pages.
To learn more about uploading videos to your WordPress site, see the tutorial below:
To learn more about uploading audios to your WordPress site, see the tutorial below:
Hopefully, the above information will help you get your files uploaded to your site with no further problems.
***
"I am beyond impressed with what you have put together. I can tell that you put a ton of hard work into building what you have. You have the absolute best content on WordPress I have ever seen!" - Robert T. Jillie
***