
Backing up your WordPress site is crucial because it protects your content, settings, and customizations from data loss.
Whether due to hacking, server failures, or user errors, having a backup ensures you can restore your site quickly and minimize downtime and potential damage to your business.
In this tutorial, we list the most popular and trusted backup plugins you can use to keep your WordPress site backed up and safe.
WordPress Backup Plugins
WordPress backup plugins create copies of your website’s files, database, or both. These backups can be stored locally or in cloud storage and are essential for restoring your site in case of data loss, hacking, or other emergencies.
Why Is Using Backup Plugins Important?
Backup plugins are important tools for WordPress site management and site security:
- Disaster Recovery: If your site is hacked, corrupted, or accidentally deleted, a backup allows you to restore it to a previous, stable state.
- Protection Against Updates: Sometimes, updates or installations of themes, plugins, or core WordPress can break your site. Having a backup lets you roll back changes easily.
What To Look For In A Good WordPress Backup Plugin
Consider the following when choosing a WordPress backup plugin for your site:
- Reliability: Ensure the plugin consistently performs backups and restores without issues.
- Automated Scheduling: Look for plugins that offer flexible scheduling options.
- Storage Options: A good plugin should support multiple storage locations, including local, cloud, and remote servers.
- Ease of Restoration: The ability to quickly and easily restore your site from a backup is crucial.
- Support and Updates: Choose a plugin that is regularly updated and well-supported by its developers.
Best WordPress Backup Plugins
WordPress offers a great choice of robust backup plugins to suit all types of websites. Here are some of the best and most popular backup plugins for WordPress:
Snapshot Pro
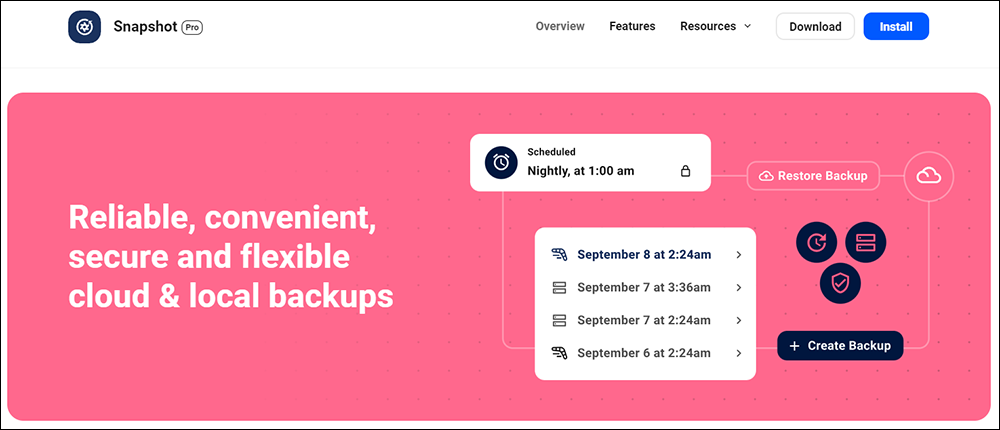
Snapshot is a backup plugin for WordPress that allows you to create and manage backups of your website’s data and store these on-site and off-site with FTP and SFTP, Amazon S3, Dropbox, Google Drive, and WPMU DEV cloud.
Snapshot Pro lets you restore a website easily from the admin dashboard, even when the site is down or locked up.
With Snapshot Pro, you can create unlimited snapshots, schedule backups, and customize what’s backed up. You can also store unlimited snapshots, auto-remove old backups, set backup intervals, and download log files.
The plugin is also flexible when it comes to backing up WordPress, allowing you to back up a single install of WordPress or, back up the main site and sub-sites of a Multisite network separately.
You can also manage snapshots directly in the WordPress dashboard or use the plugin in conjunction with WPMU DEV managed backups to save backups to multiple locations, creating redundant backups and ensuring no loss of content in the event of a hack or error.
The plugin is also included with WPMU DEV’s WordPress site management tool.
More info: Snapshot Pro
UpdraftPlus
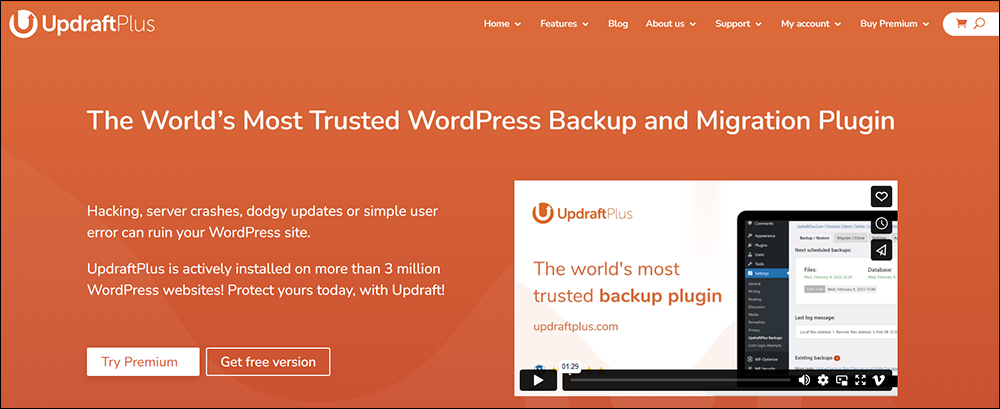
UpdraftPlus is a leading WordPress backup, restore, and migration plugin, trusted by millions of WordPress users globally. Its user-friendly interface allows you to perform full backups of your WordPress site, including files, databases, plugins, and themes, with just a single click. You can schedule these backups at intervals that suit you—ranging from every 2 hours to monthly—ensuring your site is always protected.
UpdraftPlus is more than just a backup plugin. It offers a complete suite of tools for website management, allowing you to restore your site directly from your WordPress control panel or migrate it to a new domain or host within minutes. The plugin is tested across more scenarios and installed on more servers than any other WordPress backup solution, making it a reliable choice for any WordPress user.
The Premium version of UpdraftPlus unlocks even more powerful features. It supports a wider range of remote storage options, such as Microsoft OneDrive, Google Cloud, Backblaze, and pCloud, ensuring your backups are securely stored offsite. It also offers incremental backups, which save server resources by only backing up changes made since the last backup.
With UpdraftPlus Premium, you can schedule backups during periods of low traffic, automatically back up your site before updating WordPress or plugins, and apply advanced retention rules to control the number of backups stored. Additionally, Premium users can migrate an unlimited number of websites, manage multiple WordPress sites remotely with UpdraftCentral, and enjoy 1GB of integrated storage through UpdraftVault.
UpdraftPlus stands out not just for its features but also for its reliability and user satisfaction. It has more 5-star reviews on the WordPress directory than any other backup plugin, and 88% of support tickets are responded to within 24 hours by a team of skilled developers.
Whether you’re a WordPress novice or a seasoned developer, UpdraftPlus provides a robust, flexible, and easy-to-use backup solution for protecting your website and managing your data effectively.
More info: UpdraftPlus
Solid Backups
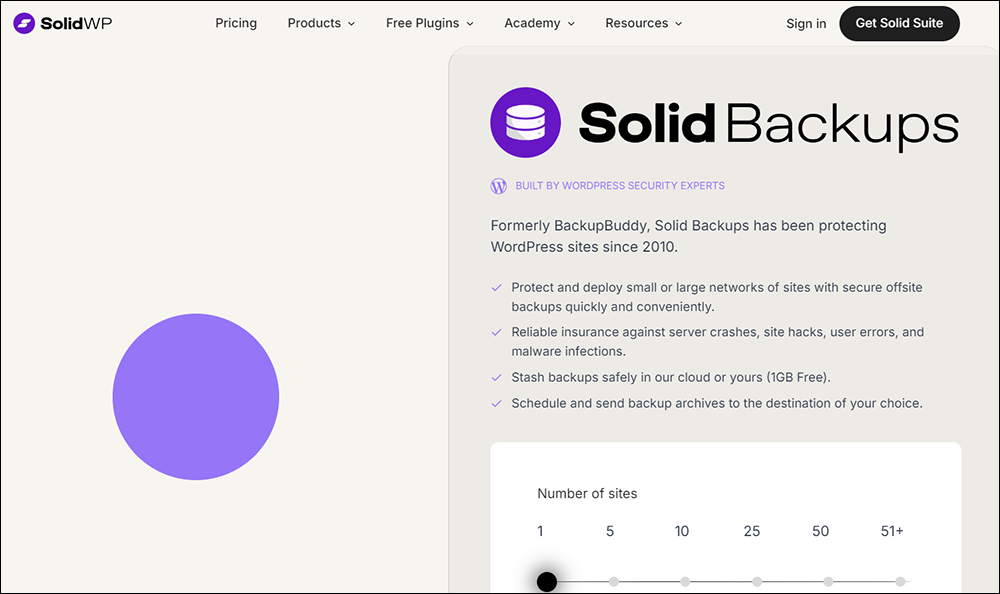
Solid Backups (formerly BackupBuddy), has been safeguarding WordPress sites since 2010, offering a robust and comprehensive backup solution designed for both small and large networks.
Whether you’re protecting against server crashes, malware, or user errors, Solid Backups ensures that your site’s data is secure, backed up, and easily restorable.
Key Features and Benefits
- Complete Backup Solution: Solid Backups offers a reliable, set-it-and-forget-it solution for archiving your entire WordPress site, including the database, files, themes, plugins, and more. You can choose to back up the entire site or select specific files, folders, and database tables to archive.
- Secure Offsite Storage: Your backups are encrypted and can be safely stored in your preferred cloud storage (Amazon S3, Dropbox, Microsoft OneDrive) or Solid Stash, which offers 1GB of free, secure storage. This offsite storage ensures your backups are safe from local server failures.
- Flexible Backup Schedules: Automate your backup process with custom schedules that fit your needs. Solid Backups can run backups hourly, daily, weekly, or on any schedule you define, keeping your site protected without any manual intervention.
- Effortless Restoration: Not every recovery requires a full site restore. With Solid Backups, you can easily roll back specific database changes or restore individual files from your backup archives. This selective restore feature is perfect for recovering from minor issues without disrupting the entire site.
- Seamless Site Migration: Solid Backups simplifies the process of migrating sites. Whether you’re moving an existing site to a new server or deploying a locally built site, Solid Backups handles domain and URL replacements, even within serialized data, ensuring a smooth transition.
- Mass Cloning and Staging: Quickly clone sites for new projects or staging environments. Solid Backups allows you to use existing sites as blueprints, saving time and ensuring consistency across multiple sites.
- Comprehensive Support and Updates: A Solid Backups purchase includes a one-year subscription to ticketed support and access to all new plugin updates. Even after your subscription expires, the plugin remains fully functional, though renewing ensures continued access to the latest features and support.
- No Backup Size Limits: Solid Backups does not impose any limitations on the size or scope of your backups. However, performance may vary depending on your hosting environment, particularly for larger sites on shared hosting plans.
- Technical Requirements: Solid Backups requires a Linux server with PHP 7.2, Apache 2.2, and MySQL 5.1 (or alternatives like Nginx, Litespeed, MariaDB, and MySQLi). It is optimized for WordPress environments and supports development on Windows, though not in production settings.
Solid Backups is a powerful, easy-to-use backup and restoration plugin that provides comprehensive protection for your WordPress sites. With automated backups, secure storage options, and seamless site migration tools, Solid Backups provides insurance against data loss and site downtime.
More info: Solid Backups
BlogVault
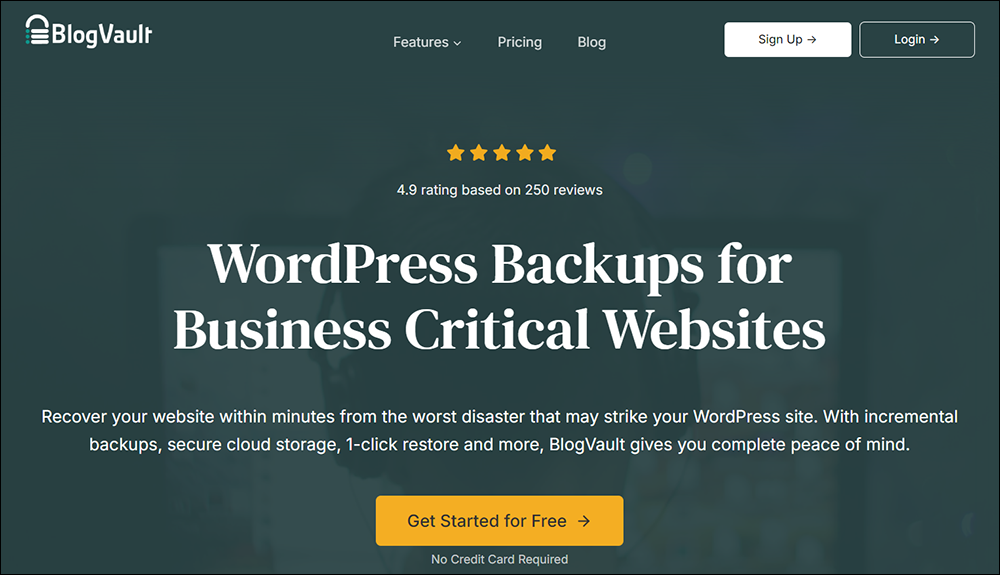
BlogVault is a powerful and reliable WordPress backup solution designed to safeguard your website against any disaster. It offers a comprehensive set of features that ensure your site’s safety and functionality, making it an ideal choice for business-critical websites.
Key Features and Benefits:
- Incremental Backups: BlogVault provides incremental backups that save only the changes made since the last backup, minimizing server load and ensuring your backups are efficient and up-to-date.
- Secure Cloud Storage: Your website’s data is stored securely across multiple encrypted data centers, providing enterprise-grade security at no additional cost.
- 1-Click Restore: In the event of a website crash or data loss, BlogVault’s 1-click restore feature allows you to recover your site quickly and with a 100% success rate.
- Staging and Migrations: Create staging environments with a single click to test changes safely. BlogVault also offers seamless migration capabilities, allowing you to move your site to any web host with ease.
- Advanced Monitoring and Security: BlogVault continuously monitors your website, provides real-time updates on changes, and integrates security features such as automatic malware scans, one-click malware removal, and a real-time firewall.
- Real-time WooCommerce Backups: For WooCommerce sites, BlogVault’s real-time backups capture every order and critical event, ensuring that you never lose a transaction, all without affecting your site’s performance.
- WordPress Multisite Support: BlogVault is fully compatible with WordPress Multisite installations, allowing you to back up, restore, and migrate multisite networks just as easily as single sites.
- Ease of Use: BlogVault is incredibly easy to set up, with automatic configuration that gets your backups running in under 60 seconds.
With over a decade of experience and more than 4 million websites backed up, BlogVault is a reliable and trusted WordPress backups solution for all types of sites, from small blogs to large e-commerce stores.
More info: BlogVault
BackWPup
BackWPup is one of the most trusted and widely used WordPress backup plugins, with over 700,000 active users and more than 12 million downloads.
Designed to ensure the safety of your website, BackWPup provides a comprehensive set of features for creating complete backups, restoring your site effortlessly, and migrating to new domains.
Key Features:
- Complete and Encrypted Backups: Secure your data with full backups of all files, databases, and installed plugins. Encrypt your backup archives for added security.
- Automatic Restore and Emergency App: Restore your site with a single click or use the standalone app for emergency situations, ensuring your site is back online quickly.
- Cloud and Remote Storage Options: Back up to popular cloud services like Microsoft Azure, Dropbox, Google Drive, Amazon Glacier, and OneDrive, or store backups on your own webspace or network.
- Migration and Multisite Support: Easily migrate your website to a new domain and manage backups across WordPress Multisite installations.
- Comprehensive Administration: Manage backup archives, log files, and job settings with ease. Receive log reports via email for continuous monitoring.
- Advanced Tools and Wizards: Use built-in wizards to execute system tests, create backup jobs, and import settings, simplifying the backup process.
With detailed documentation, personal premium support, and automatic updates, BackWPup is an all-in-one backup solution for WordPress sites.
More info: BackWPup
Jetpack VaultPress Backup
Jetpack VaultPress Backup (formerly VaultPress), is
Jetpack VaultPress Backup is a leading real-time WordPress backup solution trusted by millions, making it one of the most reliable options available.
Key Features:
- Real-Time Backups: Capture every change instantly, ensuring that no data is lost, even if your host’s servers go down.
- One-Click Restores: Get your site back online in seconds with easy, one-click restores, even if your site is offline.
- Comprehensive Backup Coverage: Protects all your WordPress and WooCommerce data, including databases, files, customer orders, and products, with global redundancy for added security.
- Cloud-Based Storage: Backups are stored off-site in the ultra-secure Jetpack Cloud, minimizing server load and ensuring your data is always safe.
- WooCommerce Support: Tailored specifically for WooCommerce stores, VaultPress Backup allows you to restore your site to any past state while keeping all orders and products current, ensuring GDPR compliance.
- Activity Log: Track every site change, including who made it and when, making it easier to debug issues and restore to specific points.
- Unlimited Restores & Migrations: Move your site to any host with no size limits and without needing a developer.
Jetpack VaultPress Backup is built on WordPress.com’s world-class infrastructure, offering reliability, ease of use, instant recovery options, best-in-class support, and the ability to restore your site from anywhere using the Jetpack mobile app.
More info: Jetpack VaultPress Backup
WP Time Capsule
WP Time Capsule offers a sophisticated and intelligent backup solution designed for seamless website protection and management.
Key features and benefits:
- Incremental Backups: Instead of backing up your entire site every time, WP Time Capsule backs up only the changes. This method is efficient, reducing storage usage and saving costs.
- Real-Time Backups: Backups occur automatically in real-time as changes are made. This ensures your backup is always current, and you can revert to a recent version with minimal data loss.
- One-Click Restore: In the event of a hack or other issues, you can restore your site to a previous state with just one click, simplifying disaster recovery.
- Staging Environment: Test changes and updates on a clone of your site before making them live. This feature helps avoid disruptions by allowing you to experiment safely.
- White-Label Solution: Agencies can rebrand the plugin by removing all mentions of “WP Time Capsule,” offering a customized backup solution to clients.
- Cost-Effective: The plugin minimizes storage requirements by backing up only changes, which also reduces server load and costs.
- Cloud Storage Compatibility: Backups are stored in your choice of cloud storage services, such as Google Drive, Dropbox, Backblaze B2, or Amazon S3, ensuring that your data is under your control.
- Automatic Updates: Backups are created before updates are applied, ensuring you can roll back if an update causes issues.
- Ease of Use: WP Time Capsule operates quietly in the background once set up, requiring no manual scheduling or intervention.
WP Time Capsule is designed to provide a hassle-free and reliable backup experience, making it an ideal choice for business owners, agencies, and eCommerce sites seeking robust website protection.
More info: WP Time Capsule
Duplicator
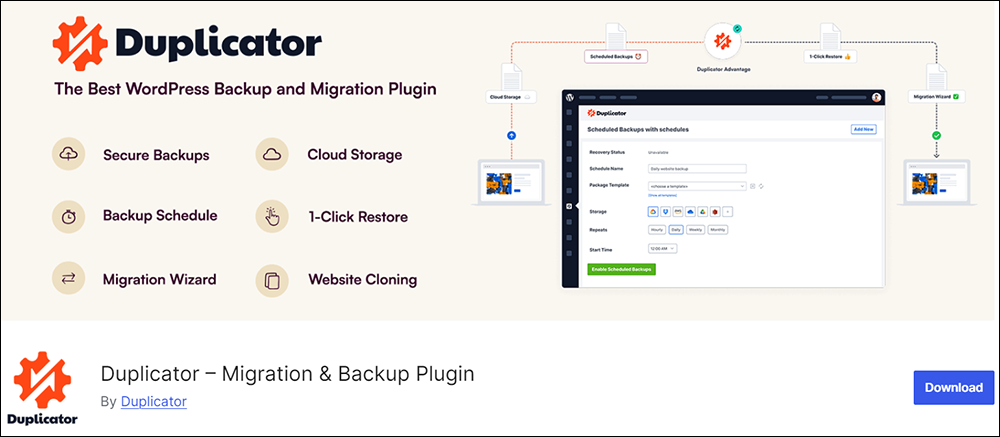
Duplicator is a leading WordPress backup and migration plugin trusted by over 1.5 million users for its ease of use and robust features.
Benefits of using Duplicator:
- Reliable & Secure: Duplicator offers reliable backups and encrypted storage to protect against data loss and server failures.
- User-Friendly: No technical skills required to set up backups or perform migrations.
- Fast & Efficient: Streamlined installer and migration tools save time and reduce complexity.
- Exceptional Support: Highly-rated customer support team, with over 3,500 five-star reviews.
Key Features:
- Complete Backups: Create full backups of WordPress files and databases with ease, ensuring all your data is secure.
- Automatic Backup Scheduling: Set up regular backups on a daily, weekly, monthly, or even hourly basis to keep your data consistently protected.
- Cloud Storage Integration: Store backups on popular cloud services such as Dropbox, Google Drive, Amazon S3, OneDrive, and more, with AES-256 encryption for added security.
- 1-Click Restore: Quickly recover your site from any issues using the 1-click restore feature, which allows you to roll back to a previous state effortlessly.
- Migration Wizard: Simplify site migration with an intuitive wizard, enabling you to move websites in just two steps without needing technical expertise.
- Server to Server Import: Import backups directly from a server or cloud storage via URL, bypassing the need for manual downloads.
- Custom Search & Replace: Easily update URLs and other site details with the built-in search and replace tools.
- Multi-site Network Support: Backup and migrate WordPress multisite networks, or convert subsites to standalone sites as needed.
- Shared Database Support: Migrate sites where databases are shared with other WordPress installations.
Duplicator is ideal if you need a straightforward and powerful solution for WordPress backups and migrations.
More info: Duplicator
Pros And Cons Of Using WordPress Backup Plugins
Here are the key pros and cons of using backup plugins on your WordPress site:
Pros Of Using A Backup Plugin
- Ease of Use: Most backup plugins are user-friendly and require minimal technical knowledge or expertise to use.
- Automated Scheduled Backups: Backup plugins allow automated backups to run at regular intervals, reducing the risk of forgetting to back up your site and minimizing the need for manual intervention.
- Flexibility: Many plugins allow you to choose what to back up (e.g., database only, files only) and where to store it . Most plugins also offer multiple storage options, including cloud services like Dropbox, Google Drive, and Amazon S3.
Cons Of Using A Backup Plugin
- Resource Intensive: Running backups can consume server resources and potentially slow down your site.
- Dependency on Plugins: Relying solely on a plugin for backups can be risky if the plugin fails or is not regularly updated.
WordPress Backup Plugins – Free vs Paid
Automating WordPress site maintenance involves several critical functionalities that may be lacking in free backup plugins.
For example, here are some essential features typically found only in premium solutions:
- Automated Site Updates: Premium plugins often offer automated updates for WordPress core, themes, and plugins, ensuring your site remains up-to-date without manual intervention.
- Incremental Backups: Unlike many free plugins that only offer full backups, premium tools may provide incremental backups, which save only the changes since the last backup, reducing server load and backup time.
- Enhanced Backup Storage Options: Premium plugins usually support a wider range of remote storage options, including advanced cloud storage services like Microsoft Azure, Google Cloud, and more, beyond the basic Dropbox and Google Drive integrations available in free versions.
- Pre-Update Backups: Automatically backing up your site before applying updates to WordPress core, plugins, or themes helps safeguard against potential issues caused by updates.
- Advanced Restoration Capabilities: Features such as the ability to restore individual files or database tables, rather than the entire site, are often found in premium plugins.
- Multisite Support: Premium solutions frequently offer support for WordPress Multisite networks, allowing you to manage backups and maintenance across multiple sites from a single dashboard.
- Security Enhancements: Advanced security features such as encryption of backup files and detailed activity logging are more common in premium plugins, providing better protection for your data.
- Automated Reporting: Premium plugins often include automated reporting and notifications, which provide insights into backup status and potential issues without manual checks.
- Backup Retention Policies: The ability to set custom backup retention rules to automatically manage the number of backups retained, ensuring optimal use of storage space.
- Integrated Management Tools: Features like centralized management for multiple WordPress sites and support for staging environments for testing updates are typically available in premium plugins.
These functionalities ensure a more comprehensive and automated approach to maintaining and securing your WordPress site, which free plugins may not fully support.
Alternative Solutions To Using Backup Plugins
WordPress users aren’t limited to using WordPress backup plugins.
Alternative solutions to using plugins for creating backups of your site include:
- Hosting-Level Backups: Many hosting providers offer backup services as part of their hosting plans. These backups are often simpler and integrated directly into the server environment.
- Manual Backups: You can manually download your WordPress files and database via FTP and phpMyAdmin. This method gives you full control but requires more effort and technical knowledge.
***
We hope you found the above information helpful.
***
"These tutorials have so much information and are easy to understand. If you use WordPress or plan to in the future these will help you with everything you need to know." - Valisa (Mesa, Arizona)
***