 In this tutorial, you will learn:
- How to edit and delete individual and multiple pages in WordPress,
- How to use the features of the WordPress Table of Pages to perform bulk page edits and deletions, and
- Useful and time-saving tips when using and editing pages.
Notes:
- Editing and deleting pages in WordPress is similar to editing and deleting posts.
- If you need help creating a new page in WordPress, see this tutorial: How To Create Pages In WordPress
- The screenshots in this tutorial show you how to edit and delete pages in WordPress using the WordPress Classic Editor.
- You can also edit and delete pages in WordPress using the WordPress Block Editor.
How To Edit Single Pages In WordPress
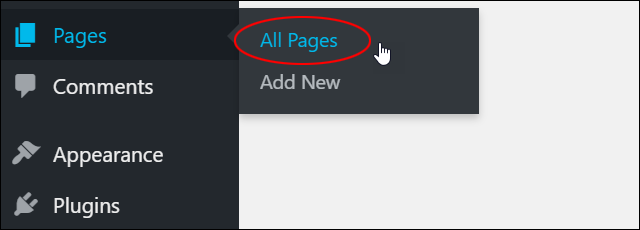
To edit a page in WordPress, log into your site’s admin area, and select Pages > All Pages from the main WordPress menu.
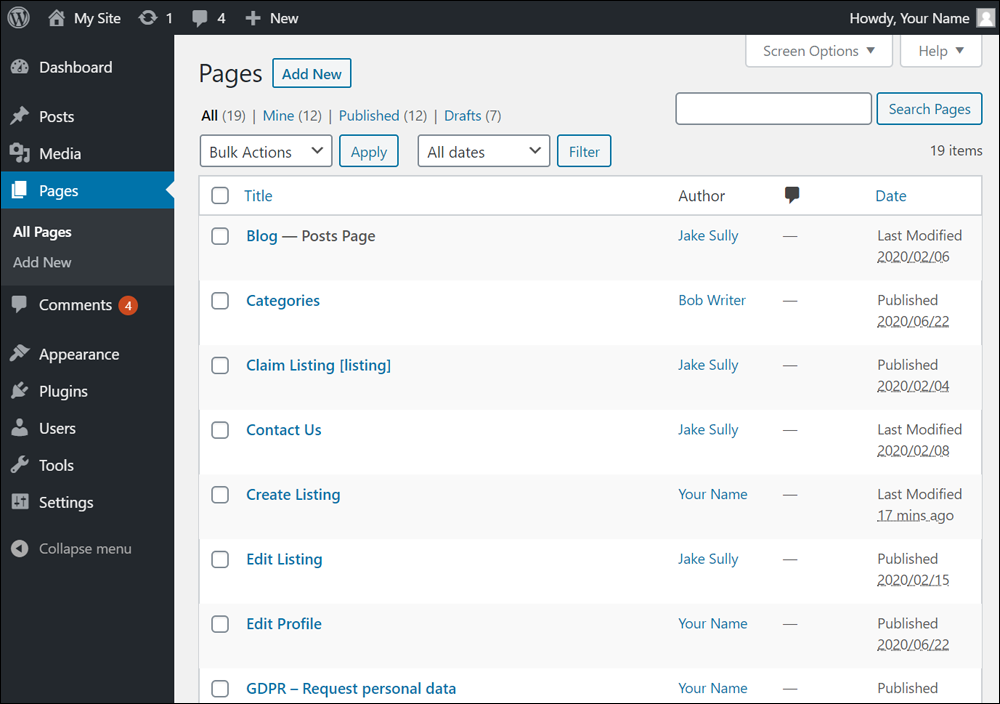
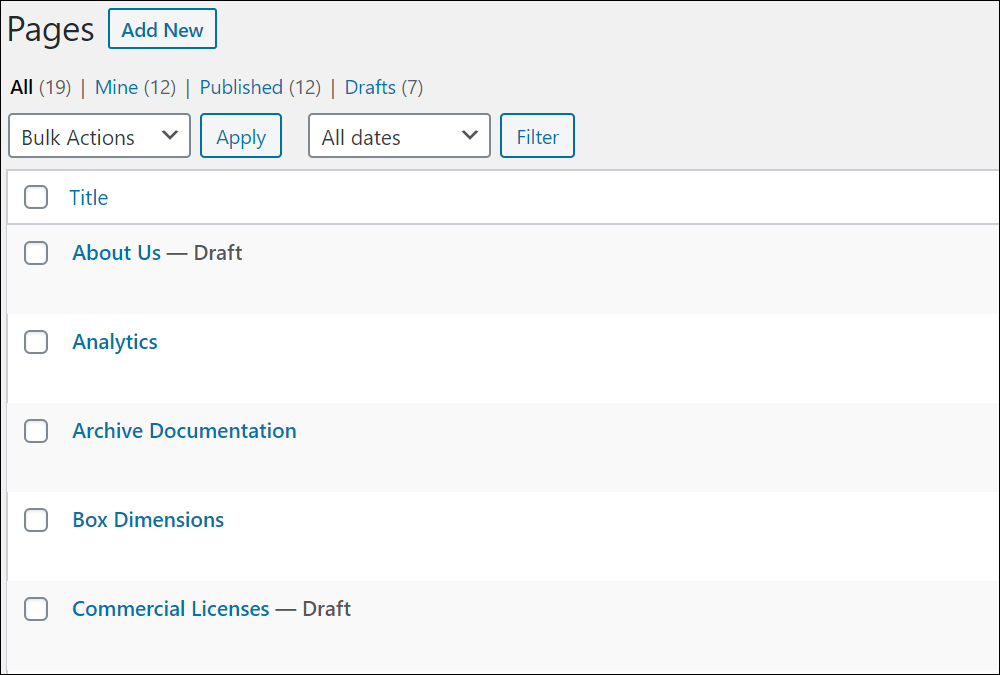
This brings up the ‘Pages’ screen, which displays a table of all the pages you have added to your site.
This table includes:
- Pages that have already been published,
- Pages that are scheduled for publishing,
- Draft pages (not yet published), and
- Pages pending review (pages that need to be approved by an administrator before being published).
Note: All the features of the Table of Pages are explained in the next section below.
In the ‘Pages’ screen, find the Page you want to edit, then either click on the title or hover your mouse over the page title to display the options menu and click on Edit.
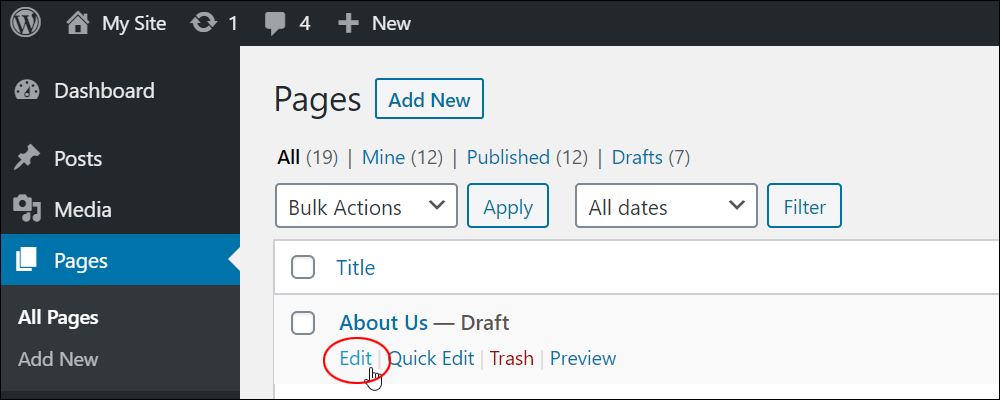
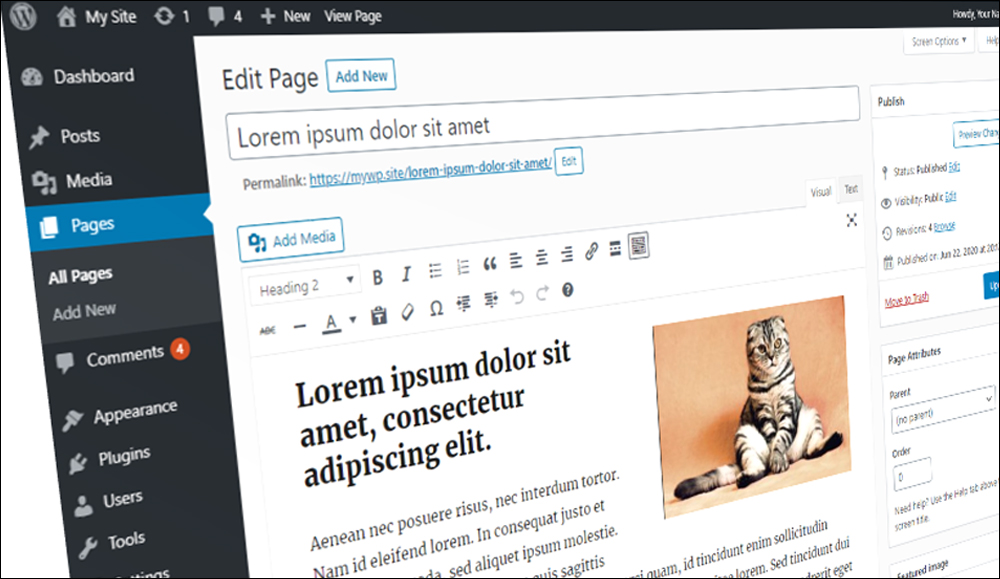
The page you have selected will open up in the Edit Page screen.

The screenshot above shows the more common areas of a WordPress page that you will typically want to edit:
- Page Title – Change the title of your page here.
- Permalink – Change the page slug here (this affects the URL of your page).
- Content Area – Edit your page content here. You can add, edit or delete text, insert and delete images, videos, and other media, etc. using the Visual Editor and/or the Text Editor.
After saving your changes, you can view your edited page by clicking on the “Page published. View page” link [1].
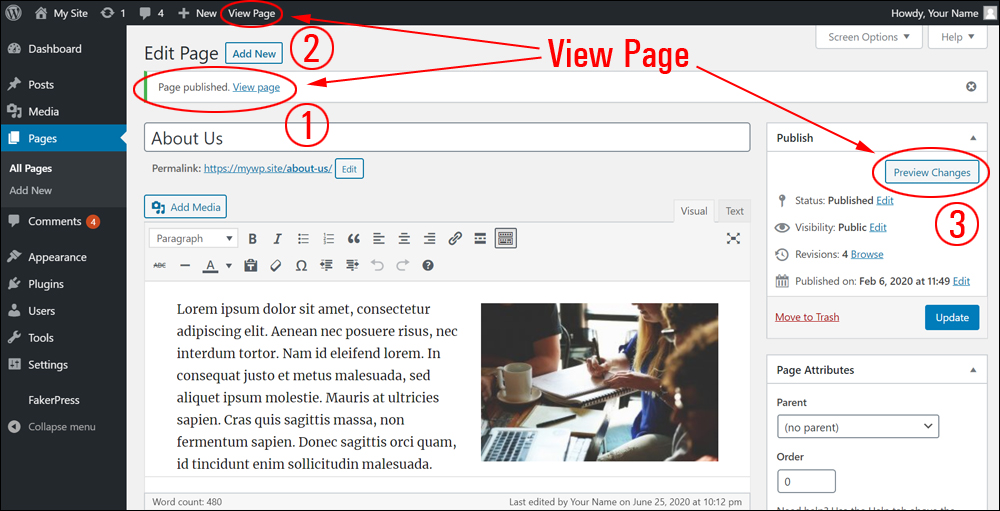
Note: You can also view your page while working in the Edit Page screen by clicking on the View Page link in the Admin toolbar [2] and previewing any changes you make by clicking on the Preview Changes button in the ‘Publish’ box [3].
WordPress Table of Pages
The table of pages lists all your pages.
Let’s go through the main features of the Table of Pages:
Pages can be selected for bulk editing or processing by clicking on the checkbox next to each page.
Title Column – The Title of each Page is displayed as a clickable link. Clicking on the Title link lets you edit the Page.
Note: Hovering your mouse over the page title also lets you edit the page and see other page options.

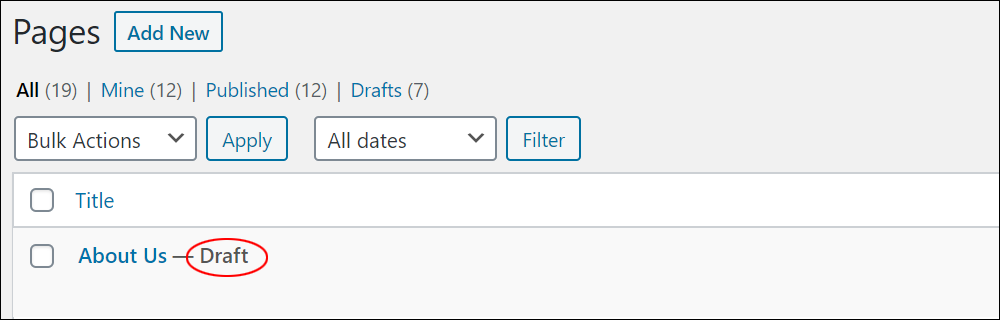
A bold text next to the Page Title will display if your Page has been saved as a Draft, Private, Pending Review, or Password Protected page.
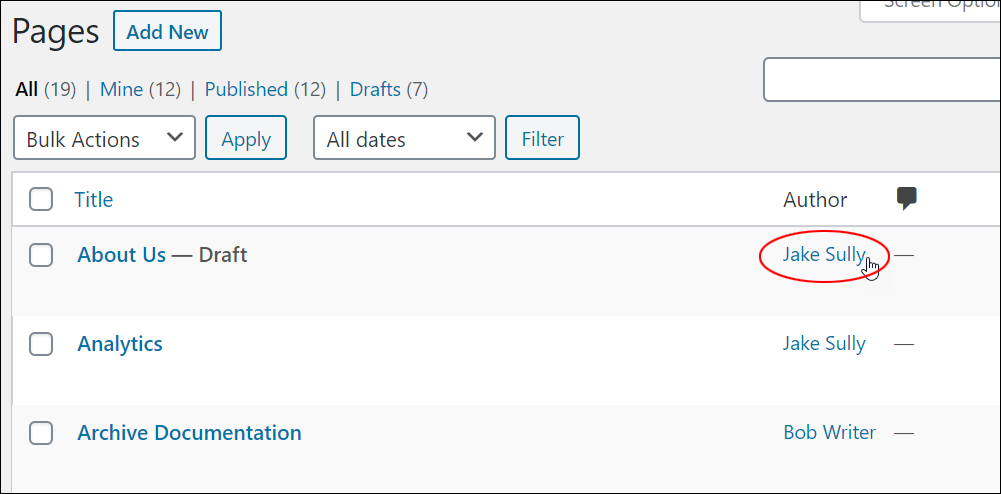
Author – The Page author is displayed in the Author column. If your site has multiple authors, then clicking on an author name will display all pages authored by that user in the Table of Pages.
Comments – The column with the “comment bubble” displays the number of comments for each page. If any pages have comments, the number of comments will be displayed in the comment bubble for that page.
You can view page comments by clicking on the comment bubble.
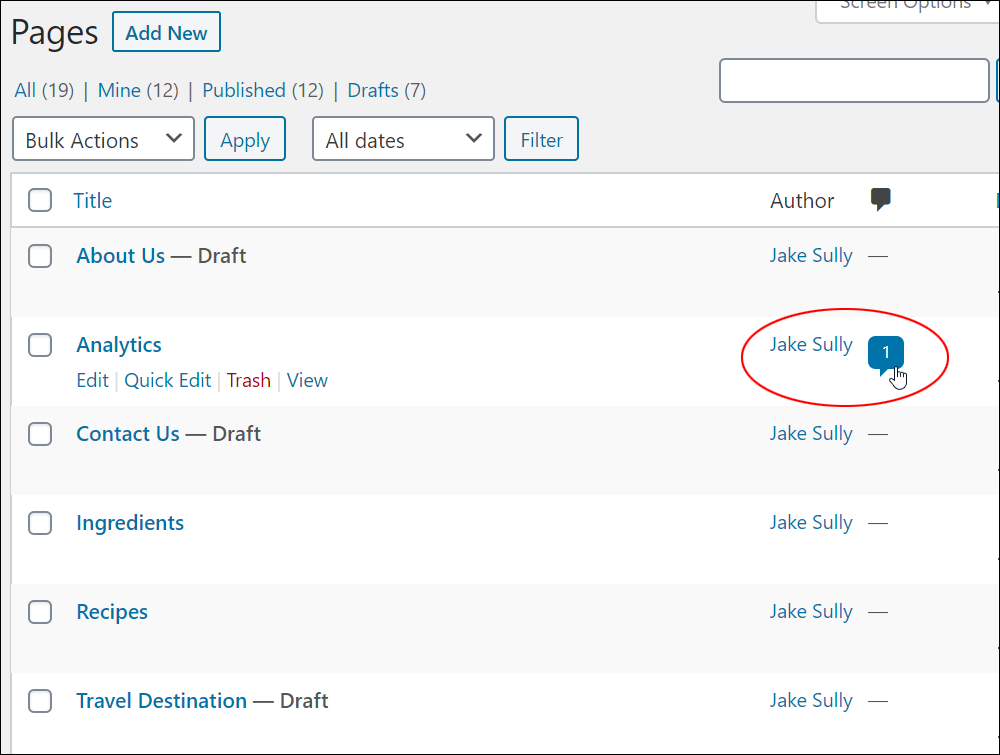
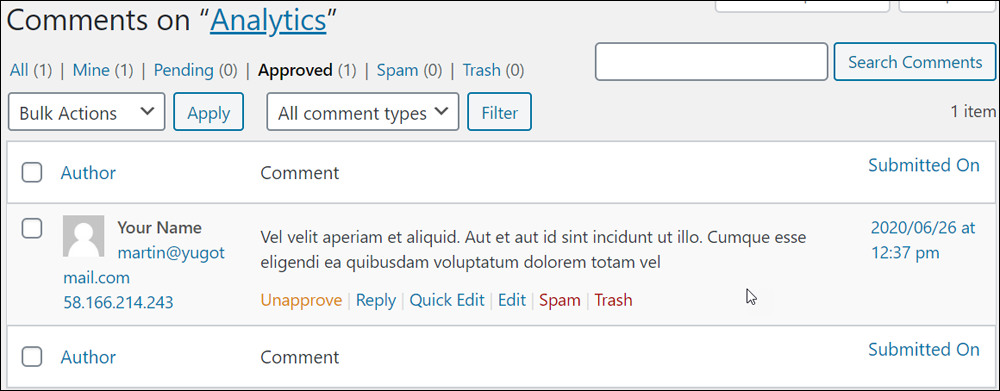
Note: Clicking on the comment bubble brings up the Comments screen, allowing you to moderate comments (learn more here: How To Manage Comments In WordPress).
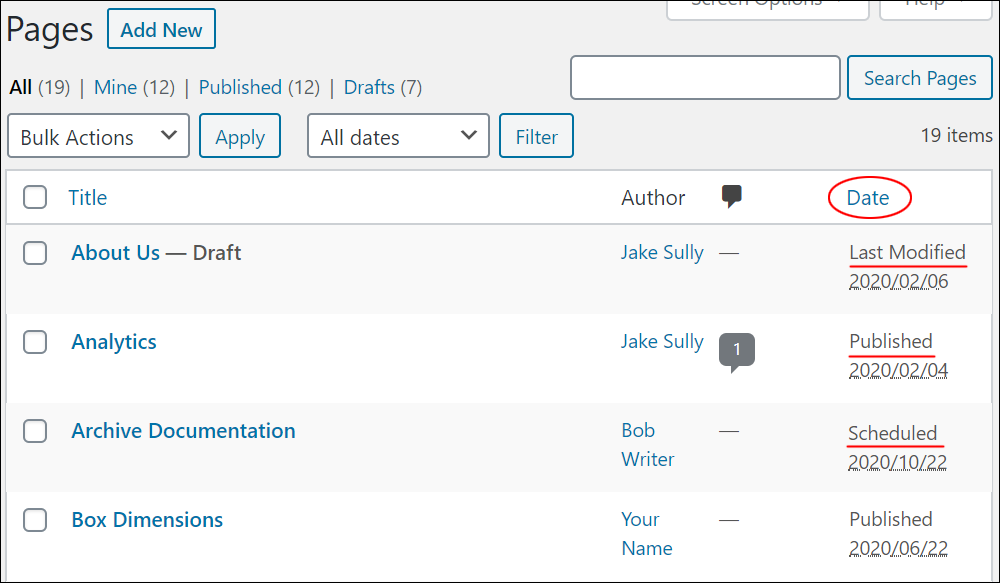
Date – The Date column for each Page shows the Published Date for published pages, the Last Modified Date for unpublished pages (e.g. Draft Pages), and the Scheduled Date for pages set for publishing at a later date.
Now that you know how to edit a WordPress page, the next step is to complete the step-by-step tutorial below to learn how to delete your WordPress pages.
How To Delete Individual Pages In WordPress
To delete a page in WordPress, select Pages > All Pages.
This brings up the ‘Pages’ screen and displays your Table of Pages.
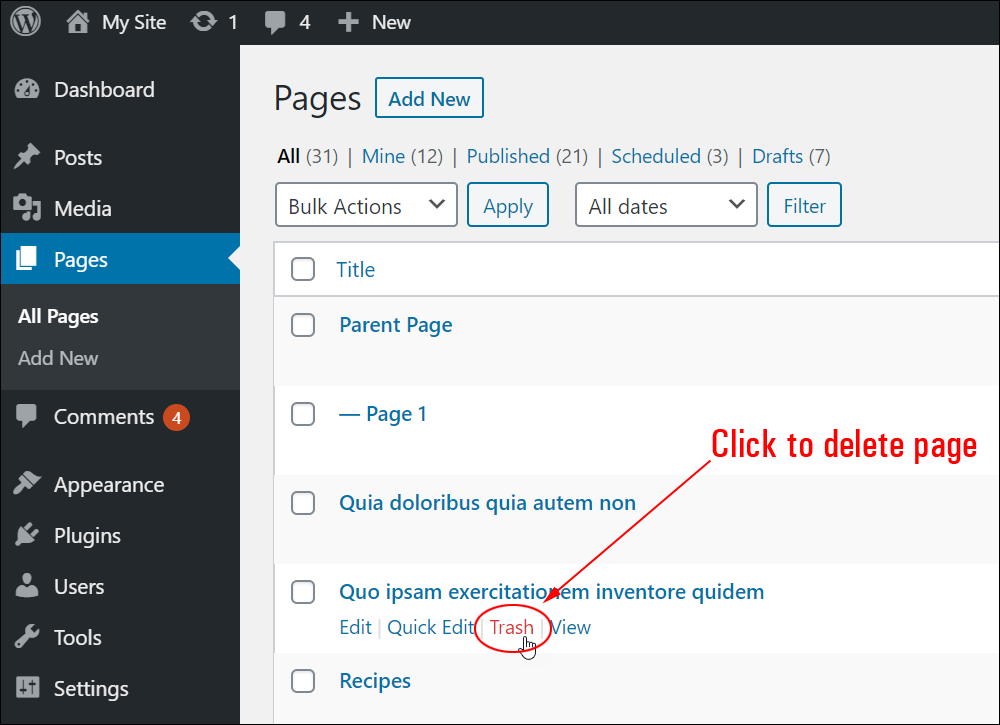
In the ‘Pages’ screen, locate the page you want to delete, then hover over the page title to display the options menu and click on Trash.
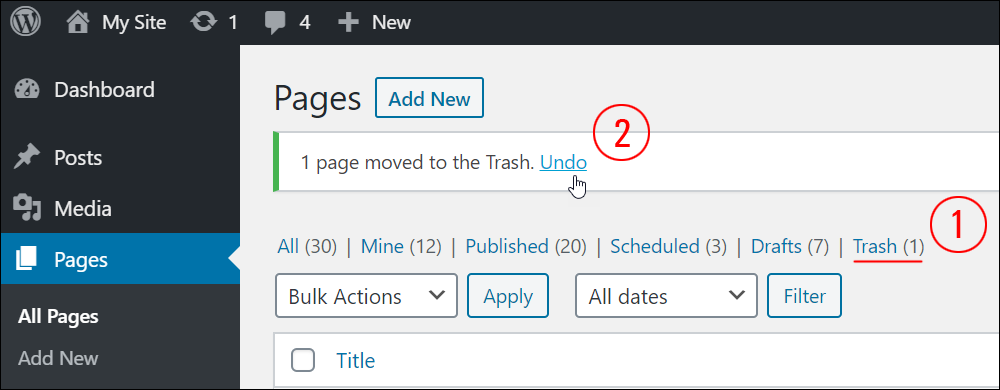
Your Page will be moved to the Trash [See (1) below].
Note: You can restore a page to the Table of Pages by clicking on the Undo link [See (2) below] immediately after being sent to the trash.
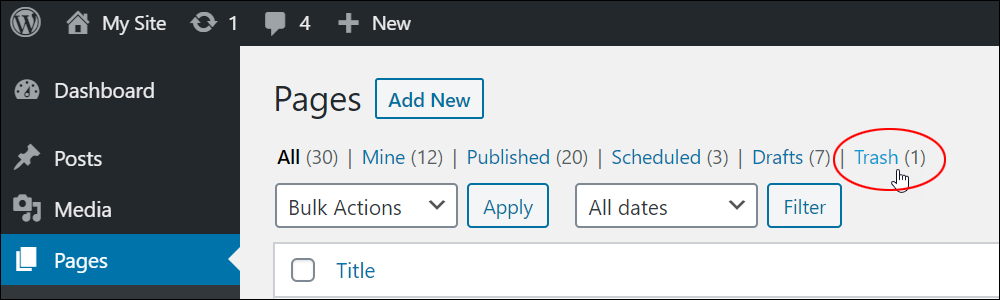
To permanently delete a page, click on the Trash link.
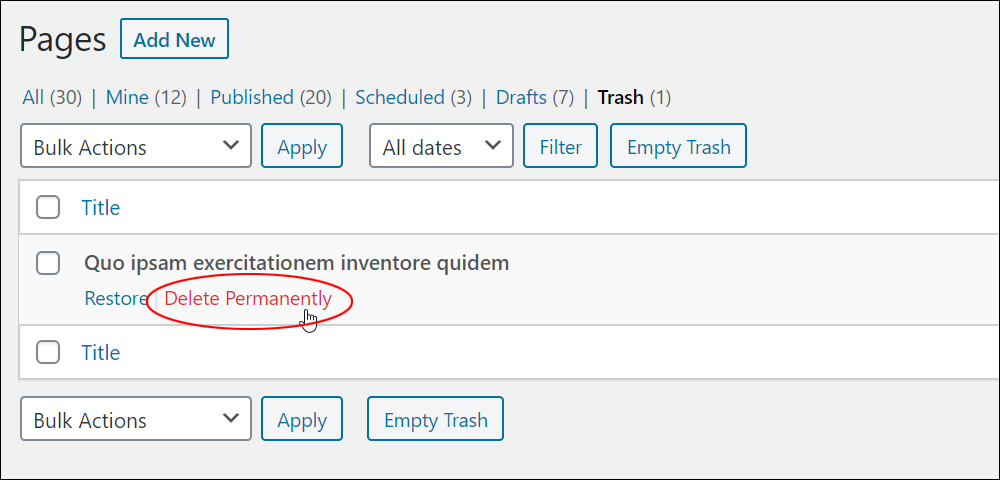
The contents of the trash will display in the Table of Pages.
Hover over the title of the page you want to permanently delete, and click on either the ‘Restore’ link to restore the page to the Table of Pages, or click the ‘Delete Permanently’ link to permanently delete the page.
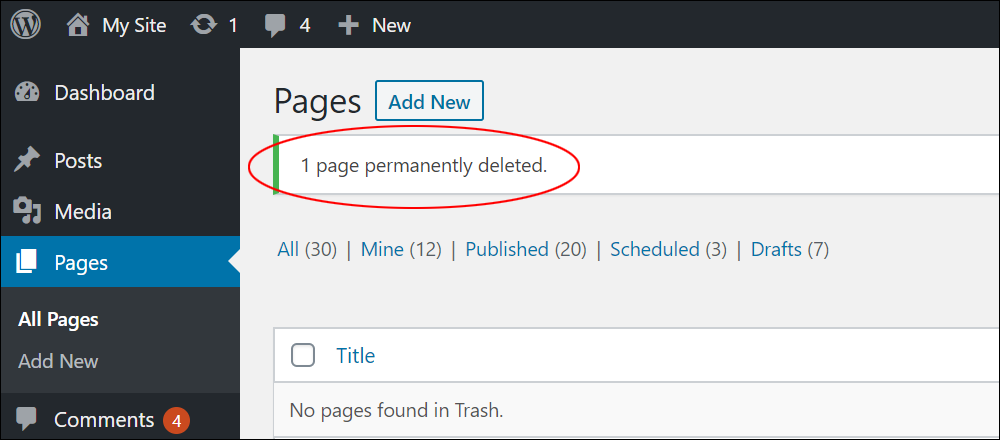
You can also permanently delete pages by clicking on the Empty Trash button.
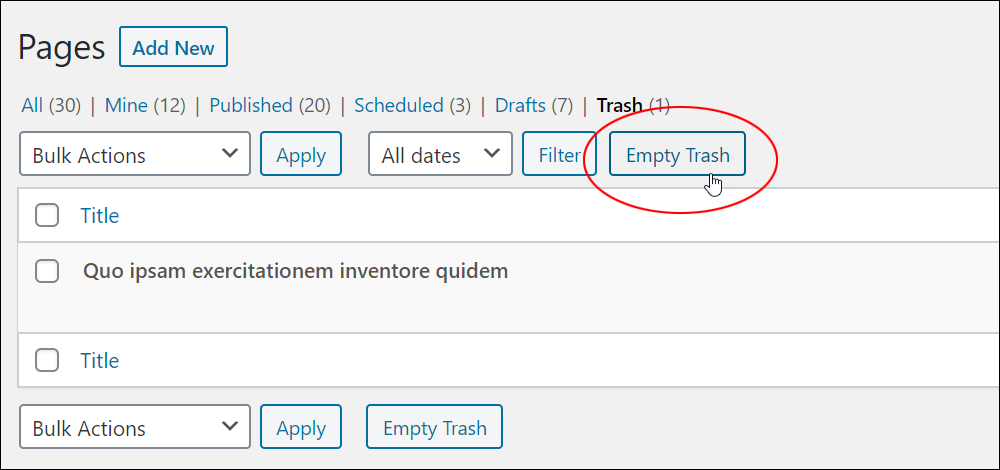
Your page will be permanently deleted.
WordPress Pages – Filtering Options
WordPress offers a number of options to filter and display selected Pages.
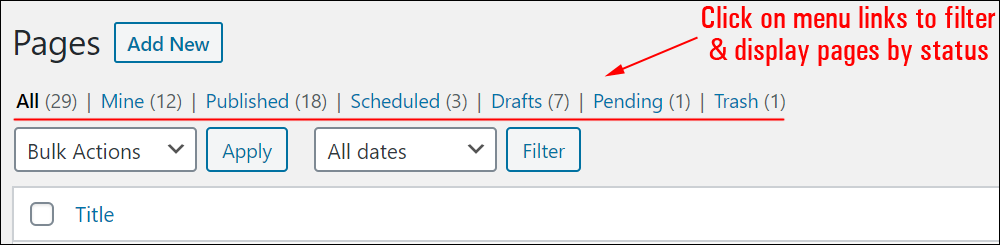
Above the Table of Pages, you will see links (e.g. All, Published, Scheduled, Draft, Pending, Private, Trash, etc.) displayed with the number of pages assigned to each status.
Click on any of these links to display only the pages assigned to that status.
Note: If no pages are assigned a status, the menu link for that status will not display.
Below this section, next to the Bulk Actions dropdown menu and Apply button, are two additional Filtering options:
Show all dates
Use this dropdown menu and then click the Filter button to select and display pages by date.
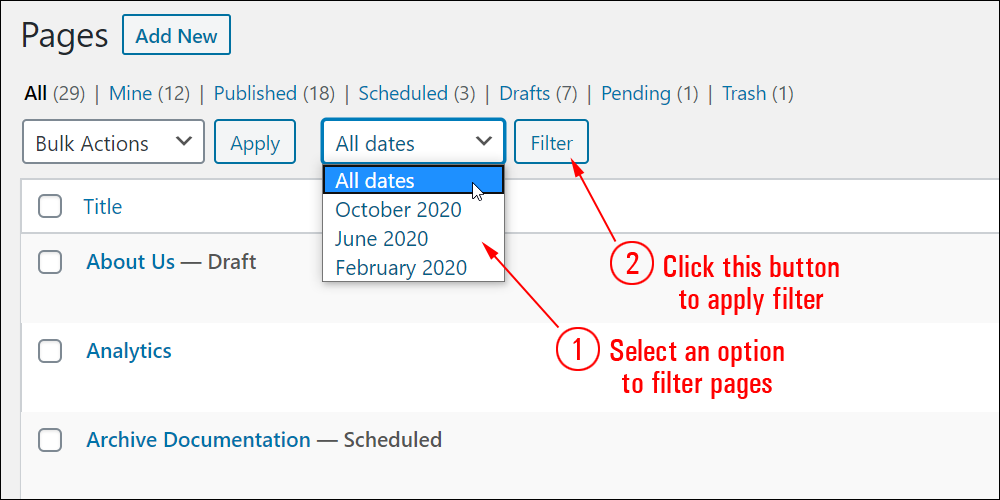
By default, “Show all dates” is selected and all of your pages are displayed.
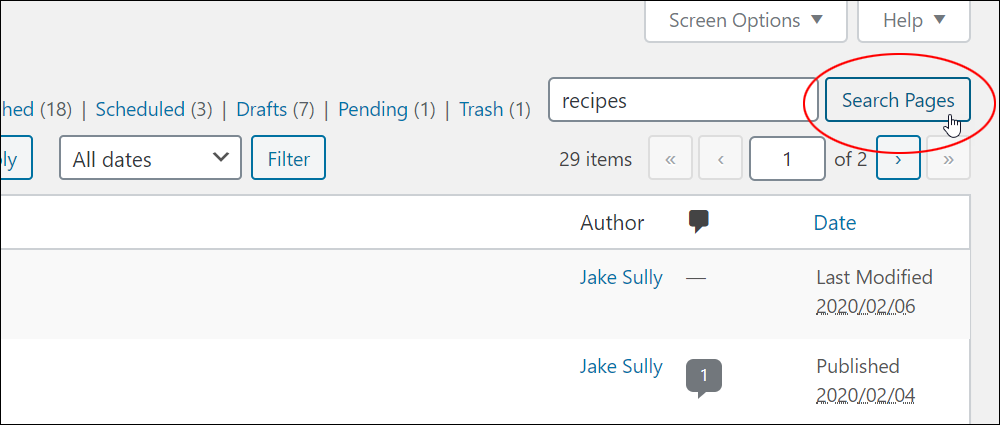
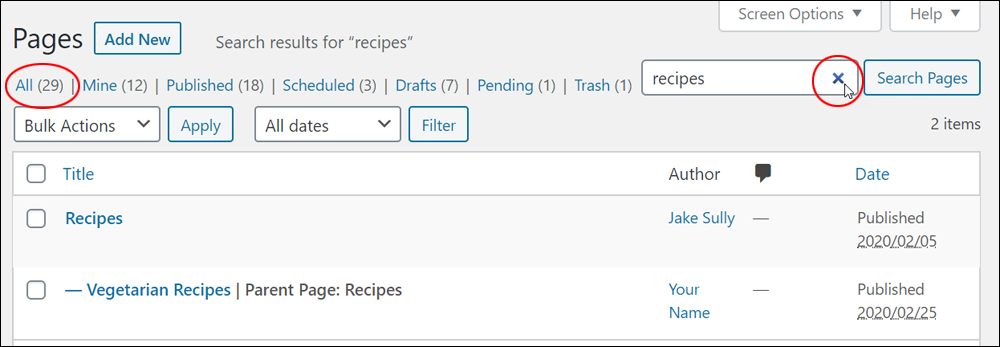
Search Pages
You can also use the Search Pages function inside your ‘Pages’ screen to filter and display only the pages that contain the search words you have entered into the search field.
To remove the search filter and view all pages again, click on the All link at the top of your page screen.
How To Bulk Edit And Delete Pages In WordPress
WordPress also allows you to edit and delete multiple WordPress pages. This is useful if you are performing WordPress management or bulk administration tasks such as removing old or unwanted pages, or if you would like to make bulk changes to specific sections of multiple WordPress pages.
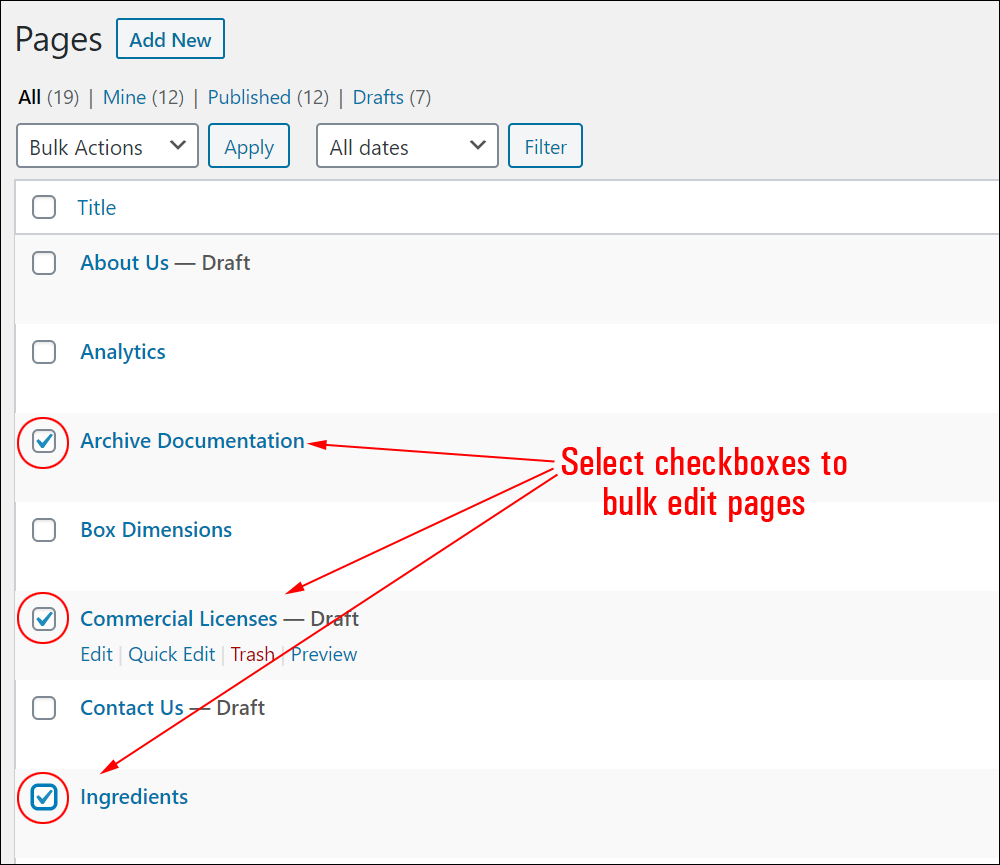
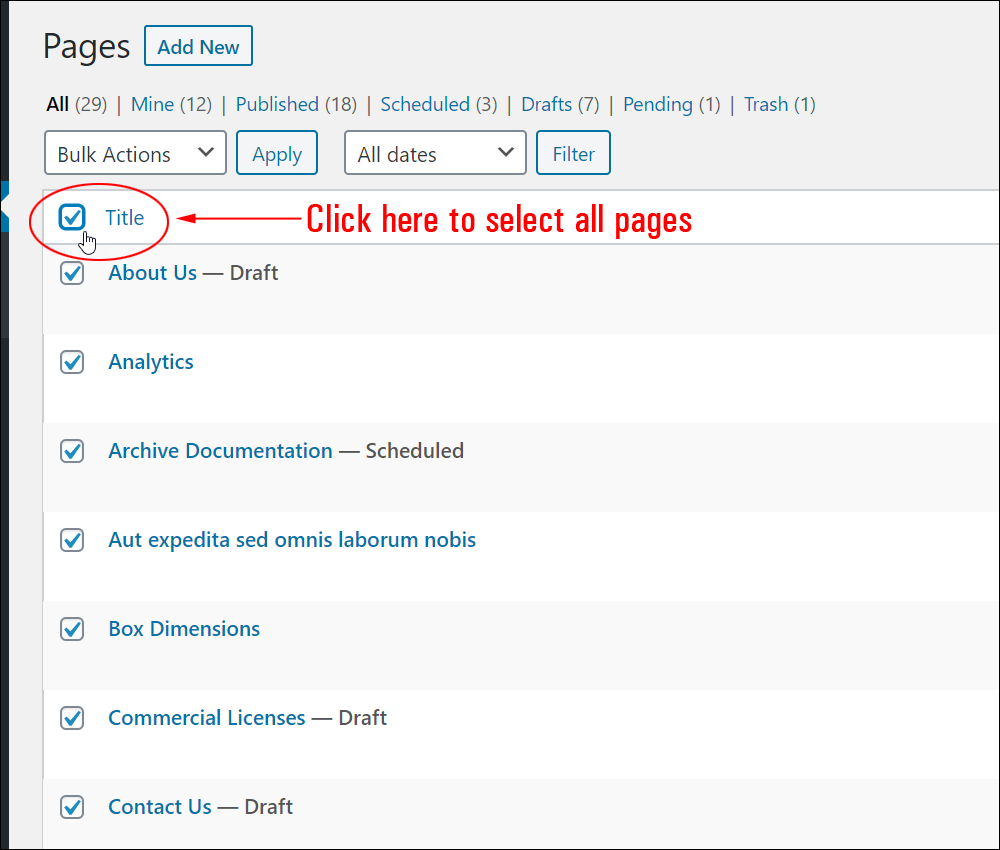
Select the pages that you would like to bulk edit or delete from the Table of Pages. You can select one page at a time by clicking on its checkbox or select all pages at once by clicking on the main checkbox in the Table of Pages column heading.
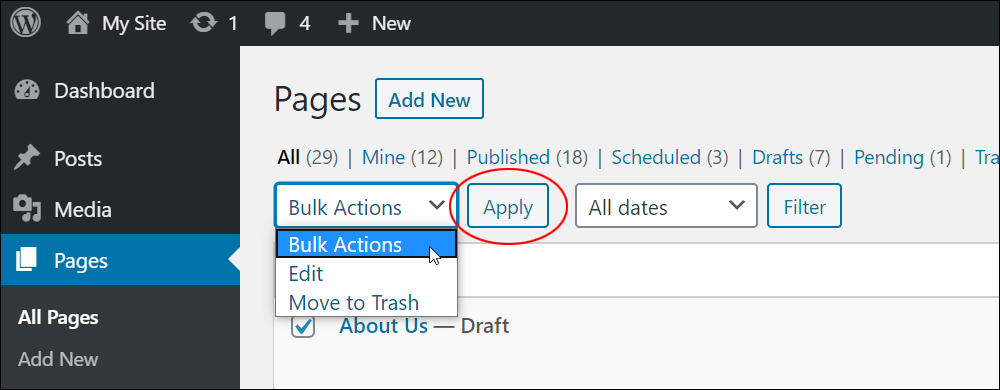
Once you have selected your pages, choose either Edit or Move to Trash from the ‘Bulk Actions’ dropdown menu and click the Apply button to begin processing your selection.
How To Bulk Edit Pages In WordPress
Select Edit from the ‘Bulk Actions’ dropdown menu [2] …

Then select the pages you want to edit [1] and click on the Apply button [3] to bring up a number of Bulk Edit options in the WordPress Quick Editor and display these below the Column headings section.
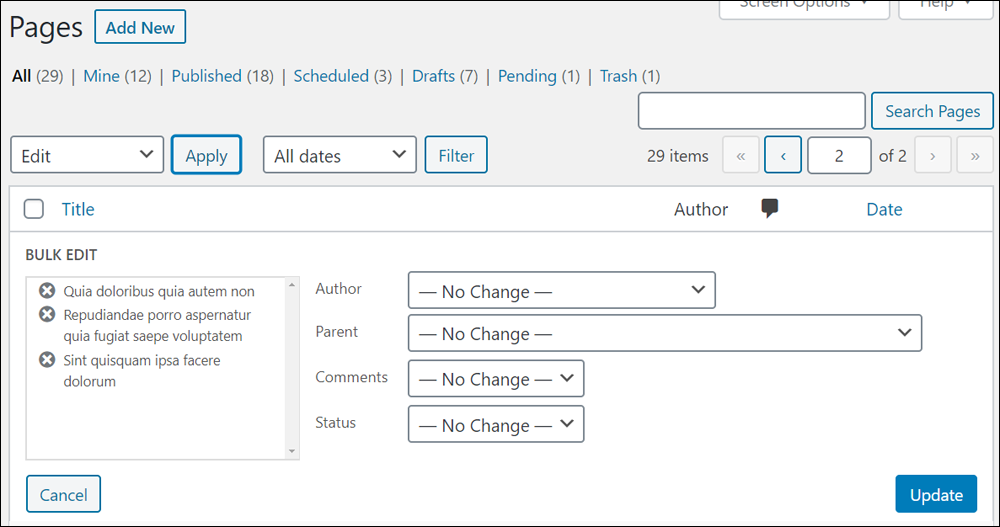
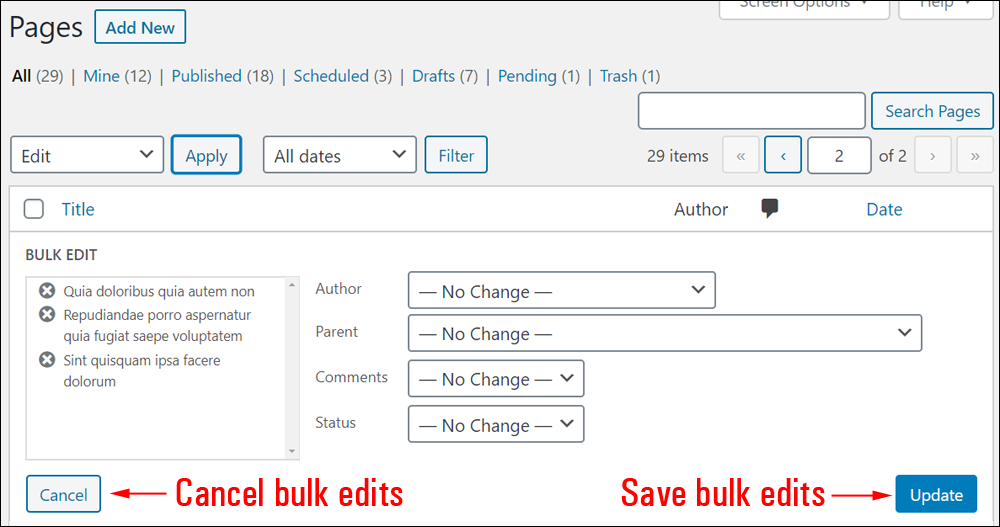
The ‘Bulk Edit’ screen allows you to bulk edit the following fields for all selected pages:
- Author – Use the dropdown menu to change the Author for all selected pages.
- Parent – Use the dropdown menu to select a new Parent Page for your selected pages.
- Template – Use the dropdown menu to select a new template for your pages
- Comments – Use the dropdown menu to allow / not allow comments for all selected Pages.
- Status – Use the dropdown menu to change the status of all selected pages to Published, Private, Pending Review, or Draft.
Click the Cancel button to cancel and exit the Bulk Edit screen, or click Update after making changes to save your new page settings.
How To Bulk Delete Pages In WordPress
Select Move to Trash in the ‘Bulk Actions’ dropdown menu [2] …
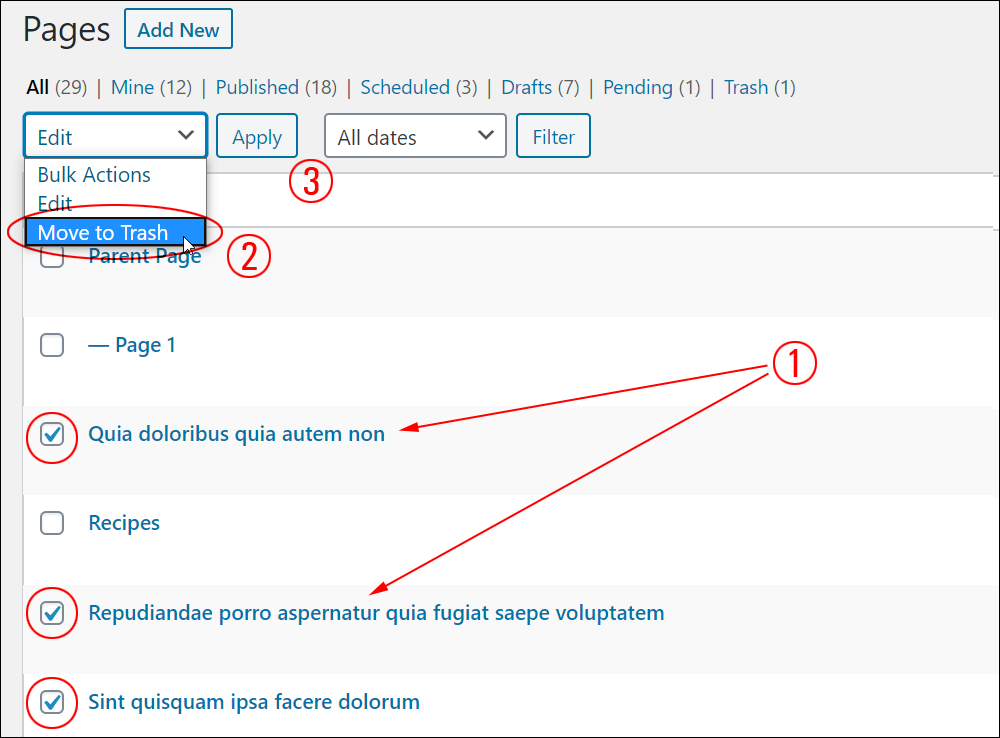
Your pages will be moved to the trash after selecting your pages to be deleted [1] and clicking the Apply button [3].
Note: Pages can be restored immediately after sending them to the trash by clicking on the Undo link [see (1) below].
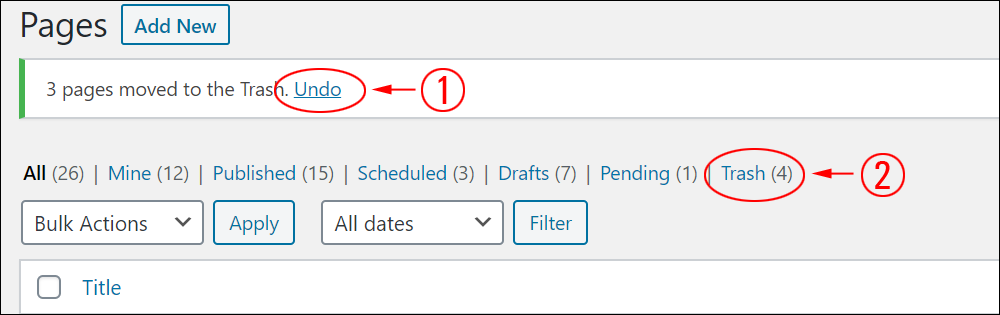
To permanently delete your pages, click on the Trash link [see (2) above or refer to the screenshot below].
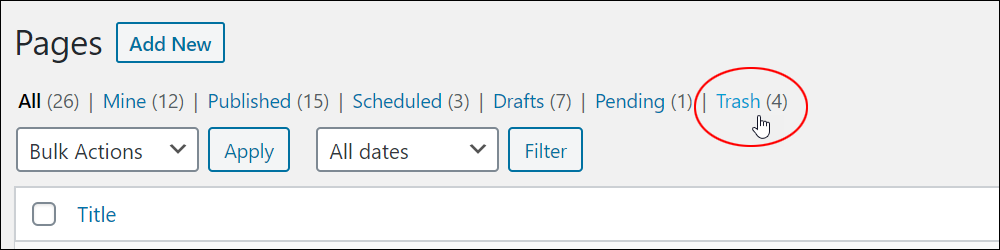
The contents of the trash will display on your screen.
Select the page(s) you want to permanently delete by ticking the checkboxes next to their page title, then using the ‘Bulk Actions’ dropdown menu, select either the Restore options to restore your pages or the Delete Permanently link to completely delete all selected pages.
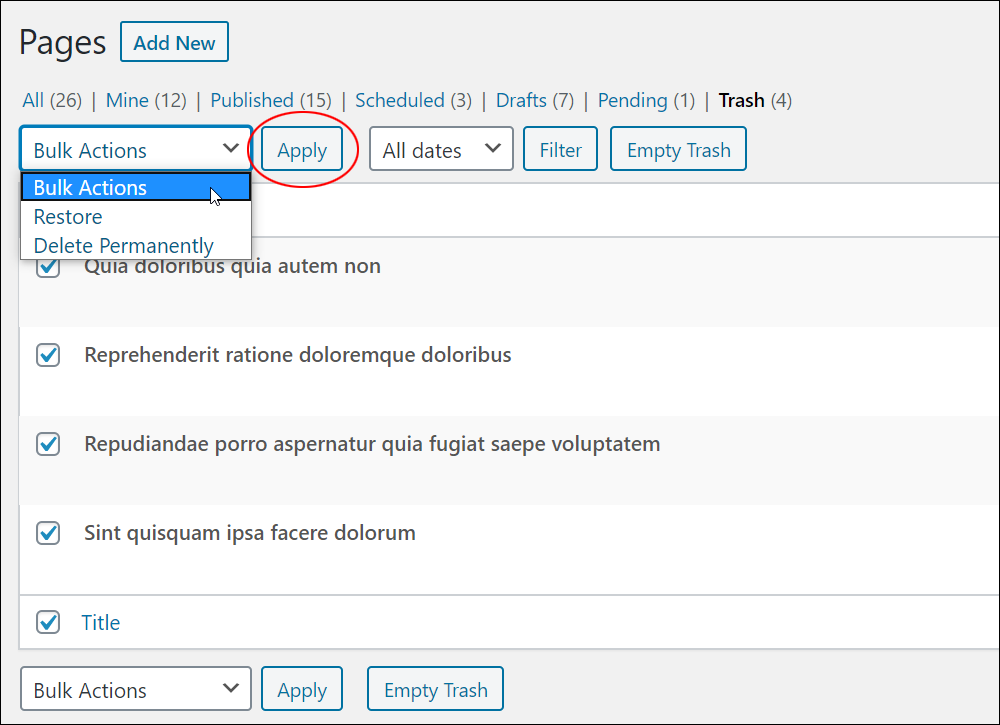
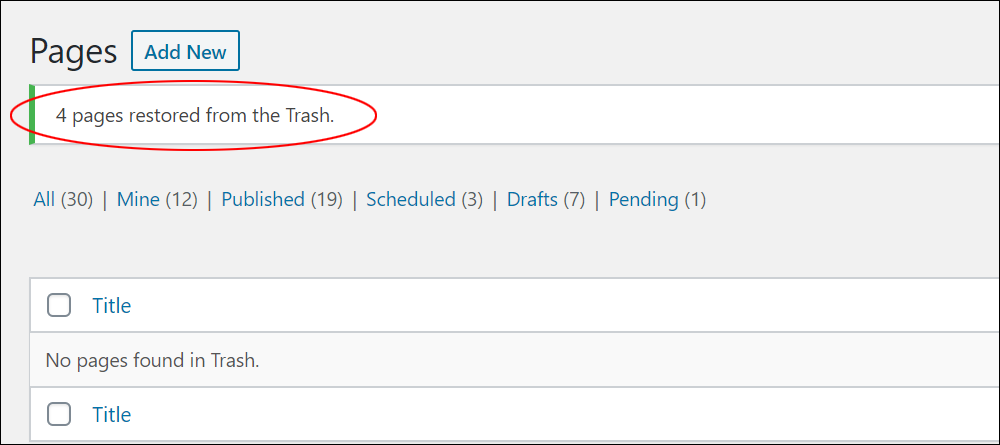
If you select Restore from the ‘Bulk Actions’ dropdown menu, your pages will be restored from the trash.
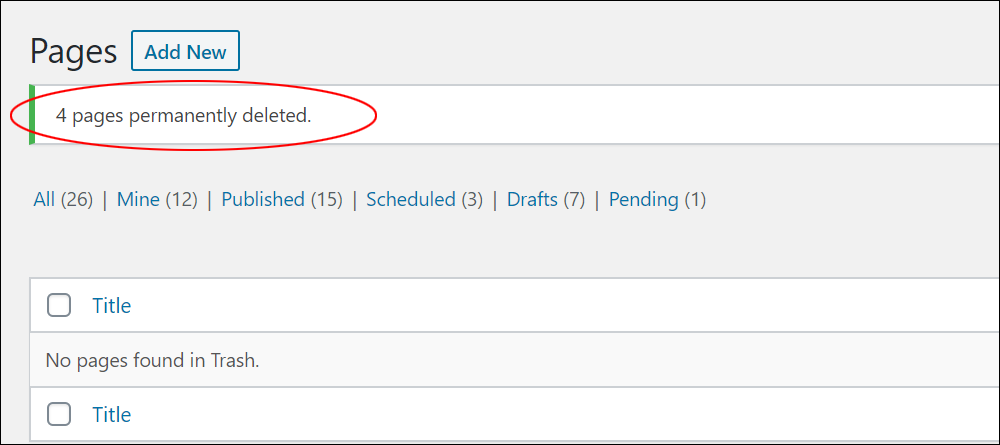
If you select Delete Permanently from the ‘Bulk Actions’ dropdown menu, your pages will be permanently deleted.
Editing And Deleting Pages In WordPress – Useful Tips
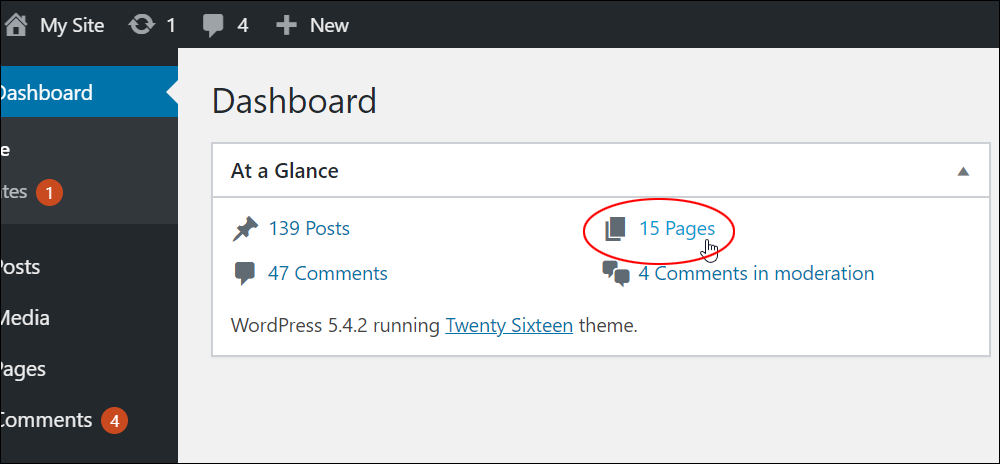
Tip #1: You can access the Pages screen from your dashboard by clicking on Pages inside the ‘Right Now’ box.
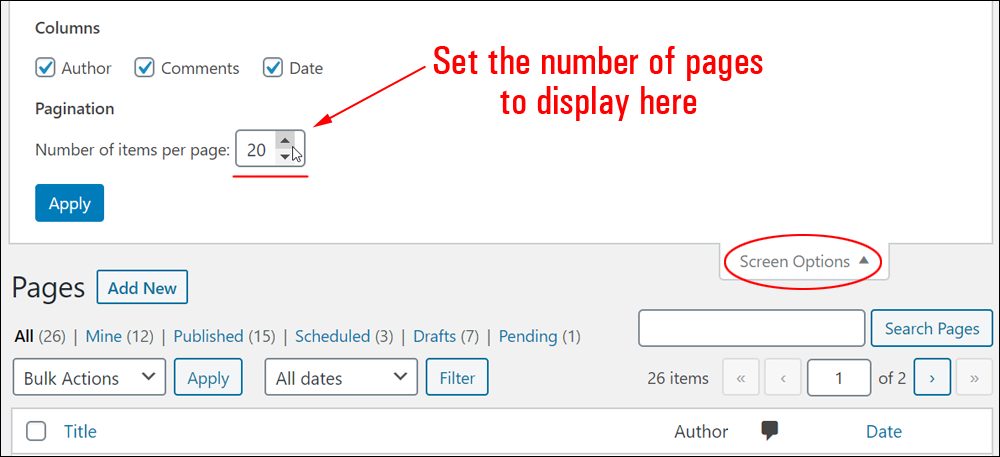
Tip #2: You can set the number of pages to display in the Pages screen by clicking on the Screen Options tab at the top of the page, then entering a number of pages to display in the Pages field and clicking the Apply button.
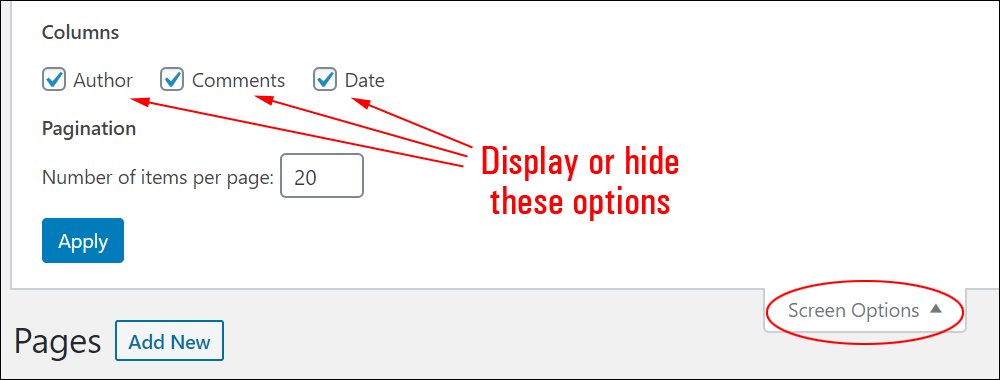
Tip #3: The Screen Options area also allows you to display or hide certain features in the Pages screen.
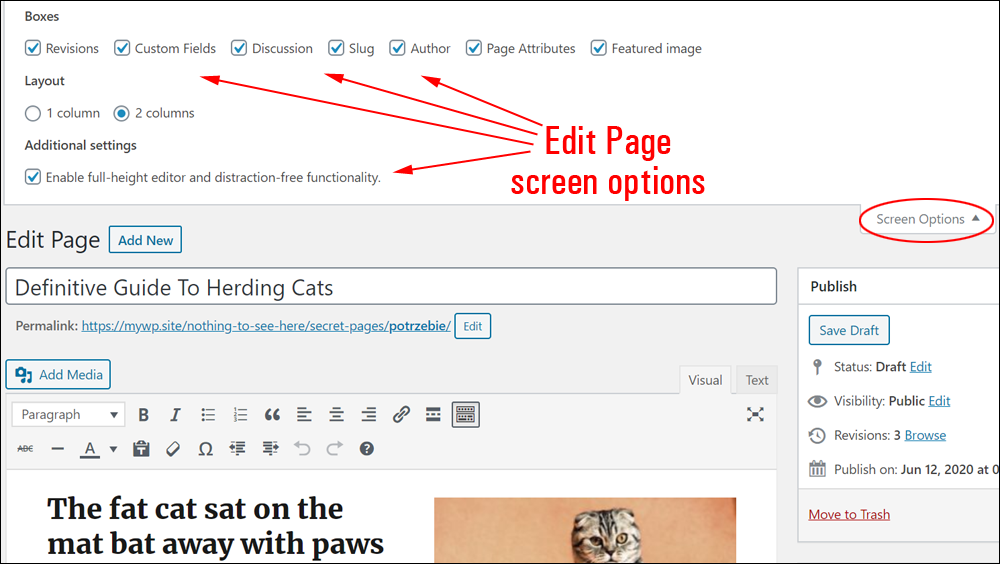
And in the Edit Page screen when editing a single page.
Congratulations! Now you know how to edit and delete pages in WordPress.
***
"Learning WordPress has been a huge stumbling block for me. I've been looking for something that covers absolutely everything but doesn't cost an arm and a leg. Thank you so much ... you have just provided me with what I have been looking for! Truly appreciated!" - Tanya
We are not affiliated, associated, sponsored, or endorsed by WordPress or its parent company Automattic. This site contains affiliate links to products. We may receive a commission for purchases made through these links.