WordPress And Google Analytics – How To Reduce Bounce Rate
 Have you got Google Analytics installed on your WordPress site?
If so, great! If not, you should definitely consider installing it. How will you improve results if you can’t track and measure what visitors are doing on your site?
If you need help installing Google Analytics on your WordPress site, then check out this tutorial:
In this tutorial, we’ll show you how to reduce “Bounce Rate” in Google Analytics without touching code.
Before we do this, however, let’s quickly review what bounce rate is and why it’s important.
What Is “Bounce Rate”?
Here is the official definition given by Google Analytics …
A ‘bounce’ is a single-page session on your site. In Analytics, a bounce is calculated specifically as a session that triggers only a single request to the Analytics server, such as when a user opens a single page on your site and then exits without triggering any other requests to the Analytics server during that session.
Source: Google Analytics Support Docs
In simple terms, a ‘bounce’ happens when a visitor exits your website from whatever page they came in (called the ‘landing page’) without going to any other page on your site.
(Google Analytics – Bounce Rate)
Here is another excerpt from Google’s Analytics blog …
Imagine you’re promoting a blog post that describes all the benefits of your company. The visitor might read the whole post and remember your company and products really well – they might even search for your product on one of the search engines straight away. However, since the visitor only looked at 1 page (exactly where the blog post is) they will be recorded as a bounced visitor.
Another example is if you have a description of your product right on the landing page, and your phone number on the same page. The visitor might study the description and call straight away – again, they will be recorded as a bounced visitor, as only 1 page was viewed.
Source: Google Analytics blog
Why Is Bounce Rate Important?
“Bounce rate” is one of the key metrics you can use to evaluate the quality of your traffic and your marketing strategy.
Google takes bounce rate into account when trying to decide how to rank your pages in its search results.
A high bounce rate can mean that:
- Your site is not attracting the right type of visitors
- Your site is not delivering a great user experience
- Visitors aren’t finding your content to be relevant, enticing, or well-organized.
- Visitors may feel confused about what to do when they land on your site and leave without going anywhere else on your site.
A high bounce rate, then, is something that needs to be addressed if you want to improve conversions. Your landing pages or content may need to be tweaked and your marketing strategy may need to be reviewed.
The lower your bounce rate, then, the better.
How To Reduce Visitor Bounce Rate
There are a number of ways to reduce bounce rate and improve conversions on your site.
For example, you can:
- Target the right visitors (e.g. use the right keywords, better headlines, better meta descriptions, etc).
- Improve the quality of your content (e.g. make it more compelling and engaging, add links to relevant posts and pages, etc.).
- Make the content easier to read (e.g. clear sections, better formatting, sghorter paragraphs, bullet points, etc.)
- Make your site easier to navigate (e.g. navigation menus in the header, footer, and sidebars)
- Reduce distractions that will make visitors want to leave (e.g. don’t use annoying pop-up ads)
- Have a clear call to action,
- Speed up your page loading times,
- Etc.
For help with the above, see our tutorials on content marketing and optimizing WordPress.
All of the above suggestions are things you can and should do over time to reduce bounce rate and improve conversions. There is, however, something you can do to start improving results immediately.
How To Reduce Bounce Rate – Quick Tip
Google Analytics calculates the time visitors spend on your site based on the length of time between when a user enters your site and their last page view.
This can affect your bounce rate stats.
For example, consider these scenarios:
- A visitor lands on one of your pages and spends 3 minutes and 31 seconds reading your content. They then leave your site. Even though they spent time on your site, they never interacted with it. Google considers this a bounce and records this as 0:00 time spent on site.
- A visitor lands on your site and spends 2 minutes and 27 seconds on the landing page, before visiting another page, where they stay for 2 minutes and 20 seconds. The visitor then leaves the site without any interaction on the page. Because Google doesn’t know how long the visitor stayed on the second page, it only records the time the visitor spent on the first page.
Google itself is aware of this issue and recommends fixing this using something they call “adjusted bounce rate,” where a small tweak is made to the Google Analytics code on your site.
Fortunately, someone in the WordPress developer community has solved this issue for non-techies by creating the plugin below.
Reduce Bounce Rate
(Reduce Bounce Rate)
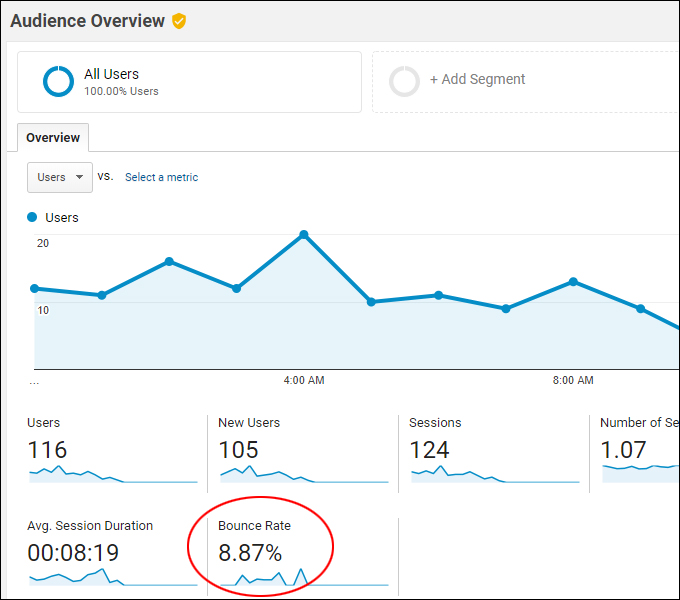
Reduce Bounce Rate is a free plugin that tells Google Analytics every few seconds (default = 10 seconds) that a visitor is still on the page and that they are interacting with it. This will ‘unbounce’ your page and help Analytics reflect a truer picture of your site’s bounce rate and time on site …
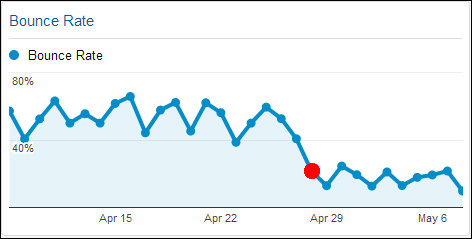
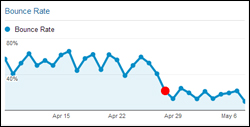
(Bounce rate after installing the plugin. Source: Reduce Bounce Rate)
Plugin Installation
You can install the plugin easily through the WordPress dashboard (see our WordPress plugin installation tutorial if you need help installing plugins).
In the ‘Add Plugins’ screen, search for “reduce bounce” or “reduce bounce rate” …
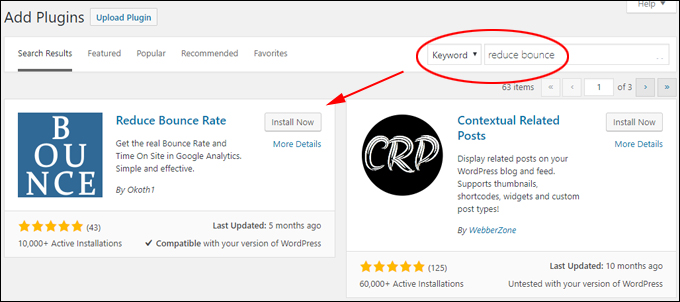
(Add Plugins screen)
Click on ‘Install Now’ …
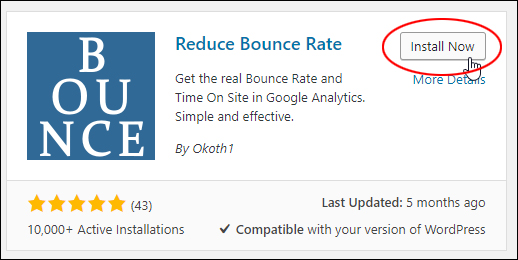
(Install plugin)
After the plugin has been installed, click on ‘Activate’ …
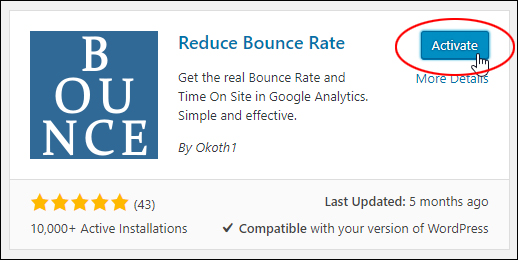
(Activate plugin)
The plugin is now activated on your site.
Plugin Usage
The plugin works right out of the box, so once the plugin has been installed and activated, there is really nothing else you need to do.
The plugin settings are located in the ‘Settings’ menu …
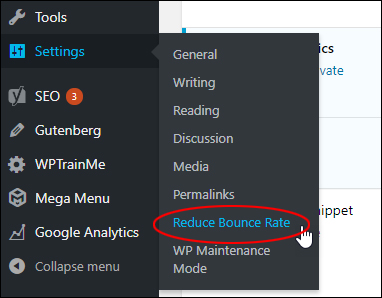
(Settings Menu: Reduce Bounce Rate)
If required, you can change or adjust the plugin’s settings and options in the ‘Reduce Bounce Rate Options’ screen …

(Reduce Bounce Rate Options)
Some of the adjustments you can make in the plugin settings screen include:
- Change tracking code type
- Change code placement (e.g. footer, header)
- Trigger events if user scrolls the page (or a percentage of the page)
- Change the number of seconds before an event is fired (default is 10 seconds)
- Change maximum tracking time of visitors on a single page.
Remember to save your settings if you make any changes.
For plugin support or more information, visit the plugin page here: Reduce Bounce Rate
That’s it! Add the plugin to your site and notice what happens to your bounce rate after a couple of days.
***
"These tutorials have so much information and are easy to understand. If you use WordPress or plan to in the future these will help you with everything you need to know." - Valisa (Mesa, Arizona)
***