
Being able to display tables on your content can be very useful. Tables are great for sorting and presenting data to people in a way that makes your information easier to understand.
WordPress provides users with a feature-rich visual editor, but there are some things that it doesn’t do by default, such as giving you the option to create tables without having to learn code.
Although you can create tables manually in WordPress if you know HTML (Hyper Text Markup Language) and CSS (Cascading Style Sheets), for most non-technical users, this is simply not a feasible option.
Fortunately, you can do just about anything you can imagine on a WordPress site with plugins, and creating tables is no exception.
In this step-by-step tutorial you will learn how to create and insert tables easily into your content with no coding skills required.
How To Add Tables To WordPress Pages And Posts With No Programming Skills Required
If you want to create and add tables into your WordPress content and don’t have the skills or knowledge to create these using HTML or CSS, the step-by-step tutorial below will show you how to easily do this using a FREE plugin called TablePress.
TablePress – WordPress Plugin

A very powerful and time-saving WordPress plugin for creating, editing and managing tables in WordPress is TablePress.
TablePress does not require you to have any knowledge of HTML, CSS, etc. The plugin lets you easily edit table data. Tables can contain any type of data, even formulas.
An additional JavaScript library can be used to include features like pagination, sorting, filtering, and more for site users. You can easily include the tables into your pages and blog posts using shortcodes and display these inside text widgets.
A table can also be imported and exported from/to CSV files (e.g. from Excel), HTML files, and JSON.
TablePress was created by Tobias Bäthge and is licensed as Free Software under GNU General Public License 2 (GPL 2).
How To Use TablePress WordPress Plugin – Tutorial
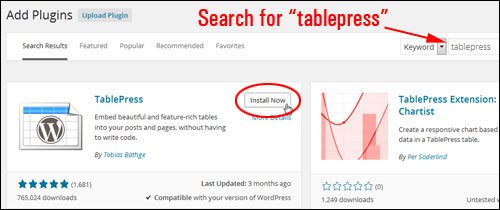
To create and add tables to WordPress, first install and activate the TablePress plugin.
You can download the plugin here:
https://wordpress.org/plugins/tablepress
Or install it directly from within your WordPress Dashboard …
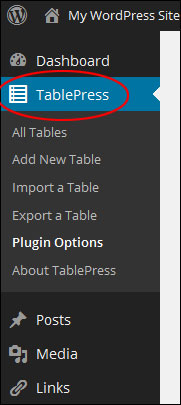
After installing and activating the plugin, you will see a new menu item in your WP admin menu called TablePress …
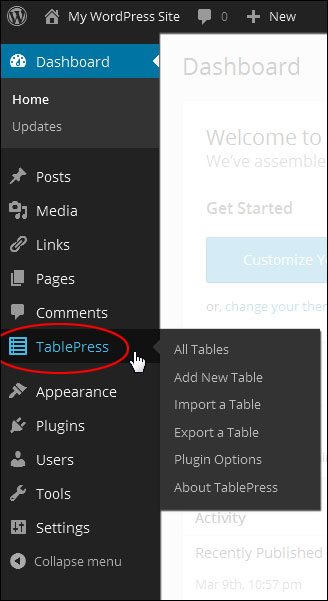
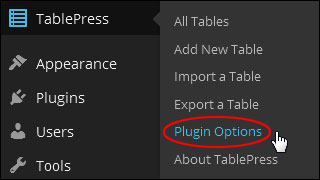
Click on TablePress and select Plugin Options from the submenu list …
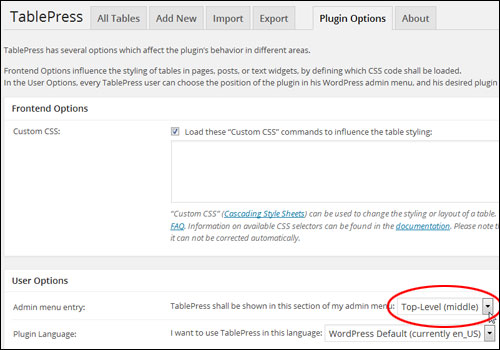
The “Plugin Options” page affects the plugin’s behavior in different areas of your site …
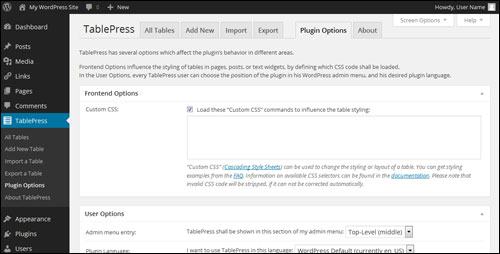
For example, in the “User Options” section, you can modify where the TablePress menu entry appears on your Dashboard menu.
Normally, the menu entry displays around the middle of your menu. If you plan to use this plugin often, then you can easily position the menu option near the top of the admin menu by selecting “Top-level (middle)” in the User Options > Admin menu entry dropdown menu …
The TablePress menu entry now shows closer towards the top area of your admin menu …
You can also specify other plugin options in the “Plugin Options” tab, like formatting styles for your tables, default language, etc. If you don’t need to modify this section, simply leave the default options.
With TablePress, tables are created and modified within the plugin section. Tables are then placed via a shortcode into your pages and posts. Your table will then display or update after your post or page is saved.
The great thing about working directly from the plugin is that you can easily modify the data in your tables without having to manually edit your pages and posts. The plugin then updates all of your table information inside all posts and pages where the table has been added to your content.
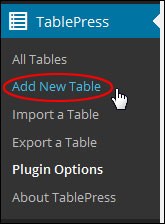
To create a new table select TablePress > Add New Table …
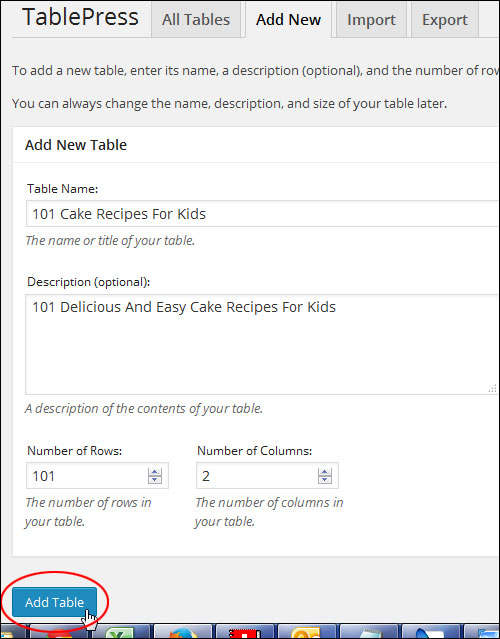
Enter a name, an optional description, and the number of rows and columns you want for the new table into the “Add New Table” form in the Add New tab, then click on the Add Table button to create your new table. You can edit the name, description and size of your tables at anytime…
Once your new table has been created, it will appear in the “All Tables” list and get assigned a unique Shortcode ID …
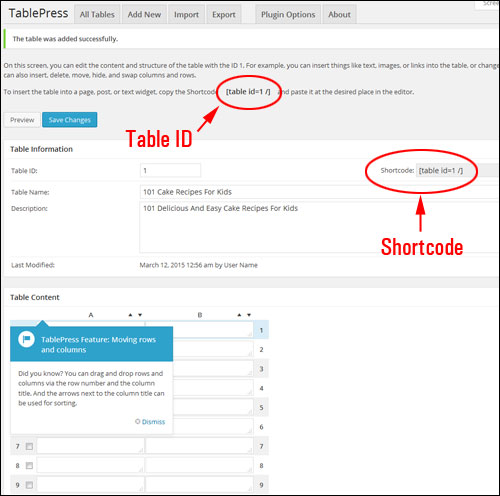
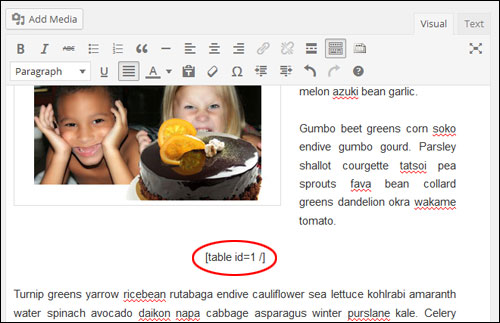
The TablePress shortcode lets you easily insert tables anywhere inside a post or page by simply typing or copying and pasting the shortcode wherever you want to display a table …
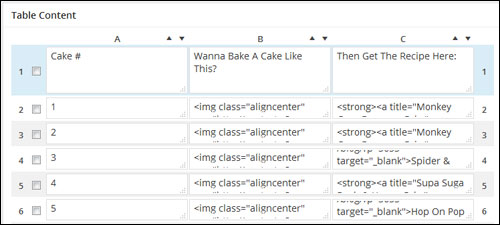
Once a new table has been created, adding content to the table is easy.
In the “Table Content” section, click in the cell and either type or paste your content. You can add text, images and HTML formatting to your content (e.g. bold or italicize words, insert links, etc …)
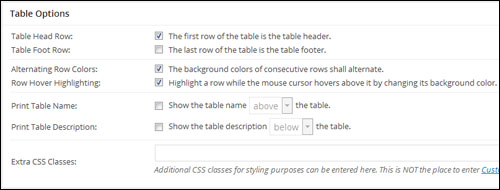
After your new table has been created, additional options appear that let you configure your table.
For example, in the “Table Options” section you can select the first row of your table to be the table header and the last row of the table to be the table footer, make the background of consecutive rows alternate in color, highlight rows when visitors hover their mouse over the table, print the table name and description above or below the table, and more …
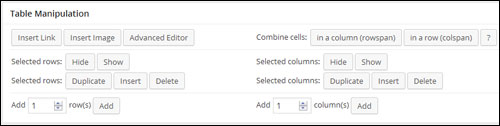
You can also modify your table after creating it in the “Table Manipulation” subsection. You can perform a range of different manipulations on your table, such as adding images or links, hiding, showing, inserting, deleting and duplicating selected columns and rows, adding new rows and columns, combining cells, etc …
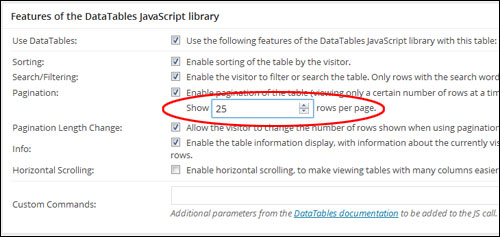
You can also enable JavaScript library features in your tables, such as allowing visitors to sort, filter and search your table content, change the number of table rows showing on your pages (and also allow users to change the number of rows displayed), display table information, etc …
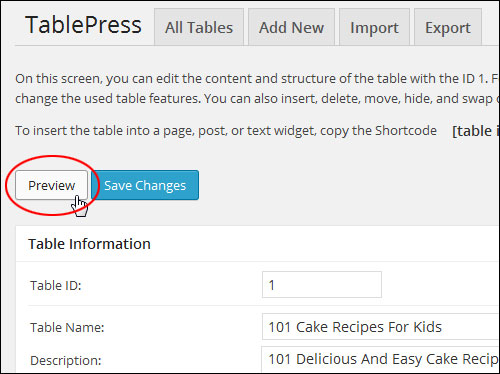
You can see how your table looks anytime, by clicking on the Preview button …
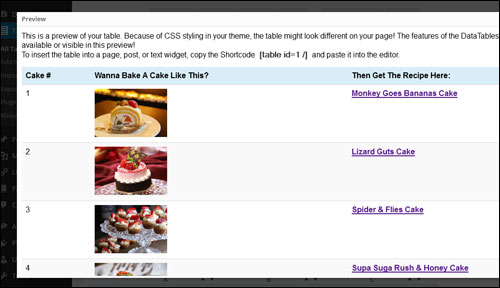
A preview window will open in your browser allowing you to preview the table. Certain features such as the JavaScript options are disabled in preview mode, but will display when your post or page is published …
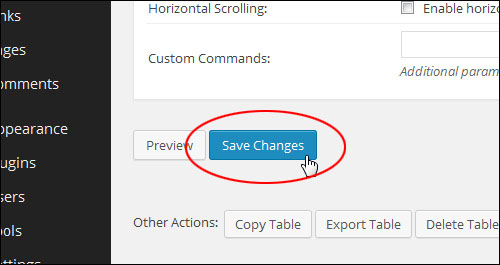
Click the Save Changes button when finished to save your table data …
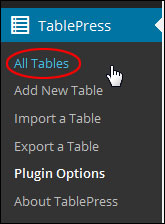
To view a list of all your tables TablePress > All Tables …
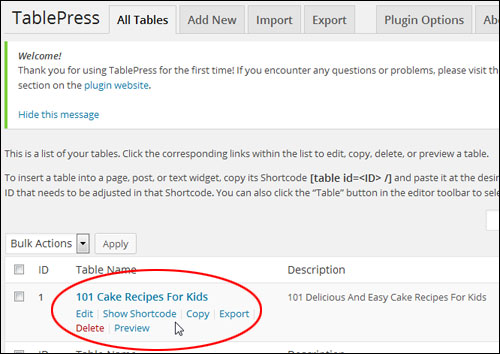
All the tables you have created are listed here. You can edit, see shortcodes, copy, delete, export and preview your tables …
Using The TablePress Shortcode To Embed Tables Into Your Posts And Pages
You embed a table into your pages and posts using a shortcode.
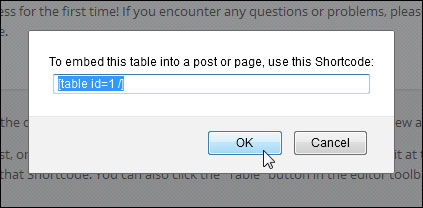
Click on the Show Shortcode menu item under your table title to get the shortcode …
The plugin also adds a menu item to your WordPress editor. This allows you to easily insert tables into your posts and pages while working on your content.
Place your cursor where you want the table to be embedded then click the TablePress menu icon …
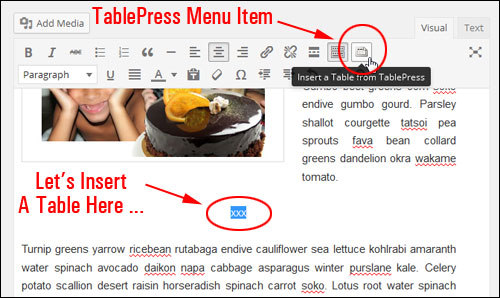
TablePress Menu Icon In WordPress Visual Editor Screen
Note: You can also add a table when working in the “Text” area of the WordPress editor …
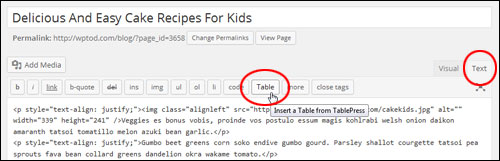
TablePress Menu Icon In Text Editor Screen
Clicking on the menu icon opens a window containing a list of all the available tables you have created.
Select the table you want to insert into the post or page and click Insert Shortcode …
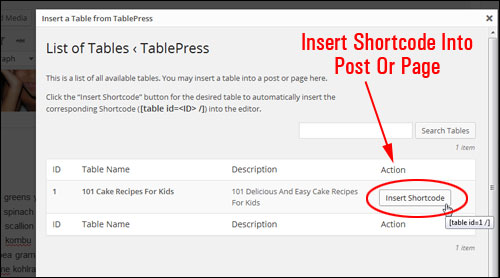
Your TablePress shortcode will be inserted into your content …
Publish the post or page to view your table contents …

As stated earlier, one of the great things about this plugin is that you can edit data after publishing the table without having to open your post or page. Just tweak the content in the plugin area, then save your new table settings and refresh your post to view the updated content.
Another great time-saving feature of the TablePress plugin, is that if you plan to keep adding data to an existing table, you can simply export your current table, then add new information, make changes, etc. You can then re-import your exported file with the news changes and your table content will be automatically updated throughout your site.
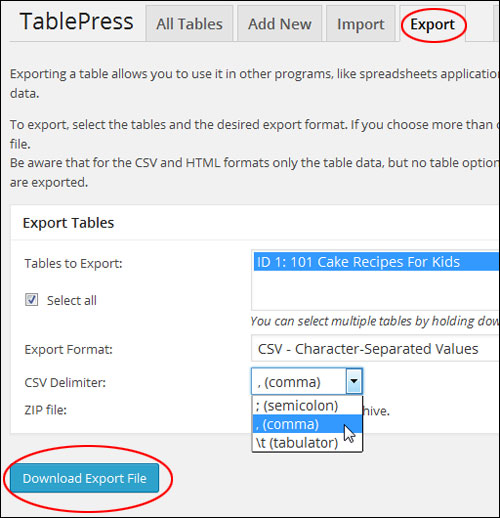
To export an existing table, click on TablePress > Export a Table in your admin menu …
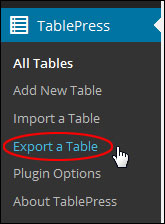
In the “Export Tables” section, choose the table(s) to export (you can select multiple tables by holding down the “Ctrl” key), then select the Export Format you want(e.g. CSV) and any other export options you’d like to make and click on the Export Table button to download the file to your hard drive …
After making changes and resaving your table file, you can then easily re-import the table into WordPress.
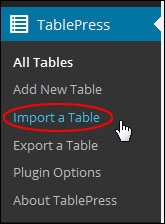
To import a table, select TablePress > Import a Table …
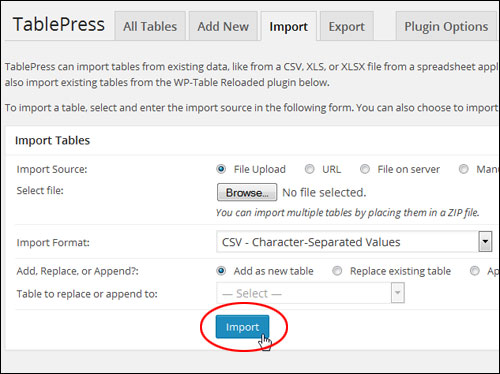
TablePress can import tables from existing data, such as CSV file data, from a spreadsheet application (e.g. Excel), an HTML file resembling a webpage, or its own JSON format.
To import a table, select and enter the import source in the “Import Tables” area. You can also import multiple tables from a ZIP file and select whether to import a table as a new table or to replace an existing table.
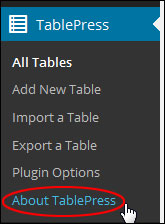
For more information about the plugin, including accessing documentation about additional features, or get technical support for the plugin, contact the plugin author, etc., click on the “About Tab” in the plugin admin section, or select TablePress > About TablePress …
As you can see, TablePress is quite a powerful and feature-rich plugin that is free and will help you easily create and add tables into your page content.
***
"Learning WordPress has been a huge stumbling block for me. I've been looking for something that covers absolutely everything but doesn't cost an arm and a leg. Thank you so much ... you have just provided me with what I have been looking for! Truly appreciated!" - Tanya