MalCare Security Service: One-Stop WordPress Security Solution
 WordPress is the world’s leading platform for building websites and for publishing and managing content online. Over 30% of all websites in the world are powered by WordPress, making the platform a huge target for hackers and malicious users looking for vulnerabilities that they can exploit and use to compromise a website.
According to security experts, 90,978 hack attempts are made on WordPress websites every minute!
Our own security reports and logs confirm this. We run a number of WordPress sites and these are constantly under attack …
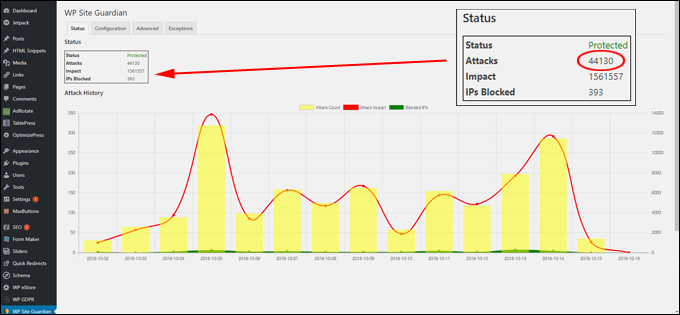
(WordPress sites are constantly under attack!)
If you have created a website without proper security planning and the right WordPress security plugins installed, then it’s only a matter of time before you fall prey to hack attempts.
Find Out If Your Website Has Been Hacked
(For more details, visit BlogVault. Source: Slideshare)
If you suspect that your website has been hacked, then check out this tutorial:
How To Prevent Your Website From Being Hacked
To prevent your WordPress website from being hacked, you should have a web security plan in place and choose security plugins that you can trust and that are well-supported.
MalCare
(MalCare: One-Stop WordPress Security Solution)
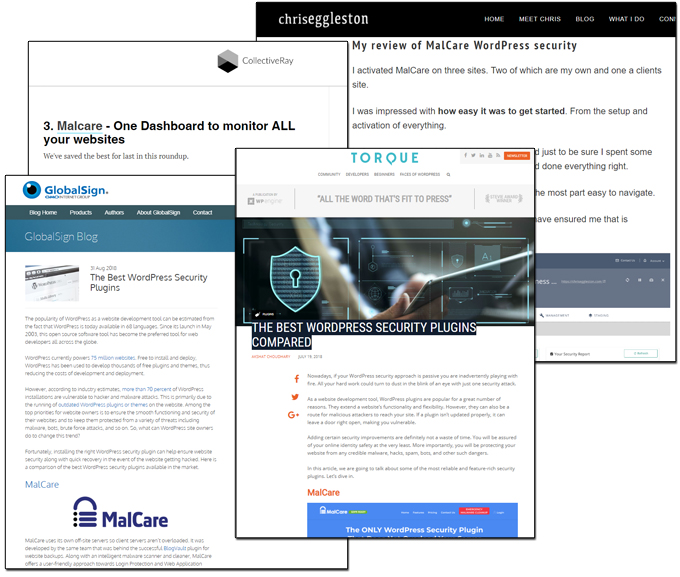
MalCare is regarded by many WordPress security experts and top WordPress plugin listicles as one of the best security solutions in the market.
(MalCare is one of the best security solutions for WordPress!)
What’s MalCare?
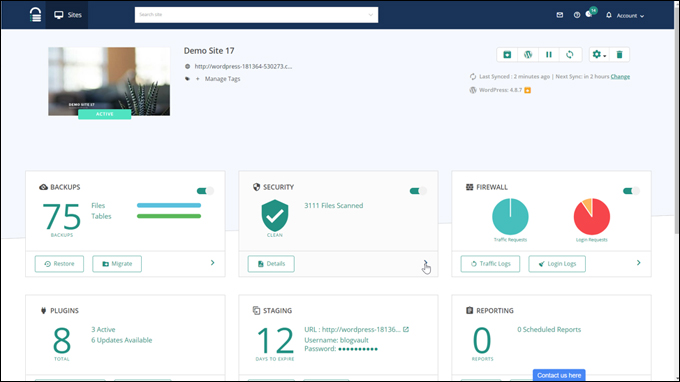
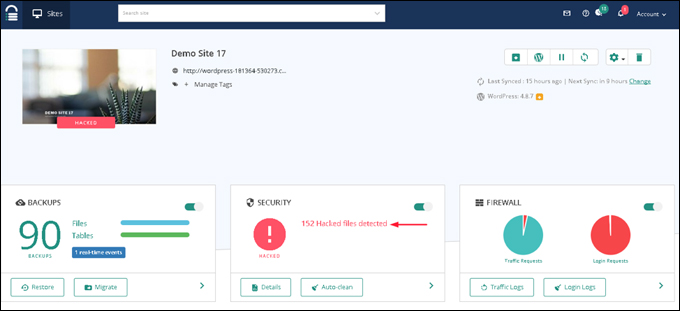
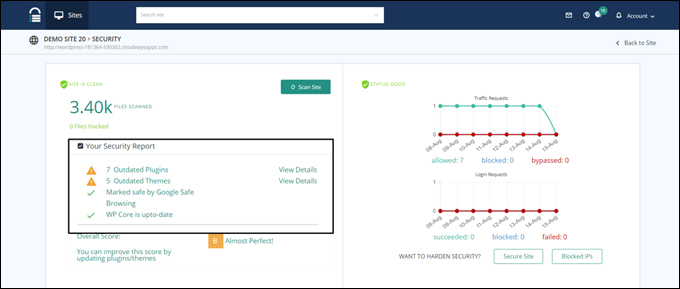
(MalCare dashboard)
MalCare was built by the same company that developed BlogVault, a popular WordPress backup plugin with over 200,000 users. While working on BlogVault, they saw the need for a good security plugin and decided to build a comprehensive security solution that can detect, remove, and prevent hacking attempts.
What makes MalCare a better WordPress security plugin? First of all, this is a multidimensional solution created for non-technical users that allows you to keep your WordPress site secure with just a few clicks.
In this post, we are going to cover the following areas of using MalCare:
- Installation and Setup
- MalCare Dashboard
- MalCare Scanner
- MalCare Cleaner
- MalCare Firewall
- Website Hardening
- Website Management
- Secure Backups
- MalCare Support
Installing MalCare
Installing and setting up MalCare requires no external help or technical assistance from experts.
Setting up MalCare and ensuring that your security plugin is running and keeping your site protected is a simple two-step process:
Step 1 – Add Your Site
First, sign up to create an account, then log in.
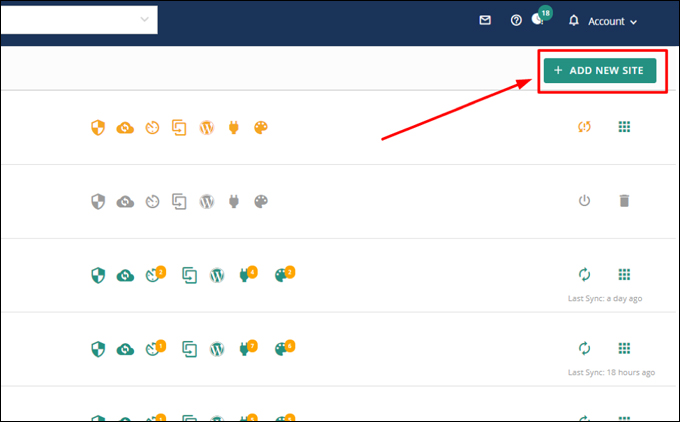
After logging into the MalCare dashboard, add your site(s) to the MalCare dashboard by selecting the Add New Site button …
(Add new site)
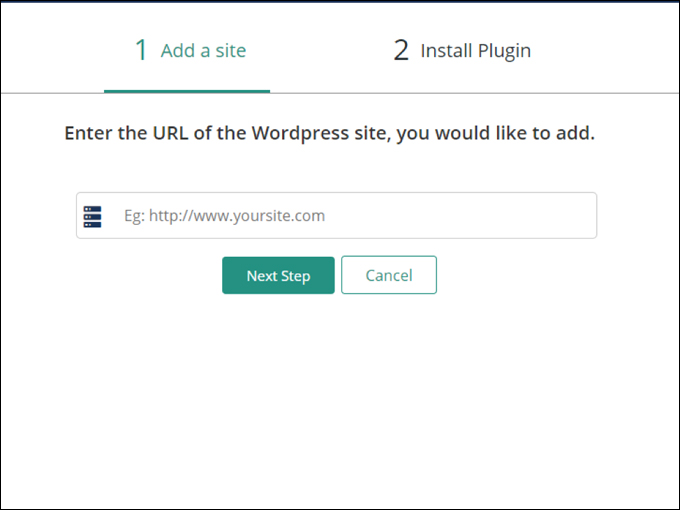
A field will display asking for the address of your website. Enter the URL of your site into the field and select the Next Step button …
(Add a site)
Step 2 – Install The Plugin
You will be asked to enter your site’s admin login details. Type in the credentials to your site and MalCare will do the rest for you and begin securing your site.
Exploring The Dashboard
The MalCare dashboard provides a clean and intuitive interface that makes it easy to navigate to the various plugin sections and features.
The left-hand side of the dashboard provides one-click navigation links to help you access all the main features quickly. The dashboard is neatly divided into five sections: Security, Management, Backup, Reporting, and White-Labelling. Below this, you will find everything you need to keep your site secure.
After performing an initial scan, your site will be marked with a security rating ranging from A to D (A is best and D is worst). The score is determined by an internal algorithm that tells you the health of your site.
Don’t be alarmed if your scan doesn’t result in an “A”. MalCare will tell you what you can do to improve the score.
There are four main features available in MalCare that you need to know about. Let’s take a deeper look at each of these features:
The Scanner
An impressive fact worth knowing is that MalCare was built after collecting data from over 240,000 websites. The scanner uses artificial intelligence to detect hard-to-find malware. MalCare scans sites at a scheduled time every day.
(MalCare scanner)
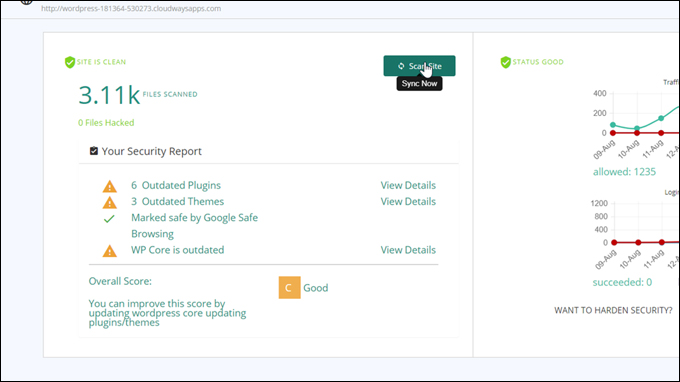
Apart from the scheduled scans, there is also a Scan Now option that lets you instantly run a scan and display the results.
(Select the ‘Scan Site’ option)
Scanning Technique
MalCare doesn’t just search for strings in the code to find malware. This technique is not sufficient to detect complex malware. It has a sophisticated algorithm along with AI that learns and discovers new and complex malware in your system with ease.
Reduces Load
Another reason why MalCare is impressive is that the scanning does not slow down your site. Instead, MalCare transfers your website data to its own server and runs the scan on the server.
After the scanning is done, if malware is found, the next step is to clean it.
The Cleaner
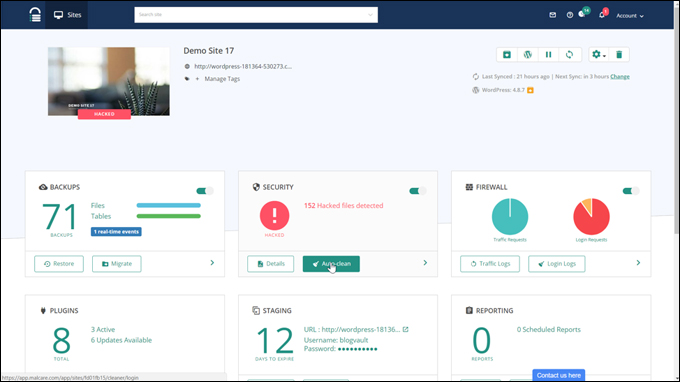
Cleaning malware is normally a time-consuming task. MalCare, however, makes this easy. The Auto Clean option is present in the Scanner section and the malware clean happens at the click of a button.
(MalCare cleaner)
If you are informed that your site has been hacked, all you need to do is press the button, and your website will be malware free! You will be informed of this by email and receive a notification alert on the dashboard.
No Technical Expertise Required
You don’t need technical experts to use the MalCare Cleaner. The entire cleaning process is simple and easy to follow and can be done by a non-technical person.
Thorough Malware Removal
The nature of malware programs is that even after being removed, many will try to make a comeback by finding a backdoor. MalCare was built to prevent these kinds of issues. After running the cleaner, most malware issues should be permanently resolved.
Precision
The MalCare cleaner works in a way that does not affect any part of your site while removing malware. It takes care of the files that were hacked and leaves your clean files untouched.
Many people will recommend performing a manual clean up after your site has been hacked. This kind of cleanup, however, is considered outdated. MalCare employs the latest technologies to clean a site with the click of a button!
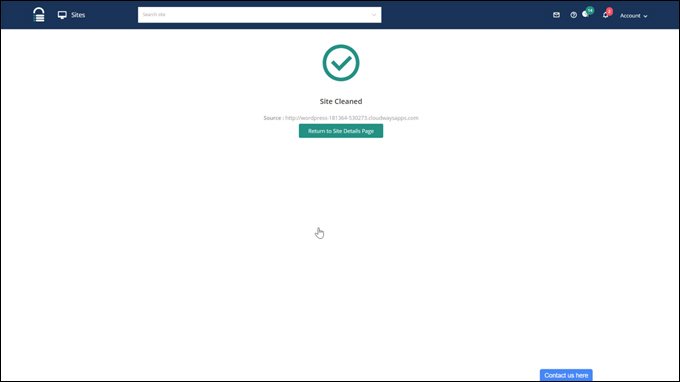
(Your site is now clean!)
While removing existing malware is essential, the next important step is preventing malware from infiltrating your website again.
Website Hardening
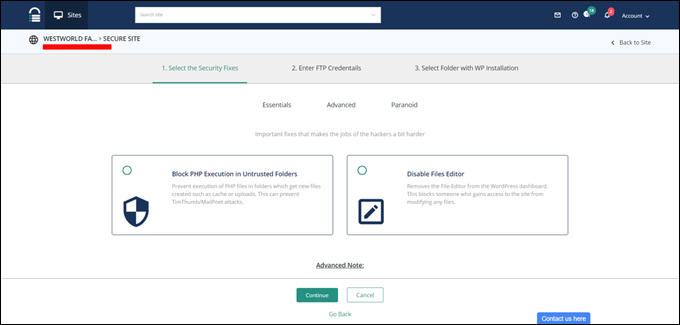
WordPress recommends certain website hardening measures to improve website security. To perform those measures, however, requires some technical knowledge. MalCare makes it easy to perform these measures. Based on the level of security required, MalCare offers three types of protection.
(MalCare website hardening)
1. Essentials
- Block PHP Execution in Untrusted Folders
- Change Database Prefix
- Disable Files Editor
2. Advanced
- Block Plugin/Theme Installation
3. Paranoid
- Reset all Passwords
- Change Security Keys
MalCare performs these actions when the above security levels are enabled. Here are a few technical aspects of the website hardening feature.
Security Keys
These are stored by default on the database of the site. However, it can be dangerous as it is an easy target for hackers. With MalCare, these keys can be replaced with a new set of keys that are stronger. They are also placed in a more secure location.
PHP files
Attacks caused due to the execution of PHP files in the uploads folder are frequent, but MalCare efficiently takes care of this too!
Prevents Plugin Installations
Rogue plugins and themes are an easy way for hackers to get into your site. MalCare detects them at the initial scan itself. It will disable these installations and reduce the risk factor.
You can select your preferred security level and choose the actions to take when you navigate to the website hardening feature. The hardening feature is highly recommended even if you have not experienced hacking issues.
MalCare Firewall
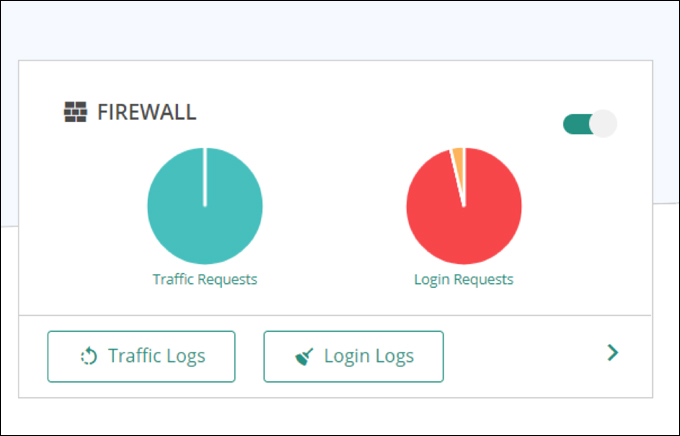
MalCare Firewall is a feature enabled to fortify your website and protect it from hackers. This feature is automatically activated when a site is added to MalCare.
(MalCare firewall)
However, you can disable if you wish. MalCare filters the traffic coming from the outside world in two ways:
IP Blocking
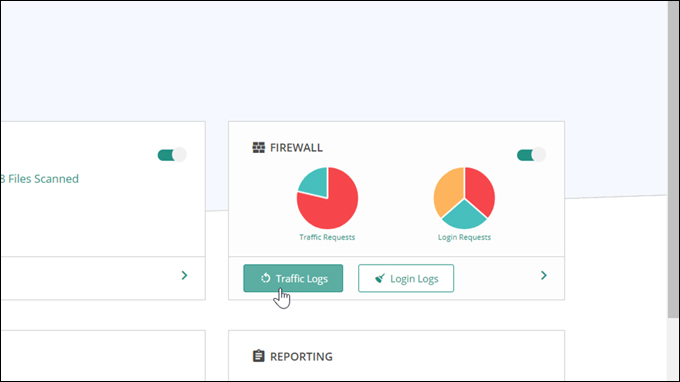
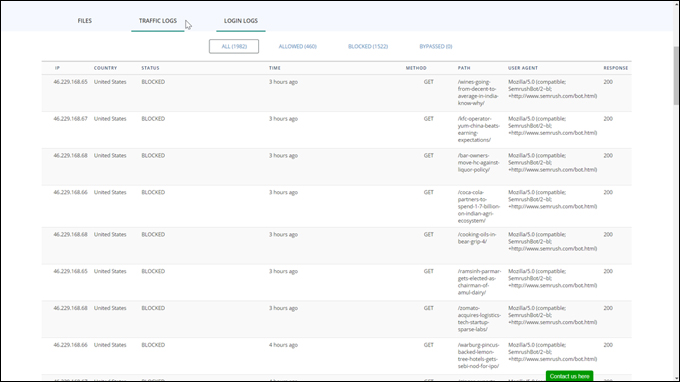
MalCare scans more than 100,000 websites in search for bad IPs. These are the ones that are known to harm your website when they visit it. So whenever one of these IP addresses try to gain access from your site, the firewall blocks it!
(MalCare traffic log)
Login Protection
Some hackers continuously try to gain access to your site by trying different combinations of passwords. MalCare blocks them after a few unsuccessful attempts by deploying a CAPTCHA.
This feature will make you feel a lot safer, so ensure that the firewall remains enabled all the time.
(MalCare login logs)
Integrated Backup
Backups are an essential part of website security. They are your safety net if a hacker gains access to your site and wipes out your files and data. With MalCare’s powerful backup service, your sites will remain protected and you always have access to your backups.
Website Management
MalCare has a website Management section where you can manage your dashboard, update plugins, themes, and a lot more. The site also has a feature that alerts you if your plugins are outdated!
Additionally, you can change passwords, user roles or even delete users who have access to your WordPress site.
(MalCare website management)
MalCare Support
If you need support or have any questions or concerns about the features or the technology behind MalCare, you will find that the MalCare support team is very responsive and eager to share their knowledge with you.
Recommendation: Install The MalCare Plugin
The features in MalCare are simple and easy-to-use. If you own or manage multiple WordPress sites, adding these to the dashboard is just a simple ‘rinse and repeat’ process. MalCare is a robust WordPress security solution backed by a solid support team and extensive help documentation.
With MalCare’s Scanner actively looking after your WordPress sites on a daily basis, you will have peace of mind knowing that your sites will be safer.
Using the Cleaner is easy and the procedure takes only a few minutes. Use the Website Hardening feature to lock down the backend of your site(s). Malcare also provides two additional useful features for agencies, web developers, or anyone managing client websites: White-Labelling and Client Reporting.
MalCare is very reasonably priced and offers a range of options to suit your needs, depending on how many sites you need to protect and manage.
If you are a WordPress site owner, we recommend installing the MalCare security plugin and using the service as part of your regular website management and security maintenance process.
For more details, go here: MalCare – Complete WordPress Security Solution


