How To Insert Code And Scripts Into WordPress Posts And Pages
 In this tutorial, you will learn how to easily insert scripts and code into your post and page content using various methods.
Note: The examples in this tutorial use the WordPress Classic Editor, but you can use the same methods described below using the WordPress Block Editor.
Why Do I Need To Know This?
You might be thinking “I don’t want to learn how to code. I’m not interested in coding. My web developer looks after this.”
This tutorial is not about coding websites, editing web site files, or writing software applications. It’s about learning how to add useful scripts and snippets of code that you may want to add to your site or insert into the content in your posts or pages, like:
- Showing an automatic expiry date, countdown, or scarcity offer (e.g. “This special offer expires in 01h:59m:36s”).
- Adding a table of contents or displaying an advertising banner below the main heading, or before/after the first/second/third/etc. paragraph.
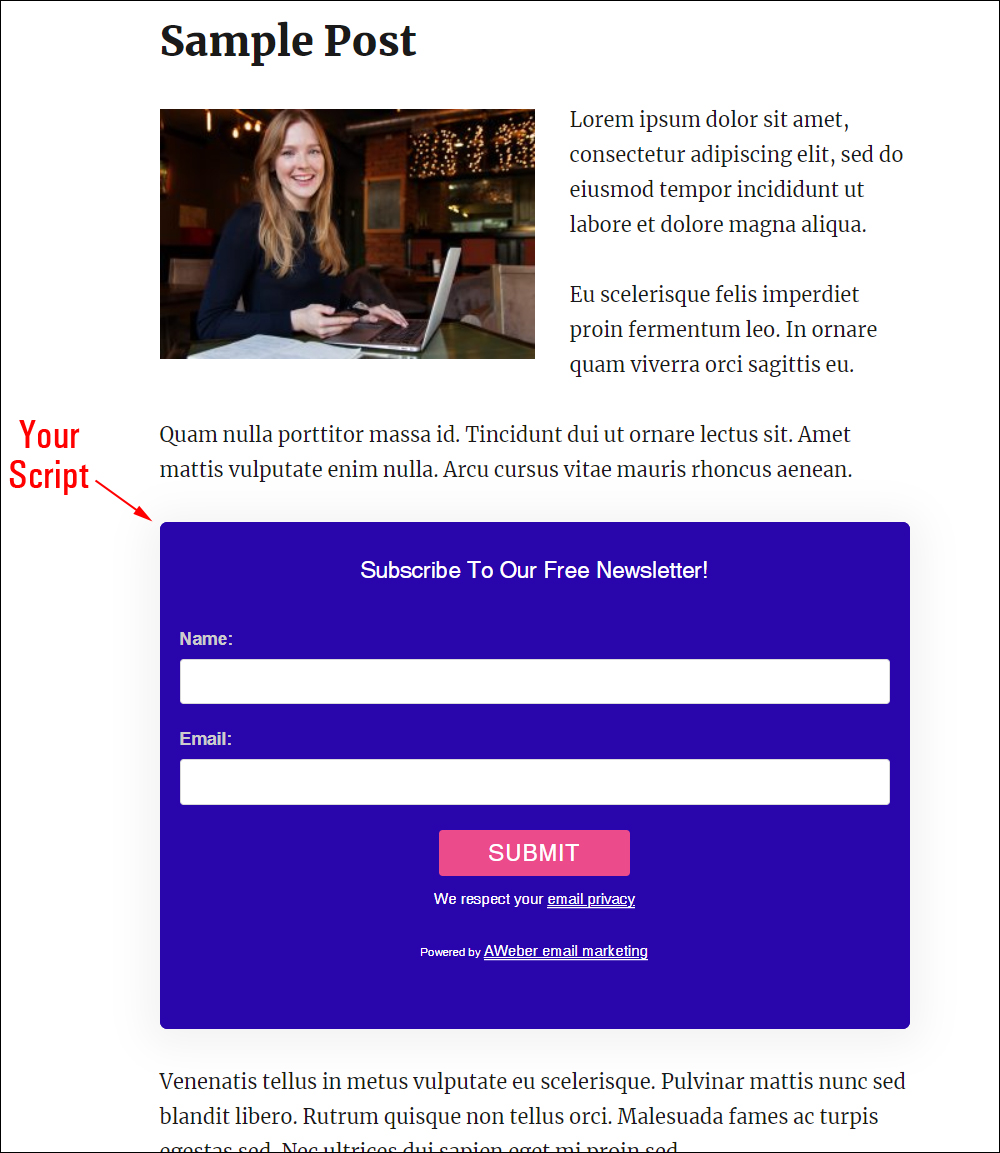
- Embedding a lead capture form into a post or page.
- Displaying contextual ads in your content (e.g. Google AdSense).
- Adding conversion tracking scripts (e.g. Google Analytics, Facebook Ad pixels)
- Etc.
Knowing how to insert simple scripts and code snippets into your WordPress site is a useful and time-saving skill.
Many applications let you control things from an external dashboard. All you need to do is add the snippet of code they provide to your website where you want this functionality to display. Then, if you need to make any changes, instead of editing one, dozens, or even hundreds of posts or pages where you’ve added that code, you can simply make the changes in your application’s dashboard and every instance of that functionality will automatically update on your site.
Adding code to content in WordPress, however, can be a little bit tricky, especially if you’re a non-techie. This tutorial will show you exactly how to do it.
Let’s get started…
How To Insert Simple Code Snippets Into Your Posts And Pages Using The Text Editor
![]()
Note: Always back up your site files and WordPress database before adding any scripts or editing code on your site.
If you don’t want to perform your own backups, then consider using a backup plugin or professional site maintenance services.
You can’t paste code or scripts (e.g. HTML, Javascript) into your content using the WordPress visual editor.

You can, however, add simple code to your content using the WordPress text editor.
To add your code to a post or page, do the following:
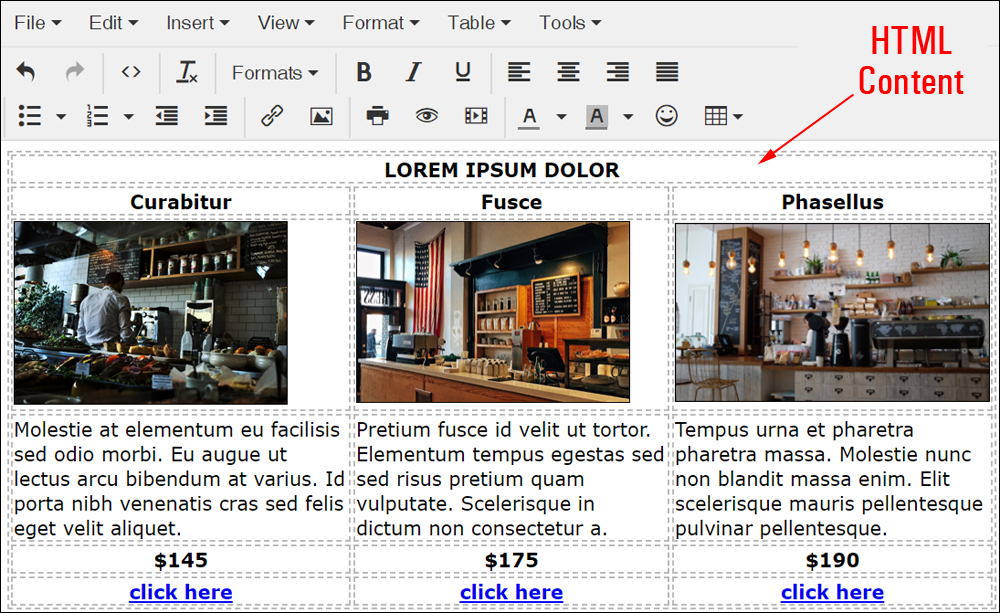
1. Find or create the code you would like to add to your content. There are free online HTML editors you can use to generate code (search online using keywords like Free HTML Code Editor, Free HTML code generator, etc.). Most of these online editors have a WYSIWYG (What You See Is What You Get) interface that will let you create your code elements visually.
Here are some sites you can use:
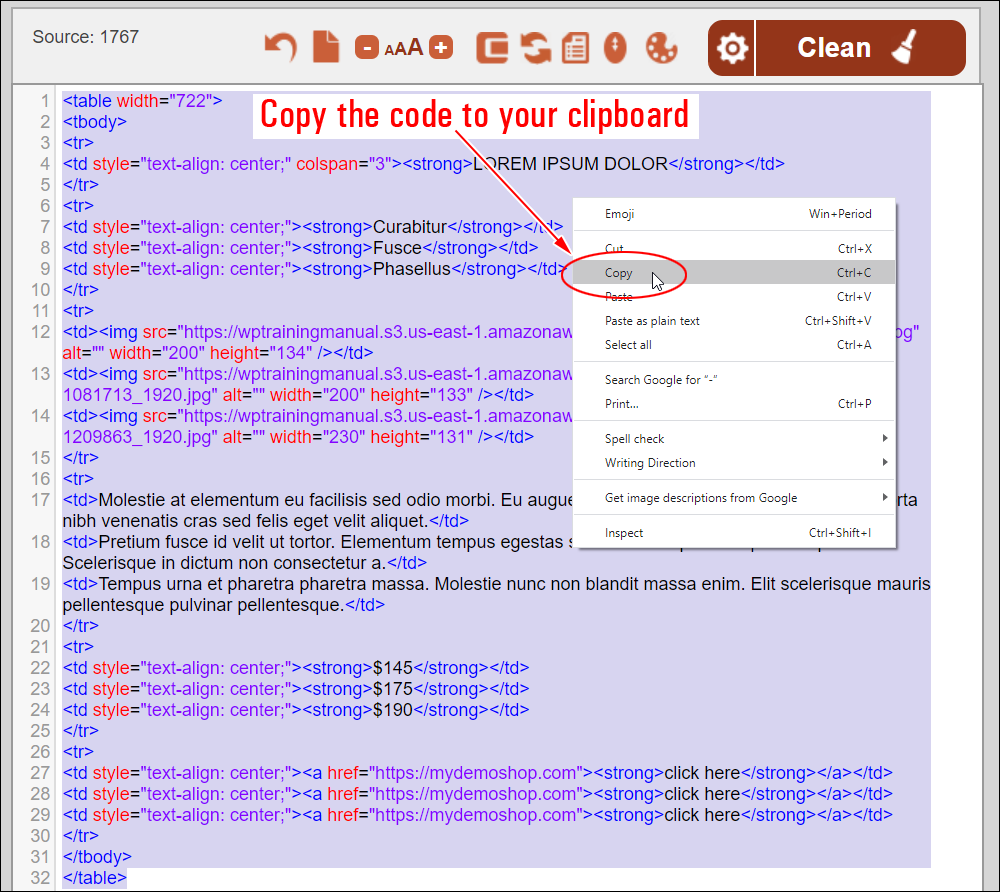
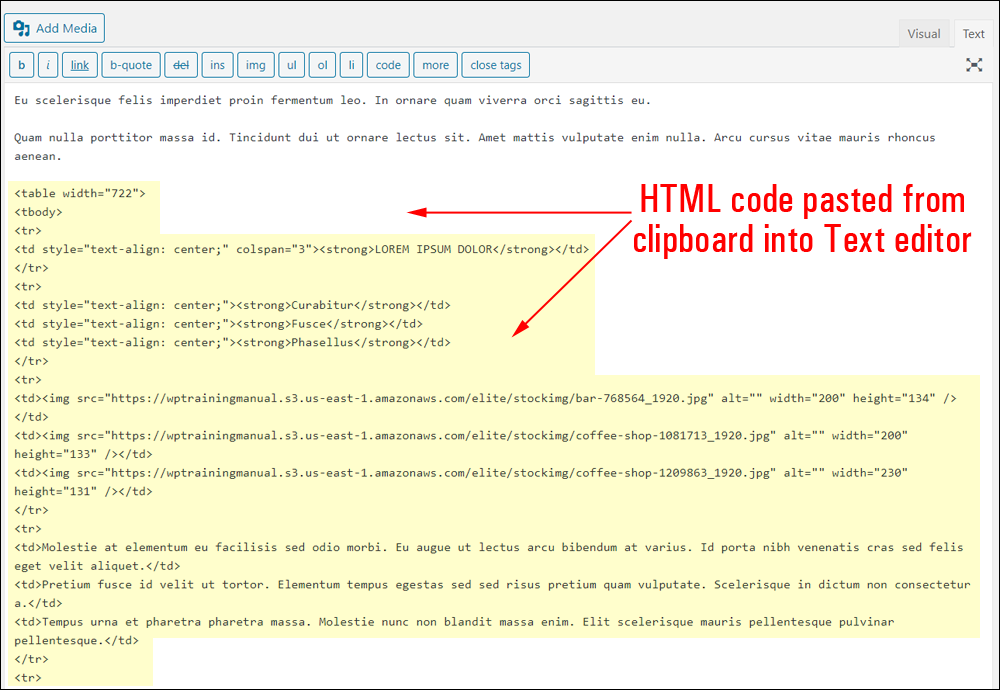
2. After creating your HTML element, switch the editor to code view, then select all the code that you have created or sourced and copy it to your clipboard.
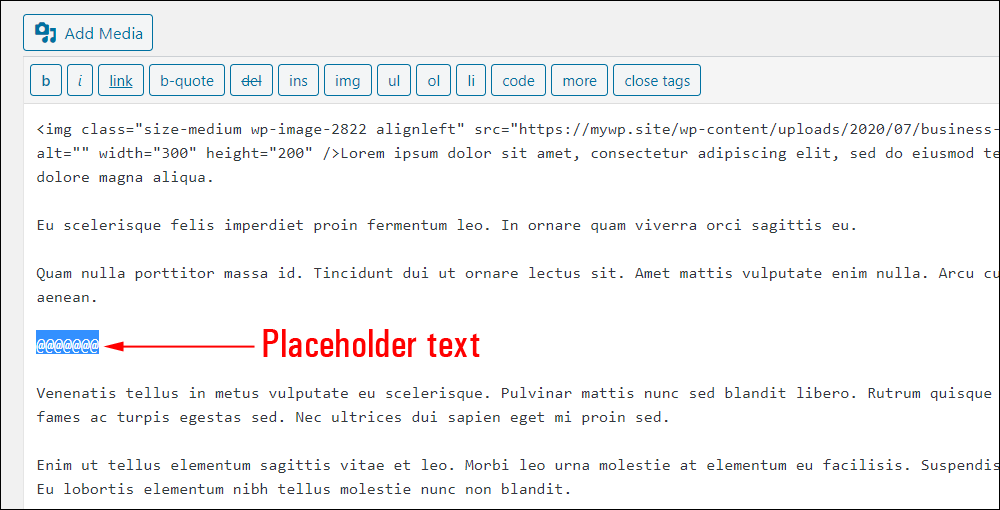
3. Open the post or page where you would like to add the code to your content. In the Visual Editor tab, find the exact location where you would like the code to display and insert a new line into your text. Add a string of placeholder characters (e.g. @@@@@) to mark the spot where you will add your code.

4. Next, select the placeholder text (1) and switch from the Visual to the Text tab (2).
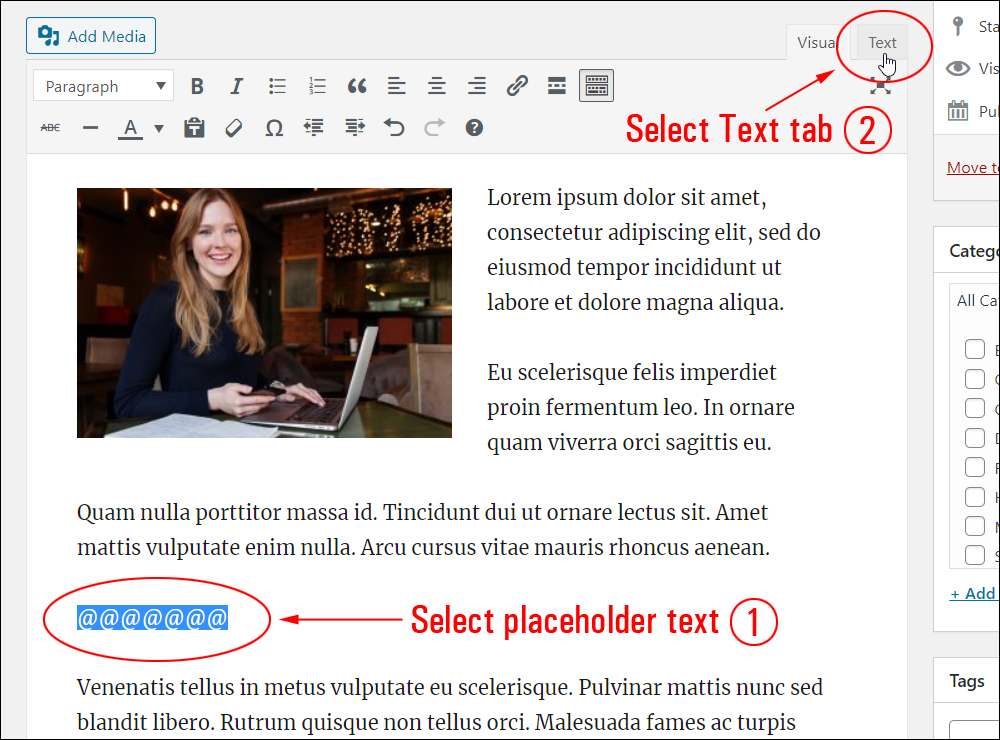
5. Your placeholder text should automatically be highlighted in the text area. If not, find the placeholder text you’ve added to mark the spot, then select and highlight the entire line.
6. Paste the code over the highlighted text, replacing it with the contents of your clipboard.
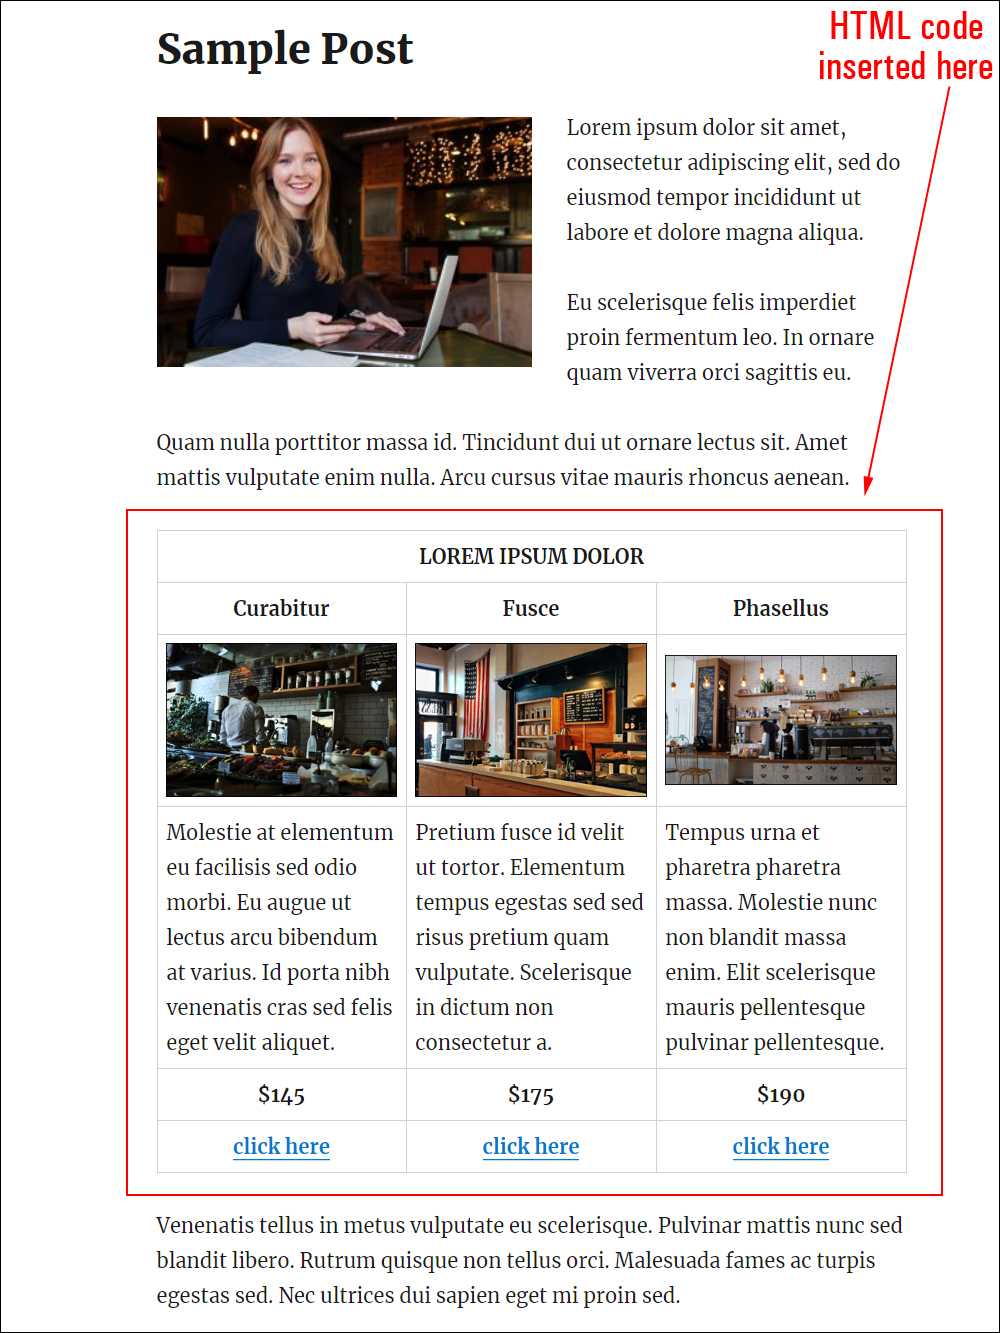
7. Save, publish or republish your post or page, then preview (and test) your code.
If you need help understanding basic HTML formatting tags, see this tutorial: A Guide To HTML Formatting In WordPress
![]()
While the above method can be used to add simple HTML code to your posts and pages, this is not the method we recommend using to paste more complex scripts directly into your content (e.g. scripts containing JavaScript code for newsletter opt-in forms).
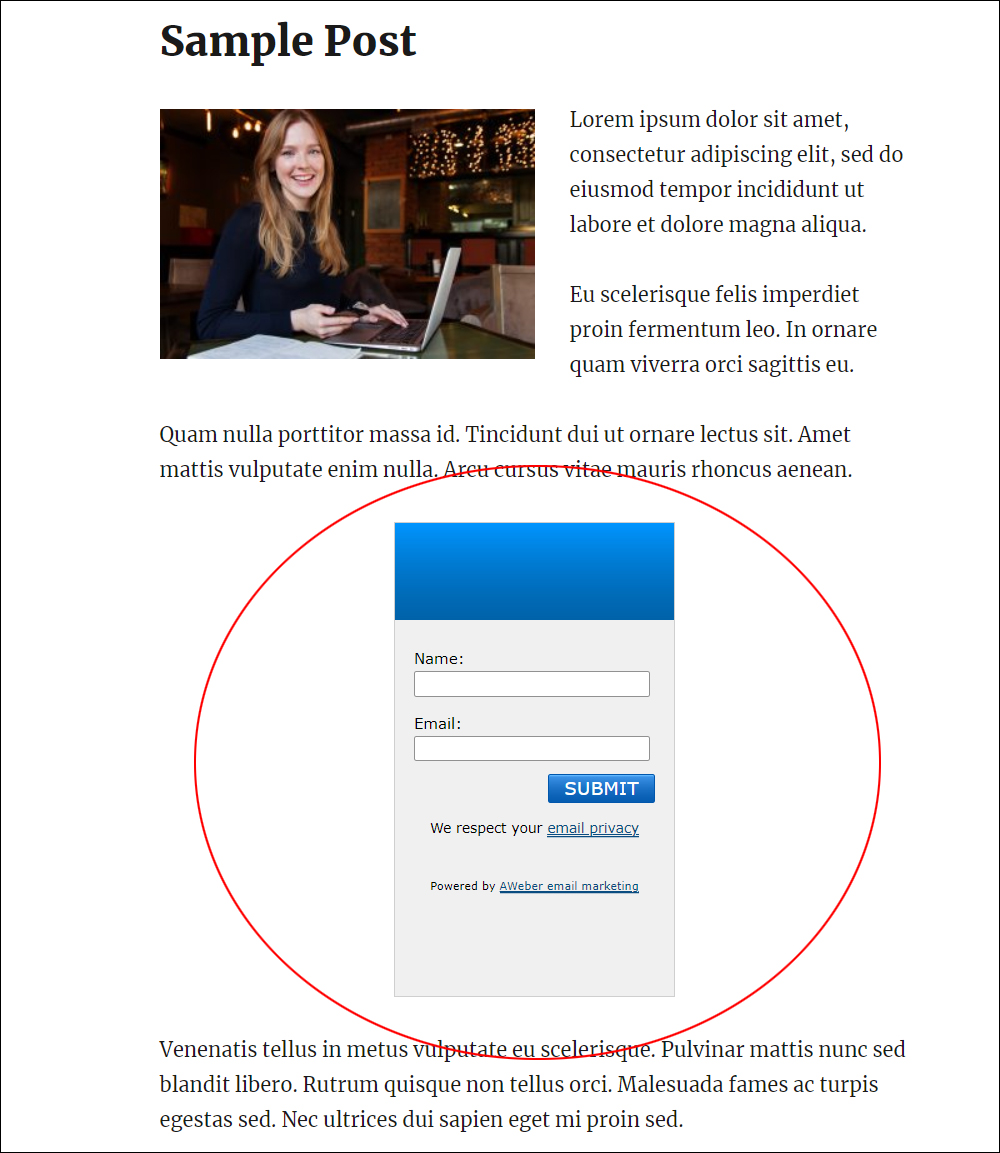
Pasting scripts with JavaScript code directly into your content via the WordPress text editor doesn’t work. It can also lead to errors.
In WordPress, you can add many useful scripts and snippets of code to your posts and pages using plugins that let you “call” (i.e. automatically process) the script by typing or pasting a ‘shortcode’ into your content.
What Is A Shortcode?
A ‘shortcode’ is a code shortcut — a short and simple bit of code that you add to your posts, pages, widgets, etc. Whenever WordPress comes across a shortcode, it processes or runs the script via the plugin.
A shortcode typically looks like little strings of text wrapped in square brackets, e.g. [ezformshortcode].

How Shortcodes Work
Shortcodes allow you to add complex scripts like forms, image galleries, content formatting tools, etc. into your content without coding or programming skills.
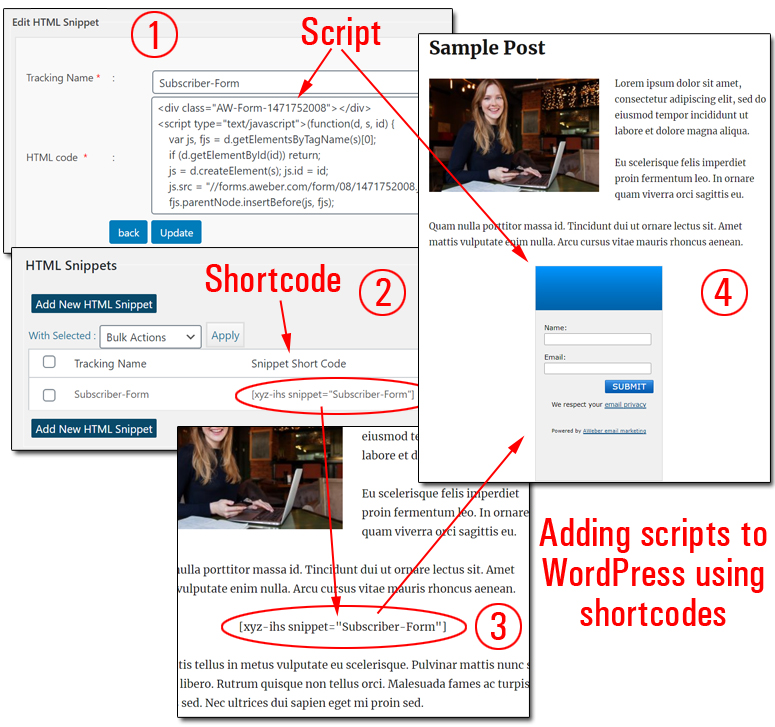
The images above show how shortcodes work in WordPress:
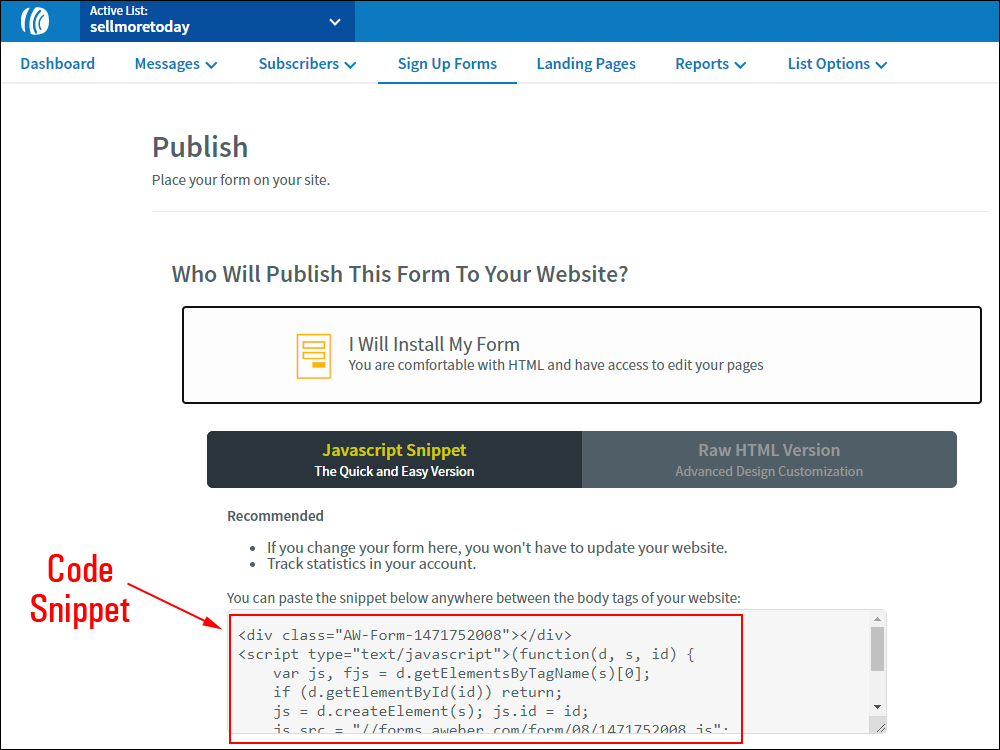
[1] First, install a plugin that lets you paste code snippets into a special field or area (see the tutorial below for an example).
[2] The plugin generates a unique piece of text (the shortcode) that will trigger and process the script.
[3] Next, copy the shortcode to your clipboard and paste it into any post, page, or widget where you would like the script to run.
[4] WordPress will automatically load and process the function called by the shortcode every time someone visits the page containing the embedded shortcode.
The great thing about using shortcodes is that you don’t have to mess with the actual code to get the functionality you want…just add the shortcode to your content and WordPress does the rest!
Embed Code Snippets And Scripts Into Your Content Using Plugins
Let’s show you how to use a plugin to add code to your content. There are several free WordPress plugins you can use to do this. We’ll walk you through the process using one of these plugins, then look at different plugins you can use.
Insert HTML Snippet
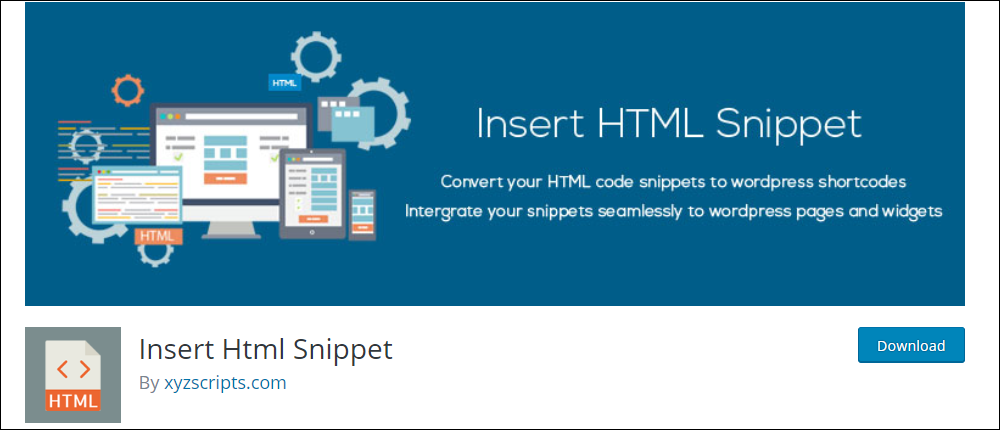
As the name of this plugin suggests, Insert HTML Snippet lets you embed HTML (and other types of code, e.g. CSS, JavaScript, etc.) into posts, pages, sidebar widgets, etc. You can create and store unlimited HTML snippets and then add these to your site using shortcodes or custom fields.
HTML snippets can store scripts for just about everything: video and audio player embed codes, forms, calculators, custom tracking codes, etc.
![]()
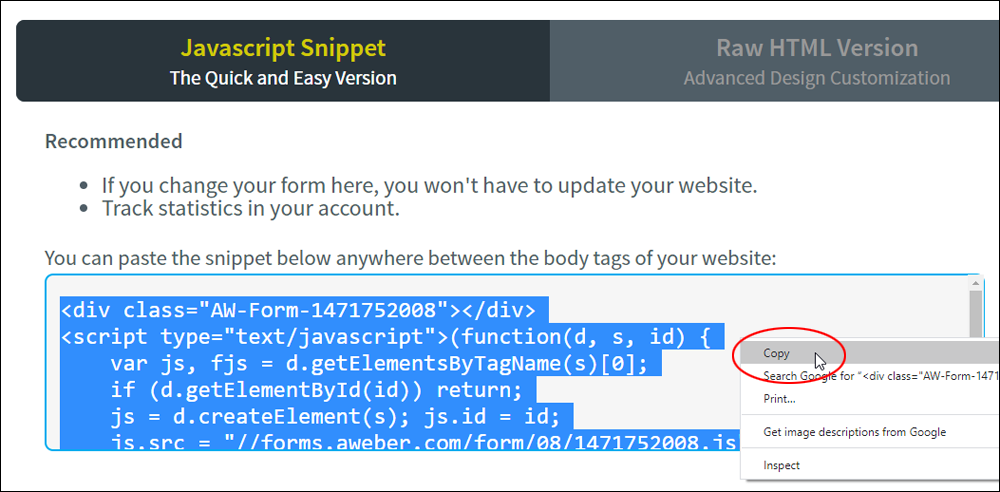
Important: Make sure you have your code or script available and saved somewhere (e.g. a plain text file).
How To Install The Plugin
Let’s install the plugin and then use it to add a newsletter signup form to a page.
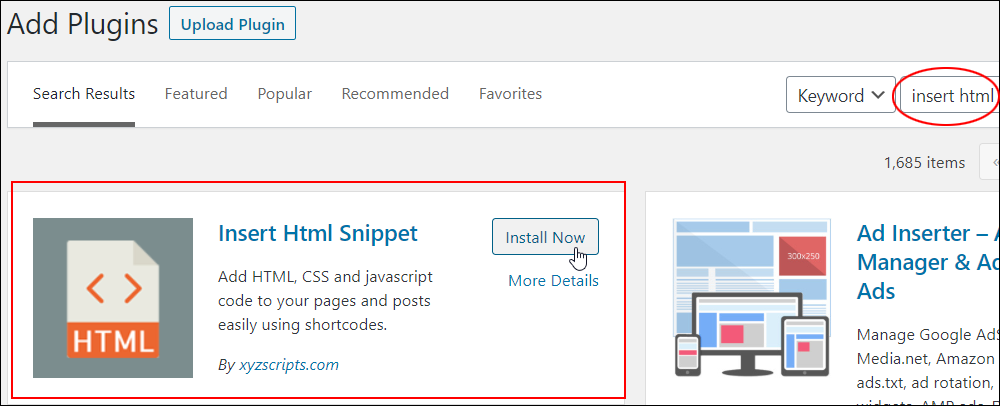
First, log into your WordPress site, then go to Plugins > Add New and search for keywords like Insert HTML, Insert HTML Code, Insert HTML Snippets, etc.
Next, activate the plugin.
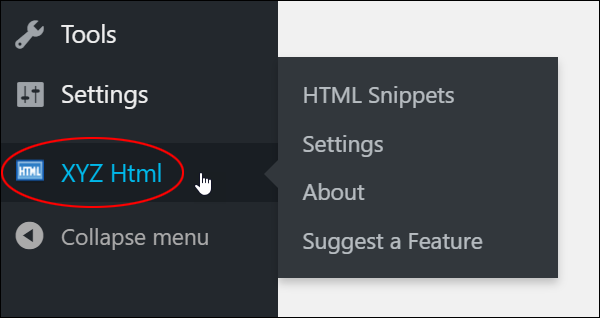
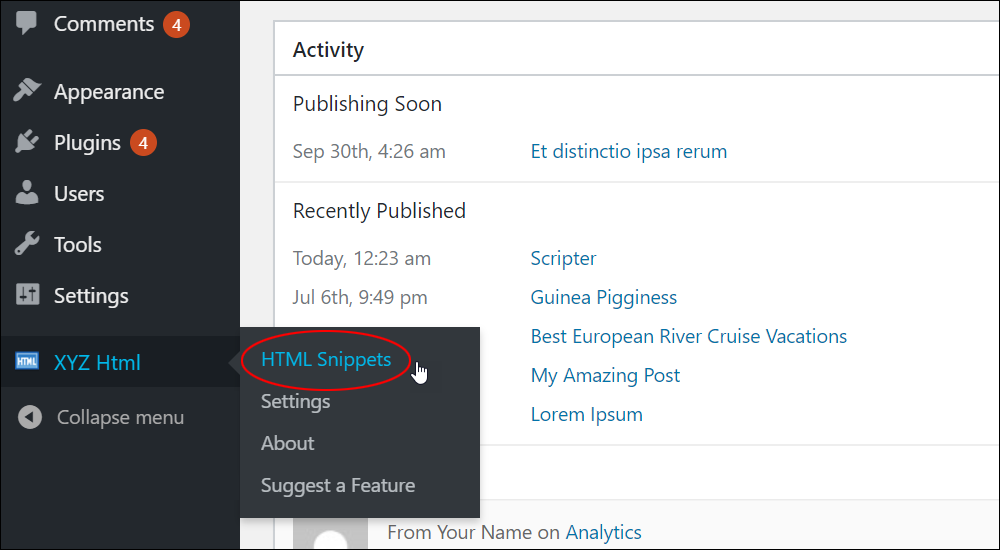
After installing and activating the plugin, you will see a new menu item on your menu, called XYZ Html.
How To Use The Plugin
To create a new code snippet, click on XYZ Html > HTML Snippets.
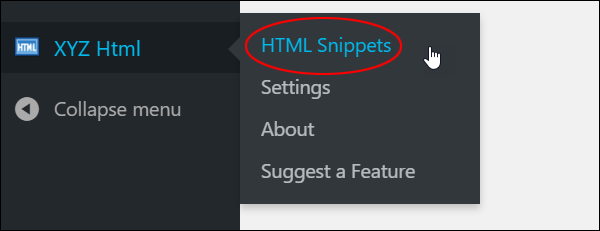
The ‘HTML Snippets’ screen loads in your browser.
Click on Add New HTML Snippet.
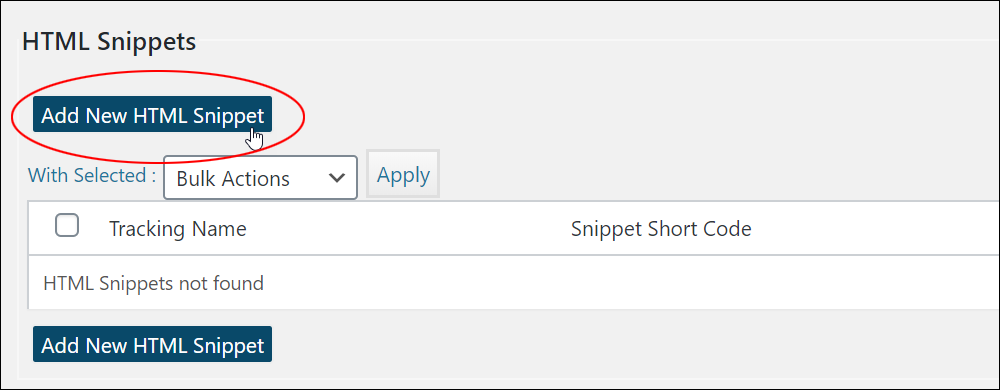
Give your snippet a title (this is for your own reference only) in the Add HTML Snippet > Tracking Name field, then paste your code into the HTML code area, and click on the Create button.
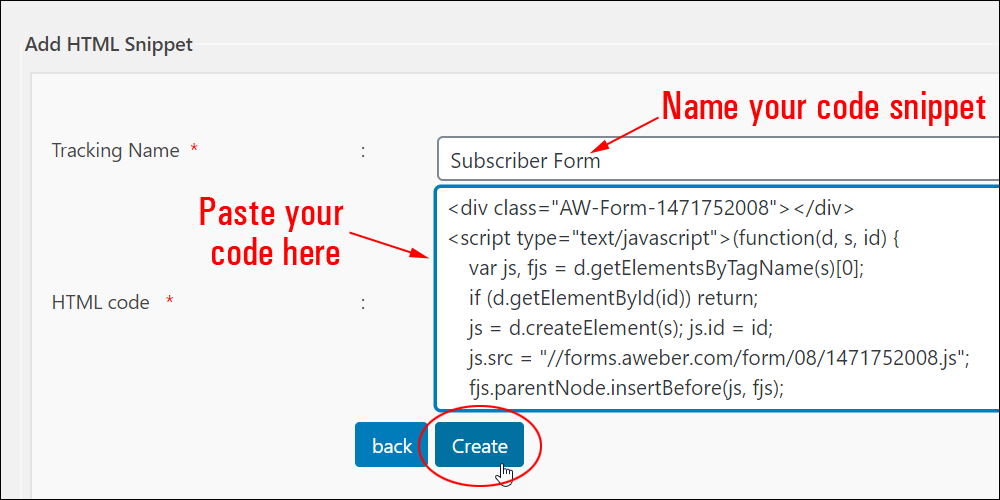
This creates, saves, and publishes your new snippet as a shortcode. Copy, paste and use this shortcode to insert your script into your posts and pages.
![]()
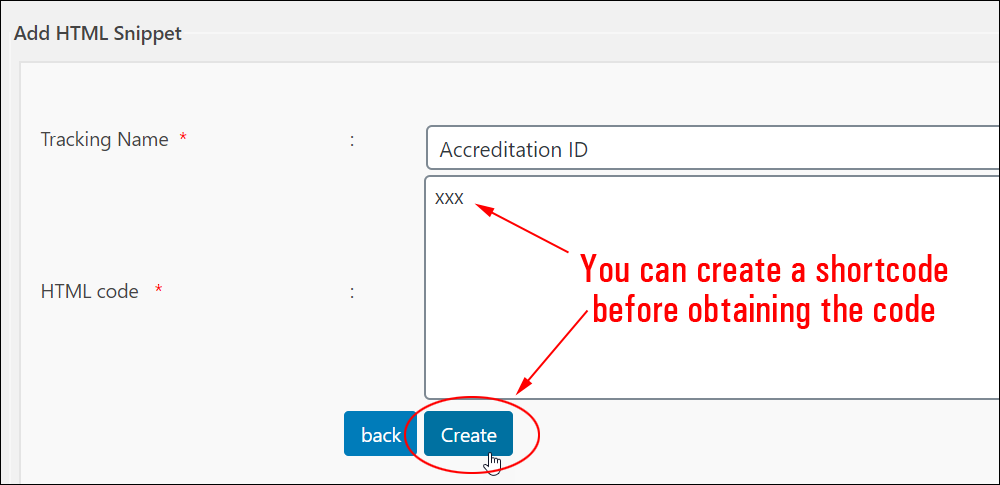
You can create a shortcode without a script. This is useful if you are planning to publish content that will include a script but you are still waiting for a third-party service (e.g. an affiliate program) to approve your account before giving you access to the script’s code.
If this happens, just go ahead and create your snippet with some placeholder content, create your post or page content, and insert the shortcode into the content where your script will appear. You can edit your snippet and add the script code later without having to edit your post or page.
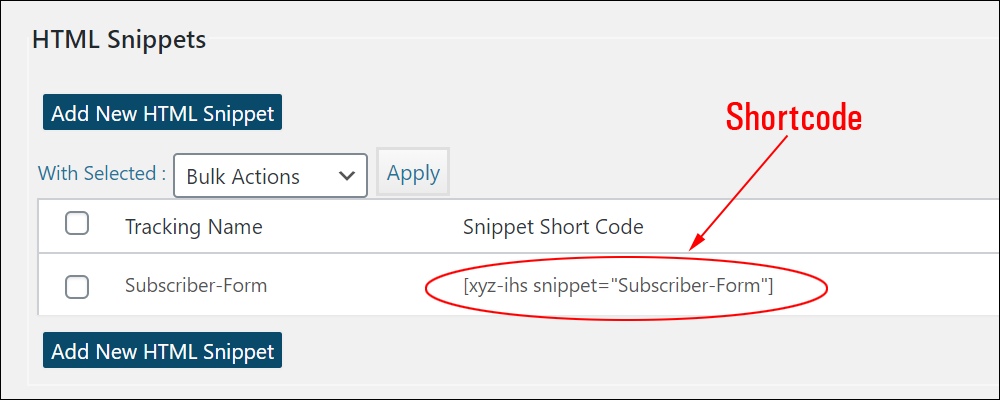
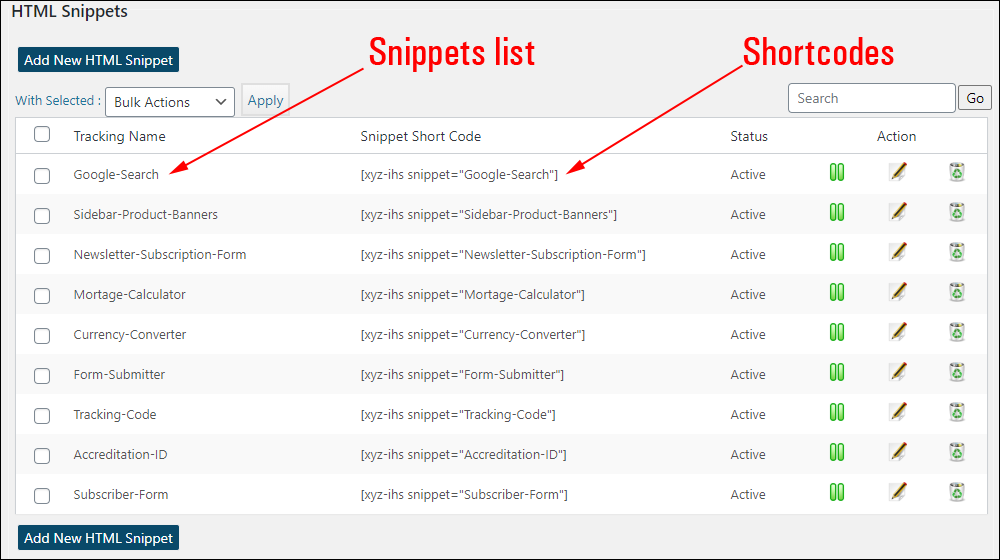
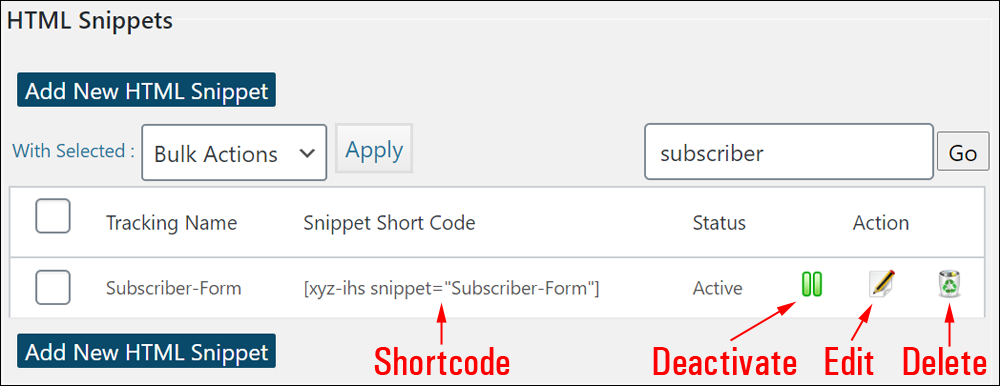
To view all of your snippets and shortcodes, select XYZ Html > HTML Snippets from the main admin menu.
A table of all the snippets and shortcodes you have created will display in the ‘HTML Snippets’ screen.
Notes:
- You can use the shortcodes from this table to insert scripts into multiple posts and pages and control everything from the HTML Snippets plugin screen.
- If you edit the code inside a snippet then update the snippet, the script will automatically update in your content wherever the shortcode has been used throughout your site.
- You can insert shortcodes into posts (including custom post types like eCommerce product pages), pages, widgets, etc.
How To Add A Shortcode To Your Content
You can add a shortcode to your posts and pages with the HTML Snippets plugin either by:
- Copying and pasting the shortcode directly into your content (note: if using the WordPress Block Editor, paste the shortcode using the shortcode block)
- Selecting the shortcode from the HTML Snippets menu toolbar button (Classic Editor)
- Additionally, you can insert your scripts via shortcodes into your site’s header, footer, or sidebar areas using the HTML Snippets widget.
Let’s go through these methods…
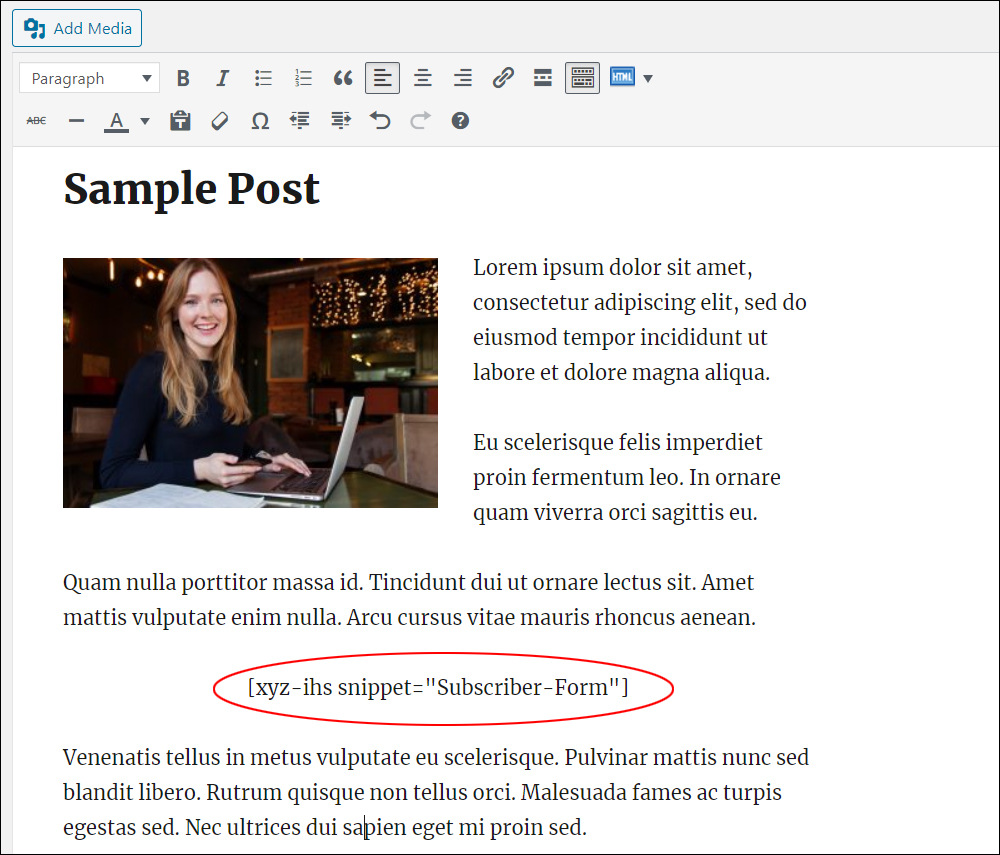
Copying and pasting the shortcode directly into your content
To paste the shortcode directly into your content:
- Copy the shortcode from the HTML Snippets table to your clipboard,
- Create or edit a post or page,
- Create a new blank line in the text where you would like to insert your code,
- Place your cursor inside this line, and
- Paste in the shortcode from your clipboard.
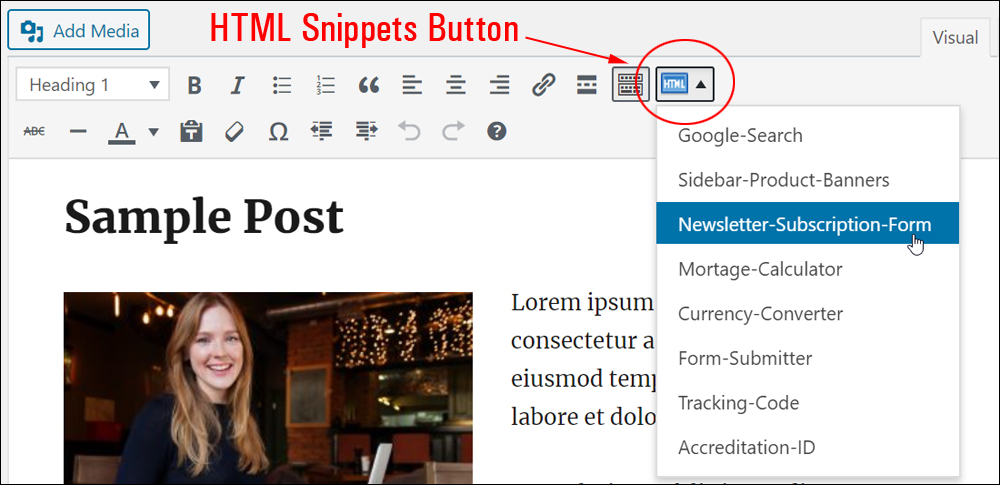
Selecting the shortcode from the HTML Snippets menu toolbar
Alternatively, if you are in the middle of writing or editing your post or page, do the following:
- Create a new blank line in the text where you would like to insert your code,
- Place your cursor inside this line, and
- Select the shortcode from a dropdown list by clicking the HTML Snippets menu toolbar button.
After adding the shortcode, publish your post or page, preview your content, and test your script to make sure that everything is working correctly.

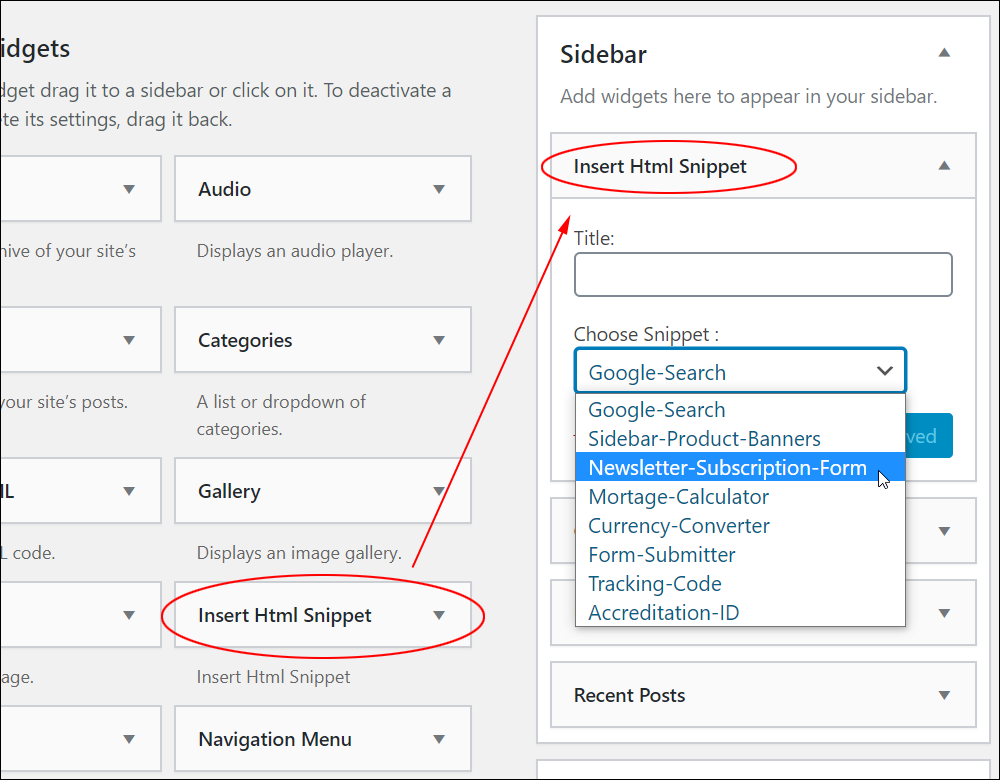
Add a shortcode using the HTML Snippets widget
In addition to adding shortcodes to content in your posts and pages, you can insert shortcodes into different sections of your site (e.g. your sidebar, header, or footer) using the HTML Snippets widget.
To learn more about using widgets, see this tutorial: WordPress Widgets Explained
Additional Plugin Information
As noted earlier, if you change the script in the original application or in the plugin’s snippet, your shortcode will automatically update the script code wherever it has been inserted throughout your site.
![]()
As well as creating and adding new snippets using the HTML Snippets plugin, you can also deactivate, edit, or delete snippets.
Notes:
If you decide that you no longer want the script to display in your content, you have a few options.
- You can delete the shortcode from your content (note: finding and deleting all instances of the shortcode can be a cumbersome task, especially if you have added the shortcode to many posts or pages on your site).
- You can deactivate or delete the snippet.
- You can deactivate or delete the plugin.
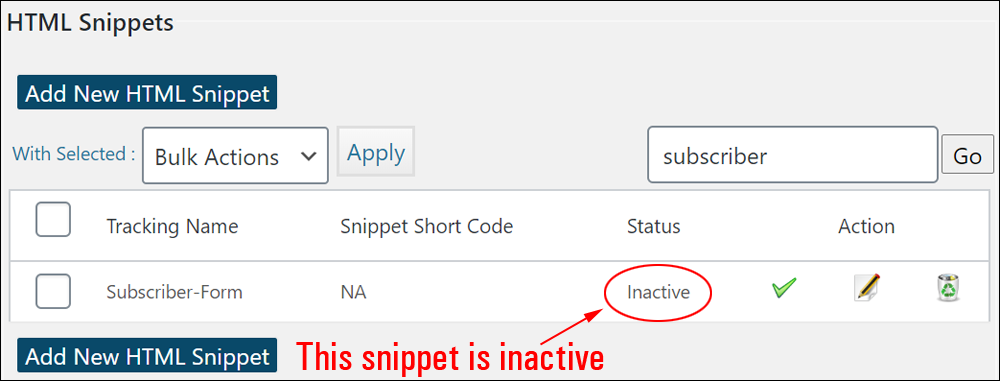
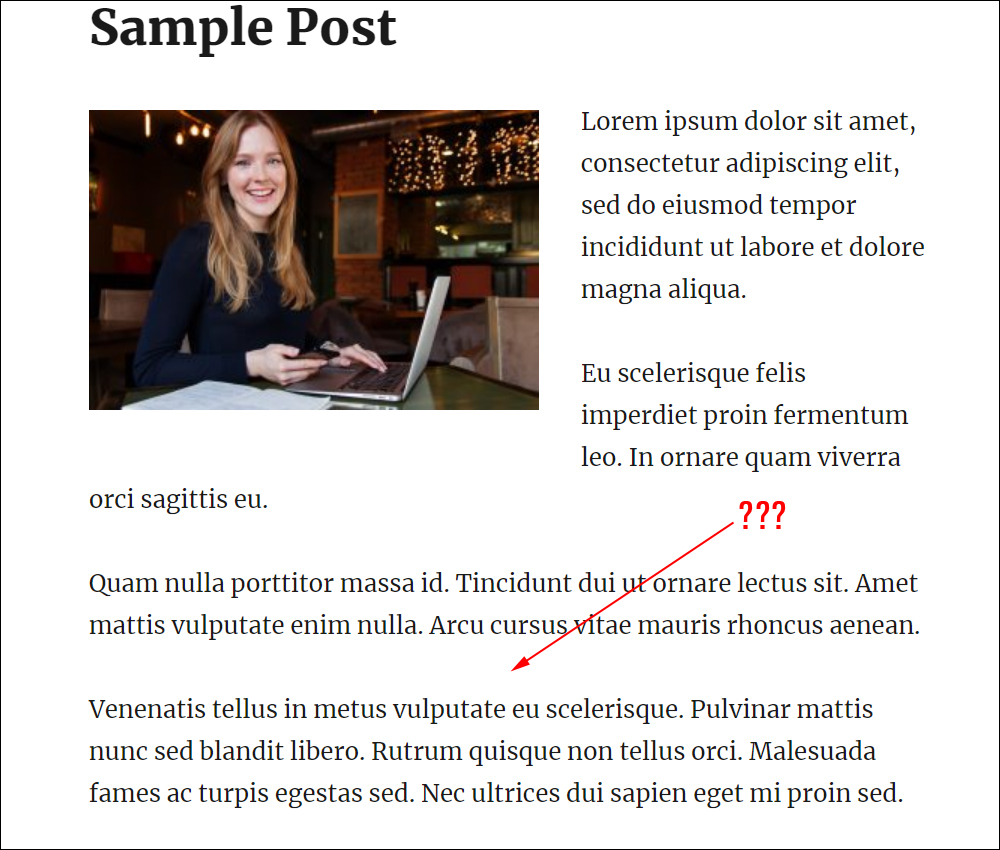
If you deactivate or delete a snippet but leave the HTML Snippets plugin installed and active on your site, the shortcode will not display in your content.
The plugin will automatically remove the line from your content containing the shortcode so that visitors will not detect or notice any gaps in your content.
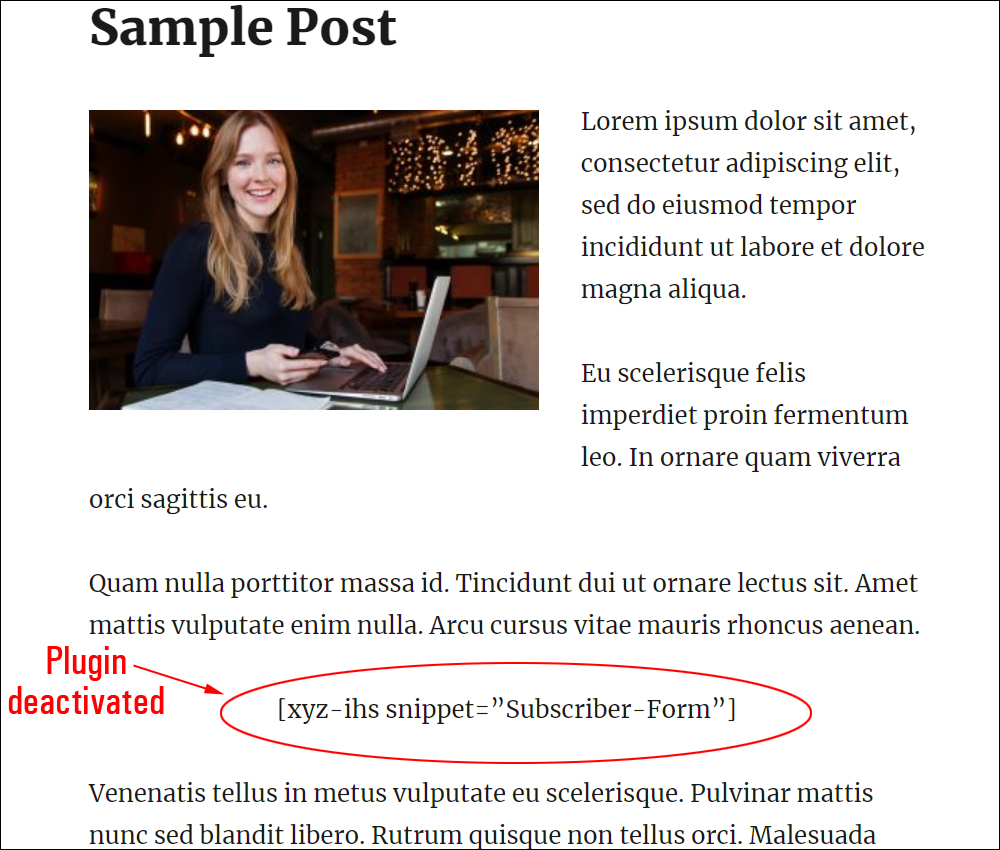
If you deactivate or uninstall the HTML Snippets plugin, however, the shortcode will display in your content and will need to be manually removed.
For more details about this plugin, go here: Insert HTML Snippet
Additional Ways To Insert Code Into WordPress Content
Use WordPress Themes With Drag And Drop Code Page Builders
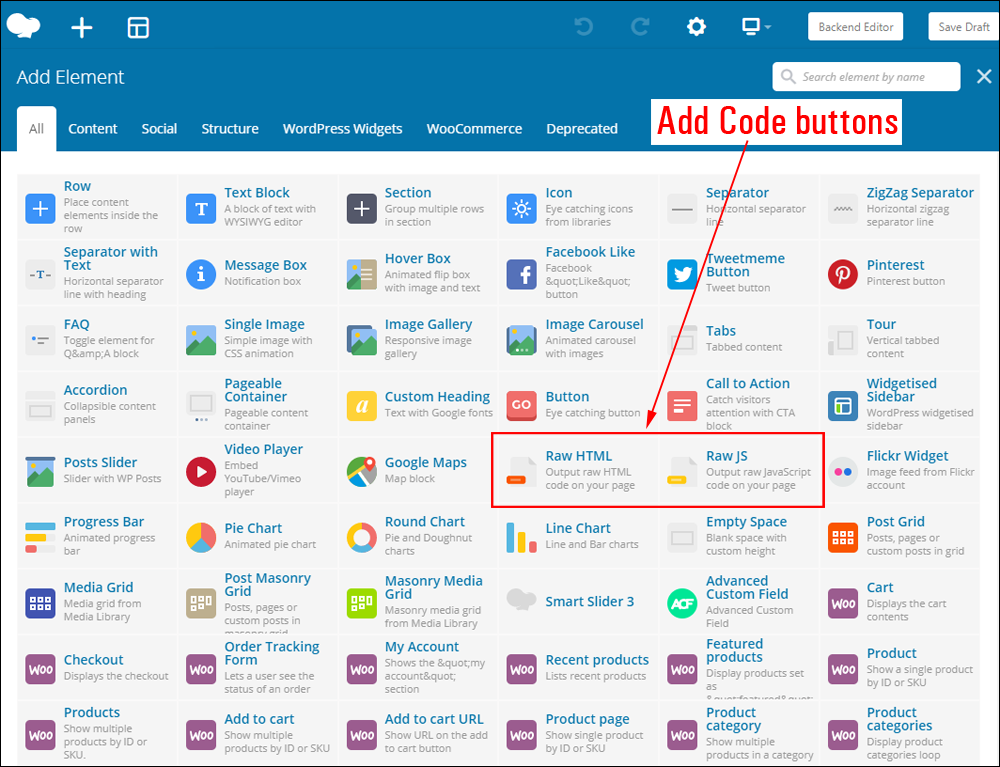
Some WordPress themes use drag and drop page-building plugins like Visual Composer or Thrive Architect that let you add raw HTML and JavaScript code to your pages.
Add Code To The Header Section Of WordPress
A plugin like HTML Snippets lets you easily add scripts to content in your posts and pages.
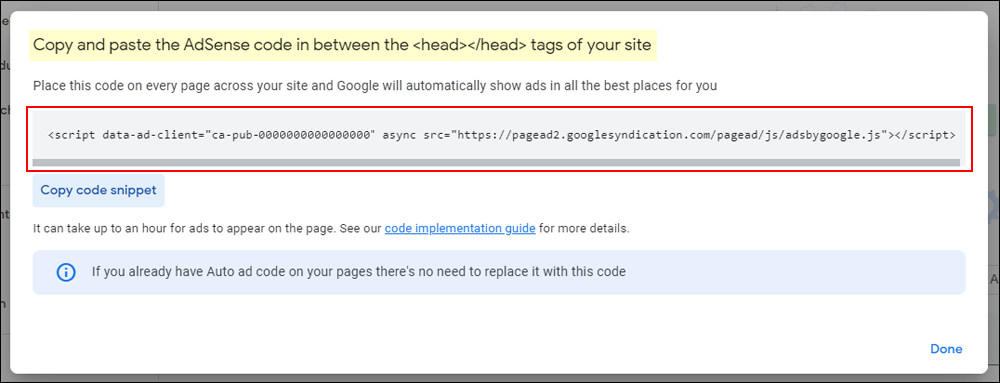
Some applications (e.g. analytics and ad conversion tracking tools), however, require adding code to sections like page headers or footers in product download pages, opt-in pages, landing pages, etc.
If you need to add code or scripts outside of content areas, then you will need to either customize your theme files or use a plugin that allows you to add code to the header or footer section of your posts and pages.
![]()
The information below is for advanced WordPress users.
CSS & JavaScript Toolbox
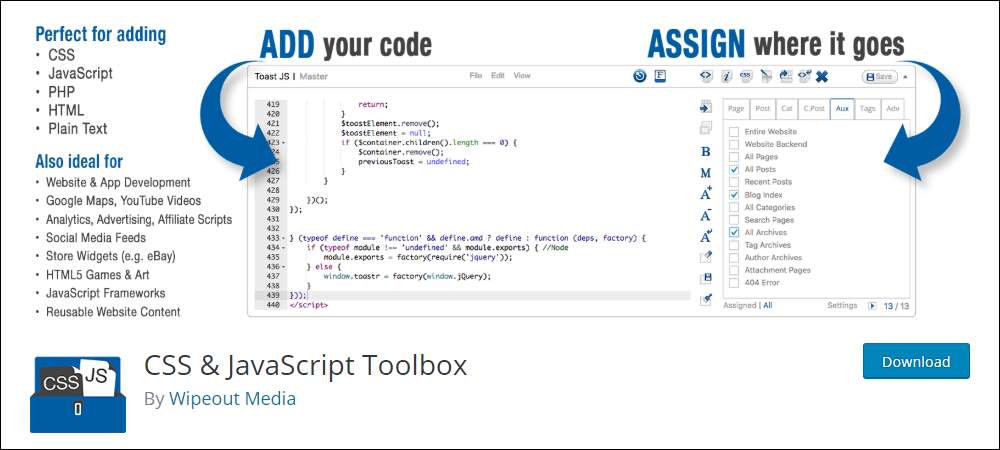
CSS & JavaScript Toolbox (CJT) is a powerful and flexible plugin that lets you add code elements to your WordPress installation using a reasonably easy-to-use web interface.
This plugin allows you to extend your site’s functionality and its appearance by adding custom code blocks that you can assign to individual posts, pages, custom posts, categories, URLs, expressions, and more.
To view the plugin’s comprehensive documentation and user manual, go here: CSS & JavaScript Toolbox
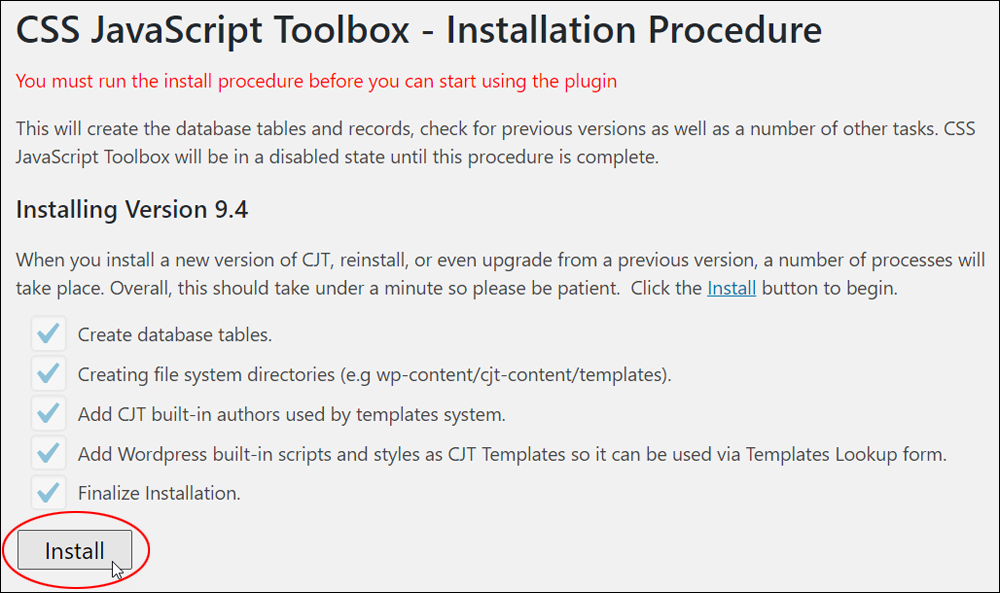
Note: After activating the plugin, you will be asked to go through a custom installation process to create the plugin’s database tables and activate the plugin’s functionality. To do this, just click the ‘Install’ button and the plugin will take care of the rest.
After installing and activating the plugin, a new menu item will appear on the main menu.
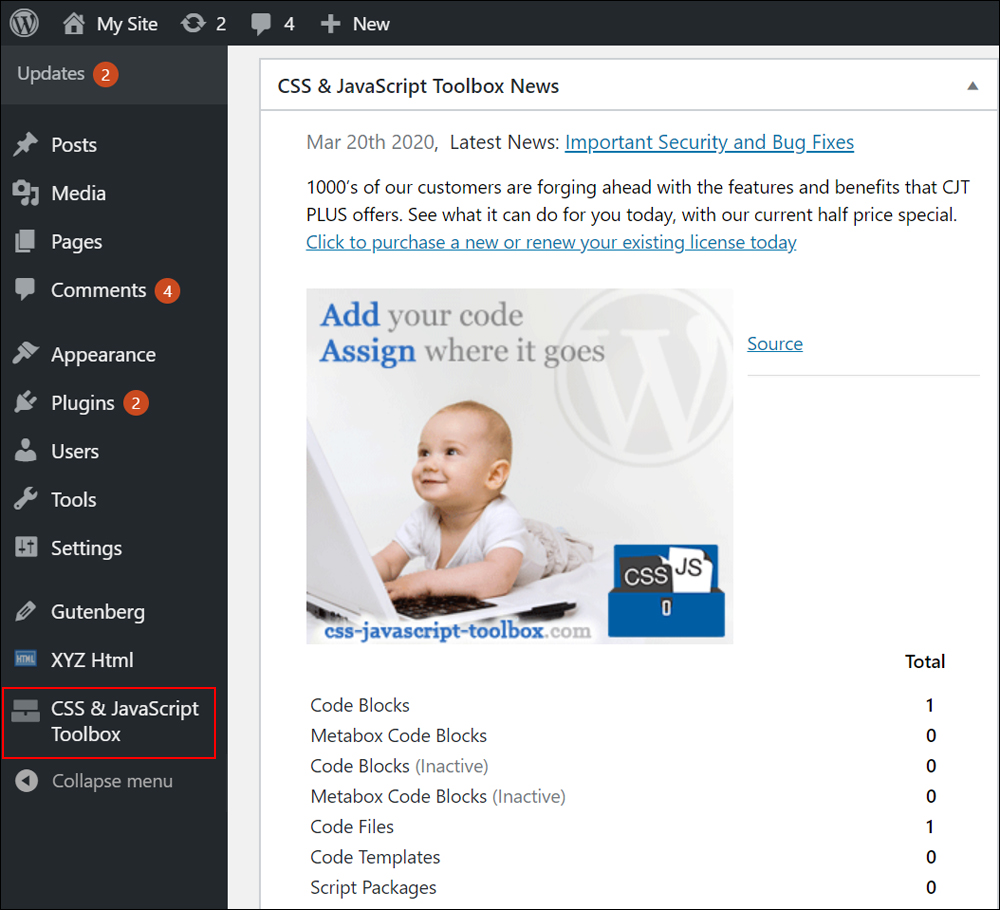
Click on CSS & JavaScript Toolbox on the menu.

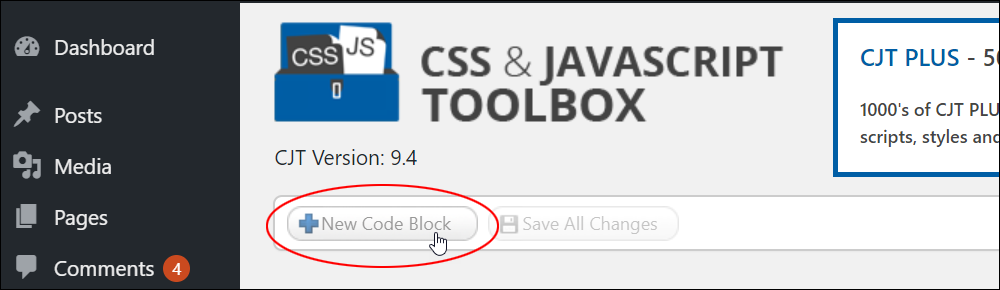
This brings up the CSS & JavaScript Toolbox screen.
Click on New Code Block to add new code to your site.
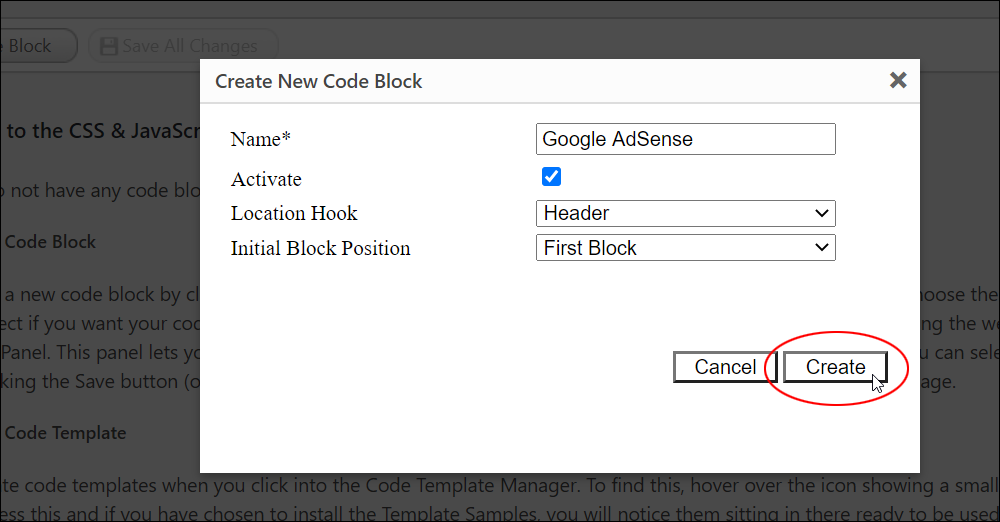
In the ‘Create New Code Block’ window, give your new code block a name, select the activate checkbox (or leave it unchecked if you don’t want to activate the code block yet, select a Location Hook (this specifies where to insert your code block. Options=Header/Footer), and choose the Initial Block Position (i.e. whether the script should be added before or after all other code in the header or footer. Options=First Block/Last Block).
After selecting your options, click Create.
A blank text area will appear. Paste your code or script into this area.
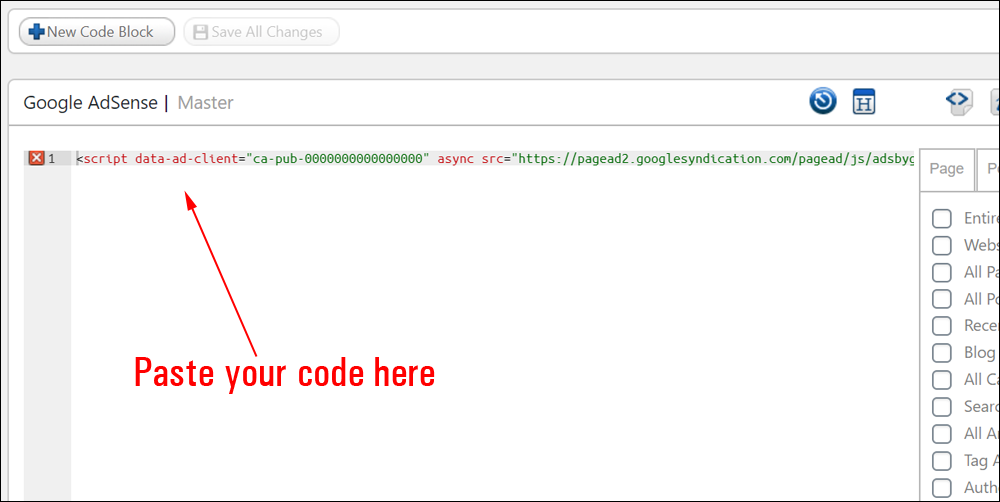
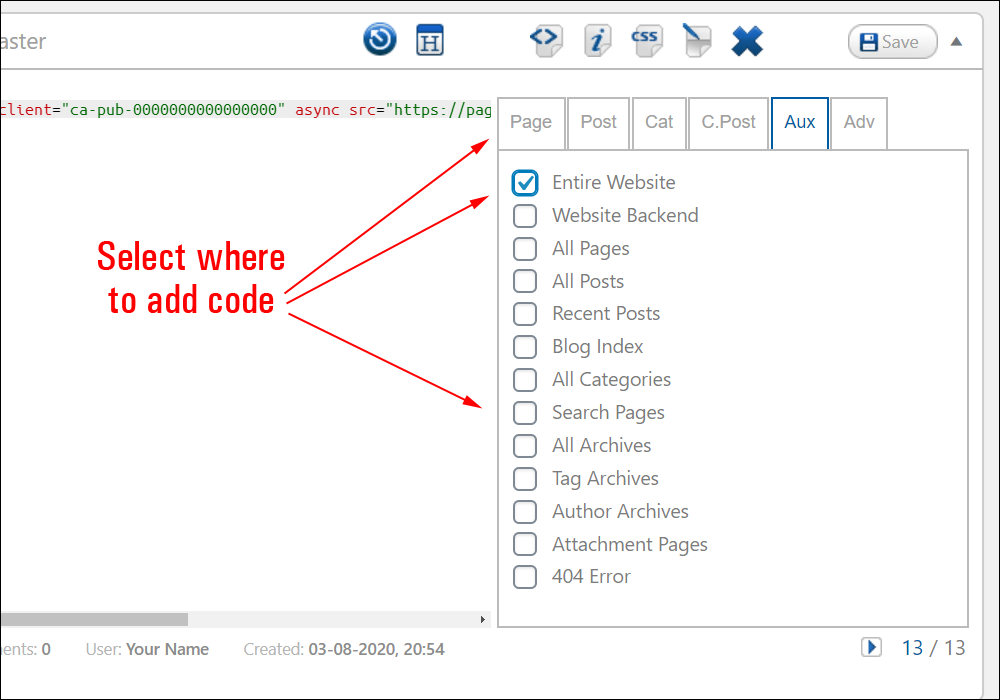
Next, select where you would like to insert your code block. You can add the code to your entire website or into specific areas of your website (e.g. pages, posts, archive pages, categories, etc.)
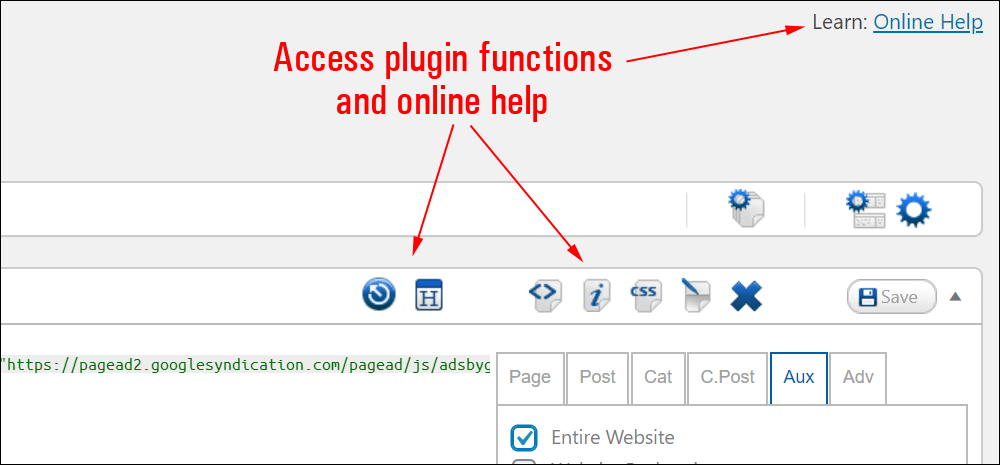
The plugin’s dashboard has a number of buttons you can click to access different functions and links to online help documentation for tutorials on how to use the plugin. Hovering over these buttons brings up tooltips with descriptions of all their functions.
When you are done creating or editing a code block click Save All Changes to update your settings.
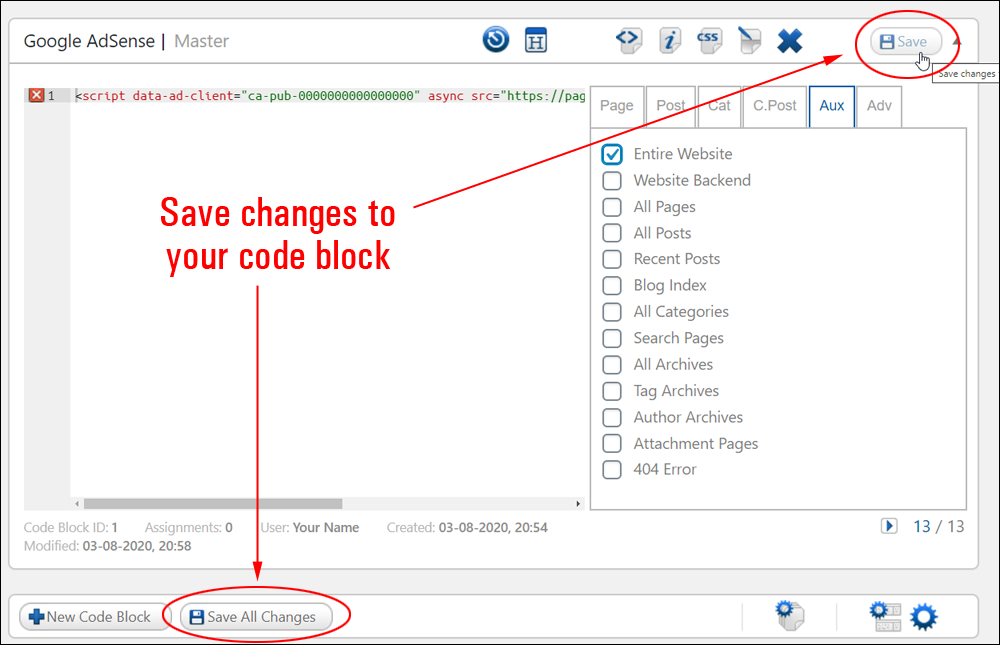
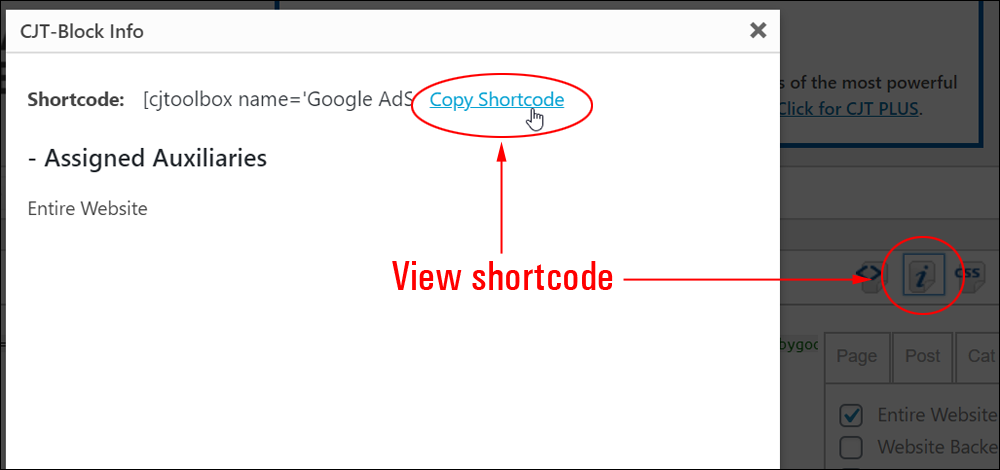
Click on the CJT Block Info button to view and copy the shortcode to your clipboard.
To learn more about this plugin, visit the plugin’s documentation section here: CSS & JavaScript Toolbox
![]()
Tip: How To Check If Your Code Has Been Added Correctly
Some scripts are meant to be visible on your site and some are not. Analytics or conversion tracking code, for example, is usually placed in sections like the header or footer of your site and is not meant to be visible.
You can verify that you have added scripts or code correctly by checking the source code of your page using your web browser.
If you use Google Chrome as your web browser, for example, you can view the source code of web pages by right-clicking on the page and selecting View page source from the menu or using a keyboard shortcut (e.g. Ctrl + U if using Windows, or Command + Option + U if using Mac).
If you use another web browser (e.g. Firefox), you can do the same thing by right-clicking on the page, or select Tools > Web Developer > Page Source from the browser’s menu.

A new window will open in your browser and display the source code for that page.
Scroll or use the search function (e.g. Ctrl+F in Windows) to locate the code. If you have added a script to your site’s header section, it will typically be found between the <head> and </head> tags.
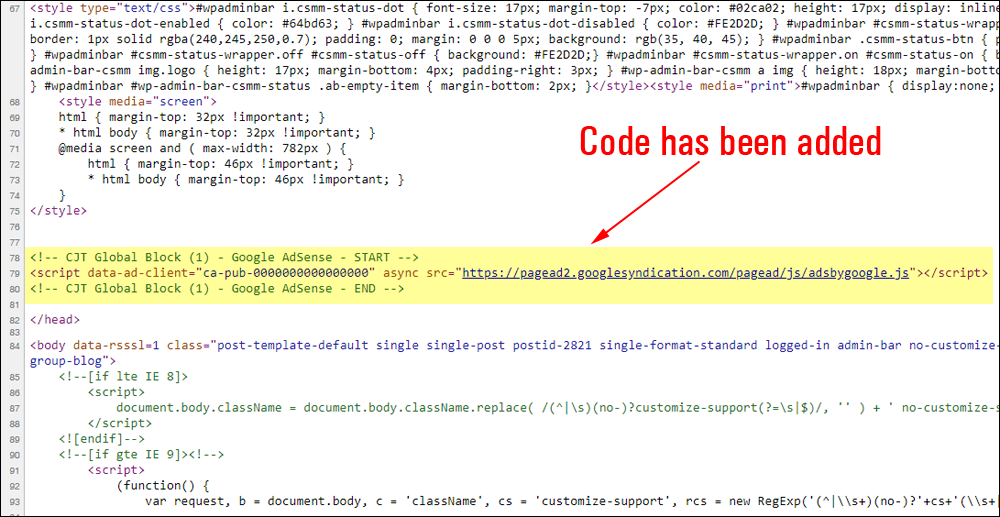
If you can see the code in page source view, then all that’s left to do is test your script and make sure that everything is working correctly. If you experience any errors, make sure that you have entered the correct code in the right location.
Congratulations! Now you know how to insert code and scripts into your content.
![]()
Remember to always back up your files before adding, changing, or deleting code on your site.

***
"I am beyond impressed with what you have put together. I can tell that you put a ton of hard work into building what you have. You have the absolute best content on WordPress I have ever seen!" - Robert T. Jillie
***
We are not affiliated, associated, sponsored, or endorsed by WordPress or its parent company Automattic. This site contains affiliate links to products. We may receive a commission for purchases made through these links.