 WordPress allows different users to work collaboratively on your site and contribute to the growth of your online business presence in various ways.
Depending on how you want to run your business, for example, you may want to give users restricted access to your site while allowing them to perform functions such as:
- Access private content,
- Write and submit posts,
- Create and manage posts and pages,
- Moderate comments,
- Manage plugins and themes and perform upgrades and other administrative tasks, including managing other users.
All of these functions require managing users and having the ability to specify what they can and cannot do on your site.
In this tutorial, you will learn how to manage WordPress users and how to use the WordPress user management section and tools.
How To Manage WordPress Users
WordPress lets you assign different roles to other users. Roles allow you to control capabilities, which define what users can and cannot do on your site.
The user management section can be found inside your WordPress Dashboard and accessed via the dashboard menu under ‘Users’ …
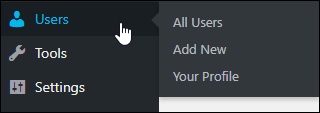
(WordPress Users Menu)
WordPress Roles And Capabilities
WordPress has 6 default roles:
- Super Admin
- Administrator
- Editor
- Author
- Contributor
- Subscriber
Each of these roles can perform a set of pre-assigned tasks (called capabilities). The Super Admin role is normally assigned to WordPress multisite installations and gives the user the ability to perform all possible capabilities.
From there, each of the other roles has a subordinate or decreasing number of allowed capabilities. For instance, someone assigned the role of Subscriber can only read content on your site – they cannot modify it in any way. An Author can create a new post on your site, but they cannot edit it (the Editor, however, can edit and delete the post that the author has written.)
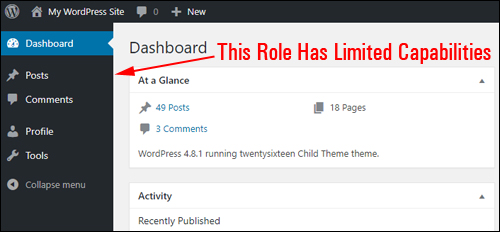
(Roles other than administrators have limited capabilities)
Roles, therefore, define the responsibilities and capabilities of users within your site.
To learn more about the specific capabilities of default WordPress roles, see this section of the official WordPress documentation site.
Here are some important things to keep in mind about WordPress roles and capabilities:
- Installing certain plugins can add new roles and capabilities to your site. For example, Advertiser, Organizer, etc.
- Membership plugins and directory plugins use the WordPress roles and capabilities feature to automate the creation and registration of new users.
- Some WordPress plugins (see further below) allow you to add new custom roles and customize the capabilities of existing roles.
Summary of Roles
- Super Admin: This role gives the user access to network administration features controlling your entire network of WordPress sites (see WordPress Multisite).
- Administrator: This role gives the user access to all administration features and privileges on your site.
- Editor: This role gives the user the ability to publish and manage posts and pages as well as manage other users’ posts, etc.
- Author: This role gives the user the ability to publish and manage their own posts.
- Contributor: This role gives the user the ability to write and manage their own posts but not publish them.
- Subscriber: Users assigned this role can only manage their profile. For example, if you run a membership or directory site, you may want to allow members to edit their own member profiles but not modify any other part of your site.
Typically, WordPress assigns the role of Administrator to the creator or owner of the site …
(Site owners are typically assigned the role of the administrator)
This is essential, as the owner has to be able to access all features and perform all functions on the site.
![]()
Never give out your Administrator login or password details as this can compromise the security of your site. If you need to provide access to your site to other people (e.g. for technical support), create a temporary “Admin” account that you can delete afterward.
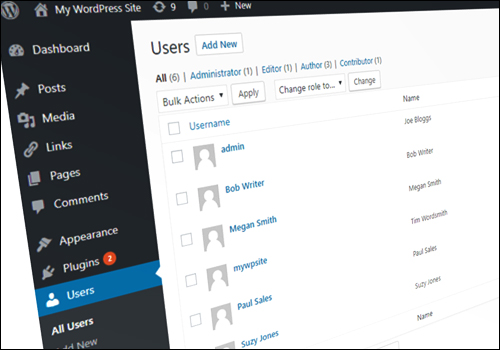
How To View All Users On Your Site
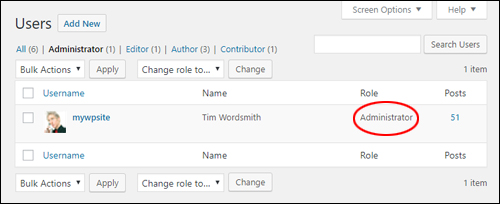
To view all registered users on your site, go to your navigation menu and select Users > All Users …
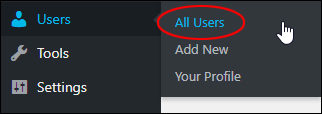
(Users > All Users menu)
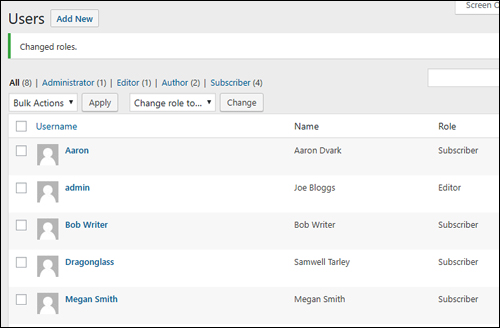
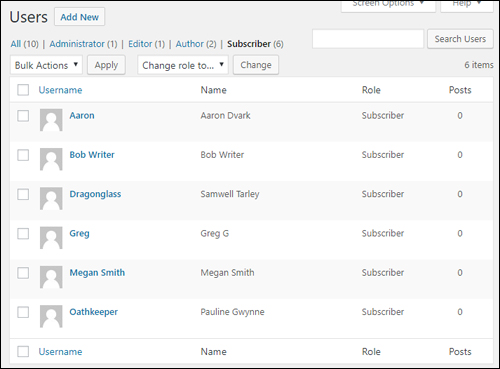
This brings up the ‘Users’ screen …
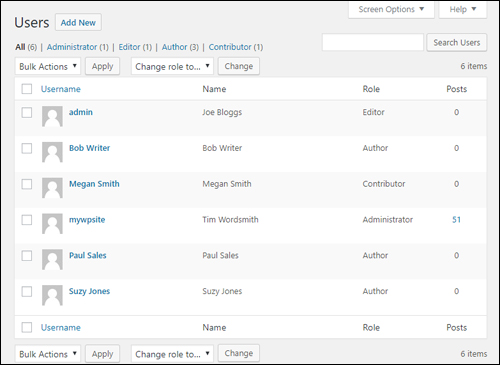
(WordPress Table Of Users)
The Users screen lists all registered users on your site and displays information about users, such as:
- Username
- Name
- Email Address
- Their assigned Role
- How many Posts they have authored (to learn how to assign posts to different users, see this tutorial)
![]()
If you can’t see information displayed on the Users screen (e.g. their email addresses), click on the ‘Screen Options’ tab and review your settings. You can display or hide information by ticking or unticking check boxes, and change the number of entries displayed on your screen (remember to click the ‘Apply’ button to update new settings) …
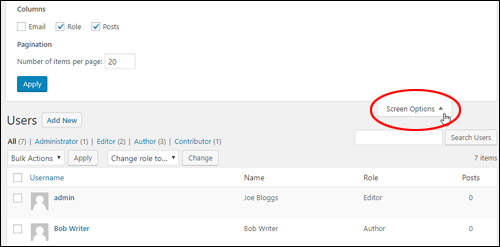
(WordPress Users Section – Screen Options Tab)
You can also perform a number of administrative user management tasks, such as
- Add new users.
- Edit user profiles.
- Delete users (individually or in bulk).
- Reassign user roles (individually or in bulk).
- Search for users (this is useful if you run a membership site and have many registered users).
Let’s go through each of these user management functions.
How To Add New WordPress Users
To add new users and give them login access to your site, go to Users > Add New…
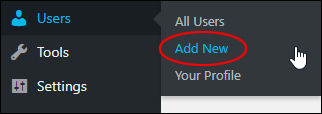
(Users > Add New menu)
You can also add new users from your ‘Users’ screen by clicking on Add New…
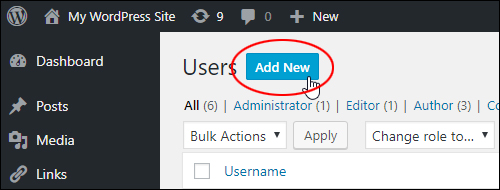
(Add New Users Button)
This brings up the ‘Add New User’ screen …
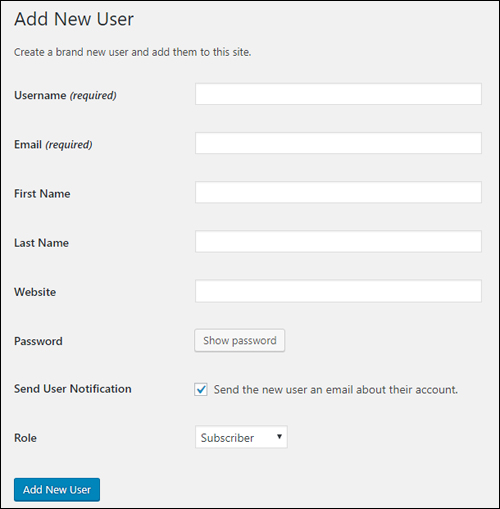
(Add New User screen)
Enter the following information for your new users in this screen:
- Username: This field is required. Enter a username here. Choose carefully as you cannot easily change the username (if you need to change the username, however, see this tutorial).
- Email: This field is also required. Enter your user’s contact email address. Various functions of WordPress will use this email address to send users notifications (e.g. lost passwords).
- First Name: Enter your user’s first name.
- Last Name: Enter your user’s last name.
- Website: This is an optional field. Complete this field if you want to or leave it empty.
- Password: Make sure you create a strong password for users. You can enter your own or use the WordPress built-in password generator.
- Send User Notification: Check this box if you want your new user to receive a notification email about their account. Deselect it if you don’t want your new user to have access to their login password.
- Role: Select the role you want to assign to your new user from the drop-down menu …
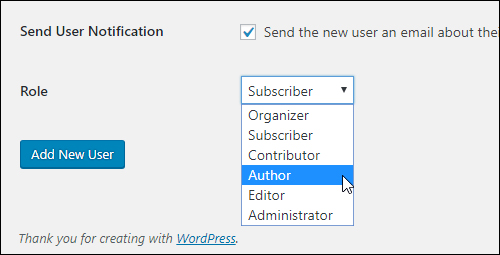
(Select a role for your new user)
After completing all of the new user’s details, remember to click on Add New User to save your changes …
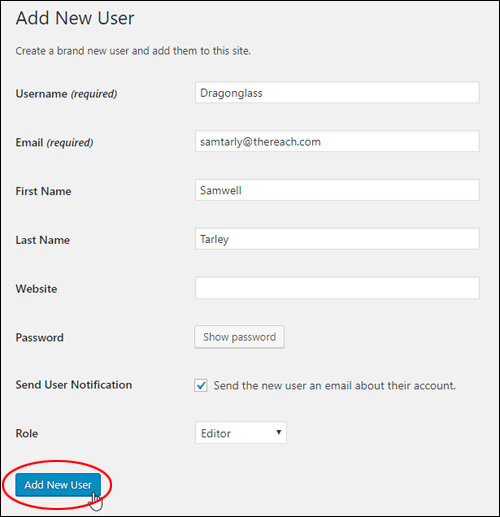
(Save your changes to add a new user)
The new user details will be added to your site and display in the WordPress Table of Users …
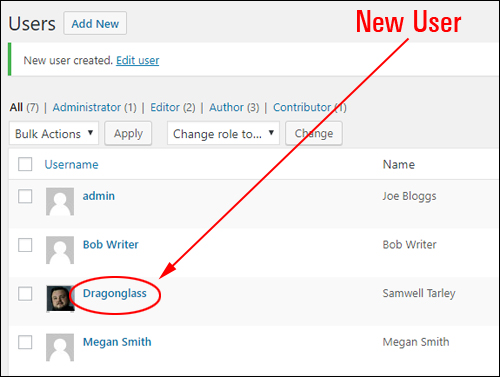
(New User added)
The site administrator will receive a notification email that a new user has registered on the site …
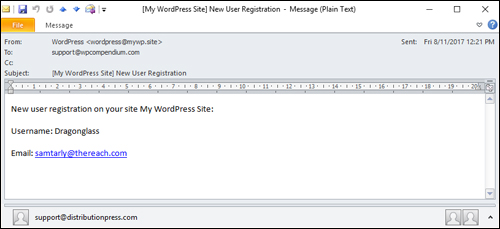
(New User Registration email notification sent to administrator)
The new user will also receive a registration email containing his or her login details …
(Email notification sent to new user after registration)
Edit User Profiles
Site administrators can edit details of any registered site users, including their own. Other roles normally do not have access to the profiles of other users but can edit their own.
To edit your own profile, log into your WordPress administration area and select Users > Your Profile from the main dashboard menu …
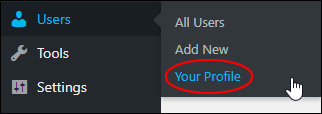
(Users > Your Profile menu)
You can also get there without leaving the Table of Users by hovering your cursor over their username and clicking on the ‘Edit’ link …
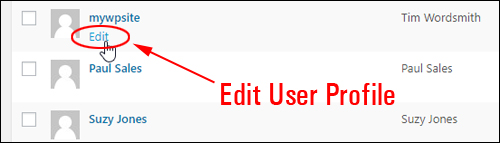
(Edit User Profile)
This brings up the User Profile screen …
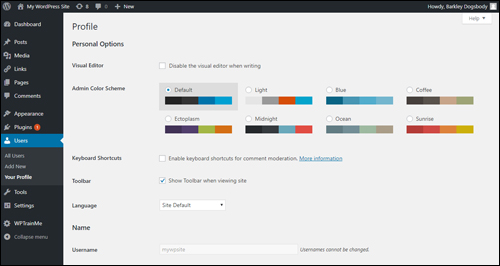
(User Profile screen)
We’ve created a separate tutorial on how to edit details in the User Profile screen, here:
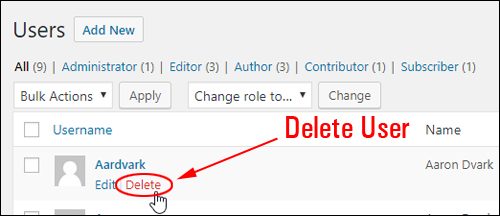
Delete Users
The WordPress Users screen lets you delete users individually or perform bulk user deletions.
Delete Users Individually
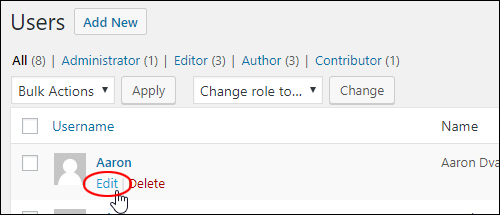
To delete an individual user, hovering your cursor over the username of the entry you want to delete and click on the ‘Delete’ link …
(Delete User)
You will be asked to confirm the deletion. Click on ‘Confirm Deletion’ to proceed …
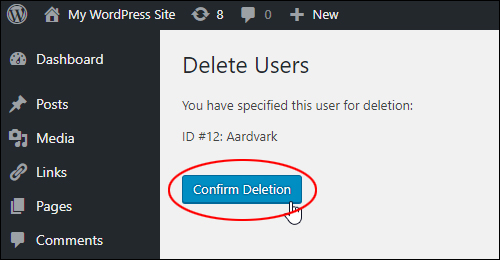
(Confirm Deletion)
The user will be deleted and their details will be removed from your database …

(User Deleted)
Bulk Delete Users
Bulk deleting users is useful if you want to delete many users at once (e.g. delete spam registrations).
To bulk delete users, select all the check boxes of the users you want to remove from your site …
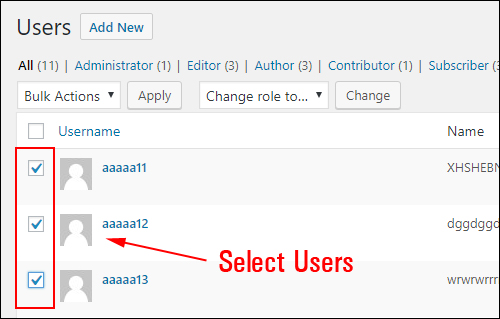
(Select users to delete)
Select ‘Delete’ from the ‘Bulk Actions’ drop-down menu …
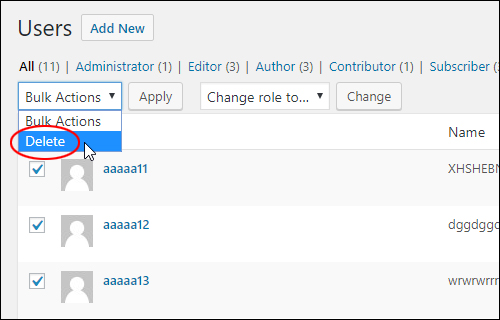
(Bulk Actions > Delete)
With ‘Delete’ selected, click the ‘Apply’ button …
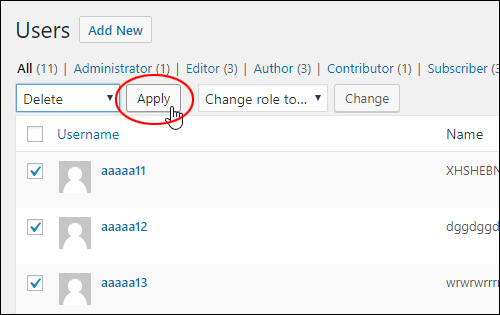
(Bulk Actions > Delete > Apply)
Click on the ‘Confirm Deletion’ button to proceed …
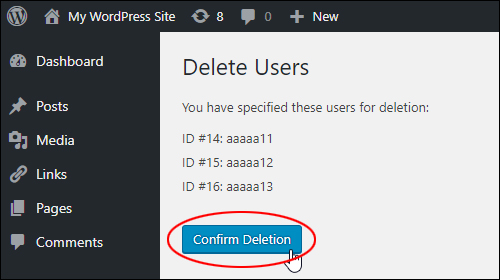
(Confirm Deletion)
The selected users will be deleted and their details will be removed from your database …
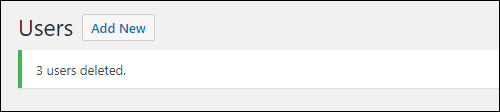
(Users deleted)
Change User Roles
Users can be assigned or reassigned to different roles either individually or in bulk.
Change Individual User Role
To assign or reassign an individual user’s role, hover your cursor over their username and click on the ‘Edit’ link …
(Edit User)
This brings up their ‘Edit User’ screen …
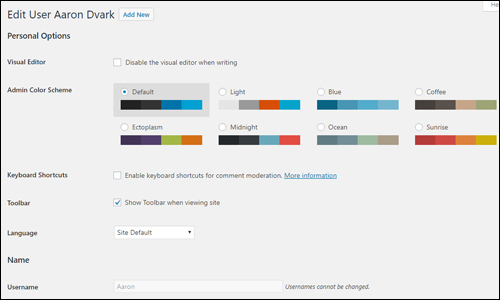
(Edit User screen)
Scroll down to the ‘Role’ section and select a new user role from the drop-down menu …
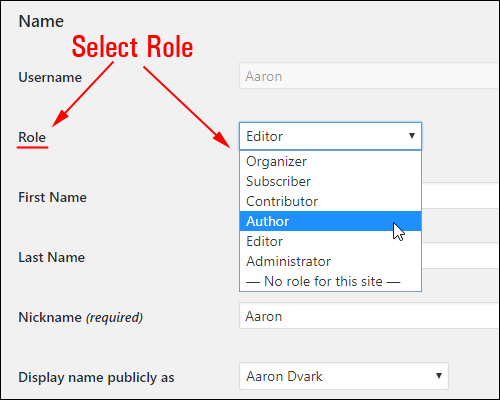
(Role drop-down menu)
Click ‘Update User’ to save your settings …
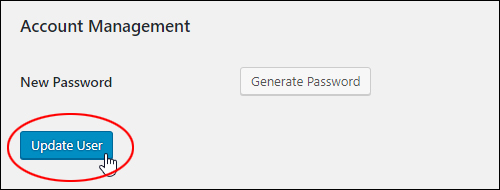
(Update User)
The user’s role will be updated. You can return to the Users screen or keep working on your site …
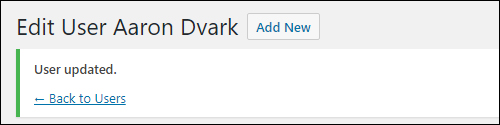
(User role updated)
Bulk User Role Changes
To perform a bulk reassignment of user roles, select multiple users by checking the box next to their username …
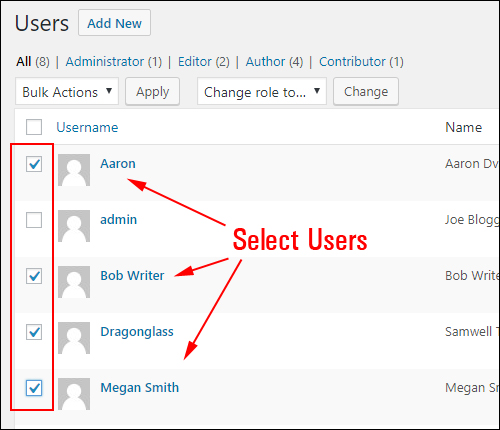
(Select users)
Choose the role you want to assign to all selected users from the ‘Change role to …’ drop-down menu …
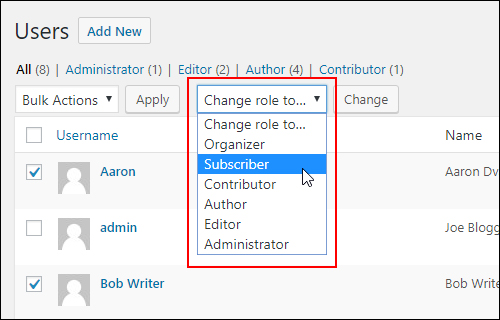
(Change role to …)
With the role in the ‘Change role to …’ field selected, click on the ‘Change’ button …
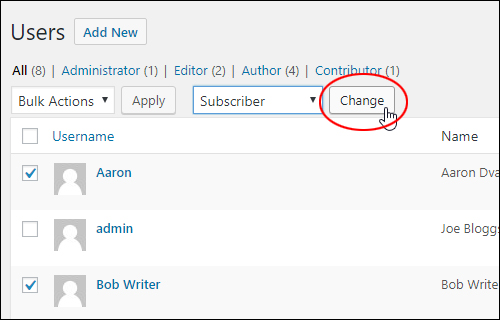
(Bulk change user roles)
The roles of all selected users will be reassigned to the new role you have specified …
(User roles changed)
Search & Filter Users
If you have many registered users on your site, you can use search and filter features to find users quickly.
Search Users
Use the ‘Search Users’ feature to search for users based on their details.
Enter your search term into the field and click the ‘Search Users’ button …
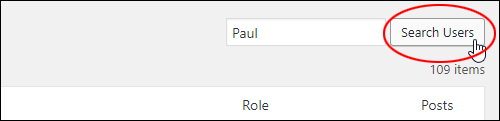
(Search Users)
A list of all results containing the search term will be returned …
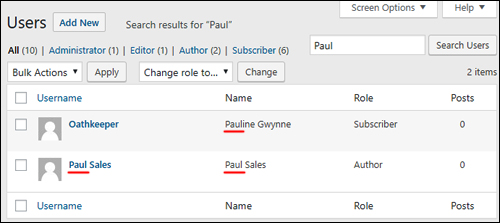
(Search User results)
Filter Users
You can also filter users by role.
To view a list of all users assigned to a specific role, just click on the link for that particular role above the able of Users …
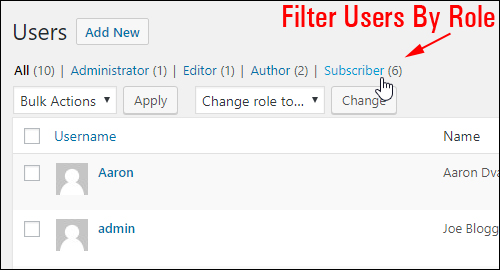
(Filter users by role)
The Table of Users will display only users assigned to the selected role …
(Users filtered by role)
WordPress User Management Plugins
This section describes some useful WordPress plugins to help improve how you manage users on your site.
Customizing User Roles And Capabilities
Depending on what you plan to do with your site, you may need to go beyond the default capabilities of WordPress and create custom roles for specific users or enhance the default capabilities of your site’s existing roles. If this is a function you need for your site, then take a look at the plugin below.
If this is a function you need for your site, then take a look at the plugin below.
User Role Editor
(User Role Editor – WordPress Plugin)
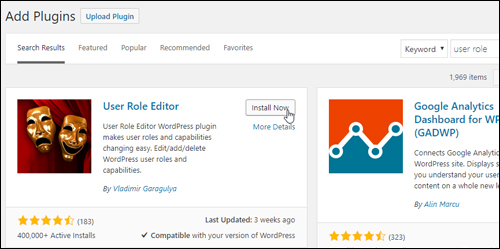
User Role Editor provides advanced user role management tools for WordPress. The free version of the plugin can be downloaded and installed from the WordPress plugin repository or from your WordPress dashboard …
(Install User Role Editor From Your WordPress Dashboard)
Once installed and activated, the plugin allows you to easily create and edit new roles and manage permissions for all users with just a few clicks and set specific capabilities for each role separately at an advanced and detailed level just by turning check boxes on or off …
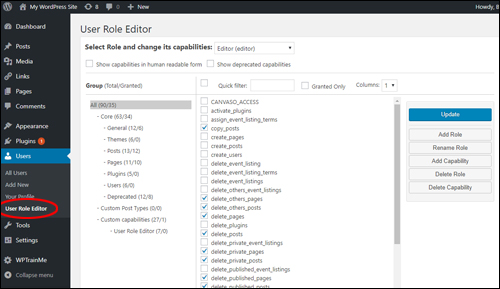
(Change role capabilities by turning check boxes on or off)
The plugin also makes it easier for non-technical users to display capabilities in plain and simple language …
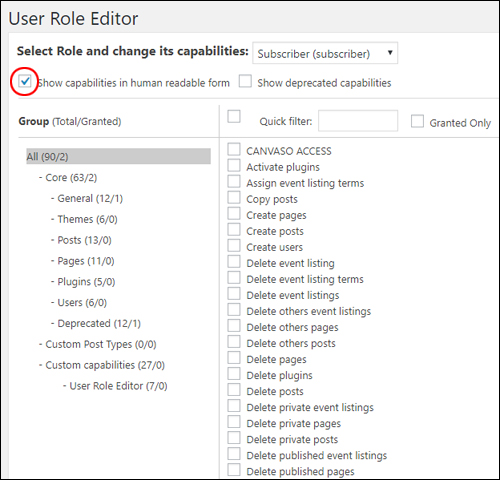
(Show capabilities in human readable form)
There are many useful things you can do with the User Role Editor plugin. For example, you can allow or disallow a registered user to upload files to your site, or disallow certain types of users to delete posts they have already published. You can also do things like remove the ability of authors to publish posts on your site, forcing posts to be submitted for review by an administrator before being approved for publishing.
The User Role Editor plugin also has a premium edition available with even more advanced capabilities.
To learn more about this plugin, go here: User Role Editor
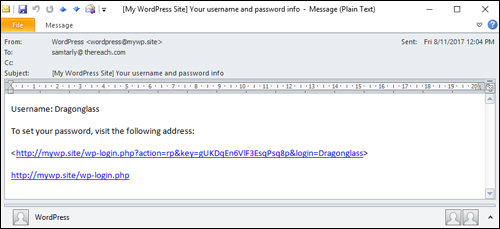
How To Change The Default User Registration Email In WordPress
As discussed in the previous section, when a new user registers on your WordPress site, they are sent a registration email containing their username and login details …
(Email notification sent to new user after registration)
Normally, the default registration email is fine to send. It’s not an attractive email, but it “does the job”. If your business requires a more “welcoming” registration email, then use the plugin below:
Better Notifications for WordPress
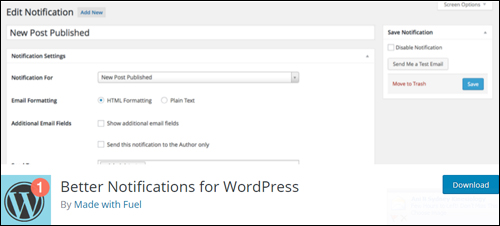
(Better Notifications For WordPress)
Better Notifications For WordPress lets you customize the email notifications that WordPress sends using the WordPress WYSIWYG editor and shortcodes.
You can customize all default WordPress email notifications and many new ones. This lets new registered users receive a more welcoming email when they register on your site. You can also send notifications to individual users, multiple users, all users in a user role, multiple roles, and more …
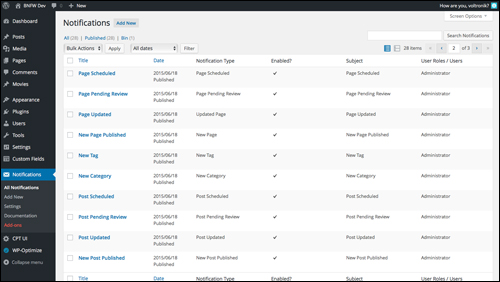
(Notifications Screen)
This plugin is useful if you are running a community site or membership site, directory, allowing guest authoring or collaboration, etc. and want to customize your messages and notifications to users.
To learn more about this plugin, go here: Better Notifications For WordPress
Congratulations! Now you know how to manage users on your WordPress site. We hope that you have found the above information useful.
Here are some additional WordPress tutorials you may find useful to help you manage users on your site:
- How To Edit Your WordPress User Profile
- How To Change Post Authors In WordPress
- How To Add A User Gravatar In WordPress
- User Security
***
"I was absolutely amazed at the scope and breadth of these tutorials! The most in-depth training I have ever received on any subject!" - Myke O'Neill, DailyGreenPost.com