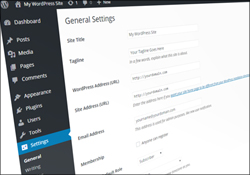
 This tutorial is part of our WordPress configuration step-by-step tutorials, where we show you how to set up and configure your WordPress site or blog with no coding skills required.
***
After cleaning up your new WordPress installation, the next step is to go through and configure your WordPress settings.
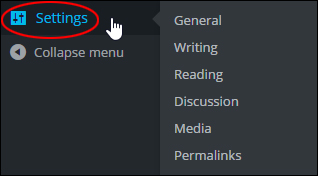
(WordPress Settings Menu)
Your WordPress Settings are made up of the following sections:
- General Settings
- Writing Settings
- Reading Settings
- Discussion Settings
- Media Settings
- Permalinks
![]()
As new plugins and themes get added to your site, you will find that new entries will be added to your Settings menu …
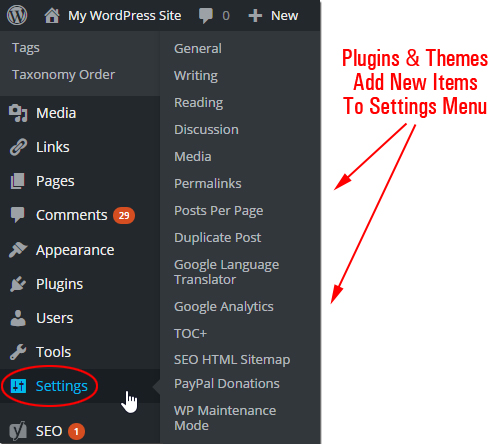
(Plugins and themes can add new items to your Settings menu)
In this tutorial, you will learn how to configure your WordPress General Settings.
How To Configure WordPress General Settings – Step-By-Step Tutorial
Select Settings > General in your dashboard menu …
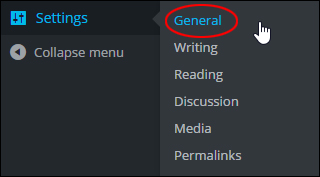
(Settings Menu – General)
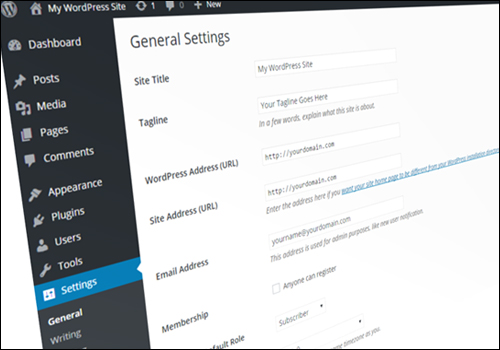
The ‘General Settings’ screen will load in your browser …
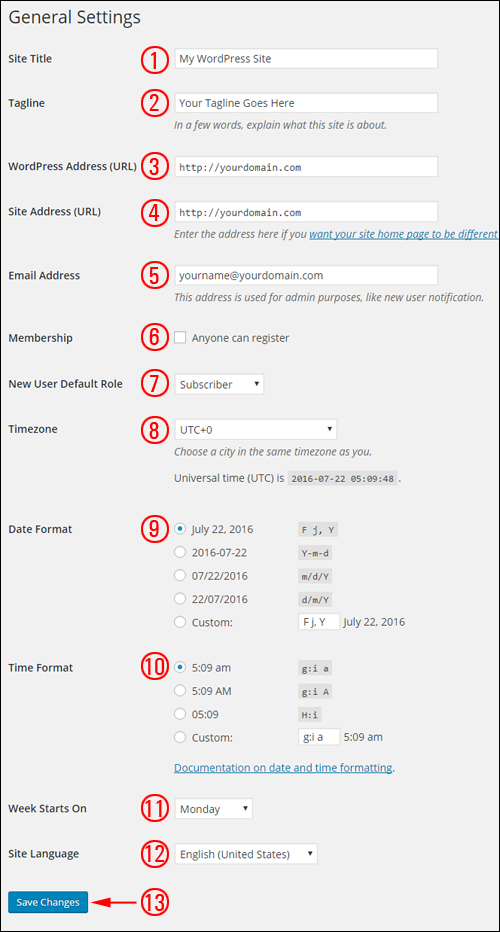
(WordPress General Settings Screen)
The WordPress ‘General Settings’ screen controls most of the general configuration settings for your site, including:
- Your website’s title and location.
- Who can register on your site as a user, member, etc.
- How dates and times are calculated and displayed on your site.
![]()
For a complete description of General Settings features (we have included general descriptions of these features below for ease of reference), see the official WordPress documentation page here:
To configure your WordPress General Settings, complete the fields and options listed below:
1) Site Title: Enter the name of your website or blog here. This title will display on most themes at the top of {every page|your pages] and in your visitors’ web browser title bar. WordPress also uses this title in your syndication feeds.
2) Tagline: In a few words, explain what your site is about. You can enter a slogan or a tagline. A tagline is a short phrase or sentence used to convey the essence of the site and catch your reader’s attention.
3) WordPress Address (URL): This field should display the full URL of the directory where your WordPress core application files have been installed.
For example, if you have installed WordPress into a directory called “blog”, then your WordPress address will be http://yourdomain.com/blog.
If you have installed WordPress correctly, there should be no need to edit the information in this field.
4) Site Address (URL): Enter the address you want people to type into their browser to reach your WordPress site. This is the directory where WordPress’ main index.php file is installed.
Notes:
- If you have installed WordPress into your root directory (i.e. if you are using WordPress as your main website), the URL should display as http://yourdomain.com without the end slash (/).
- If you have installed WordPress correctly, there should be no need to modify the content in this field.
- For most setups, the Site Address (URL) should be the same as the WordPress Address (URL) unless you need to move your WordPress files to a different directory in your domain but still want users to access your site via the root (main) domain.
- If you change the URL from http://yourdomain.com (i.e. no www) to http://www.yourdomain.com in the General Settings screen, WordPress may log you out of the site after saving your settings. If this happens, simply log in again and continue working as normal. The new URL will be updated in the WordPress database.
![]()
![]()
![]()
![]()
WordPress lets you install your website into a subdirectory (e.g. http://yourdomain.com/wordpress), but have your website served from your website root directory (e.g. http://yourdomain.com). To learn more about moving WordPress to another directory, click on the link in the Site Address (URL) description section or refer to the instructions in the official WordPress Codex page here: Giving WordPress Its Own Directory …


(Give WordPress its own directory)
![]()
![]()
Changing your WordPress Site Address URL requires editing code inside WordPress templates. Unless you are an advanced WordPress user, we recommend not modifying the settings in this section. If you are not comfortable editing code, please consider using the services of a professional.
5) Email Address: This is the email address you would like site administration messages and notifications to be sent to.
Notes:
- Your website administration email address can be different than the address you specify for your admin user account (the admin account email address is sent an email only when someone submits a comment to a post created by the user “admin”).
- The address you enter in this field will never be displayed on your site.
6) Membership: If you plan to allow other people to register as users on your site (e.g. for a membership site, customer account, or private access to certain areas), check this option. If not, leave this option unchecked.
7) New User Default Role: If you did not check the “Membership” checkbox above then ignore this section. This drop-down menu allows you to select the default role that will be assigned to new users or registered members added via the Administration > Users > Users Screen.
The options are:
- Administrator
- Editor
- Author
- Contributor
- Subscriber
We explain what different WordPress user roles mean in various tutorials in the training module below:
![]()
![]()
![]()
![]()
The time and date settings described below can affect WordPress plugins and services that integrate features on your site like making bookings, sending reminders, or setting appointments.
8) Timezone: Select your city or timezone from the drop-down menu, or just ignore this option.
9) Date Format: Choose the format that you would like to use to display dates on your site, or just ignore this option. The Date Format setting is typically used by themes to display dates on your site, but it does not control how dates are displayed inside your administrative screens (for example, when managing posts).
10) Time Format: Choose the format that you would like to use to display times on your site, or just ignore this option. The Time Format setting is typically used by themes to display time on your site, but does not control how times are displayed in your administrative screens (for example, when editing a post’s timestamp).
11) Week Starts On: This option controls how the WordPress calendar displays its first column …
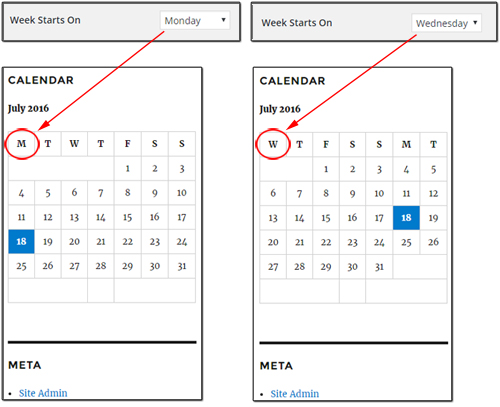

(WordPress General Settings – ‘Week Starts On’ settings)
12) Site Language: Specify the language to be used in your dashboard …
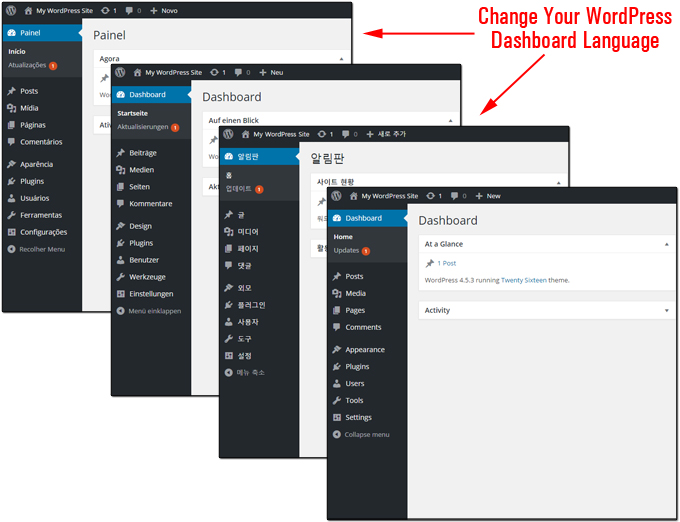

(View your dashboard in another language)
13) Once you have entered all of the above settings in this section, click Save Changes to update your settings.
To review and further edit your Site Title and Tagline, go to My WordPress Site > Visit Site (tip: to view your home page and continue working on your settings, open a separate window by right-clicking on the ‘Visit Site’ link and choosing “Open Link In New Tab”) …
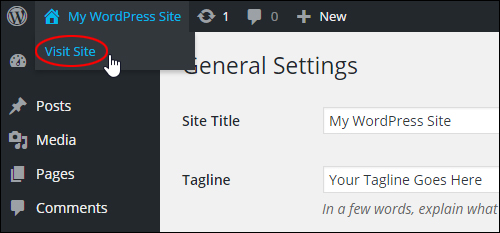

(My WordPress Site > Visit Site)
Your Site Title and Tagline display on your site and in your visitors’ web browser …
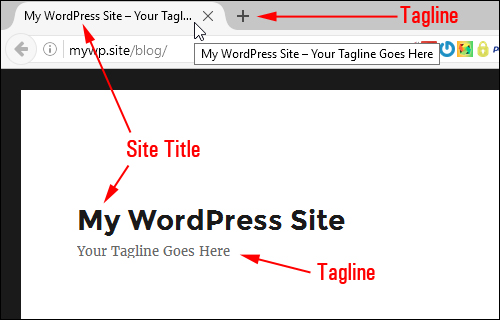

(View your Site Title and Tagline)
![]()
![]()
You can also view some of the changes you make to your General Settings like your Site Title and Tagline without leaving your WordPress dashboard by going to the WordPress Theme Customizer section (select Appearance > Customize in the dashboard menu) …
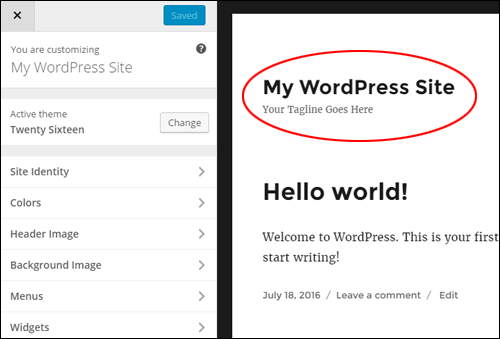

(WordPress Theme Customizer)
Learn more about using the WordPress Theme Customizer in this training module:
![]()
![]()
Note: Because WordPress keeps your site’s content separate from your web design (web design is controlled by your active WordPress theme), the information entered for your Site Title and Tagline will remain the same regardless of the themes used in your site. WordPress themes and WordPress plugins, however, can affect how titles and taglines display on your website.
Congratulations! Now you know how to configure your WordPress General Settings.

Next Step: Configure Your WordPress Site: Writing Settings
***
"If you're new to WordPress, this can stand on its own as a training course and will stay with you as you progress from beginner to advanced and even guru status." - Bruce (Columbus, Ohio)
***

