 This tutorial is part of our WordPress Management tutorial series. In this tutorial, we show you how to backup your WordPress database using phpMyAdmin.
***
How To Back Up Your WordPress Database Using phpMyAdmin
What Is phpMyAdmin?
phpMyAdmin is a free and open source tool written in PHP intended to handle the administration of MySQL with the use of a web browser. It can perform various tasks such as creating, modifying or deleting databases, tables, fields or rows; executing SQL statements; or managing users and permissions.
(source: Wikipedia)
phpMyAdmin Backup Method – Step By Step Tutorial
To perform a MySQL database backup of your WordPress site using phpMyAdmin, do the following:
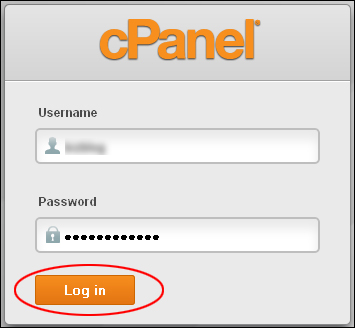
Log into your cPanel administration area …
Click on phpMyAdmin in the ‘Databases’ section of your administration panel …

This takes you to the main ‘phpMyAdmin’ section …
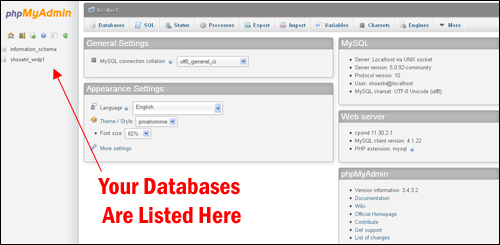
Click on the MySQL database associated with your WordPress site …

Most default WordPress installations automatically assign the suffix “wrdp1” to the database. In the example above, the database name is “shosetri“.
This loads the MySQL data tables structure into the main window of your phpMyAdmin panel …

Optimize MySQL Database Tables
The first part of the maintenance process is to optimize your tables if there is anything showing in the ‘Overhead’ column …

To begin optimizing your database tables, click on the Check All link at the bottom of the tables list to select all tables …

Choose ‘Analyze table’ from the drop down menu next to the link you have just clicked …
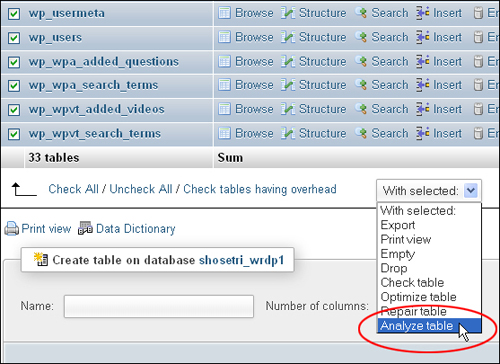
The ‘Analyze table’ query helps to speed up the optimization process.
The query will automatically be executed …
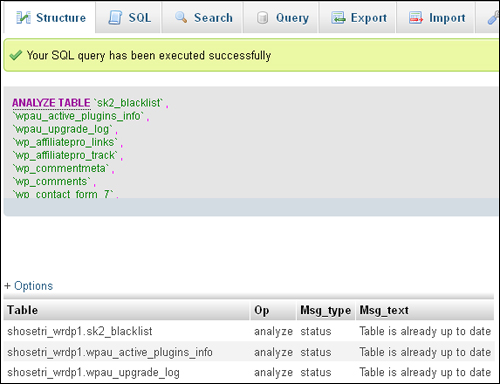
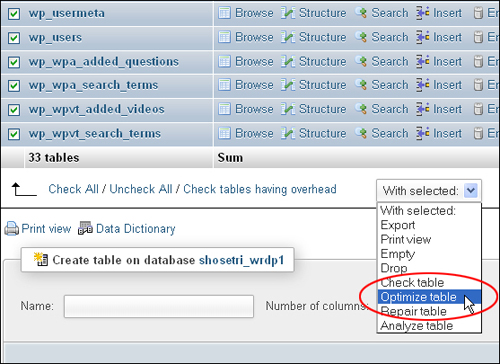
Next, click the Check All link again to select all tables and select ‘Optimize table’ from the drop-down menu …
Once the query has been executed, the ‘Overhead’ column should be cleared …

Export MySQL Database Tables
After optimizing your tables, the next step is to export (backup) your MySQL data to your local hard drive.
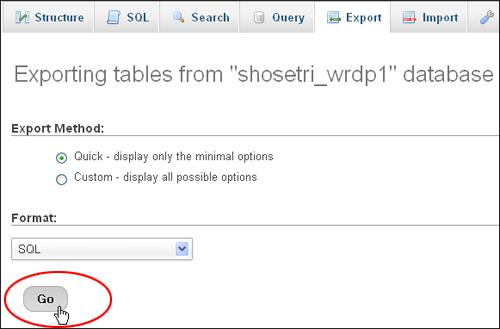
To begin the export process, click on Export in the phpMyAdmin menu …

Leave all the settings as shown below and click on Go …
Select ‘Save File’ and click OK …

Select a folder on your hard drive to save your SQL file containing all of your MySQL data and click on Save …
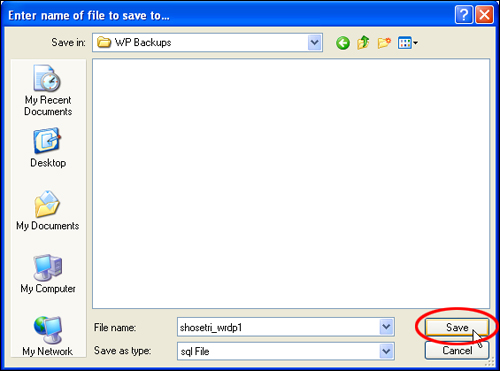
Your file will begin downloading. Depending on the size of your database, this could take a couple of minutes …

Using phpMyAdmin to export a large database can result in errors and an incomplete export of your data. If you experience errors as a result of trying to export a very large database, please contact your webhosting provider for assistance.
Check & Repair MySQL Database Tables
It’s a good idea while you’re performing your MySQL maintenance to run an automatic check of your database tables, just to make sure everything is ok.
Using the ‘Check Table’ and ‘Repair Table’ functions can help you perform simple repairs to your MySQL database.
![]()
We recommend running the ‘Check table’ and ‘Repair table’ functions only after performing a backup of your MySQL database (“Export table” query). This will allow you to restore your original data and help you reverse any errors that may occur if the repair process is unsuccessful.
To check your tables, click the ‘Check All’ link to select all tables and choose ‘Check table’ from the drop-down menu …
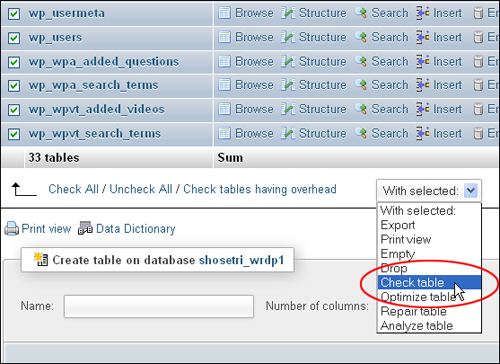
The results are displayed on the screen after the ‘Check table’ query has been executed. In the example below, errors were detected that require using the ‘Repair table’ query …

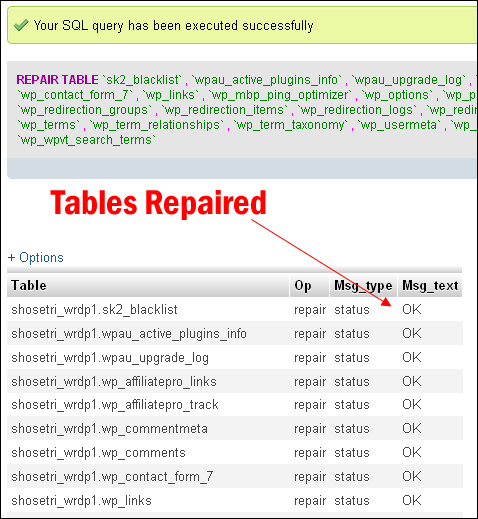
To perform simple repairs, click the ‘Check All’ link to select all tables, then select the ‘Repair table’ option from the drop-down menu …

The ‘Repair table’ query will automatically execute and the results will be displayed when the process has completed …
![]()
Extensive damage to your MySQL data tables may require performing difficult repairs which are beyond the scope of these training modules. If this happens, consult your hosting provider for advice. You may be required to reinstall or restore your database, or use an experienced and professional technical services provider to repair the problem.
DO NOT select the ‘Drop’ or ‘Empty’ option from the query drop-down menu unless you absolutely know what you are doing. Doing so will clear or entirely delete your database tables.
When you have finished performing the MySQL database maintenance process for your WordPress site, close the ‘phpMyAdmin’ tab to exit …

Automating MySQL Backups
In other tutorials in this training module, we will explore tools that can help automate some of your WordPress site maintenance processes. These options include using FREE WordPress plugins that do some of the required maintenance tasks and plugins that integrate and automate essential maintenance processes.

Additional Tutorials
To learn how to perform a WordPress database backup using cPanel’s Backup Wizard, see the tutorial below:
![]()
To learn how to automate your WordPress backups using WordPress plugins, go here:
Next
Now that you know how to perform regular MySQL database maintenance for your WordPress site, the next step is to learn how to back up your WordPress site files.
To learn how to backup your WordPress site files, see the tutorial below:
(Source: Pixabay)
***
"Your training is the best in the world! It is simple, yet detailed, direct, understandable, memorable, and complete." Andrea Adams, FinancialJourney.org
***