Displaying rotating banners on your WordPress site is not only a great way to monetize your online presence with ads from AdSense, affiliate products, etc., but you can also add rotating banners on your site to:
Promote …
- New items, products, or services
- Brands
- Partners
- Best-selling products
- Slow-moving products
- Excess stock
- Clearance items or discontinued inventory
- Special deals & limited offers
- Annual, seasonal, or one-off sales
- Financing options
- etc.
Display …
- Coupon codes
- Testimonials
- Shipping Info
- Public holiday dates/opening & closing hours
- Important notices and alerts
- etc.
Send Visitors To …
- Your newsletter sign-up form
- Shopping/ordering pages
- Help, Support, FAQ, Training sections
- etc.
In this tutorial, you will learn how to add rotating banners in your WordPress site to promote anything you want in your sidebar, header, footer, and content without touching code.
How To Add Rotating Advertising Banners In Your WordPress Site
Most website owners use advertising banners to monetize their site. However, you can also use banners to promote your products or services, add sitewide notices, and direct visitors to other areas of your website.
The easiest way to add rotating banners, adverts, and images in your WordPress site is using a WordPress plugin.
There are many WordPress plugins that you can use for this. In this tutorial, we’ll use a versatile plugin called AdRotate.
AdRotate Banner Manager
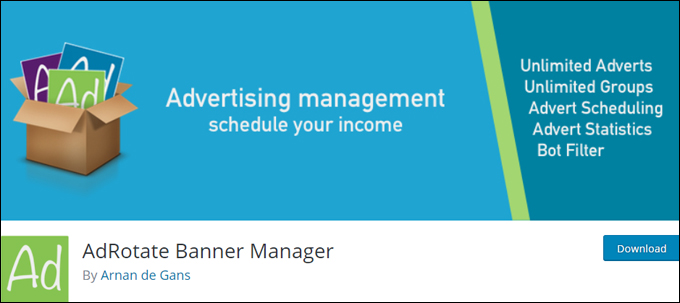
(AdRotate Banner Manager)
Plugin Description
AdRotate Banner Manager is a free and comprehensive ad management WordPress plugin that lets you easily place advertising banners anywhere on your site and manage your ads inside your WordPress admin area.
With AdRotate, you can create and add your own adverts or insert adverts from ad networks (e.g. AdSense, Chitika, Doubleclick, etc.) using basic HTML and/or Javascript code.
The plugin lets you add unlimited ads and create unlimited ad groups. You can also add text and mobile ads, group ads together, display blocks of ads, display ads on specific posts or pages, track clicks and impressions, create ad schedules, and more.
AdRotate also has a PRO version with advanced features like geo targeting, media/asset management, advertiser management, reports, premium support, and many more options.
Plugin Installation
To install the AdRotate Banner Manager plugin from your WordPress dashboard, go to Plugins > Add New, enter “adrotate” into the Keyword search field (if you need help see our tutorial on installing WordPress plugins), and click on the ‘Install Now’ button …
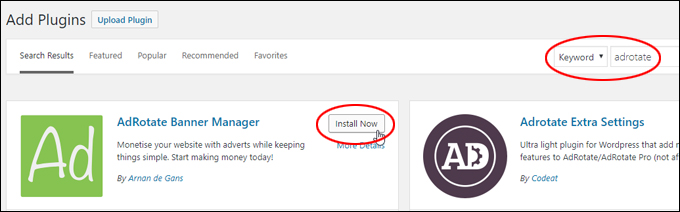
(Install AdRotate Banner Manager plugin)
After installing the plugin, click ‘Activate’ …
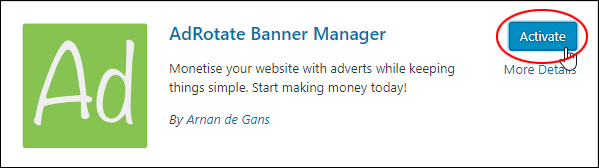
(Activate the plugin)
Configuring The Plugin
Installing and activating the plugin adds a new menu section to your WordPress dashboard …
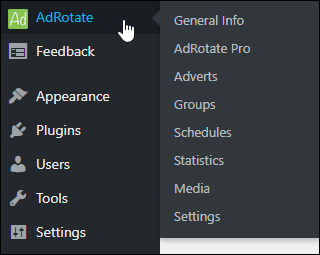
(AdRotate Menu)
AdRotate – Main Features
Settings
The plugin’s default settings should work just fine as they are. If you need to configure or change the plugin’s settings, select AdRotate > Settings from the AdRotate menu …
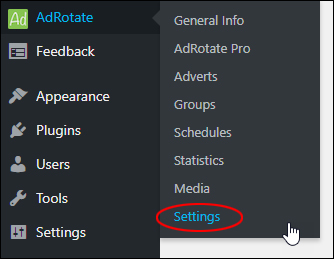
(AdRotate – Settings menu)
This will bring up the ‘AdRotate Settings’ screen …
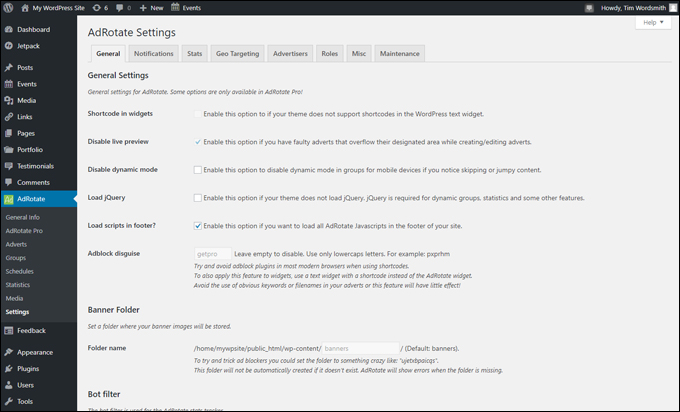
(AdRotate Settings screen)
If you need help configuring the plugin’s settings, click on the ‘Help’ tab to access links to the plugin’s user manuals, tutorials, documentation, and support forum …
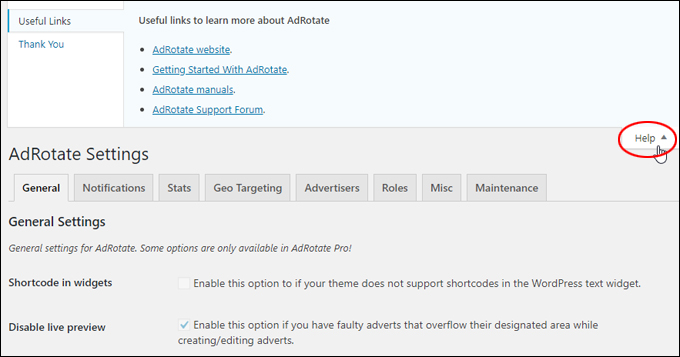
(The ‘Help’ tab contains links to plugin documentation)
Media
Installing the PRO version of the plugin allows you to store ad banners in a separate folder (e.g. ‘banners’) than where other files are stored in the WordPress media library. You can set the folder where your banner images will be stored in the plugin’s Settings screen.
To upload images to the ‘banners’ folder, select AdRotate > Media …
(AdRotate – Media menu)
This brings you to the ‘Media and Assets’ section, where you can upload and store your banner images …
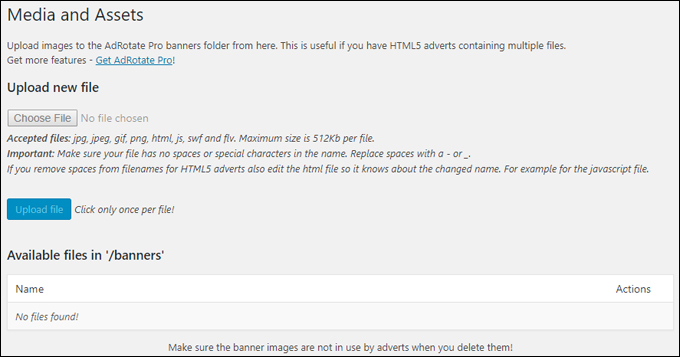
(‘Media and Assets’ screen)
![]()
We recommend storing your banner images in a cloud storage service like Amazon S3. This way, you can easily manage and replace ad banners without having to log into your website.
For more details, see our tutorial on how to set up an Amazon S3 account.
Using The Plugin
Once the plugin has been installed and configured, you can start adding rotating banner ads to your WordPress site.
![]()
We recommend doing a little planning before you begin.
What type of banner ads do you want to display on your site and where will you display these?
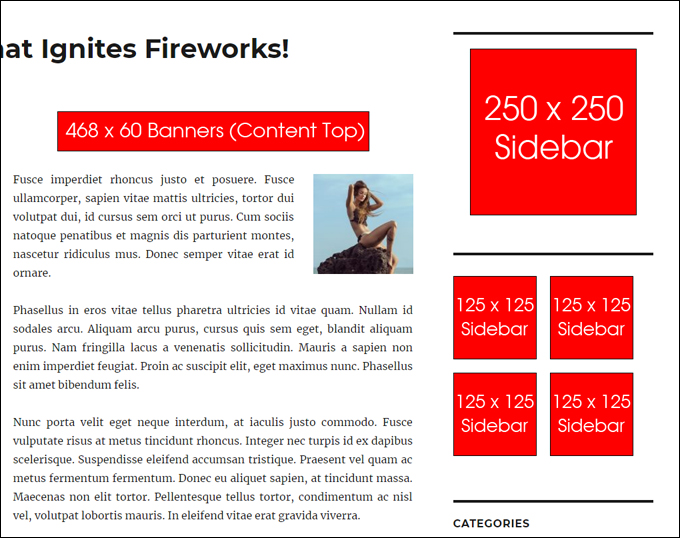
For example, you may want to display the following on your site:
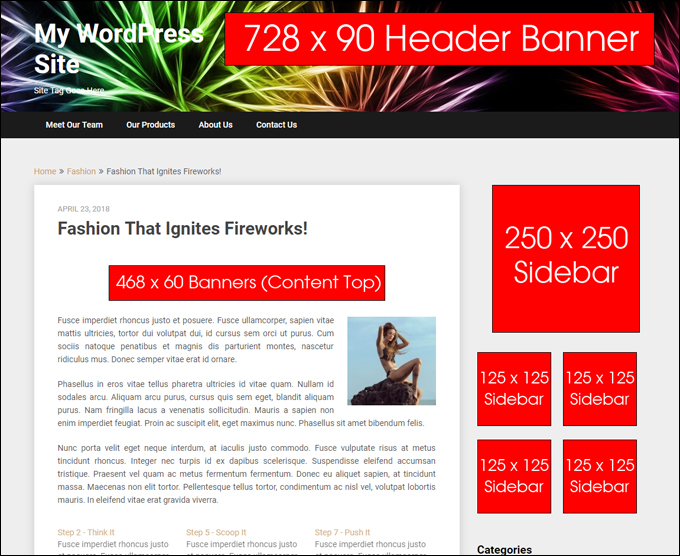
- 468×60 rotating banners before your content
- 250×250 rotating banners on your sidebar
- A block of 125×125 rotating ads (2 rows x 2 columns) on your sidebar
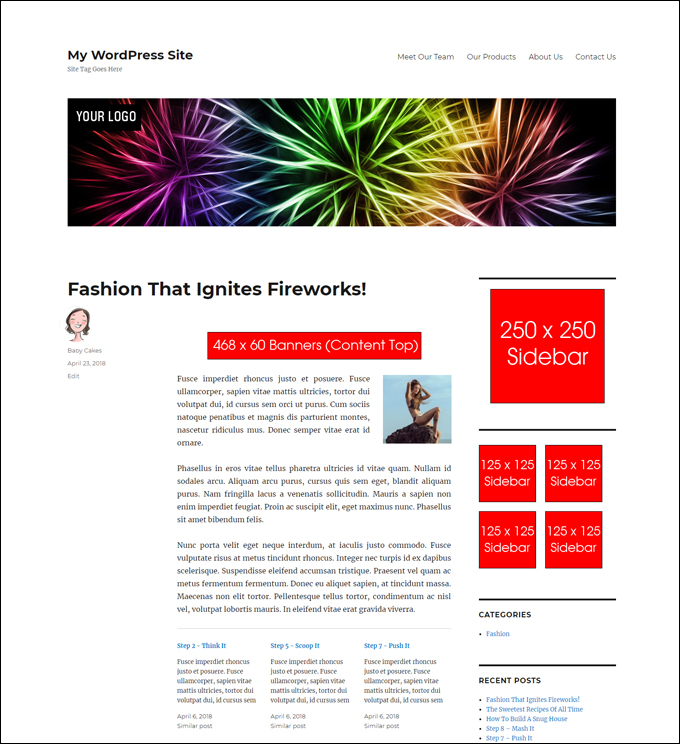
(Plan your ads before you begin!)
For the above example, then, you will need to set up at least 3 different ad groups:
- 468×60 banners
- 250×250 banners
- 125×125 banners
We recommend setting up your banner ad groups first before adding individual adverts.
Groups
Groups let you display and rotate a number of ads in the same location. You can create an unlimited number of ad groups and add an unlimited number of ads to each group. All ads in an ad group should be the same dimension
For example, let’s say you create an ad group to display 250×250 ad banners on your sidebar. You could then add 5 banners measuring 250×250 to this ad group and the banners will then rotate on your sidebar.
To set up an ad group, select the AdRotate > Groups menu …
(AdRotate – Groups menu)
This brings up the ‘Group Management’ screen …
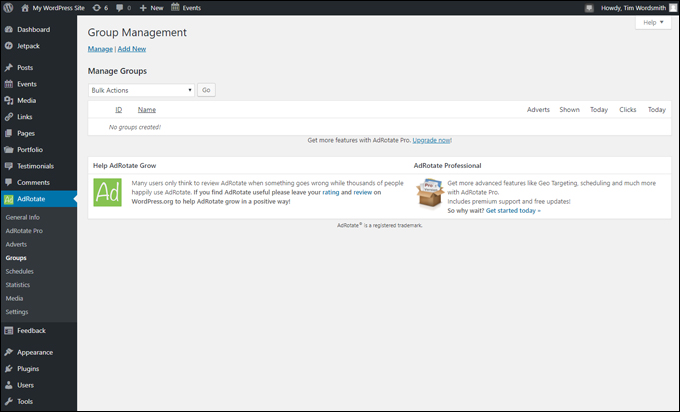
(Group Management screen)
To create a new ad group, click on ‘Add New’…
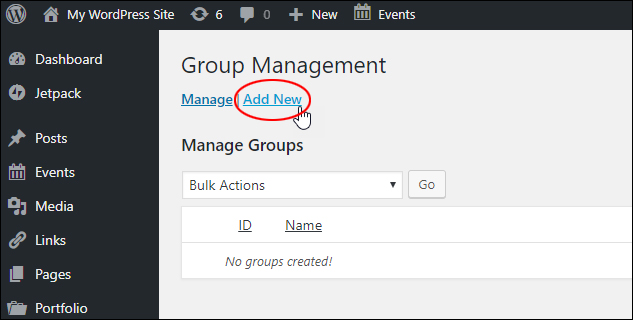
(Click ‘Add New’ to create a new ad group)
This brings up the ‘Groups’ screen where you can specify the settings for your ad groups.
Edit Group
- Enter a descriptive name for your ad group (e.g. size and locations of ads). This name is only visible to administrators (or your advertisers if using the PRO version of the plugin) and should help you identify what the ad group is being used for (e.g. ‘125×125 ad block footer’)
- Select the Mode (Show ads one at a time, every few seconds, or a block of ads), and
- Specify Advert size in pixels (e.g. 125×125, 468×60, 300×250, etc.)
Dynamic and Block Mode
If you select Dynamic Mode or Block Mode in the ‘Edit Group’ mode settings, then configure the settings in the Dynamic and Block Mode section:
- Block size (e.g. 1 row x 1 column, 2 rows x 2 columns, 2 rows x 1 column, 3 rows x 2 columns, etc.)
- Automatic refresh in seconds,
- Repeat impressions.
Usage
This section shows you the ID of the group you are creating. This is useful when inserting a shortcode into your content or adding the AdRotate widget to your sidebar (see sections further below) …
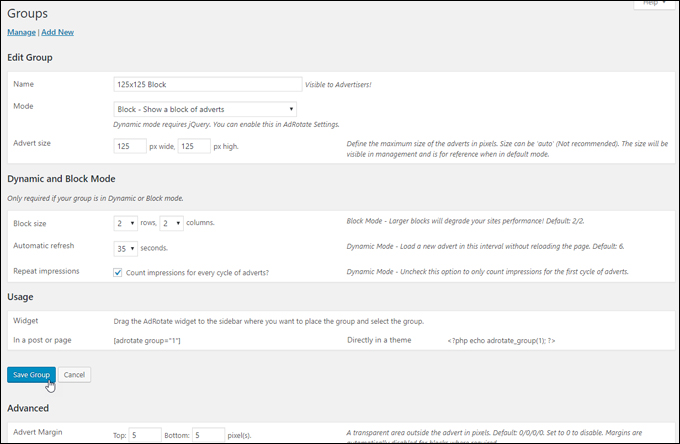
(Groups settings)
Scroll down the screen to specify other options for your ad group, such as Advanced settings (advert margins, alignment, mobile support, and fallback group), and Post Injection, which lets you specify automatic settings for inserting ads into different areas of your content, or in specific post categories or pages …
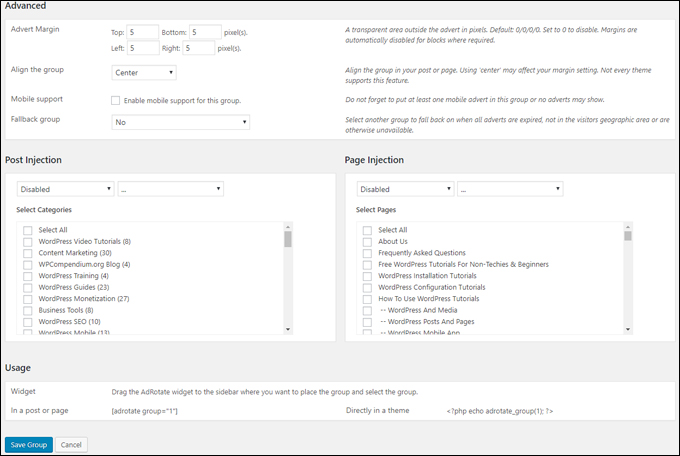
(Groups – Advanced settings)
Remember to click the ‘Save group’ button when done to add your new ad group and update your plugin settings and refer to the plugin’s tutorials, user manual, and documentation if you need help configuring ad group settings.
![]()
Let’s go back to our earlier planning example for a moment …
(3 ad groups are needed to display these ads)
Here’s what the ad groups in the example above look like in the AdRotate ‘Group Management’ section …
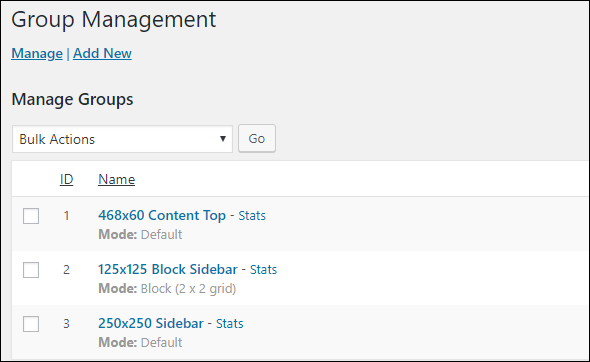
(Group Management – 3 ad groups created)
Note the following:
- The table lists the ID of each group (e.g. ‘468×60 Content Top’ is “1”, ‘125×125 Block Sidebar’ is “2”, and ‘250×250 Sidebar’ is “3”)
- The Mode for Groups “1” and “3” are set to ‘Default’ (displays one ad at a time), but the Mode for Group “2” is set to ‘Block (2×2 Grid)’
To add some space between each of the 125×125 adverts, a margin of 10 pixels was set in the Advert Margin field …
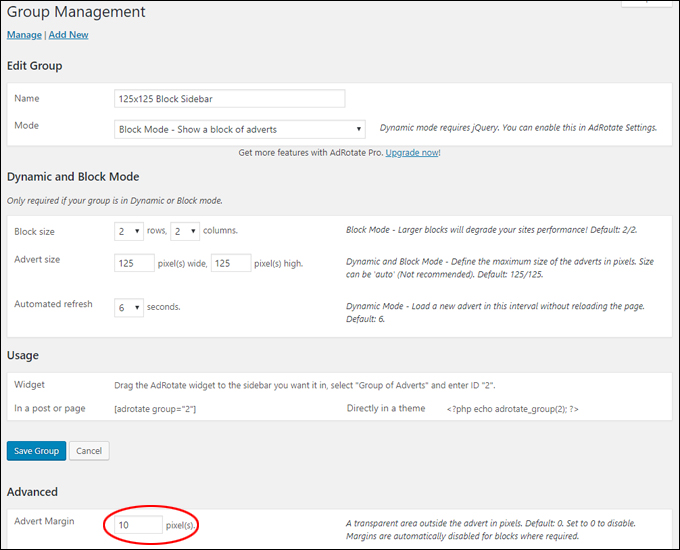
(Group Management – Advanced Settings: Advert Margin)
Note: You can edit your group settings at any time (e.g. change the size of your adverts, or change the Mode from displaying one ad at a time to displaying ads dynamically or as an ad block), but you can’t change their ID number.
Adverts
After setting up your ad groups, you can add individual adverts and assign these to ad groups.
To add a new advert, select AdRotate > Adverts …
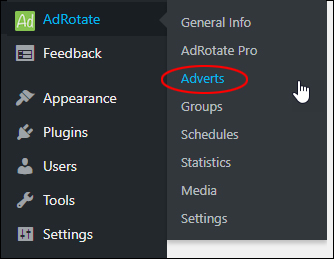
(AdRotate – Adverts menu)
This brings up the ‘Advert Management’ screen.
Click ‘Add New’ to create a new advert or banner ad …
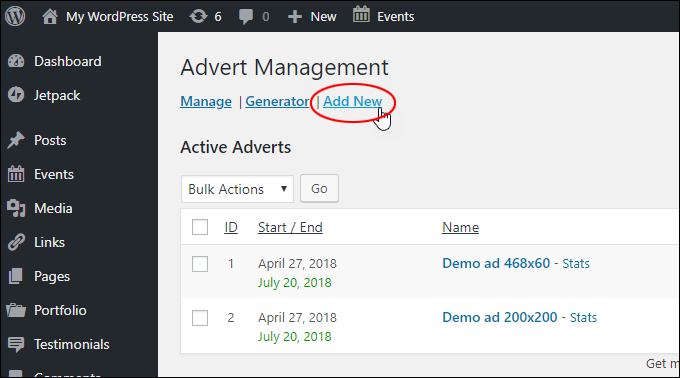
(AdRotate Advert Management screen – Add New)
Follow the steps below to add your new advert:
(1) Name – Enter a descriptive name for your advert (e.g. size and topic of ad). This name is only visible to administrators (or your advertisers if using the PRO version of the plugin).
(2) AdCode – Paste in the code for your advert or banner image here. You can add your own adverts or insert adverts from ad networks (e.g. AdSense, Chitika, Doubleclick, etc.) using basic HTML and/or Javascript code.
![]()
If you’re adding Javascript banner ads from advertising networks (e.g. AdSense), just copy and paste the supplied code into the ‘AdCode’ text box …
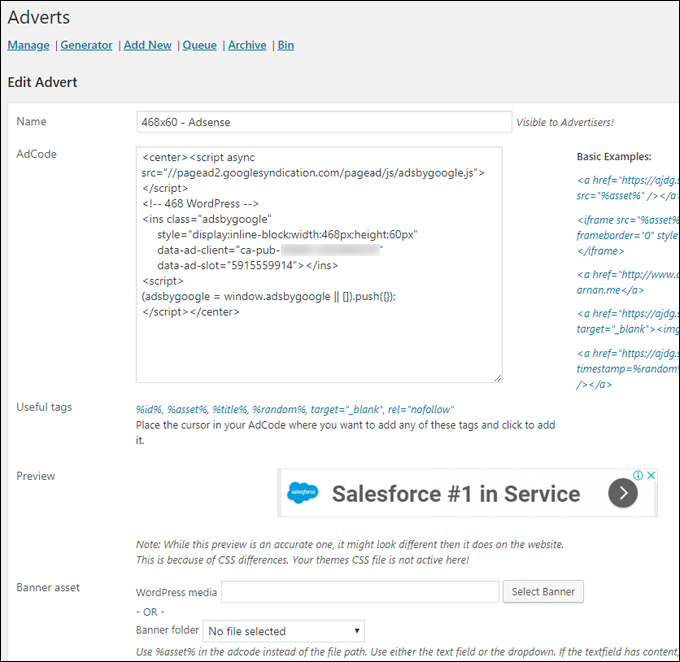
(Adding AdSense code)
If you’re adding your own advert, you can enter the code below in the AdCode box to display your ad …

(AdRotate Advert Code)
The above code snippet will:
- Center your banner
- Display the image you have specified in the Banner Asset field (see item “4” below)
- Send visitors to the destination URL specified in the code snippet (replace the URL highlighted in red with the URL you want to send your visitors to when they click on your ad)
- Open the destination URL page in a new window (so visitors don’t leave the page they were on when they click your ad)
(3) Preview – If you have entered your ad code and image details correctly, you should see a preview of your advert displayed here.
(4) Banner Asset – Enter the location of your banner image here, or select the banner image from your banner folder.
(5) Statistics – Tick the checkbox if you want to track clicks and impressions for the ad (Note: this does not work for ads that use Javascript, like Google AdSense)
(6) Status / Activate– Enable or disable your ad from displaying on your site. (Note: This section looks slightly different depending on the plugin version you have installed) …
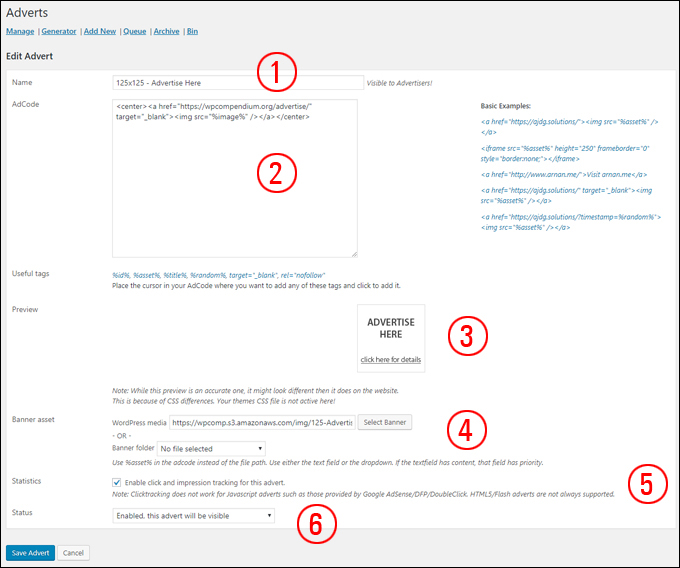
(Adverts screen – Edit Advert)
If you scroll down the screen, you will additional options …
(7) Usage – Every advert you create is assigned a unique ID. This lets you add the banner anywhere you like in your content using a shortcode or on your sidebar using the AdRotate widget.
(8) Create a schedule / Schedule your advert – Specify the start and end dates & times for your ads to run. (Note: This section looks slightly different depending on the plugin version you have installed).
(9) Choose Schedules – The PRO version of the plugin lets you create multiple and more advanced schedules for each advert. This section does not display in the FREE version of the plugin.
(10) Advanced – The PRO version of the plugin lets you specify different weights for adverts and optimizes support for mobile devices.
(11) Advertiser / Geo Targeting – These are PRO version features.
(12) Select Groups – Specify which ad group you want the advert to be assigned to.
Remember to click the ‘Save Advert’ button when done to update your ad settings …
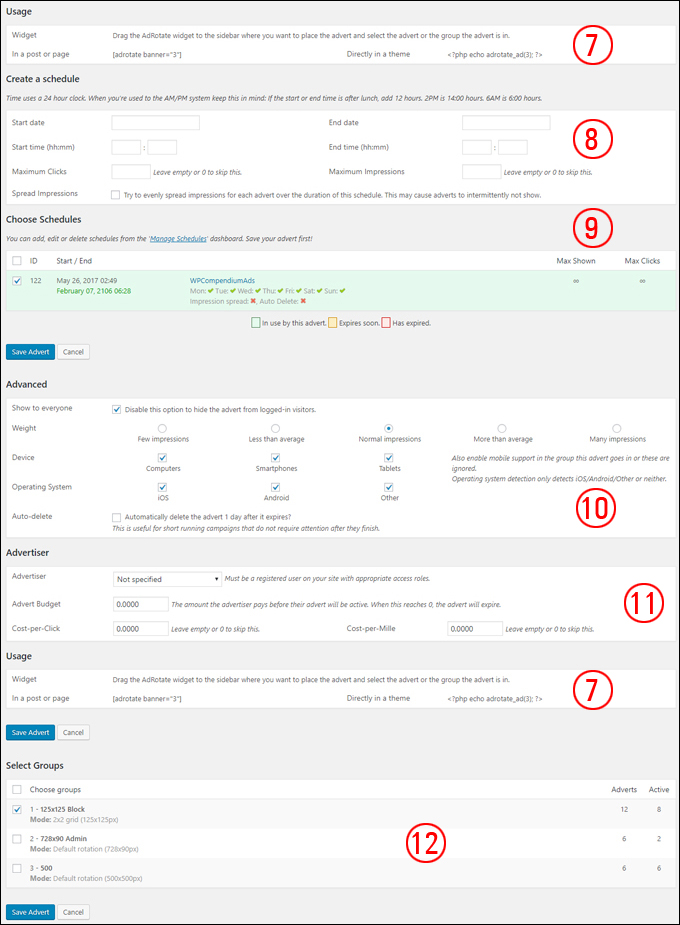
(Adverts screen – Edit Advert cont.)
Repeat the above process to add new adverts or edit existing ones and remember to assign these to ad groups …
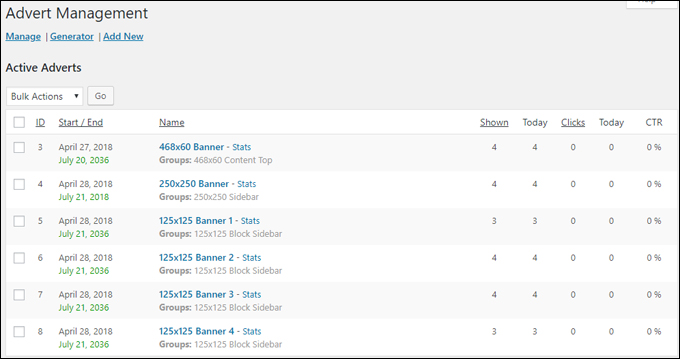
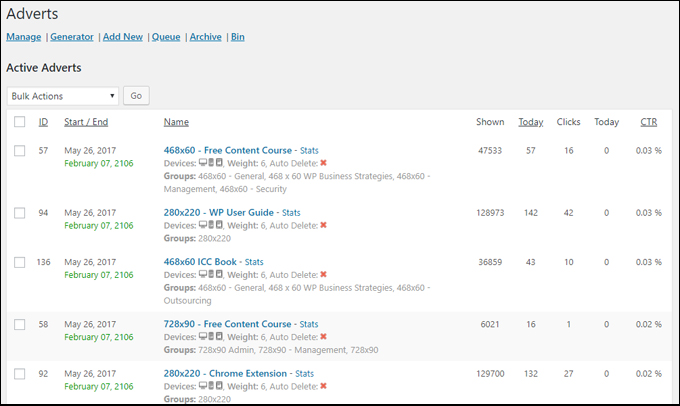
(Advert Management – Active Adverts)
Note: You can edit your advert settings at any time, but you can’t change their ID number.
![]()
Troubleshooting Adverts
If something is not right with your ads, AdRotate will let you know that there is an issue that needs fixing …
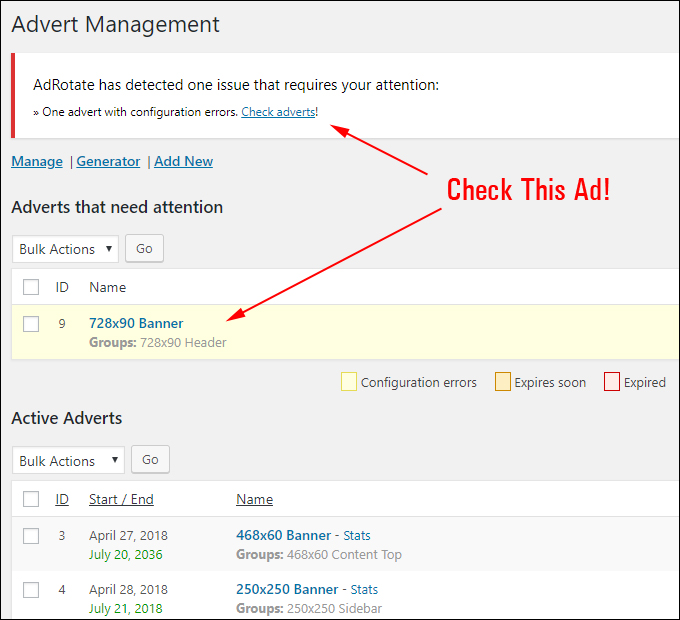
(Adverts that need attention)
This could be that you have missed or forgotten something, entered something incorrectly, or even that your ad has expired …
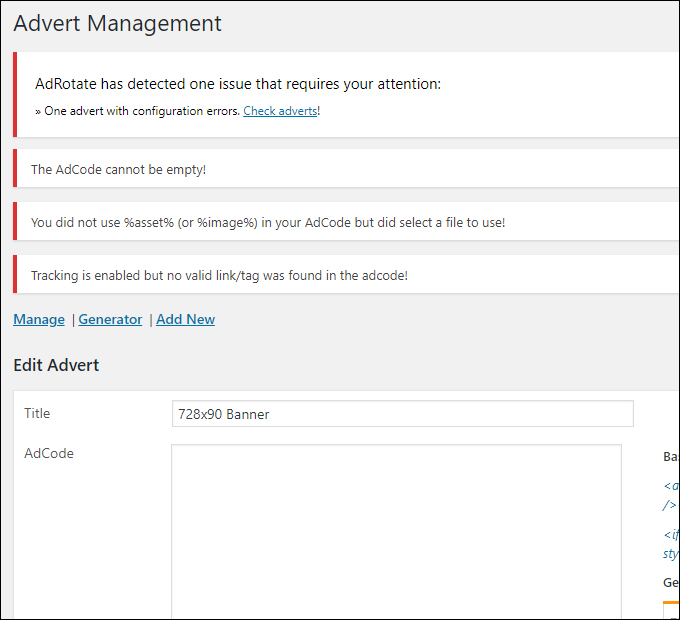
(Fix issues to display ads correctly)
Bulk Ad Management Tasks
To perform bulk ad management tasks, select the adverts you want to edit and choose an option from the ‘Bulk Actions’ drop down menu, then click ‘Go’ …
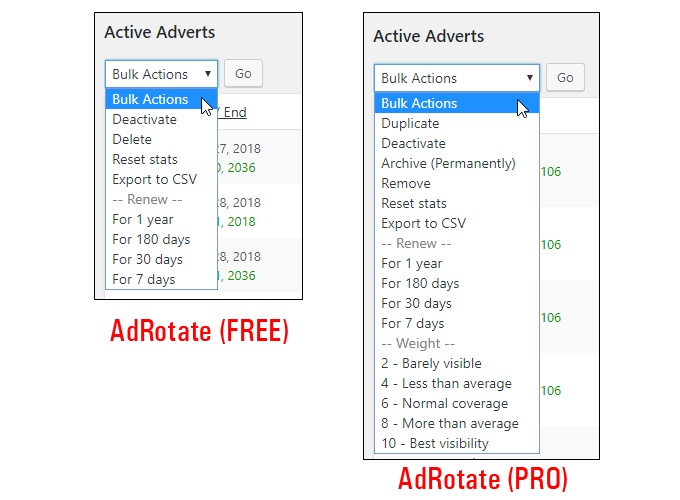
(Perform bulk ad management tasks)
Depending on whether you have AdRotate Free or PRO versions installed, you can duplicate, deactivate, delete, and archive ads, reset stats, export ad data to CSV, renew expired ads and change the weight assigned to adverts.
AdRotate – Additional Features
Schedules
In AdRotate Pro you can schedule adverts for multiple time periods. One schedule can be assigned to many adverts, allowing you to easily manage multi advert campaigns. Schedules can be active on certain days of the week or on certain hours of the day.
To create and view schedules, select the AdRotate > Schedules menu …
(AdRotate – Schedules menu)
This brings up the ‘Manage Schedules’ section, allowing you to create and manage your schedules …
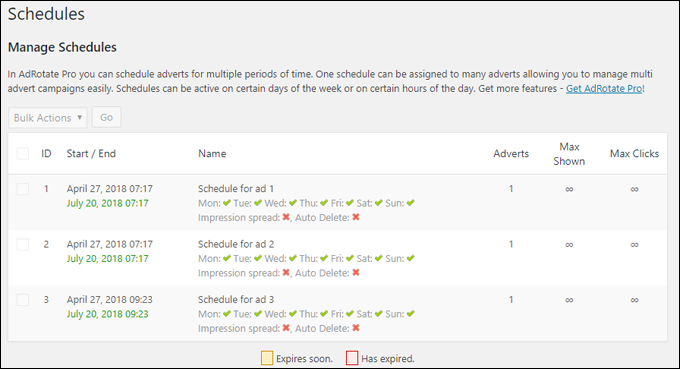
(‘Manage Schedules’ section)
Statistics
The Statistics section lets you see how your adverts are perfoming. To access your stats, select the AdRotate > Statistics menu …
(AdRotate – Statistics menu)
This brings up the ‘Statistics’ screen, allowing you to see advert clicks and impressions, CTR (Click-Through Rate), best and worst performing ads, monthly overview of clicks and impressions, and export options …
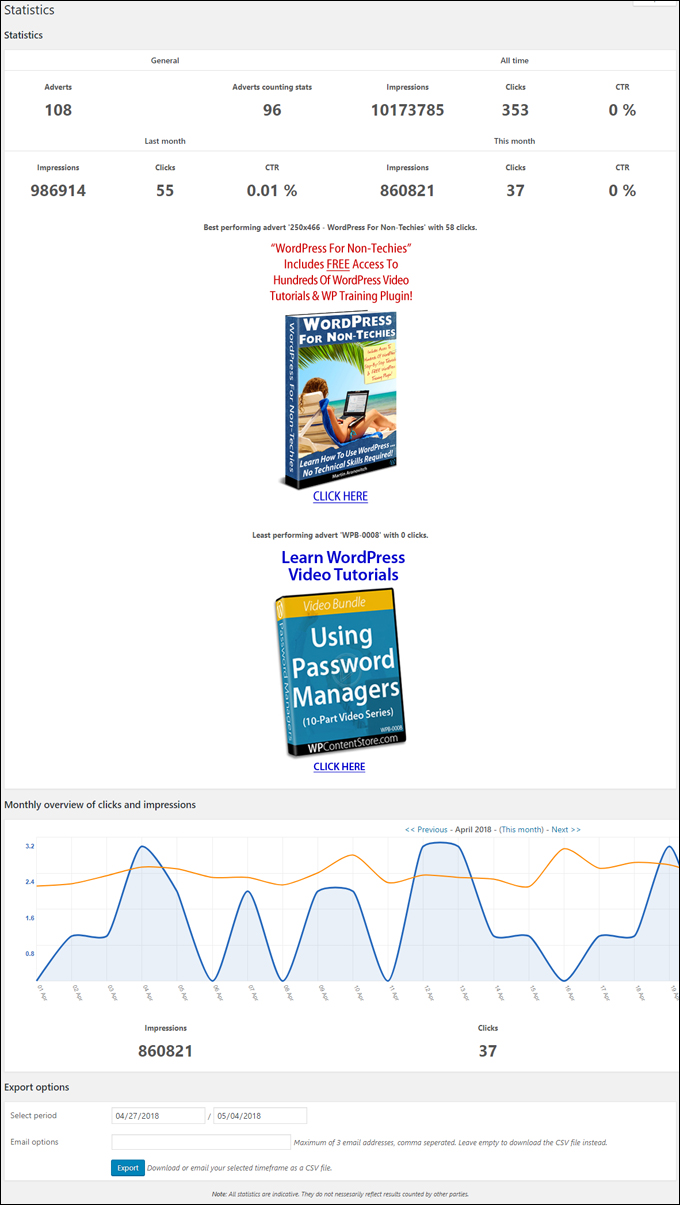
(AdRotate Statistics)
![]()
You can also view clicks and impressions for your ads in the ‘Adverts’ screen (AdRotate > Adverts) …
(View clicks and impressions for your ads in the ‘Adverts’ screen)
The ‘Adverts’ screen stats is useful if you are split-testing ads, as you can see which ads in your ad groups are getting the most clicks and higher click-through rates (CTR).
AdRotate Shortcode
As mentioned earlier, when you create a new advert or ad group, AdRotate assigns a unique ID to each item.
This allows you to use the AdRotate shortcode to insert a banner ad or display an ad group with rotating images anywhere in your content and in any post or page on your site …
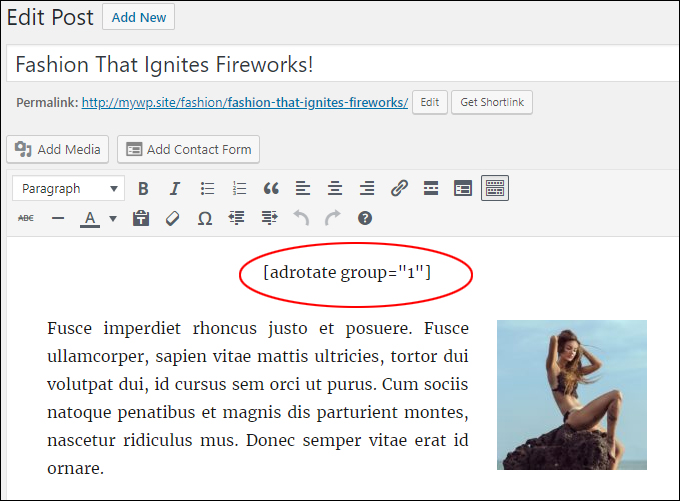
(Add a shortcode to display an ad or ad group in your content)
Your ads display on your published posts or pages …
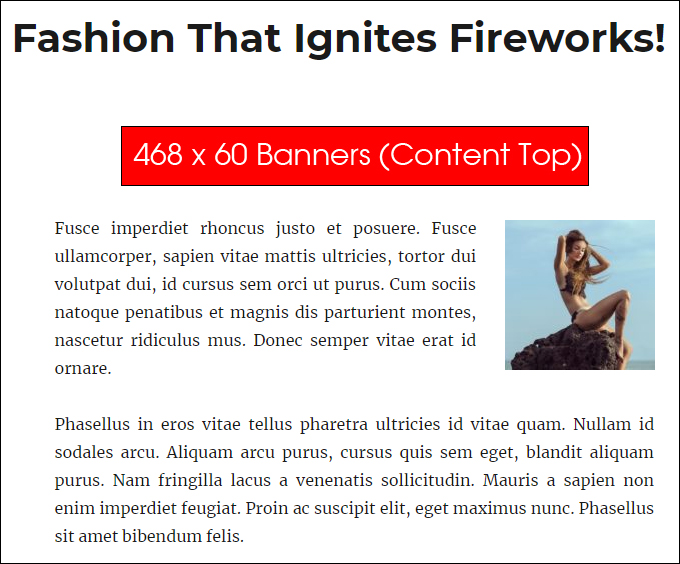
(Display rotating banner ads in your content using shortcodes)
AdRotate Widget
You can also add individual adverts, banners, or groups of ads to your sidebar using the AdRotate widget …
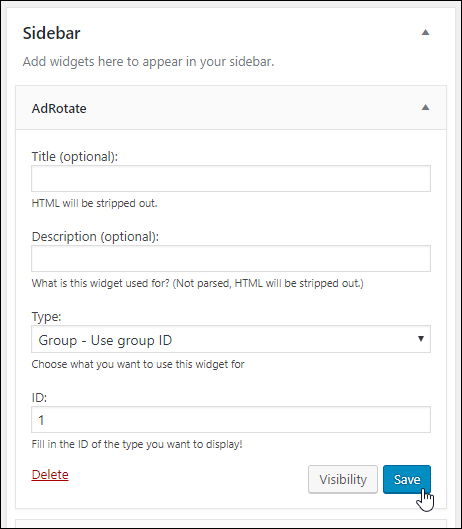
(AdRotate widget)
This will display the banner ads in your sidebar …
(Display rotating banners in your sidebar using the AdRotate widget)
![]()
Some WordPress themes include widgets that let you insert ads in your header …
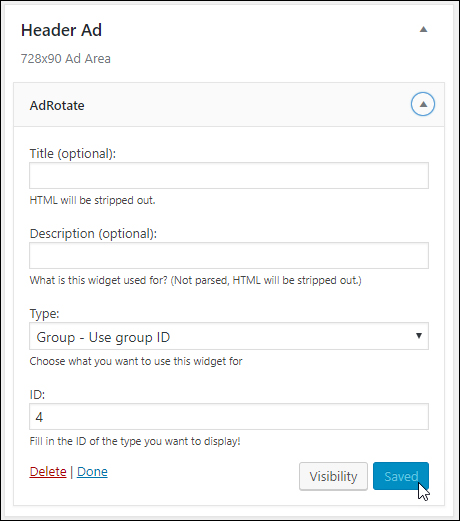
(Header Ad widget)
This lets you easily display banners in your header without touching code …
(Display rotating banners in your header using the AdRotate widget)
AdRotate – Additional Info
As you can see, the free version of AdRotate is quite comprehensive. If you plan to sell advertising on your site or need additional features and advanced control of your adverts (like Geo-targeting, multiple ad schedules, assign different weights to ads, etc.), then consider upgrading to the PRO version of the plugin.
You can find more information about the premium version of the plugin by selecting the AdRotate > AdRotate Pro menu …
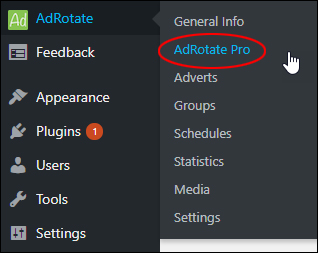
(AdRotate – AdRotate Pro menu)
To learn more about using this versatile ad management plugin, visit the website here: AdRotate Banner Manager
![]()
We’ve also written a post about the WP Ad Center ad management plugin.
Congratulations! Now you know how to add rotating banners and adverts in your WordPress site.
***
"Your training is the best in the world! It is simple, yet detailed, direct, understandable, memorable, and complete." Andrea Adams, FinancialJourney.org
***