 As you learn more about WordPress, you may occasionally come across references to the term blogroll.
A blogroll is a list of hyperlinks pointing to external sites or pages that display on your sidebar area.
According to official WordPress documentation …
“The term ‘blogroll’ was originally used because it was a list of links to other blogs, but you can include links to any sites.”
The Links Manager lets you add and manage a links section to a widget-ready theme.
![]()
Before WordPress v.3.5 was released, Links were a core feature of the WordPress CMS. After v.3.5, the Links Manager section was removed …
Before …

(WP Links Manager Feature – pre v.3.5)
After …

(Post v.3.5 – no WordPress Links Manager)
If you’ve had an earlier version of WordPress than v 3.5 installed and updated your installation, the Links Manager would be removed, unless you’ve previously used it.
How To Add A Link Section To WordPress
![]()
You can add a link section to your sidebar menu by creating a custom menu, or use a plugin like the one shown in the tutorial below.
If you can’t see the Links feature when you log into your WordPress dashboard you will need to install a plugin. In this step-by-step tutorial, you will learn how to add and manage links on your site’s sidebar using WordPress plugins.
Link Manager

(Links Manager WordPress Plugin)
Plugin Download URL
http://wordpress.org/plugins/link-manager
Description
This plugin restores the default Links feature on your WP dashboard, even if you update WordPress to a later version or remove all of your current links.
Note: All this plugin does is add a single line of template code to WordPress to restore the hidden feature. The last time we checked, this plugin had not been updated for a while, but it should still work fine. If you don’t want to use the Link Manager plugin, then use the plugin below instead, or contact us for help editing your site’s template code.
Simple Links

(Simple Links WordPress Plugin)
Plugin URL
https://wordpress.org/plugins/simple-links/
Description
Simple Links recreates the concept of the built-in Link Manager while addressing the shortcomings of the deprecated functionality.
Installing The Plugin
To install the Link Manager plugin, follow these step-by-step instructions:
From your WordPress dashboard area, select Plugins > Add New …

(Plugins Menu – Add New)
Click on the Install Plugins > Search tab, type ”link manager” into the search field and hit Enter …

Locate the plugin in the search results screen and click Install Now …

Activate the plugin …

After you have activated the plugin, WordPress will add a ‘Links’ section to your sidebar menu area …

(WordPress links menu)
Setting Up Link Manager
We recommend setting up link categories first before adding any new links. This way, you can assign any new links to the link category you have already created.
Link Categories
To create a new link category, go to the admin menu and choose Links > Link Categories …

(WordPress Links Menu – Link Categories)
This loads the ‘Link Categories’ screen in your web browser.
Type in the following information:
- Name: Enter the link category name.
- Slug: The slug shows up in the search-engine friendly URL of the link category name. It must all be in lowercase letters and contain no spaces (use hyphens to separate words).
- Description: Some themes may display a link category description.
When done, click the Add New Link Category button …

(Link Categories)
The category details will display in the list …

(Link Categories)
![]()
Tip: WordPress calls its default link category Blogroll . Unless you specify a category for a link, WordPress will automatically assign new links to the default category …

(Default link category name)
You may want to change this to something that your visitors can understand. This will not only make it easier for visitors, but any new links that you add to your site will automatically be listed under the new category name …

(Change the default ’blogroll’ to something your visitors will understand)
To change the default category name, hover your mouse over the list item and click on Quick Edit …

(Editing the link category)
Replace both the Name and the Slug with a new category name (remember to keep the slug in lowercase letters and replace all spaces with a hyphen), then click on the Update link Category button …

(Editing the default link category)
In our example, we’ve replaced the category name ‘Blogroll’ with a more suitable category name (e.g. ‘Recommended’).
Let’s create a description for this link category. To add a description to an existing link category, hover over the link category name and click Edit …

(Link category description)
Add your description in the ‘Edit Link Category’ page and click Update when you’re done …

(Edit Link Category screen)
Repeat the above process to add as many new link categories as you need.
After you have finished setting up your link categories, you can start adding your links.
How To Add New Links
To create a new link, go to the WP admin menu and choose Links > Add New …

(Links Menu – Add New)
The ‘Add New Link’ screen will display in your web browser …

(Add New Link screen)
You can also access this screen by clicking on ’Add New’ in the main Links page …

(Links – Add New Link button)
The ‘Add New Links’ page includes several sections:
Name, Web Address & Description
The first section lets you enter your link details …

(Name, Web Address, Description area – Add New Link)
Type in the following information:
- Name: What you enter in this field displays as the category your links will be assigned to.
- Slug: The slug is the SEO friendly URL bit of your link category. It must all be in lowercase letters and contain no spaces (use hyphens to separate words).
- Description: Some themes may display your link category description.
Categories & Target
After adding link details, select a Category and Target for your new link …

(Add New Link page – Categories & Target)
In the Categories section, select a link category you’ve already set up, or click on ’+ Add New Category’ to add a new category link.
Also, select a target frame radio button for your link in the Target section. This lets you specify how you want the link to open when clicked on by visitors:
- _blank means that a new browser window will open up to display the information for that link.
- _none means that when a visitor clicks on the link, they will exit your site and a new website or page will load in your browser window instead.
- _top opens links at the top level of the frame system if you’re using frames. Ignore this option if you don’t use frames, or if you don’t know what frames are.
Link Relationship XFN
This area provides some additional link functionality …
")
(Link Relationship (XFN) – Add New Link page)
Link Relationship (XFN) – XFN stands for XML Friends Network – lets you define your relationship with the linked person. For example, if you have a professional relationship with Louis Jenkins and you link to his blog, you would probably tick co-worker or colleague.
XFN relationships are optional for WordPress links. You can leave everything in this section blank and all of your links will still work. XFN makes the links defined on your site more understandable to some websites and search engines that use this information.
rel – This field lets you specify the ‘rel’ attribute that will be assigned to your link. The rel attribute is used to define what relationship exists between the current document and the linked document. For example, if you don’t want search engines to follow your link, enter nofollow into this field. Other ‘rel’ attributes include author, start, index, help, etc.
To learn more about XFN, visit this site:
Advanced
The last section lets you enter Advanced features for your links (You can leave the fields in this section empty unless you have a reason to use them) …

(Add New Link page – Advanced area)
The Advanced section contain the following fields:
- Image Address: Specify an image to be displayed with the link. Add an image URL and make sure that your image is small (around 16×16 like a favicon).
- RSS Address: If your theme allows it, the link’s RSS feed will be displayed next to your link.
- Notes: Add notes about the link in this section for your own internal reference.
- Rating: Add a rating score to the link if you would like to sort links by rating (see the ‘Links’ widget section below).
Enter information into the above fields or just leave this section blank.
When you have finished adding information about your link, click on Add Link to update your link settings …

(Click on the Add Link button to save your new link)
![]()
Note: If you select the Keep this link private checkbox, the link will not be visible in your Blogroll section …

(Make your links private)
Making links private allows you to add links and then toggle their visibility on or off without deleting your links (this is useful if you want to add seasonal links) …

(Toggle link visibility on and off)
To view a list of all the links you have created, choose Links > All Links in the WP navigation menu …

(Links Menu – All Links)
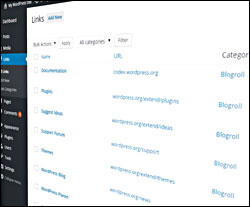
This brings up the ‘Links’ page. The Links screen displays all your links and link information (e.g. URL, categories, relationship, etc.) …

(Table of links)
![]()
Tip: To view or hide information in the list of links, click on the ‘Screen Options’ tab at the top of the screen …

(List of links – Screen Options)
Display/hide fields on your Links table by selecting/deselecting their check boxes …

(Show/hide links)
How To Edit Your Links
To edit links in the Link Manager, go to the dashboard navigation menu and select Links > All Links to bring up your list of links …
(Links Menu – All Links)
Locate the item you want to edit and click on Edit to bring up the link’s information …

(Editing your link information)
Make changes to the link …

(Edit Link page)
After you’re done editing your link, you can:
- Click the Update Link button to save your link details,
- Click on Visit Link to view your link and make sure that you have set up your link’s URL correctly (the link will open up in a new window),
- Click Delete to delete the link …

(Update Link button)
Removing Your Links
To remove links, go to your navigation menu and choose Links > All Links …
(WordPress Links Menu – All Links)
This brings up the ‘Links’ screen in your browser.
You can delete links individually, delete multiple links by selecting their check boxes, or delete all your links.
To delete individual links, hover over the link title that you want removed and click Delete …

(Deleting links)
To delete links in bulk, either click on the checkbox next to every item that you want to remove, or select all links by clicking on the checkbox next to the ‘Name’ column header …

(Deleting multiple links)
Select Delete from the ‘Bulk Actions’ drop menu, and click Apply to delete all selected links …

(Links: bulk-deletion function)
The selected links will be deleted …

(Link deletion notice)
Plugin Usage
Now that you know how to configure link categories and how to add, edit and delete links, it’s time to learn how to make links display on your website.
Links Widget
Installing the Links Manager plugin adds a ‘Links’ widget to your ‘Widgets’ section.
To access and configure your Link widgets, go to the WP navigation menu and choose Appearance > Widgets …

(Appearance Menu – Widgets)
The ‘Widgets’ screen will load in your browser.
You will notice a ‘Links’ widget in the Available Widgets section …

(Links widget)
Drag the ‘Links’ widget to one of your widget sections in the Widgets page and drop it wherever you want the links section to display …

(Add a links widget to your sidebar)
The Links widget offers various settings. You can specify what information you want displayed about your links and how many links you want displayed on your sidebar …

(Link widget - options)
You can also add as many link widgets to your sidebar and footer as you want. This lets you add and feature several link lists on your site …

(Add multiple link widgets to your sidebar)
Display a list of items for a specific category …

(Link widget options – Select Link Category)
You can sort links by Link title, Link rating, Link ID, or display links in Random order …

(Link widget options – Sort by options)
Once you are done setting up your links widget, click Save to update your settings. Your link section should show on your sidebar menu …

(Links can be displayed on your site’s sidebar)
As the above example shows, you can display specific links to your site visitors (e.g. a list for a specific link category only), and add multiple lists of links to your sidebar menu.
![]()
Need help using widgets? We have written a detailed article about adding widgets. Go here to learn more:
Links Manager – Additional Information
If you have loads of links, the Links Manager plugin lets you easily administer these with sort, filter, and search functionality.
Sorting Links
You can sort links by hovering your mouse over the title of the column you want to sort and clicking on the black triangle displayed next to the column title …

(Sorting your links)
Search Links Function
Find links using the ‘Search Links’ button …

(Search links)
Filtering Links
You can filter links by category …

(Filtering links by category)
You can also search and filter links in the Link Categories screen. Use the ‘Search Link Categories’ button to search for link categories, or click on the category links in the ‘Links’ column …

(searching and filtering links in the Link Categories screen)
This brings up a list of all links grouped under a specific link category …

(Links filtered by category)
Additional Link Options
If you plan to add a lot of links to your website or blog, or if you would like to add a page containing a list of links to your site (i.e. not just add a links section to your sidebar), then you may want to look at using a plugin that can help you administer links.
Link Library

(Link Library WordPress Plugin)
Plugin URL
http://wordpress.org/plugins/link-library/
Plugin Description
Link Library allows you to publish a list of your link categories and a complete list of links together with notes and descriptions …

(Link Library links. Image sourced from Link Library plugin documentation.)
This useful plugin creates a page on your web site that contains a list of all of the link categories in your Links area, and all links listed in these categories. You can select a sub-set of categories to display or not display, show only one category at a time, display a search box and find results based on visitor queries, display a form to accept user submissions that can be moderated by a site administrator, and even generate an RSS feed of your link collection that lets your site users become aware of any additions made to to your link library.
To learn more about the Link Library plugin:

Congratulations! Now you know how to add a link section to your WordPress site.
![]()
We have written a comprehensive article on inserting hyperlinks into WordPress posts. Go here to learn more:
***
"This is AMAZING! I had learnt about how to use WordPress previously, but this covers absolutely everything and more!! Incredible value! Thank you!" - Monique, Warrior Forum