

***
In our WordPress installation tutorials, we show you how to install a WordPress site or blog on your own domain name.
Typically, you will want to install WordPress either in the ‘root’ directory of your server (i.e. what visitors see when they type in your domain address – e.g. www.mydomain.com) or in a subfolder of your domain (e.g. www.mydomain.com/blog).
Depending on what you want to achieve and your digital business strategy, you may also decide to do things like:
- Register multiple domain names for different products or services,
- Set up different websites with identical content,
- Publish different content in separate areas of your existing domain,
- Redirect visitors from other web pages or domain names to specific web pages on a new website,
- Ensure that visitors who mistype or hyphenate your domain name can still reach (e.g. my-domain-name.com vs mydomainname.com)
- etc.
All of these domain configurations can be set up inside your webhosting control panel.
![]()
![]()
![]()
You should already be familiar with the following tutorials:
- How to register a domain name
- How to set up webhosting for your WordPress site
- How to set up a nameserver for your domain name
In addition to the comprehensive tutorials in the WordPress installation module, we also recommend watching the video tutorials listed in our WordPress Installation Video Tutorials section.
Let’s take a look then, at some of the main domain types you will probably want to use and learn more about.
Subdomains, Addon Domains, And Domain Aliases
Subdomains
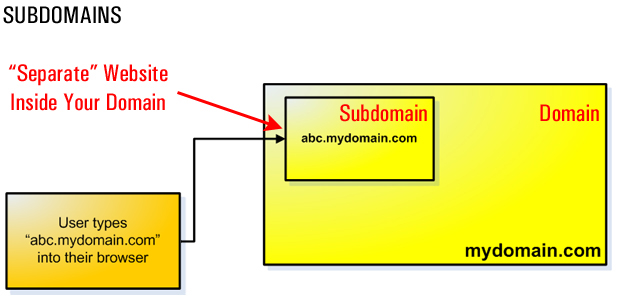
Subdomains are used to divide your primary website into different sections.
Each section or subdomain is then seen as a completely separate area of your website.
This is useful if, for example, you have an English language website and you want to create a separate Spanish-language version of your site using the same “root” domain.
Your English-speaking visitors would visit your website by typing in your regular domain web address (e.g. http://yourdomain.com), and your Spanish-speaking visitors would access the Spanish version of your site by typing something like http://spanish.yourdomain.com.
As described in the official cPanel documentation site …
“Use subdomains to create memorable URLs for different content areas of your site. For example, you can create a subdomain for your blog that is accessible through blog.example.com and www.example.com/blog”
Source: https://documentation.cpanel.net

Addon Domains
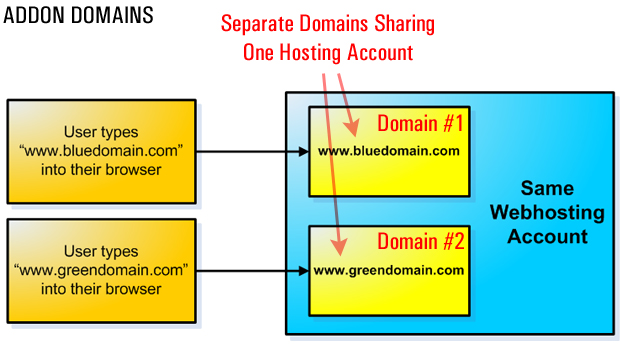
Addon domains are used when you want to add a new domain name to your existing hosting account instead of paying for new hosting.
The cPanel documentation site describes addon domains as follows …
“Addon Domains are additional websites that are hosted on your account. Each addon domain has its own files and will appear as a separate website to your visitors.”
Source: https://documentation.cpanel.net

Parked Domains
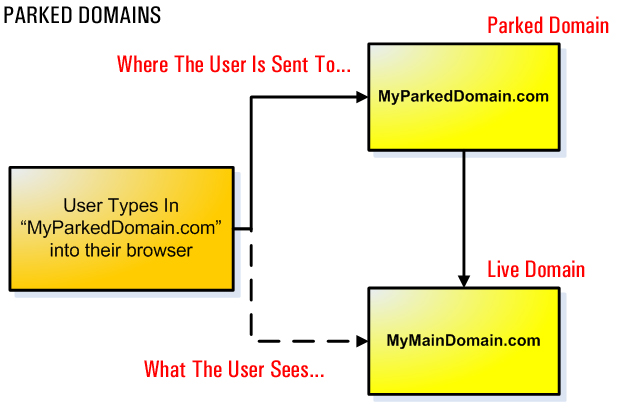
There is also another type of domain called a parked domain (also called a domain alias). Parked domains point visitors to other domains while displaying the parked domain URL on the visitor’s browser.
Once again, if we refer to the official cPanel documentation …
“Domain Aliases allow you to point additional domain names to your existing hosting account. This allows users to reach your website if they enter the pointed domain URL in their browsers.”
Source: https://documentation.cpanel.net

Redirects
“Redirects allow you to make a specific web page redirect to another page and display the contents of that page. This allows you to make a page with a long URL accessible through a page with a shorter, more memorable URL.”
Source: https://documentation.cpanel.net
Redirects can be set up to point visitors from one URL to a different URL in the same domain, or to redirect visitors from web pages on a domain name that you are no longer promoting to pages on a new website.
This is useful if, for example, you have great content on an old website that you want to duplicate on your new website or content with updated references.
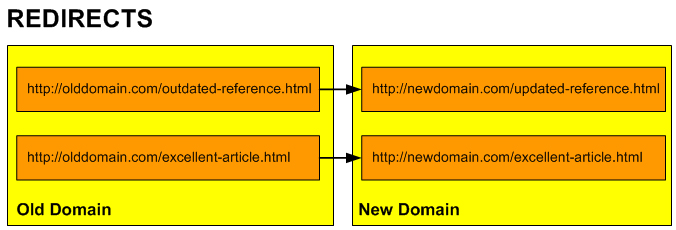

You can also inform search engines whether to treat the redirection as permanent or temporary.
Setting Up Subdomains, Addon Domains & Domain Aliases
This tutorial provides more information on the difference between addon domains, subdomains, and domain aliases, and shows you how to set these up in your webhosting control panel.
Addon Domains
An addon domain makes it possible to host two or more sites with two or more domains on the same hosting account. Addon domains are useful if you want to register and promote another domain name but don’t want to pay the additional cost of having another web hosting account. In this case, (if your web hosting company allows it), the best solution would be to create an addon domain.
An addon domain, therefore, is just like having a separate website. You host or point your addon domain to a folder in the public_html folder of your main domain name. Like your main domain, you will need to register your addon domain and set the nameservers for the addon domain to point to the same nameserver as your main domain name.
If your main domain name is called domainname.com and your addon domain name is called addondomain.com , then you could access your addon domain in one of the following ways:
- addondomain.com
- domainname.com/addondomain
- addondomain.domainname.com
Benefits Of Using Addon Domains
One of the main benefits of using addon domains is that it helps to optimize your web hosting space. The addon domain uses the same space and bandwidth as your main account and has its own CGI and FTP access, as well as its own email accounts and web statistics, but it doesn’t have its own cPanel (web hosting manager) account.
Summarizing then, the benefits of using addon domains include:
- Since typing addondomain.com into your web browser displays that exact domain name in the address bar, it’s like having a completely separate website.
- You can create multiple domains and websites on the same web hosting account.
- You save money and web space by using one web hosting account instead of having to purchase separate hosting accounts.
- Your addon domain shares the same resources as your main domain name (i.e. disk space and bandwidth).
- Your addon domain will have its own FTP access, site stats, and cgi-bin.
- You can access your addon domain using different website addresses.
Subdomains
A subdomain uses your existing domain name. It is a subfolder of your main domain name and does not have its own separate domain name. So, for example, if your domain name is mydomainname.com and you install a blog inside a folder of that domain name called blog, then your blog would be located in a subdomain called mydomainname.com/blog.
A different variation of a subdomain that is also commonly used is blog.mydomainname.com. For example, you can access many of your Google accounts by typing in the subdomain myaccount.google.com into your web browser …
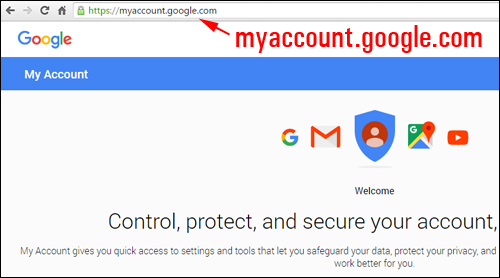

(An example of a subdomain)
Parked Domains
A parked domain is a domain that is registered but does not have a web hosting account – it simply points to an existing domain. It is an additional domain you own that directs visitors to the domain name it is “parked” on top of. If visitors type the address of a parked domain name into their browser, they will be redirected to the main domain name and will see exactly the same information they would get if they had typed in the main domain name address.
In other words, it’s like building multiple websites that contain exactly the same information using different domain names, but only having to maintain one.
![]()
![]()
![]()
A parked domain name is useful if you own a “domain name family” (e.g. domain.com, domain.net, domain.org, domain.com.au), or similar / related domains, but you only want to build and promote a single domain name (i.e. one website).
Similarly, if you plan to build an international business but are just starting out, you can initially point domains that you have registered with different country extensions (e.g. .us, .it, .cn, etc.) to your main website so that all visitors can access the same content until you are ready to expand and create different websites for each country.
Note: Your parked domain needs to be registered and pointing to the same nameservers as your existing domain name.
Comparing Addon vs Parked Domains
If you’re trying to decide what kind of domain configuration you should use, here’s a quick guide:
- If you want to use different domain names to show the same content as your existing website, choose a domain name alias.
- If you want to add a new domain name that shows different website content or uses different e-mail addresses as your existing website, choose an addon domain.
The screenshot below provides an additional comparison of Addon vs Alias (Parked) domains …
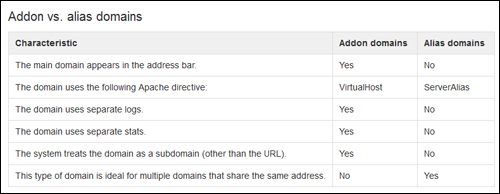

(Addon vs Parked (Alias) Domains – Source: https://documentation.cpanel.net)
Creating Addon Domains, Subdomains & Parked Domains In cPanel: Step-By-Step Tutorial
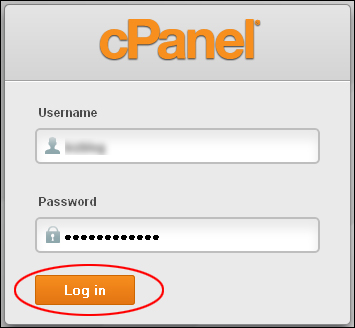
Log into your cPanel account …

Creating Subdomains
Scroll down to the ‘Domains’ section and click on Subdomains …
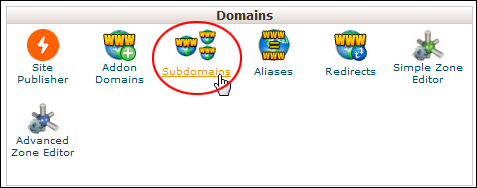

(cPanel: Domains – Subdomains)
Adding a subdomain will create a new section in your website using any prefix you choose (e.g. “support”, “myaccount”, etc …).
Type in the name of your subdomain in the ‘Subdomain’ field, then click the blank field in the ‘Document Root:’ section. cPanel will automatically fill this section with the correct path information for your subdomain.
Click the ‘Create’ button when you’re done …
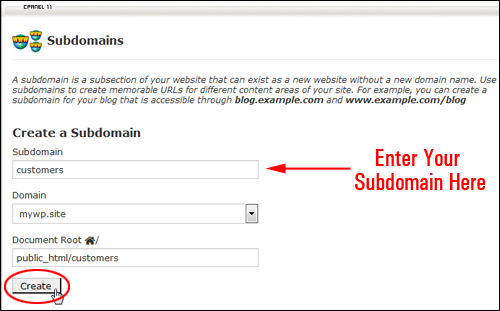

(How to create a subdomain)
Your new subdomain will be created …
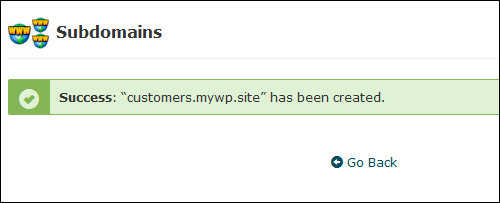

(Confirmation of subdomain setup)
Note: If you get an error message, make sure that your hosting setup allows you to set up subdomains …
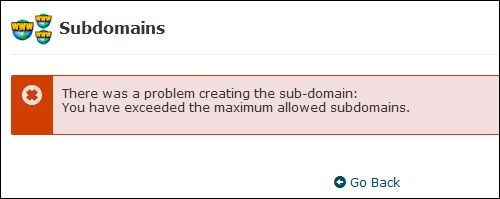

(Contact your web host if you get error messages)
You can easily remove subdomains using the Subdomains feature.
How To Delete Subdomains
To delete your subdomain, go to the Subdomains > Modify a Subdomain area, locate the domain to be deleted and click Remove …
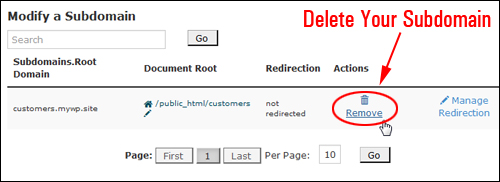

(Removing subdomains)
You will be asked to confirm your deletion …
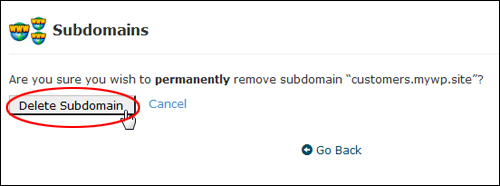

(Click ‘Delete Subdomain’ button to confirm deletion)
Your subdomain will be permanently deleted …


(Confirmation of Subdomain removal)
Creating An Addon Domain
Scroll down to the ‘Domains’ panel and click on Addon Domains …
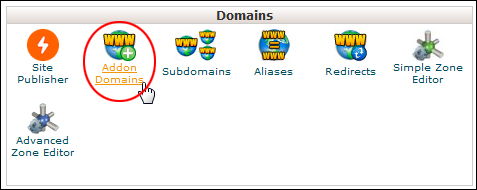

(cPanel: Domains – Addon Domains)
Enter your domain name in the ‘New Domain Name’ field (no http:// or www is required). Note: cPanel will automatically complete the “Subdomain/FTP Username:” and “Document Root:” fields.
Click the ‘Add Domain’ button to create your addon domain …
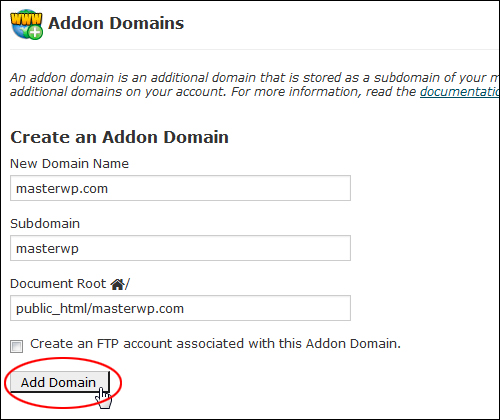

(Creating an addon domain in cPanel)
Your addon domain will be set up …
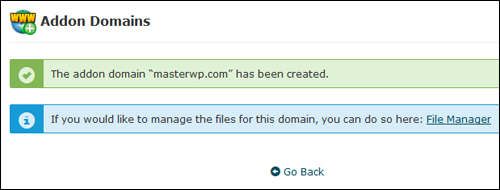

(Addon domain created)
Note: Make sure that your hosting setup allows you to set up addon domains …


(Contact your web host if you get error messages)
You can easily remove an addon domain using the cPanel Addon Domains feature.
Deleting An Addon Domain
To delete your addon domain, go to Addon Domains > Modify Addon Domain, then locate the domain to be deleted and click Remove …
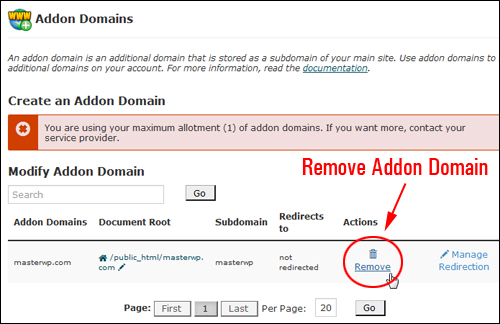

(How to delete addon domains)
If you are sure that you want to permanently remove the addon domain, click on the ‘Remove’ button …
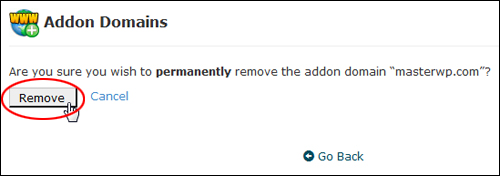

(Click ‘Remove’ to confirm deletion)
The addon domain will be deleted …
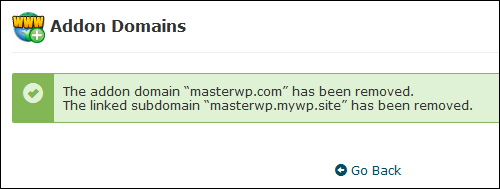

(Confirmation of permanent addon domain deletion)
Creating Domain Aliases
To “park” a domain on top of another domain, first make sure that the domain’s nameservers have been set up correctly (see this tutorial for more information about setting up nameservers).
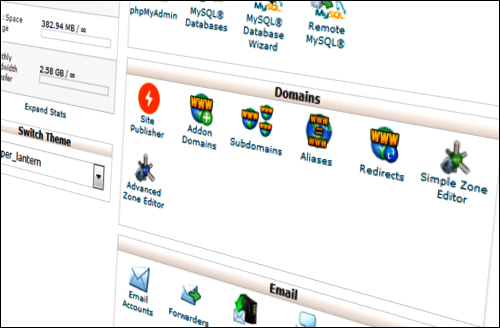
Log into your cPanel admin area and scroll down to the ‘Domains’ section. Click on Aliases …
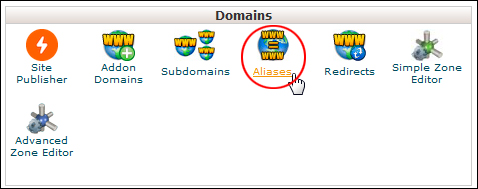

(Domains – Aliases)
Note: In older versions of cPanel, the ‘aliases’ function will be listed as Parked Domains …


(Domains – Parked Domains)
Enter the name of the domain you want to park on top of your existing domain and click Add Domain to create a new parked domain …


(Creating parked domains in cPanel)
Your new parked domain will be created …
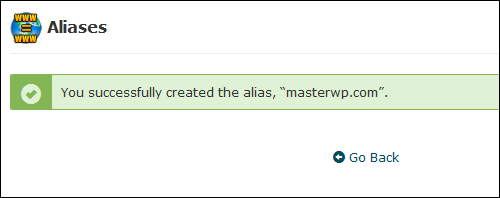

(Parked domain created)
![]()
![]()
Unless your web host has added limitations on your server, you can have multiple parked domain names on your existing domain. For example, this site is built on WPCompendium.org. We have also registered the related domains WPCompendium.com, WPCompendium.net, and WPCompendium.info, and parked these on top of this domain. To see how parked domains work, just type in any of the parked domain names into your browser (e.g. type in WPCompendium.com) …
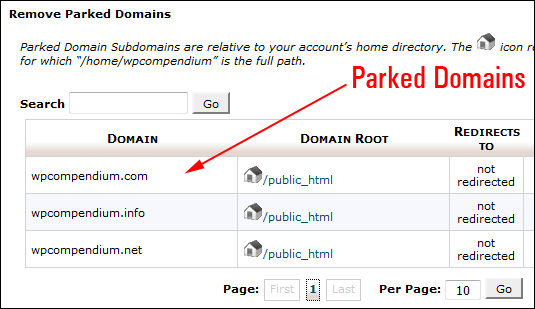

(You can have multiple parked domain names on your existing domain)
You can also easily remove a domain alias using the Parked Domains feature.
Deleting Domain Name Aliases
To remove a domain alias, go to Aliases > Remove Aliases, locate the parked domain to be deleted and click Remove …
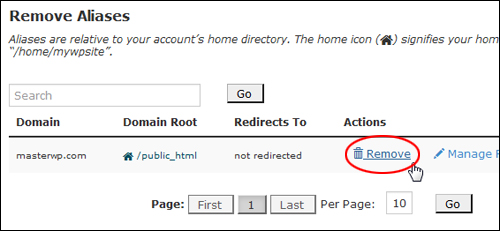

(Deleting parked domains)
If you are sure that you want to permanently remove the alias, click on the ‘Remove Alias’ button …
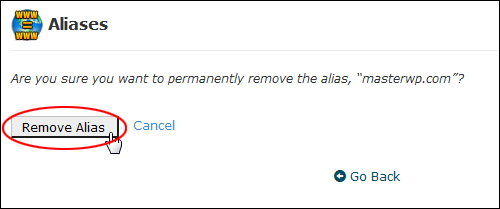

(Confirm alias deletion)
The alias will be permanently deleted …
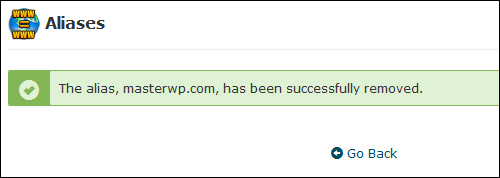

(Confirmation of permanent alias removal)
Note: If you get an error message, make sure that your hosting setup allows you to create domain aliases …


(Contact your web host if you get error messages)
![]()
![]()
If you have not set up your domain nameservers correctly, you will get an error message when you try to perform the above tasks …


(Don’t forget to set up your DNS servers!)
See this tutorial to learn how to set up nameservers for your domains.
Congratulations! Now you know how to create subdomains, addon domains, and parked (alias) domains.

Learn How To Register A Domain Name
Learn How To Set Up Webhosting
Learn How To Set Up Domain Nameservers
Learn How To Create An Email Account
Back To WordPress Installation Tutorials Index
***
"This is an awesome training series. I have a pretty good understanding of WordPress already, but this is helping me to move somewhere from intermediate to advanced user!" - Kim Lednum
***
