 Google Analytics is a free service offered by Google that lets you generate and view detailed statistical reports about your site’s traffic and traffic sources and use this information to measure and track important metrics that will help you improve your traffic and conversions.
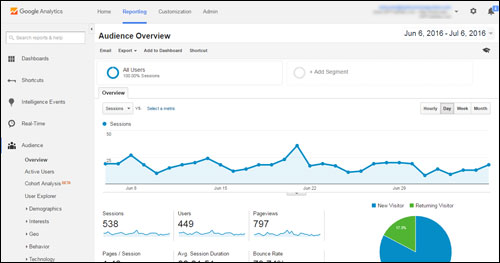
(Google Analytics)
In this step-by-step tutorial, you will learn how to add Google Analytics to your WordPress site with no coding skills required.
How To Add Google Analytics To WordPress
Adding Google Analytics to WordPress involves three steps:
- Create a Google Analytics account
- Add your website details to Google Analytics
- Add Google Analytics code to your WordPress site
Let’s go through each of these steps in more detail.
Create A Google Analytics Account
To create a Google Analytics account for your website, you will need to have a Google account set up. If you haven’t set up a Google account yet, go through the step-by-step tutorial below before continuing any further:
After you have set up your Google account, visit the Google Analytics website (https://analytics.google.com) and log in with your Google account details …
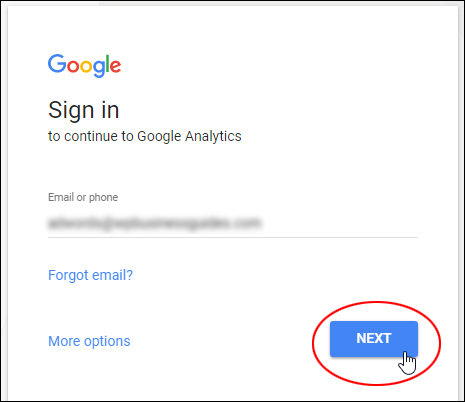
(Log into Google Analytics using your Google account details)
You will be taken to your Google Analytics dashboard …
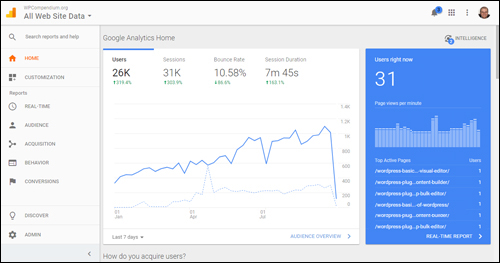
(Google Analytics dashboard)
![]()
Google Analytics has a comprehensive help section that you can access for help and tutorials on how to use all features of the service …
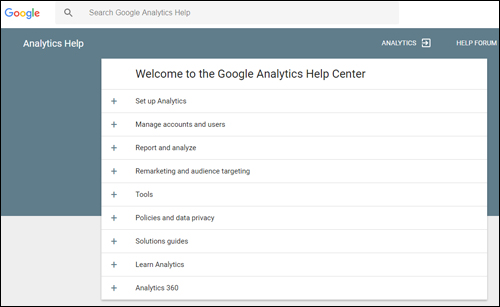
(Google Analytics Help Center)
We recommend going through the articles and tutorials to learn how to set up and use your Google Analytics account. To access the help center, go here:
Add Your Website Details To Google Analytics
After setting up your Google Analytics account, the next step is to add your website details.
Inside your Google Analytics dashboard, click on the gear icon to access your account’s ‘Admin’ settings …
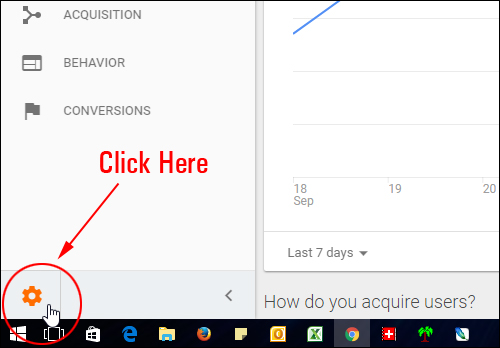
(Click to access Google Analytics Admin section)
In your Admin section, select Account > Property > Create new property to add your website details …
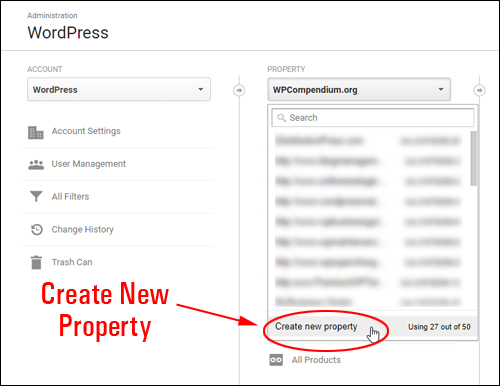
(Google Analytics – Create new property)
In the ‘New Property’ screen, enter your website details and click on ‘Get Tracking ID’ …
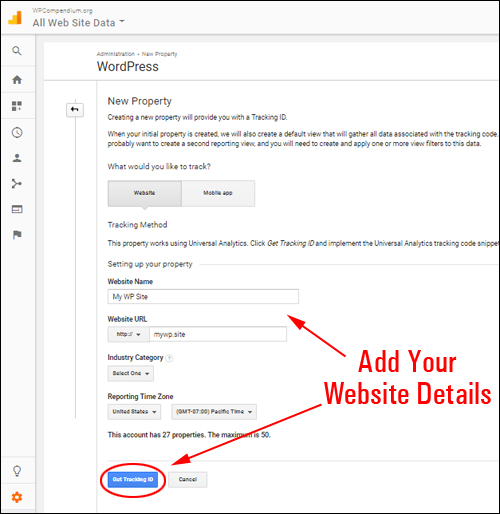
(Add your website details)
A unique ‘Tracking ID’ will be generated for your website along with additional scripts and code …
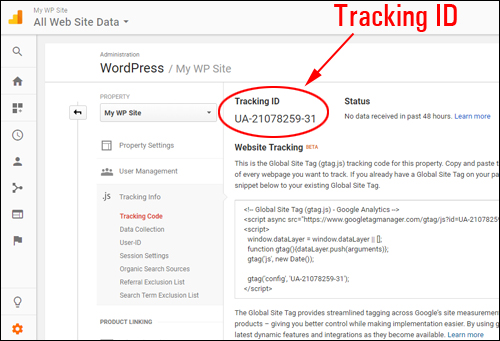
(Google Analytics generates a unique Tracking ID for your website)
![]()
Some WordPress themes let you add your Google Analytics tracking code directly into the theme templates …
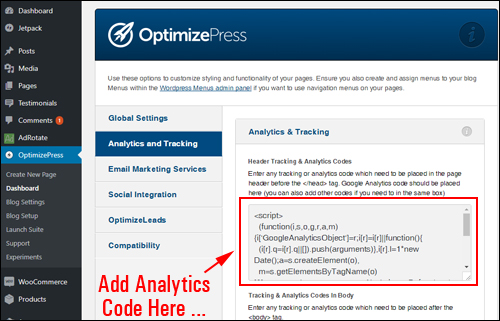
(Some WordPress themes have built-in settings for Google Analytics)
If your WordPress theme has a built-in setting for adding Google Analytics, then all you need to do is log into your Google Analytics account, go to Administration > Property > Your Account > Tracking Info > Tracking Code, select and copy all of the Website Tracking code to your clipboard, then paste the code into the appropriate field inside your WordPress theme settings and click save …
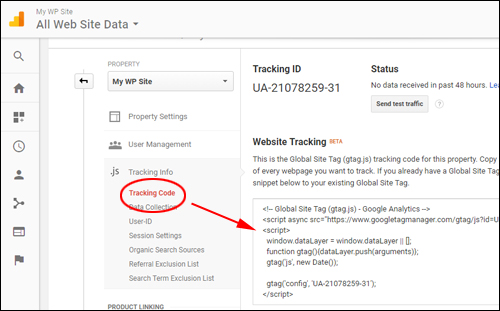
(Google Analytics website tracking code)
Some WordPress themes only require adding your unique Tracking ID.
If your WordPress theme doesn’t have a built-in field for adding Google Analytics, then go through the section below to learn how to install Google Analytics into your WordPress site using a plugin.
If installing Google Analytics via the plugin shown below, you won’t even need the website tracking code, just your unique Tracking ID.
Add Google Analytics Code To WordPress
After adding your website details to Google Analytics, the next step is to install a WordPress plugin that lets you add your unique Google Analytics tracking ID to your WordPress site and begin tracking your site’s activity.
To install a WordPress plugin for Google Analytics, log into your site and go to Plugins > Add New …
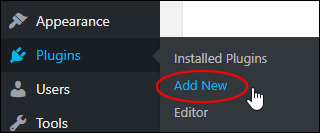
(WordPress Plugins Menu > Add New)
If you need help installing WordPress plugins, see this tutorial:
In the ‘Add Plugins’ screen, type ‘analytics’ into the keyword search field …

(WordPress Plugins – Google Analytics)
As you can see, there are many plugins available that you can use to install Google Analytics into your WordPress site. You can use any plugin you like, as most will work in a similar way.
For this tutorial, we’ll use a Free WordPress plugin called Google Analytics by Share This …
Google Analytics by Share This

(Google Analytics by Share This)
Google Analytics by Share This is a free WordPress plugin that lets you add GA tracking code to your website without touching code or modifying any files. If you manage multiple WordPress sites, this plugin lets you choose which website you want to track from your WordPress admin dashboard. You can also disable GA tracking for specific user types, so that when you browse your own site it won’t bias your analytics.
To install this plugin from your WordPress dashboard, go to Plugins > Add Plugins and type in “analytics ShareThis” in your keyword search field.
Locate the Google Analytics by ShareThis plugin and click on ‘Install Now’ …
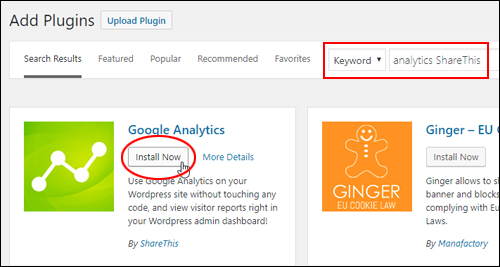
(Google Analytics by ShareThis – Install Now)
After the plugin has been installed, click ‘Activate’ …
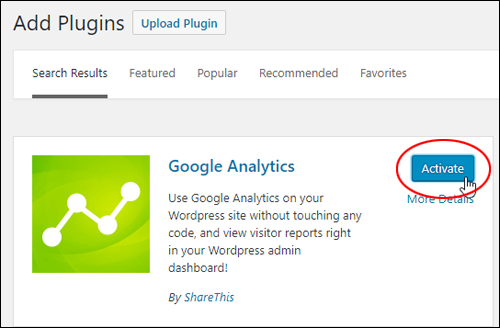
(Activate the plugin)
After the plugin has been activated, you will see a new item on your dashboard menu called ‘Google Analytics’.
To configure the plugin’s settings, make sure that you are logged into your Google account, then inside your WordPress dashboard, go to Google Analytics > Settings …
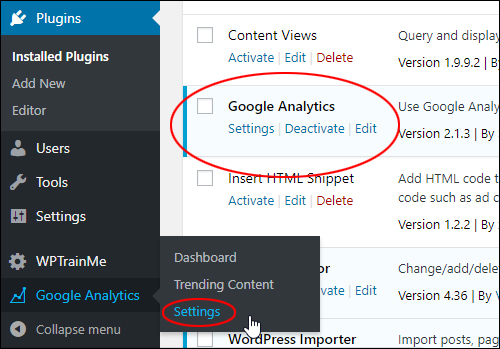
(Google Analytics > Settings)
This will bring up the ‘Google Analytics – Settings’ screen …
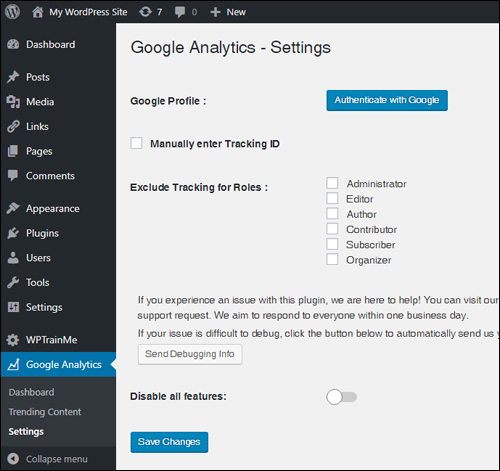
(Google Analytics – Settings screen)
In the ‘Google Profile:’ section, click on ‘Authenticate with Google’ …
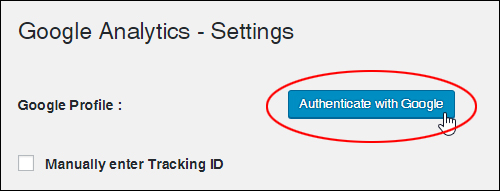
(Authenticate with Google)
This will bring up a couple of windows: one to obtain an access code from Google Analytics, and a second window to paste the access code into WordPress.
First, select the Google account associated with your Google Analytics tracking account …
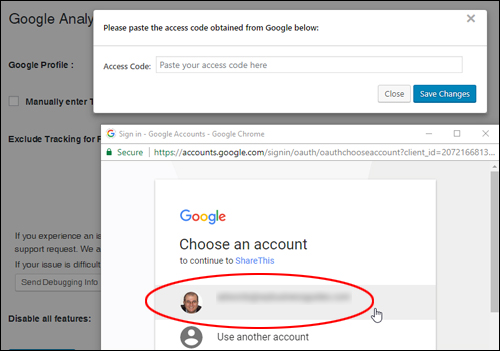
(Select your Google account)
Click ‘Allow’ to give the plugin permission to access your Google Analytics data …
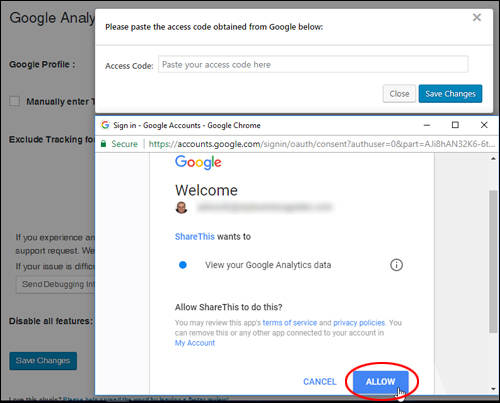
(Allow the plugin to access your Google Analytics data)
Copy the code generated by Google to your clipboard and paste it into the ‘Access Code:’ field, then click ‘Save Changes’ …
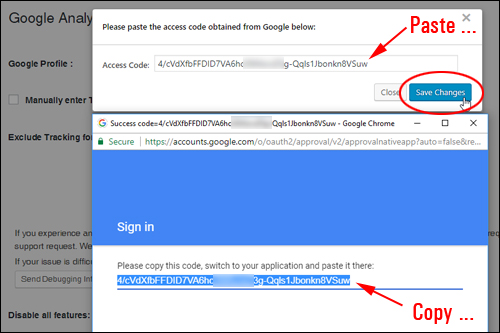
(Copy and paste the access code)
This will connect your Google Analytics account to your WordPress site.
Once these are connected, the ‘Google Analytics Account:’ drop-down menu in your plugin screen will display all of your Google Analytics accounts. Select the GA account you want to link to your site from the drop-down menu …
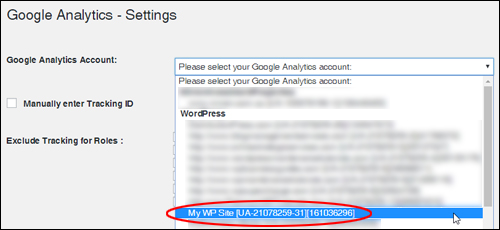
(Select the Google Analytics account to link to your site)
After selecting the account to link to your site, select any user roles you want to exclude from being tracked in your analytics and click ‘Save Changes’.
For example, tick the box next to ‘Administrator’ if you don’t want Google Analytics to count administrators logging into the site as visitors …
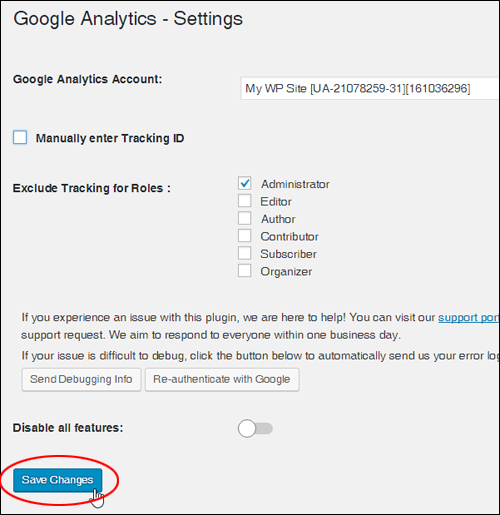
(Exclude tracking for roles and click save)
Your settings will be saved …

(Google Analytics settings saved)
Congratulations … Google Analytics is now installed on your site!
How To Check Visitor Activity On Your WordPress Site
After installing and configuring your Google Analytics plugin, allow 24-48 hours for Google Analytics to gather data about your site’s visitor activity …
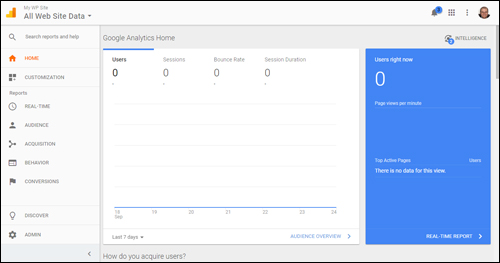
(Allow 24-48 hours for Google Analytics data to show)
If you want to test your connection, log into your Google Analytics account, then go to Administration > Property > Your Site Account > Tracking Info > Tracking Code and click on Status > Send test traffic …
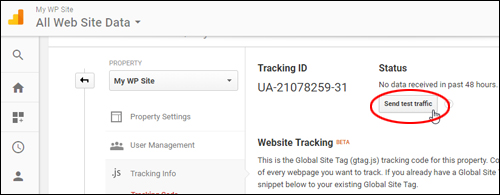
(Test your Google Analytics connection)
After clicking the button, you will see a new window open with your test results and the Status message “Test traffic sent.”
If you can see your site in the testing window, then your connection has been established and everything should be working ok …
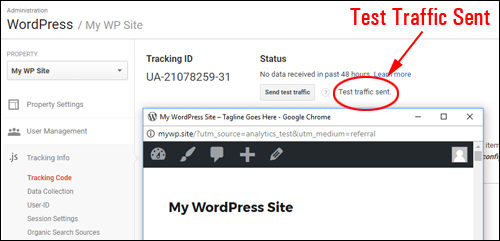
(The connection between Google Analytics and your WordPress site has been established)
To access analytics data from your WordPress dashboard, log into your site and go to Google Analytics > Dashboard …
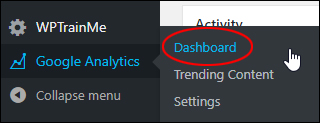
(Google Analytics > Dashboard)
This will bring up the ‘Google Analytics – Dashboard’ screen inside your WordPress admin area …
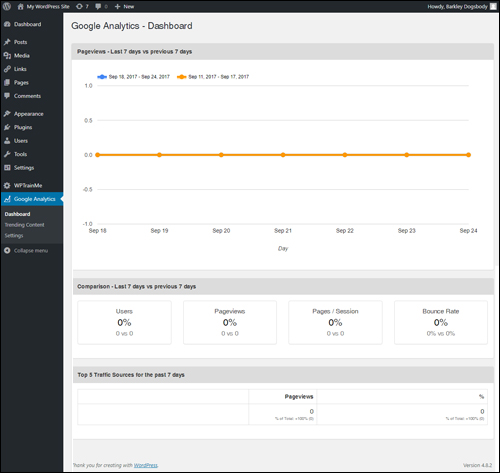
(Google Analytics – Dashboard screen)
Check back in a few days and you should begin to see activity data from your site in your Google Analytics account …
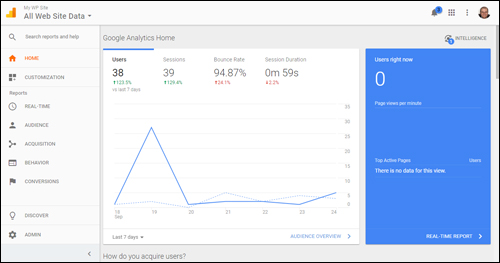
(Google Analytics dashboard)
And inside your WordPress site …
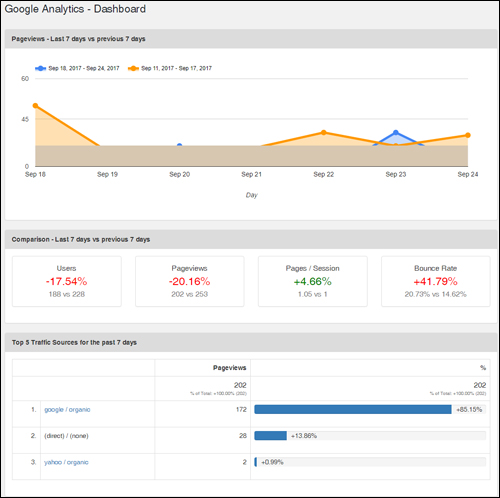
(Access Google Analytics data inside WordPress)
Google Analytics & WordPress – Additional Information
Here are some additional tips for using Google Analytics with WordPress:
Install The Google Analytics App
After installing and setting up Google Analytics in WordPress, we also recommend downloading and installing the Google Analytics app …

(Install the Google Analytics App)
This lets you check your site’s statistics any time from your phone …
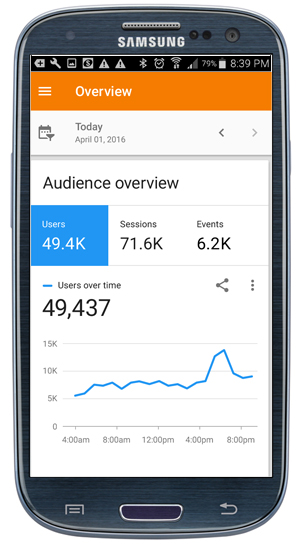
(Check your site’s stats from your phone)
For more information about using the Google Analytics App, go here:
Learn How To Use Google Analytics
The better you understand the behavior of your audience and how visitors interact with your site, the more you can improve your content marketing, your sales, and your conversions.
Knowing where visitors are coming from, how long they stay on your site, what pages they are entering and leaving from, what keywords they are searching for, what devices and browsers they are accessing your site with, etc. is valuable data.
We recommend going through the articles and tutorials in the Google Analytics Help Center to learn how to use all of the features available, online tutorials, Google Analytics videos, etc. …
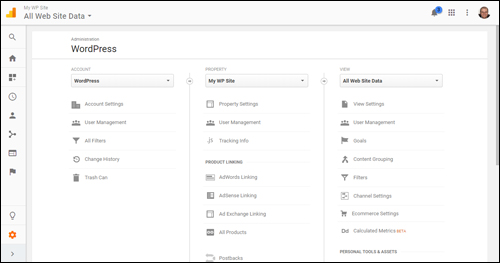
(Learning how to use Google Analytics will improve your sales and conversions)
Congratulations! Now you know how to install and integrate Google Analytics with your WordPress site.

(Source: Pixabay)
***
"These tutorials have so much information and are easy to understand. If you use WordPress or plan to in the future these will help you with everything you need to know." - Valisa (Mesa, Arizona)
***