 This tutorial is part of our FREE WordPress Management training and WordPress Troubleshooting tutorial series.
In this series of step-by-step tutorials, we show you how to troubleshoot and fix common WordPress errors.
If you plan to move your WordPress installation to another directory or change your website from ‘http’ to ‘https’, you will need to edit the URLs in your Settings > General Settings section.
If these fields are greyed out, however, the fields will be uneditable.
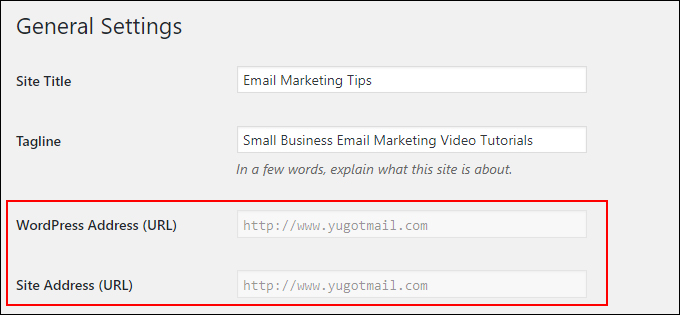
If you find that your WordPress Address (URL) and Site Address (URL) are greyed out on your Settings > General Settings section, the step-by-step tutorial below will show you how to easily fix this issue.
For help configuring your General Settings section, see this tutorial: How To Configure WordPress General Settings
![]()
Important: Always back up your WordPress site (files and database) before modifying files or performing any upgrades or installations!
If you don’t want to perform manual backups, then consider getting help from a WordPress professional, or use WordPress backup plugins.
How To Fix Can’t Change WordPress Website Address – Greyed Out URLs
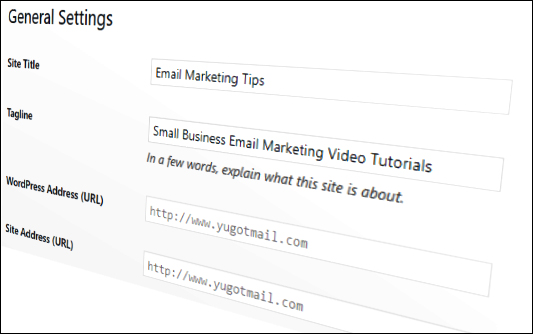
Greyed-out WordPress Address and Site Address URLs can be caused when someone moves or clones a WordPress site but forgets to delete a couple of lines of code or the migration process is interrupted, making the fields uneditable in the General Settings section.

(WordPress General Settings – Greyed out URLs)
To fix this issue, you will need to edit the wp-config.php file in your WordPress installation, either using FTP software, or File Manager in cPanel.
For this tutorial, we’ll use File Manager in cPanel.
How To Edit wp-config.php File Using cPanel File Manager
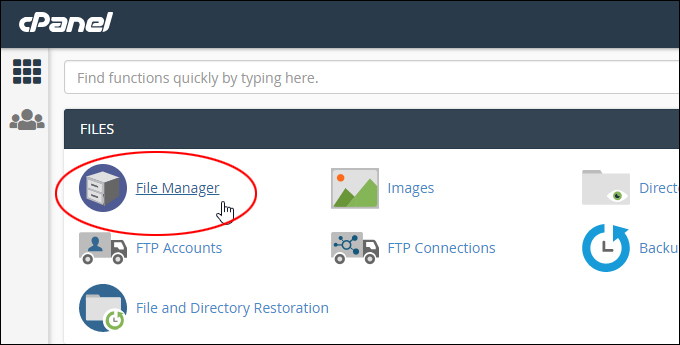
If your WordPress site is hosted on a server with cPanel installed, log into your cPanel control area and click on File Manager (Files > File Manager).
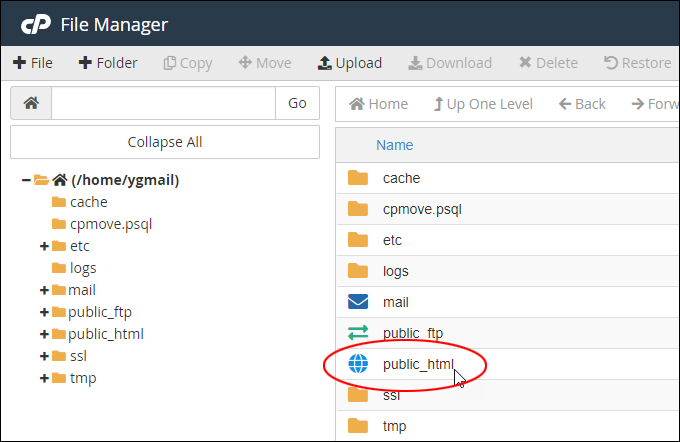
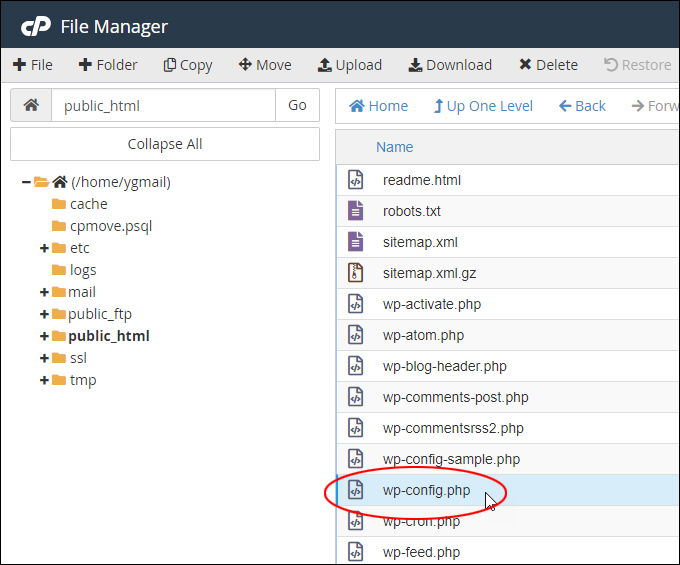
Most WordPress installations are found inside the ‘public_html’ directory. Double-click on ‘public_html’ to open the directory folder.
Locate and select the wp-config.php file.
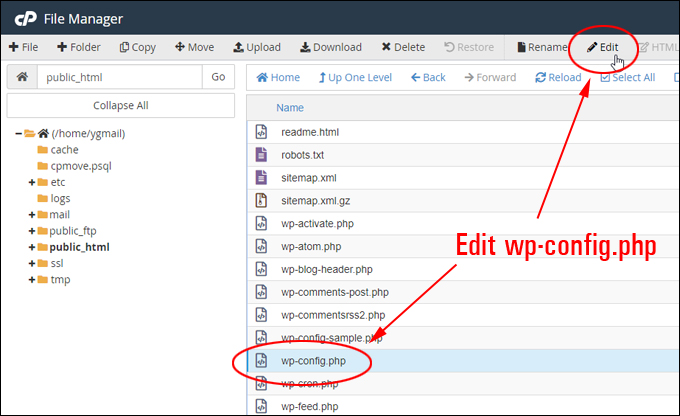
With wp-config.php selected, click on Edit to open the file (note: we recommend making a backup of the file before editing.
To do this, select ‘Download’ first and save a copy of the file to your hard drive).
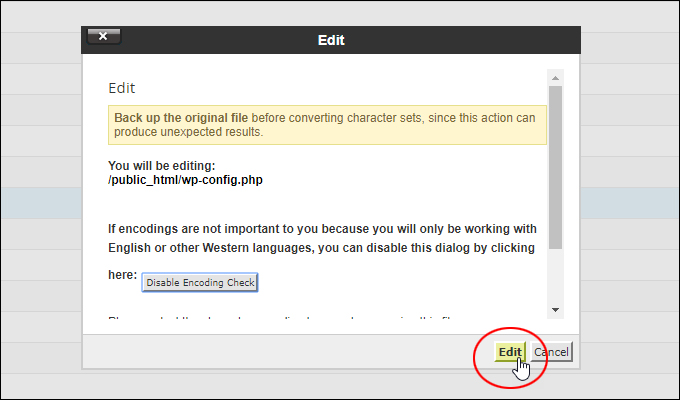
A warning dialog window may pop up reminding you to back up the original file. Click on ‘Edit’ to proceed.
Scroll down through the code in this file until you find the two lines shown below (define ‘WP HOME’ and define ‘WP SITEURL’). The ‘yourdomain.com’ URLs should display your actual domain.

Select only these two lines inside the wp-config.php file, nothing else.
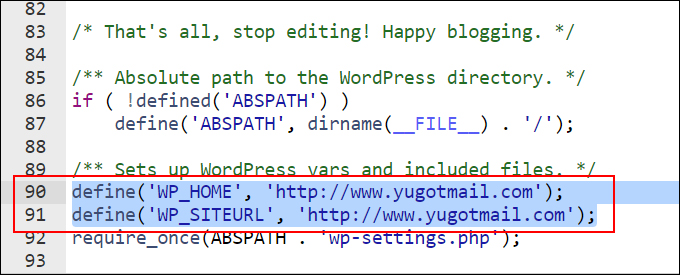
Delete only these two lines, nothing else.
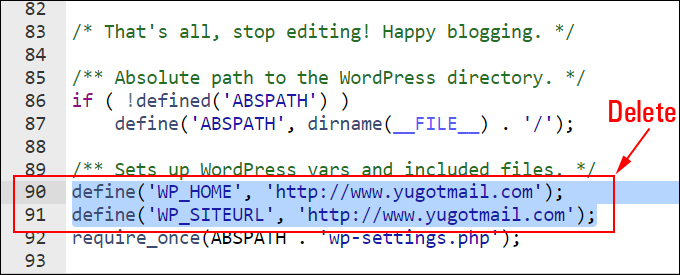
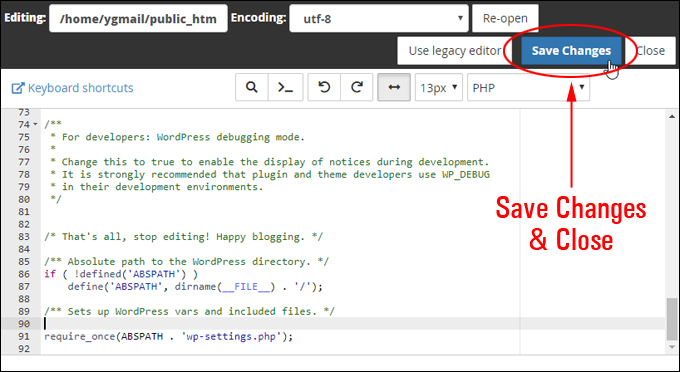
After deleting these two lines of code, the section of your wp-config.php file should look like the screenshot below.

Click the ‘Save Changes’ button to save and update your wp-config.php file and then click ‘Close’ to exit the editing window in File Manager.
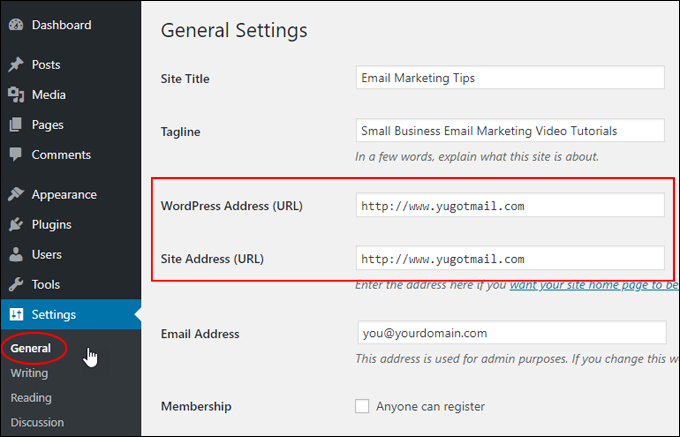
Log out of cPanel and log into your WordPress site’s admin area, then click on Settings > General in the main menu. The WordPress Address (URL) and Site Address (URL) fields should no longer be greyed out but restored to normal and editable once again.
![]()
The above should fix this issue in most instances. If you are still experiencing issues with greyed-out URLs, contact your website developer or web hosting company for help.
Congratulations! Now you know how to fix the issue of greyed-out URLs preventing you from changing your WordPress site address URLs in the General Settings section.
More WordPress Troubleshooting Tutorials
If you experience additional issues with WordPress refer to the tutorials in this section: Troubleshoot And Fix Common WordPress Errors
***
"Your training is the best in the world! It is simple, yet detailed, direct, understandable, memorable, and complete." Andrea Adams, FinancialJourney.org