 Keeping your website or blog secure and protecting your data from hackers against digital theft, digital surveillance, and identity hijacking is important, especially if you plan to set up an e-commerce store or collect information from users or site visitors.
While security is one of the main reasons to migrate your WordPress site from http to https (we’ll explain what this means in a moment), you may also want to do this for SEO reasons.
In August 2014, Google announced that, as part of its bid to further protect users from cyber attacks, it would start treating HTTPS as a ranking signal and prioritizing secure HTTPS URLs over regular HTTP URLs.
In fact, studies conducted by leading search engine analysis companies like Moz.com found that over 30% of all first-page Google results use HTTPS and predicted that this number will continue to grow as part of Google’s “HTTPS everywhere” initiative.
If you own a WordPress site and your website’s address starts with ‘http’ (e.g. ‘http://www.yourdomainname.com‘), then, it’s a good idea to consider switching your site’s URL from ‘http’ to ‘https’ sooner rather than later.
In this tutorial, we’ll show you how to do this.
How To Add SSL To WordPress For Free Using CPanel AutoSSL
![]()
As we provide tutorials for beginners and non-coders, this is not a technical tutorial. The section below provides a brief description of what is involved in changing your WordPress site from http to https and an easy step-by-step tutorial on how to configure your site for https using a free feature of cPanel hosting called AutoSSL.
For detailed technical information, please refer to the sources listed at the end of this tutorial, or contact a professional web service provider.
SSL – Basic Overview
What Is SSL?
SSL (Secure Sockets Layer) is the standard security technology protocol for transmitting private documents via the internet. SSL establishes an encrypted link between a web server and a browser and this link then ensures that all data passed between the web server and web browsers remain private, secure and unmodified.
SSL is the backbone of our secure Internet and it protects your sensitive information as it travels across the world’s computer networks. SSL is essential for protecting your website, even if it doesn’t handle sensitive information like credit cards. It provides privacy, critical security and data integrity for both your websites and your users’ personal information.
(Source: SSLShopper.com)
(Source: SSL.com)
The benefits of using SSL include:
- SSL encrypts sensitive information – If sensitive information like credit card numbers, usernames and passwords is not encrypted using an SSL certificate, any computer that gets between the server sending the information and its intended recipient can see the information. SSL makes sensitive information becomes unreadable to hackers and identity thieves.
- SSL provides authentication – An SSL certificate from a trusted SSL provider protects users from being ‘tricked’ by ensuring that they send personal information to the right server, not to computers pretending to be other websites. HTTPS also protects against phishing attacks.
- SSL provides trust – Seeing the HTTPS icon (green padlock) helps to increase trust on your website and gives visitors confidence to buy or do business with you online.
The advantages of using SSL (protecting your business and your customers’ information, increasing trust, improve SEO ranking etc.) far outweigh any disadvantages like cost (see below to learn how get SSL for FREE) and performance (generally only noticeable on highly trafficked web sites which your webhost can help improve).
Once an SSL certificate has been correctly installed and configured on your server for your domain, the URL of your site displayed in visitors’ web browsers will switch from ‘http://yourdomain.com’ to ‘https://yourdomain.com’ with a green padlock icon next to it …

(‘https’ sites display a green padlock next to the web address)
Note: Depending on the page content, sometimes you may see a padlock with a warning sign. Click on the padlock icon for more information on the site’s security status …
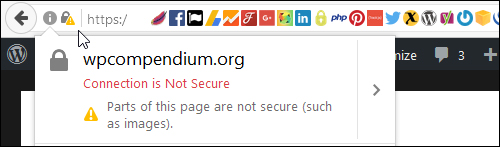
(Click on the padlock symbol for site security information)
Adding SSL To WordPress
We recommend using a reliable web hosting provider and hosting your website(s) on servers with cPanel installed. If you are hosting on cPanel ask your webhost about AutoSSL.
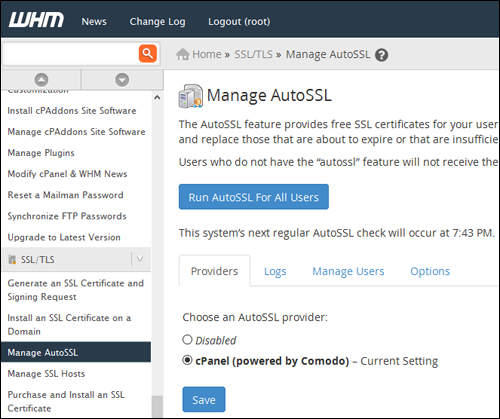
(cPanel AutoSSL)
What Is AutoSSL?
AutoSSL is the solution to one of the biggest pain points that exists for every cPanel & WHM user: SSL installation and renewal. With AutoSSL there are no more forms to fill out, and no more certificates to manually copy into place. Once you enable AutoSSL your websites are automatically secured with a Domain Validated SSL certificate. Perhaps more exciting is the fact that your coverage will never lapse, because at expiration time a new SSL is requested and automatically installed.
(Source: cPanel.com)
You can learn more about AutoSSL here or search online for “cpanel autossl”.
![]()
Ask your host if your server supports cPanel AutoSSL and if so, confirm that you can have it enabled for your website for free. Depending on your hosting setup, you may need to purchase an SSL certificate.
Regardless of the SSL option you choose (i.e. cPanel AutoSSL or purchasing an SSL certificate), we recommend asking your hosting provider to install, set up and configure SSL on your server for your domain. Once this has been done, follow the steps below to make sure that everything works correctly on your WordPress site.
![]()
We strongly recommend performing a complete backup of your WordPress site (files and data) before modifying any files on your server.
You can read about a great WordPress backup plugin that can automate your backup process here:
Backup, Clone And Keep Your WordPress Web Site Protected With Backup Creator WP Plugin
After your hosting provider notifies you that SSL has been installed and configured on your domain, do the following:
Check that SSL is installed. You can do this by going here, then entering your domain name and clicking the ‘Check SSL’ button …
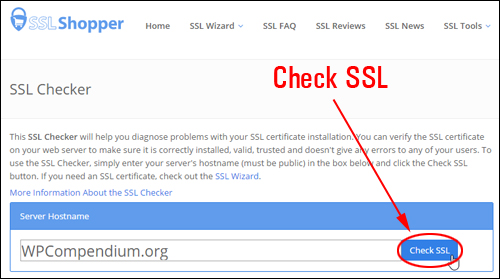
(SSL Shopper – Check SSL Tool)
If SSL has been installed correctly on your domain, you will see confirmation indicators like the ones shown in the screenshot below …

(SSL Installed)
You can also check if SSL is installed on your domain and perform a deep analysis of your SSL configuration by going to Qualy’s SSL Labs …
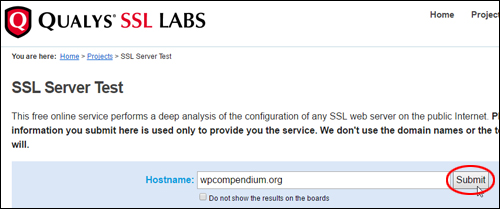
(Qualy’s SSL Labs)
This provides you with an in-depth SSL report …
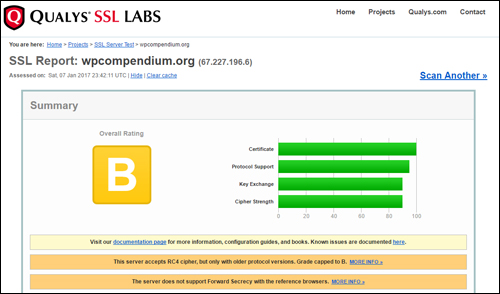
(SSL Report)
Once you have confirmed that SSL has been installed correctly on your server, log into your WordPress admin and go to General Settings.
In the ‘General Settings’ screen …
Replace the ‘http’ in your WordPress Address (URL) and Site Address (URL) fields …

(Replace ‘http’ …)
With ‘https’ and save to update your settings …
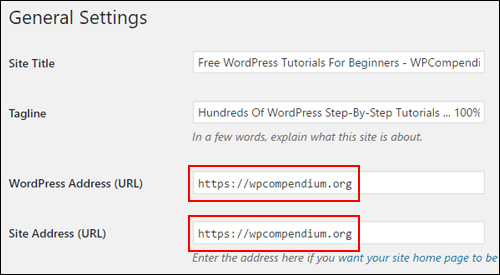
(With ‘https’)
This will log you out of your WordPress site. Log back into your admin area.
The next step is to install an SSL plugin that will scan and fix all code in your WordPress installation to make sure it is compatible with SSL and will not get blocked over SSL.
This includes code in your:
- Theme files
- Plugin files
- WordPress database
- Stylesheets, javascript libraries with http:// links, or resources (like images on http domains).
WordPress SSL Plugins
There are a number of free plugins you can use to make your newly upgraded ‘https’ site compatible with SSL. Here are just a couple (note: you only need to install one of the plugins shown below):
Really Simple SSL
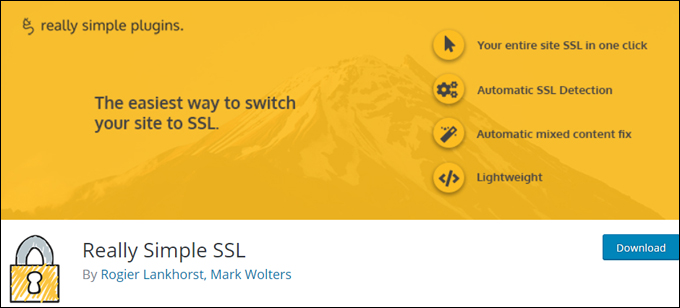
(Really Simple SSL WordPress Plugin)
Really Simple SSL automatically detects your settings and configures your website to run over https. With just one click, your entire site will move to SSL.
To install this plugin, go to Plugins > Add New …
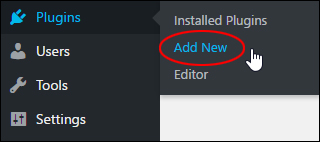
(Plugins > Add New)
Search for ‘SSL’ in the Keyword field to bring up the plugin in the search results and click on Install Now …
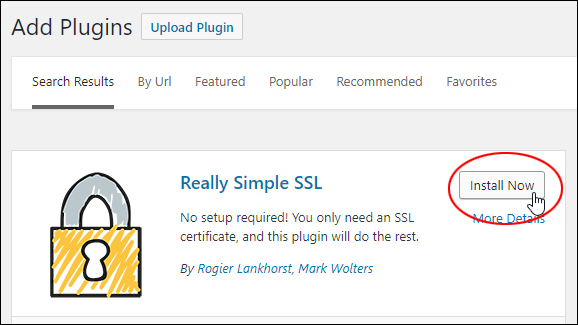
(Really Simple SSL – Install Now)
Click on Activate …

(Activate Really Simple SSL Plugin)
You are almost done. To migrate your site to SSL, just click on the activation button …
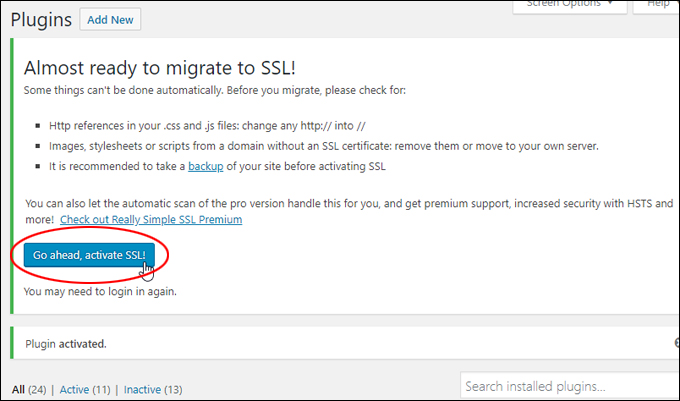
(Activate SSL)
After activating SSL, you may get logged out of your site and need to log in again.
The plugin works out of the box, so there is nothing to configure. The process of migrating your site over to SSL (https) is now complete.
Note: If you are running an e-commerce store, we recommend upgrading to the premium version of this plugin, for comprehensive SSL features. You can learn more about the plugin features here: Really Simple SSL
Below is another WordPress SSL plugin you can use …
SSL Insecure Content Fixer
(SSL Insecure Content Fixer WordPress Plugin)
SSL Insecure Content Fixer cleans up your WordPress website’s HTTPS insecure content and mixed content warnings.
To install this plugin, go to Plugins > Add New …
(Plugins > Add New)
Search for ‘SSL Insecure’ in the Keyword field to bring up the plugin in the search results and click on Install Now …
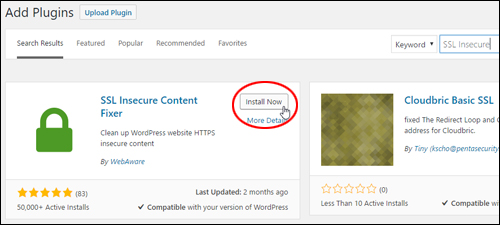
(SSL Insecure Content Fixer – Install Now)
Click on Activate …
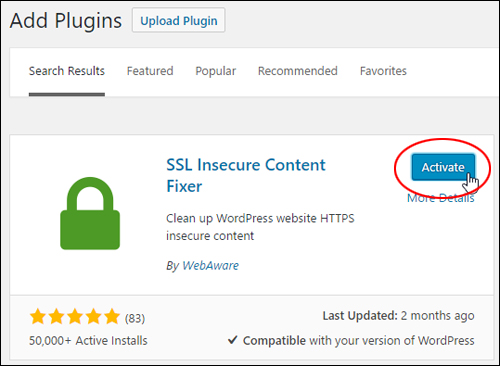
(Activate SSL Insecure Content Fixer Plugin)
This plugin works out of the box. However, if you need to change the settings, go to Settings > SSL Insecure Content, or click on the Settings link in the ‘Plugins’ screen …
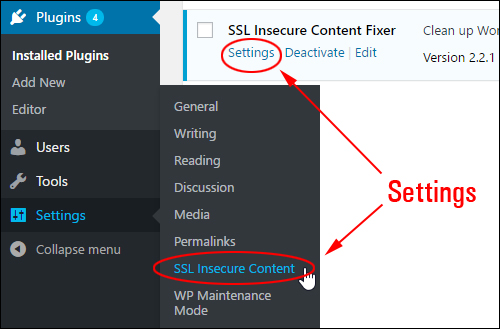
(SSL Insecure Content – Plugin Settings)
This brings you to the ‘SSL Insecure Content Fixer settings’ screen. Remember to save your settings if you make any changes …
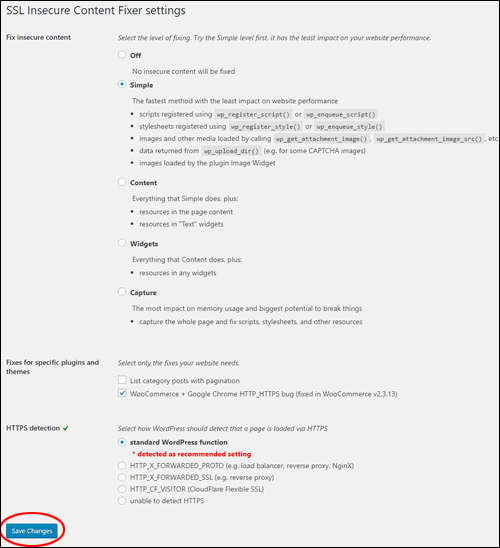
(SSL Insecure Content Fixer settings screen)
For more details about this plugin, go here: SSL Insecure Content Fixer
Moving To HTTPS: Next Steps …
If you are moving a site with existing content to HTTPS, some of your content may be linking to the ‘http’ version of your domain. In this case, you can do a global search and replace to replace all instances of ‘http://yourdomain.com’ with ‘https://yourdomain.com’ …
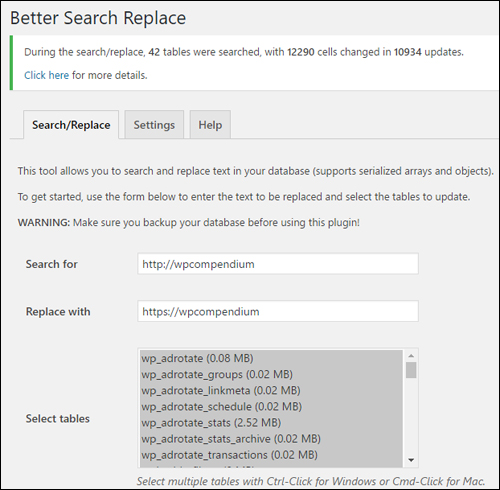
(Perform a global search and replace to change ‘http’ links to ‘https’)
You should also change the default URL settings for your domain in your Google Analytics accounts …
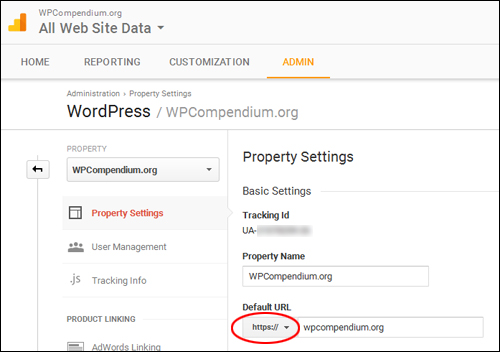
(Update your Google Analytics account)
Remember to also add an HTTPS property to your Google Webmaster account …
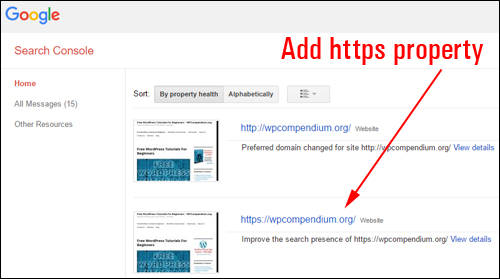
(Update your properties in Google Search Console)
After completing the above, check your site to make sure that everything is working correctly. If you experience any problems, contact your webhosting provider for help.
Congratulations! Now you know how to add SSL to WordPress.
References
- https://blog.cpanel.com/autossl
- https://documentation.cpanel.net/display/ALD/Manage+AutoSSL
- https://www.sslshopper.com/why-ssl-the-purpose-of-using-ssl-certificates.html
- https://www.sslshopper.com/ssl-checker.html
- https://www.ssllabs.com/ssltest/
- https://moz.com/blog/https-tops-30-how-google-is-winning-the-long-war
- https://webmasters.googleblog.com/2014/08/https-as-ranking-signal.html
***
"I was absolutely amazed at the scope and breadth of these tutorials! The most in-depth training I have ever received on any subject!" - Myke O'Neill, DailyGreenPost.com