 As you continue to learn more about WordPress, you may occasionally come across the term blogroll.
A blogroll is a list of hyperlinks pointing to external websites or pages that display on your sidebar area.
According to official WordPress documentation …
“The term ‘blogroll’ was originally used because it was a list of links to other blogs, but you can include links to any sites.”
The Links feature lets you easily add and manage links to a widget-ready theme.
![]()
Before WordPress v.3.5 was released, Links were a visible feature of the WordPress CMS. From v3.5 onwards, the Links manager and blogroll sections were kept hidden by default in new installations …
Before …

(The Links Manager feature – part of the admin menu until the release of WordPress version 3.5)
After …

(The Links Manager feature – no longer included in the WordPress dashboard menu after WordPress v3.5)
If your site had a previously active Link Manager section, then it will still be available when you upgrade to newer WordPress versions. If you’ve never used the Links feature, however, or if your WP installation is new, then this function will remain hidden – it will not display on the menu.
How To Add A Link Section To WordPress
![]()
You can add a link section to your sidebar menu by creating a custom menu, or use a plugin like the one shown in the tutorial below.
If you can’t see the Link Manager section when you log into your WordPress admin area you will need to install a plugin. In this step-by-step tutorial, you will learn how to add, edit, delete and manage blogroll links on your sidebar using plugins.
Link Manager

(Link Manager)
Download URL
http://wordpress.org/plugins/link-manager
Plugin Description
This plugin restores the built-in Links Manager, even if you upgrade to a later version of WordPress or remove all of your existing links.
Note: This plugin adds a single line of template code to restore the hidden feature. When we last checked, the plugin had not been updated for some time, but it should still work fine. If you don’t want to use this plugin, then use the one below instead, or contact us for help editing your template code.
Simple Links

(Simple Links)
Download URL
https://wordpress.org/plugins/simple-links/
Description Of Plugin
Simple Links attempts to recreate the concept of the built-in WordPress Link Manager while addressing the shortcomings of the deprecated feature.
Installing Link Manager
To install the Link Manager plugin, follow these step-by-step instructions:
From your WordPress administration area, select Plugins > Add New …

(Plugins – Add New)
Click on the Install Plugins > Search tab, then type ”link manager” into the search field and hit Enter …

Locate the plugin in the results screen and click Install Now …

Activate the plugin …

Once the plugin has been activated, a ‘Links’ section will be added to the WP dashboard menu …

(WordPress links management menu section)
Setting Up The Plugin
Before adding links, it’s a good idea to set up your link categories. This way, you can assign new links to a link category you have already created.
Link Categories
To create a link category, choose Links > Link Categories in the WP admin menu …

(Links Menu – Link Categories)
This brings up the ‘Link Categories’ page.
Enter the following information:
- Name: Whatever you type in this field will display as the category your links will be assigned to.
- Slug: The slug is the web address part of the link category. Use only lowercase letters without spaces (use hyphens to separate words).
- Description: Some themes may display your link category description. (Optional)
Click the Add New Link Category button …

(Link Categories area)
The new category will now show in the list …

(Link Categories)
![]()
Tip: The default WordPress link category is called Blogroll . Unless you specify the category when adding a link, WordPress automatically assigns new links to the default category …

(Default link category)
You may want to change this to something better suited to your business. This will not only make it easier for visitors, but any new links that you add to the Links section will automatically be assigned to the new category name …

(we recommend changing the default link category name to something your visitors will understand)
To edit the ‘Blogroll’ link name, hover your mouse over the item and click on Quick Edit …

(Editing the link category)
Change both the Name and the Slug with a new category name, and click on Update Link Category …

(Quick Edit)
In our example, we’ve replaced the category name ‘Blogroll’ with an appropriate links section category name (e.g. ‘Recommended’).
Let’s add a description for this link category. To add a description to an existing link category, click on Edit under the category name …

(You can add/edit the category description)
Add your description in the ‘Edit Link Category’ screen and click Update …

(Edit Link Category screen)
Repeat this process and add as many different link categories as you need.
Once you have finished configuring your link categories, you can add your links.
How To Add New Links
To create a new link, choose Links > Add New in the main dashboard menu …

(WordPress Links Menu – Add New)
The ‘Add New Link’ screen will display in your web browser …

(Add New Link screen)
You can also reach this page by clicking on the ‘Add New’ button at the top of the main Links screen …

(Add New Link button)
The ‘Add New Links’ page is divided into a number of sections:
Name, Web Address & Description
Enter your link details in this section …

(Name, Web Addressand Description fields)
Enter information into the following sections:
- Name: What you enter here is the link category name that will display on your site.
- Slug: The slug shows up in the search-engine friendly URL of the link category. It must be in lowercase letters and contain no spaces (use hyphens to separate words).
- Description: Some themes may display a link category description in the links section, or as a tool tip when visitors hover over the link name with their mouse. (Optional)
Categories & Target
After adding your link details, select a Category and Target for the new link …

(Categories & Target)
In the Categories section, tick a link category you’ve already created, or click on ’+ Add New Category’ to create a new category.
Also, select a target frame radio button for your link in the Target section. This lets you specify how the link should open when clicked on by visitors:
- _blank means that when visitors click on the link, a new window will open up in their web browser to display the content associated with the link. Your visitor can access the link information without leaving your website
- _none means that when a visitor clicks on your link, they will exit your site and a new website or page will load in your browser window instead.
- _top opens the link at the top level of the frame system if you’re using frames. Don’t worry about this option if you don’t use frames, or if you don’t know what frames are.
Link Relationship XFN
This area provides some additional link functionality …
 area")
(Link Relationship (XFN))
Link Relationship (XFN) – XFN (XML Friends Network) is a way to define your relationship to the linked person. For example, if you have a professional relationship with Aaradhya Fields and you link to her blog, you would probably check co-worker or colleague.
XFN relationships are optional. You can ignore this section and your links will still work. XFN makes your links more understandable to some websites and search engines that use this information.
rel – This field specifies the ‘rel’ attribute that will be assigned to your link. The rel attribute specifies what relationship exists between the current document and the linked document. For example, if you don’t want search engines to follow your link, type nofollow into this field.
You can learn more about XFN by visiting the site below:
Advanced
The last section of the Add New Link’ screen allows you to enter Advanced features for your links (You can leave the fields in this section empty unless you have a reason to use them) …

(Add New Link – Advanced link settings)
The Advanced section contain the following fields:
- Image Address: Specify an image to be displayed with the link. To use this feature, add the URL of your image and make sure that your image is small (around 16×16 like a favicon).
- RSS Address: If your theme allows it, the link’s RSS feed will be displayed next to the link.
- Notes: Add notes about the link in this section for your own internal reference.
- Rating: You can add a rating score to the link if you would like to sort links by rating (see the ‘Links’ widget section below).
Type in your information in the above fields or just leave this section blank.
When you have finished adding your new link information, click on Add Link to save your new link …

(Click on Add Link to save your new link)
![]()
Note: If you select Keep this link private, the link will not be visible in your Blogroll section …

(Make your links private)
Making a link private allows you to toggle its visibility on or off without deleting it (this is useful if you would like the link to display during certain times and hide it afterwards) …

(Toggle link visibility on and off)
To see a list of all the links you have created, go to the dashboard menu and click on Links > All Links …

(Links Menu – All Links)
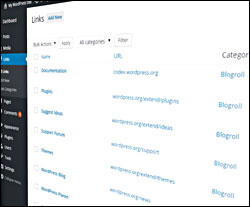
The ‘Links’ screen will display in your browser. The list of links displays all of your links and link information (e.g. link URL, link categories, relationship, etc.) …

(Links screen)
![]()
Tip: To view additional information in the list of links, click on the ‘Screen Options’ tab near the top of your screen …

(Screen Options – List of links)
Enable/disable fields on your table of links by selecting/deselecting their checkboxes …

(Table of links – Show/hide screen options)
Editing Links
To edit links, go to the WP dashboard navigation menu and click on Links > All Links to bring up your table of links …
(Links Menu – All Links)
Select the item you want to edit and click on Edit to bring up the link’s details …

(Editing links)
Edit your link fields …

(Edit Link screen)
After you’re done editing the link, you can:
- Click on Update Link to save your link details,
- Click on Visit Link to view your link and check that you have set up your link’s URL correctly (your link will open in a new window),
- Click Delete to remove the link if it’s no longer required …

(Update Link button)
Deleting Your Links
To delete links from the Link Manager, select Links > All Links in your WP dashboard navigation menu …
(WP Links Menu – All Links)
The ‘Links’ page will display in your browser.
You can delete links individually, delete multiple links by selecting their check boxes, or perform a bulk delete.
To delete individual links, hover over the link title you want removed and click on Delete …

(Delete your links)
To delete multiple links, either tick the checkbox next to every item that you would like deleted, or select all links by clicking on the main check box next to the ‘Name’ column header at the top of the list …

(Delete multiple links)
Select Delete from the ‘Bulk Actions’ menu, and click Apply to remove your selected links …

(Bulk-delete links)
Your selected links will be removed …

(Deleted links notification)
Plugin Usage
Now that you know how to set up link categories and how to add, edit and delete links, let’s show you how to make links display on your site.
Using The Links Widget
Installing the Link Manager plugin adds a ‘Links’ widget to your ‘Widgets’ section.
To access and configure your Link widgets, choose Appearance > Widgets in your WP dashboard navigation menu …

(Appearance Menu – Widgets)
This loads the ‘Widgets’ screen in your browser.
You will see a ‘Links’ widget in the Available Widgets section …

(Links widget)
To make the ‘Links’ widget active, drag it to one of the active widget sections and drop it wherever you want the links section to show up …

(Add a links widget to your widget bar using drag & drop)
The Links widget offers a number of configurable options. For example, you can specify what information you want to show about your links and how many links you want to display on your sidebar menu …

(Link widget - settings)
You can also add as many link widgets to your sidebars and footers as you want. This allows you to add and display link categories on your site …

(You can add a number of link widgets to your widget bars)
Display links for a specific category …

(Link widget settings – Select Link Category)
You can sort links by Link title, Link ID, Link rating, or display links in Random order …

(Link widget settings – Sorting options)
Once you are done configuring the Links widget, click the Save button to update your settings. A link section should show up immediately on your website …

(An example of how links can be displayed on your site’s sidebar)
As the above example shows, you can display specific links to your site visitors (e.g. a list for a specific link category only), and add multiple lists of links to your sidebar menu.
![]()
Need help with widgets? Go here if you would like to learn more about using widgets:
Link Manager – Additional Information
If you have many links, the Links Manager plugin allows you to easily administer these with sort, filter, and search functions.
Sorting Your Links
To sort links, hover your mouse over the title of the column you want to sort and click on the little triangle displayed next to the column title …

(You can easily sort your links)
Search Your Links
Type a search term into the search field and click the Search Links button to search for links …

(Finding links)
Filter Your Links
You can filter links by categories …

(Filter links by link categories)
You can also search and filter links in the Link Categories page. Use the ‘Search Link Categories’ button to search for link categories, or click on the links in the ‘Links’ column …

(Search and filter links in the Link Categories page)
This brings up a list of all links grouped under a specific link category …

(Links filtered by link category)
Links – Additional Options
If you plan to add a lot of links to your site, or if you intend to add a ‘Links’ page to your site (i.e. not just add links on your sidebar), then you may want to look at using a plugin that can help you administer your links, like Link Library.
Link Library

(Link Library)
Plugin Download URL
http://wordpress.org/plugins/link-library/
Plugin Description
Link Library allows you to publish a list of your link categories with a complete list of all your links with notes and descriptions …

(List of links created with Link library. Image source: Link Library plugin documentation.)
Link Library can be used to create a page on your site containing all the link categories in your Links area, plus all links defined for these categories. You can select a sub-set of categories to display or not display, show only one category at a time, display a search box and find results based on visitor queries, display a form to accept user submissions that can be moderated by a site administrator, and even generate an RSS feed of your link collection so that your site users can be made aware of any additions made to to your link library.
Go here for more information about the benefits of using this great plugin:

Congratulations! Now you know how to how to add a blogroll and manage links to other websites and pages in your WordPress sidebar menu.
![]()
We have written a detailed article on adding HTML links to your WordPress content. Go here to learn more about this:
***
"I love the way your email series "Infinite Web Content Creation Training Series" is documented and presented. It is very absorbing and captivating. The links and tutorials are interesting and educational. This has motivated me to rewrite my content following the concepts I am learning from the email series." - Mani Raju, www.fortuneinewaste.com