 This tutorial is part of our tutorial series on WordPress Security. In the previous section of this tutorial, we looked at ways of adding a physical layer of security between your computer and the internet. In this tutorial, we show you how to harden computer security.
Please also review our WordPress Security Guide For Beginners and our free WordPress Security Checklist.
***
How To Harden Computer Security
Hardening computer security makes your computer very difficult to break into on multiple levels.
Use the methods below to help you harden your computer against attackers:
Create A Decoy Admin
Red Herring: something that misleads or distracts from the relevant or important issue.
(Wikipedia)
If someone is trying to hack into your computer, the most likely thing they will want to do is to actively search for your admin account, as this will then give them complete control over your machine, including the ability to modify all of your device settings and access all of your data.
A quick and easy strategy that you can implement to thwart hackers, is to create a ‘decoy’ admin user.
In simple terms, you change your real admin user account to a name other than ‘admin’, and create a fake user account with limited privileges named ‘admin’ instead. This way, if someone does hack into your computer, and are able to access the fake ‘admin’ account, they will not be able to control anything, or access any of your important settings or data.
If your current administration user account is named something that is obviously associated with the ‘admin’ account (e.g. “Admin”), then the first step is to change the name of this account to something less conspicuous.
To change your admin user name, click the ‘Start’ button and choose ‘Control Panel’ …

Select ‘User Accounts’ …

Click ‘Add or remove user accounts’ …

Click on the administrator account …
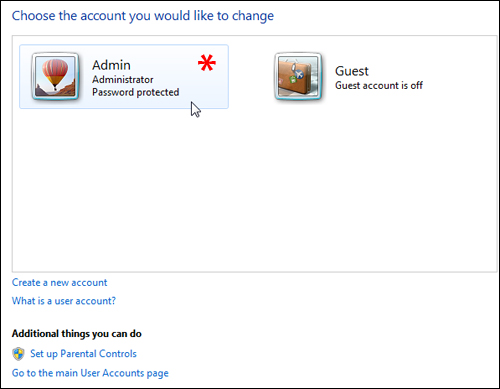
Click on ‘Change the account name’ …

Type in a new account name for your ‘Admin’ account and click on ‘Change Name’ to update your system settings …

Your admin account now has an inconspicuous name …

Now, let’s create a ‘decoy’ admin account.
Repeat the above process to get to ‘User Accounts’ > ‘Add or remove user accounts’ …

Click on ‘Create a new account’ …

Name this account ‘Admin’, but remember to select ‘Standard user’ for the account you are creating …

Your new ‘admin’ decoy account is now created …

Anyone looking at your computer would not think of trying to crack the real admin account on their first attempt, as the real admin is disguised as an ordinary user account …

Check Your Computer Protection Settings
The next step is to increase the built-in protection of your computer.
Microsoft Windows has a utility called msconfig (short for Microsoft System Configuration Utility) that allows computer administrators to troubleshoot system issues by disabling software and device drivers. This windows utility can also help to harden the security of your computer.
Here’s how to do it:
Click on the ‘Start’ button …
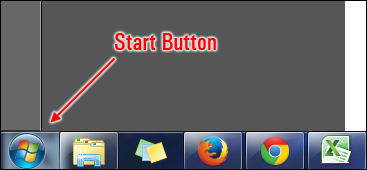
Type msconfig into the search box and click on the link when the search returns the utility under ‘Programs’ …

Click on the ‘Tools’ tab, then select ‘Change UAC Settings’ and click the ‘Launch’ button …

The ‘User Account Control Settings’ screen lets you adjust the protection settings on your computer that can help prevent potentially harmful programs from making changes to your computer.
To increase the security of your computer, move the slider from ‘Never notify’ to a higher settings …

Moving the slider to the highest setting (‘Always notify’) provides the maximum security …

To learn more about what kind of protection is provided by the different settings, click on the ‘Tell me more about User Account Control settings’ link.
We have reproduced below the information you will see when you click on the utility’s information link …

You will need to restart your computer for the changes to take effect …

Note: If you notice your computer slowing down when you install new software programs, you can turn the protection slider all the way down before installing new software, and restore the security settings afterwards.
Check Your Computer Ports
As well as providing an interface for connecting your computer to other devices (e.g. printers, external hard drives, USB devices, etc …), computer ports identify different applications or processes running on a computer and then allow these to share a single physical connection …

Here is an easy way to think about computer ports: If your computer was a television, then your computer ports would be the channels. Just as you can turn on a tv and tune into hundreds of channels, you can also use different computer ports to access different processes and applications on your computer. In fact, there are over 65,000 different computer ports available.
The first 1024 ports on your computer are already assigned for specific purposes, such as email, FTP, internet access, chat applications, etc… but the rest have unspecified purposes, and can be used for things like file storage.
Ports 49152-65535 are regarded as being private, and will set off red flags if your firewall software detects any suspicious activity happening in these channels.
You can check to see which ports on your computer are open and vulnerable to hackers, using a free online tool called ShieldsUp! …
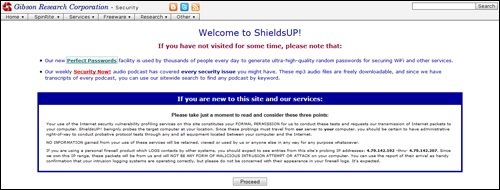
Read the information on the ShieldsUp! page before using the tool, as it will help you understand how the application tests your ports. After reading the description, click on ‘Proceed’ to continue …

You will be presented with a number of port scanning options. Select ‘All Service Ports’ …

The application will begin analyzing the status of your system’s first 1056 ports. If everything is okay, you will get a result as shown in the screenshot below …

To view which port each element of the grid represents, simply hover your mouse over one of the little squares …

Hardware Component Security
WiFi Card Security
If you use a laptop computer in public places (e.g. at a coffee shop), then be aware that wireless networks and WiFi hotspots are a prime source of targeting by hackers, searching for computers with unsecured connections and other security vulnerabilities.
To protect your computer from being hacked through your wireless connection, locate your WiFi card model ID and then search online to see if anyone is discussing security issues related specifically to your WiFi component.
To locate any hardware component ID, click Start > Computer …

Click on ‘System properties’ …

Select ‘Device Manager’ …

You will find your WiFi hardware component under ‘Network Adapters’ …

Disable Sharing Options
Microsoft Windows allows you to configure your computer settings to share files and applications with other computers on a home or office network.
This creates potential opportunities for hackers to infiltrate your network, view all of your system components and access your computer and/or files.
If you do not require these options to be on, you can disable them as follows:
Click on the ‘Start’ button, type ‘advanced sharing settings’ into the Windows search tool and click on ‘Control Panel’ > ‘Manage advanced sharing settings’ …

This brings up a screen with your network profile settings. There are two main options: ‘Home or Work’ and ‘Public’. Go through the settings in each option, and turn off any sharing options that are unnecessary (e.g. file and printer sharing) …

Of course, if you are on a network and do require sharing options to be available, then don’t turn these off.
At the very least, keep your account password-protected.
To learn more about password security, see the tutorial below:
Registry Protection
The registry is a database on your computer that keeps track of everything on your computing environment, like hardware, software, user profiles, settings, etc …
For example, your registry can contain records of the following information:
- Files you have downloaded (name, type and source of files)
- Passwords you have stored in applications
- List of mounted storage devices
- List of wireless networks that your computer connects to
- etc…
Many spyware programs try to access the registry to obtain information about your computer, or to try and modify it, which can cause serious problems.
It’s a good idea, therefore, to regularly clean the registry in order to avoid having your computer information exploited by malicious users.
Registry files can be cleaned manually, but this requires some technical knowledge.
If you’re not technically inclined, then we recommend using an application like CCleaner to clean your computer registry, as any mistakes could cause your computer to seriously malfunction (or not reboot at all) …
CCleaner

CCleaner is a fast, versatile system optimization, privacy and cleaning tool that removes unused files from your system, allowing Windows to run faster and freeing up hard disk space. It also cleans traces of your online activities such as your Internet history, and contains a fully featured registry cleaner that makes cleaning your registry files easy.
To learn more about CCleaner, visit the site below:
Clear Cached DNS Entries
The Domain Name System (DNS) was created to make it easier for humans to reference website addresses.
For example, when we want to visit Google.com we type in an easy-to-remember web address using Google’s domain name …
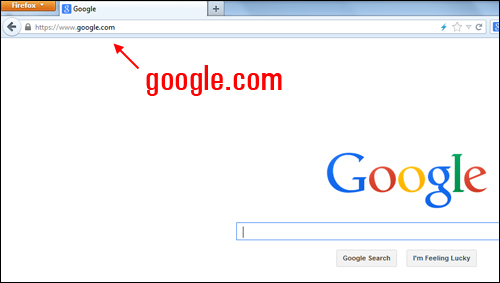
Your computer, however, doesn’t see domain names – it only recognizes IP addresses instead! Every time you visit a website, your computer operating system actually sees the IP address.
You can visit Google’s website simply by typing in its IP address into your browser …
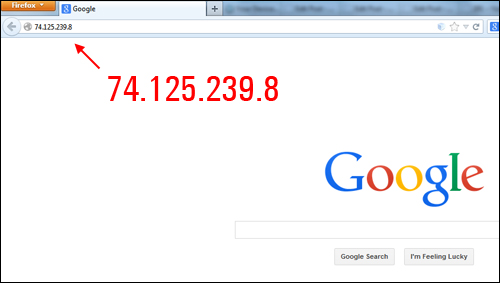
Domain names, therefore, make things convenient for humans (so you don’t have to remember a bunch of numbers every time you want to visit a website).
When you visit a website, the IP addresses of the visited sites remain on your computer. Knowing which websites you have visited can be potentially useful information for hackers, as it may reveal personal information about you.
Sophisticated hackers can retrieve information about websites that you have visited by analyzing cached DNS information.
To clear the cached DNS entries and erase this information, click on the ‘Start’ button, then type in “cmd” into the Windows search tool, and click on ‘Programs’ > ‘cmd’ …
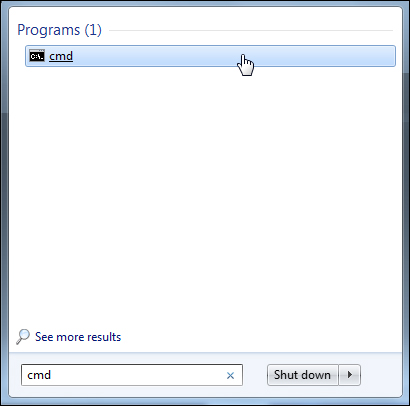
A terminal window like the one shown below will display …

Type the text below into the terminal window (in the blinking cursor) …

Type in the above command, and press the ‘Enter’ key …

A list of all cached DNS entries will display …

To clear the cache, type the text below into the terminal window (in the blinking cursor) …

Type in the above command, and press the ‘Enter’ key …

Your DNS cache will be flushed and all DNS entries will be erased. …

Repeat this process every so often to empty out your DNS cache.
Destroy Deleted Files
Deleted files on your computer can be easily recovered if you use normal file deletion methods (e.g. right-click and select ‘delete’, or emptying out the trash), or even if you reformat your hard drive.
Normally, “deleted” files aren’t actually erased from your computer – what happens is that the entry to the file is removed so that you can no longer see it or search for it, and the entry is then marked as being available for a new file to overwrite it. Since hard drives can store so much data nowadays, however, it can take a very long time for deleted files to be overwritten. Your deleted files, therefore, will still likely exist on your drive, and any savvy computer user can retrieve these using widely available data recovery tools.
Unlike “file recovery” software that can retrieve deleted files, “file deletion” programs actually destroy data by rewriting the files with random series of binary data multiple times so that it is almost impossible to recover the file content. This process is called “shredding”.
Just as confidential information stored in old files get shredded by many businesses, so can you ‘shred’ your deleted electronic files and permanently destroy them on your disk.
Here are some file deletion programs and utilities to consider:
File Shredder
 File Shredder is a Windows-compatible open source application. Files removed with File Shredder cannot be recovered.
File Shredder is a fast, safe and reliable tool and can be downloaded for free without restrictions for the permanent and safe removal of your confidential documents.
To learn more about File Shredder, visit the site below:
Eraser
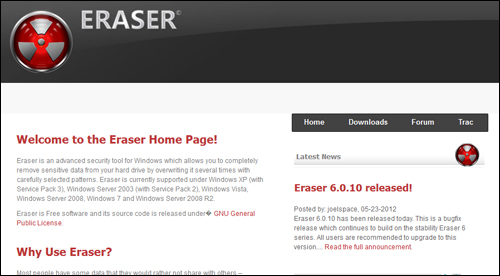 Eraser is an open source advanced security tool for Windows that allows you to completely remove sensitive data from your hard drive by overwriting it several times with carefully selected patterns.
Eraser is Windows-compatible, works right out of the box and is available as a free download.
To learn more about Eraser, visit the website below:
Next Step:
Now that you know how to harden your computer security, the next step is to learn how to keep your computer operating system up-to-date.
To learn how to keep your computer operating system up-to-date, see the tutorial below:
See Also …
- Computer Security Guide For WordPress Users
- Creating A Computer BackUp System
- How To Add A Physical Layer Of Security Between Your Computer And The Internet
- Additional Computer Security Tips
References

(Source: Pixabay)
***
"Wow! I never knew there's so much to learn about WordPress! I bought one of the WordPress for Dummies three years ago, such authors need to be on this course!" - Rich Law, Create A Blog Now
***