The WordPress Dashboard
In this step-by-step tutorial, you will learn about the WordPress dashboard, how to use it to manage all the different areas of your website or blog, and how to navigate the different sections of the dashboard to access your site’s main administration and management features.
You will also learn some useful “hidden” features of the WordPress dashboard that will help you to manage and use your WordPress site more effectively.
![]()
Note: For this tutorial, we’ll assume that you already have a WordPress website set up and that you know how to log into your site’s admin area.
If you need help logging into WordPress, see this tutorial: How To Log Into WordPress
If you’re not sure whether or not your website is built using WordPress, see this tutorial:
Learn why you should choose WordPress and the benefits of using the WordPress Content Management System to power your website or blog here:
Your WordPress Dashboard
Your website was built using the WordPress platform.
The WordPress Dashboard is normally the first thing you will see after logging into your site’s administration area.
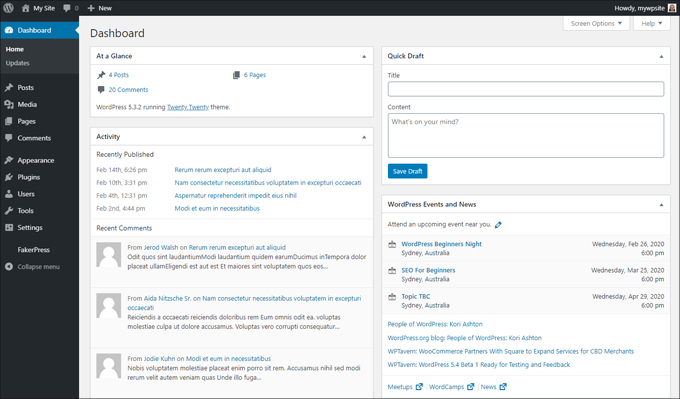
All of your website’s management and administration tasks are performed inside this admin area and can be accessed via the Dashboard.
Your WordPress Dashboard Explained – Useful Information
- As you will see shortly, the WordPress Dashboard is divided into various sections.
- Every user on your site has access to their own dashboard.
- The dashboard can be customized to suit your needs and/or preferences and will display different information, different settings, different features, and different tools depending on the role and the access privileges you have been assigned (e.g. administrator, editor, contributor, etc.)
The WordPress Dashboard provides users with access to:
- Control and management of all your site’s settings and options.
- Features that enable you to add, edit, and delete your content, modify, and enhance your site’s design and functionality, upgrade, or remove plugins and themes, etc.
- System updates and notifications.
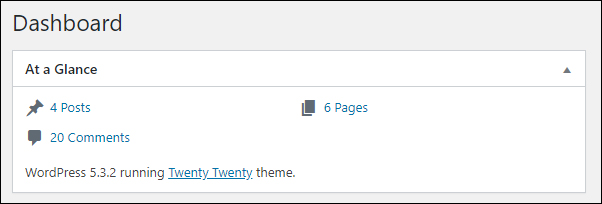
- Useful data, information, and “at-a-glance” metrics and reports about the activities taking place on your site.
- News and announcements from the WordPress community, including WordPress-related resources and announcements from plugin/theme vendors and developers (these announcements will only display if you have certain plugins or themes installed on your site).
In version 3.8, WordPress introduced a completely redesigned administration area.
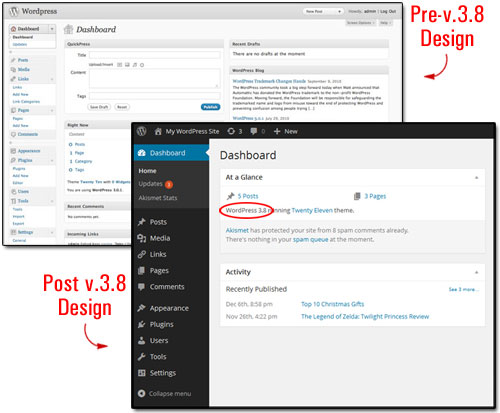
This redesign was done mostly for aesthetic purposes. It aimed to give WordPress site administrators and web developers improvements like:
- Cleaner typography for an optimized mobile and desktop viewing experience;
- Easier to read sections and screens;
- More options and ways to customize the look and feel of the site’s administration area.
WordPress is continually evolving and improving, so expect to see changes in design or functionality when you log into your dashboard as new features are added or new versions are released.
Note: This can affect WordPress documentation (e.g. tutorial screenshots and videos, etc.)
WordPress Dashboard – Sections
The Dashboard gives users with administrator privileges access to all the features, settings, options, and controls required to manage your site effectively.
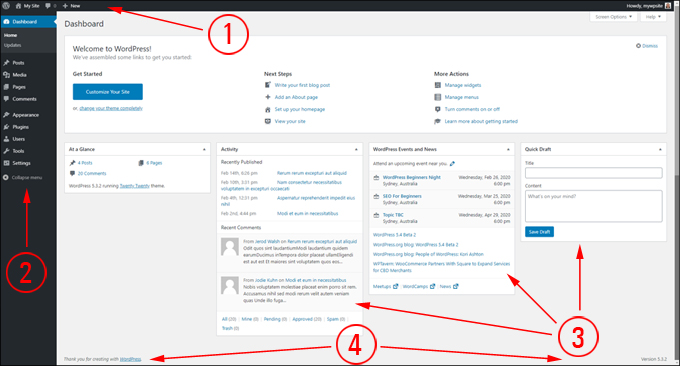
The Dashboard is divided into the following sections:
- Header And Toolbar Section
- Main Navigation Menu
- Work Area
- Footer Section
WordPress Dashboard: Header & Toolbar Section
Header
The header section displays system updates, warnings, and notifications.
For example, you may see system updates and notifications when a new version of WordPress is released.
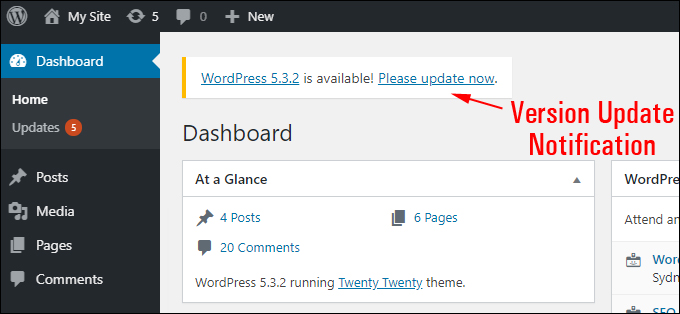
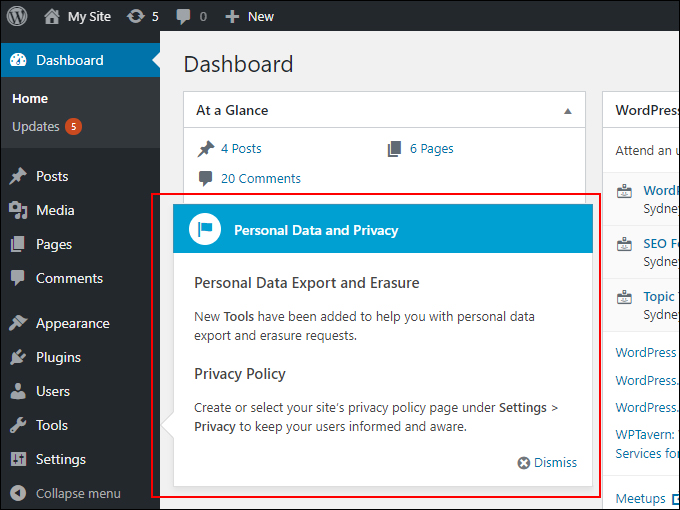
You will also get notifications when new features or functionality are added to your site and/or your dashboard menu.
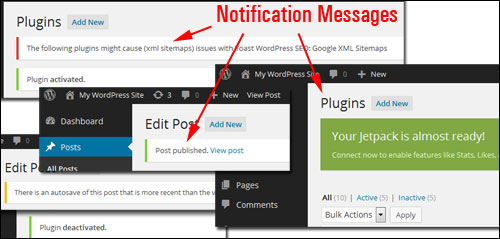
Various system updates, messages, banners, announcements, warnings, and notifications will display in your dashboard depending on the section you are working on, the tasks you are performing, and any plugins or themes you have installed.
Note: The first time you log into your site, you may see a “Welcome to WordPress” message displayed at the top of your Dashboard, unless your site has been configured otherwise.
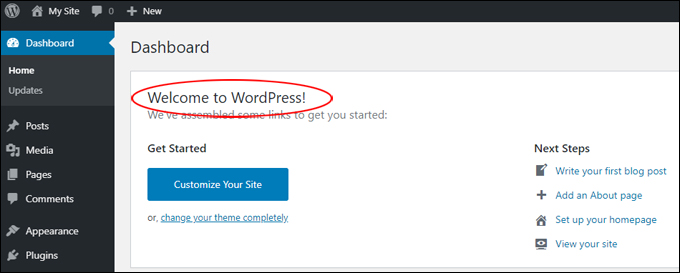
Click on the links in the “Get Started” or “Next Step” sections if you want to learn more about using WordPress or view official WordPress documentation.
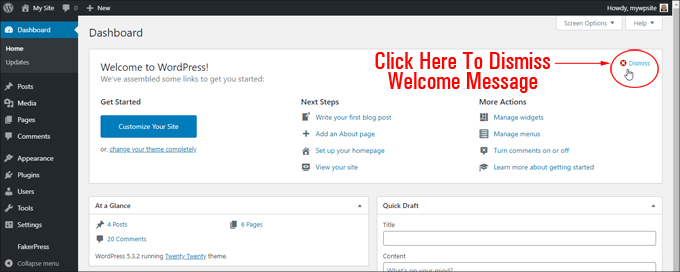
To dismiss (hide) the “Welcome” message and prevent it from displaying again the next time you log in, click on the Dismiss link near the top right-hand corner of the message panel.
Note: You will also receive notifications in your dashboard whenever WordPress updates to a new version.
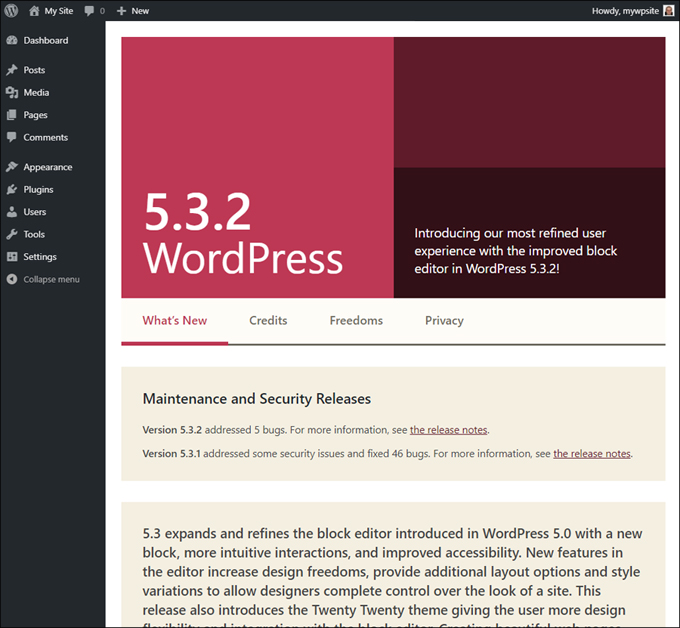
You can explore the information and links in this panel to learn more about new features and updates.
To return to the dashboard, select ‘Dashboard’ (or click on Dashboard > Home) in your admin menu section.
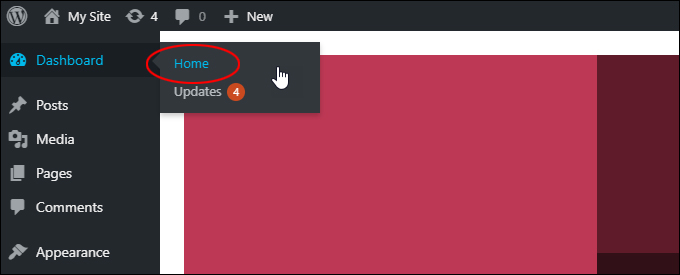
You can also dismiss the message and return to your main Dashboard by scrolling to the bottom of your screen and clicking on the Go to Dashboard -> Home link.

Screen Options Tab
The Screen Options tab is located in the top-right corner of the dashboard screen’s header section.

Clicking on this tab will display different options and features depending on the screen you are currently working on.
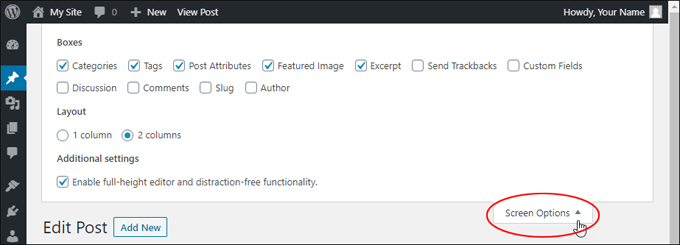
For example, if you are in the Dashboard, clicking on the Screen Options tab lets you configure options like hiding or displaying different dashboard information panels.

If you are in the Posts section, clicking on the Screen Options tab allows you to configure different options, like displaying or hiding information in the Posts Table screen (e.g. tags, comments, etc.), or specify the number of posts to display per page and other configurable settings depending on the plugins you have installed on your site.
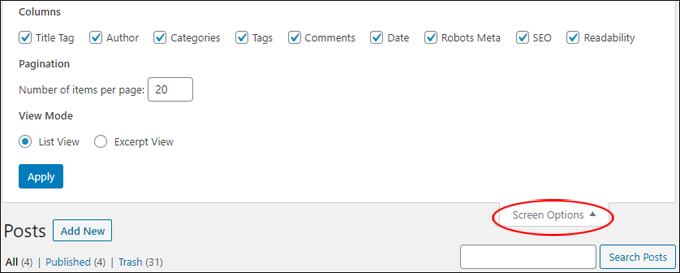
Your site may have certain elements hidden from view. This is usually done for one or more of the following reasons:
- You probably don’t need access to these features;
- To give your site a less “cluttered” look;
- To prevent accidental errors from happening.
![]()
If you are searching for a particular feature or element in your admin section and can’t seem to find it or don’t know where to look for it, try clicking on the Screen Options tab…what you’re looking for may be hidden or disabled.
To learn more, go here: The WordPress Screen Options Tab
Online Help Section
You can access official WordPress documentation and user community support or help forums by clicking on the Help tab at the top of your screen, next to the ‘Screen Options’ tab.

Like the Screen Options tab, the Help tab also displays context-specific information depending on which section of the admin area you are in.
For example, if you are editing content in the Edit Post screen, clicking on the Help tab will bring up helpful information related to editing posts.

To learn more about a feature or function of WordPress, just click on the Help tab.
WordPress Admin Area: Toolbar
The WordPress Admin Toolbar is located at the very top of your Dashboard screen and provides you and your logged-in users with access to a range of useful administrative functions, features, information, and “quick links” to other areas of your site.
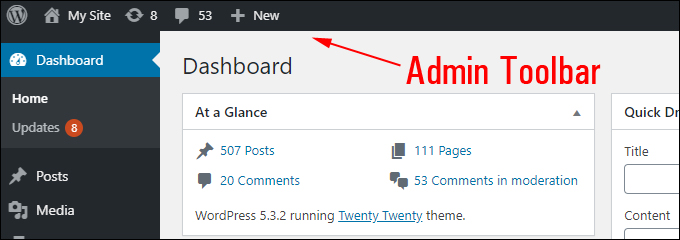
Most Toolbar items can expand to display additional information simply by hovering your mouse over the toolbar icons.
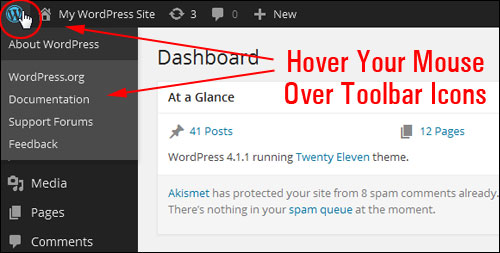
For example, hovering over the “updates” icon on the toolbar lets you see what features of your site like plugins or themes need updating.

You can also view things like how many comments in your posts are currently awaiting moderation, or perform tasks using shortcuts in the toolbar to create new posts or pages or add new media, links, or users to your site, plus a whole lot more.
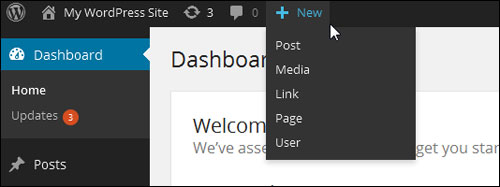
The toolbar also lets you quickly see how any changes you make to your posts, pages, or settings will affect how visitors see these on your site. Just hover your mouse over the title of your website and click Visit Site.
Tip: To continue working on your site and view your home page as your visitors will see it, right-click on the Visit Site link and choose either “Open Link In New Tab”, or “Open Link In New Window” to view the frontend of your site in a separate window in your web browser.

As long as you remain logged into your admin area, the WordPress toolbar will display on your web browser when you view the “front end” section of your site.
This allows you to easily return to your admin area and continue working on your site without having to log back in.
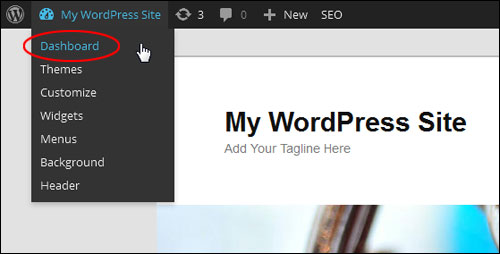
Depending on where you are inside the admin area and what plugins or services you have installed on your site, you may also see additional information displayed on the toolbar.

![]()
If you are logged in and cannot see the admin toolbar in your dashboard, make sure that you have enabled it in your “Profile” settings (how to enable/disable the admin toolbar is explained further below).
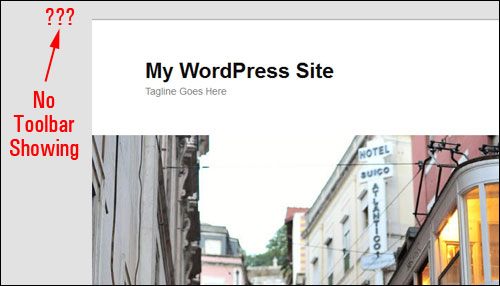
The “Howdy, User” Section
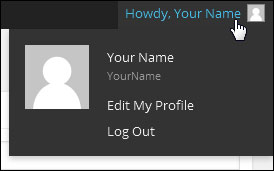
At the far right-hand side of the Admin Toolbar is the “Howdy, User” section with your Gravatar image.
Hover your mouse over this section and it will expand to display your name and username and links that allow you to edit your profile and log out of your site.
How To Enable Your WordPress Admin Toolbar When Viewing Your Site
Here’s how to enable/disable the admin toolbar:
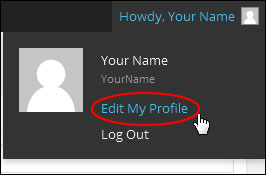
Click on the “Howdy, Your Name” tab in the top right-hand corner of your dashboard and select Edit My Profile…
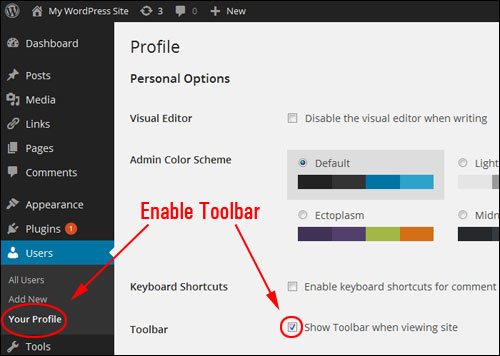
Check that Show Toolbar when viewing site is enabled (the box should be ticked) in your Profile screen.
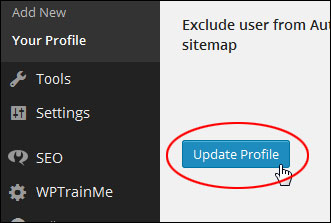
Click the Update Profile button at the bottom of your screen to save your changes.
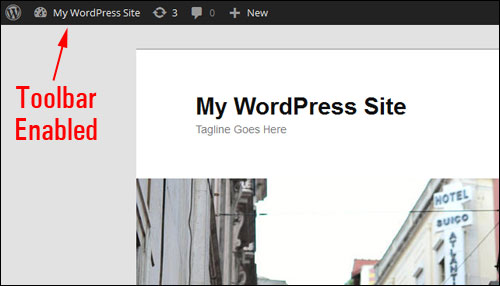
You should now be able to see the WordPress Toolbar displayed at the top of your screen whenever you log into your site.
WordPress Admin Section: Navigation Menu
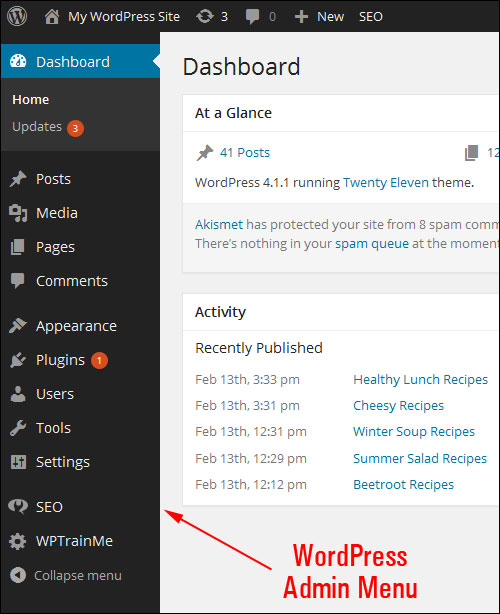
On the left-hand side of your Dashboard is the main navigation menu. This menu contains links to all of your site’s features, settings, and administrative areas.
![]()
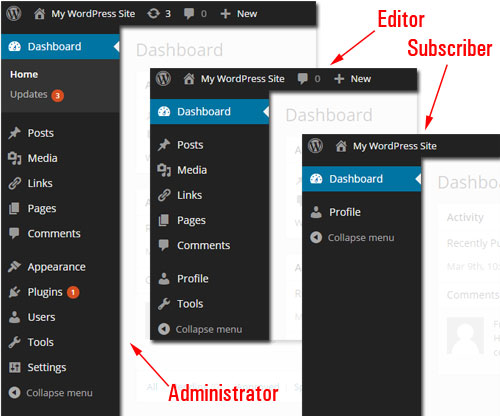
What users will see inside the Dashboard area when they are logged in will depend on what role and capabilities they have been assigned and how the site administrator has configured settings and options for different features.
You must be an administrator of the site to access all of the dashboard features, functions, settings, and capabilities.
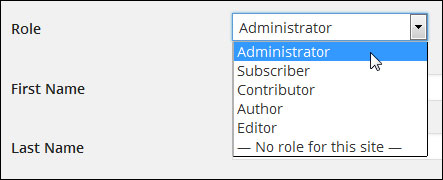
Users assigned roles other than “Administrator” (e.g. Editor, Subscriber, Contributor, Author, etc.) have access to fewer menu options inside their dashboard.
Regardless of the role assigned to a user, some features of the menu like “Collapse menu” remain accessible to all users.
Click the Collapse menu button at the bottom of the navigation menu.
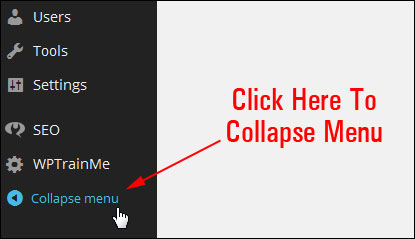
And the admin menu will shrink and collapse into a narrow strip with icons displaying for all items instead.

This menu feature is useful if you want more space to work in your admin area, or are working within a smaller window frame.
If you are working with the collapsed menu and are not sure what the icons mean, just click on the bottom icon to expand all menu items or hover over the icon to display its submenus.
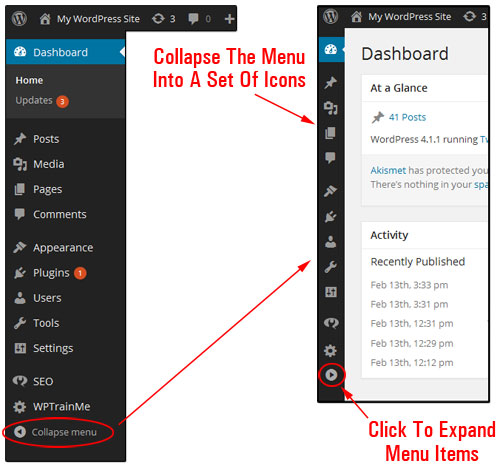
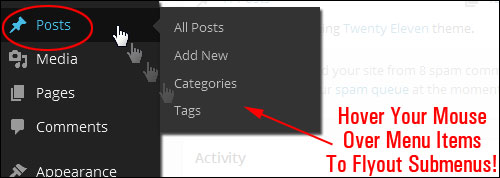
If you hover over a menu item, a submenu will fly out.
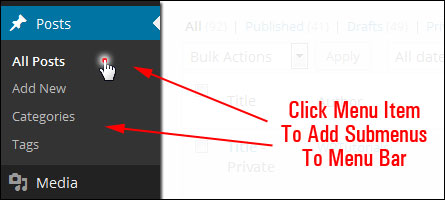
To “stick” submenus into your main menu bar while you’re working, click on a menu item.
Each of the features of the main WordPress menu is covered in separate tutorials.
WordPress Admin Section: Working Area
The large section in the middle of your admin screen is your main working area. Here, you can do things like:
- Access all of your site’s information and do all of your admin work,
- View different screens and configure settings and options for different sections,
- Create, edit and delete posts, pages, and other types of content
- Upload media to your site, edit media, etc.
- View, install, update, and configure plugins and themes,
- etc.
When you log into your admin area, the Dashboard displays a number of panels containing information about various different activities taking place on your site, including news, updates, and announcements from different WordPress-related resources.
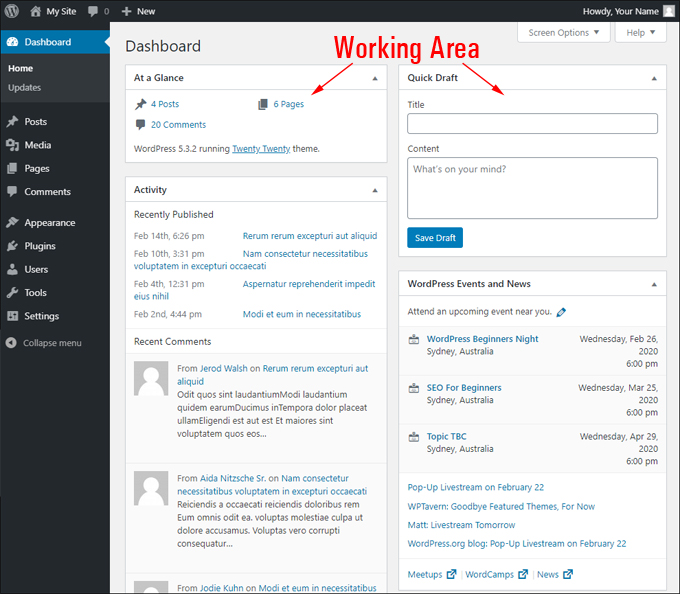
Occasionally, you may even find that new panels get added to your WordPress dashboard.
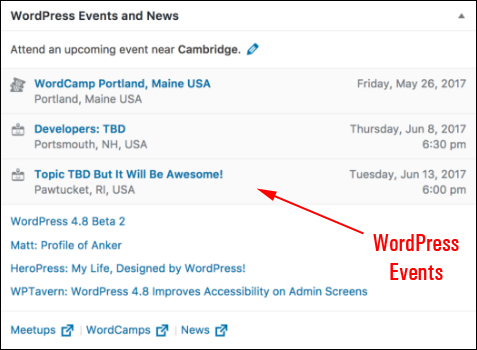
For example, in version 4.8, WordPress added a new dashboard panel that displays nearby WordCamps and local WordPress Meetups in your area.
As your site grows with more content and functionality (e.g. adding e-commerce or a support helpdesk) and more visitors begin interacting with your site, you may find that your working area can start to look very busy.
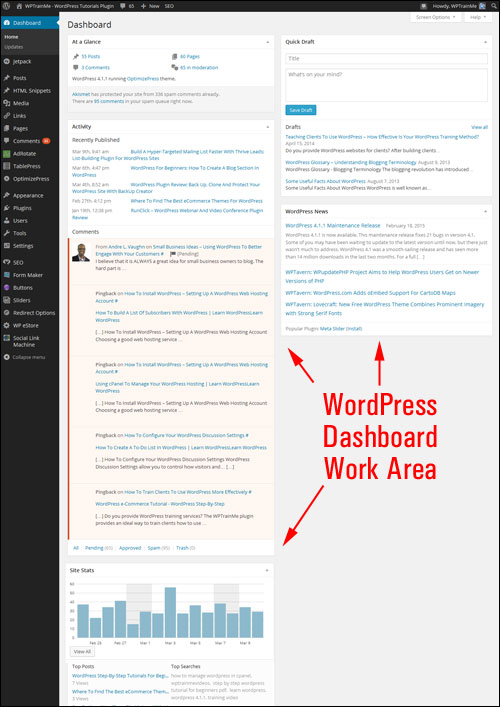
Fortunately, you can “tidy up” and declutter your WordPress dashboard by hiding, minimizing, and reorganizing the layout of your information panels.
For a quick and easy tutorial on how to customize your WordPress Dashboard, go here: How To Customize Your WordPress Dashboard
WordPress Administration Section: Footer
The footer section is located at the bottom of your admin screen and displays links to the WordPress website and your site’s current version of the WordPress software.

Note: You may not see this information if your dashboard has been customized.
Congratulations! Now you know how to navigate around your WordPress dashboard and all the important admin sections you need to know to use your site effectively.
***
"Your training is the best in the world! It is simple, yet detailed, direct, understandable, memorable, and complete." Andrea Adams, FinancialJourney.org
We are not affiliated, associated, sponsored, or endorsed by WordPress or its parent company Automattic. This site contains affiliate links to products. We may receive a commission for purchases made through these links.