 This tutorial is part of our WordPress Management tutorial series. In this tutorial, you will learn how to update your WordPress installation manually using cPanel.
***
How To Update WordPress Manually Using cPanel
Some web hosting environments or configuration settings can create problems for the WordPress auto-update feature.
If you cannot use the WordPress Automatic Update feature, you can upgrade WordPress manually using cPanel.
How To Update WordPress Using cPanel – Step-By-Step Tutorial
WordPress automatically notifies you inside your dashboard when a new update is available …

(WordPress Update Available)
You can also check which version of WordPress you are currently using and what the latest version of WordPress is from your dashboard …
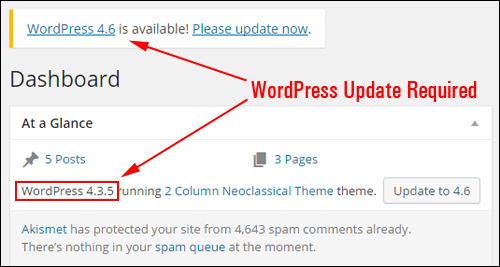
(WordPress Update Required)
Downloading The Latest WordPress Version
Download the latest WordPress installation upgrade files. This can be done either by visiting WordPress.org and clicking on the “Download” tab …
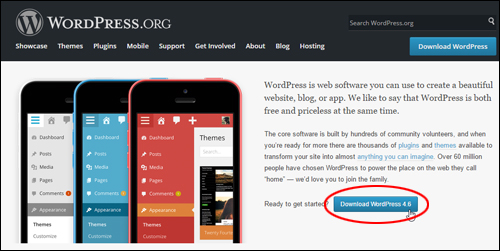
(Download The Latest WordPress Version From WordPress.org)
… or from within your WordPress administration dashboard by clicking on the ‘Update to X.X‘ button …
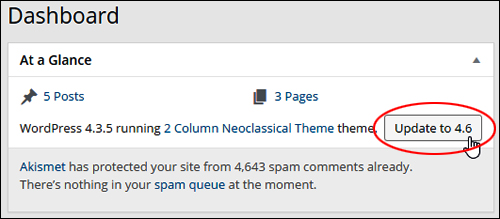
… and choosing the download option …
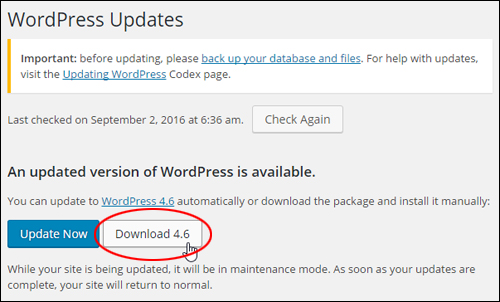
(Download WordPress Files For Manual Installation)
![]()
Always backup your WordPress site, including your database and files before updating WordPress. This way you will be able to restore your site if anything goes wrong!
You can learn more about a WordPress backup plugin that can fully automate your site backups here:
- Back Up, Duplicate & Keep Your WordPress Web Site Protected With Backup Creator Plugin For WordPress
![]()
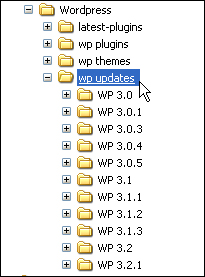
Organization Tip: We recommend creating a folder for your WordPress downloads (e.g. wp updates), and a new folder inside that one for each new version you download (e.g. “WP 4.5.3”). This will help you stay organized in case you ever need to revert to a previous version of WordPress.
To learn more about creating an organized system for performing WordPress maintenance, see the tutorial below:
Save your downloaded WordPress zip file to your hard drive:
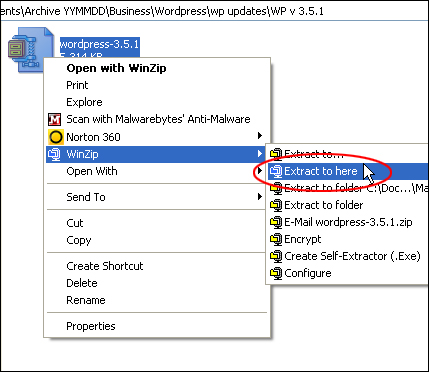
After the zip file containing the updated WordPress files has finished downloading, extract (unzip) the file …
Open the unzipped folder and delete the ‘wp-content’ folder inside …

![]()
Deleting the ‘wp-content’ folder ensures that your plugin or theme settings won’t be overwritten during the update process.
After deleting the “wp-content” folder from the file, compress (zip) the folder again …

The latest version of WordPress is now ready to be uploaded to your site.

Notes: In the above screenshot, you can see that there are two files called “wordpress” inside the latest version folder – one “zipped” file (i.e. compressed) and one “unzipped” file (uncompressed):
- Use the uncompressed file if uploading the contents of the folder using FTP
- Use the compressed (zipped) file if uploading the contents of the folder using cPanel
Uploading WordPress Files Manually Using cPanel
Note: If you don’t have access to cPanel, you will need to perform the upgrade installation using FTP. This process is explained in this tutorial.
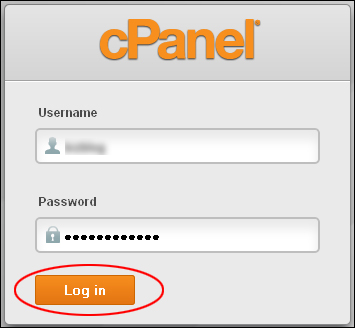
After downloading and preparing your files for the upgrade installation, log into your cPanel administration area …
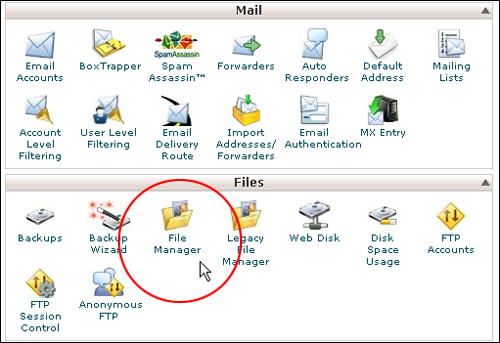
Select Files > File Manager …
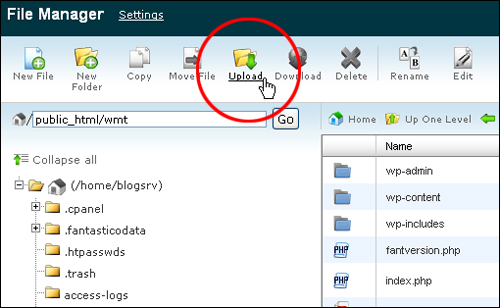
Inside the ‘File Manager’ section, locate the directory in your server containing your existing WordPress installation and click on the ‘Upload’ link …
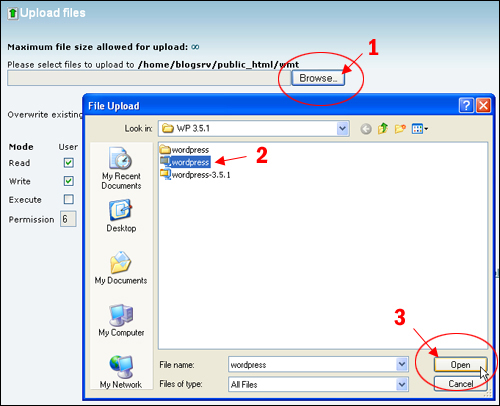
The ‘Upload files’ screen opens in a new window. Click on the Browse button (1), and locate the folder where you have downloaded and modified the WordPress upgrade file. Select the compressed upgrade installation file (2) and click Open to begin uploading the file (3) …
Your zip file will begin uploading into your server directory …

Once the file has been uploaded, close the ‘Upload files’ tab, then navigate to the ‘File Manager’ window …

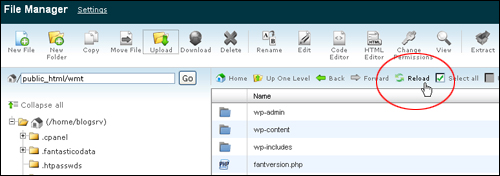
Click on Reload to refresh the screen and display your newly uploaded upgrade installation file …
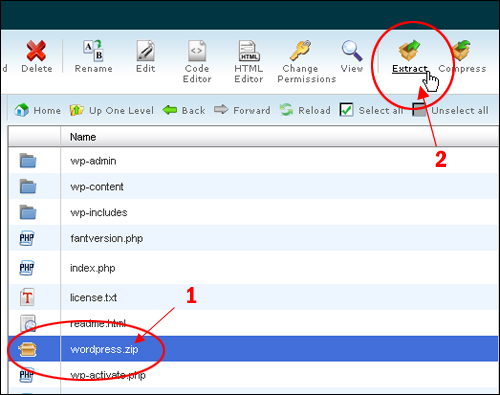
Locate and select the uploaded zip file (called “wordpress.zip” in the example below), then click on the Extract menu button …
A pop-up box appears in your window. Leave the settings as they appear and click the Extract File(s) button to begin decompressing all of the contents in your zipped file …

Once your file contents have been fully extracted, close the Extraction Results pop-up window …

Locate the folder containing all of the extracted files (it will have the same name as the zipped file) and double click on the folder to open it …
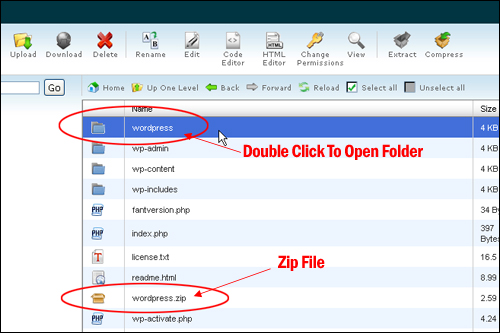
Click on Select all to select all of the files inside the extracted folder …

Click on the Move File button …

The Move box displays on your screen. At the bottom of the window, you will see the current path where your extracted WordPress upgrade files are located …
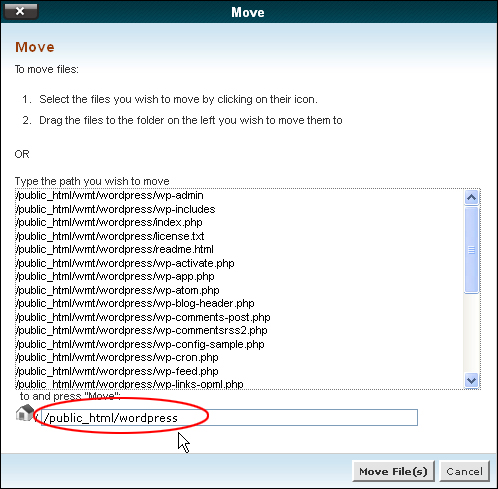
If you have been following the instructions in this tutorial correctly, your files only need to be moved one level up from the folder into which they have been extracted.
To move all of your selected files one level up …
(1) delete the last folder name from the path string (in this example the folder is called “wordpress”) – if you delete this folder from the path, your files will be moved into the directory above – in this case, the root directory (i.e. “public_html”),
(2) Click on Move File(s) …

After all the WordPress upgrade files have been moved one level up, your current folder is going to be empty. Click on Up One Level to return to the directory containing all of your WordPress installation files …

Moving the new version files into your WordPress installation directory will automatically replace the existing files in the old version.
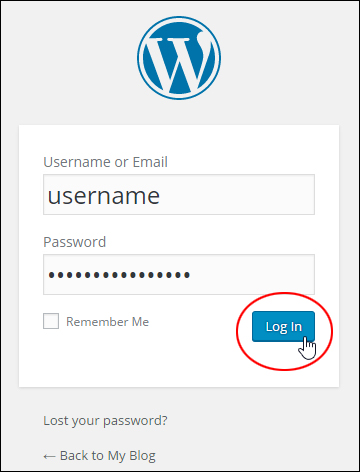
To check that your upgrade has been successful, log into your WordPress admin area …
![]()
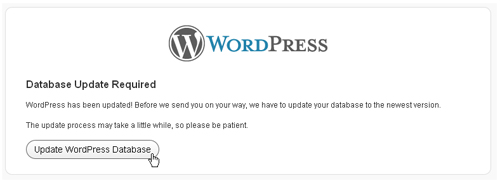
You may be greeted by a message informing you that a Database update is required. If this message pops up on your screen, click on the Update WordPress Database button to update your WordPress database …
You will be notified if the update is successful with another message window. Click on ‘Continue’ to proceed …

You will be taken to your WordPress dashboard …
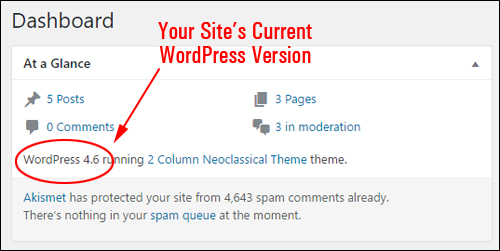
(Your Site’s Current WordPress Version)
Your WordPress upgrade installation has been successfully completed.
Congratulations! Now you know how to update your WordPress installation manually using cPanel.
See Also …
- How To Update WordPress Automatically From Your WordPress Dashboard
- How To Update WordPress Manually Using FTP
Next Step:
Now that you know how to update and maintain your WordPress installation software, the next step is to learn how to update and manage your WordPress plugins.
To learn more about updating and managing your WordPress plugins, see the tutorial below:

(Source: Shutterstock)
***
"These tutorials have so much information and are easy to understand. If you use WordPress or plan to in the future these will help you with everything you need to know." - Valisa (Mesa, Arizona)
***

