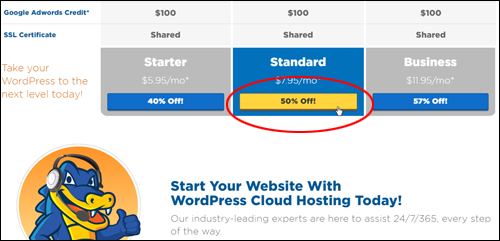
 This tutorial is part of our WordPress installation step-by-step tutorials, where we show you how to install a WordPress site or blog on your own domain name with no coding skills required.
***
After you have registered a domain name for your website, the next step is to set up a website hosting account with a reliable web hosting service provider.
Your domain name needs to be “hosted” somewhere. This allows people to go online, type your domain address into their web browser (or click on a link to your domain name in someone else’s website) and visit your website instead of getting a “this site can’t be reached” error page …
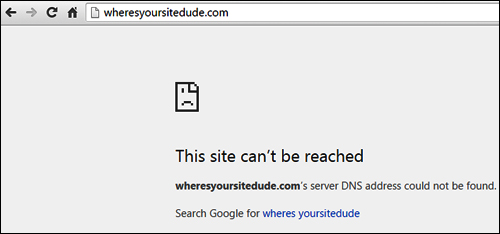
(Your domain has to live somewhere so people can find your website)
Hosting your website with a reliable webhosting service provider ensures that all files associated with your domain name (e.g. your website files, email addresses, etc …) remain online 24/7 to visitors worldwide …
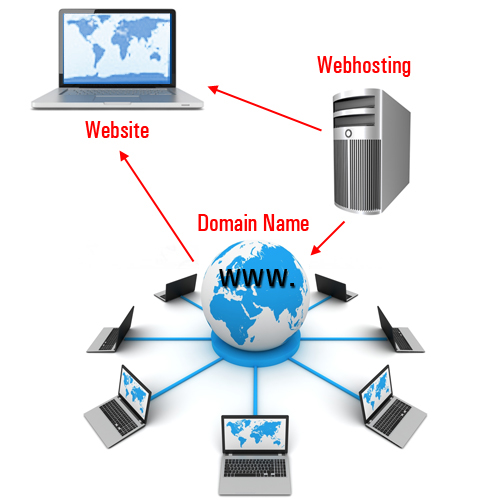
(Reliable webhosting keeps your website online 24/7 for users worldwide)
Choosing a good and reliable hosting service, therefore, is one of the most important steps in the process of setting up your WordPress site.
Step 2: Set Up Webhosting For WordPress
The tutorials in this section cover the following:
- WordPress installation requirements.
- Choosing a web hosting service provider.
- The information you will need from your web host to install WordPress correctly.
- How to configure your domain name to work with your web server.
WordPress Web Hosting Requirements
The right hosting environment will ensure that your WordPress site is quick and easy to install and will make managing your website easier, especially if you want to avoid problems and complex technical issues.
As well as looking for a reliable, reputable, and responsive web hosting service provider, make sure that your web hosting solution also meets the following requirements:
Hosting Requirements
- Linux server
- cPanel (preferably with Fantastico or Softaculous installed)
- MySQL databases
- PHP support
If you are not sure whether your server meets the above requirements, please contact the web host and ask them.
![]()
To learn more about managed WordPress hosting, go here:
Benefits Of Managed WordPress Hosting For WordPress Website Owners
WordPress Web Hosting A Web Hosting Service
Avoid free web hosting services. Instead, choose a reliable commercial web hosting solution provider, especially if you plan to set up a business website.
“Free” hosting typically comes at a price. You may have to accept certain conditions, such as displaying pop-up advertising on your site, or have restrictions imposed on your account (e.g. limited space and/or bandwidth, restricted file upload size for your images or videos, etc.)
Free hosting (and Free websites) is normally offered as a way of getting you to upgrade to a paid account or using other paid services offered by the company. Your hosting service provider has to recover their operating costs somehow, especially if they provide any form of support (you do not want to host your website with a company that offers little to no support – that’s just a disaster waiting to happen!)
There are many reliable commercial hosting service companies that offer affordable hosting plans to suit all types of budgets, so there is no need to ever consider using a free hosting service.
Choosing Your Web Host – Useful Tips
When choosing a commercial web hosting solution provider, carefully consider the following criteria:
Reliability – Your website needs to be accessible to users and visitors 24/7. Choose web hosting that guarantees at least 99% uptime.
Speed Of Access – As well as being reliable, your web hosting service needs to be fast.
Data Transfer – This is normally referred to as the amount of traffic or bandwidth your account gets allocated. Make sure you know exactly what your data transfer limits are – especially if your hosting plan is advertised as ‘unlimited data transfer.’
Cost – Not only the cost of hosting, but also how much extra it will cost you if you go over the data quota.
Disk Space – Although most web pages typically consume very little disk space, most websites nowadays need to upload large media files, so make sure that your hosting plan provides you with sufficient disk space for all all the media you plan to upload.
Technical Support – Things always seem to go wrong at the most inconvenient moments. We recommend choosing hosting companies that offer fast support response times, are available around the clock (including weekends and public holidays), and that have competent technical staff who can deal with any kind of problem you experience.
Essential Scripts & Applications – WordPress requires certain scripts and applications to be installed on your server.
At some point, your business will require certain scripts and software programs to be installed on your server. You may decide to add new functionality to your website and this will require certain web applications, scripts, or object libraries to be installed in order for things to work properly.
Common server scripts and applications include htaccess, FTP (File Transfer Protocol), PHP, MySQL, SSL (Secure Socket Layer), cURL, Perl, ionCube, etc …. Good hosting companies generally offer all of these essential scripts by default, or have no problem installing these upon request (depending on whether you choose a “shared” or “dedicated” webhosting environment – see next section).
If you have a certain application in mind that you want to install on your website and it requires a special script to run, ask the hosting company if they will have any problems running the application or the required scripts on your server before you sign up for their service.
Web Hosting Control & Management Features – Often, you will need to access, manage, and control certain aspects of your own web hosting, such as adding, deleting or forwarding email accounts, setting up access for file uploads and transfers, setting up multiple sites and/or domains, etc. It’s important, therefore, to choose a hosting solution that offers you easy management and control of your own hosting account.
We recommend hosting your site with a company that offers cPanel.

cPanel is a powerful and simple-to-use web hosting management software application that gives website owners the ability to control and easily manage their servers and server-related functions.
Having access to a hosting environment that offers cPanel will make managing your WordPress site a whole lot easier.
![]()
In addition to our tutorials in this module, we suggest watching the following video tutorials:
- Build A WordPress Site Fast
- How To Use Softaculous
- How To Use FTP
- How To Use cPanel
- How To Use Amazon S3
You can view these videos online anytime by becoming a member of WPMasterclasses.com.
The above list contains just some of the criteria you should keep in mind when choosing a webhosting solution for your website. In addition to pricing and payment options (e.g. monthly, yearly), other factors in your decision may include:
- Ease of upgrading (and downgrading) from your existing hosting plans,
- Redundancy strategies (facilities and infrastructure),
- Data backup options (e.g. daily backups),
- etc.
Dedicated vs Shared Web Hosting
When choosing hosting, you essentially have two main options: dedicated hosting or shared hosting.
![]()
Note: If you have your own server equipment, you also have the option of using Colocation hosting services. This is where you rent a secure space in a datacenter and take advantage of the center’s secure facilities, power availability, bandwidth, cooling system and other operational services to store your server equipment.
Colocation hosting, however, means that you are in charge of maintaining your own equipment. In order to be able to manage the server, you, or someone in your company must have a certain level of hardware and software knowledge.
The options below are more suitable for webhosting that you can manage without technical skills:
Dedicated Webhosting
Hosting your website on a dedicated server basically means that the entire server is at your service. This option is relatively more expensive than sharing, as you will be the only one using the server and paying for all of the costs.
Some reasons for choosing a dedicated server include the following:
- You want full control and greater security of the server.
- You don’t want to share space and bandwidth with other website owners.
- Your business uses sufficient bandwidth or space to justify using a dedicated server.
- Your websites require special applications to be installed on your server in order to work.
- Your webhosting company offers exclusive features to dedicated customers, such as dedicated server management, backup servers, and more.
- You plan to operate multiple websites and the cost of hosting all of these sites on one server works out to be cheaper than running many different shared hosting accounts.
Dedicated hosting is an ideal choice for many businesses and many solutions are available to suit businesses ranging from small to large enterprises. Pricing can vary widely depending on your hardware and software requirements and the level of support and service offered by the company, so it’s important to shop around, compare plans and features, and read reviews and recommendations from different companies and services.
Shared Hosting
Unless you specifically require a private, dedicated server for hosting your website, you may want to consider choosing a shared hosting service instead.
Essentially, a shared hosting plan means that one server is used to host a number of different users. This reduces the cost significantly and is ideal for hosting most small business sites.
If you are just starting out, you can start on a shared hosting plan and upgrade to a dedicated server if and when required.
![]()
If you need reliable hosting for your WordPress site, we recommend checking out these providers:
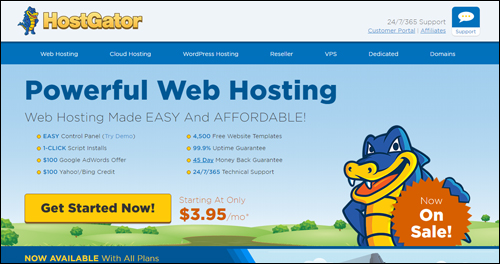
- HostGator is one of the world’s most popular web hosting companies providing unmetered, reliable bandwidth and disk space for unlimited domains.
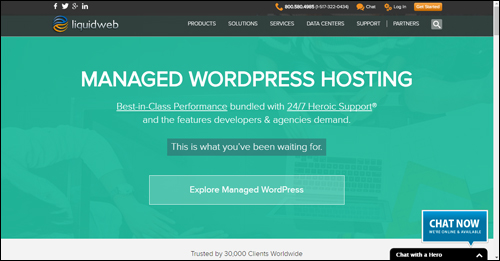
- LiquidWeb is a premier web hosting provider specializing in managed dedicated servers, dedicated server hosting, VPS, shared web hosting and heroic support.
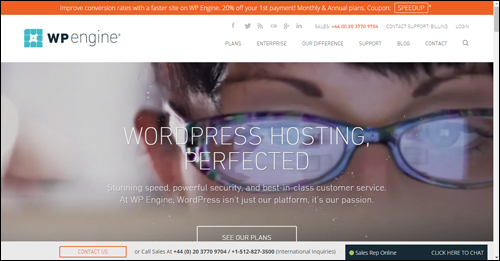
- WPEngine offers robust and world-class infrastructure options and managed WordPress hosting for different customer needs.
- BlueHost provides fast and reliable website hosting with everything you need to get your website online quickly.
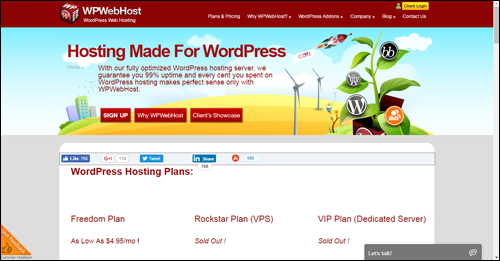
- WPWebhost is a WordPress hosting company specializing in hosting and supporting WordPress powered blogs.
- Hostinger provides cheap WordPress hosting with effortless installation and quick set-up for immediate online exposure .
Shared Hosting Provider
For this tutorial, we will use HostGator as our example. HostGator offers reliable and affordable web or blog hosting.
WordPress Hosting – Step-By-Step Tutorial
The web host that we will be using for this tutorial is HostGator. You can use any host you like. HostGator are a reliable web hosting provider with many years of experience hosting WordPress sites.
Note: We also have a tutorial on how to set up a managed WordPress hosting account.
Let’s take you now step-by-step through the process of purchasing a shared web hosting service and setting up your account using HostGator.
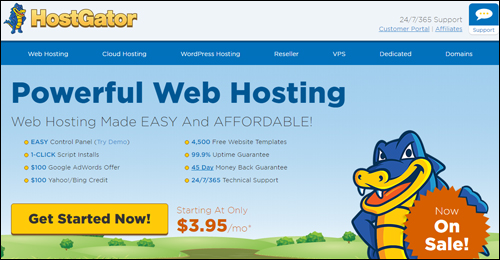
First, visit HostGator.com …
(HostGator)
You can choose from standard webhosting plans or hosting designed for WordPress users …
(HostGator – Standard Web Hosting Plans)
HostGator’s standard web hosting plans include cPanel, many standard hosting features, and WordPress hosting …
(HostGator Standard Plan Features)
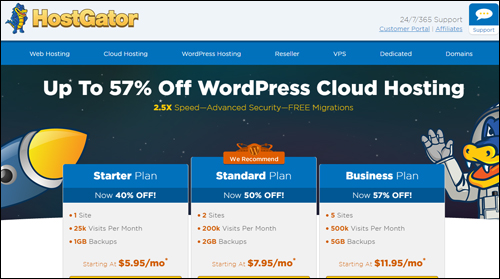
HostGator also offers hosting services specifically designed for WordPress sites. Click on ‘WordPress Hosting’ in the menu to bring up the WordPress Cloud Hosting plans …
(HostGator – WordPress Hosting)
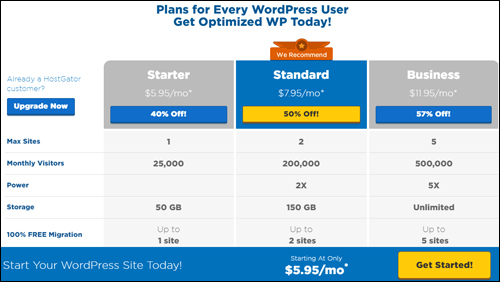
You can compare different hosting plans …
(HostGator – Comparison Of WordPress Hosting Plans)
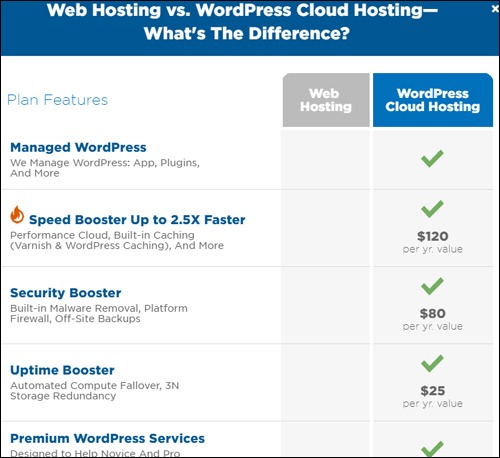
You can also compare the difference between HostGator’s standard web hosting vs WordPress cloud hosting when you visit their site …
(HostGator – Web Hosting vs WordPress Cloud Hosting)
HostGator: Standard Hosting Vs WordPress Hosting
Whichever hosting plan or hosting company you go with is up to you. WordPress does not need “WordPress Hosting.” WordPress only needs a Linux server with PHP and adequate. Since our WordPress installation tutorials focus on standard hosting setups with cPanel and FTP, we recommend choosing hosting plans that include cPanel and FTP.
If you only plan to set up a single domain, then all you need is a basic plan, e.g.:
- Standard Web Hosting – Hatchling Plan
- WordPress Cloud Hosting – Starter Plan
If you plan to host multiple domain names, choose either:
- Standard Web Hosting – Baby Plan (unlimited sites), or Business Plan (unlimited sites)
- WordPress Cloud Hosting – Standard Plan (2 sites), or Business Plan (5 sites)
After reviewing and selecting your hosting plan, click on the signup button to set up your hosting account …
(Click Order Button To Purchase Web Hosting With HostGator)
Web Hosting Ordering Process
Let’s go through the steps you need to complete to get your hosting account up and running.
1 – Choose A Domain
After selecting your plan and clicking on the order button, you will be prompted to choose a domain to be associated with your hosting plan …
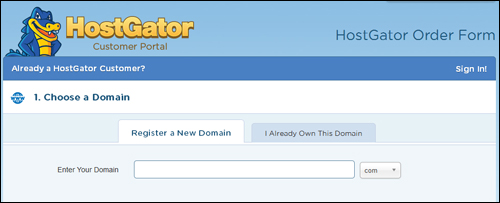
(Step 1 – Choose a domain)
If you haven’t registered a domain name yet, see this tutorial:
If you already have a Domain Name, then select the I Already Own This Domain Name option and enter your domain name into the ’Enter Your Domain’ field.
2 – Choose A Hosting Plan
Confirm your hosting package and billing cycle. You can start with as little as 1, 3, or 6 months of hosting, or pre-pay 12, 24, even 36 months in advance to get the best possible pricing. You will also need to enter a username and security pin for your account.
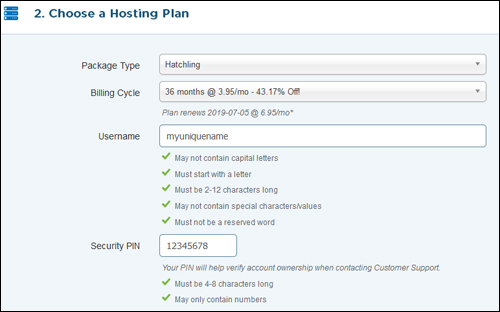
(Step 2 – Choose a hosting plan)
3 – Enter Your Billing Info
Enter you contact and payment details …
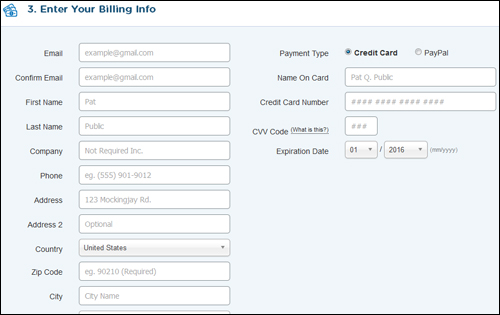
(Step 3 – Enter your billing info)
4 – Additional Services
Select any additional services you need or ignore this section. Additional services you may want to consider adding to your order include hosting security, automated daily backups, and SSL certificate (for secure e-commerce). You can ignore the email option. We show you how to easily create a “you@yourdomain.com” email using cPanel in this tutorial.
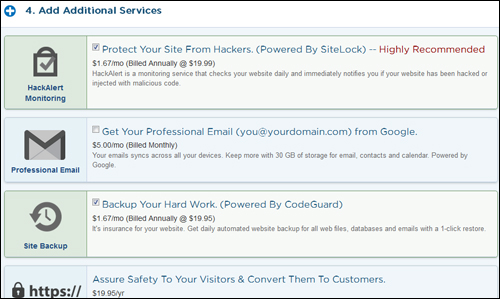
(Step 4 – Add Additional Services)
5 – Enter A Coupon Code
If you have a coupon code or special promo offer, enter it into the ‘Coupon Code’ field in this section …

(Step 5 – Enter a coupon code)
6 – Review Order Details
Review your order details, confirm that you have read and agree to the terms and conditions and click on the ‘Checkout Now’ button to complete your order …
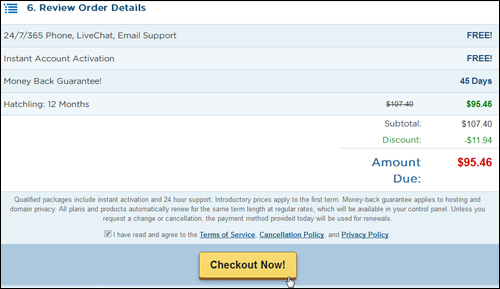
(Step 6 – Review order details and complete your purchase)
Your hosting account will normally become active and be available within one hour after your payment has been successfully processed.
Once your order has been successfully processed, you will receive an email containing your purchase receipt, technical support contact details and your hosting login and nameserver information …
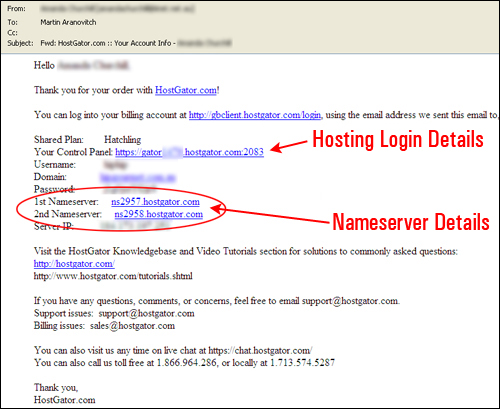
(Your host will email you your nameserver details)
Print this important email out for your records and keep the information secure, as anyone with this information will be able to access your hosting account and website files.
You will need your hosting nameserver details from the email above to complete the next step.
Congratulations! Now you know how to set up webhosting for your WordPress website or blog.

(Source: Shutterstock)
Click the button below to continue …
Learn How To Set Up Domain Nameservers
Skip This Step (My Nameservers Are Set Up)
Back To WordPress Installation Tutorials Index
***
"Wow! I never knew there's so much to learn about WordPress! I bought one of the WordPress for Dummies three years ago, such authors need to be on this course!" - Rich Law, Create A Blog Now
***

