 In Part One of this tutorial, we explained how to use widgets in WordPress and in Part 2, you learned how to configure a text widget.
In this tutorial you will learn how to configure other default sidebar widgets.
Add Categories
Now that you have configure a text widget containing a clickable support button, let’s configure a widget to display Post Categories on your sidebar.
By default, the Categories widget displays on your sidebar navigation section. Place the widget wherever you want your post categories to display by clicking and dragging it on your sidebar widget area …
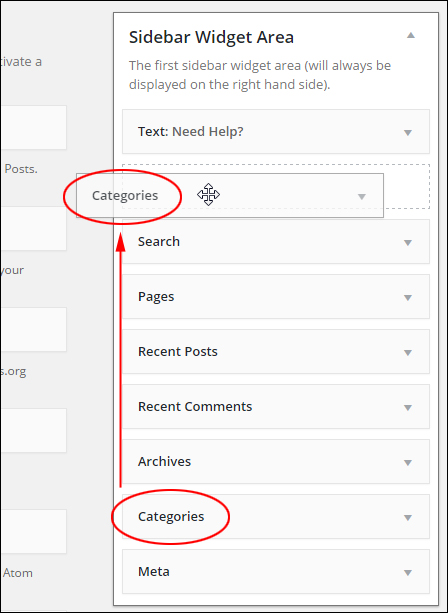
(Post Categories widget)

Before adding a Categories widget to your sidebar, we recommend configuring the Categoriesfeature inside the WordPress dashboard …
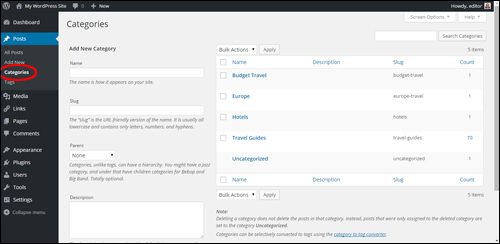
(WordPress Categories Panel)
Note: We are currently putting together tutorials on how to use WordPress categories.
Let’s configure the Categories widget settings as described below:
- In Title: type something that will make sense to your visitors, like “Choose A Topic…” (1)
- Check Display as dropdown if you plan to add many categories (this significantly reduces the length of your widget content by displaying all categories in a drop-down menu). If you plan to publish posts under a few categories only, then leave the Display as dropdown box unchecked. (2)
- Leave the default settings for the remaining options, or see the additional notes on configuring this widget below.
- Click Save when done …
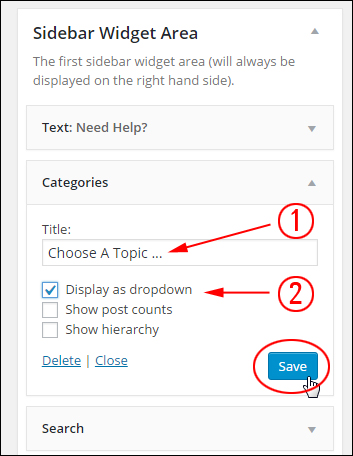
(Configuring a WordPress Categories widget)
Load the site in your web browser or refresh your page to see how your Categories widget will display to your site visitors …
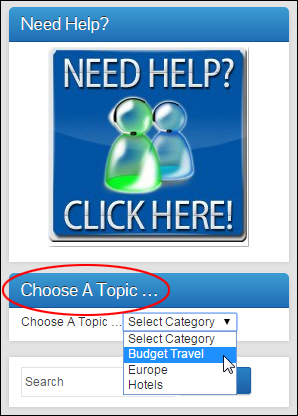
(Categories widget added to sidebar navigation area)
Tips:
- Change the default Uncategorized post category to something more meaningful.
- If you use nested categories on your site, you may want to check the Show hierarchy box, otherwise leave this box unticked.
- To display the number of posts published in each category, enable the Show post counts check box …
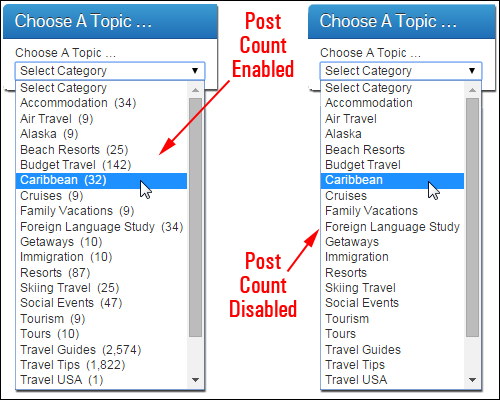
(Category widget options – Post Count Enabled vs Post Count Disabled)
Add A Recent Posts Section
The Recent Posts widget displays in the sidebar section by default. All you need to do is configure your widget.
Click on the Recent Posts widget title bar to display the configuration settings …
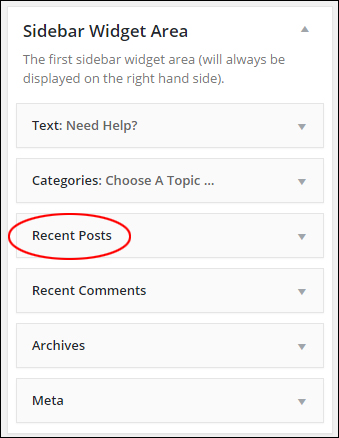
(Recent Posts widget)
There is not much to configure in this widget. You can add a title if you want, select the number of posts to display and display post dates. If you’re happy to use the default Number of posts to show setting, then just leave the widget as is, otherwise enter the number of posts to show and click Save …
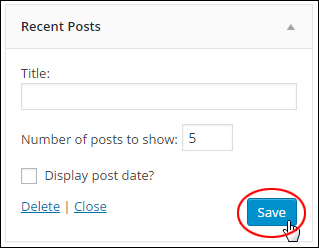
(Recent Posts widget settings)
Your most recent posts will display on the sidebar navigation menu …
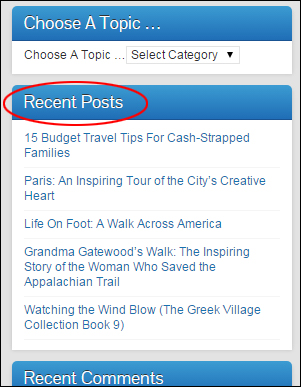
(Recent Posts WordPress widget displayed on blog sidebar)
Creating and editing posts in WordPress is covered here: How To Create A New Post In WordPress
Adding Links To Your Site’s Pages
Next, let’s add a widget to your sidebar to display the pages you select.
Find a Pages widget in the Available Widgets section …
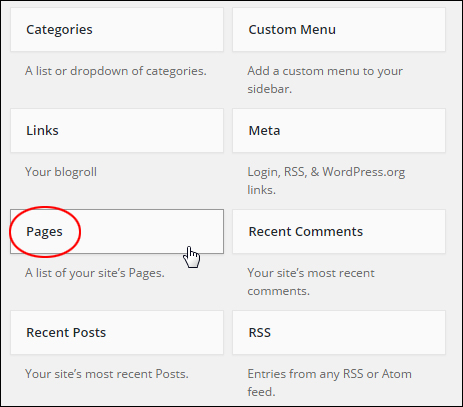
(Pages Widget)
Drag the Pages widget to your widget area …
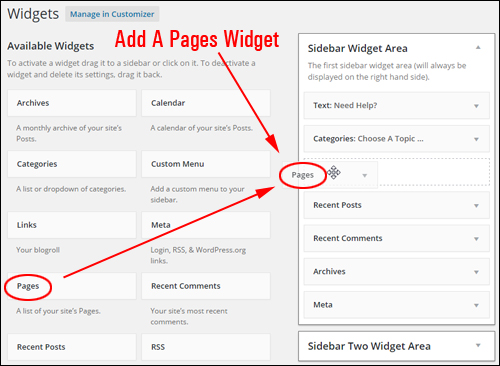
(Adding a Pages widget to the sidebar navigation section)
The Pages widget lets you configure the following settings:
- Title: Add a title to the widget (e.g. “Site Info“) (1)
- Sort by: Sort how your pages display: by title (i.e. alphabetically), by page order, or page ID. (2)
- Exclude: Hide pages on the sidebar (3) …
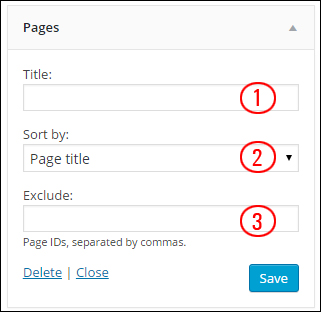
(Pages Widget settings)
By default, pages will be listed by title in alphabetical order. If you want to display pages using one of the other options, then select a different method in the Sort by: drop-down menu …
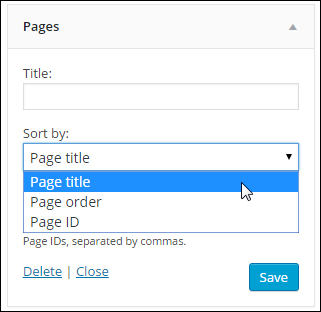
(WordPress Pages Widget settings – sorting options)
To exclude certain pages from displaying in the sidebar, type in their Page Ids separated by commas into the Exclude field …
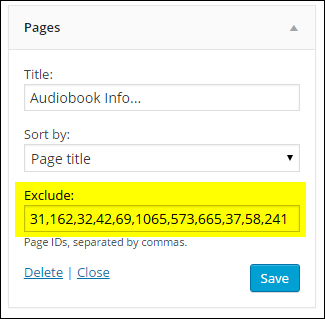
(Pages Widget settings – excluding pages)
A tutorial is provided on finding a WordPress post or page ID here: Finding A WordPress Page Or Post ID
Click the Save button when finished and then click Close at the bottom of the widget box to minimize your widget.
Links to your site’s main pages will now show in your sidebar …
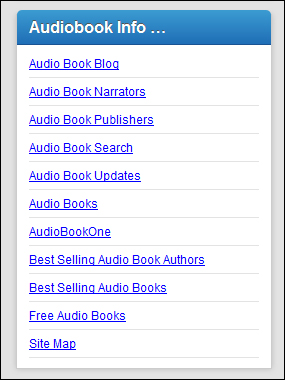
(WordPress Pages Widget on sidebar)
Tip: You can add multiple Pages widgets to the sidebar section. This is useful if you need to display separate groups of pages on the sidebar (e.g. “Products”, “Legal Pages” etc.)
Add Links To Your WordPress Sidebar Navigation Area
Next, let’s add a Links widget to your sidebar.
Before adding the Links widget to your sidebar, we recommend first configuring the Links section inside your WordPress dashboard …
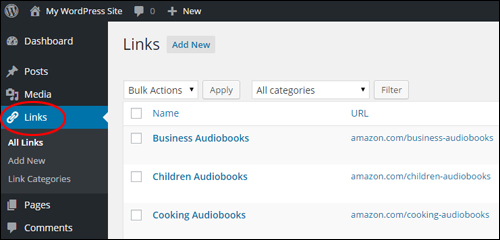
(WordPress Links screen)
Note: We are currently putting together tutorials on how to use the WordPress Links feature.
To add the widget, select a Links widget in the Available Widgets section …
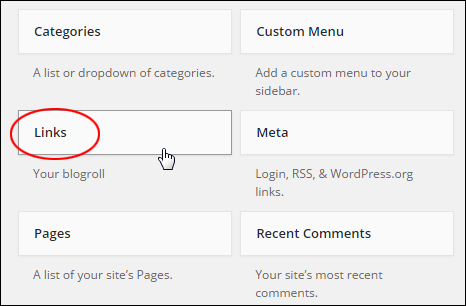
(Links Widget)
Drag it to your sidebar …
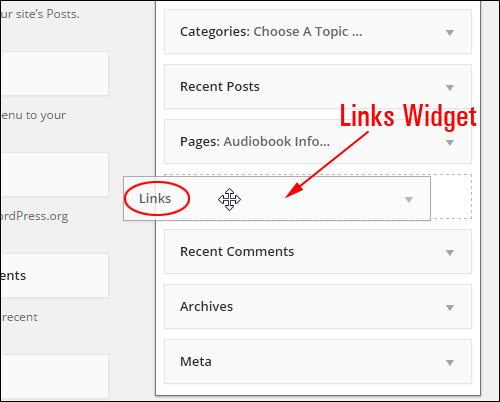
(Making Links Widget active)
The Links widget offers a number of configurable options, including the ability to specify what information to show about your links and how many links you want to display on your sidebar …
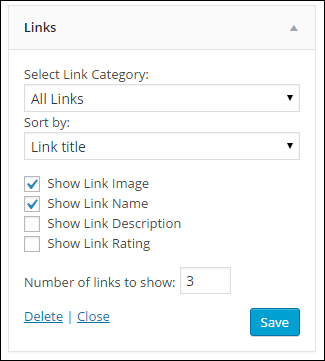
(WordPress Links Widget Settings)
You can add as many separate ‘Link Widgets’ to your sidebar as you want. As you will see in a moment, this lets you create and display specific lists of links on your site …
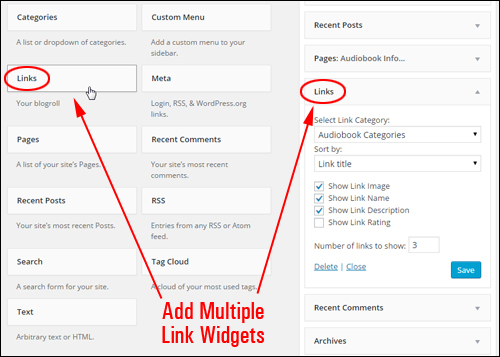
(Add Multiple Links Widgets To Your Sidebar)
You can sort links by Link title, Link rating, Link ID, or display links in Random order …
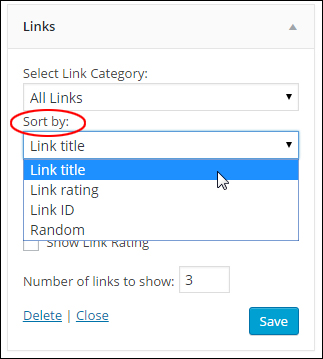
(Links widget: ‘Sort by:’ drop-down menu)
You can also create and display a list of items for a specific category, by selecting a link category from the ‘Select Link Category’ drop-down menu …
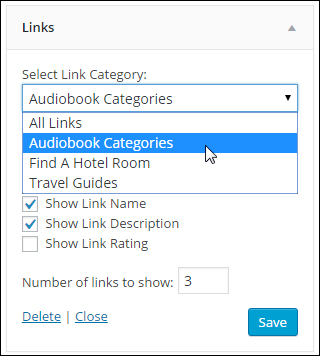
( WordPress Links widget: ‘Select Link Category’ drop-down menu)
When you have finished configuring your Links Widget, click the Save button …
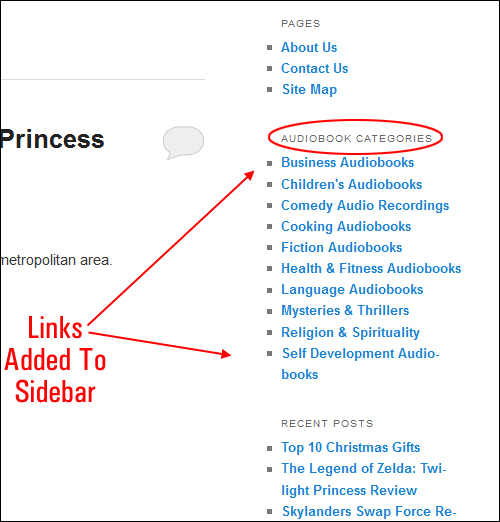
(External links added to sidebar section)
As the above example shows, you can display specific links to your site visitors (e.g. a list for a specific link category only), and add multiple lists of links to your sidebar area.
***
This is the end of part three of this tutorial series.
Click here to keep reading:
***
"I was absolutely amazed at the scope and breadth of these tutorials! The most in-depth training I have ever received on any subject!" - Myke O'Neill, DailyGreenPost.com