WordPress Block Editor – How To Use Blocks

This tutorial is part of our series on How To Use The WordPress Block Editor (Gutenberg).
In this tutorial, you will learn what Blocks are and how to work with blocks when creating or editing content.
Links to detailed tutorials on how to use many default WordPress content editor blocks are provided at the end of this tutorial.
For a complete understanding of how to use the WordPress Block Editor, see these tutorials:
- How To Use The WordPress Block Editor Content Area
- How To Use The WordPress Block Editing Toolbar
- How To Use The WordPress Block Editor Settings Section
WordPress Gutenberg: A Block-Based Content Editor
As mentioned in our overview of the WordPress Block Editor, WordPress 5.0 introduced a new content editor called Gutenberg (named after Johannes Gutenberg, who invented the printing press over 500 years ago).
The Gutenberg editor (now referred to simply as the Block Editor) aims to simplify the content creation and content editing process in WordPress using ‘blocks’.
WordPress Block Editor – What Are ‘Blocks’?
Think of ‘blocks’ as being the smallest units or modules you can use on your site to build something or get something done.
This could be adding a paragraph of text, a layout or media element, or some other functionality.
Imagine too, that no matter how different each block’s purpose may be, they all fit and work together seamlessly (like ‘Lego’ blocks).
By combining different blocks, you can build complex web pages with sophisticated layouts and modular functionality.
WordPress, however, aims to extend the functionality of blocks beyond just creating content pages on your site.
Imagine turning your entire web presence into a giant Plug’n’Play site where you can combine content blocks with block-based plugins, widgets, themes, third-party apps, and integrations, etc. and add these seamlessly anywhere to your site at any time with just the click of a button and without requiring any coding skills.
One of the main advantages of switching to a block-based content editor is that it opens your website up to many possibilities for simplified future development.
For example, WordPress’s block-based environment allows third-party developers to create new block types that can integrate seamlessly with your existing website, giving you the power to add a whole new level of functionality to your web presence without having to start from scratch or make major changes to what you have already built.
Focusing back on the content editor, Blocks let you add different types of content (e.g. paragraphs, images, quotes, multimedia, etc.) into your posts and pages and rearrange your post/page layouts using features like:
- ‘Point and click’ (e.g. move your cursor over an item and click to select it or add an element to your page).
- ‘Drag and drop’ (e.g. rearrange your page layout).
- Resizing handles (e.g. for resizing images).
- Drop-down menus (e.g. select one of several options to configure a setting).
- Incremental Sliders (e.g. slide right or left to increase or decrease values, adjust widths, etc.)
- Value fields (e.g. enter a number of items to display for an element).
- Up and down arrows (e.g. move content sections up and down the page).
WordPress has published a great video introduction to publishing content with the block editor. To watch this video, go here:
Working With Blocks
As mentioned earlier, with the Gutenberg editor, adding content to posts and pages is all done using ‘blocks’.
The Block Editor contains tools that let you select and insert different blocks into your content.
Let’s go through these tools:
Block Inserter Tool
The Block Inserter tool (Add Block) can be accessed from the Editing Toolbar, or inside the Content Area.
The Add Block tool is the button with the [+] sign. It is the second button on the top left side of the Editing Toolbar.
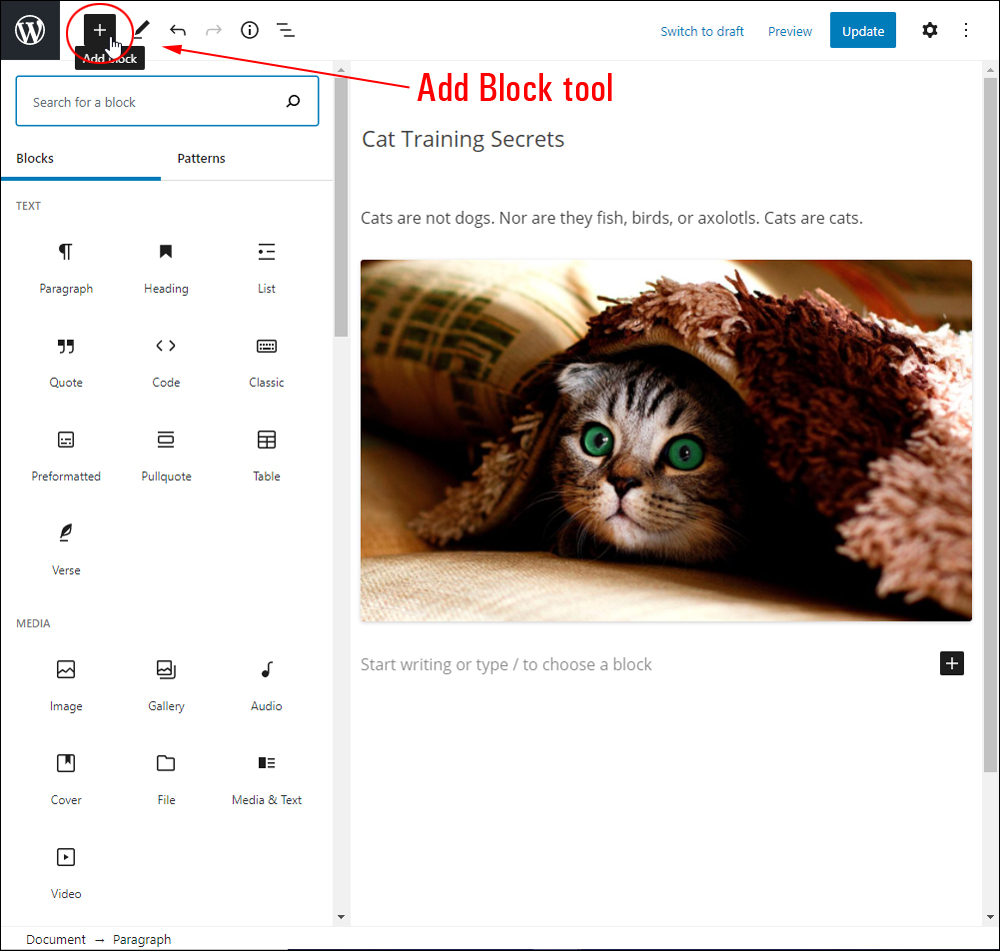
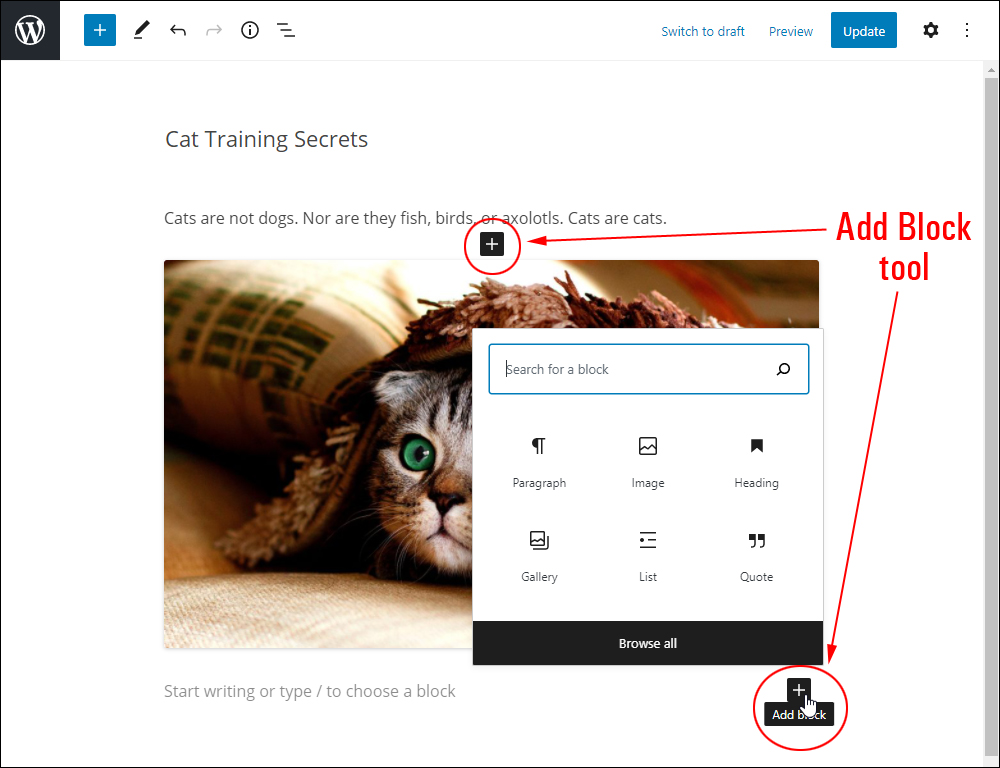
You can also access the Add Block tool inside the content area by clicking above or below an existing block.
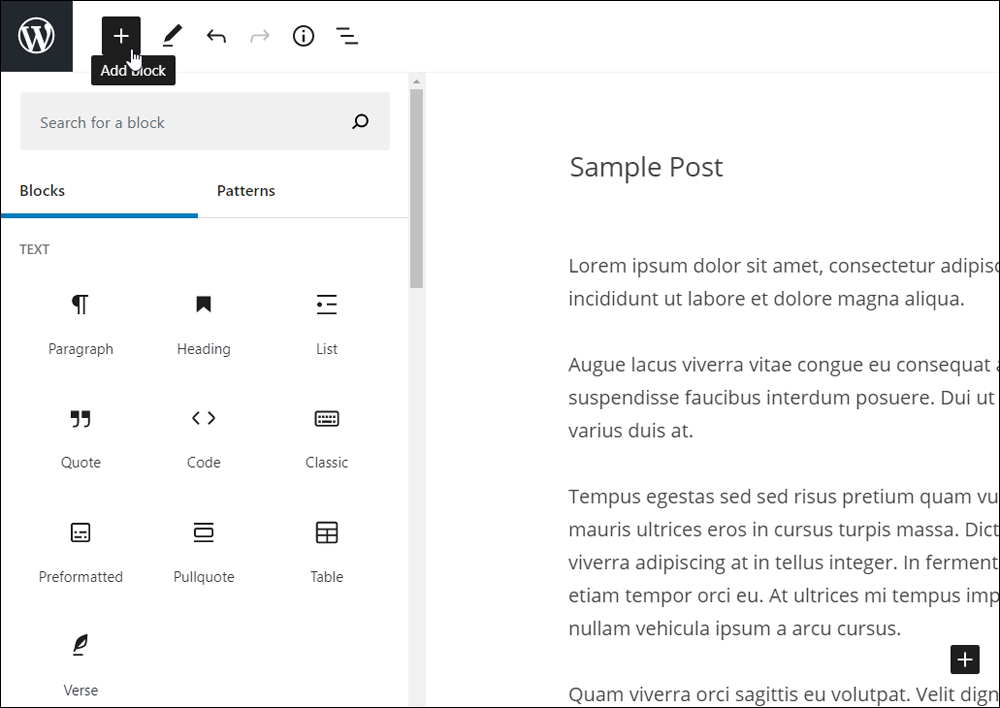
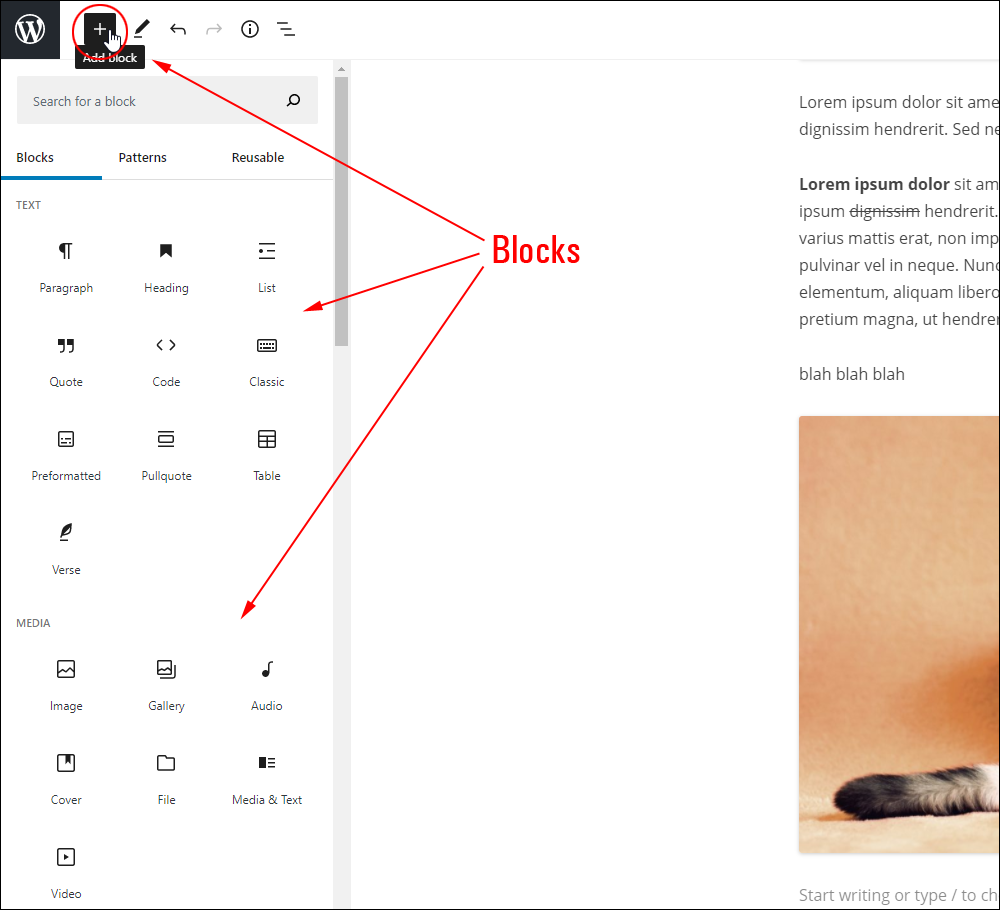
The ‘Add Block’ tool is divided into the following tabbed sections:
- Blocks – Blocks are the building elements of your content. This section displays a list of all the default and installed blocks in your content editor.
- Patterns – Patterns are predefined block layouts (groups of blocks) created by designers. This section is explained further below.
- Reusable Blocks – Reusable blocks can be used over and over again in your content. Note: You must create at least one Reusable Block for this section to display in the Add Block tool’s tabbed menu section.
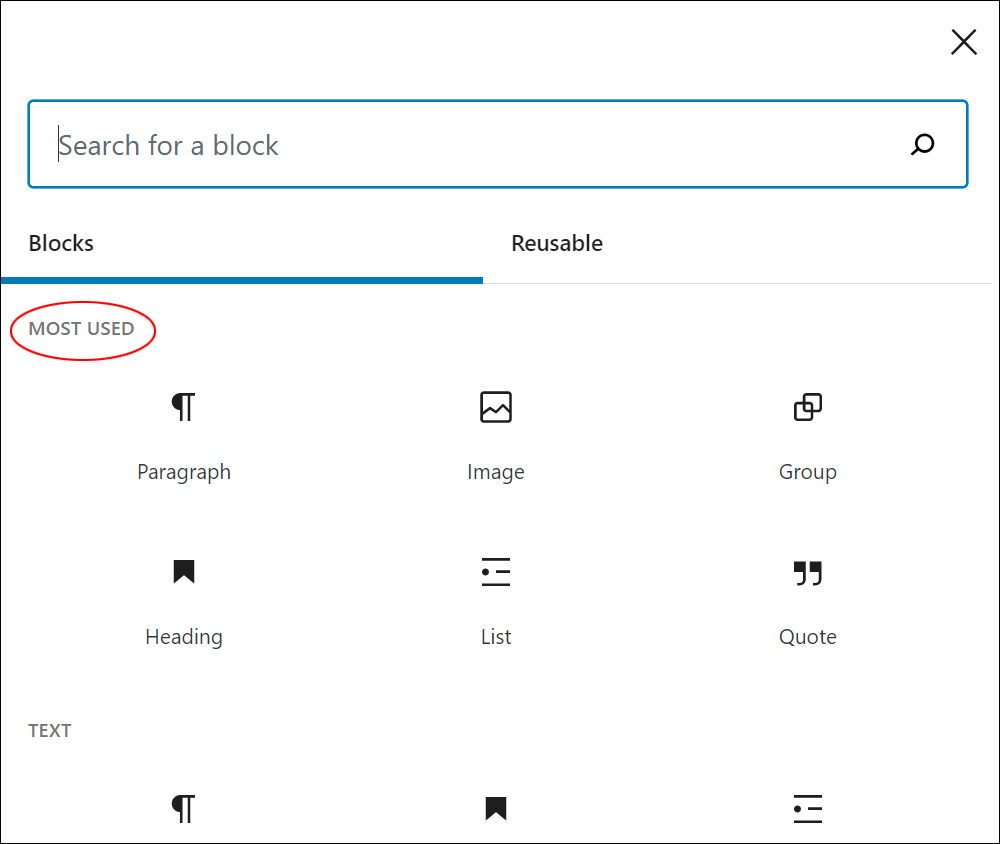
Additionally, the Blocks menu contains a ‘Search’ field and different menu sections:
- Most Used
- Common Blocks
- Formatting
- Layout Elements
- Widgets
- Embeds
- Reusable Blocks – Note: You must create at least one Reusable Block for this section to display in the Add Block tool’s menu.
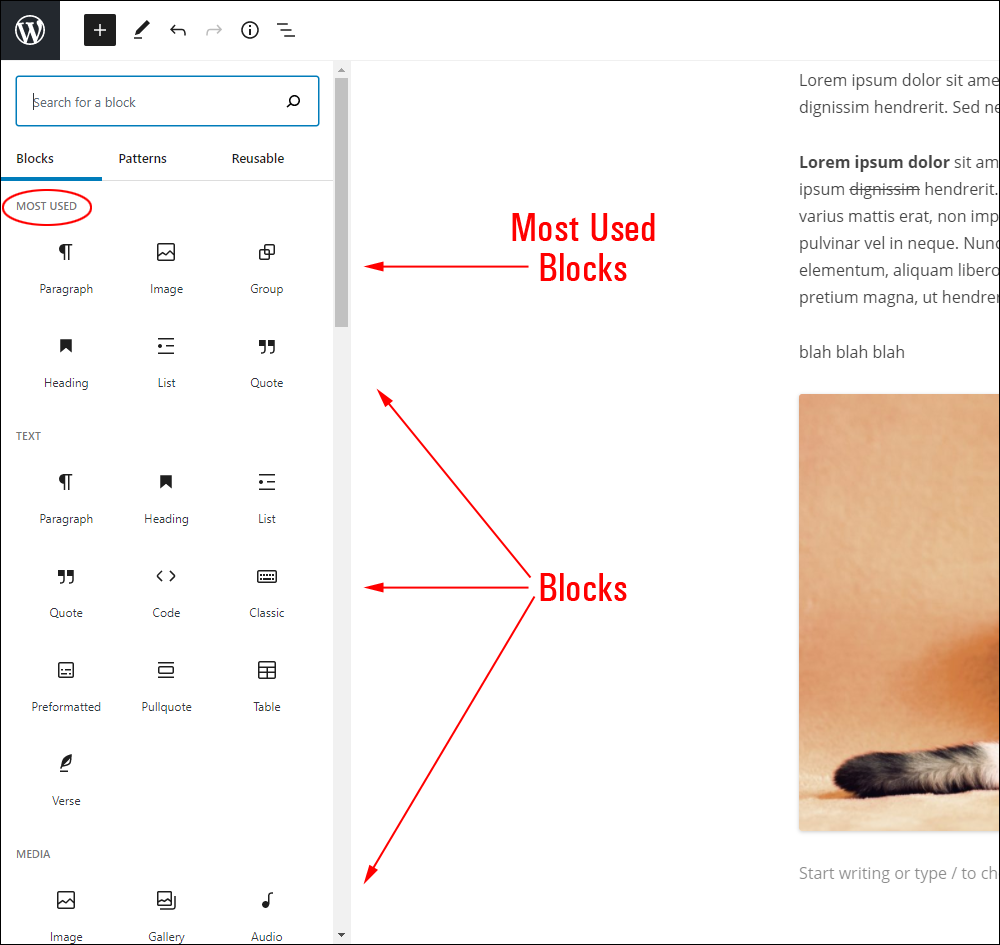
To insert a block into the content editor, either search for the block inside the ‘Add Block’ tool and then click on the block or scroll down the list and click on the block. If you’re not sure what a particular block does, hover over it and a description will pop up.
![]()
To learn more about the block types found in each of these sections, see the links provided at the end of this tutorial.
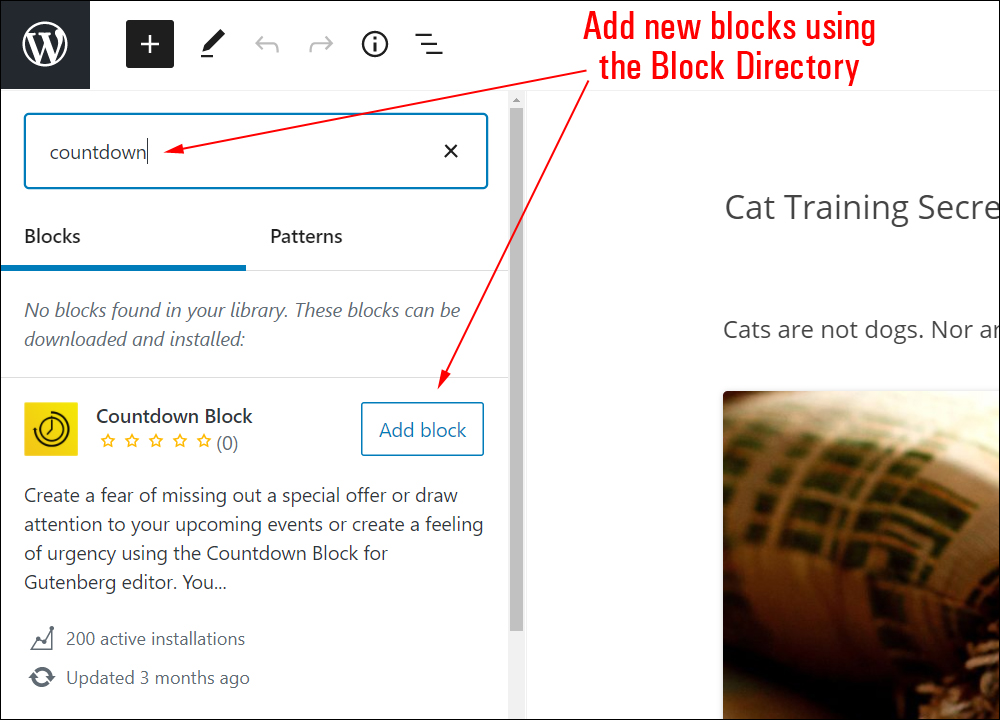
Block Directory
Just like plugins and themes, you can also add blocks to endlessly extend your site’s functionality.
This is where the Block Directory comes in handy.
After the block editor became the new default WordPress editor, WordPress made the creation of a Block Directory one of its next priority projects.
While the default block editor includes a sizeable number of useful blocks already, the Block Directory allows web and plugin developers to create and add new types of blocks with specific types of functionality to the Block editor. It also allows users to discover, test, and install new blocks for their website without leaving the editor, as the Block Directory is built right into the block editor.
You can install blocks from the built-in Block Directory into your site using the Add Block tool. Just search for a specific functionality you would like to add to your content and a list of blocks matching your search will display inside the menu.
![]()
Note: The block directory is only available to users that have the capabilities to install and activate plugins on their site.
To download and install these custom blocks, click on the Add block button.
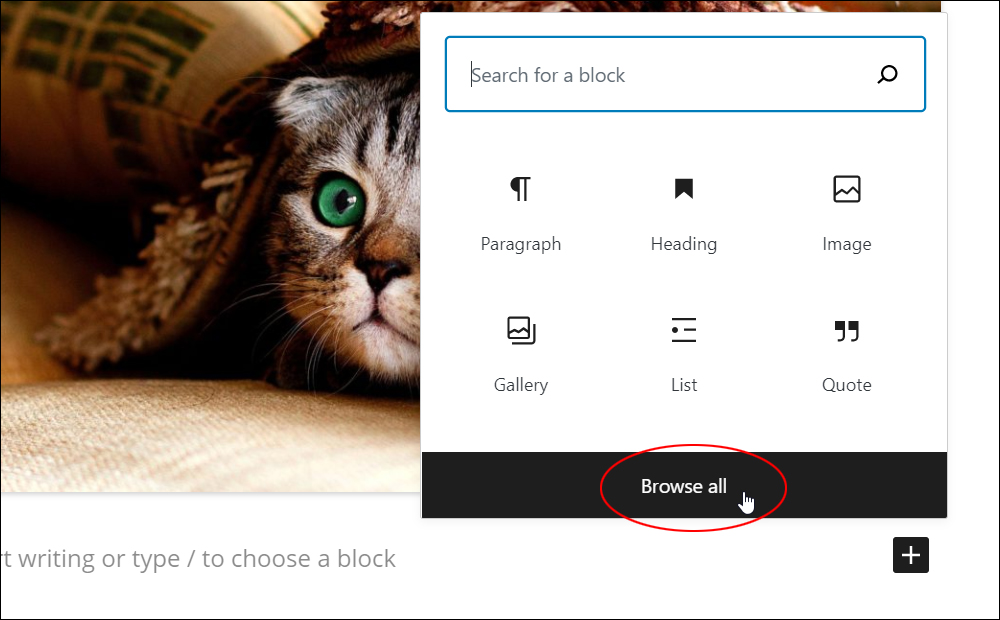
You can also access the Block Directory while working inside the content area by selecting the Block Inserter tool and clicking on the Browse all link.
The WordPress team has put together a great video that explains how the Block Directory works. Visit the page below to learn more about using the WordPress Block Directory:
Block Patterns
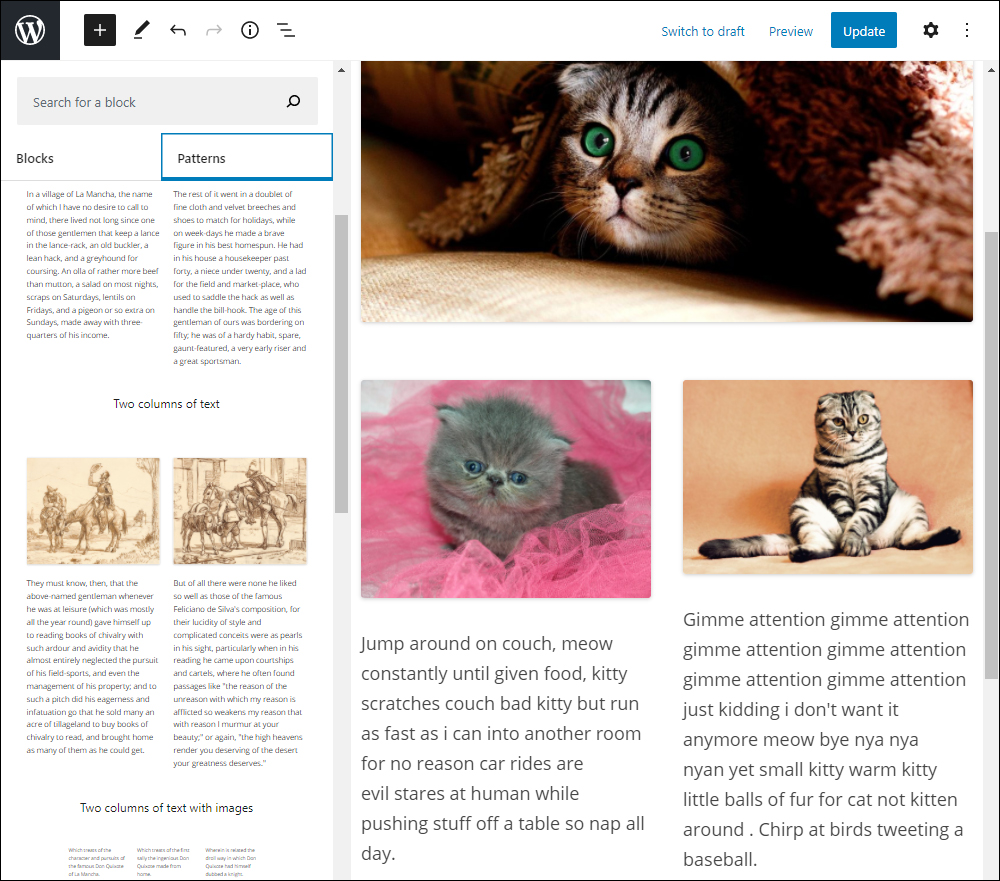
Block Patterns are predefined block layouts (groups of blocks) that you can insert into your posts and pages and then tweak and customize to suit your needs.
Block patterns allow web designers to create complex, beautiful, and stylized layouts using combinations of text and media blocks that you can then instantly add to you enhance the look and feel of your content without having to design or create these yourself.
Block patterns can be found in a wide variety of plugins and themes, with more patterns being constantly added as WordPress evolves.
Like Blocks, you can select and add patterns into your content from the Inserter tool.
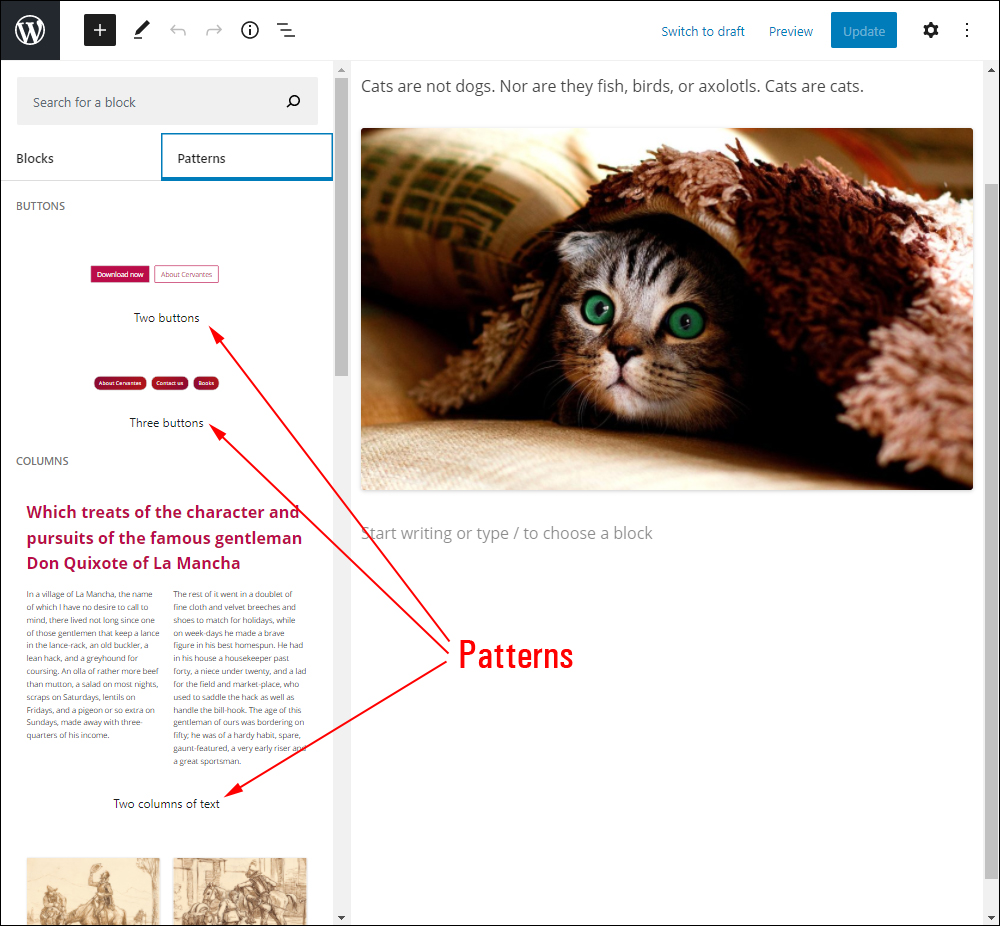
Just select and click on a Pattern and it will be automatically added to your content.
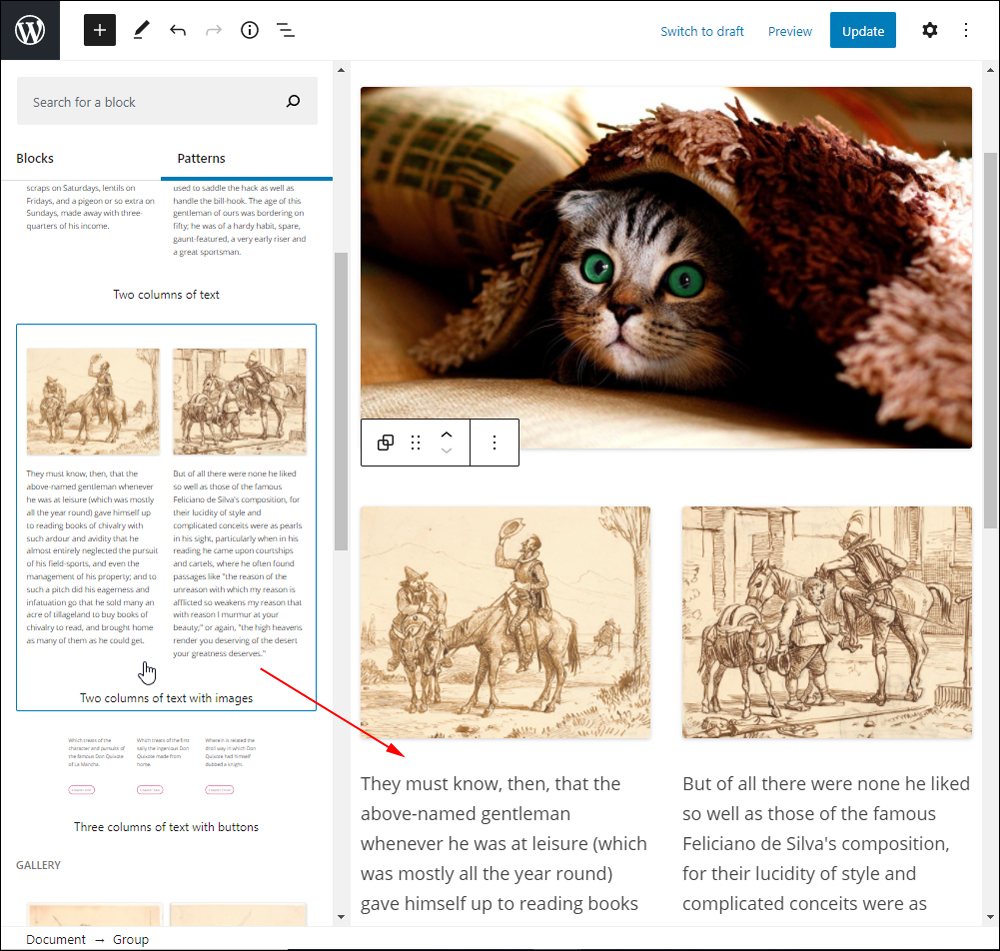
You can then easily tweak and customize the block elements inside the Block Pattern to suit your needs.
The WordPress team has also put together a video explaining how Block Patterns work. Visit the page below to learn more about using Patterns in the Block Editor:
Block Editors
Depending on the type of block you add to your post or page, you will see that each block has its own Block Editor with a menu of options that let you change things like format, add or remove links, replace color, change the alignment of elements, etc.
These appear when you click inside the block.
For example, here is the Block Editor of a Paragraph Block …
Each block also has its own set of controls that will display in the Settings section when you select the block.
Some blocks let you adjust various settings and some blocks have few or no settings.
You can show or hide these settings from the Block Editor’s More Options menu. Click the three dots (vertical ellipsis) to reveal additional settings in your Block Editor.
For a great overview of how Block settings work in the WordPress Block Editor and how to adjust these, see the video below:
For in-depth tutorials about using different types of blocks, see the links at the end of this tutorial.
Block Editor Settings
As mentioned in the previous section, every block type has its own set of controls with additional settings and options.
All block types, however, follow a similar build structure.
Some of the universal elements you will find in most Block Editors include features that let you:
- Move Blocks
- Change Block Type or Style
- Access Additional Options
- Access Advanced Block Settings
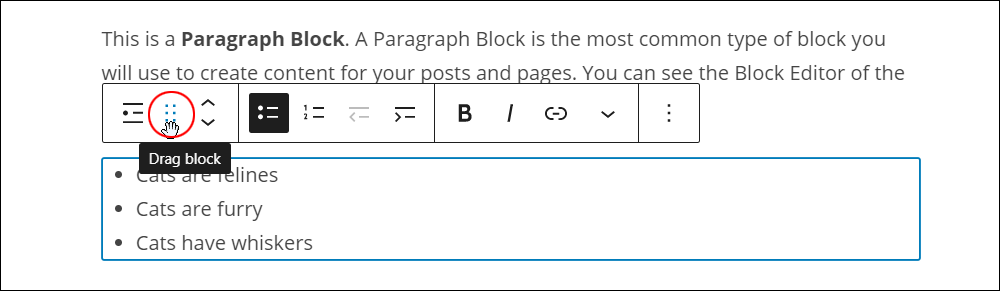
Moving Blocks
You can easily reorder, rearrange, or reposition blocks in your content using ‘move up’ and ‘move down’ arrows in the Block Editor.
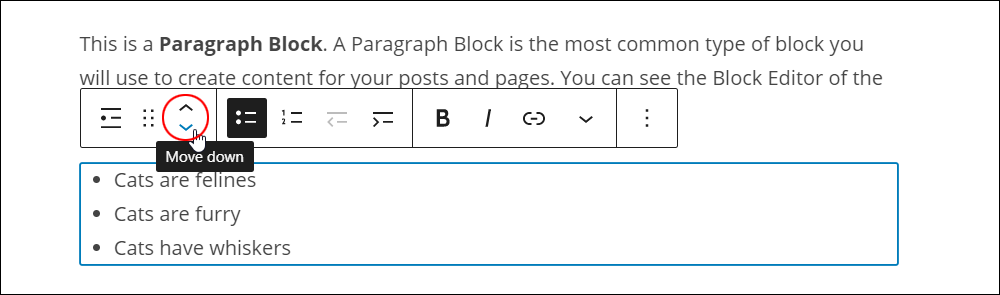
You can also place blocks wherever you like and rearrange the layout of your content in your post or page using drag and drop.
Additionally, you can move blocks using the Move To function in the More Options menu (this is explained further below).
Moving blocks is covered in more detail in our tutorial on how to use the Block Editor’s Content Area.
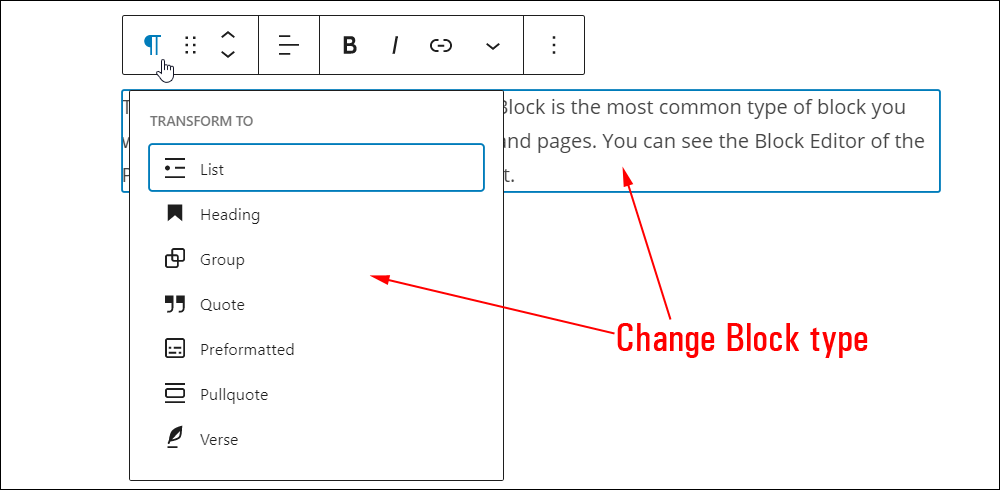
Change Block Type Or Style
Some blocks allow you to easily change or substitute the block type or style.
This feature is useful for converting content from one type into another without having to insert a new block and transfer its content over.
For example, here are the options available for changing a Paragraph Block into another type of block (e.g. a Quote block or Verse block)…
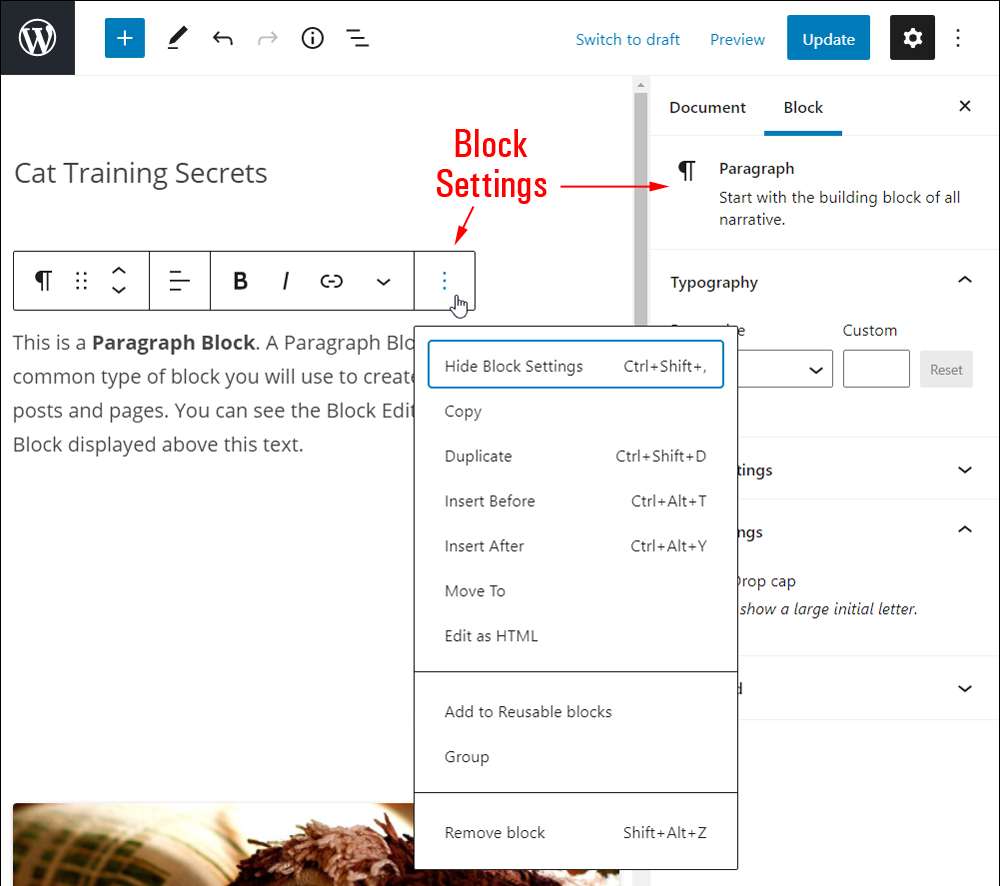
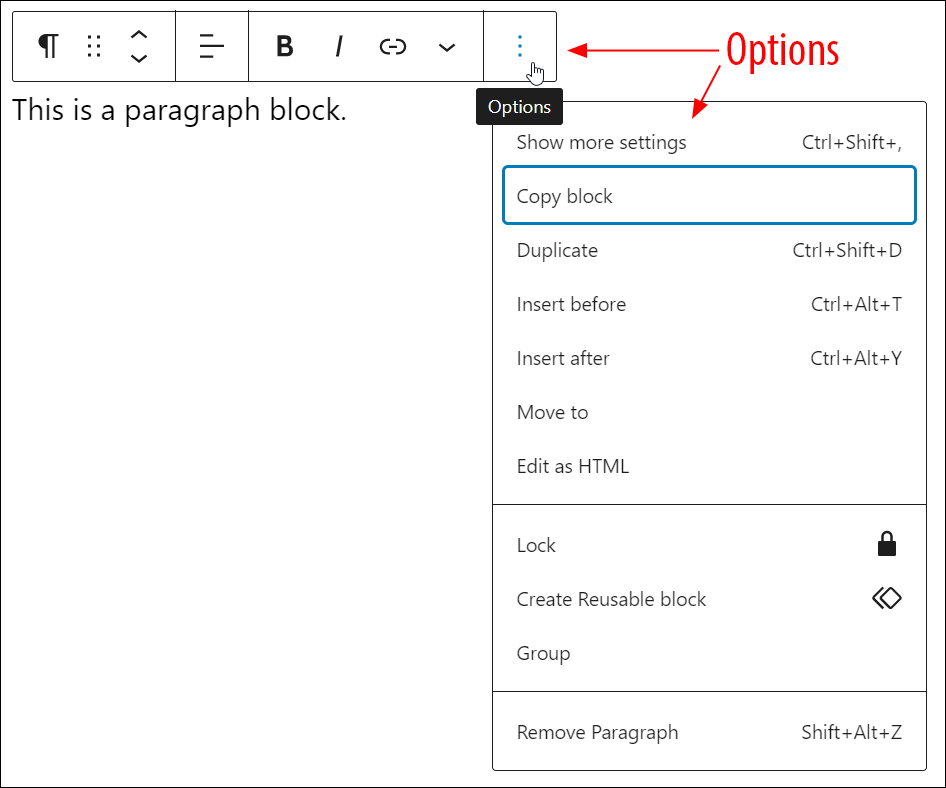
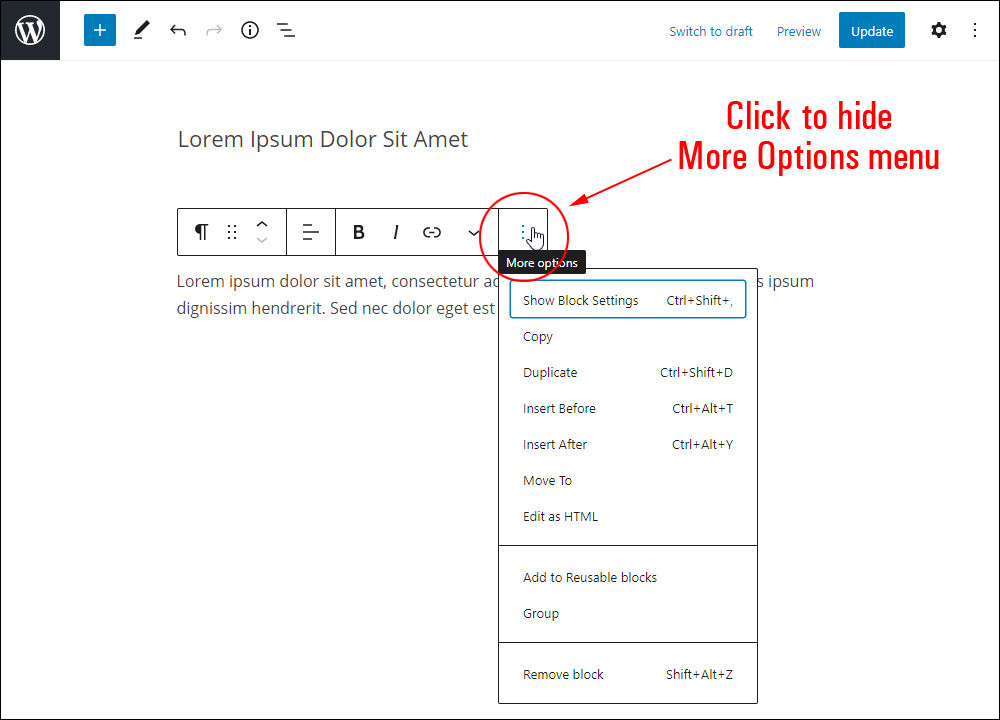
Block Editor Settings – More Options
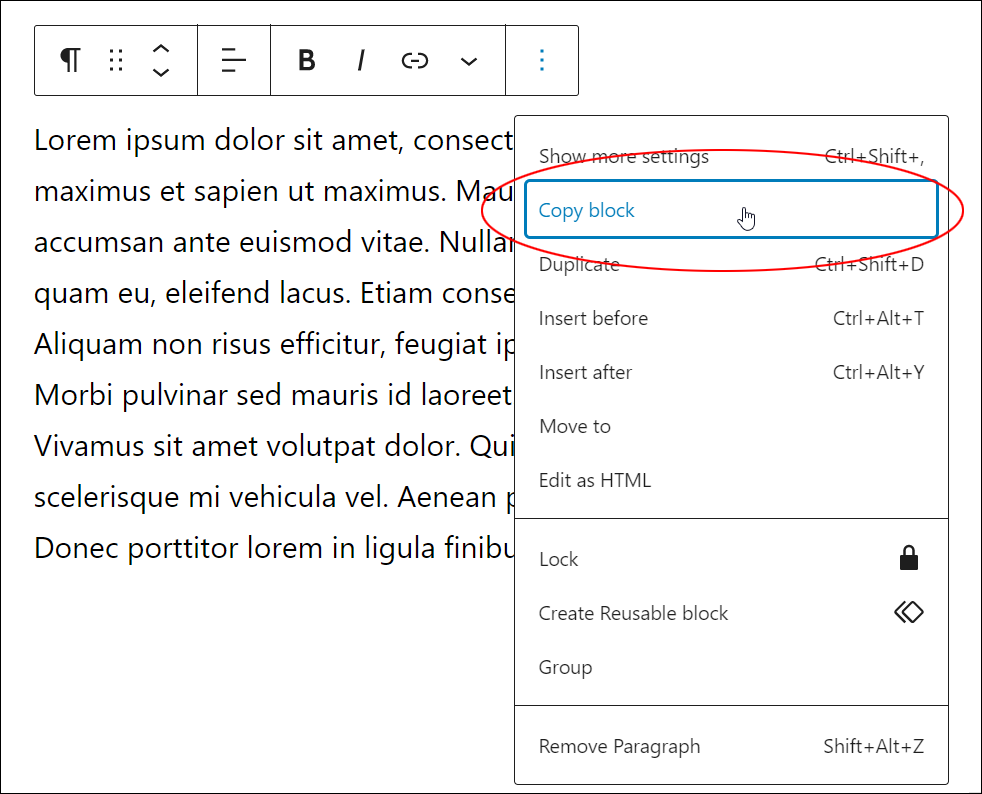
Another common element of block editors is the ‘More Options’ section, which includes the following standard settings:
- Show/Hide Block Settings
- Copy
- Duplicate
- Insert Before
- Insert After
- Move To
- Edit as HTML
- Add to Reusable Blocks
- Group
- Remove Block
To display the ‘More Options’ menu, click on the three dots (vertical ellipsis) on the Block Editor menu.
Let’s go through each of these settings.
![]()
Once you’re familiar with the settings below, you can save time accessing these features using Keyboard Shortcuts.
Show/Hide Block Settings
Hiding block settings lets you work on your content free of distractions (i.e. (‘Distraction-Free’ Mode).

To hide block settings:
- Click anywhere inside the block to view the Block Editor.
- Select the ‘More Options’ menu
- Click ‘Hide Block Settings’ to hide the ‘Settings’ sidebar from view.
- Click ‘Show Block Settings’ to display the ‘Settings’ sidebar on your content editor again.
Copy
This function copies all the content inside your selected block to your clipboard (e.g. text, images, etc.) and preserves all of its formatting tags.
This function is useful if you would like to copy and paste the content from a block into a different post or page.
Note: if you plan to reuse the same block content often, you can also turn the block into a Reusable block – see further below for more details.
To copy content from a block to your clipboard:
- Click anywhere inside the block to view the Block Editor.
- Select the ‘More Options’ menu
- Select ‘Copy’ to copy all the content from the block to your clipboard.
- Use the normal ‘Paste’ function to paste the content into another block (e.g. on a different post or page), save the block content to a text file, etc.
Duplicate
This setting lets you save time recreating an existing block. Use the Duplicate setting to create and add an identical copy (i.e. a clone) of any selected block into your content, then tweak the content on your duplicated block to suit your needs.
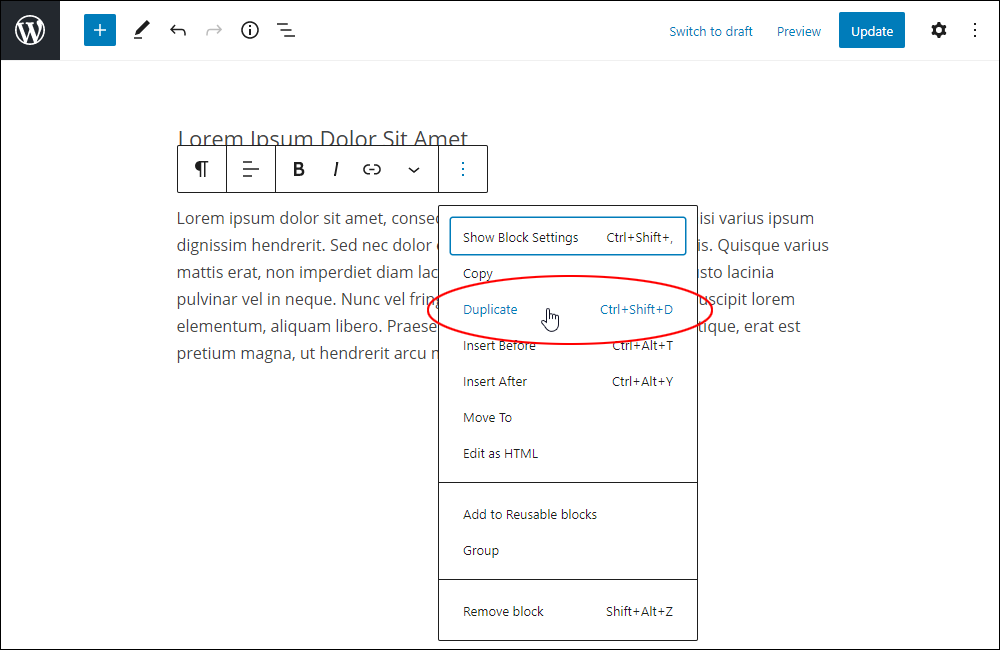
To duplicate a block:
- Click anywhere inside the block to view the Block Editor.
- Select the ‘More Options’ menu.
- Click ‘Duplicate’.
- Edit and/or reposition the duplicated block if required.
- Save your post or page to update your content.
Insert Before
This setting lets you insert a new block into your content above the block you are currently working on.

To insert a block above your selected block:
- Select the block where you want to insert a new block before it.
- Click anywhere inside the block to view the Block Editor.
- Select the ‘More Options’ menu.
- Click ‘Insert Before’.
- A new block ‘placeholder’ will be inserted above your selected block.
- Use the ‘Add Block’ tool to select the type of block you want to add to the new block placeholder.
- Save your post or page to update your content.
Insert After
This setting lets you insert a new block into your content below the block you are currently working on.
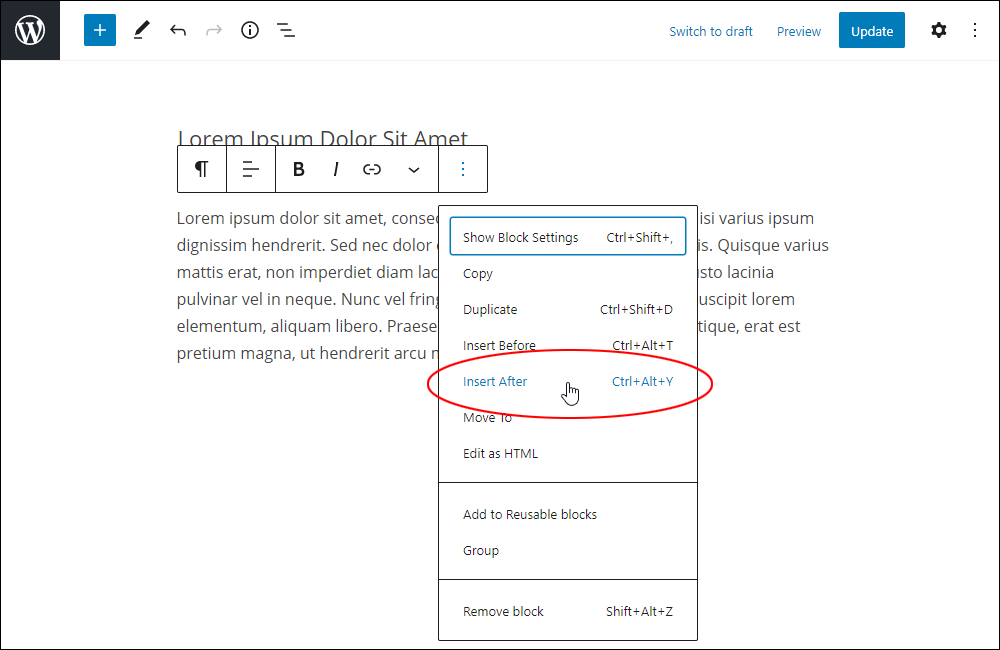
To insert a block below your selected block:
- Select the block where you want to insert a new block after it.
- Click anywhere inside the block to view the Block Editor.
- Select the ‘More Options’ menu.
- Click ‘Insert After’.
- A new block ‘placeholder’ will be inserted below your selected block.
- Use the ‘Add Block’ tool to select the type of block you want to add to the new block placeholder.
- Save your post or page to update your content.

Move To
This function lets you reposition a block on your post or page using your keyboard instead of clicking on the Block Editor’s Move Up and Down arrows or using the drag and drop handle.
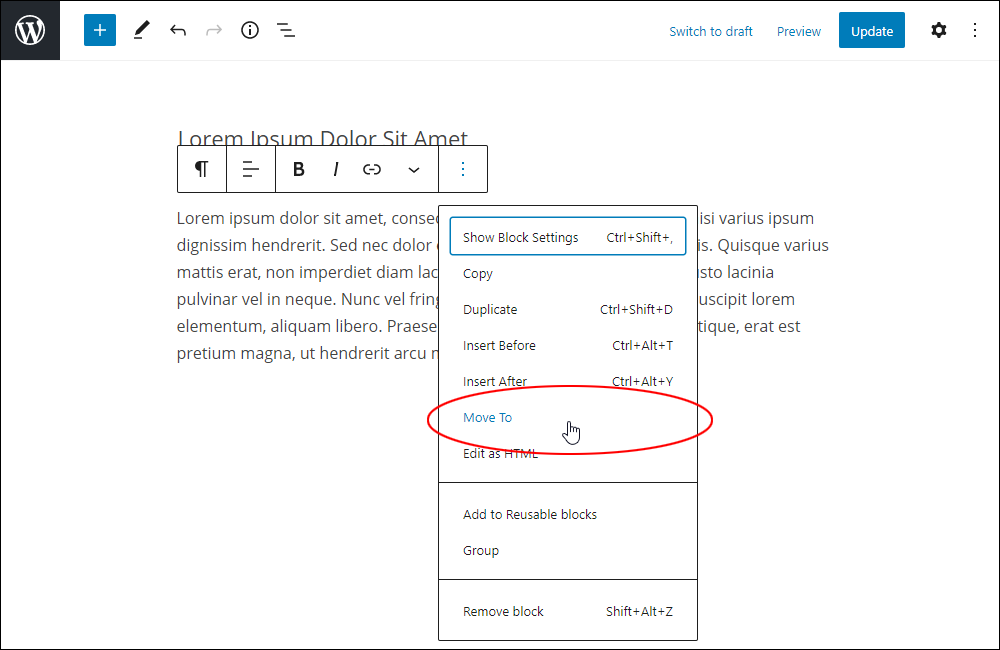
To move a block:
- Select the block you want to move to a different location on your post or page.
- Click anywhere inside the block to view the Block Editor.
- Select the ‘More Options’ menu.
- Select ‘Move to’.
- A blue horizontal line will display above the block.
- Move the blue horizontal line up and down your content using your keyboard’s ‘up’ and ‘down’ arrow keys until the line is in the desired location you want the block moved to.
- Hit the ‘Enter’ key.
- Your selected block will be moved to the new location on your post or page.
Edit as HTML
Normally, you view, edit, and format your content using a visual editor. This setting lets you view and edit the block’s underlying HTML code.
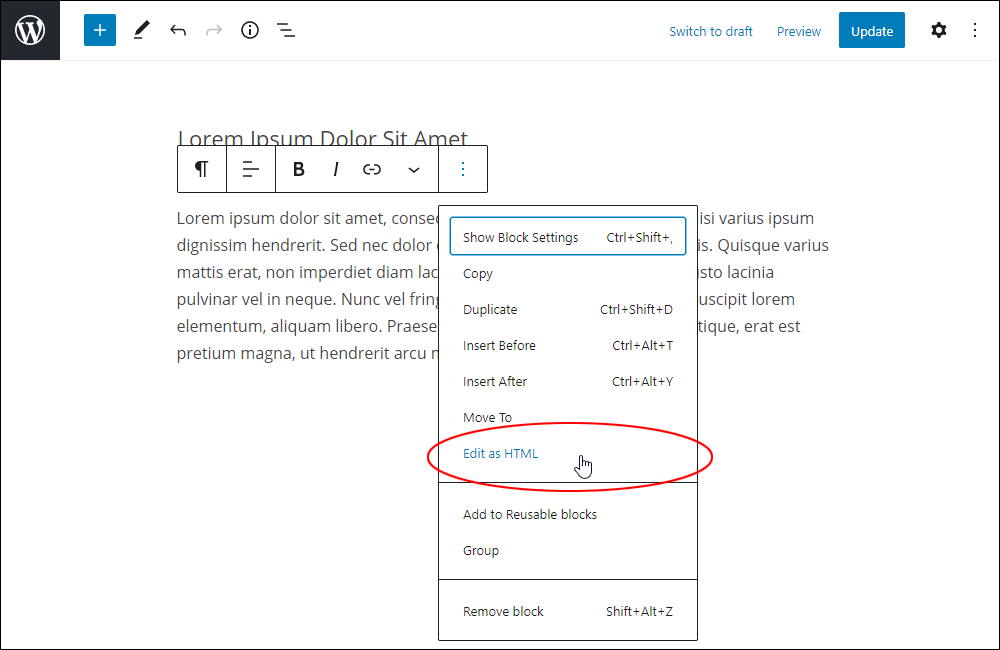
To view and edit a block’s HTML code:
- Click anywhere inside the block to view the Block Editor.
- Select the ‘More Options’ menu.
- Click ‘Edit as HTML’.
- The block content will switch to the HTML editor.
- To return to the visual editor, select the ‘More Options’ menu again and click on ‘Edit visually’.
- Save your post or page to update your content.
Add to Reusable Blocks
This setting lets you store a customized block that can be reused anywhere you like on your site.

To save a block as a reusable block:
- Click anywhere inside the block to view the Block Editor.
- Select the ‘More Options’ menu.
- Click ‘Add to Reusable Blocks’.
- Your block will be stored in your site’s ‘Blocks’ library.
Note: Reusable blocks are global. This means that any edits you make to a reusable block will be applied to every instance of that repeatable block used on your site.
To learn more about creating, editing, using, and managing reusable blocks, see this tutorial: Reusable Blocks
Group
This setting lets you group different blocks together.
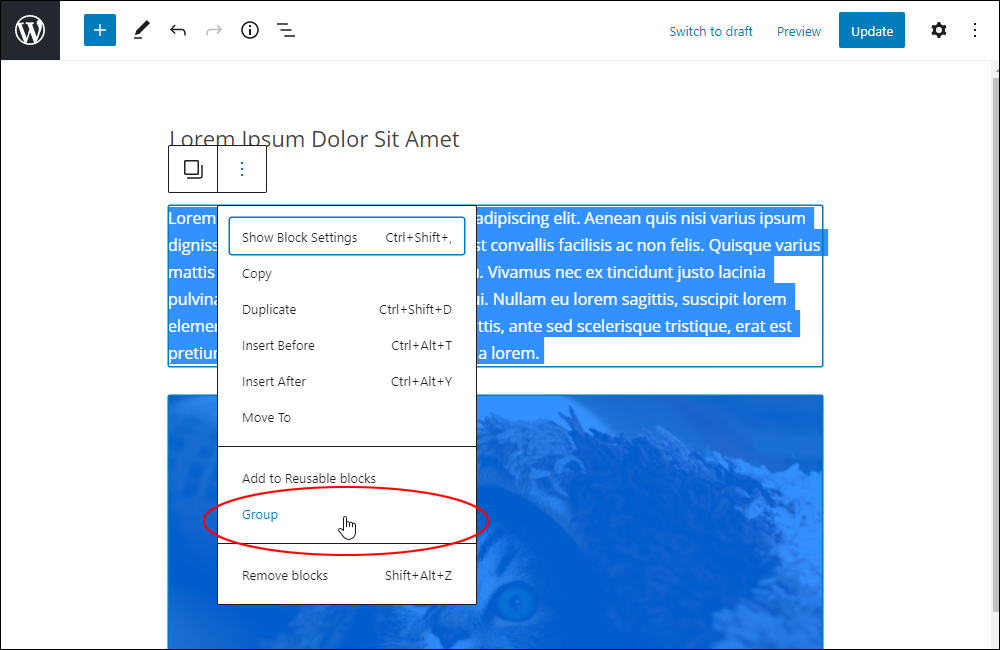
To group blocks together:
- Either:
- Drag your cursor to highlight a group of blocks, or
- Hold down the ‘Shift’ key and click on the blocks you want to group together
- A Block Editor will display after you have selected multiple blocks.
- Either:
- Click on the left-hand icon (i.e. the two overlapping boxes) and select ‘Transform to Group’, or
- Click on the three dots (vertical ellipsis) to expand the ‘More Options’ menu and then select ‘Group’.
- Your selected blocks will be grouped together.
- You can also ungroup the blocks using the same process.
Note: You cannot move other blocks on your post or page (eg using the ‘Move to’ function) between grouped blocks.
Remove Block
This setting lets you remove a block that you no longer need from a post or page.
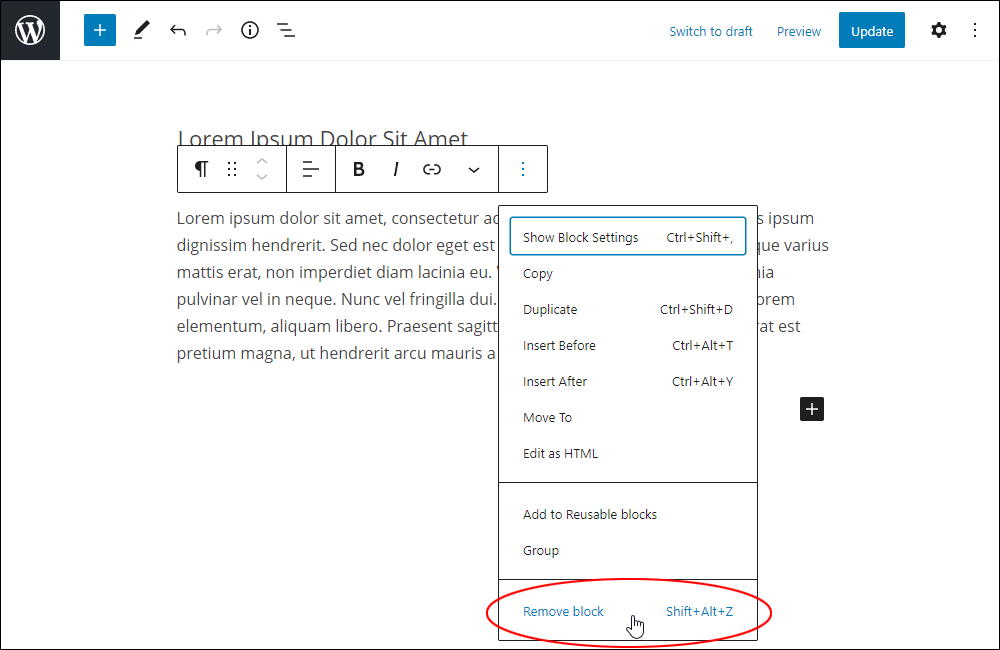
To remove a block from your post or page:
- Select the block you want to remove.
- Click anywhere inside the block to view the Block Editor.
- Select the ‘More Options’ menu.
- Click ‘Remove Block’.
- Your block will be deleted from your post or page.
- Save your post or page to update your content.

To hide the ‘More Options’ menu, click on the three dots (vertical ellipsis) on the Block Editor menu.
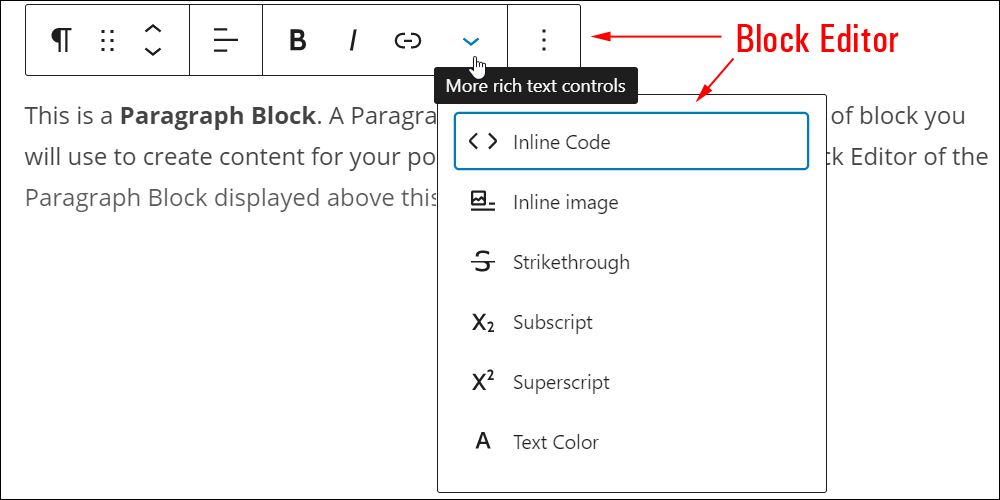
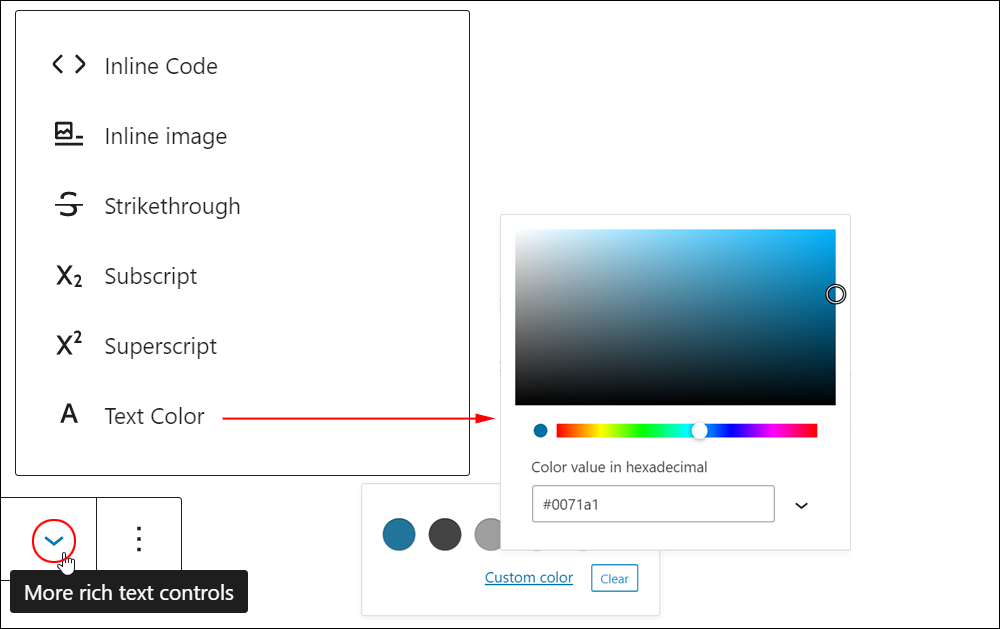
More Rich Text Controls
Many block editors include a ‘More rich text controls’ section with the following options:
- Inline Code – Convert selected text into code (e.g.
printf("Enter a character: ");) - Inline image – Insert an image directly within your text (e.g. a logo or image thumbnail).
- Strikethrough – Add a
strikethrougheffect to your selected text. - Subscript – Convert selected text into subscript text. (e.g. H2O)
- Superscript – Convert selected text into superscript text. (e.g. 102)
- Text color – Change the color of your selected text (select a color from a predefined palette or add your own custom color).
Advanced Block Settings
Many blocks contain an Advanced Settings section with advanced options such as:
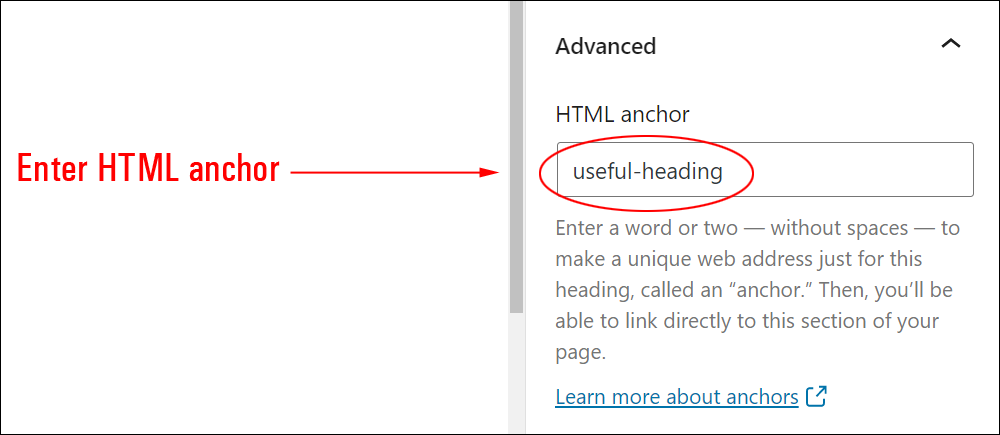
- HTML Anchor – Also known as Page Jumps or Jump Links, this allows you to link directly to any section of your page using a unique URL. See the section below on Using HTML Anchors.
- Additional CSS Class(es) – This field lets you add multiple CSS classes to your block separated with spaces. This allows you to write custom CSS and style the block as you see fit. Note: This requires having knowledge of CSS (Cascading Style Sheets).
Using HTML Anchors
To create a Jump Link, enter a word or two (no spaces allowed, but hyphens, underscores, colons, and periods are ok) into the HTML anchor field in the Advanced block settings section to create a unique web address (e.g. useful-heading).
Next, select the element in your content that you want to add a jump link to and enter your HTML anchor text preceded by a hash symbol (#).
Press Enter to add this link, then save and publish/update your post or page.
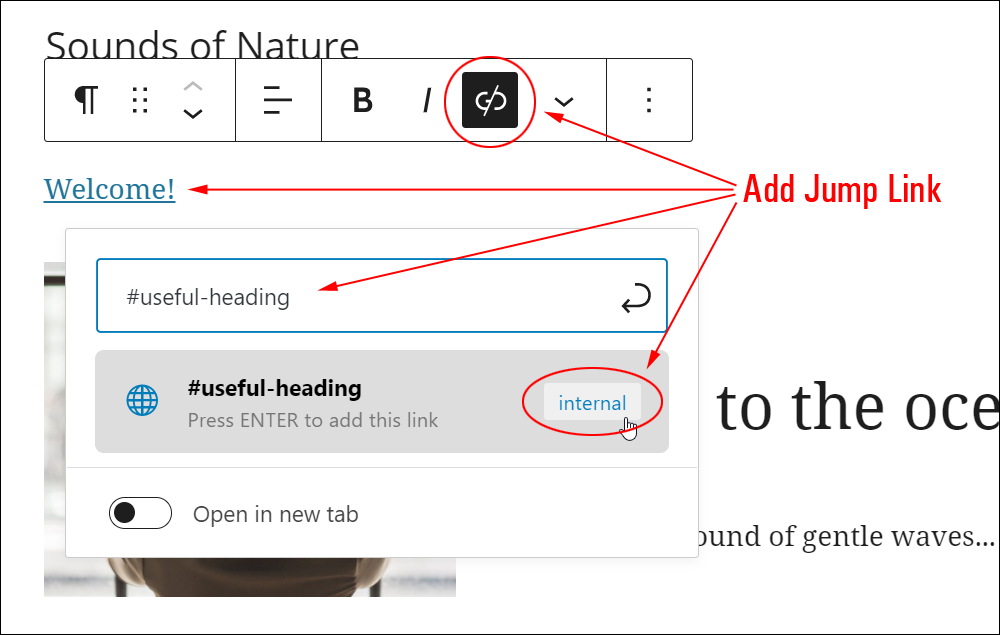
Users can now go directly to the section of your content (i.e. the block) tagged with the HTML anchor by either:
- Clicking on the internal link in the content, or
- Entering the link’s unique URL in their web browser (e.g. https://yourdomain.com/page-slug/#useful-heading).
How To Add Blocks To Content
Blocks can be added anywhere on the page with the click of a button, inserted before or after other blocks using dropdown menus, converted into different block types, and easily reordered using ‘drag and drop’, or ‘up and down’ buttons.
You can add blocks to content in several different ways.
For example, you can add blocks:
- From the ‘Add Block’ tool in the Editing Toolbar
- From the ‘Add Block’ tool in the Content Area
- From inside an existing block.
- From your ‘Reusable Blocks’ library.
To learn how to add blocks to your posts and pages, see this tutorial: The WordPress Block Editor Content Area
![]()
Creating content for posts and pages using the WordPress Block Editor works the same way regardless of what type of site you have (e.g. a blog, company website, eCommerce site, etc.).
Because blocks are designed to allow your website to integrate with all kinds of new and external applications, how your content will look after publishing your posts or pages depends on various factors like:
- The WordPress Theme installed on your site (and any specific theme styles or customizations).
- Different block settings, options, and configurations.
- Any content modification plugins you have installed on your site (most plugins now include their own custom blocks for the WordPress block editor).
- Integrations with third-party applications (many third-party application developers are now also creating blocks that allow their apps to integrate seamlessly with the WordPress block editor),
- Any additional site customizations, etc.
WordPress Gutenberg Blocks
The WordPress block editor includes many useful default blocks.
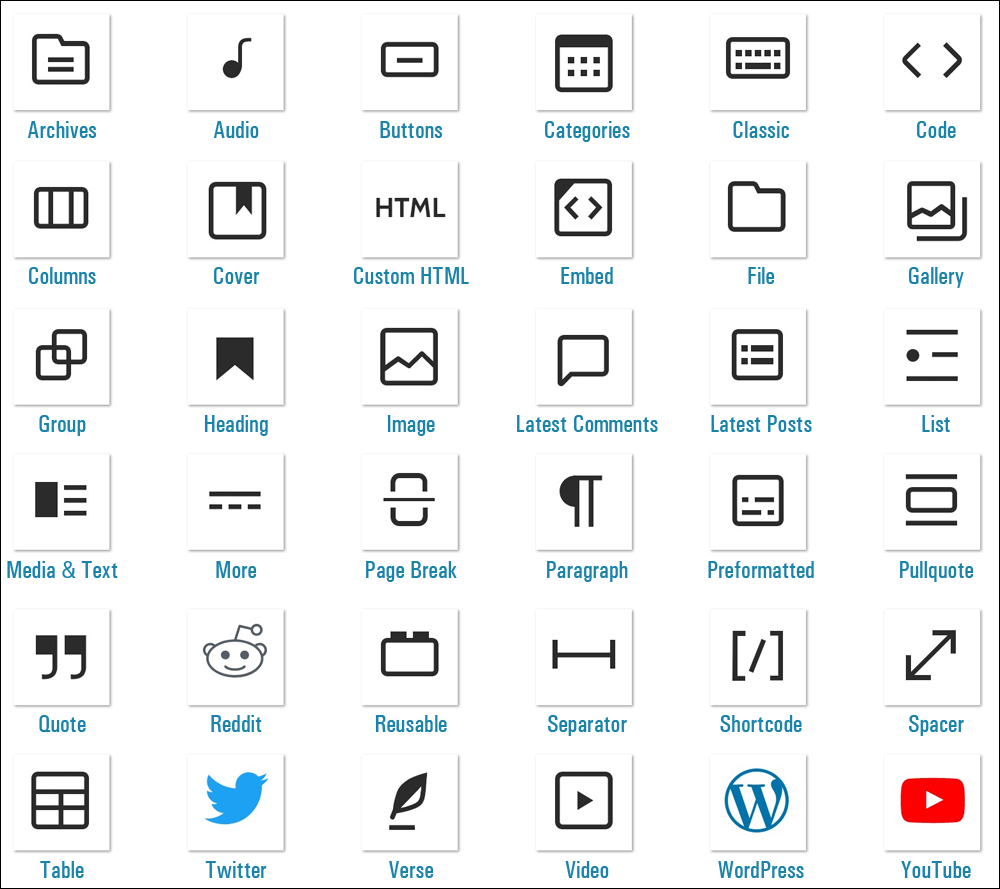
More block-enabled plugins are being continually developed by the WordPress developer community to help you extend and expand the functionality of the Gutenberg content editor.
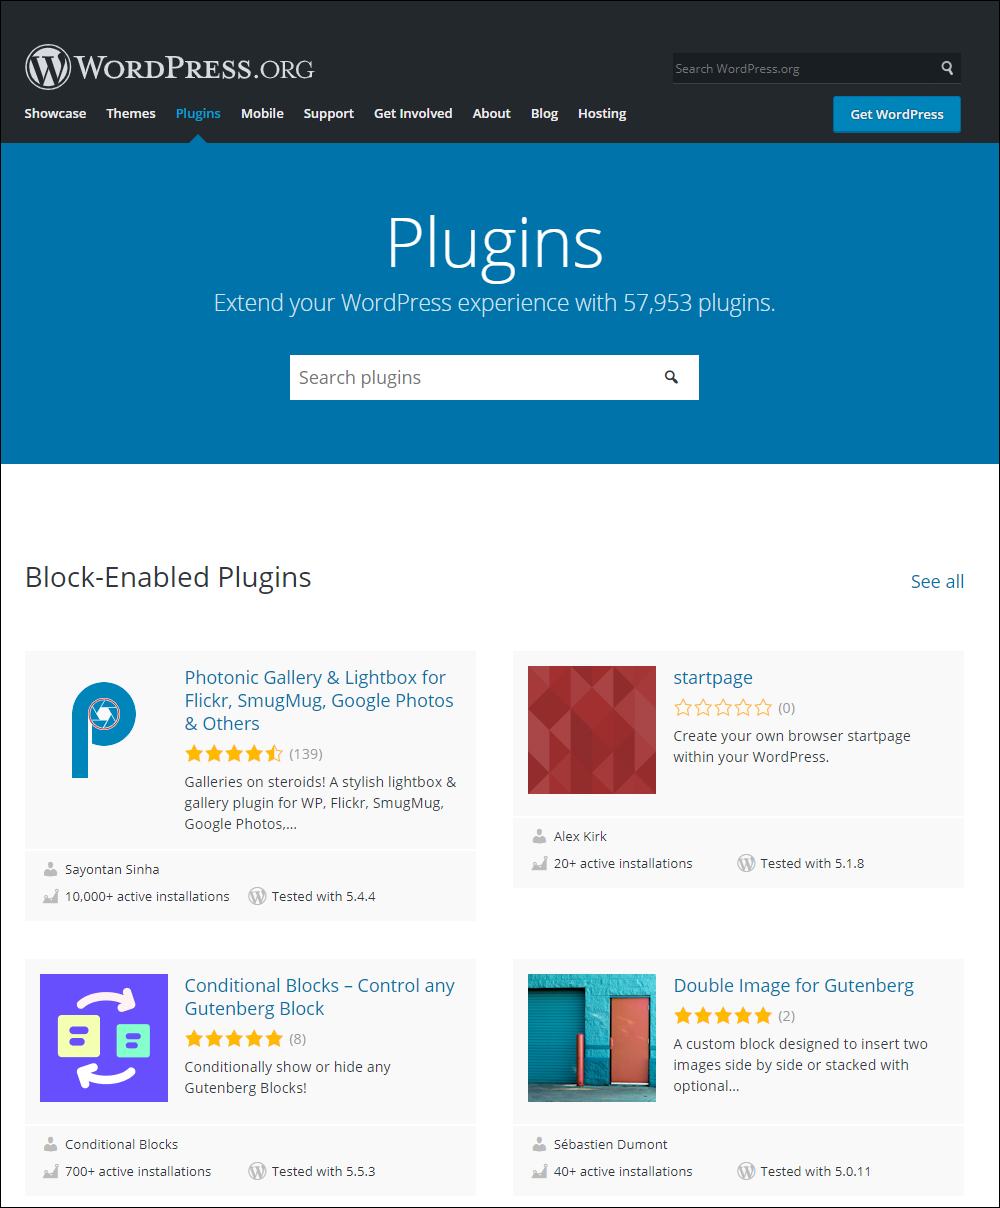
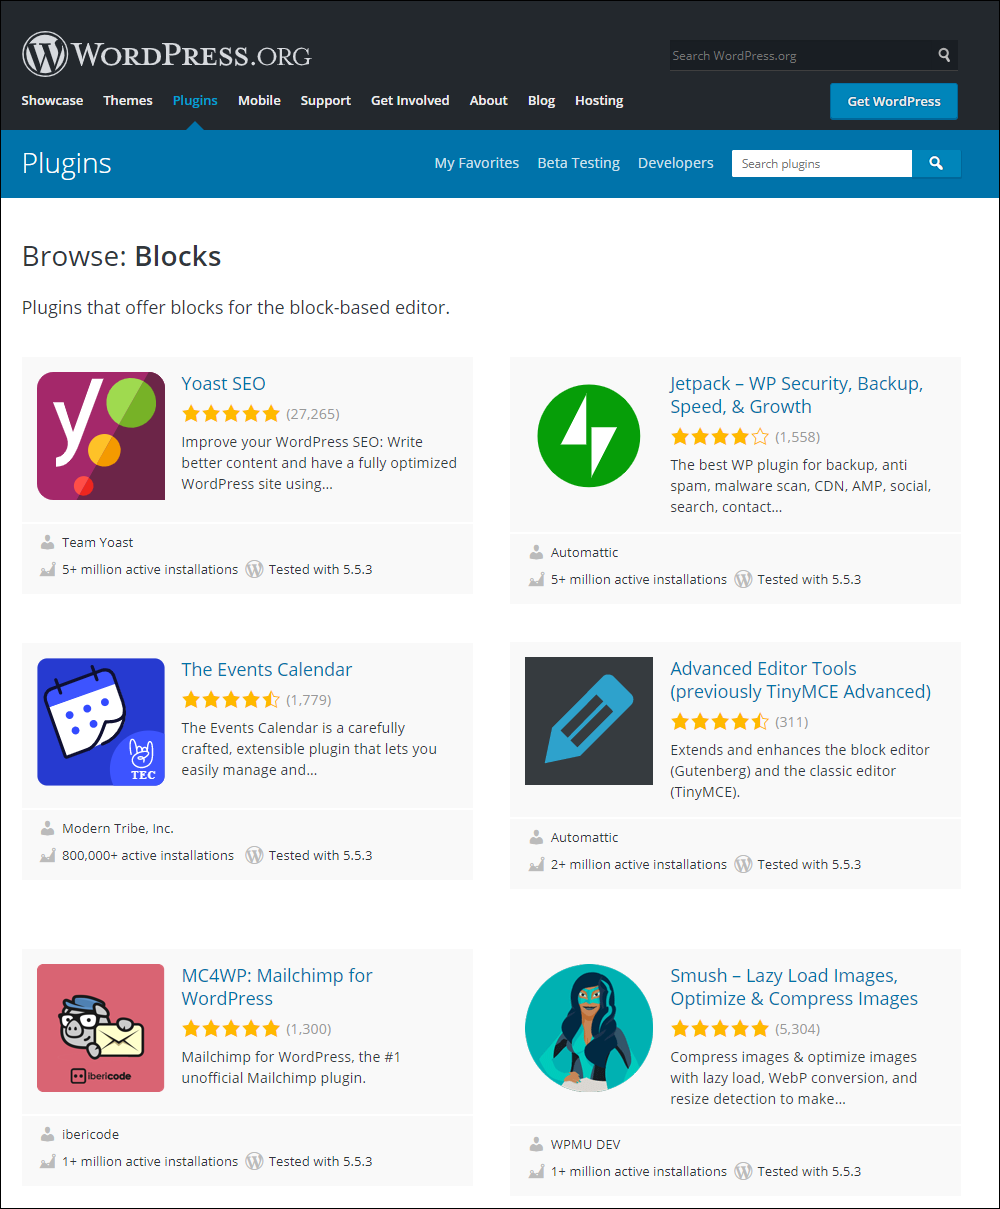
If you click on ‘See all’ in the Block-Enabled Plugins section, you can browse many plugins that offer blocks for the block-based editor to help enhance and extend your content.
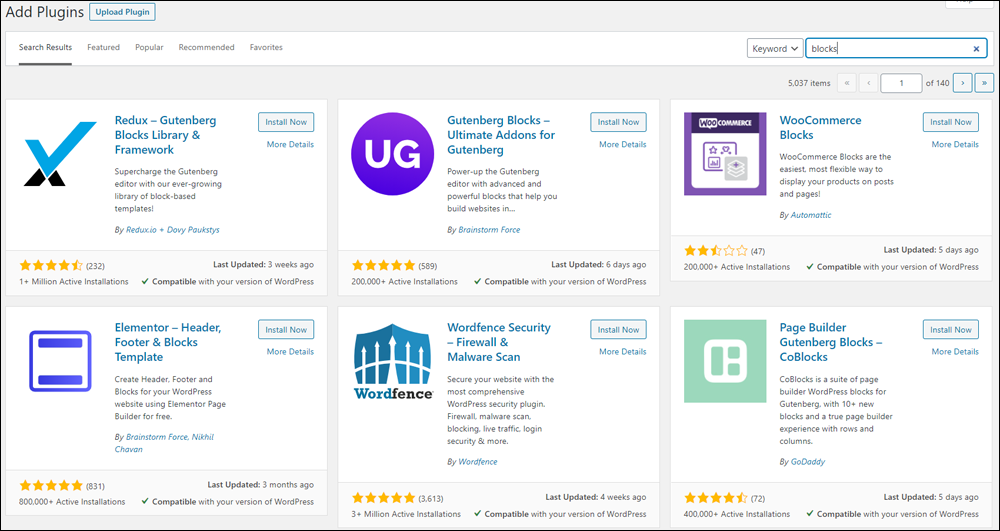
Additionally, you can search the WordPress plugins library from your dashboard for new block-enabled plugins (Plugins > Add Plugins).
WordPress Block Editor – Blocks
Clicking on the ‘Add Block’ tool in the WordPress Block Editing Toolbar brings up a list of Blocks.
This tool contains a ‘Search’ field and tabbed sections for Blocks, Patterns, and your Reusable Blocks library (you need to create at least one reusable block for this tab to display).
The Block List is divided into the following sections:
- Most Used (see below to learn how to add this section)
- Text
- Media
- Design
- Widgets
- Embeds
- Reusable (only displays when a reusable block is created)
See Your Most Used Blocks
If you use the same blocks often, you can display your most commonly used blocks at the top of your block list.
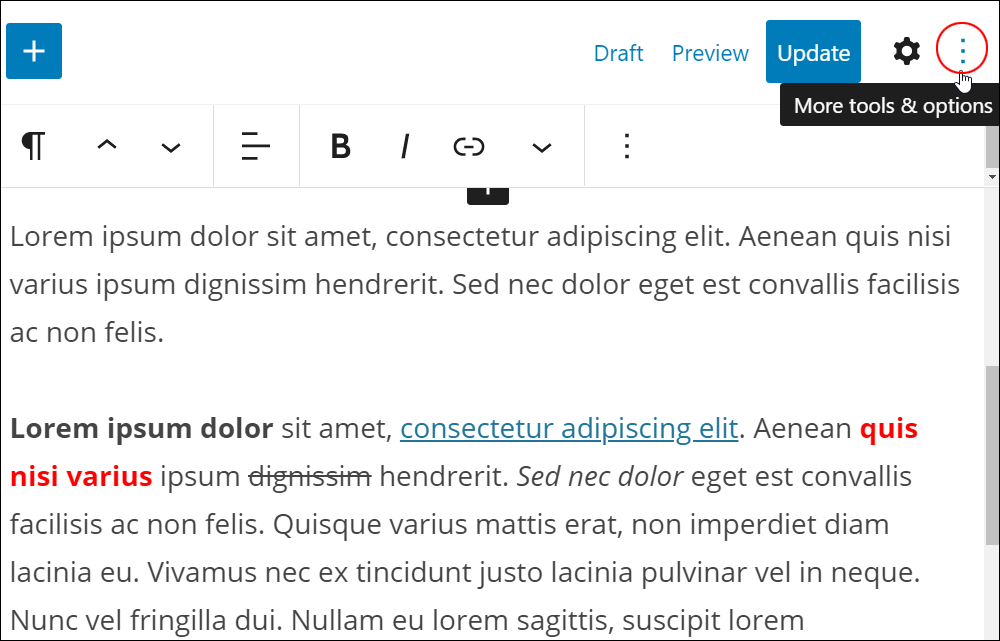
To enable the most used blocks category, do the following:
Click the icon with the three dots (vertical ellipsis) in the top right-hand corner of the editor screen to access the ‘More tools & options’ section.
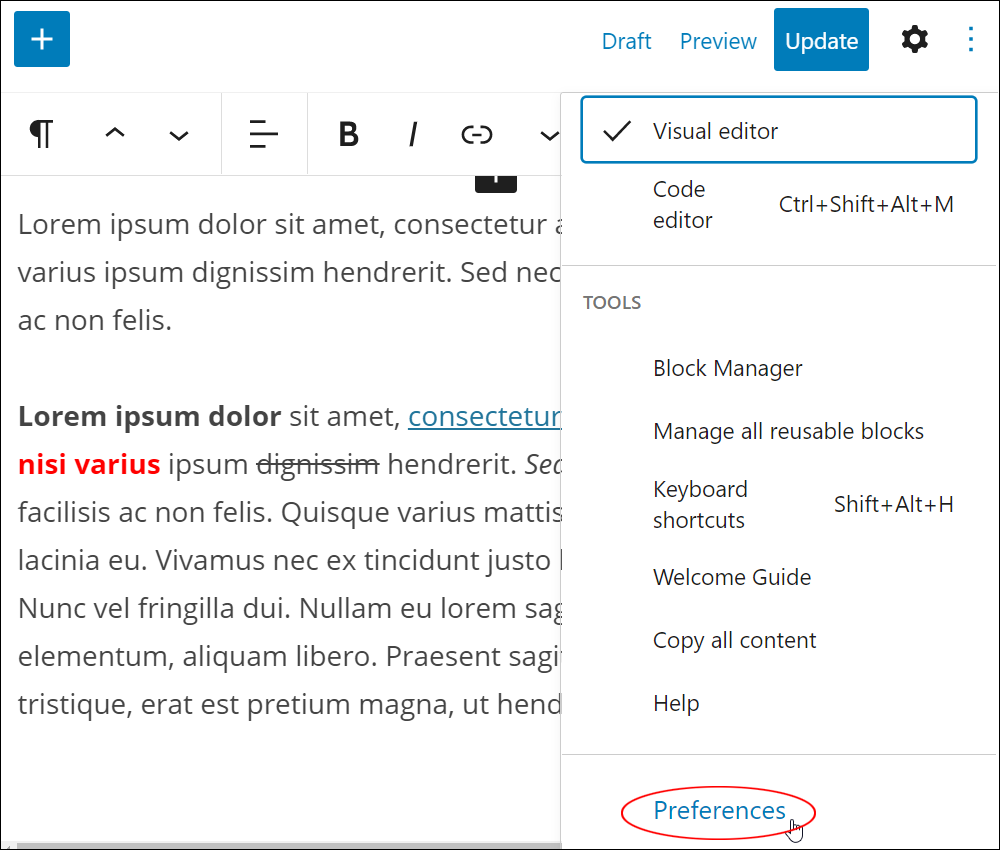
Click on Preferences.
In the Preferences > General section, check the box next to Show most used blocks.
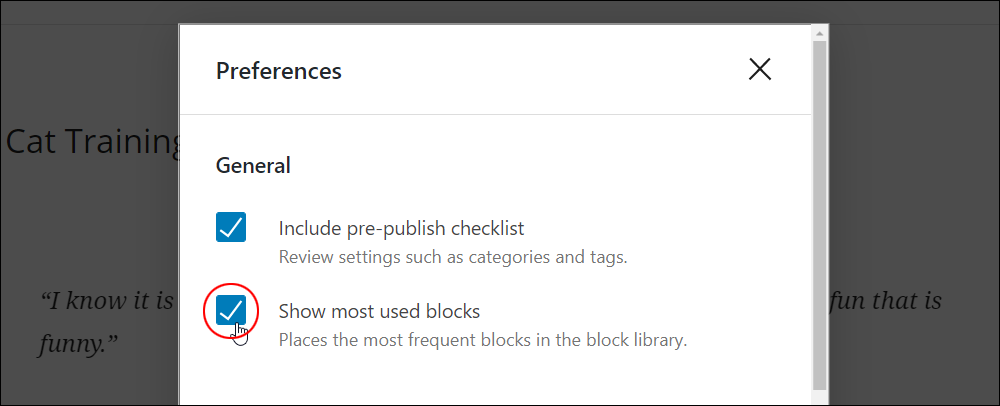
The ‘Most Used’ blocks category will now display at the top of your list of Blocks.
Default WordPress Editor Blocks – Tutorials
For detailed tutorials on using the WordPress Block Editor’s default blocks, click on the links below:


Paragraph Block


Heading Block


Cover Block


Video Block
Code Block

Classic Block

Custom HTML Block


Table Block

Verse Block
Columns Block

More Block

Media & Text Block

Buttons Block

Page Break Block
Separator Block


Latest Comments Block

Shortcode Block

Archives Block

Embed Block

Reusable Blocks
Blocks By Category
The section below lists WordPress Gutenberg blocks by category.
Common Blocks
Formatting Blocks
Layout Element Blocks
Widget Blocks
Embed Blocks
Blocks By Functionality
The section below lists WordPress Gutenberg blocks by functionality.
Text Blocks
Media Blocks
Quote Blocks
Code Blocks
Layout Blocks
***
Congratulations! Now you know how to use WordPress Blocks when creating and editing content using the WordPress Block Editor.
Additional WordPress Block Editor Tutorials
To learn more about using the WordPress Block Editor, see these tutorials:
- How To Use The WordPress Block Editor Content Area [INSERT-WPTM-042-URLHERE]
- How To Use The WordPress Block Editing Toolbar [INSERT-WPTM-043-URLHERE]
- How To Use The WordPress Block Editor Settings Section [INSERT-WPTM-044-URLHERE]
- WordPress Block Editor – Keyboard Shortcuts [INSERT-WPTM-076-URLHERE]

***
***
"These tutorials have so much information and are easy to understand. If you use WordPress or plan to in the future these will help you with everything you need to know." - Valisa (Mesa, Arizona)
We are not affiliated, associated, sponsored, or endorsed by WordPress or its parent company Automattic. This site contains affiliate links to products. We may receive a commission for purchases made through these links.