WordPress Block Editor – File Block

This tutorial is part of our series WordPress Gutenberg: The Ultimate Guide For Non-Technical WordPress Users.
- To learn more about using the WordPress block editor interface, go here: The WordPress Block Editor – Content Area
- To learn more about using blocks, see this tutorial: How To Use WordPress Block Editor Blocks
- For additional information, see the following tutorials:
***
File Block – Description
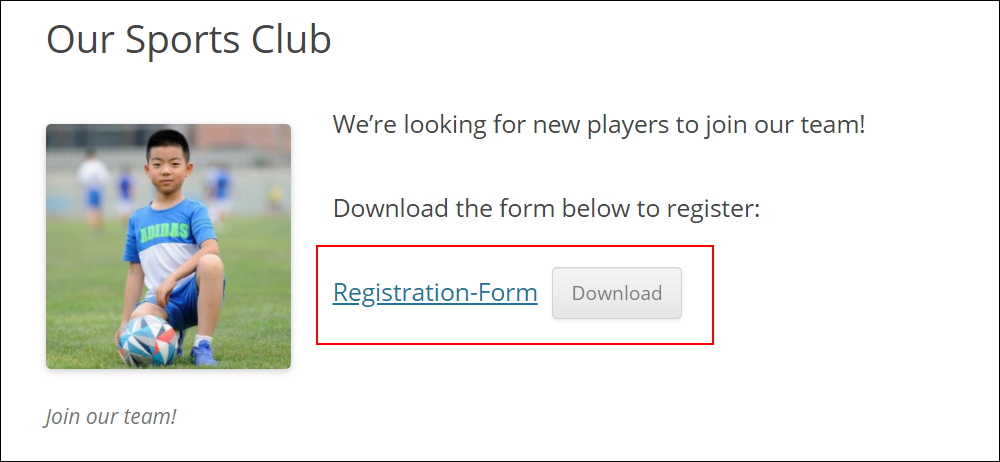
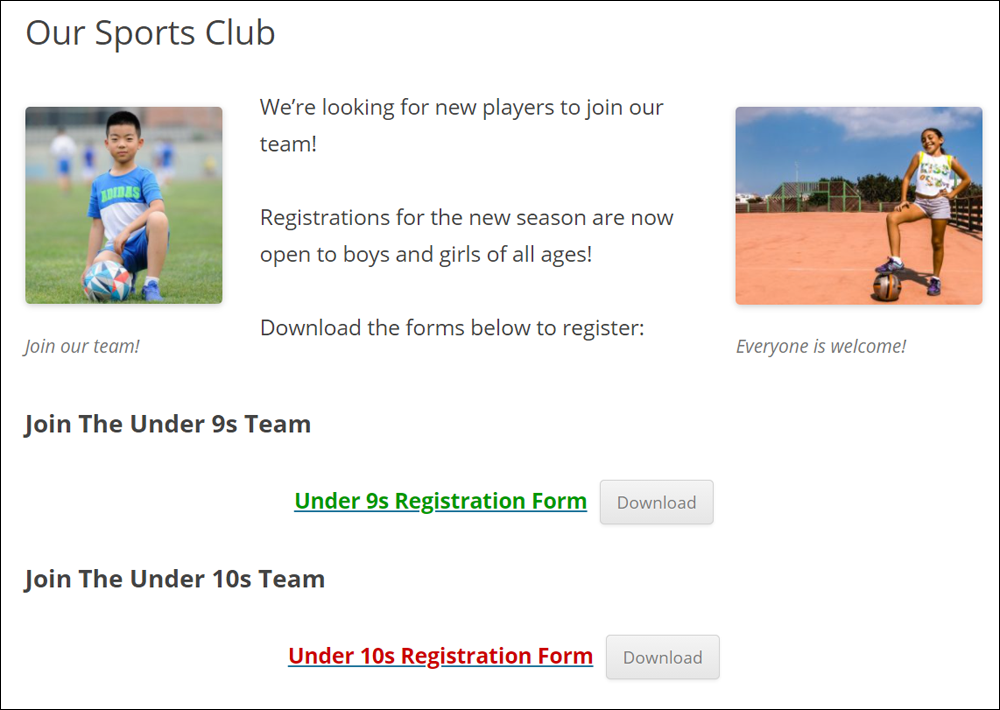
The File Block lets you place a download button on your posts and pages that users can click on to download documents and other files from your website.
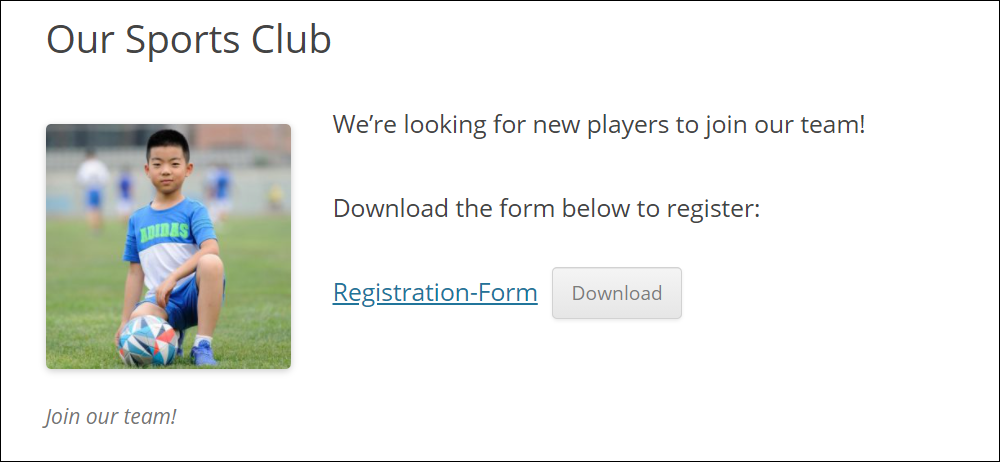
Clicking on the download link lets users save these files to their hard drives or media storage devices.
![]()
- For security reasons, WordPress only allows certain types of files to be uploaded. To learn more about supported file types, see this tutorial: How To Use The WordPress Media Library.
- To learn how to protect your downloads in WordPress, see this tutorial: How To Add Downloadable Files In WordPress.
How To Use The File Block
In this section, we’ll cover:
- How to add a File block to your content.
- How to edit and configure your File block and block settings.
- How to remove the File block from your content.
For more details on using blocks (e.g. how to move blocks around your content), see this tutorial: How To Use Blocks.
Adding A File Block
To add a File block:
- Either:
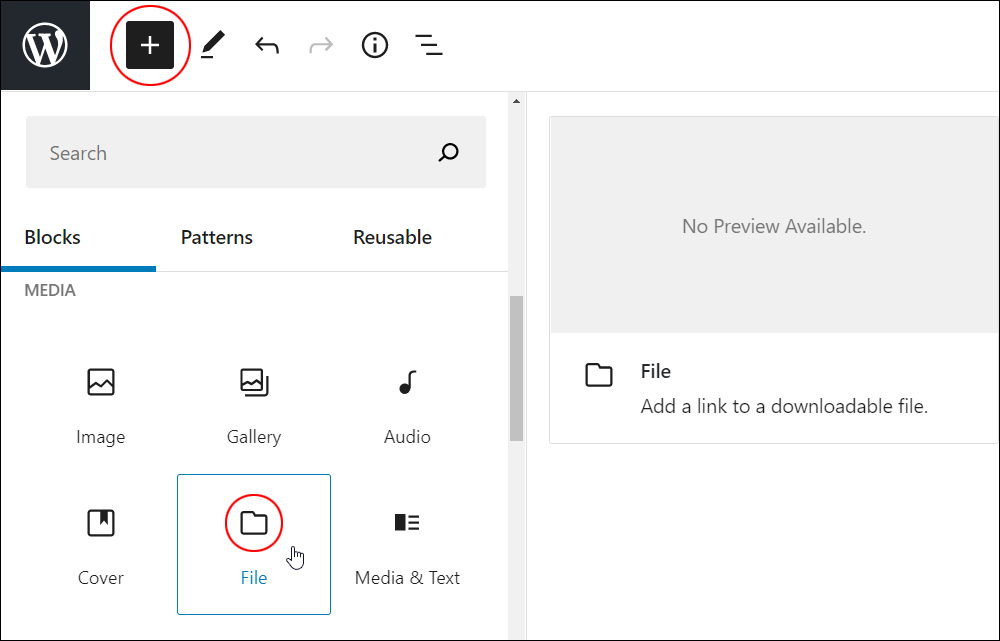
- Click on the ‘Add Block’ tool in the Editing Toolbar section and select the File block (in Most Used or Media section),
- Add the File block in the Content Area.
- Upload and select your file.
- Use the tools in the File Block Editor or Block Settings section to edit and configure File Block settings.
Let’s go through the above steps.
First, create a new post or page or open an existing post or page and either:
Click on the Add Block tool and select a File block…
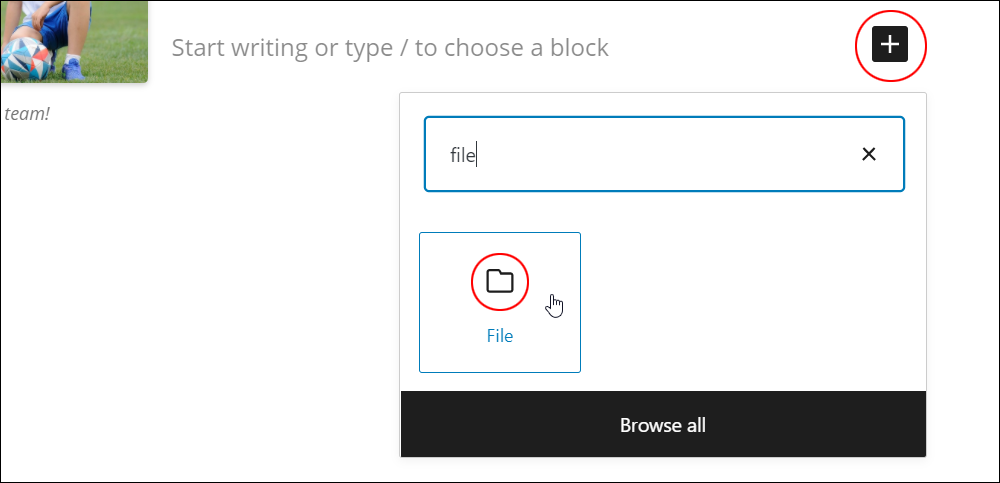
Or, select a File block using the Inserter tool in the Content Area.
Either of the above methods will insert a File block into your content.
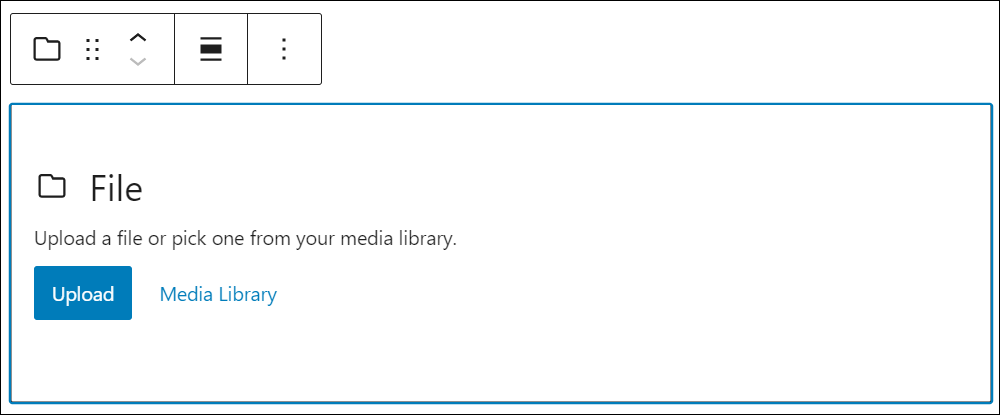
The File block includes the following options for adding a downloadable file to your content:
- Upload – select this option to upload a new file from your media storage device.
- Media Library – choose this option to select a file you’ve already uploaded to your site’s Media Library.
After adding a File block to your content, you can:
- Add a file:
- Using drag and drop (Upload button).
- Using the web browser uploader (Upload button).
- From your media library.
- Edit the download link and download button text.
Let’s go through the methods of adding a downloadable file to your content.
Add A File Using Drag & Drop
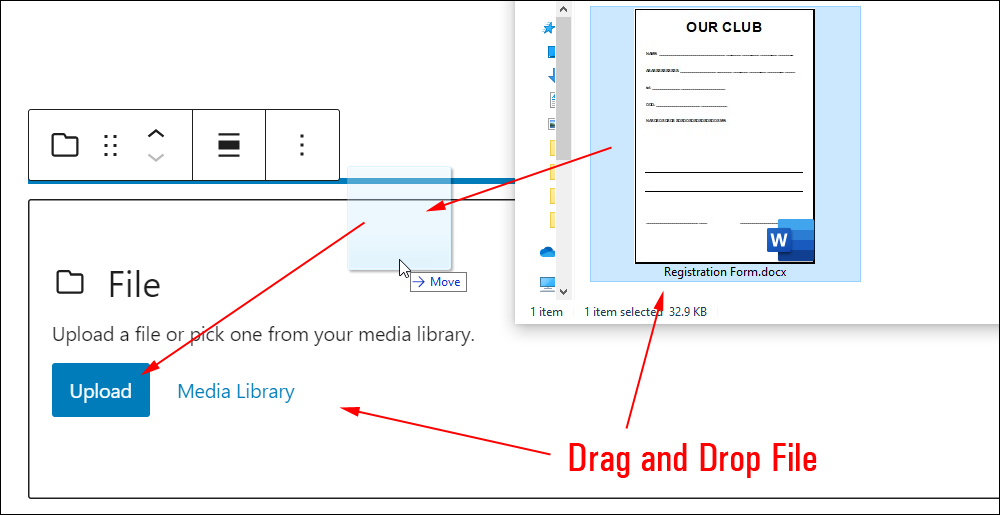
To add a file using drag and drop:
- Make sure you have the folder containing your file open (you may have to resize your browser to view your post and your file folder).
- Select a file from the media files folder in your media storage device and drag it into the File block.
- The file will be automatically uploaded to your media library and inserted into your File block.
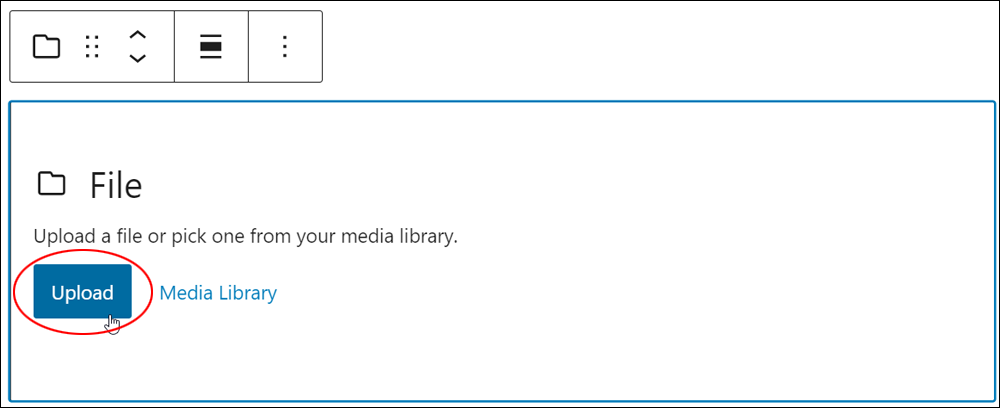
Add A File Using Your Web Browser Uploader
To add a file using your web browser uploader:
- Make sure you know where the media files folder in your storage device is located.
- Hover your cursor over the File block and click the ‘Upload’ button to open your web browser’s image uploader window.
- Select a file from your media folder and click the ‘Open’ button to import the file into your site.
- The file will be automatically uploaded to your media library, inserted into your File block, and added to your post or page.
Let’s go through the above steps:
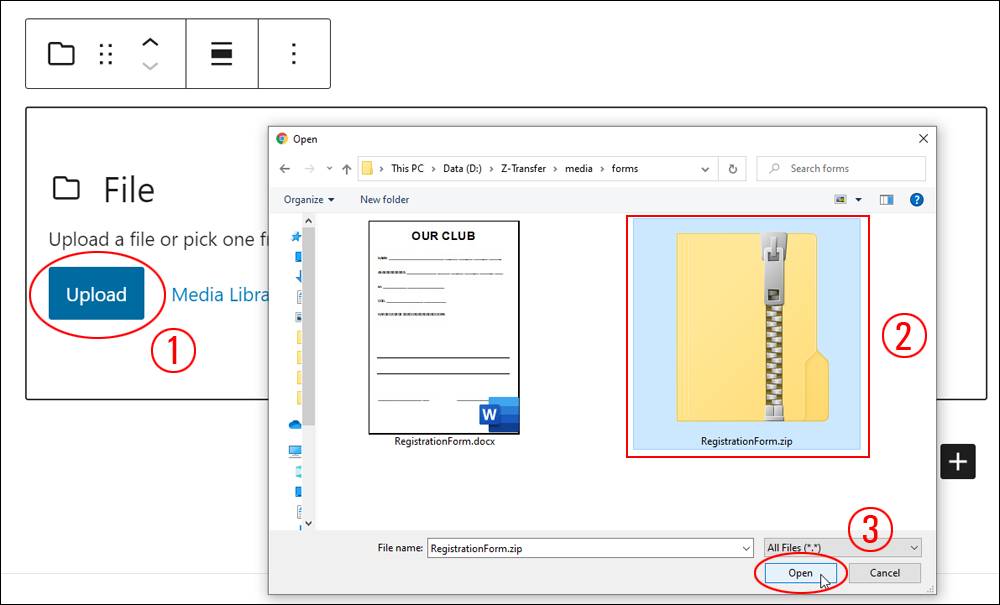
First, click on the ‘Upload’ button in the File block (Step 1).
This will bring up the ‘Upload Media’ window on your browser. Select a file from your media storage device (Step 2) and click on ‘Open’ to import the file into the File block and add it to your post or page (Step 3).
Add A File From Your Media Library
To add a file from your media library:
- Make sure that your file(s) have been uploaded to your media library (if you need help with this step, see our tutorial on How To Use The WordPress Media Library).
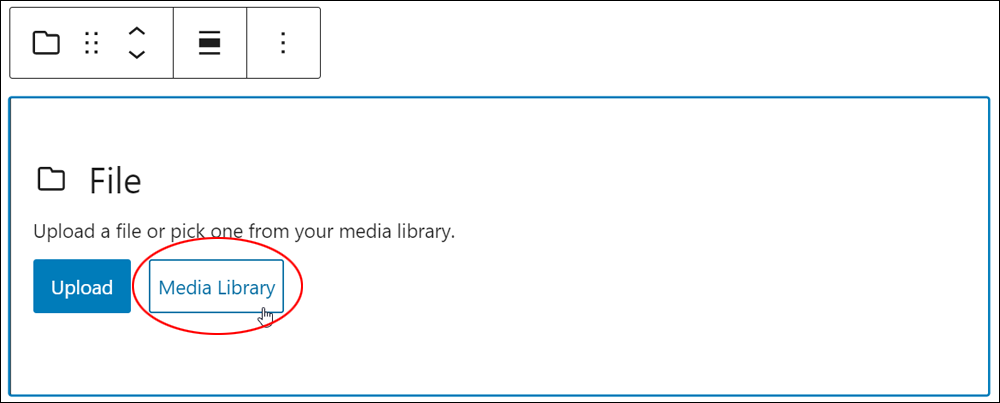
- Go to the File block and click on the ‘Media Library’ button.
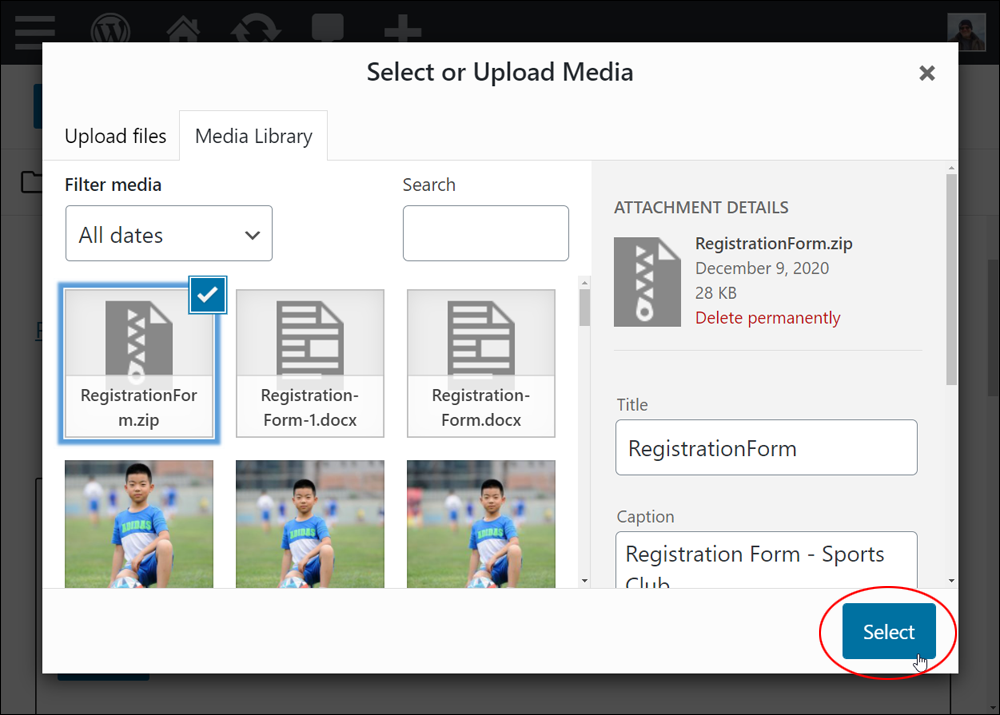
- Click on an image from the Media Library to select it.
- Click on the ‘Select’ button.
- Your file will be imported to the File Block and added to your post or page.
- Update or publish your post or page to save your changes and update your content.
Let’s go through the above steps:
Go to your File block and click on the ‘Media Library’ button.
Select a file from your media library (or upload one from your storage device) and click on the ‘Select’ button.
The file will be imported to your File block and added to your post or page.
After adding files:
- Edit and configure block settings,
- Save, publish, or update your post or page.
How To Edit A File Block
To edit a File block:
- Click inside the File Block to select it.
- Use the Block Editor tools to:
- Change the alignment of the file (left, center, right).
- Replace your file.
- Copy the file link to your clipboard.
- Edit and format the file link text and download button text.
- Use the Block Settings to:
- Change your file link settings.
- Open the download file link in a new browser window.
- Display or hide the download button.
Let’s go through the above.
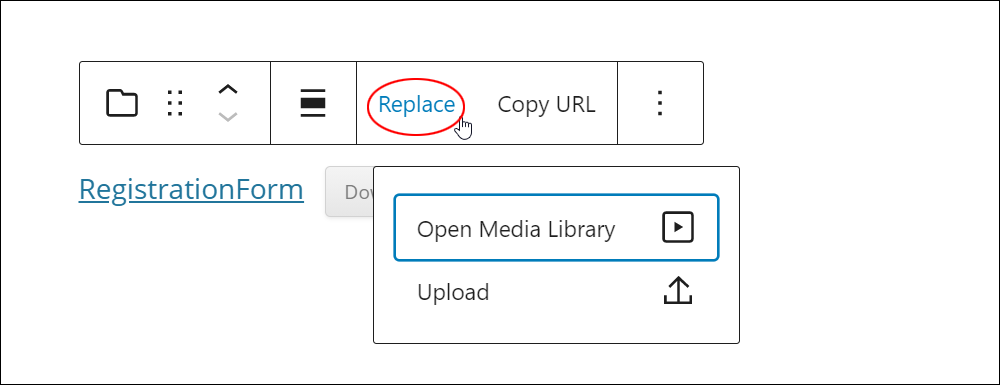
Use the Replace and Copy button in the File block editor to replace your downloadable file and copy the download link to your clipboard.
The Replace link lets you select another file to replace your current file using the following options:
- Open Media Library – Select a file you have previously uploaded to your Media Library.
- Upload – Upload a new file from your media storage device.
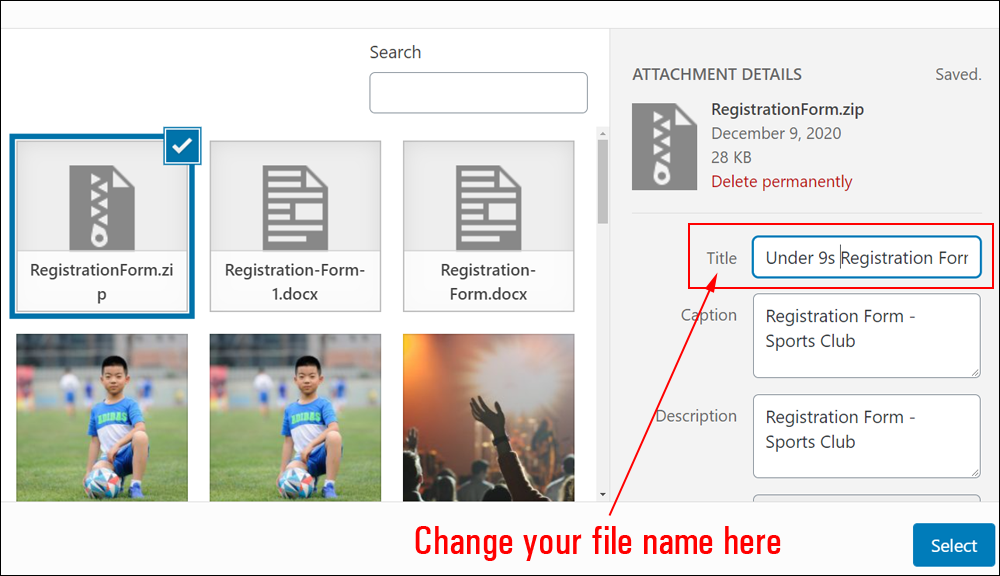
You can also edit your download file name and button.
To change the download link text associated with your file, change the title of your file in the Media Library.
If working in the post or page editor, click on the file name to change or format your link text.
You can also edit and format your download button text by clicking on the button in your File block.
Remember to update and publish your post or page to save your settings.
How To Remove A File Block
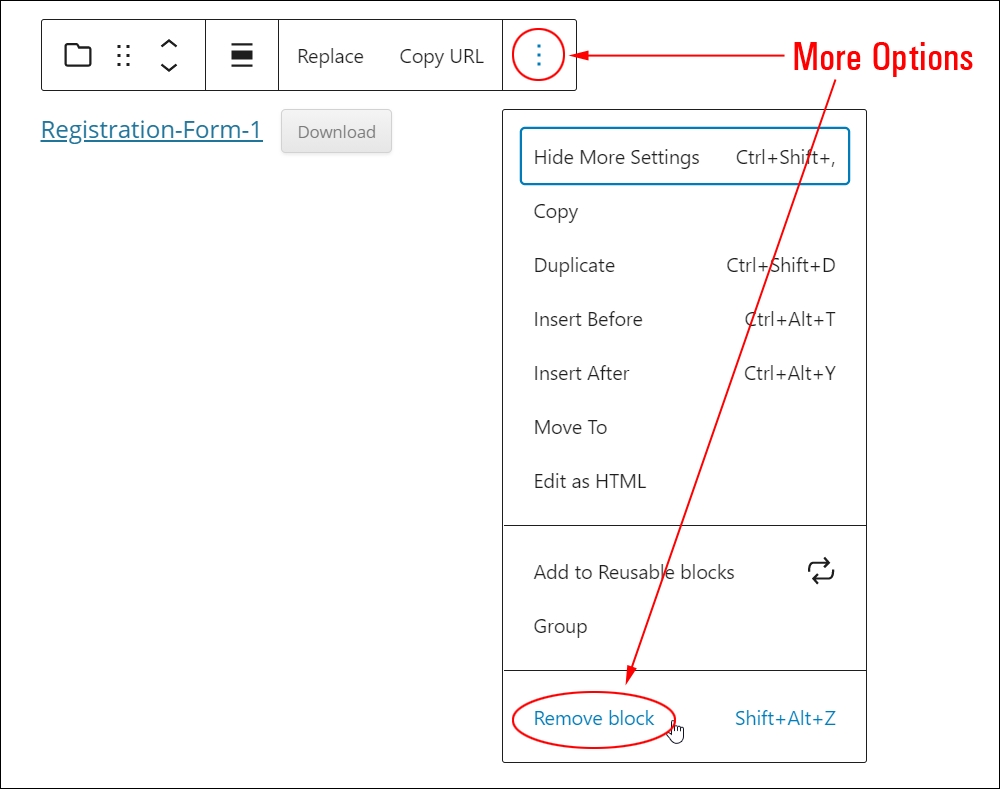
To delete or remove a File block from your content:
- Click inside the File block to select it.
- Select the ‘More Options’ tool in the Block Editor.
- Click on ‘Remove block’.
- This will remove the File block from your content.
Additionally…
- You can reposition your block using the ‘Move Up’ and ‘Move Down’ arrows or the Drag and Drop handle tool (if you need help with this step, see our tutorial on How To Use Blocks).
- You can also convert a File block into a Reusable block.
File Block Tools, Options & Settings
The File Block includes tools, options, and settings for:
- File Block Editor
- File Block Settings
File Block Editor
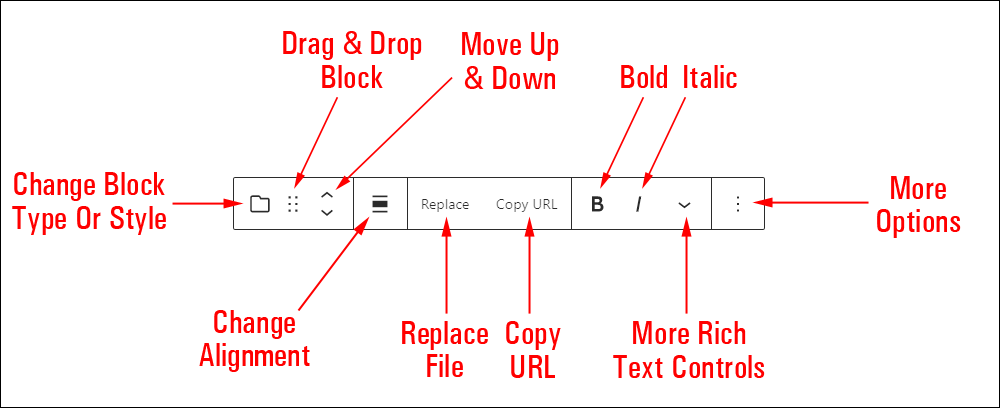
The File Block Editor includes tools that let you perform the following operations:
- Change Block Type (See ‘File Block – Additional Info’ section below.)
- Drag & Drop Tool
- Move Up and Down Tool
- Change Alignment
- Align left
- Align center
- Align right
- Replace – Select another file.
- Copy URL – Copy the file’s download link to your clipboard
- Bold – Add bold text formatting to your file’s link text.
- Italic – Add italicized text formatting to your file’s link text.
- More Rich Text Controls – See How To Use Blocks to learn more about using rich text control settings.
- More Options – See How To Use Blocks to learn how to use this section.
File Block Settings
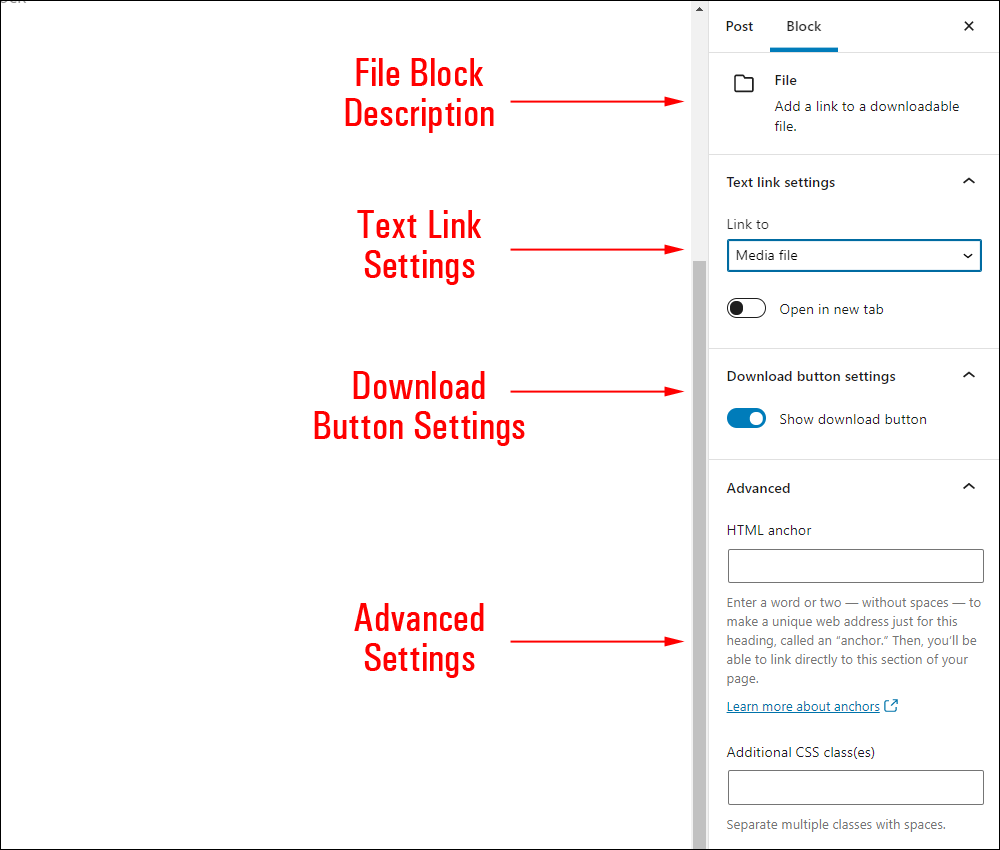
File block settings include:
- Block description area
- Text Link Settings
- Link to
- Media file – Add a direct link to your download file.
- Attachment page – Link to a content page containing the link to your download file.
- Open In New Tab (On/Off)
- Link to
- Download Button Settings
- Show Download Button (On/Off)
- Advanced Settings
- HTML Anchor – Create a unique web address to send users directly to a section of your page using a unique jump link URL. To learn more about using HTML Anchors, see our tutorial on How To Use Blocks.
- Additional CSS Class(es) – This field lets you add multiple CSS classes to your block separated with spaces. This allows you to write custom CSS and style the block as you see fit. Note: This requires having knowledge of CSS (Cascading Style Sheets).
File Block – Additional Info
You can convert a File block into the following block types:
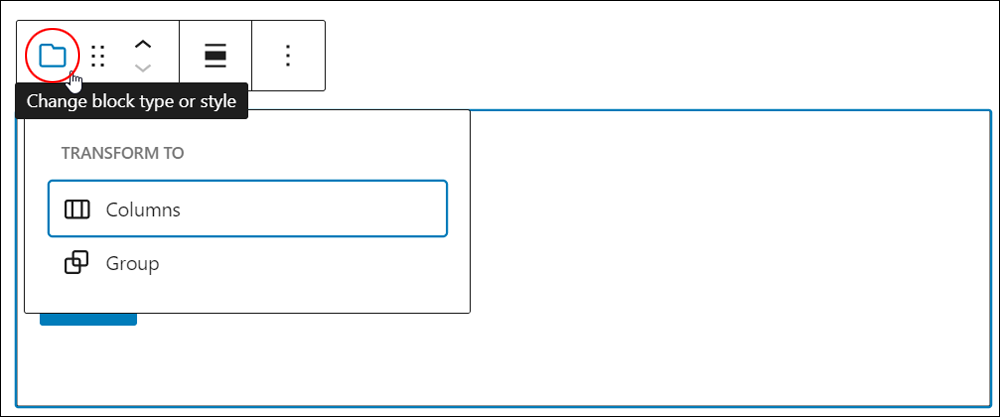
Installing plugins or themes on your site may also add new functionality, options, or settings to a File block.
Congratulations! Now you know how to use the WordPress content editor’s File block.
To learn how to use other blocks, go here: WordPress Block Editor – How To Use Blocks
***
"If you're new to WordPress, this can stand on its own as a training course and will stay with you as you progress from beginner to advanced and even guru status." - Bruce (Columbus, Ohio)
***
We are not affiliated, associated, sponsored, or endorsed by WordPress or its parent company Automattic. This site contains affiliate links to products. We may receive a commission for purchases made through these links.