WordPress Block Editor – Image Block

This tutorial is part of our series WordPress Gutenberg: The Ultimate Guide For Non-Technical WordPress Users.
- To learn more about using the WordPress block editor interface, go here: The WordPress Block Editor – Content Area
- To learn more about using blocks, see this tutorial: How To Use WordPress Block Editor Blocks
- For additional information related to this topic, see these tutorials:
***
Image Block – Description
The Image block lets you add images to your posts and pages.
The Image block also lets you easily resize images and position them within your content, add image captions, and more.
How To Use The Image Block
In this section, we’ll cover:
- How to add an Image block to your content.
- How to edit and configure your Image block and block settings.
- How to remove an Image block from your content.
For more details on using blocks (e.g. how to move blocks around your content), see this tutorial: How To Use Blocks.
Adding An Image Block
To add an Image block:
- Either:
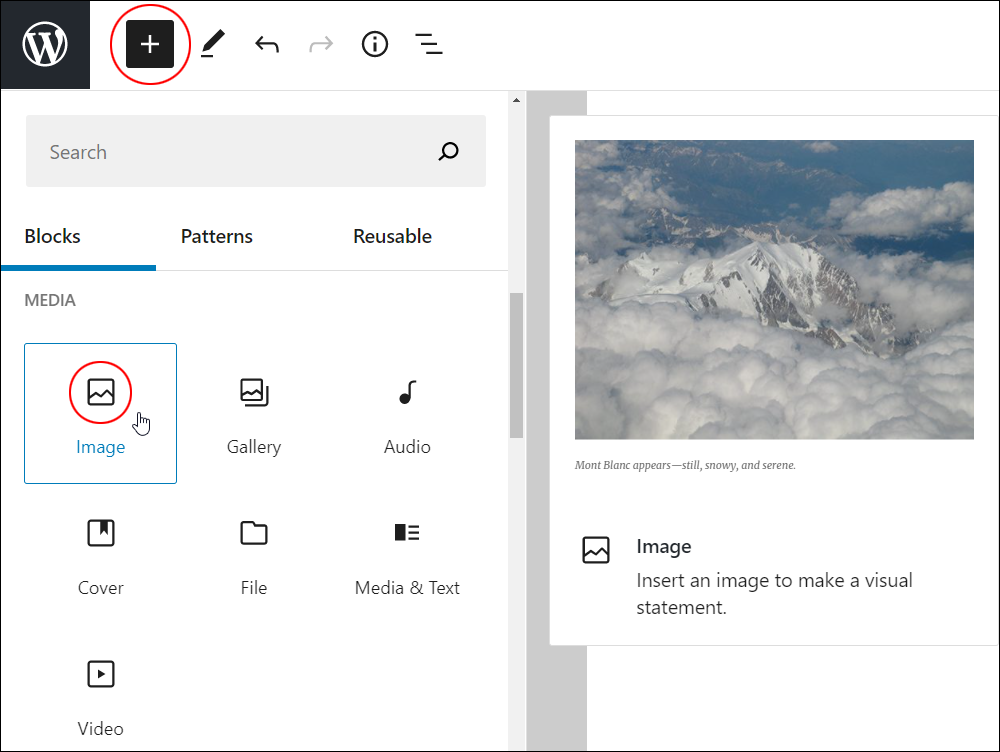
- Click on the ‘Add Block’ tool in the Editing Toolbar section and select the Image block (in Most Used or Media section),
- Add the Image block in the Content Area.
- Drag or upload a new image, or select an image file from the Media Library.
- Use the tools in the Image Block Editor or Block Settings section to resize, edit, format, or customize your image.
Let’s go through the above steps.
First, create a new post or page or open an existing post or page and either:
Click on the Add Block tool and select an Image block.
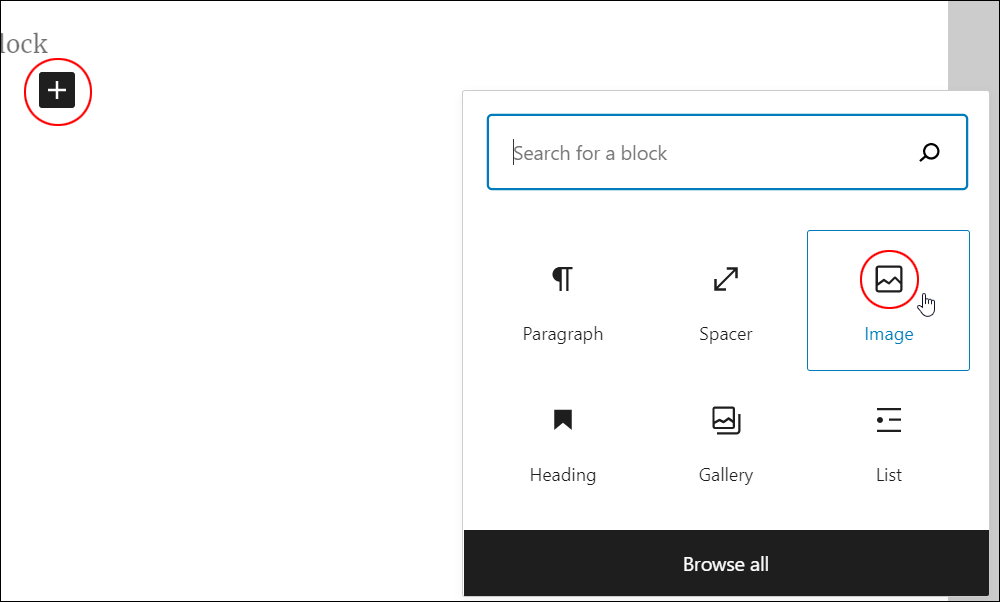
Or, select an Image block using the Inserter tool in the Content Area.
Using either of the above methods will add an Image block to your content.
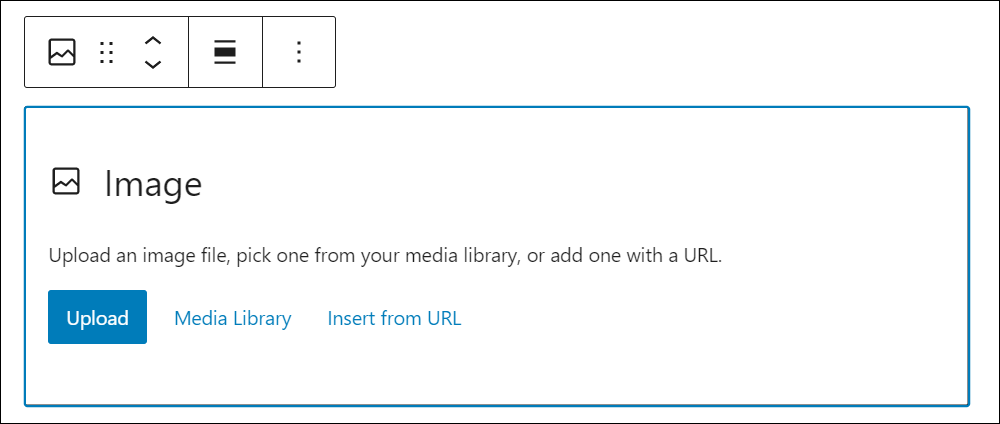
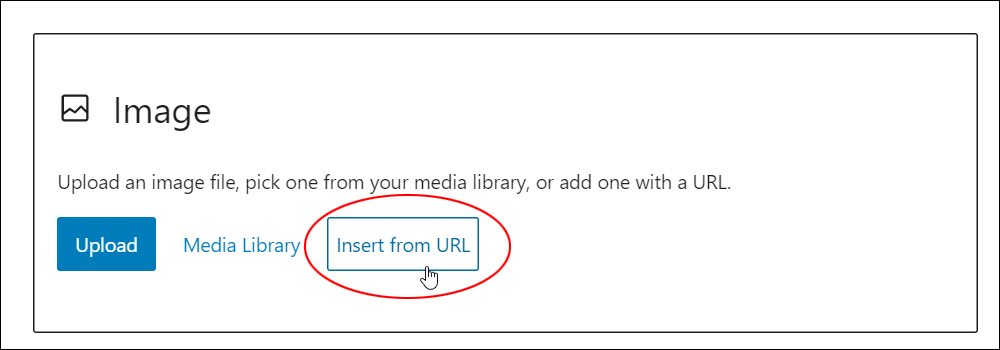
The Image block includes the following options for adding images to your content:
- Upload – select this option to upload new images from your media storage device.
- Media Library – choose this option to select images you’ve already uploaded to your site’s Media Library.
- Insert from URL – choose this option to add an image from an external URL (e.g. a cloud-based media storage location)
After adding an Image block to your content, you can add an image to the block:
- Using drag and drop.
- Using the web browser uploader.
- From your media library.
- From an external URL.
Let’s go through each of the above methods.
Add An Image Using Drag & Drop
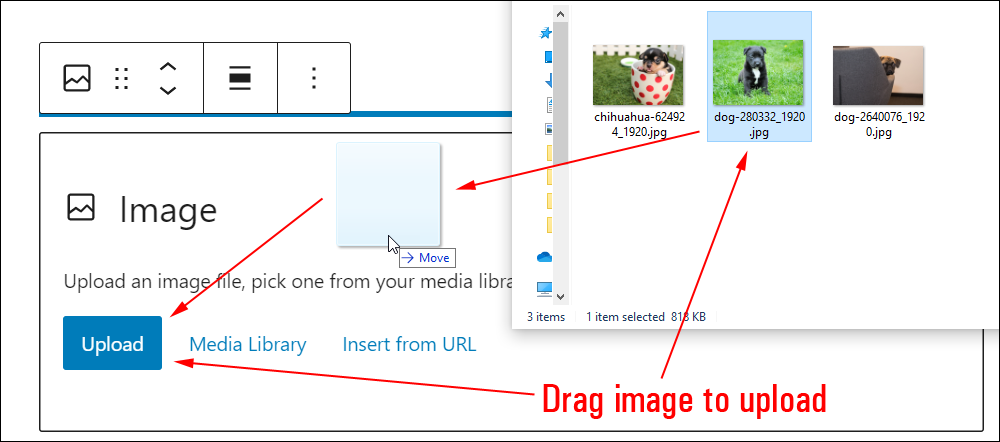
To add an image using drag and drop:
- Make sure you have the ‘images’ or media files folder open on your media storage device (you may have to resize your browser to view your post and your media folder).
- Select an image from your media folder and drag it to the Image block upload tool.
- The image will be automatically uploaded to your media library and inserted into your Image block.
Add An Image Using Your Web Browser Uploader
To add an image to your Image block using your web browser uploader:
- Make sure you know where your media files folder is located.
- Select the Image Block and click the ‘Upload’ button to open your web browser’s image uploader window.
- Select an image from your media folder and click the ‘Open’ button to import the image into your site.
- The image will be automatically uploaded to your media library, inserted into your Image Block, and added to your post or page.
Let’s go through the above steps:
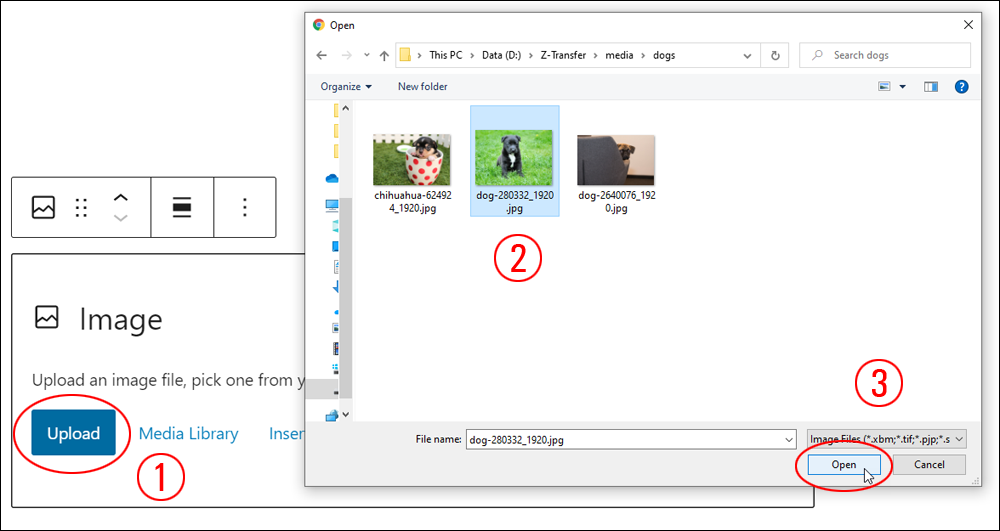
First, click on the ‘Upload’ button in the Image block (Step 1).
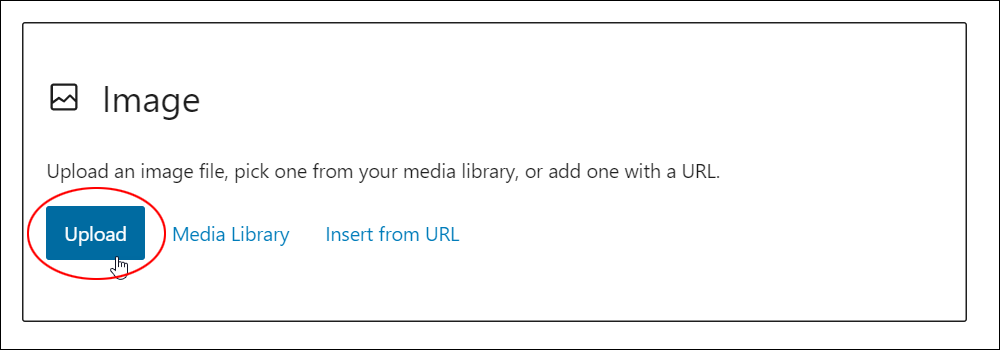
This will bring up the ‘Upload Media’ window on your browser. Select an image from your media folder (Step 2) and click ‘Open’ to import the image into the Image block and add it to your post/page (Step 3).
Add An Image From Your Media Library
To add an image from your media library:
- Make sure that your image has been uploaded to your media library (if you need help with this step, see our tutorial on How To Use The WordPress Media Library).
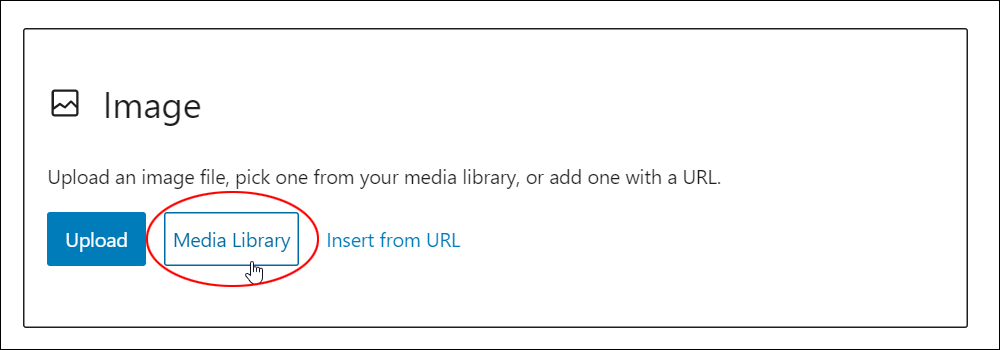
- Hover over the Image block and click on the ‘Media Library’ button.
- Click on an image from the Media Library to select it.
- Click on the ‘Select’ button.
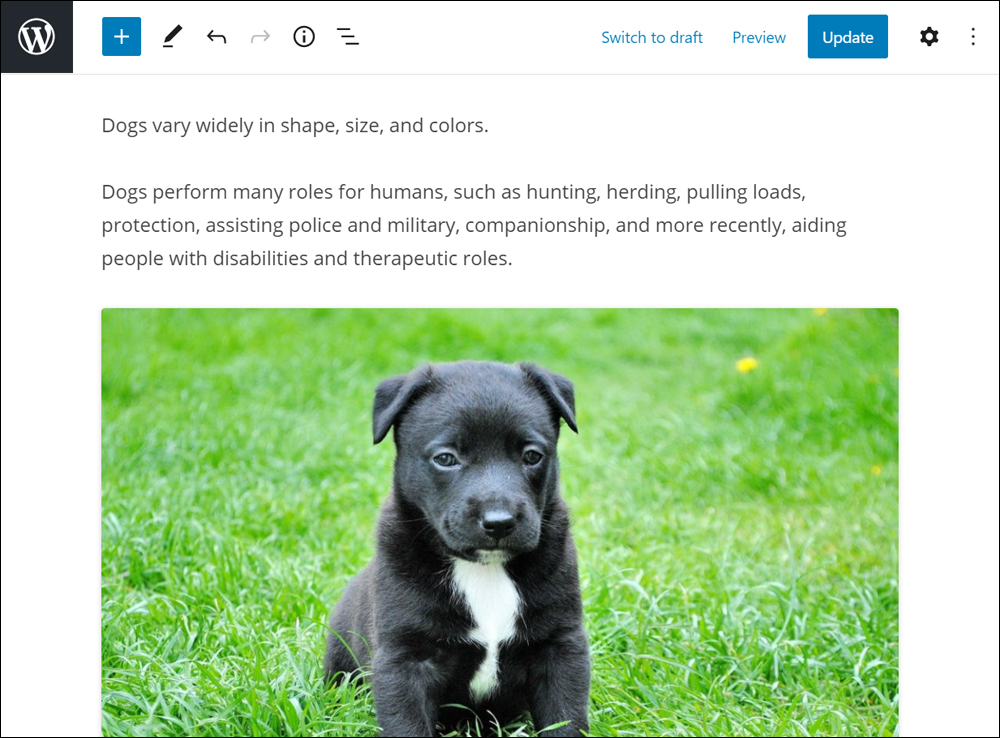
- Your image will be imported to the Image block and added to your post or page.
- Update or publish your post or page to save your changes and update your content.
Let’s go through the above steps:
Select the Image block and click on the ‘Media Library’ button.
Select an image from your media library (or upload one from your ‘images’ folder) and click on the ‘Select’ button.
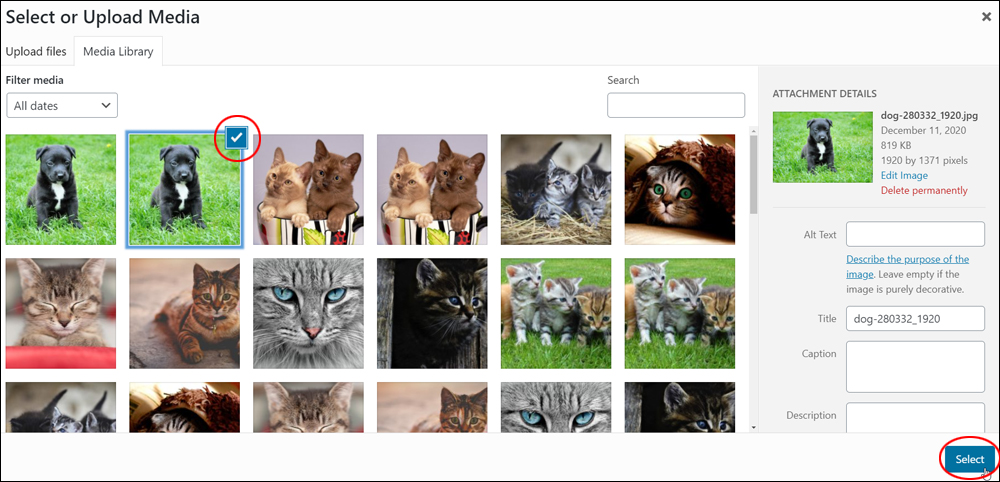
The image will be imported to your Image block and added to your post or page.
Add An Image From An External URL
You can add an image to your post or page from an external URL.
To add an image from an external URL:
- Make sure you have uploaded your images to your server or external cloud storage location (e.g. Amazon S3, Dropbox, etc.)
- Copy the image URL
- Select your Image block and click on ‘Insert from URL’
- Paste your image URL into the URL field
- Click ‘Apply’ to insert the image into your content.
Let’s go through the above process.
After uploading your image to your storage location and copying its URL, hover over the Image block and click on ‘Insert from URL’.
Paste the image URL into the URL field and click the ‘Apply’ button to insert the image into your post or page.
After adding images to your content, you can:
- Edit and configure block settings,
- Save, publish, or update your post or page.
How To Edit Your Image
Use the Image Block Editor to change image alignment, add a caption to your image, replace an image, resize your image, etc.
To edit your image:
- Click inside the Image block to
- Use the Block Editor tools:
- Image alignment tool – Use this tool to change the alignment of the image on your post or page.
- Insert Link tool – Add a hyperlink from your image to another page or external URL.
- Edit image tool – Use this tool to upload and/or replace your existing image.
- Caption your image (and style your caption with bold, italics, strikethrough, or add a hyperlink).
- Resize your image using the image resizing handles
- Delete or remove the image from your content.
- Use the Block Editor tools:
How To Align & Resize Your Image
Use the alignment tools and resizing handles to align and resize your image.
You can also adjust your image size and dimensions using your Image block’s settings.
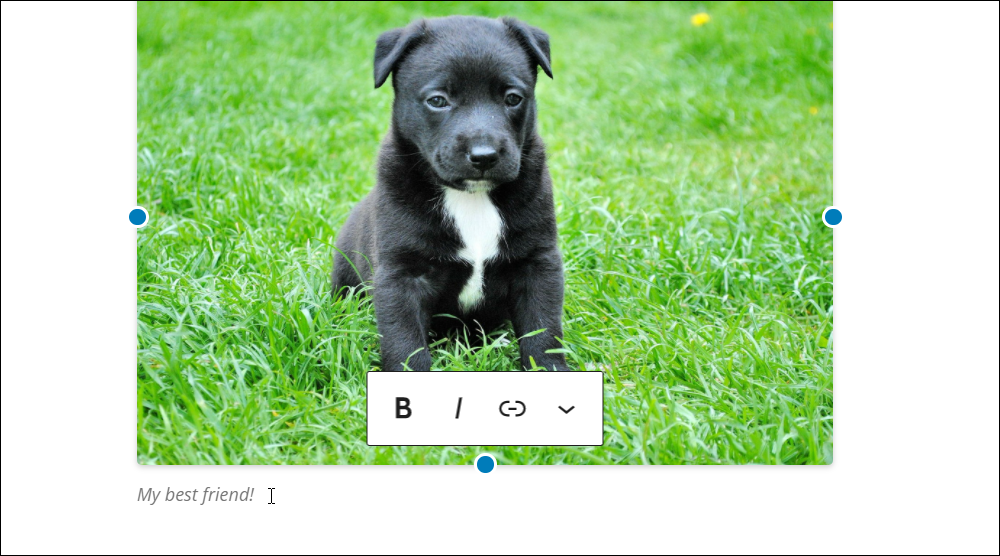
How To Caption Your Image
After inserting an image into your post or page, you can add a caption to it.
To add a caption, click inside the Image block and begin typing your caption. Add a link and format your caption using bold, italics, strikethrough (in the More rich text controls settings), etc.
![]()
If you want to display the caption across all instances of your image, add the caption to the image in your Media Library. You can do this by clicking the Replace > Edit button on your Image block (see further below).
How To Wrap Text Around An Image
You can wrap text around your image by nesting your image inside a paragraph of text.
To wrap text around an image:
- In the content area, position your image above or below one or more Paragraph blocks containing the text you want to wrap your image around.
- Click inside the Image block to select the image.
- Resize your image by dragging one of the resizing handles.
- Align your image to the right or left using one of the alignment buttons.
- Click inside the Paragraph block to select it.
- Move the Paragraph block down (if the text is positioned above the image), or up (if the text is positioned below the image).
- The image will be nested inside your paragraph(s) and the content of the paragraph block(s) will be wrapped around your image.
- Note: To separate your Image and Paragraph blocks, select the image and click on the Align Center button, then use the Up or Down Arrow tool to decouple the image from the text.
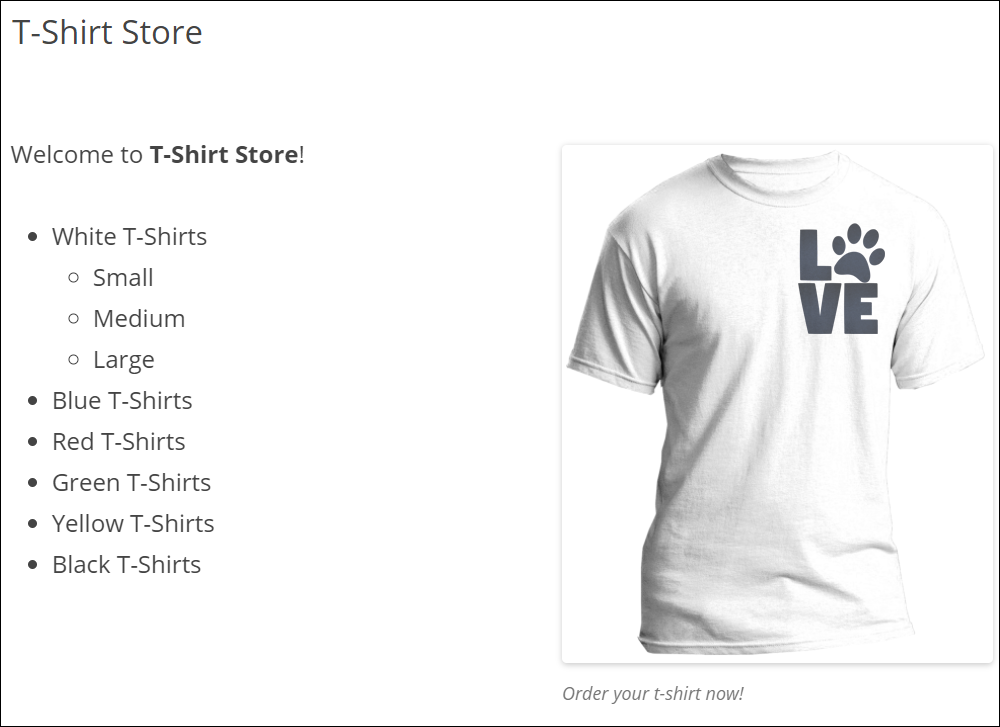
You can also nest images inside other block types (e.g. embed an Image block into a List block).
Remember to update and publish your post or page to save your settings.
Link Your Image
You can add a link from your image to an internal page or an external URL, a Media File, or an Attachment Page using the Image block’s Link tool.
To add a link to your image:
- Select your image.
- Click on the Link tool. This gives you the following link options:
- Media File – Clicking on an image sends visitors to the location on your server where the image has been uploaded.
- Attachment Page – This is an informational page about your image that includes the image, caption, image description, and a comment field.
- Custom URL – Paste a URL or type a search term to bring up a list of posts, pages, or custom post types on your site containing your search term.
- Click on the Link settings button to:
- Open the link in a new tab.
- Add a Link Rel attribute (e.g. nofollow).
- Add a Link CSS Class to style your link using CSS (Cascading StyleSheets).
- Click on the Apply button to insert the link.
- After adding a link to an image, you can:
- View your link.
- Edit your link.
- Delete your link.
- Click on the Link settings button to:
Crop Your Image
You can edit your image using the Image block’s Crop tool.
Clicking on the Crop tool brings up an additional subset of tools:
- Zoom – Zoom your image in or out of the crop grid using the slider or value field.
- Aspect Ratio – Selecting an option from the menu transforms the crop grid into the dimensions of your selected ratio.
- Rotate – Click on the rotate button to rotate the image at 90-degree angles.
After selecting a cropping option, click the Apply button to implement your selection. or click on Cancel to abort your selection and return to the unedited image.
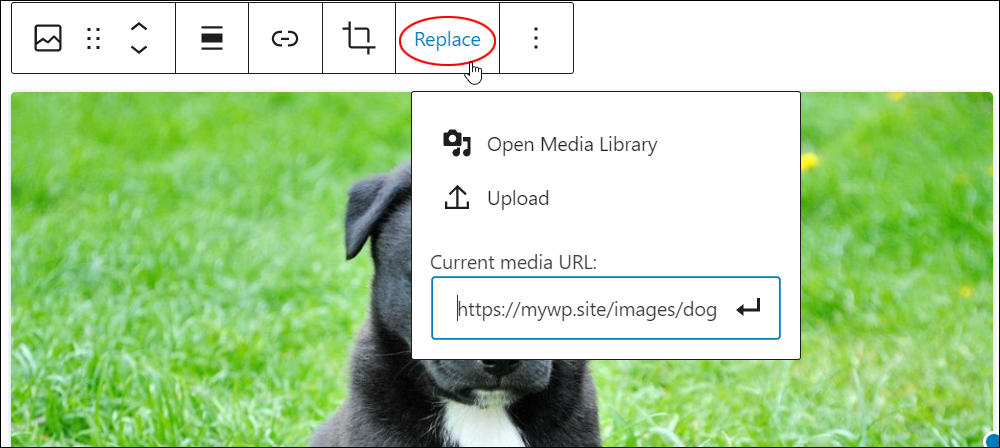
Replace Your Image
You can replace the image in an Image block by uploading a new image from your media storage device, selecting an already uploaded image from your Media Library, or replacing the current media URL with another URL (e.g. a link to an image stored in a cloud storage folder).
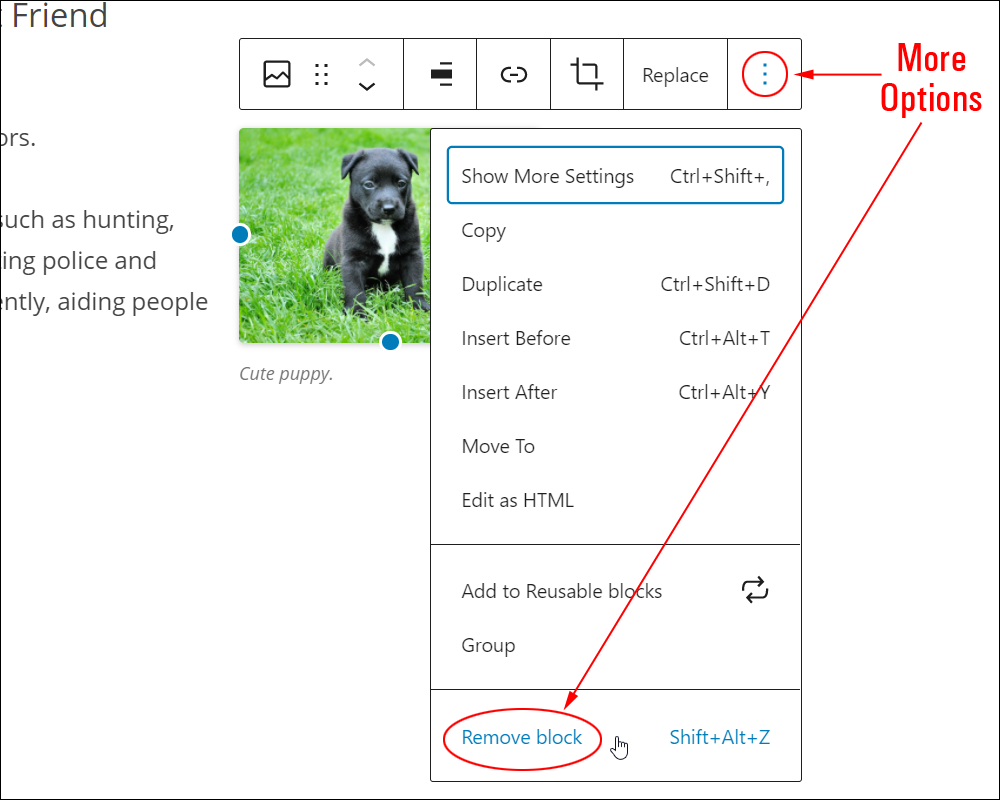
How To Remove An Image Block
To delete or remove an Image block from your content:
- Click inside the Image block to select it.
- Select the ‘More Options’ tool in the Block Editor.
- Click on ‘Remove block’.
- This will remove the Image block from your content.
Additionally…
- You can reposition your block using the ‘Move Up’ and ‘Move Down’ arrows or the Drag and Drop handle tool (if you need help with this step, see our tutorial on How To Use Blocks).
- You can also convert an Image block into a Reusable block.
Image Block Tools, Options & Settings
The Image block includes tools, options, and settings for:
- Image Block Editor
- Image Block Settings
Image Block Editor
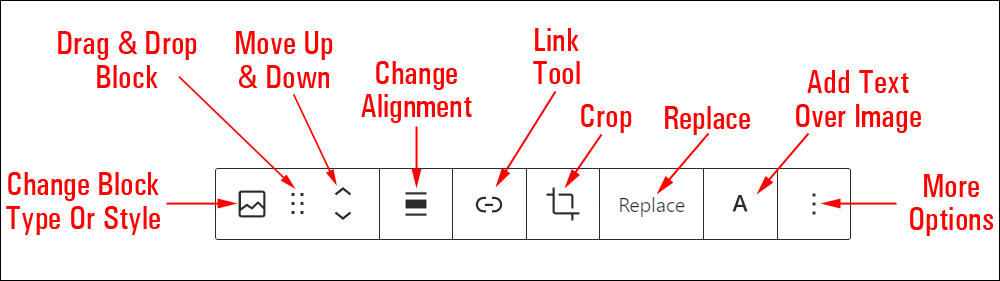
The Image Block Editor includes tools that let you perform the following operations:
- Change Block Type (See ‘Image Block – Additional Info’ section below.)
- Drag & Drop Tool
- Move Up and Down Tool
- Change Alignment Tool
- Align image left
- Align image center
- Align image right
- Link Tool
- Media File – Clicking on an image sends visitors to the location on your server where the image has been uploaded to.
- Attachment Page – This is an informational page about your image that includes the image, the caption, the image description, and a comment field.
- Custom URL – Paste a URL or type a search term to bring up a list of posts, pages, or custom post types on your site containing your search term.
- Clicking on the Link settings button brings up the following options:
- Open the link in a new tab (on/off).
- Add Link Rel.
- Add a Link CSS Class.
- Apply button. Once the Apply button is clicked, your link displays the following additional options:
- View the link.
- Edit the link.
- Delete the link.
- Clicking on the Link settings button brings up the following options:
- Crop Tool
- Zoom – Use the slider or value field to zoom your image in or out of the crop grid.
- Aspect Ratio – Transforms the crop grid into the dimensions of your selected ratio option:
- Original
- Square
- Landscape
- 16:10
- 16:9
- 4:3
- 3:2
- Portrait
- 10:16
- 9:16
- 3:4
- 2:3
- Rotate – Rotate the image at 90-degree angles.
- Apply – Apply the selected crop settings to your image.
- Cancel – Return to your unedited image without applying any cropping settings.
- Replace Tool
- Open Media Library – Opens the WordPress Media Library and allows you to select (or upload then select) another image.
- Upload – Upload an image from your media storage device.
- Current media URL – Displays the location of the currently uploaded image.
- Edit – Change the URL of your uploaded media location.
- More Options – See How To Use Blocks to learn how to use this section.
Image Block Settings
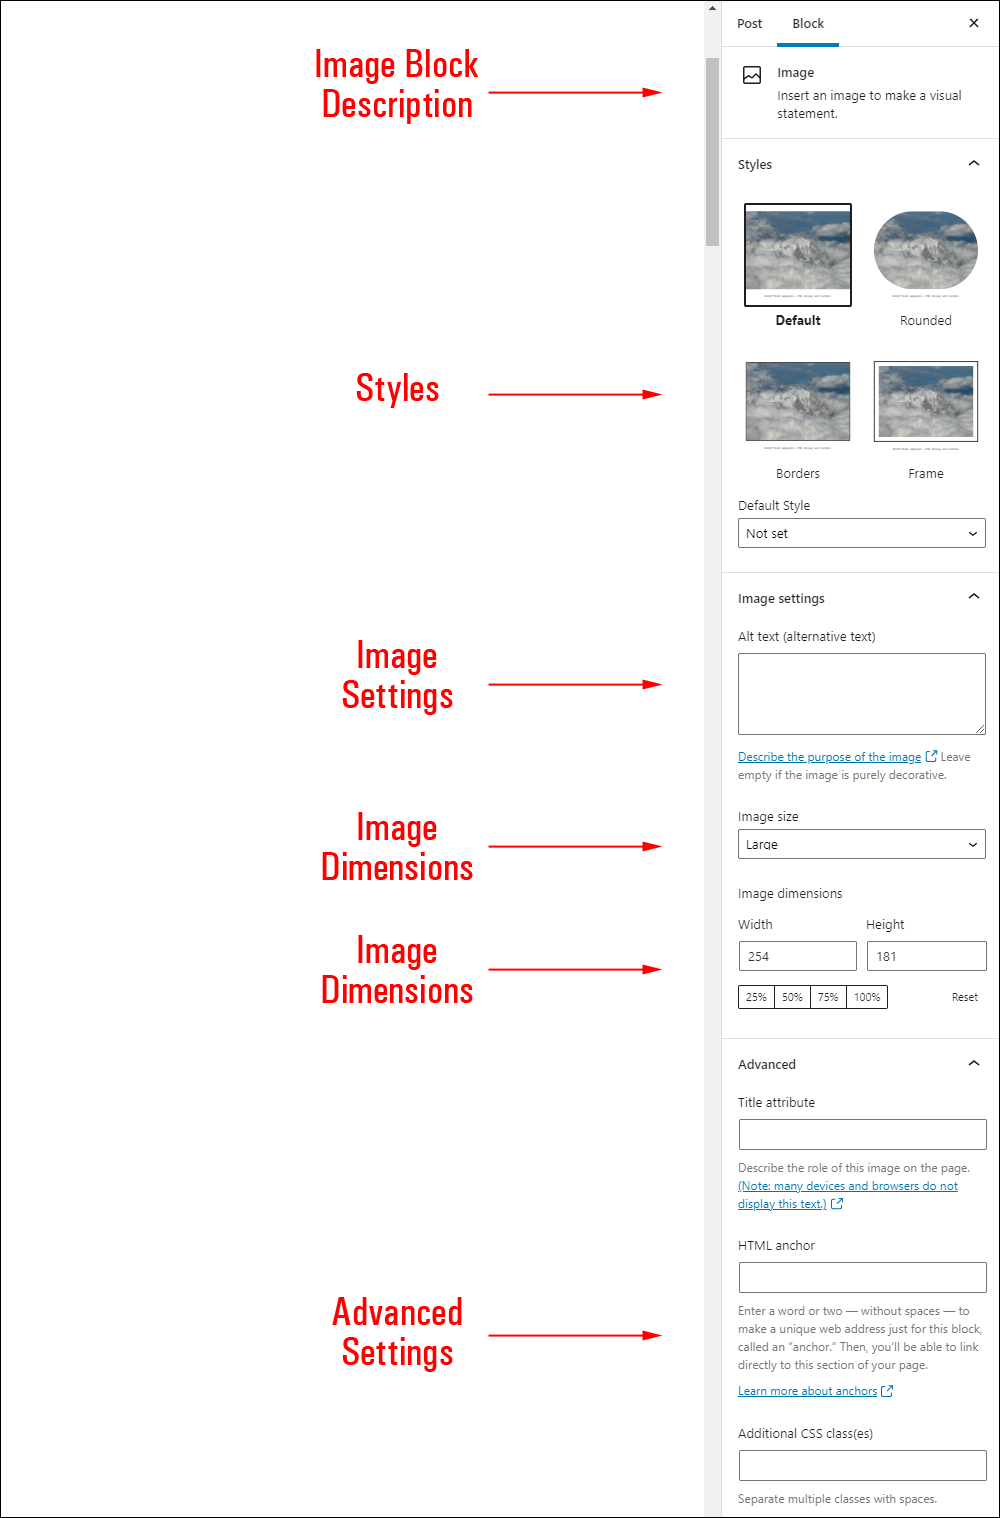
Image Block settings include:
- Block description area
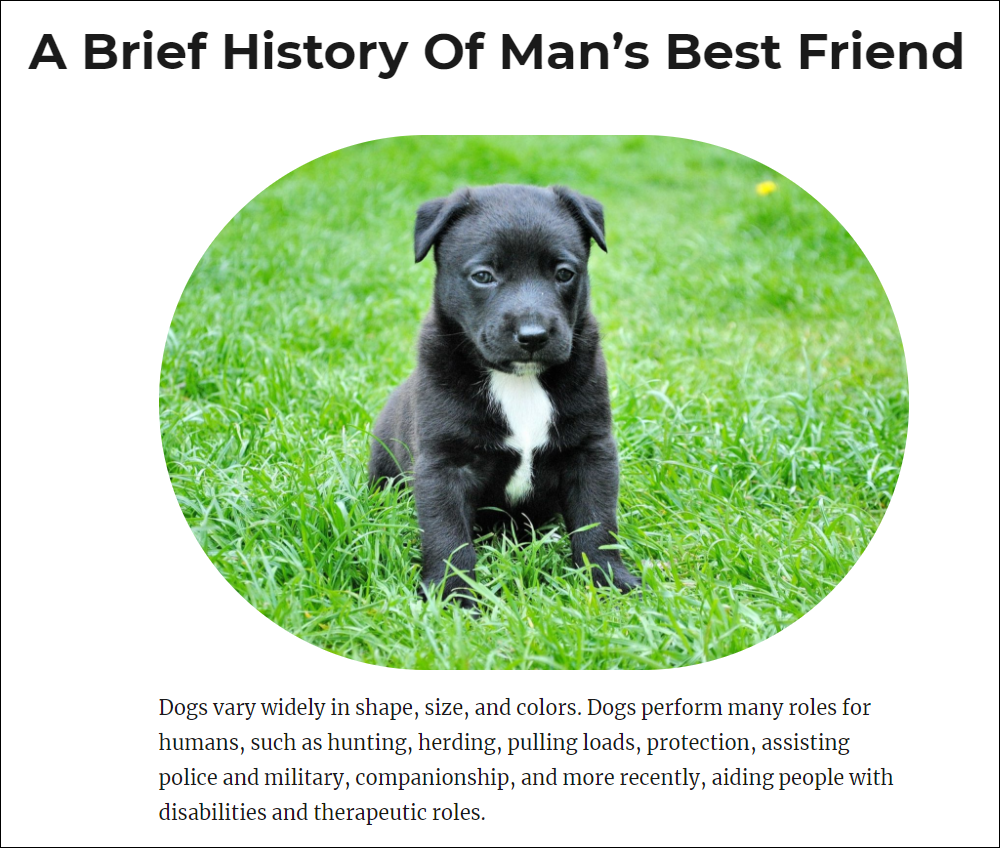
- Styles – The styles displayed in this section depend on the theme and plugins installed on your site. For example, normal, rounded, etc.
- Default Style – Use the drop-down menu to select a default style for images in your block.
- Image Settings
- Alt Text (Alternative Text) – Adding an image description here is useful for:
- Site visitors – if your image doesn’t load on your web page, people who can’t see the image can still get an idea of what the image is about, and
- SEO – Alt text descriptions help search engines index your images.
- Image Size
- Thumbnail
- Medium
- Large
- Full Size
- Image Dimensions
- Width – Enter a value for the width of your image.
- Height – Enter a value for the height of your image.
- Preset Sizes
- 25%
- 50%
- 75%
- 100%
- Reset Button (Resets image to original size)
- Alt Text (Alternative Text) – Adding an image description here is useful for:
- Link Settings – Link your image to:
- None (clicking on the image does nothing.)
- Media File (clicking on the image sends visitors to the location on your server where the image has been uploaded to.)
- Attachment Page (clicking on the image sends the visitor to an’ attachment’ page created by WordPress to display the item).
- Custom URL (clicking on image sends the visitor to the URL destination: i.e. an internal page, external website, product page, e-commerce store, etc.)
- Note: Selecting any of the above settings except ‘None’ gives you the option to open the link in a new tab.
- Advanced Settings
- Title Attribute – The title attribute can be used to add text for a tooltip, an image credit or a description of the image, etc. Note: many devices and browsers do not display this text.
- HTML Anchor – Create a unique web address to send users directly to a section of your page using a unique jump link URL. To learn more about using HTML Anchors, see our tutorial on How To Use Blocks.
- Additional CSS Class(es) – This field lets you add multiple CSS classes to your block separated with spaces. This allows you to write custom CSS and style the block as you see fit. Note: This requires having knowledge of CSS (Cascading Style Sheets).
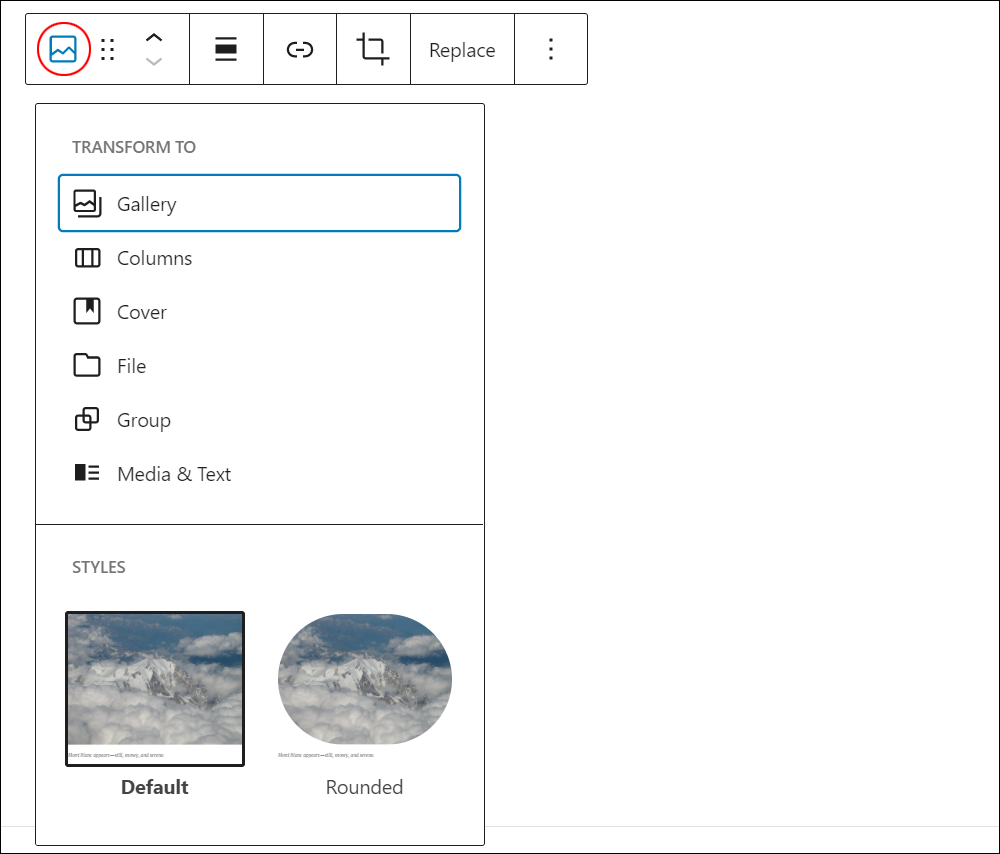
Image Block – Additional Info
You can convert an Image block into the following block types:
![]()
Installing plugins or themes on your site may also add new functionality, options, or settings to an Image block.
For example, depending on the active theme you have installed, the Image block may also let you choose different styles for your image.
Congratulations! Now you know how to use the WordPress content editor’s Image block.
To learn how to use other blocks, go here: WordPress Block Editor – How To Use Blocks
***
"If you're new to WordPress, this can stand on its own as a training course and will stay with you as you progress from beginner to advanced and even guru status." - Bruce (Columbus, Ohio)
***
We are not affiliated, associated, sponsored, or endorsed by WordPress or its parent company Automattic. This site contains affiliate links to products. We may receive a commission for purchases made through these links.