 As we explain in this tutorial, WordPress uses a special kind of avatar called a Gravatar to display user profile photos.
To learn how to set up a Gravatar, see the step-by-step tutorial below:
How To Add A Custom Gravatar To WordPress
Take a look at WordPress sites and blogs where users frequently post comments or engage in online discussions and you will most likely see user profile images displayed next to their comments.
These are user avatars or Gravatars …
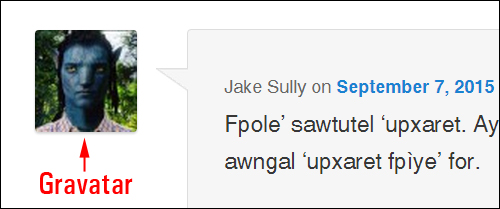
(A Gravatar is a special kind of avatar used in WordPress)
Your Gravatar is associated with your email address and follows you around the web, displaying your profile image whenever you post comments online or interact with other WordPress users.
If a user doesn’t have a gravatar, WordPress will display a default image, called a ‘Mystery Person’ …
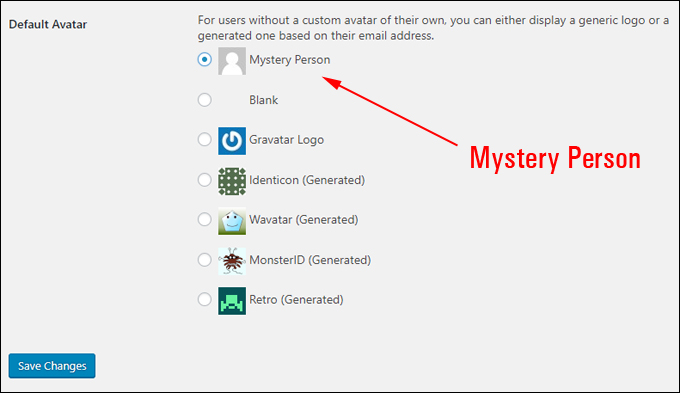
(Mystery Person)
Since many users don’t have an image associated with their email address, your site can end up displaying lots of ‘Mystery Person’ images.
If you allow users to post comments on your site and you don’t want a ‘Mystery Person’ to display next to commenters without gravatars of their own, you can set up a custom default gravatar to display on your site. This can be any image you like, even a branded logo.
In this tutorial, you are going to learn how to add a custom default gravatar to WordPress without touching code.
Why Add A Custom Gravatar To WordPress?
There are two reasons for adding a custom gravatar to WordPress:
- To change your own default user gravatar.
- To change the default gravatar of other users.
Why Change Your Own Default User Gravatar?
As explained in this tutorial, Gravatar is a free web service that allows users to create a profile and associate avatar images to their email addresses.
Once you set up your Gravatar, the image you have associated with your email address will display everywhere your email address is used. While it’s great to keep the same profile image consistent when interacting with other sites, you may not want to use your gravatar image on your site.
For example, you may want to use your professional gravatar when posting comments on websites related to your work or industry …

(Professional Gravatar)
But you may also have created a fun or special character avatar or a mascot image that you would like to associate with your profile when posting on your own site …

(Fun Gravatar)
Why Change The Default Gravatar Of Other Users?
As explained earlier, the main reason for changing the default gravatar of other users on your site is to replace the ‘Mystery Man’ default image …

(Mystery Man gravatar … Boooo!)
But you may also have created a fun or special character avatar or a mascot image that you would like to associate with your profile when posting on your own site …

(Custom user gravatar … Yaaay!)
Add A Custom Gravatar To WordPress Using Plugins
The easiest way to add or change custom gravatars in WordPress without touching code is using plugins. There are a number of plugins you can use to customize WordPress using avatars.
For this tutorial, let’s look at how to change your default gravatar and set a different default gravatar for other users on your site using a couple of gravatar plugins.
Podamibe Custom User Gravatar

(Podamibe Custom User Gravatar)
Podamibe Custom User Gravatar is a free WordPress plugin that allows users to upload their own gravatar in the media gallery and displays that image as a gravatar instead of looking for an avatar from gravatar.com based on their registered email.
To install the plugin from your WordPress dashboard, go to Plugins > Add Plugins and search for “gravatar” in the Keyword field.
Locate the plugin and click ‘Install Now’ …

(Install the plugin)
After the plugin has installed, click on ‘Activate’ …
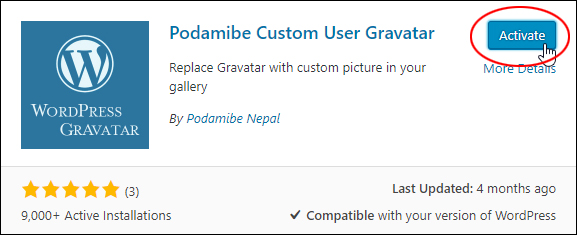
(Activate the plugin)
After installing and activating the plugin, go to your User Profile and scroll down to the Custom Gravatar section. Check ‘Use Custom Gravatar’ and click the ‘Select Picture’ button …
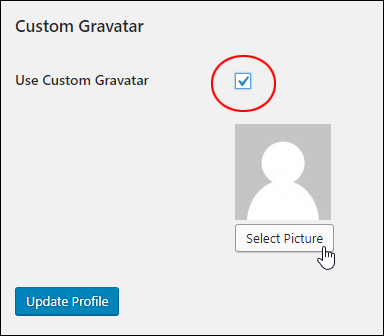
(User Profile – Custom Gravatar)
Upload and/or select an image from the WordPress Media Library to use as your custom gravatar, then click on ‘Update Profile’ to update your settings and set your image as your new default gravatar …
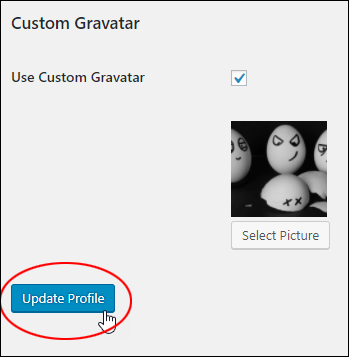
(Use Custom Gravatar)
Your new custom Gravatar image will display throughout your site, replacing the previous default gravatar …
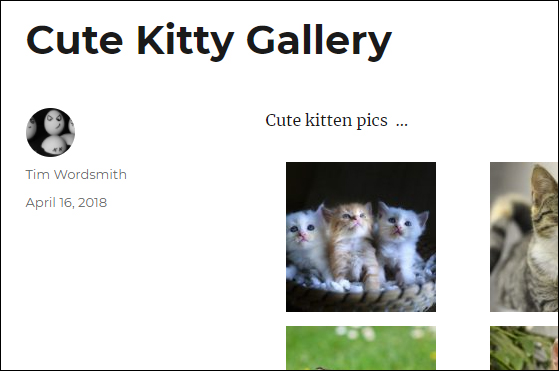
(Your custom Gravatar image)
You can return to the default gravatar simply by disabling the Custom Gravatar feature in your User Profile or deactivating the plugin …
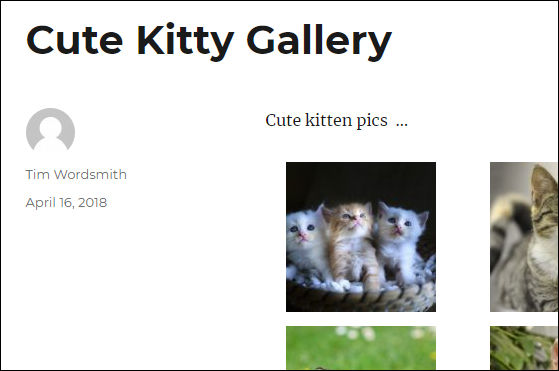
(Back to ‘Mystery Man’)
To learn more about this plugin, go here: Podamibe Custom User Gravatar
WP User Avatar
(WP User Avatar)
WP User Avatar is a free WordPress plugin that lets you use any image or picture from your WordPress Media Library as a custom user avatar, including adding your own default avatar.
To install the plugin from your WordPress dashboard, go to Plugins > Add Plugins and search for “gravatar” in the Keyword field.
Locate the plugin and click ‘Install Now’ …
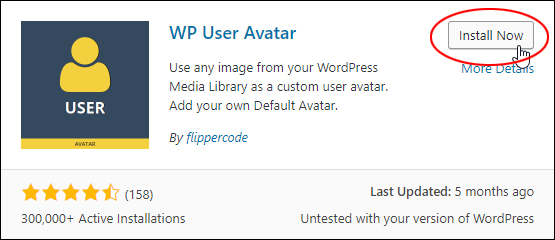
(Install the plugin)
After the plugin has installed, click on ‘Activate’ …
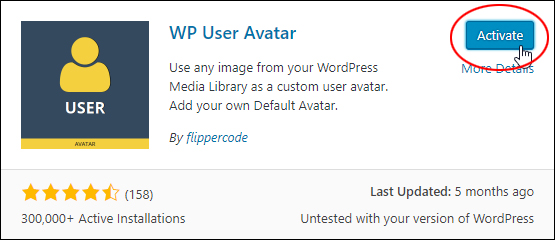
(Activate the plugin)
The plugin adds a new ‘Avatars’ menu to your main WordPress menu. Go to Avatars > Settings to add a new default avatar …
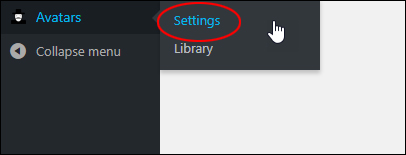
(Avatars > Settings menu)
This brings you to the ‘WP User Avatar’ settings screen, which effectively mirrors the Avatar section of the WordPress Discussion settings area, allowing you to configure the plugin settings, select whether or not to display avatars, set the content rating, and change the default avatar for users without a custom avatar of their own …
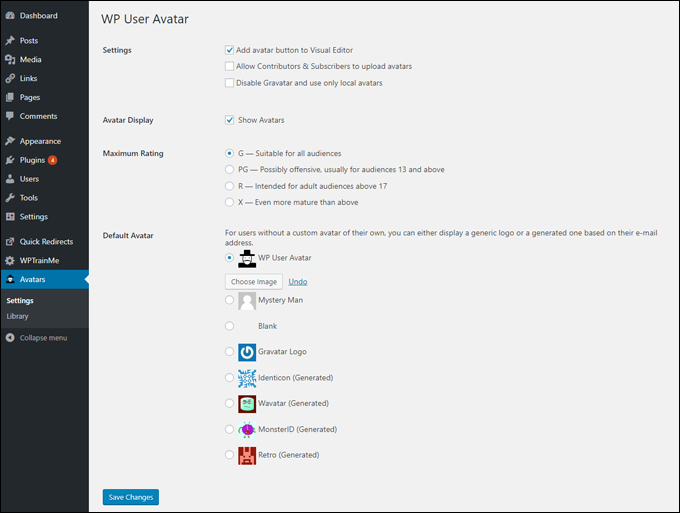
(WP User Avatar settings screen)
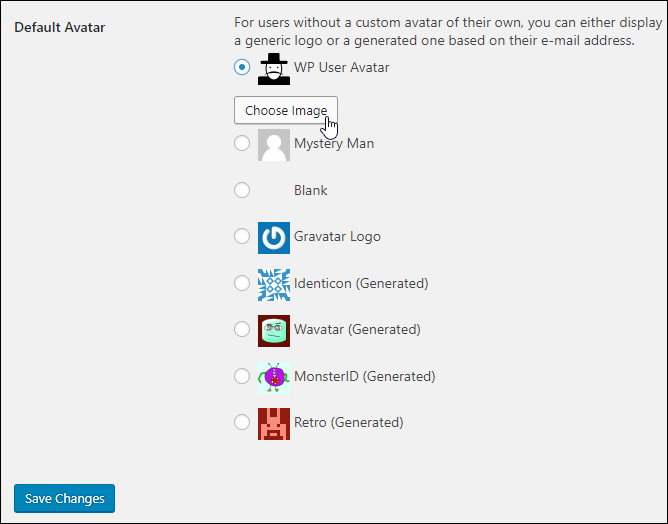
Scroll down to the ‘Default Avatar’ section, select the WP User Avatar radio button and click on the ‘Choose Image’ button …
(Default Avatar – WP User Avatar)
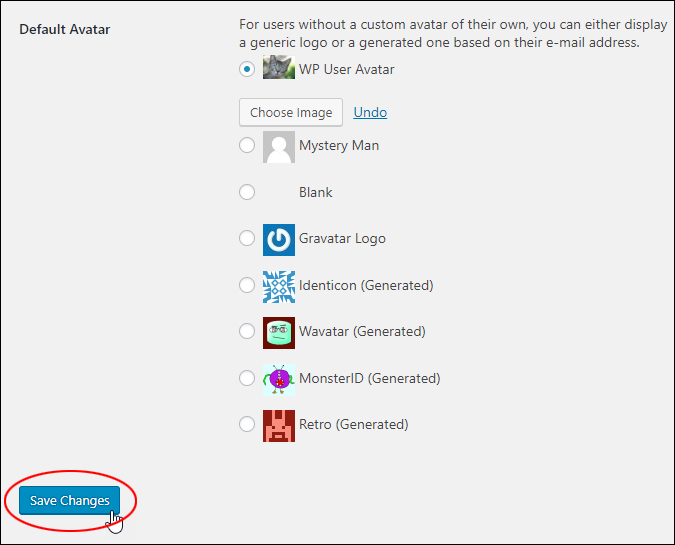
Upload and/or select an image from the WordPress Media Library to use as your custom gravatar and click ‘Save Changes’ to update your settings …
(Set a new default WordPress avatar)
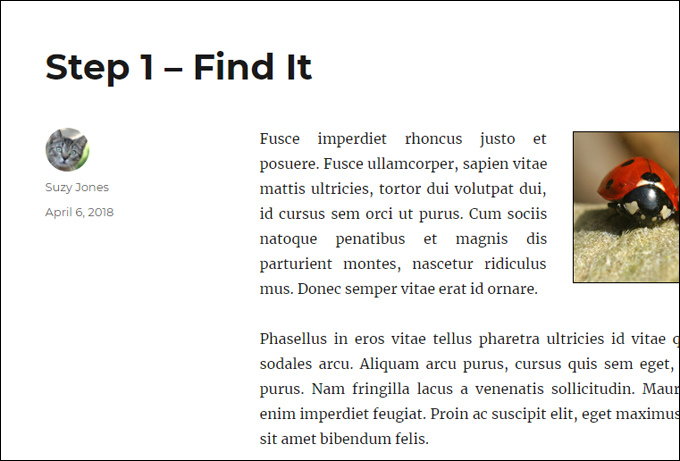
The new custom avatar image will replace the default avatar on your site …
(Custom avatar image)
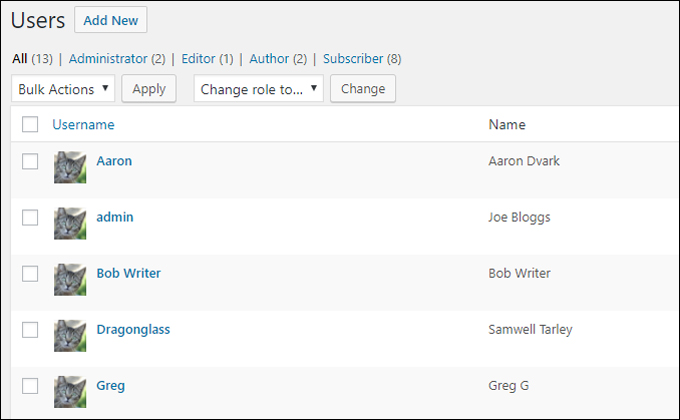
The new custom avatar image will also replace the default image for all users on your site without a Gravatar of their own …
(New default user gravatar)
The plugin also adds a library of Avatars to your admin area …

(Avatars – Library menu)
This lets admin users view and manage all custom avatars uploaded by users on your site …
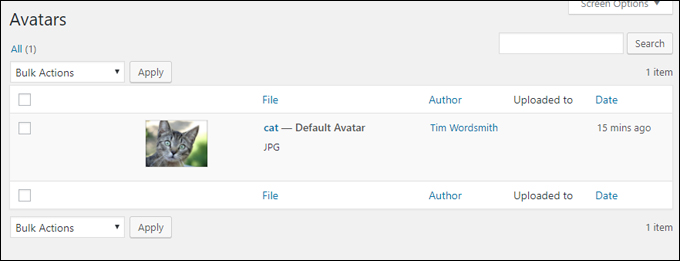
(Avatars library)
WP User Avatar – Additional Features
If you allow the plugin to add a menu button to your Visual Editor in the plugin ‘settings’ section, users can insert their custom gravatar into their content using the menu button or a shortcode …
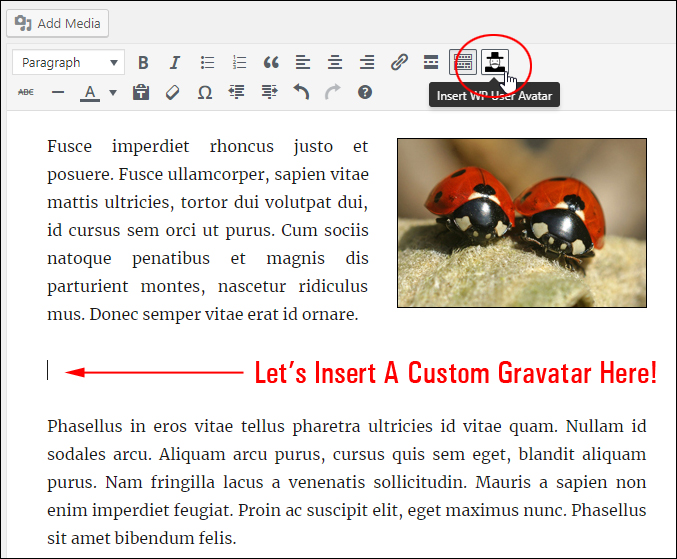
(Insert a custom gravatar into your content)
Clicking on the menu button brings up a dialog box where users can edit and insert their custom avatar into their content …
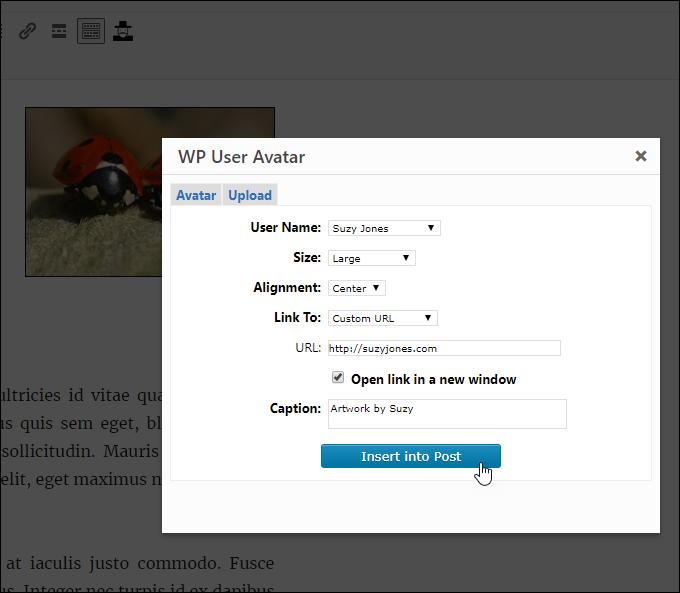
(Insert a custom avatar into your content)
This places a shortcode into the content …
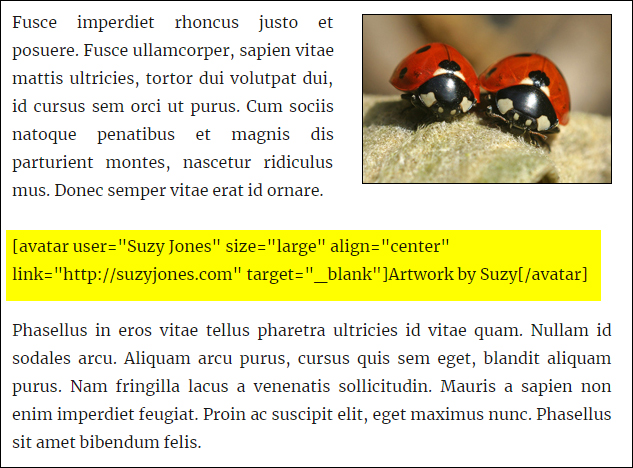
(Custom gravatar shortcode)
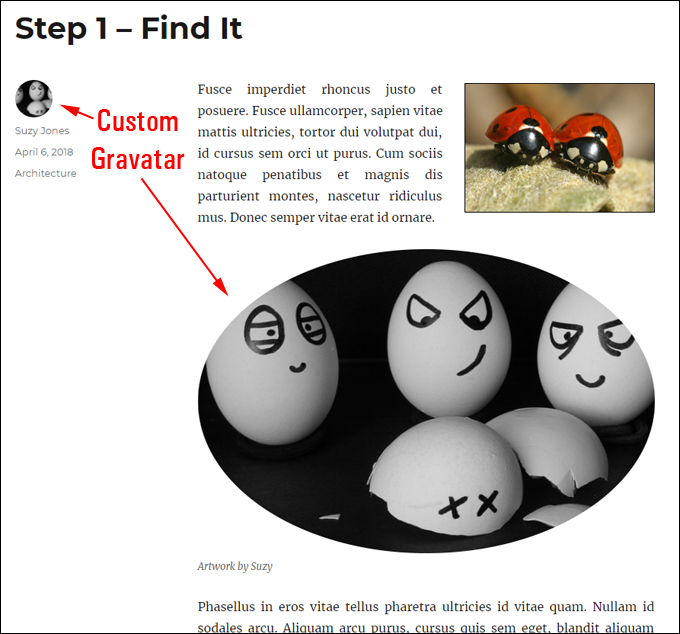
The custom gravatar will display in the content in the specified location after the post or page has been published …
(Custom Gravatar)
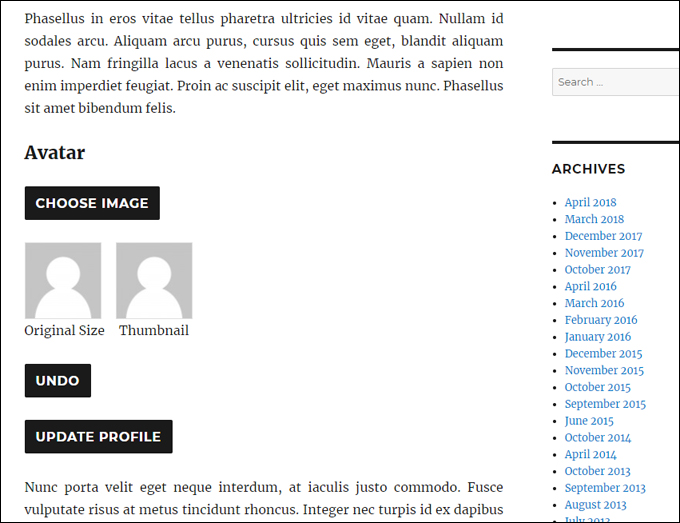
Clicking on the menu button also gives you the option of adding a standalone uploader to a front page or widget which is only visible to logged-in users …
(Add a standalone uploader to a page or widget)
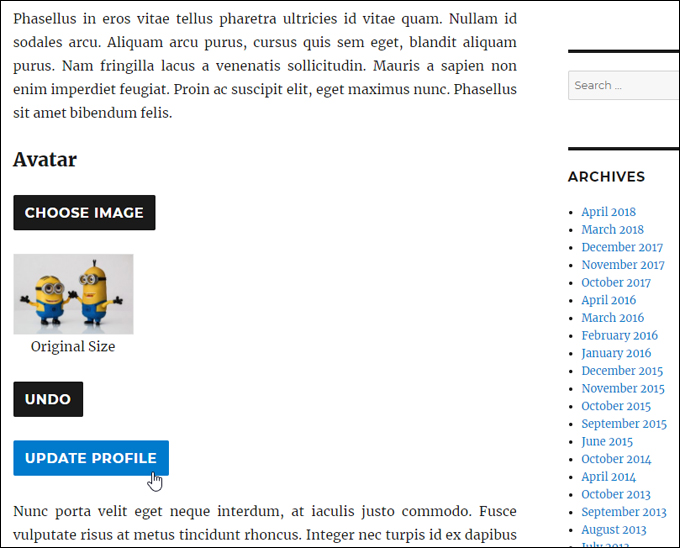
This lets logged-in users directly upload their own custom avatar and update their profiles …
(Logged-in users can upload their own custom Gravatar)
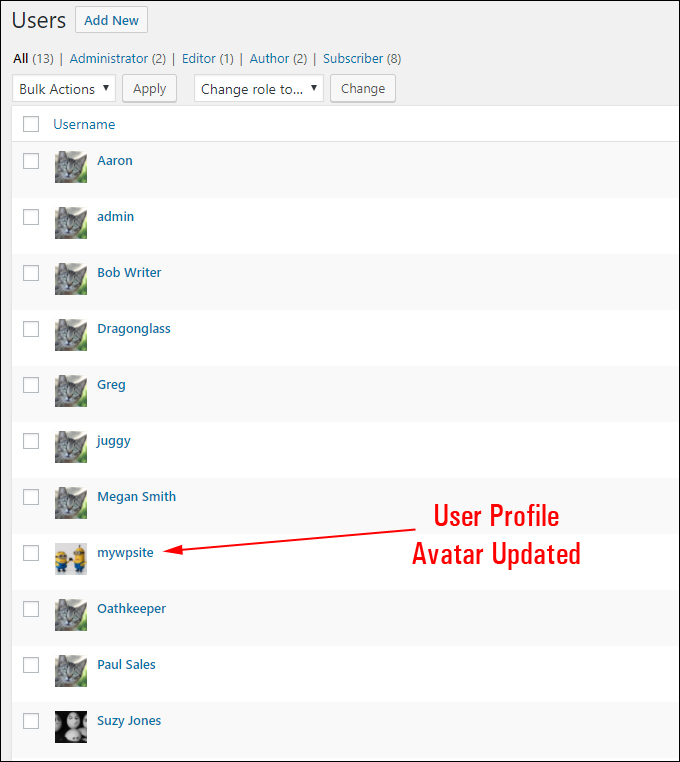
This feature can be useful if you plan to run a membership site or user forum …
(User profile avatar updated)
There is also a WP User Avatar PRO version of the plugin that adds more customizable features for adding, editing, managing, and storing custom avatars.
Watch the video below to see a demo of the Pro version of the plugin:
Learn more about …
- The free edition of the plugin here: WP User Avatar
- The premium edition of the plugin with advanced features here: WP User Avatar PRO
We hope you have found this tutorial on how to add a custom gravatar to WordPress useful.

Angry eggs image: Pixabay
***
"These tutorials have so much information and are easy to understand. If you use WordPress or plan to in the future these will help you with everything you need to know." - Valisa (Mesa, Arizona)
***

