 This tutorial is part of our WordPress configuration step-by-step training series, where we show you how to set up and configure your WordPress site or blog with no coding skills required.
***
After configuring your site’s Writing Settings, the next step is to configure your Reading Settings.
There are only a few settings to configure in this section, but these are very important. Your WordPress Reading settings let you specify what visitors will see on your home page and allow you to configure important content syndication and search engine indexing settings.
The tutorial below shows you how to configure your WordPress Reading Settings.
Configuring Your WordPress Site – Reading Settings – Step-By-Step Tutorial
Click on Settings > Reading in your main WordPress dashboard menu …

(WP Settings – Reading)
The ‘Reading Settings’ page will load in your web browser …
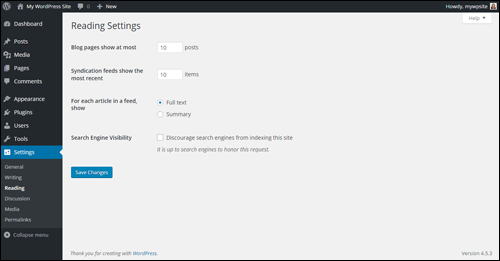
(WordPress – Reading Settings)
WordPress Reading Settings Screen
As mentioned in the introduction section of this tutorial, there are only a few settings to configure in this section, but these are very important.
Let’s go through and show you how to configure these settings:
WordPress Reading Settings – Home Page Display Settings
The Reading Settings section lets you decide if you want to display a list of your latest posts or an individual page as your website’s main page.
If you have not created any WordPress Pages for your site yet, then the first option you will see on this screen is the option to specify how many WordPress Posts will display on your home page …
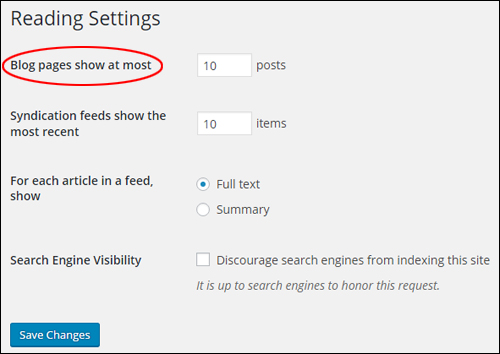
(Reading Settings – ‘Blog pages show at most’ settings)
If your site has at least one WordPress Page, then you will see the following option at the top of this screen instead …
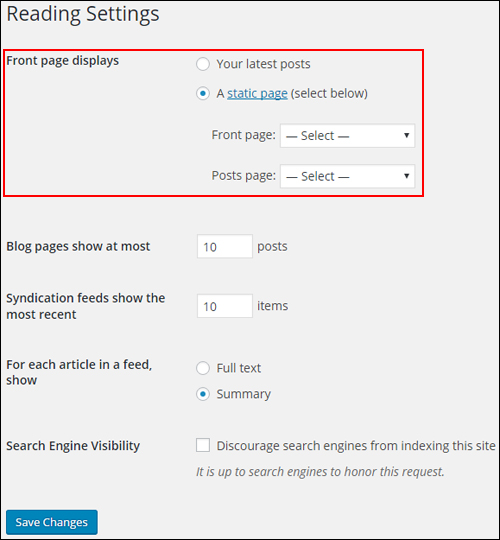
(Reading Settings – ‘Front page’ displays settings)
These options allow you to choose what your visitors will see when they arrive on your site via your home page.
WordPress Reading Settings – Displaying An Individual Page As Your Home Page
If you have created at least one page on your website, select one of the following options from the ‘Front page displays’ section:
- Your latest posts – Your visitors will see your latest blog posts when they visit your site.
- A specific page – Your visitors will be shown a specific page when they visit your home page (e.g. a “welcome” page, or a page with sales copy, e-commerce store catalog page, etc.), much like a traditional “static” website.
The screenshot below shows you the difference between choosing to display a WordPress page vs. displaying your latest posts on your home page …
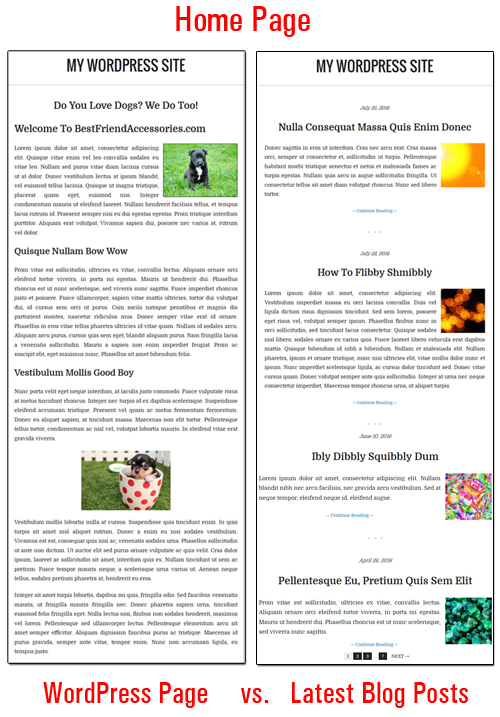
(Displaying a WordPress page vs your latest blog posts on your home page)
![]()
To learn how to set a WordPress page as the main page of your website, see the tutorial below:
WordPress Reading Settings – Displaying Your Latest Blog Posts On Your Home Page
If you have not created a page on your website yet (i.e. you have set up a blog that only publishes posts), then your home page will display your latest blog posts by default. If your website already has pages but you want to display your latest blog posts on your home page, then select Front page displays > Your latest posts …
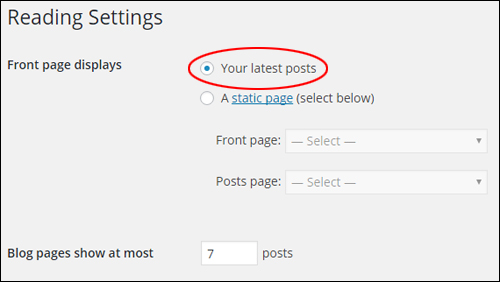
(Reading Settings: Front page displays – Your latest posts)
You can also specify how many blog posts you would like displayed on your posts page by entering a number in the Blog pages show at most [xxx] posts field …
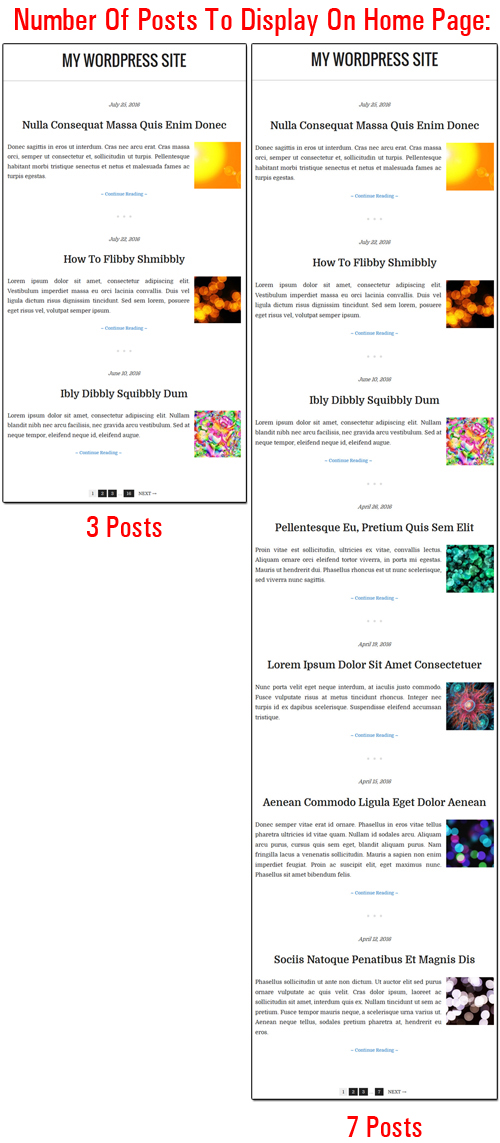
(You can specify the number of blog posts to display on your home page)
![]()
To learn how to specify the number of blog posts to display on your blog pages, see the tutorial below:
If you want to display a specific page as your home page and a summary of your latest blog posts on a separate page, then you will need to create a blog page in WordPress.
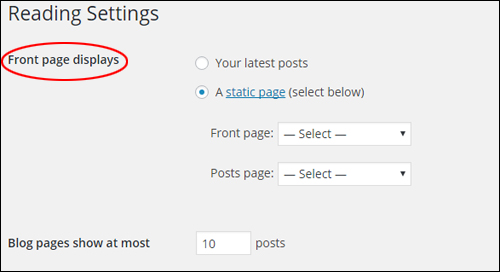
(Reading Settings – ‘Front page’ displays settings”)
To learn how to create a blog page in WordPress to display a summary of your blog posts, see the tutorial below:
WordPress Reading Settings – Syndication Feed Settings
You can adjust some of your WordPress RSS Feed features to determine how the information from your site will be sent to a reader’s web browser or other applications that use RSS feeds.
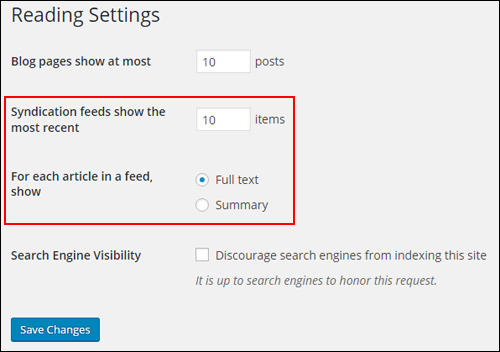
(WordPress Reading Settings – Syndication Feed Settings)
Every WordPress site has a built-in RSS page that automatically displays feeds of your posts …
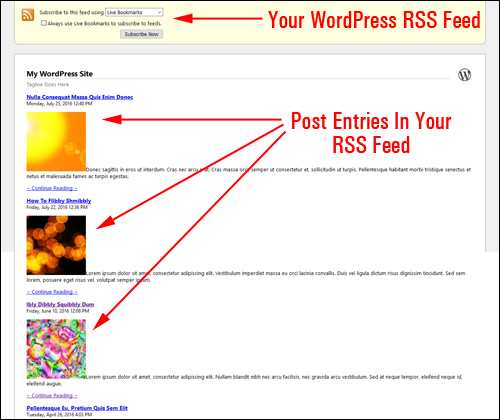
(Post entries in your WordPress RSS feed)
To learn more about syndicating content and increasing traffic with your built-in WordPress RSS feed, see the tutorial below:
Let’s go through your configuration options for this section.
Syndication Feeds Show The Most Recent …
The settings in the Syndication Feeds section allow you to specify how many feeds display on your RSS feeds page.
So, for example, if you specify “5” items to show in the Syndication feeds show the most recent [xxx] items field …
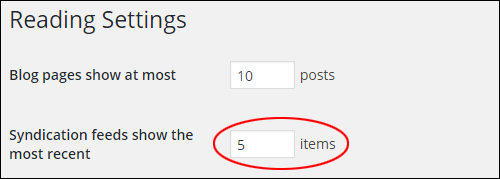
(Reading Settings – ‘Syndication feeds show the most recent’ option)
Your WordPress RSS feed page will display the 5 most recent items …
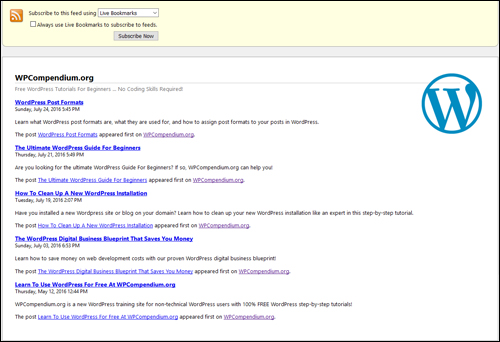
(Your WordPress RSS feed page – 5 items displayed)
If you change the number of items to something higher like “15”, for example …
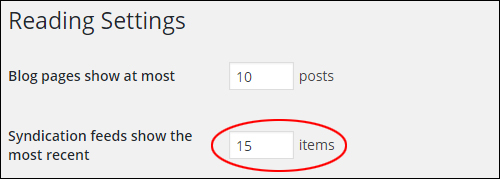
(Change the number of items to display in your syndication feeds)
Your WordPress RSS feed page will display the 15 most recent items, and so on …
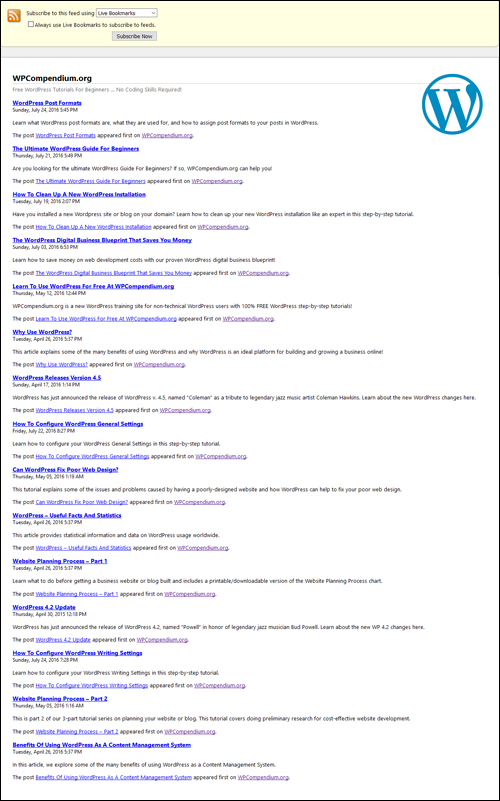
(You can control the number of items displayed in your feeds)
For Each Article In A Feed Show …
The settings in this section affect how your RSS feeds display to external feed readers (i.e. when your feeds are syndicated externally).
![]()
It’s important not to confuse the option to display Full Text or Summary of RSS feeds with how post excerpts display on your site.
To learn more about using WordPress post excerpts, including how to change the length of your post excerpts, see the tutorial below:
When users syndicate your feed or view your feeds using a feedreader, what they see on their browser will depend on the option you specify in the For each article in a feed, show setting, as follows:
- Full Text – Displays your entire blog post in a feed.
- Summary – Display either the excerpt of your post (if you create one), or a teaser containing the first 55 words of your post. (See this tutorial to learn more about using WordPress post excerpts).
Let’s take a look at what happens when you choose the Full Text vs Summary option.
Full Text
If you select For Each Article In A Feed Show > Full Text …

(For Each Article In A Feed Show > Full Text option)
This is what your feeds are going to look like when viewed with a feedreader …
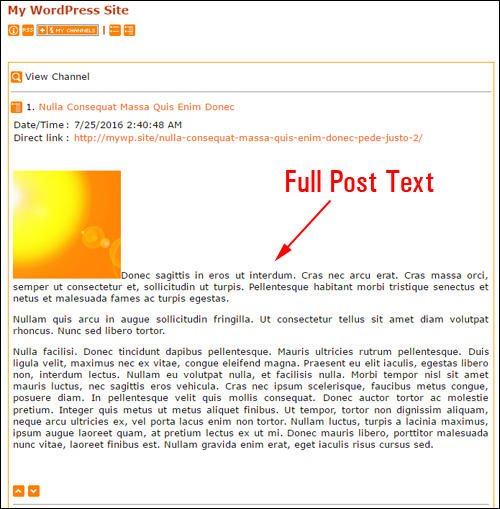
(Feedreader service shows full post text from your RSS feed.)
Summary
If you select For Each Article In A Feed Show > Summary …

(For Each Article In A Feed Show > Summary option)
Then only a summary of your posts will display when your feed is run through a feedreader service …
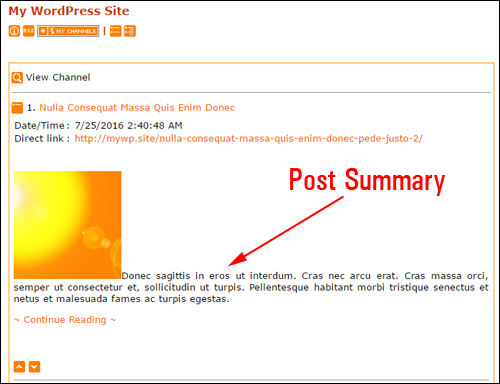
(Feedreader shows post summary from your RSS feed)
![]()
While your choice to select either of the above options comes down mostly to personal preference, if you choose to display the full content of your posts in your RSS feeds (by selecting the ‘Full Text’ option), other users can syndicate the entire content of your articles, including software designed to “scrape” (i.e. steal) content, and republish your posts in their entirety. This is how “spam blogs” (also called splogs) get content.
Unless you have a specific reason to syndicate your posts in their entirety, therefore, consider selecting the “Summary” option instead of “Full Text” until you learn how to configure your WordPress RSS feeds to credit you as the original author. This will then automatically create an attribution to every post you publish and post a link back to your site from external sites that syndicate (or even scrape) your content.
To better understand this, take a look at the screenshots below.
Here is what entries in a default WordPress RSS feed look like …
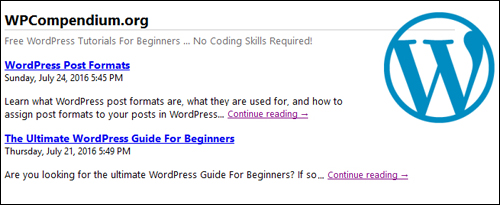
(Default WordPress RSS feed entries)
Here is the same RSS feed with post attributions added …
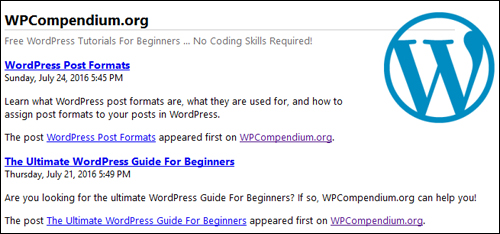
(WordPress RSS feeds with post attributions)
To learn how to set up RSS feeds with attribution links, see the tutorial below:
WordPress Reading Settings – Search Engine Visibility
The WordPress Reading Settings section also lets you configure settings aimed at discouraging search engines from indexing your site …
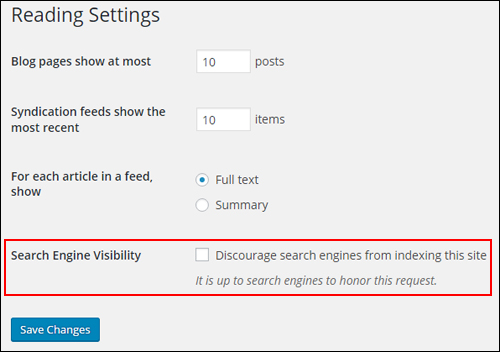
(Search Engine Visibility)
Typically, you will want search engines to find your site and index your pages, so you would leave the Discourage search engines from indexing this site box unchecked.
If you check the box to discourage search engines from indexing your site, WordPress adds code to files in your server instructing search engine spiders to ignore your site and stops transmitting information to all of the pinging services you have added to the “Update Services” area in your Writing Settings section, effectively blocking this service.
With search engines discouraged from indexing your site, you will see the message “WordPress is not notifying any Update Services because of your site’s visibility settings” in the Writing Settings > Update Services section …

(You can block WordPress from automatically notifying update services)
You will also see a message on your dashboard reminding you that you have enabled this option …
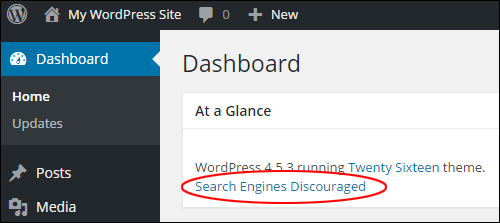
(WordPress Dashboard – Search Engines Discouraged)
![]()
There may be situations where you may not want search engines to index your site. For example, a WordPress site set up for private use or internal purposes only like training staff, documenting internal processes, testing different plugins, themes, or configurations, or running applications that require a dedicated WordPress site installation.
Selecting the option to discourage search engines from indexing your site doesn’t block out search engines completely. To prevent search engines from indexing your WordPress site or blog requires configuring additional settings. As stated in the ‘Search Engine Visibility’ description, it is up to search engines to honor your request.
To learn how to block search engines from indexing your WordPress site, see the tutorial below:
Click ‘Save Changes’ when you are done configuring your settings …

(Save changes to update your settings)
WordPress Writing Settings – Additional Information
Installing plugins and themes on your WordPress site can add new settings to your WordPress Writing Settings section …
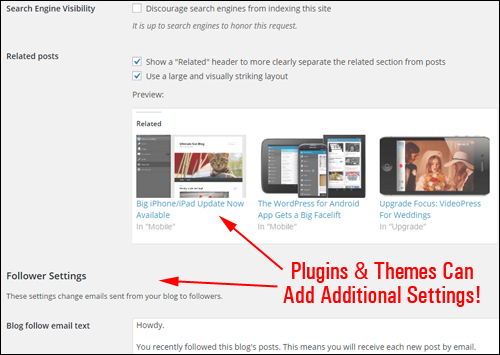
(Plugins and themes can add additional settings to the WordPress Reading Settings section)
Congratulations! Now you know how to configure your WordPress Reading Settings. The next step is to configure your WordPress Discussion Settings.
Next Step: Configure Your WordPress Site: Discussion Settings
***
"I love the way your email series "Infinite Web Content Creation Training Series" is documented and presented. It is very absorbing and captivating. The links and tutorials are interesting and educational. This has motivated me to rewrite my content following the concepts I am learning from the email series." - Mani Raju, www.fortuneinewaste.com
***

