How To Schedule Posts In WordPress

Having an effective content marketing plan to grow your business online will most likely require developing, implementing, and maintaining a regular content publishing schedule.
Publishing new content on a regular basis helps you get more of your sites’ pages indexed by search engines, drive new visitors to your business, and help you generate leads and sales.
There may be instances, however, when you don’t necessarily want your content to appear on your site immediately after hitting the publish button. This is where scheduling content can be very useful.
Wouldn’t it be great if you could just add a whole bunch of content to your site and then have it all be automatically “drip-fed” to your readers, so they get to read one new post each day/week, every few days, or during special times of the year?
With WordPress, you can! You can set a specific date or time to publish your content and WordPress will then automatically publish or republish it on that exact date and time.
This tutorial covers the benefits of content scheduling, how to schedule posts in WordPress to publish at a later date, and time-saving tips on ways to automate and handle scheduled content.
Note: Make sure you’re familiar with the tutorial below. These will help you get the most out of this lesson:
- How To Create A Post In WordPress – Part 1
- How To Create A Post In WordPress – Part 2
- How To Edit and Delete Posts In WordPress – Part 1
- How To Edit and Delete Posts In WordPress – Part 2
- How To Create Pages In WordPress
- How To Edit And Delete Pages In WordPress
- How To Use The WordPress Quick Edit Feature
- How To Use The WordPress Classic Editor
- The WordPress Block Editor
Benefits Of Scheduling Content
WordPress not only lets you easily create, edit, and publish posts and pages, but you can also change your posts’ publishing dates and times.
You can schedule posts to publish in the future or backdate your post to display a prior publishing date for your content.
![]()
The ability to backdate posts is useful if, for example, you’ve been away traveling and want to publish a “travel diary” so that your post dates match the narrative or account of your day-to-day events. Another use for backdating your posts is to give a brand new site the feel of being more established. Alternatively, if you’re planning to launch a brand new site, you can add a bunch of posts to your site and set all content to start publishing at regular intervals after everything is set up and configured and your site goes live.
Some of the benefits and applications of the content scheduling feature of WordPress include the following:
1. Create A Regular Content Publishing Schedule
The scheduling feature allows you to create and maintain a regular content publishing schedule even while you are away or unavailable.
For example, let’s say that you are traveling overseas and would like to publish posts or announcements on your blog for an audience that lives in your country. You would like posts to be published at a certain time of the day while you are away, but due to time differences, it would mean staying up late at night or getting up at an odd hour of the morning to hit the publish button.
With the scheduling feature, you can just set your posts to go live on the days you want to publish, and while you’re asleep.
2. Publish Content On Special Days Of The Year
Want to publish posts to coincide with a special Holiday, season, special event, or annual sale? With the content scheduling function, you can.
Just get your content written earlier and queue it for publishing on that special date.
3. Republish Old Posts
You can update a post that you have previously published and schedule it to automatically republish at a specific time/date in the future. This lets you reuse content that is relevant for certain times of the year (e.g. republishing a post about setting New Year’s resolutions every January) or bring back old but useful posts that got buried by other content on your blog.
4. Bulk Write Content, Then Drip Feed
With the scheduling feature, you can create a whole bunch of content in one go then publish it over time.
For example, let’s say that you decide to set one day aside each week to create a whole week’s worth of content for your site or outsource your content writing to freelance writers who deliver you many articles once a month, but you don’t want to publish all the new content at once.
Membership plugins also use the scheduling feature to drip-feed content over time inside a membership area.
Step-By-Step Tutorial: How To Schedule Posts (And Pages) In WordPress
With WordPress, you can set posts (and pages) to publish at any given date and time. You can also change the date and time of a draft or published post or page using the scheduling feature.
You can schedule posts and pages:
- From your Table of Posts using the Quick Edit feature.
- While creating new posts or editing existing posts using the WordPress Classic Editor or the WordPress Block Editor.
Let’s go through each of these methods.
![]()
As the process for scheduling posts and pages is the same, we’ll just refer to “posts” in this tutorial. Also, there is no difference in how you schedule posts and pages when using the WordPress Classic Editor or the WordPress Block Editor. The screenshots in this tutorial use the WordPress Classic Editor.
How To Schedule Posts (And Pages) In WordPress Using The Quick Edit Feature
Use this method to schedule draft posts for publishing at a later time.
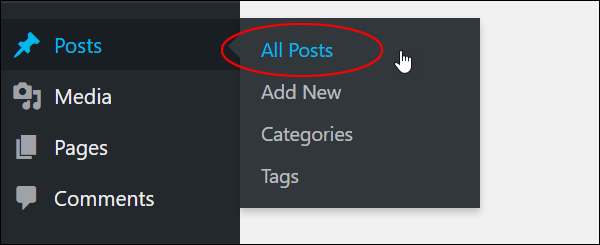
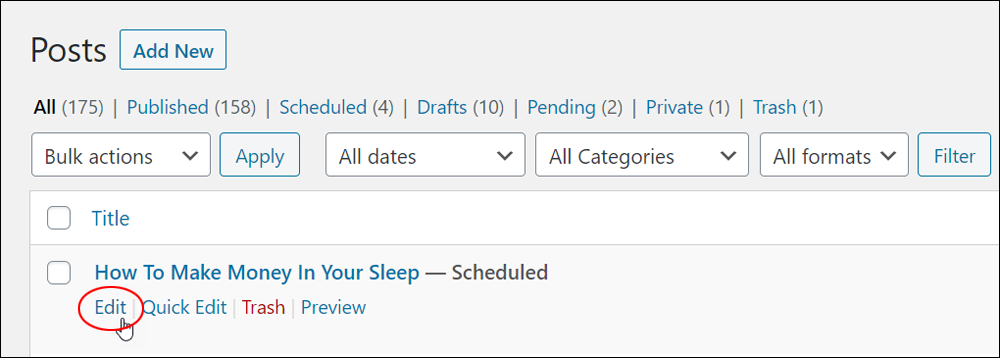
To schedule posts in WordPress using the Quick Edit feature, log into your WordPress admin area and select Posts > All Posts from your main menu.
In the Posts screen, locate the post you want to edit, then hover over the post title to display the options menu and click on Quick Edit.
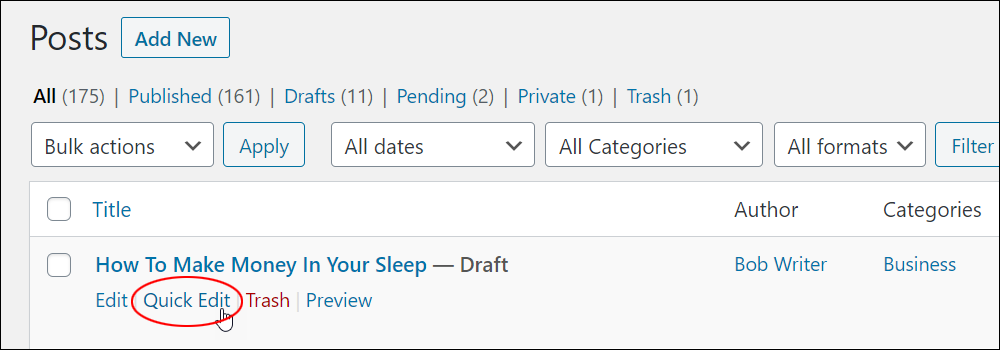
The Quick Edit inline editor will expand to display all of the options available for editing the post.
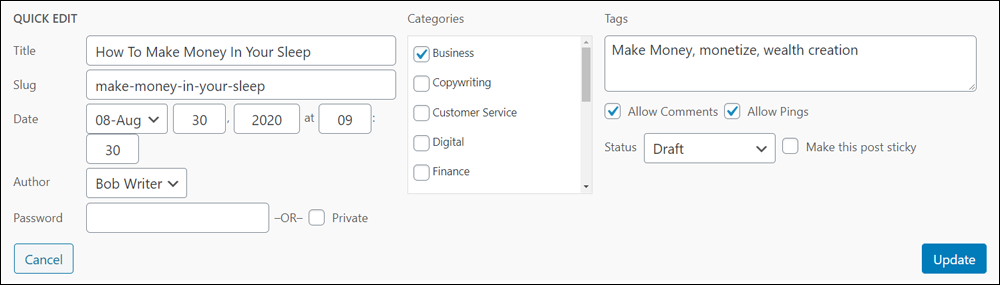
Locate the Date section.
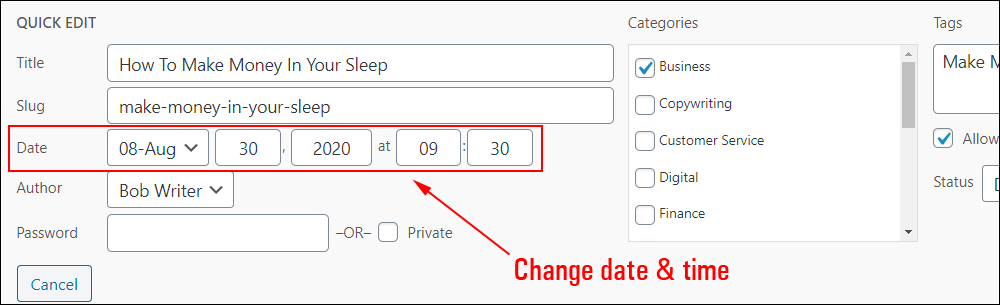
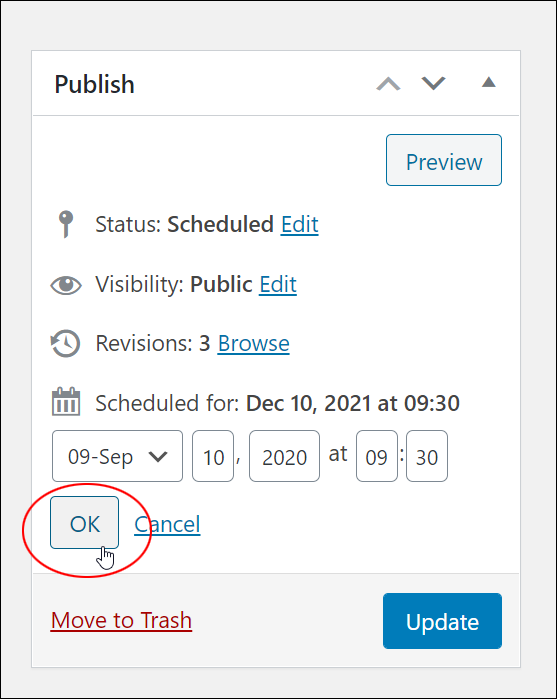
Set the date and time to publish your post by selecting options from the dropdown menu and changing or entering new values in the date/time fields.
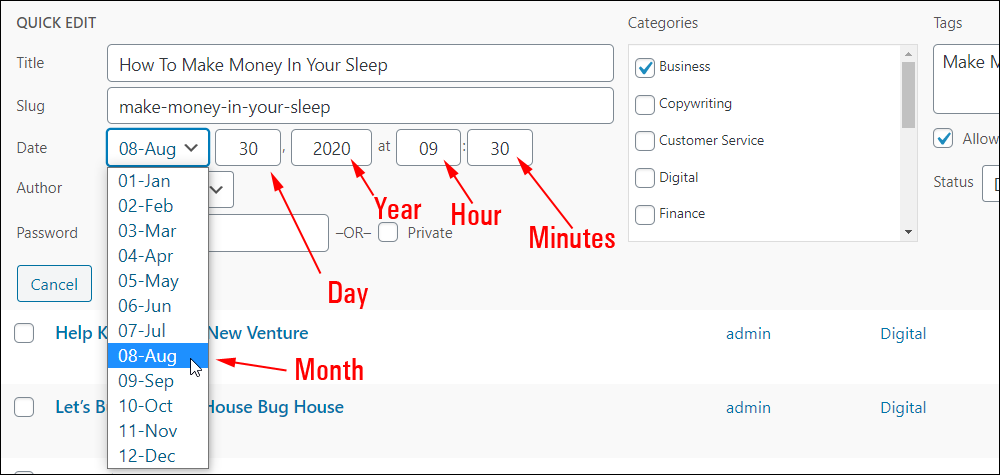
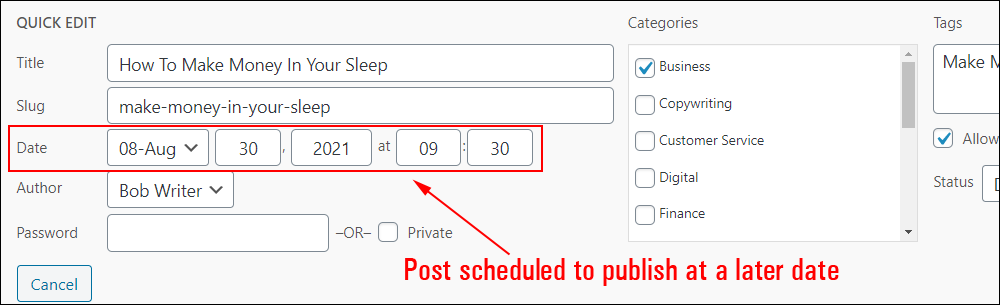
For this example, we’ll schedule the post to publish at a later date by changing the post creation timestamp date to the following year.
![]()
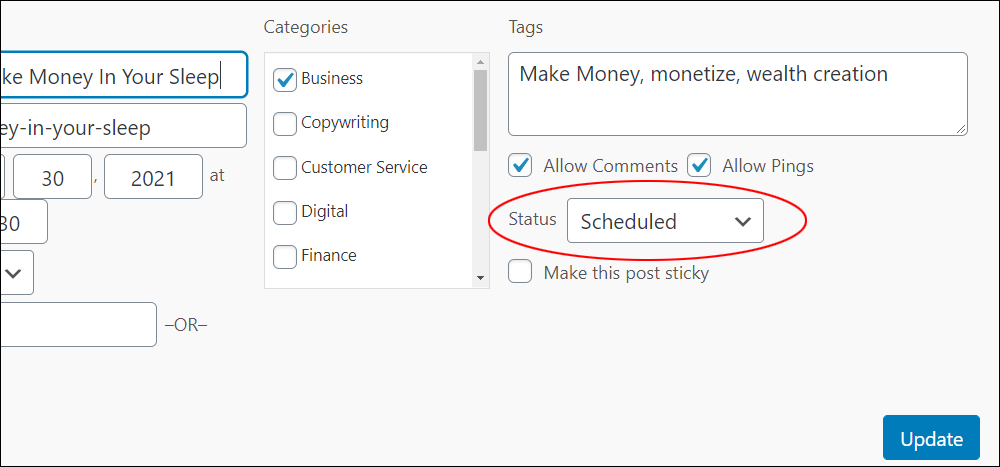
To schedule a post in the PM, you will need to use the 24-hour clock. For example, to display 1:00 PM enter 13:00 in the Post Scheduling section. The time your post will actually publish will depend on the location settings specified in your Settings > General area.
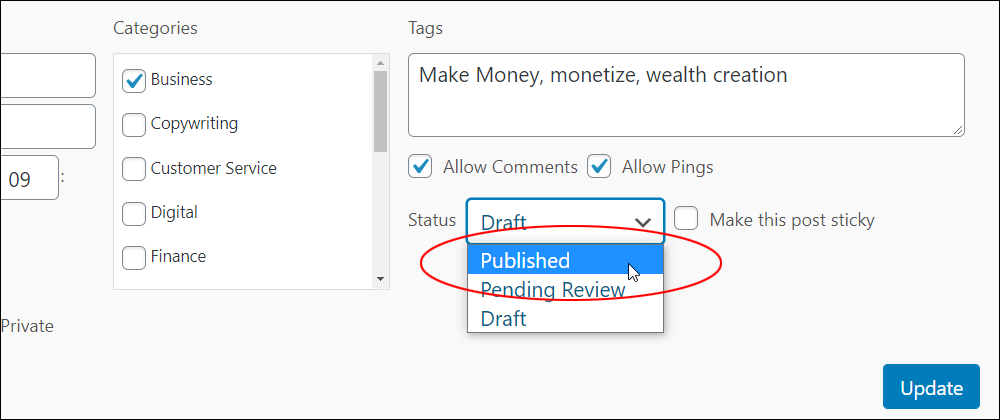
Your post will remain set to Draft or Pending Review unless you change the Post Status to Published.
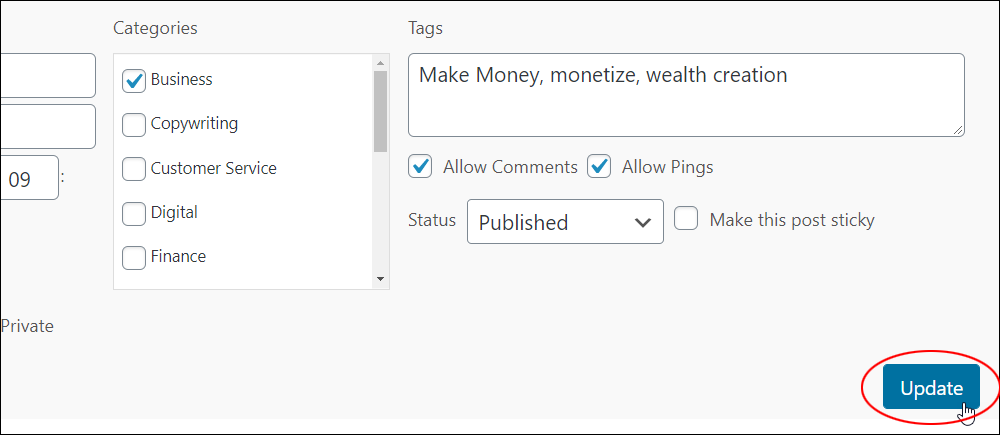
Remember to click the Update button to save your new post settings.
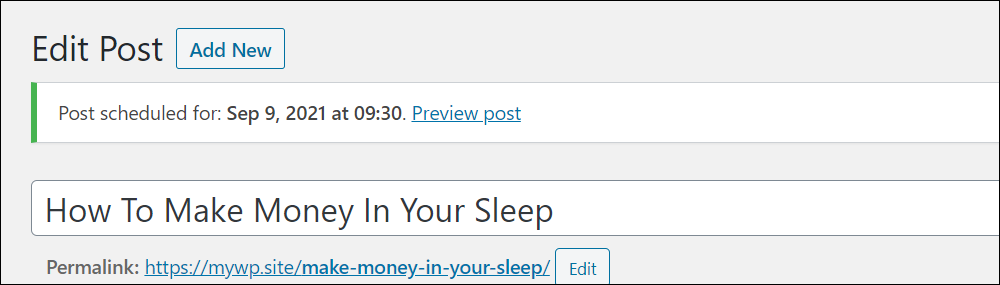
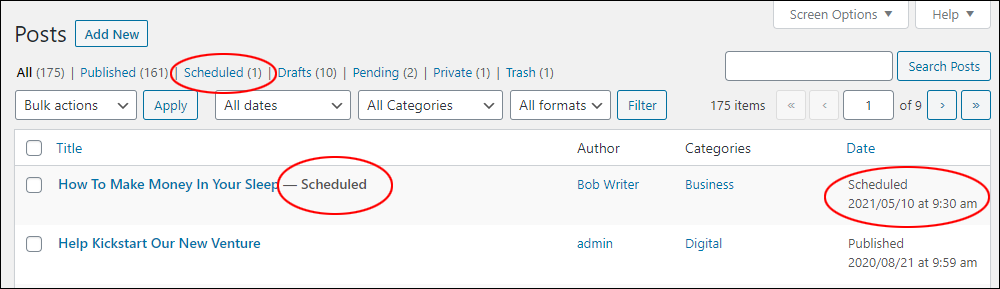
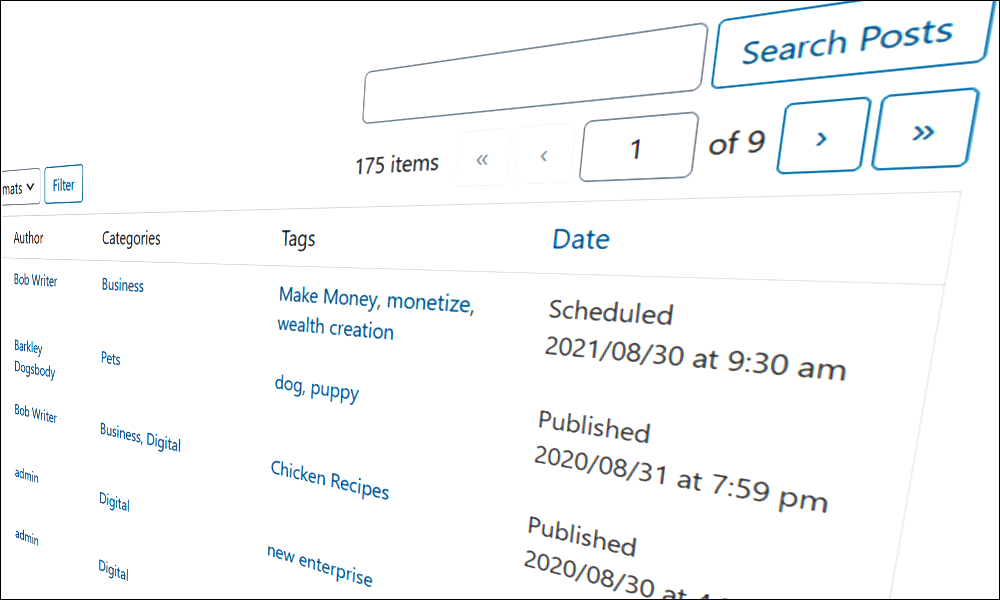
Your post will now show as being ‘Scheduled’ in the Table of Posts.

Your post will also show as being ‘Scheduled’ in the Quick Edit > Status section.
How To Schedule New Posts (And Pages) In WordPress
Use this method to schedule draft posts for publishing at a later time.
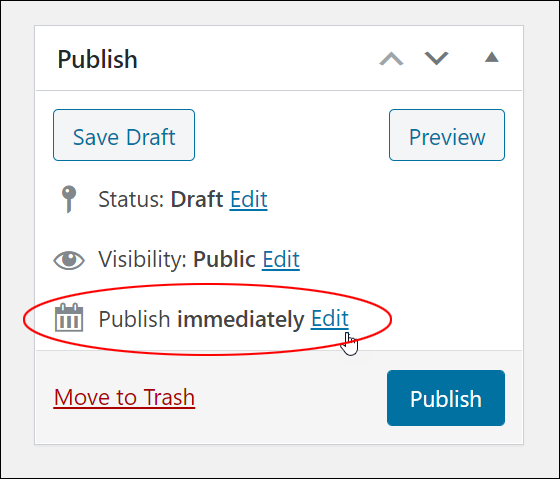
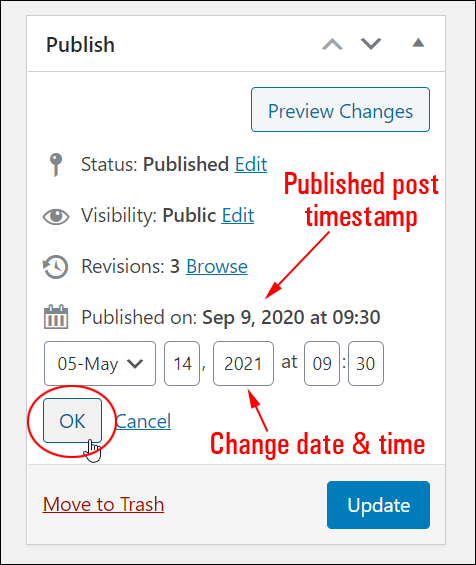
If you are creating a new post, you can schedule your post to publish at a later date and time by clicking on the Publish immediately > Edit link.
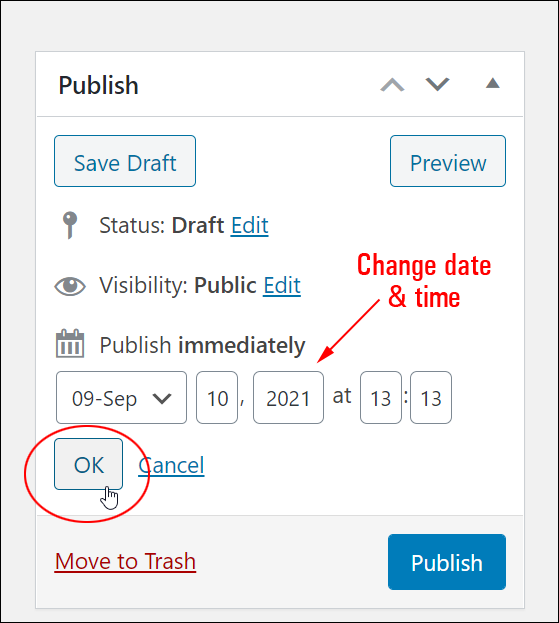
Change the date and time of your post and confirm your changes by clicking the OK button.
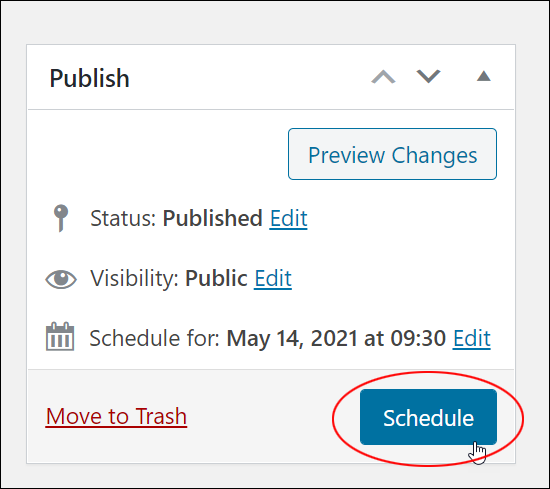
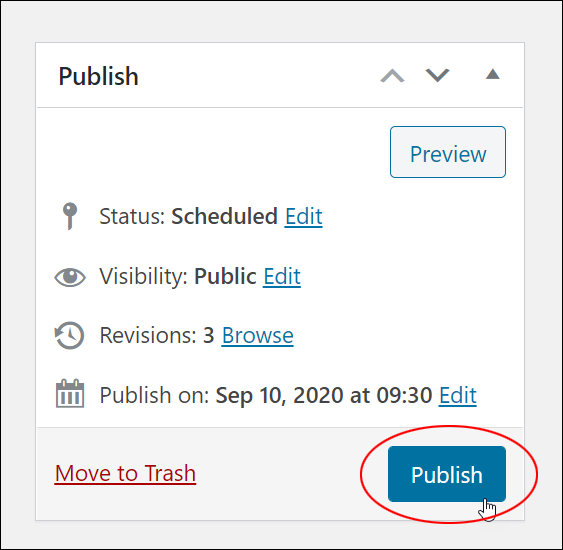
This will change the Publish button to Scheduled. Click the Schedule button to save and update your post settings.
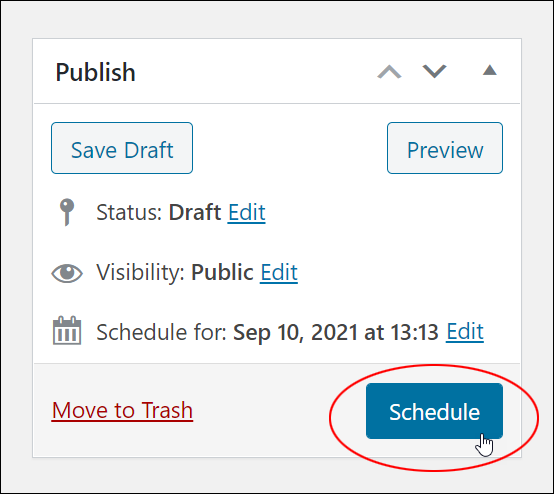
Your post status will change to Scheduled and will automatically publish on the date and time you have specified in the Publish box.
Your Table of Posts will also show the post status as scheduled.
![]()
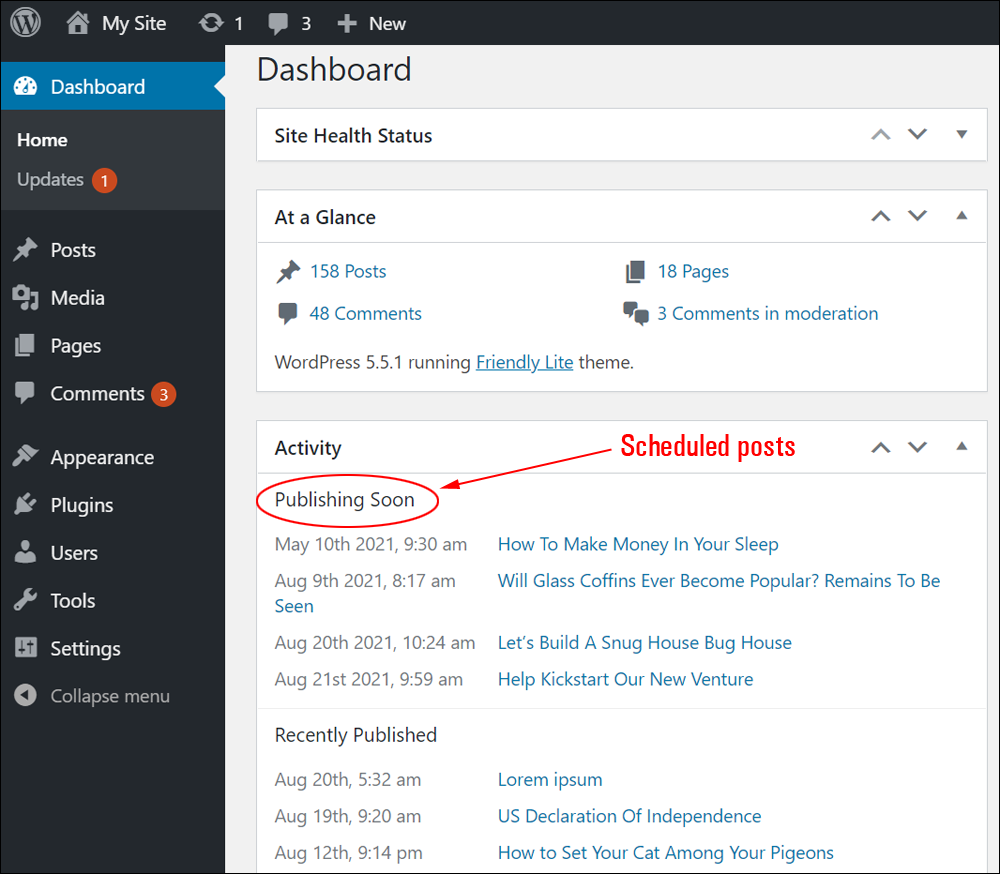
You can see which scheduled posts are queued for publishing in the Activity panel of your WordPress Dashboard.
How To Republish Existing Posts (And Pages) In WordPress
In some instances, you may want to republish an old post. If so, you can reschedule your post to publish again at a later date by editing your existing post, changing the date and time to create a future timestamp, and then clicking the Schedule button (if you don’t change the date or time, you will simply update your existing post).
Use this method to republish existing posts and pages at a later time and send posts to the top of your Blog Page.
When the scheduled time arrives, the post will jump from its current place in your timeline to the most recent spot on your blog and display the new date and time. The post link will also be updated to reflect the new publication date.
Let’s take a look now at how to republish existing posts and pages in WordPress.
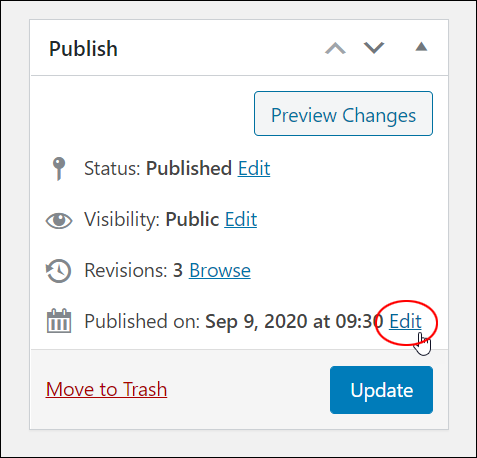
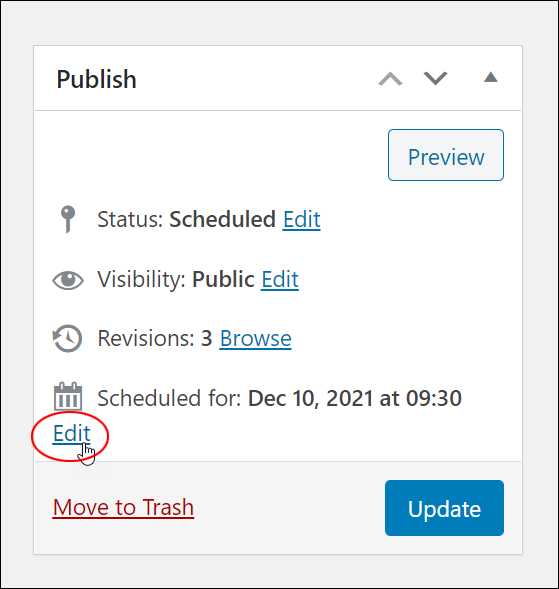
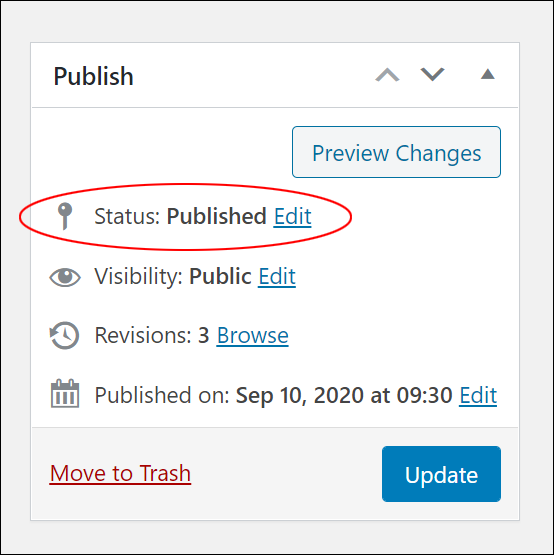
If you are editing an existing published post, you can schedule your post to be republished at a later date by clicking on the Edit link next to the Published on: section.
Change the date and time settings of your post and click OK to confirm.
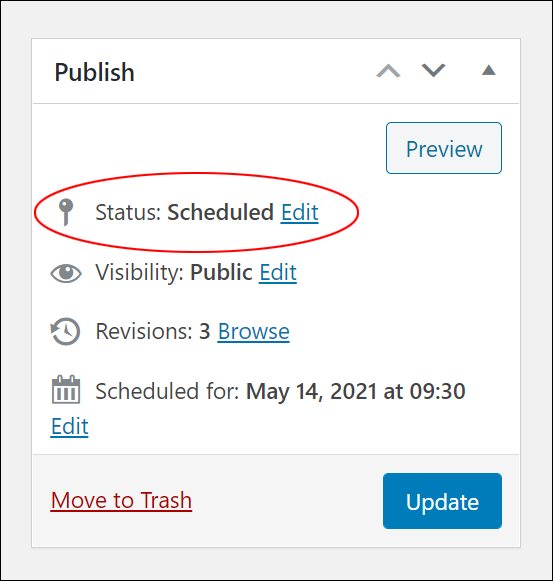
Click the Schedule button to resave and update your post.
Your post status will now show as being scheduled inside the Post Edit > Publish section.
![]()
When you reschedule a post, it will not redistribute to your blog subscribers. If you want to redistribute your post to your blog subscribers, then republish your post by changing the status of your post to Draft, clicking Update, and then clicking Publish again.

When you do this, your post will immediately redistribute to your blog subscribers. However, the publication date and time will remain the same, so the link and position of the post in your blog timeline will remain unchanged.
If you want to display a republished post at the top of your blog page without changing its date, just make it “sticky”.
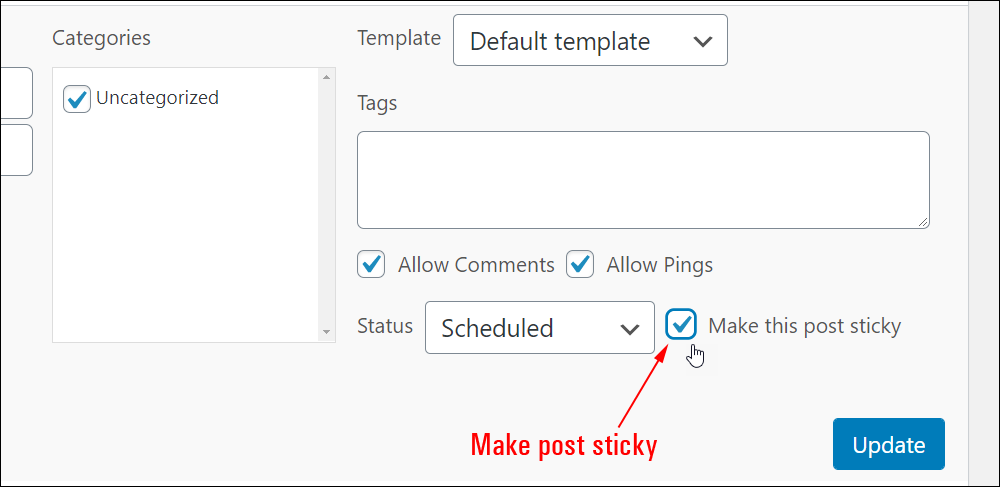
You can learn more about creating sticky posts in this tutorial: How To Make WordPress Posts Sticky
How To Unschedule A Post (Or Page) In WordPress
If you’ve scheduled a post or page in WordPress to publish at a future date, but then change your mind and decide to publish it immediately, just go back to the Edit Post screen of your scheduled post.
In the Publish box, click on the Edit link next to the date you have scheduled your post to publish.
Now, just enter today’s date and time (tip: if you’re not sure of the exact time just type in an hour or two earlier than the current time showing on your clock) as your scheduled post time and click OK.
Click the Publish button to unschedule your post.
Your post will unschedule and be published right away.
Troubleshooting Scheduled Posts
If your scheduled post failed to publish when the scheduled time arrived, check the following:
- Is your timezone set correctly in your Settings > General section?
- Check your Post Status. Did you save your post as a Draft instead of scheduling it?
- Did you remember to click the Schedule button after changing your post’s date/time settings? For the post to publish, you must click the Schedule button.
- Did you schedule too many posts for publishing? Are you using bulk post scheduling plugins to queue up thousands of posts? Depending on your server resources, you could experience problems. If so, try reducing the number of scheduled posts and see if this fixes the problem.
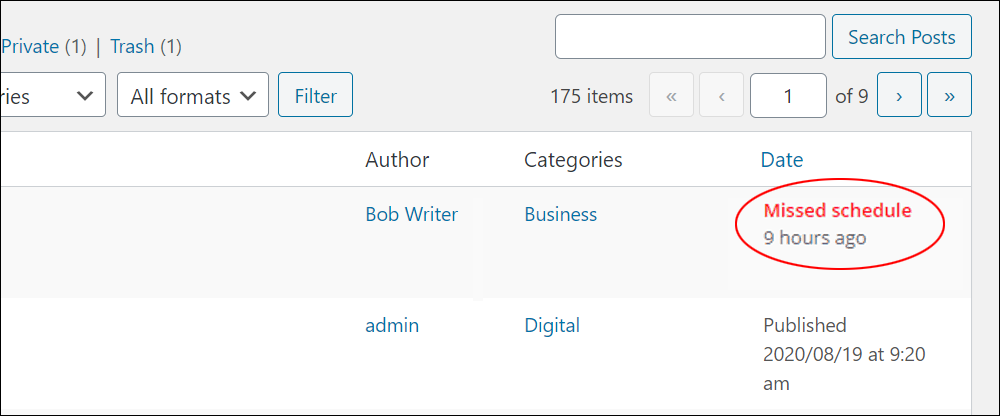
Fixing “Missed Schedule” Posts
In addition to the above points, sometimes WordPress will just miss publishing a scheduled post.
WordPress uses an internal script (called wp-cron) to automatically run a number of scheduled tasks (called cron jobs), such as sending out emails, checking plugins and themes for updates, and scheduling posts and events.
In some situations, the wp-cron script is prevented from working, which can lead to posts missing their publication schedule and/or scheduled events not being executed.
This can be fixed with plugins, including some of the plugins described below.
To learn how to fix the missed post scheduling issue, see this tutorial: How To Fix Missed Schedule Posts
Automate Post Scheduling With WordPress Plugins
There are plugins you can use to automate various aspects of publishing and scheduling content in WordPress. Let’s go through some of the tasks and plugins:
Queuing Posts For Publishing
Queue Posts

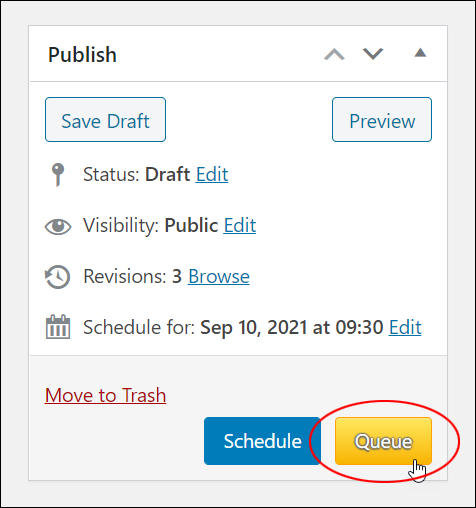
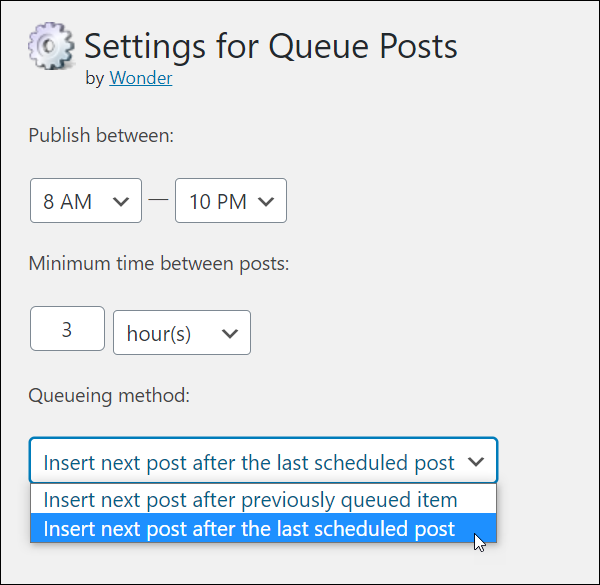
Queue Posts is a free plugin that lets you place new posts and pages in a queue for publishing later at a specified interval.
When you create a new post or page, the plugin gives you the option of queuing it for publishing later.
This is useful if you are scheduling multiple posts and would like these to be published in a specific order, or at specific times and intervals.
To learn more about this plugin, go here: Queue Posts
Bulk Scheduling Posts
There are a number of WordPress plugins that are designed for “autoposting” or “autoblogging” content (adding content automatically to WordPress sites).
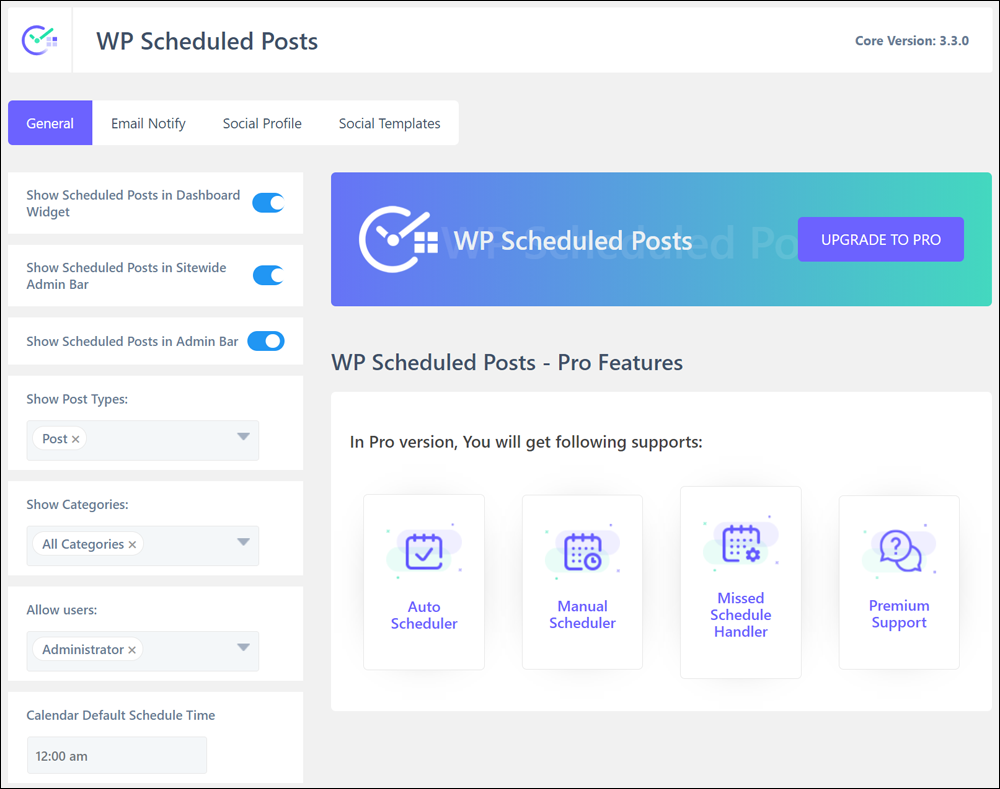
WP Scheduled Posts
WP Scheduled Posts is a plugin that lets you create editorial calendars and publishing schedules with auto social sharing. This plugin is useful for sites that plan to publish a lot of content, editors, etc.
After installation, the plugin guides you through the setup process with an easy wizard interface and gives you the option of displaying information about your scheduled posts in various sections of your site.
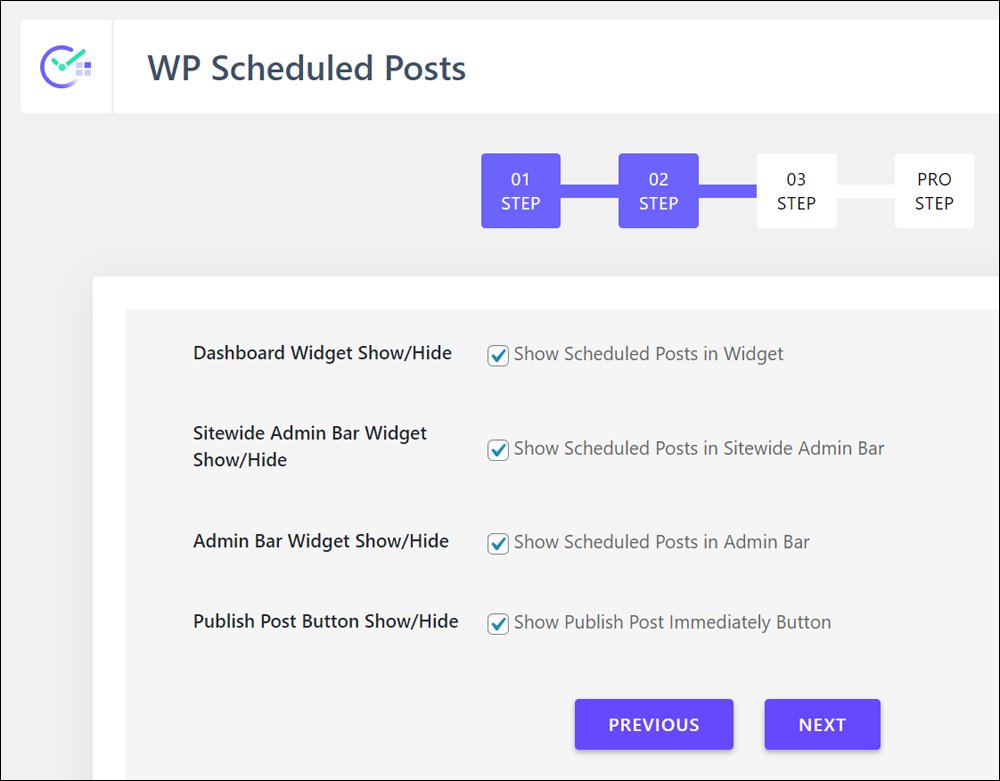
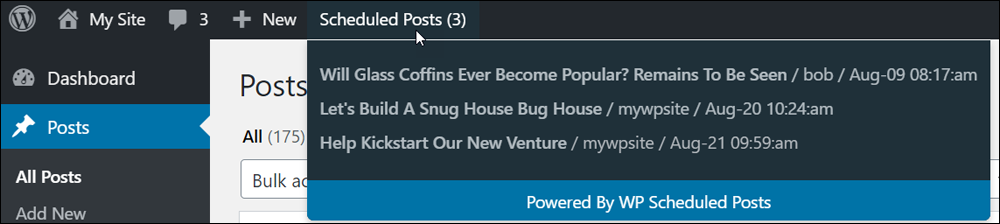
For example, you can choose to display a list of scheduled posts in a widget and in your Admin toolbar.
It also adds additional useful scheduling features to your posts.
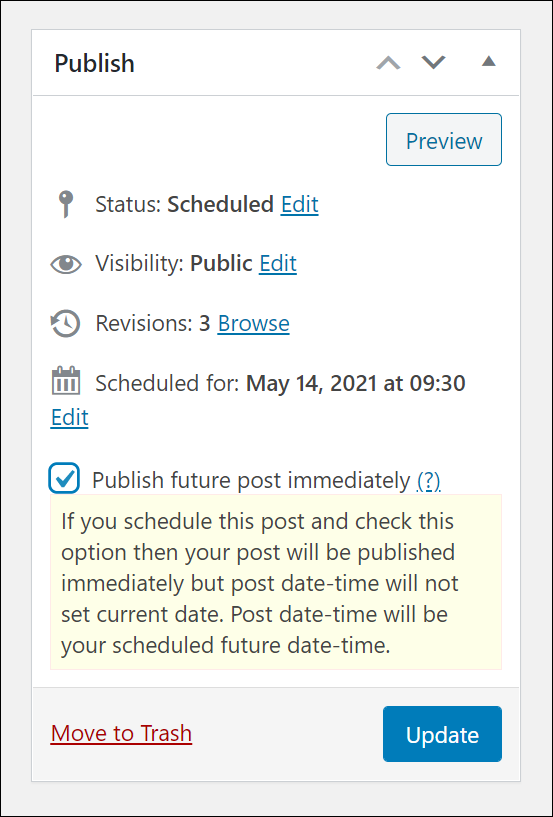
The Pro version of the plugin lets you auto-schedule posts and addresses the “missed schedule” error described earlier.
To learn more about this plugin, go here: WP Scheduled Posts
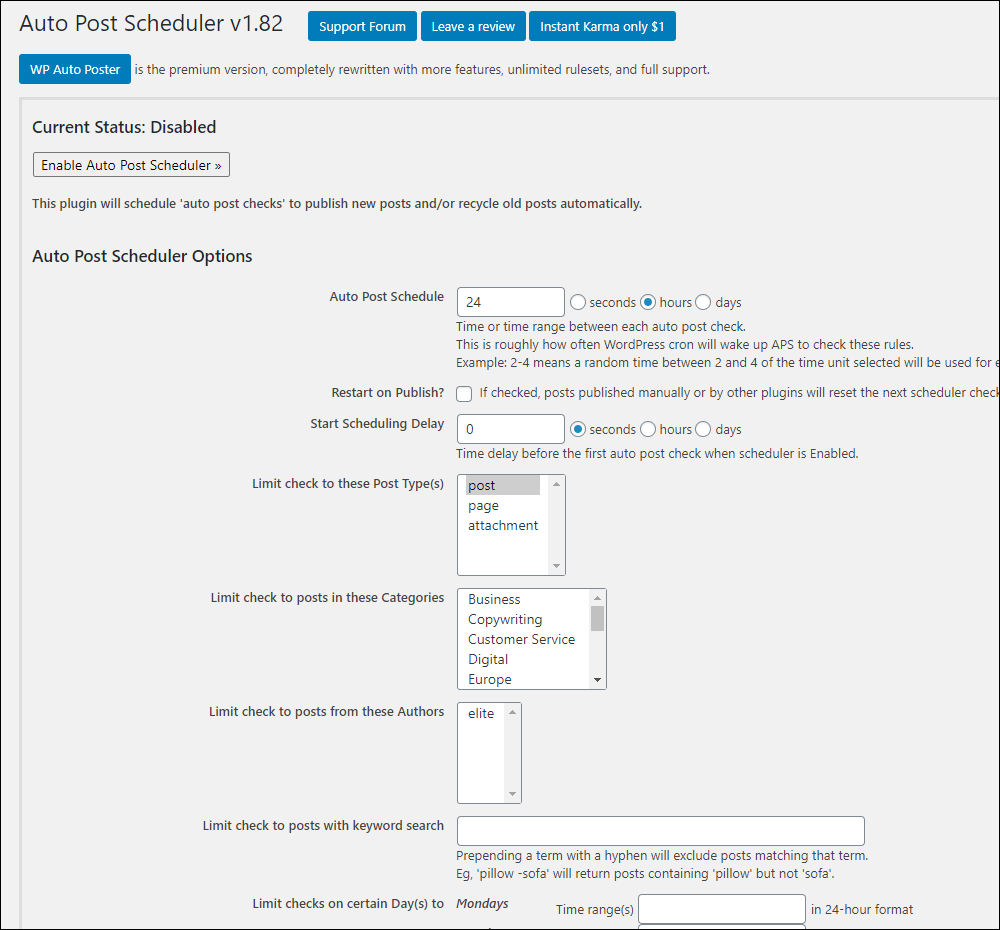
Auto Post Scheduler

Recycling older posts keeps your site looking fresh and can revitalize your traffic. Auto Post Scheduler is a free WordPress plugin that you can use to schedule and auto-publish new posts and/or recycle old posts automatically.
There’s no need to schedule post times individually. This plugin is useful if you plan to import a large number of posts into your site, as you can set the Auto Post Scheduler to publish posts at whichever frequency you choose as well as setting a range of other options.
To learn more about this plugin, go here: Auto Post Scheduler
WP Robot

Although you may not want to use an “autoblogging” plugin, WP Robot includes a module that lets you import bulk posts or article files into your WordPress site and then set these to automatically publish at regular or random intervals.
To learn more about using this plugin, go here: WP Robot
Drip-Feeding Posts
A plugin like WP Robot can be used to drip-feed content to your site over time. Additionally, if you plan to run a membership-style website, most professional membership plugins for WordPress also allow you to schedule your content to be ‘drip-fed’ to members at specific intervals (e.g. every 7, 14, or 30 days).
To learn more about membership plugins that allow you to schedule content delivery, go here: WordPress Membership Plugins: A Comprehensive Guide
Congratulations! Now you know how to schedule and implement a “set and forget” system for publishing new or repurposed content on your site that will keep your visitors regularly engaged and free up your time to focus on other areas of your business. You can even step out for a while knowing that your content marketing strategy will continue working for you while you’re away.
***
"If you're new to WordPress, this can stand on its own as a training course and will stay with you as you progress from beginner to advanced and even guru status." - Bruce (Columbus, Ohio)
***
We are not affiliated, associated, sponsored, or endorsed by WordPress or its parent company Automattic. This site contains affiliate links to products. We may receive a commission for purchases made through these links.