Website Planning Process – Part 2
 This is part two of our three-part tutorial on planning your website.
For Part 1 of this tutorial, go here: Website Planning Process – Part 1
Planning Your Website – Your Web Content
In Part 1 of this tutorial series, we covered the following areas of the website planning process:
- Step 1 – Define Your Goals
- Step 2 – Name Your Web Site
- Step 3 – Your Web Platform
- Step 4 – Define Your Target Audience
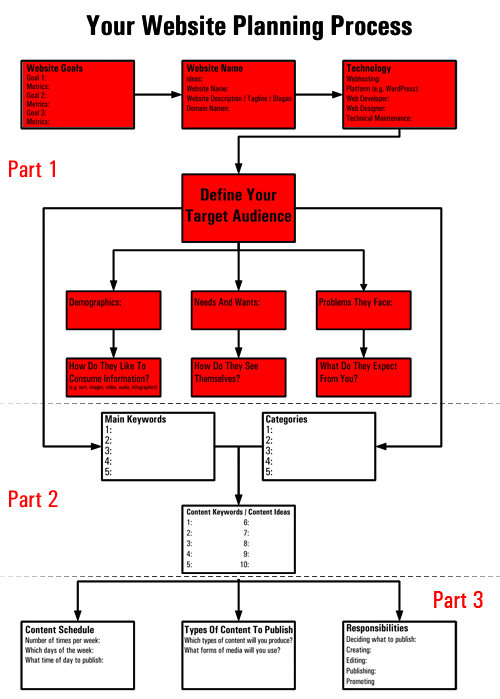
So far, we have established the foundations for planning your new website. If you have been following this process, you should have a clear idea of the goals and objectives for your site, decided on your website’s name, the technology platform you will use to power your website, and defined your target audience.
At this point, you could feasibly start building your website. However, we recommend going through the rest of the planning process in this guide, as we will now cover planning the initial content you will launch your site with and review some effective strategies for publishing and managing your web content once your site is up and running.
Planning your site’s initial content before you commence any web development work can save you considerable time and money by avoiding back and forth delays once the site-building process actually gets underway.
Step 5 – Identify Your Main Keywords

Once you have a clearer idea of who will be visiting your site (i.e. your target audience), the next step is to identify the main keywords that you would like search engines to associate with your site. This will help to optimize your site for search engines and set you on the right path to creating web content targeting your ideal audience.
Ideally, you would try to find keywords and keyword phrases targeting your niche that have “low” competition, a reasonable monthly search volume, and some level of commercial profitability.
There are many tools you can use to identify suitable keywords.
Without a doubt, the best and most powerful keyword research tool available (and it’s completely free) is your brain. If you set aside one focused hour without distractions to work on your keyword list on your own or with a partner or mastermind group, you should be able to come up with a long list of keywords that are relevant to your products, services, and business. You can then sort, filter, analyze and run these keywords through some of the tools below to build an even bigger list of related and relevant keywords.

If you have a Google Ads account, you can use Google’s Keyword Planner — another powerful free tool—to help you build your keyword list, check things like monthly keyword search volume, competition, commercial viability, find other related keywords and keyword ideas, etc.
For example, in the screenshot below you can see the results of using the Keyword Planner Tool to analyze keywords related to “overseas adventure travel” and “singles adventure travel“, which could be useful keyword phrases for a niche travel agency.
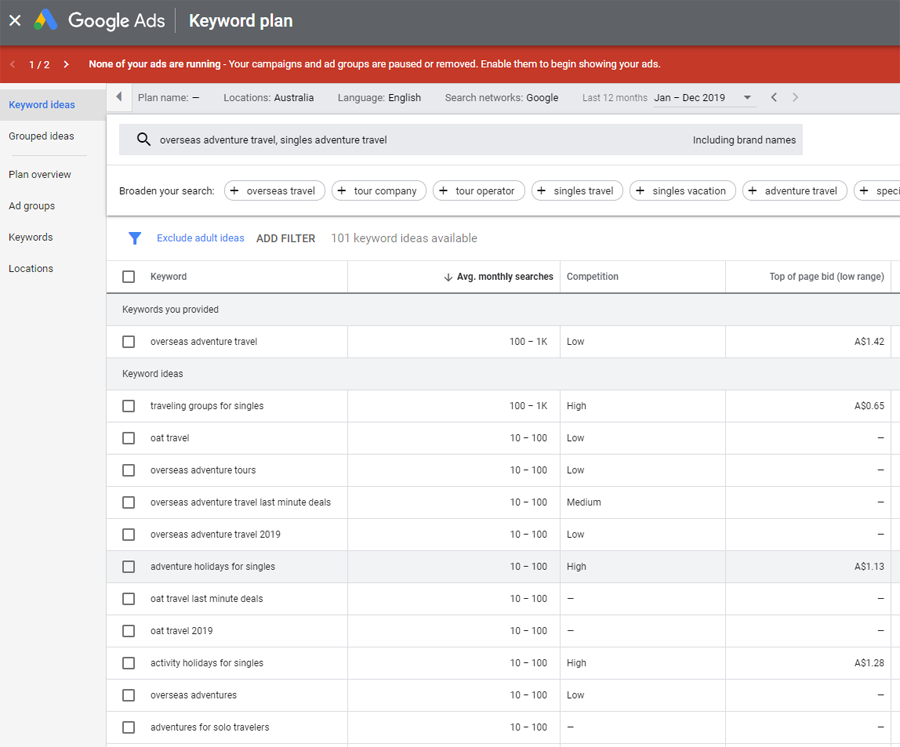
We can see from the example above that there is less competition for visitors searching for keyword phrases like overseas adventure travel, overseas adventure tours, and overseas adventures than overseas adventure travel last minute deals. We can also see that there is a lot more competition for a keyword phrase like activity holidays for singles. A specialty travel business can use this information to target its web content (and website) toward a special niche area of the travel sector.
For example, they can use targeted images on their site’s headers and banners to appeal to a specific crowd of people looking for adventure travel or holiday destinations for singles.
This basic example shows the value of doing keyword research at the initial stages of website planning. It can influence web design by helping you design a website targeted to your ideal audience and give you an idea of your marketing spend by helping you understand the commercial value of focusing on certain keywords. Savvy marketers know that they will get better returns by targeting keywords that appeal to “buyers” rather than “browsers.”
For example, people searching online for keywords like color printer minolta are typically not as ready to make a buying decision on a color printer as people searching for a more specific keyword phrase like konica minolta magicolor 7450 II grafx review, so if you plan to sell or review color printers on your website or blog, you would want to aim for longer, more descriptive and more targeted keyword phrases (called “long-tail keywords”) that have a higher monthly search volume and low to medium competition.
Having some highly searched keywords in your web content when you launch will help your site get indexed faster in the search engines. However, don’t spend too much time doing keyword research, especially when you are just starting out. It’s important to strike a good balance between keywords that help your visitors understand what the focus of your site is all about and keywords that will help you with the search engines. Begin by making a list of the “top 5” keywords you would like to rank for, make sure that these keywords are getting a decent number of searches each month and begin using these keywords naturally in your site’s name, descriptions, categories (covered later in this article) and then later on in your web content.
Once your site begins to attract visitors, you can then review and analyze actual data like keyword searches users perform online to find your site by looking at your server log and analytic tools and apply this information to improve your results.
![]()
Practical Tips
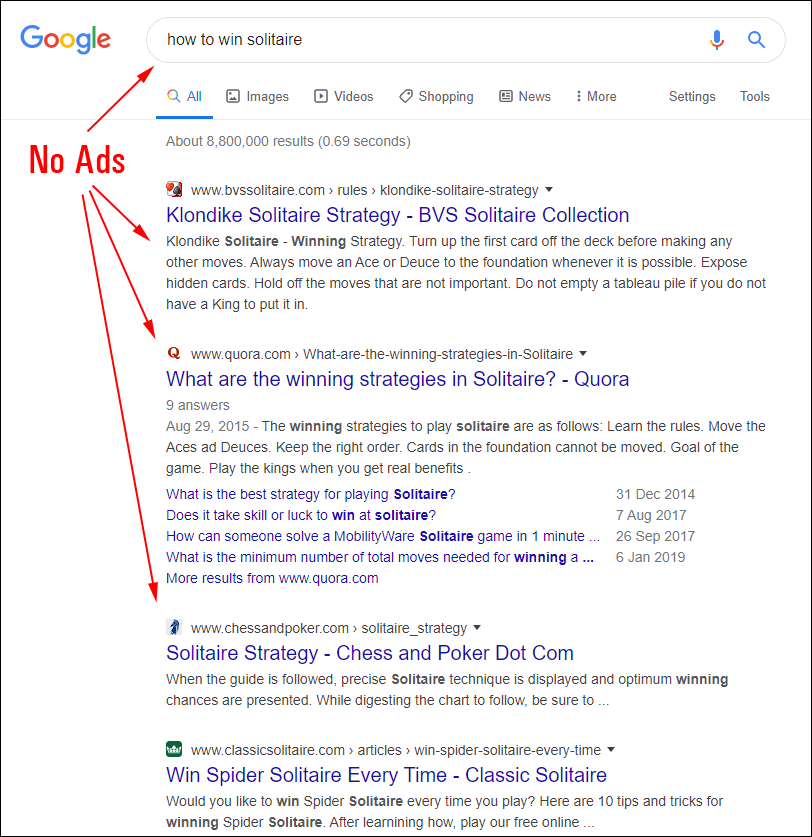
Tip #1: Avoid building your marketing campaigns on keywords that return extremely low to no monthly searches, or that have no commercial value. There’s no point ranking #1 in Google for keywords that no one is searching for. A good way to tell this is by typing your keywords into Google to see if anyone is advertising products or services with Google ads. If no ads show up, then that keyword most likely has no commercial value or targeting your site and content for that keyword could prove to be unprofitable.

Tip #2: Use keyword research tools to build lists of keywords that you can use to help generate ideas for your content. Here are some useful free and paid keyword research tools you can use:
Free Keyword Research Tools
Google Keyword Planner
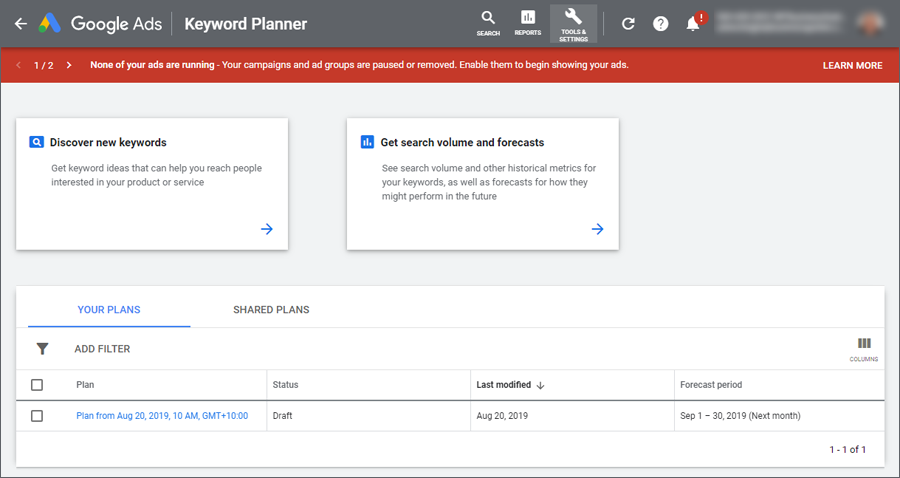

As mentioned earlier, the Google Keyword Planner lets you explore hundreds of keywords for content ideas and keyword-based advertising (e.g. pay-per-click ads), analyze keyword search volume and competition, and create new keyword lists.
For more details, go here: Google Ads
Ubersuggest
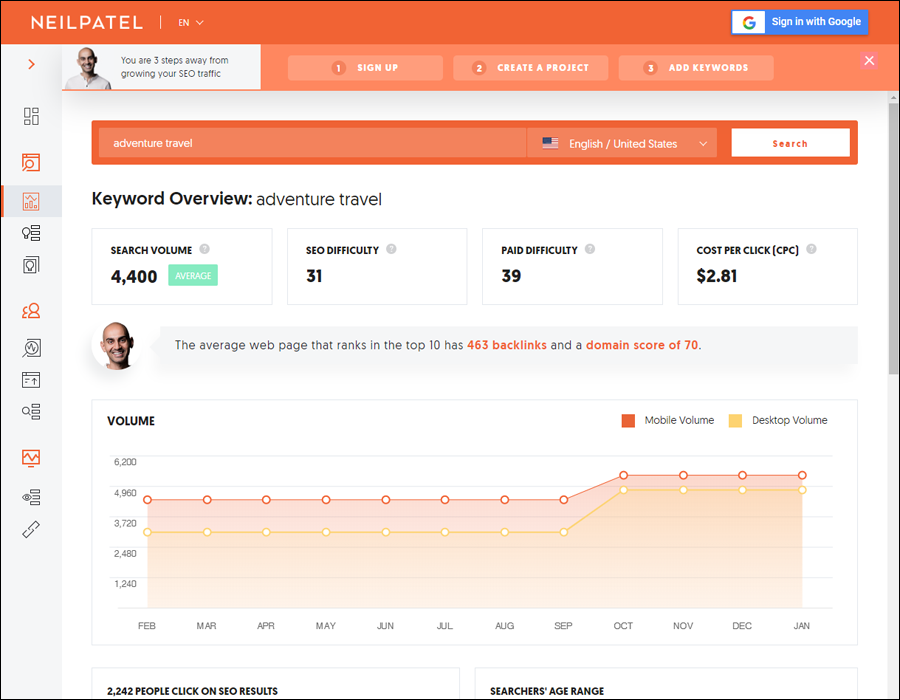

UberSuggest is another useful free keyword research tool you can use to explore keywords for your website and content.
Paid Keyword Research Tools
The keyword research tools below will help you uncover many profitable and useful keywords and long-tail keywords for content planning and advertising campaigns in addition to analyzing your competitors’ keywords and formulating a content SEO strategy for your website.
Market Samurai


Market Samurai includes keyword research, content planning, and SEO research tools with excellent tutorials on how to perform keyword research for SEO purposes.
For more details about this tool and to download a free trial, visit the site here: Market Samurai
SEMRush
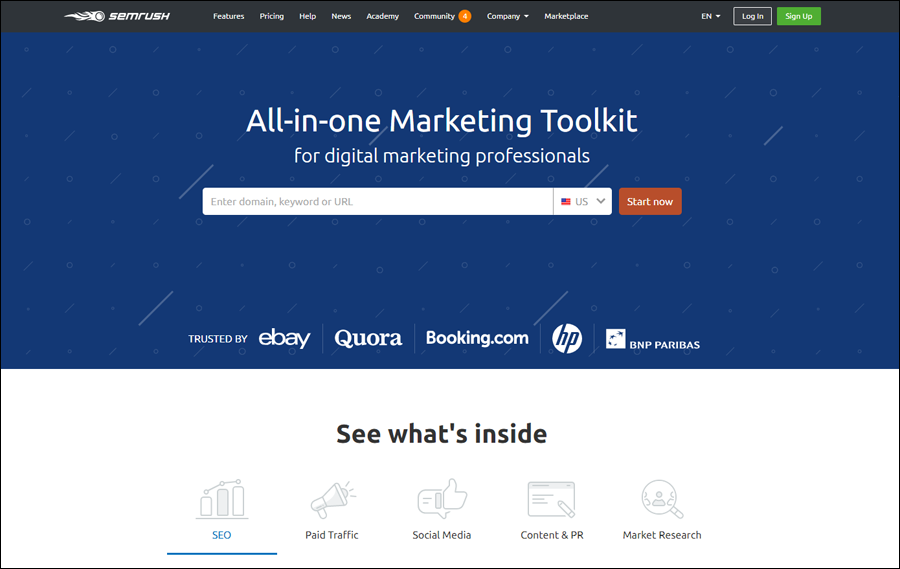

SEMRush lets you enter your competitor’s URL and it then gives you a list of all the keywords that your competitors’ sites are ranking for, allowing you to easily find short-tail and long-tail keywords that you can then target for your own website.
For more information about this tool, visit the site here: SEMRush
Keyword Spy


Keyword Spy is an SEO tool that lets you perform keyword research. You can use Keyword Spy to view competitor keywords and to research keywords for your own website and content marketing strategy.
For more details, including a free trial, visit the site here: Keyword Spy
Step 6 – Define Your Website Categories
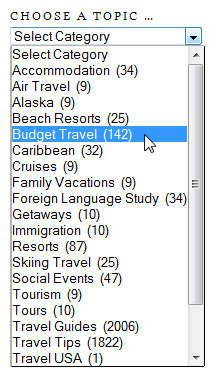

Now that you have done some initial keyword research, the next step is to decide specific areas within your niche market that your visitors will be interested in learning more about and create a list of “categories” for all the topics you plan to publish content about.
For example, if you run a travel agency, your categories could be organized into topics like:
- Business Travel
- Luxury Travel
- Adventure Travel
- Exotic Destinations
- Family Holidays
- Budget Accommodation
- Travel Tips
- Travel Accessories
- Cruises
- Winter Travel
- Airfare Discounts
- etc.
Action Step: Create an initial list of about 5 – 12 categories. You can always add more categories later on.
![]()
![]()
![]()
![]()
![]()
Practical Tips
Tip #1: Use WordPress To Easily Manage Your Site’s Categories
WordPress provides two basic ways of grouping and organizing content on your website or blog (WordPress refers to these as taxonomies): “categories” and “tags”.
With a WordPress-powered website, you have complete control over the management of your categories. You can also easily add new categories and assign your posts to different categories to keep your content organized.
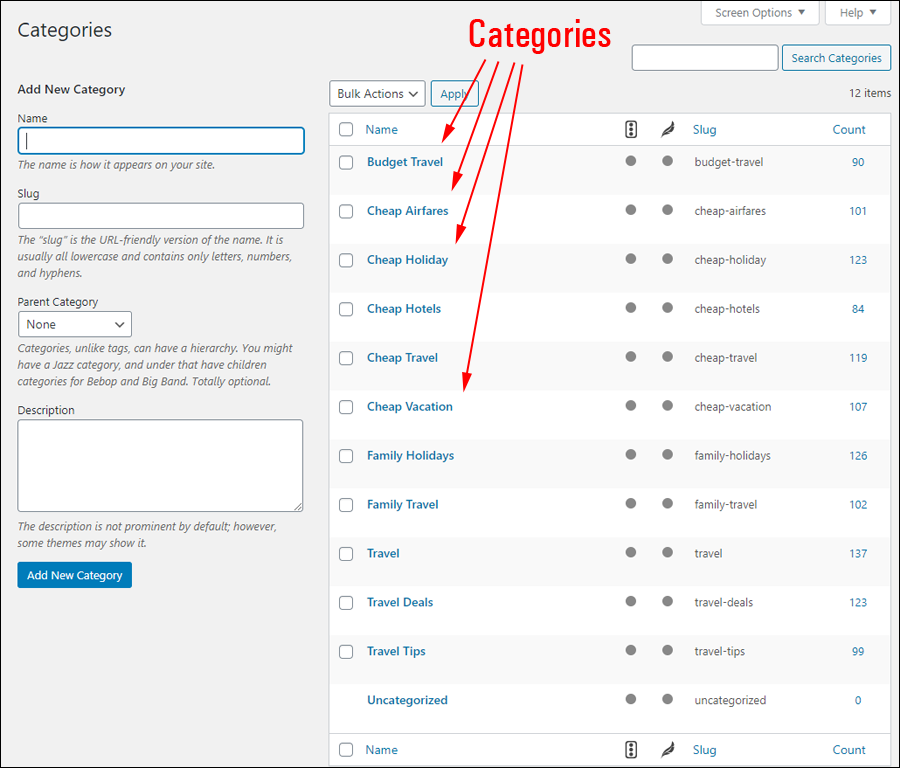

Tip #2: Categories Help To Improve Your SEO
Targeting the right keywords when naming your categories helps to improve your website’s SEO rankings.
WordPress has an SEO optimization feature called ‘permalinks’ that automatically creates search engine-friendly URLs with your categories included as keywords in the website URL, so keep this in mind when planning your category topics.


Tip #3: Use Categories To Improve Your Site’s Navigation For Users
Categories help users find and navigate more easily through your site’s content and its different sections.
With WordPress, every category you create gets its own searchable web page called an ‘archive’ page. This allows users to browse all content related to that category that you have published on your site in one place.
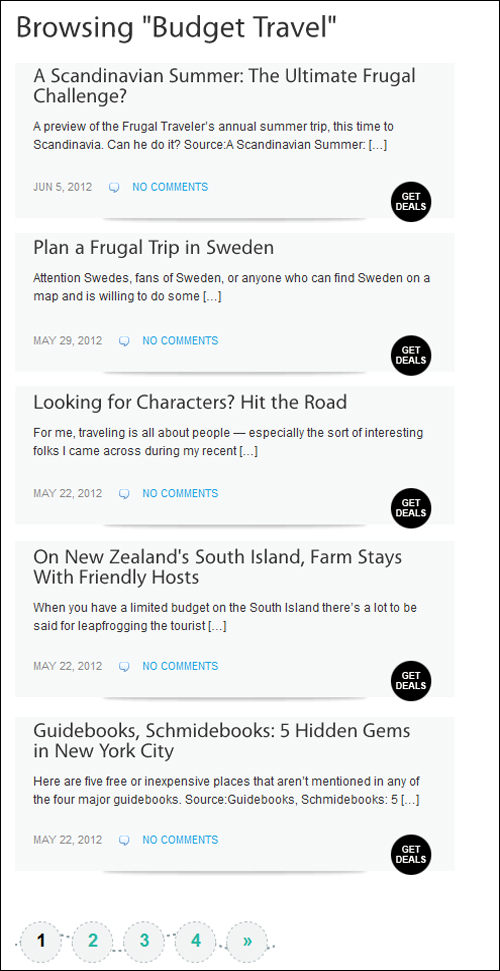

For a detailed step-by-step tutorial on using WordPress post categories, go here: How To Use WordPress Post Categories
Step 7 – Plan Your Content Strategy


Now that you have created a list of keywords and categories, the next step is to begin planning your content strategy.
Organizing Your Website Pages
Your website should have standard pages like Home, About Us, Contact, Legal Pages, Product/Service information pages, and any additional pages specific to your business (e.g. a staff directory page linked to your About page, FAQ page, etc.) Your website may also need special pages or sections, such as a members-only section for customers, private access pages for resellers or affiliates, etc.
Your website may also need special pages or sections, such as a members-only section for customers, private access pages for resellers or affiliates, and so on.
![]()
![]()
![]()
![]()
![]()
If your business provides a number of services, don’t list them all on one page. Instead, create a separate page for every service being offered. This allows search engines to better index and rank your web pages and creates multiple landing pages (i.e. entry points) for visitors to find and access your website.


Don’t make the mistake of lumping all your services on one page. Create a main ‘Services’ page listing all your services and link from this page to each separate service page with more details.
Organizing Your Web Content
You will need content for every page you create on your website and regular web content to attract visitors, educate prospects, train clients, etc.
Ideally, you should define your web content plan and content marketing strategy when planning your digital business presence.
To learn more about the planning process we recommend for keeping your website and web content organized as your business grows, see this tutorial:
![]()
![]()
![]()
![]()
![]()
Practical Tips
Tip #1: Have Your Static Web Content Ready
Make sure that you have content written for all of your ‘static’ website pages. This will help you avoid additional costs caused by delays or lack of preparation.
Use this simple checklist to make sure that you create all the content you will need to have before launching your website:
- Business name and a brief description of your business.
- Home Page content.
- About Us page.
- Products/Services page(s).
- A list of your main service/product categories.
- Contact Details (business address, email, telephone number, map location, etc.)
- Images (e.g. product images, logos, staff photos, etc.). Image formats = .jpg, .png or .gif.
- 3-5 main keywords related to your business.
- 1-3 initial articles to be used as “seed content” for your site (saved as a Word document or plain text file).
- List of all URLs to be included on your site (e.g. “Resources”, “Partners”, etc.)
- Media or downloadable files (e.g. videos, PDF reports, pricing lists, etc.)
- Also, check that all web addresses and links that you plan to add to your site are working and that details like the spelling of names, roles in the organization, places, phone numbers, etc. are correct.
Tip #2: Create A List Of Topics For Web Content
Here is a “quick and easy” method you can use to create a list of content ideas for your website.
Go through the list of keywords you created in Step 5 and turn these into topics for web content that you will create for your site.
For example, if one of your main keywords is adventure travel, create a list of potential topics around this keyword, like:
- Add These Top 10 Adventure Travel Locations To Your Bucket List
- These Adventure Travel Horror Stories Could Happen To You (And How to Avoid Them)
- Five Adventure Travel Accessories You Should Never Be Without
- etc.
You can also easily write articles about each of the following topics:
- Your products or services – pick one and create a “featured product” article.
- Introduce the people in your company – let readers know who they are, what role they play, and their achievements/special skills; describe any awards your business has received.
- The latest industry news – what’s big news in your industry right now? Educate visitors about your industry – what challenges it faces and how your business is helping to address these.
- A networking event you have attended or plan to attend.
- Customer tips and “how-tos” – product training information.
- Staff/reseller/affiliate/partner training information.
- What aspect of your products or services could you educate your prospects about to help overcome their objections?
- What problems do your products or services help your customers solve?
- What reviews can you provide to help prospects with their buying decisions?
- What are some of the more common FAQs you get from visitors and prospective customers?
- etc.
After creating your list of content ideas, save them in a folder on your hard drive, and make a habit of continually adding new ideas to your list on a regular basis.
Tip #3: Learn How To Never Run Out Of Web Content Ideas
We provide detailed training on how to develop a content marketing strategy, how to promote your business with content, and how to never run out of content ideas for your website, blog, or newsletter…100% Free!


The “Infinite Web Content Creation” email training series is specifically designed to help WordPress users and website owners with the following aspects of the content creation process:
- How To Create An Effective Content Strategy
- Content Writing Tips
- Effective Copywriting
- Content Posting Guidelines For WordPress
- What To Write About: How To Never Run Out Of Web Content Ideas For Blogging About Your Business
- How To Outsource Your Content Writing
- Time-Saving Content Creation Strategies
Enter your details in the form below to subscribe now and start receiving training content immediately!
***


***
This is the end of Part 2
To continue reading this tutorial, click here: The Website Planning Process – Part 3
Images: Pixabay.
***
"This is AMAZING! I had learnt about how to use WordPress previously, but this covers absolutely everything and more!! Incredible value! Thank you!" - Monique, Warrior Forum
We are not affiliated, associated, sponsored, or endorsed by WordPress or its parent company Automattic. This site contains affiliate links to products. We may receive a commission for purchases made through these links.

