Are you looking for a way to keep prospective and existing customers coming back to your site?
Adding an events calendar to your site can keep your visitors, customers, and newsletter subscribers informed about upcoming in-store, community, or industry events, trade shows, workshops, conferences, etc.
It can also attract new prospects to your business, engage site users, and build authority in your niche or industry.
Additionally, you can monetize your WordPress site with paid event listings, sell event tickets, and more!
In this tutorial, you will learn how to add a calendar of events to your WordPress website or blog and how to schedule events in the events calendar.
How To Add An Events Calendar To WordPress
There are a number of WordPress plugins available that let you add an events calendar to your website or blog. For this tutorial, we’ll use a plugin called The Events Calendar.
The Events Calendar
(The Events Calendar)
Plugin Description
The Events Calendar is a free, feature-rich WordPress plugin that lets you easily create and manage a customizable events calendar on your site. It’s suitable for all kinds of businesses, from large hubs listing thousands of events and universities and colleges with thousands of users, to small or sole businesses listing classes, workshops, etc.
The plugin is also available as a premium edition with extensible features that let you expand its functionality to include recurring events, event submissions, event filtering, ticket sales, and more.
Plugin Installation
Although the plugin is described as “built by developers for developers,” it is easy for non-techies to install, set up, and use.
To install the The Events Calendar plugin from your WordPress dashboard, go to Plugins > Add New, enter “events calendar” into the Keyword search field (if you need help, see our tutorial on installing WordPress plugins), and click on the ‘Install Now’ button …
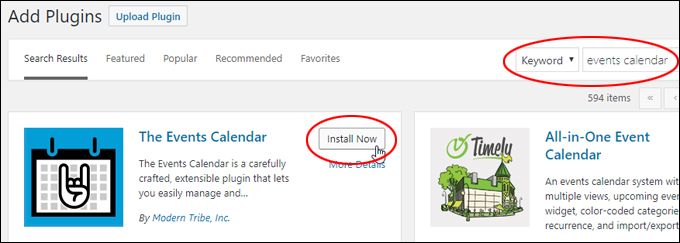
(Install The Events Calendar plugin)
After installing the plugin, click ‘Activate’ …
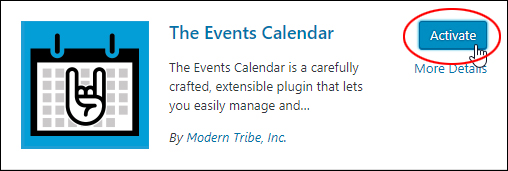
(Activate the plugin)
Configuring The Plugin
Installing and activating the plugin adds a new menu item to the WordPress dashboard menu.
To configure the plugin’s settings, select the Events > Settings menu …
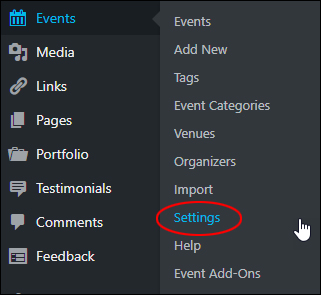
(Events – Settings menu)
This brings up the ‘Events Settings’ screen …
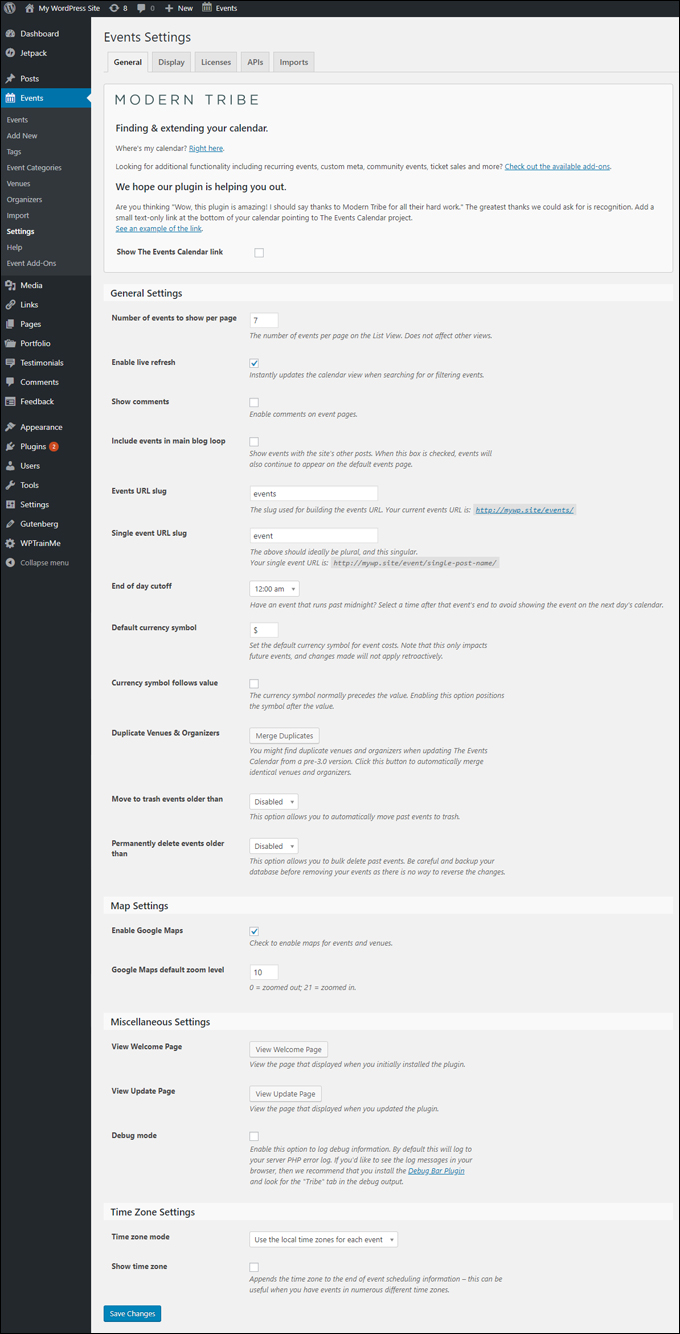
(‘Events Settings’ screen)
The plugin is well supported and documented. To learn how to configure the plugin’s settings, select the Events > Help menu …
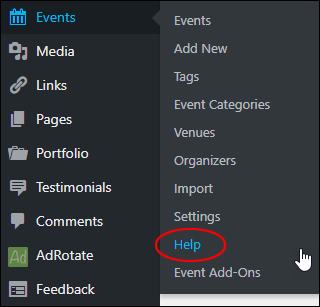
(Events – Help menu)
This brings up a screen with links to the plugin’s support section and help documentation, including a walkthrough on how to configure the plugin’s settings …
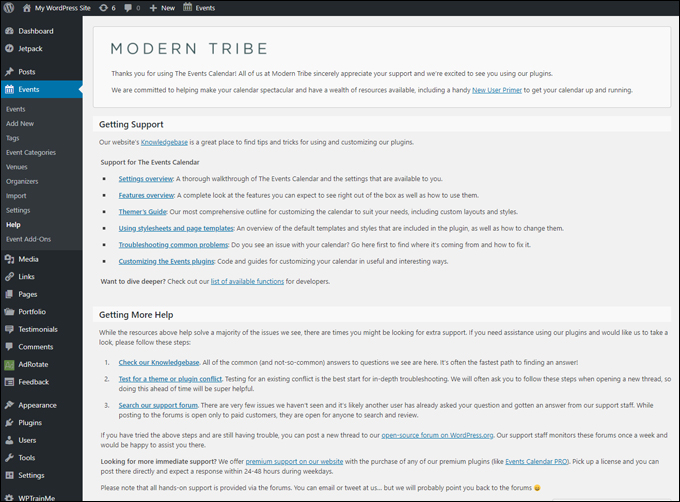
(The Events Calendar – Support and Help screen)
In addition to configuring your calendar settings, it’s a good idea to also plan your event categories before creating event listings.
Select the Events > Event Categories menu …
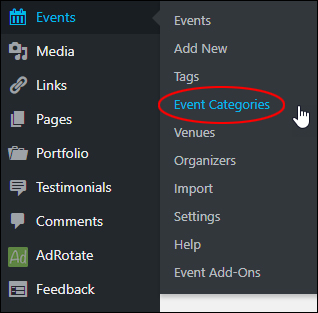
(Events – Event Categories menu)
Adding event categories is just like adding post categories (see our tutorial on how to use post categories if you need help with this step) …
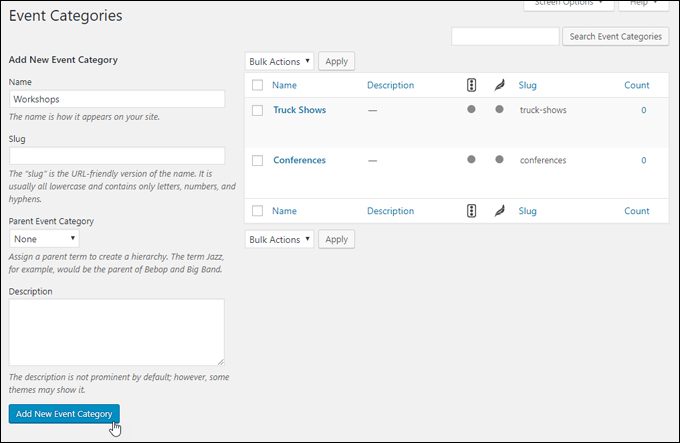
(Add event categories)
One last thing …
Make sure to add links to your Events Calendar on your site’s navigation menus …

(Link to your Events Calendar on your main navigation menus)
The default URL for your Events Calendar should be something like http://yoursite.com/events (check your plugin settings to confirm the URL).
Using The Plugin
After configuring your plugin’s settings and event categories, you can begin adding events to your calendar.
To view or edit your event listings, select Events > Events …
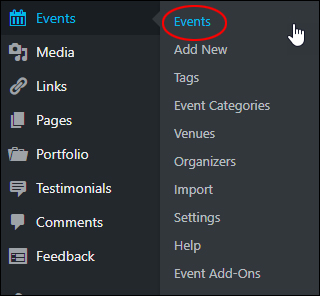
(Events – Events menu)
This brings up the ‘Events’ screen with all your event listings …
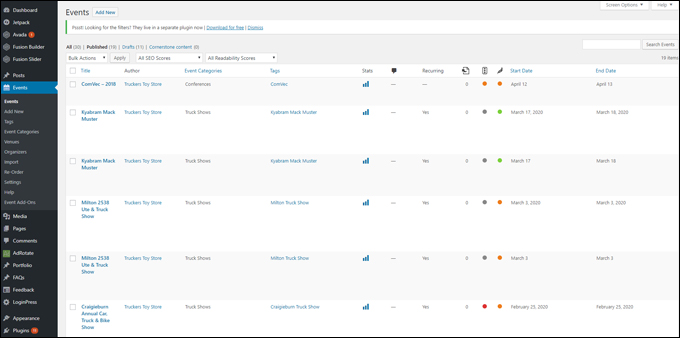
(Events screen)
Let’s go through an example on how to set up an event listing …
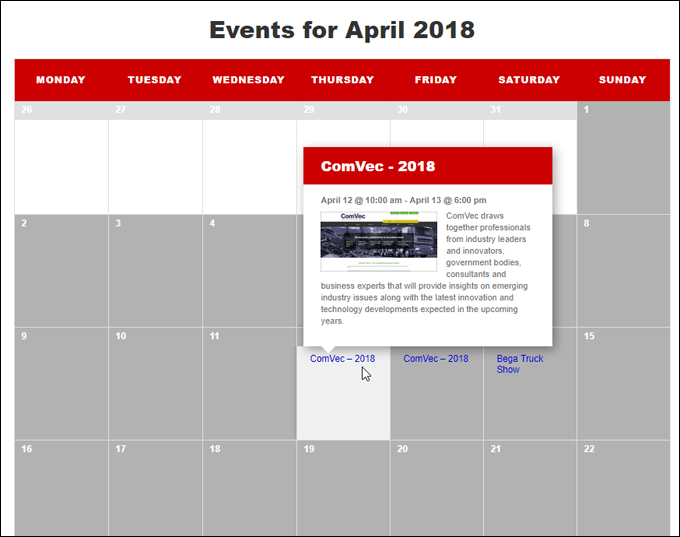
(Let’s set up an event listing)
Planning Your Events
Before adding a new event to the calendar, make sure you have the following:
- Event details – start & end dates/times, cost, etc.
- Venue details – venue name & address
- Organizer details – name and contact details, website address, etc.
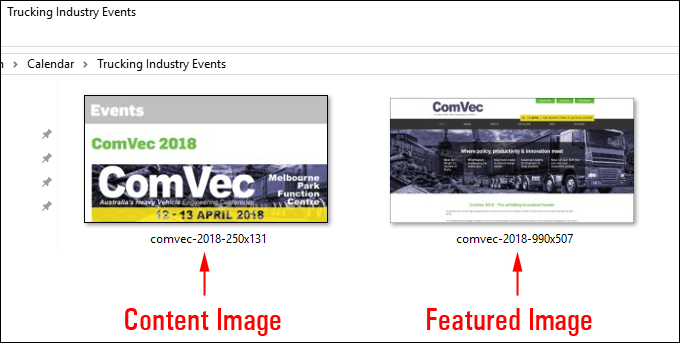
- Event listing images – images for your content and listing thumbnail, and a featured image …
![]()
In addition to content and featured images, we also recommend creating placeholder images for future events. This will allow you to set up “coming soon” events where you add event details later.
We also recommend uploading your content and placeholder images to a cloud storage service (e.g. Amazon S3) and your featured images to your WordPress Media Library.
To create a new event listing, log into your WordPress admin area and select the Events > Add New menu …
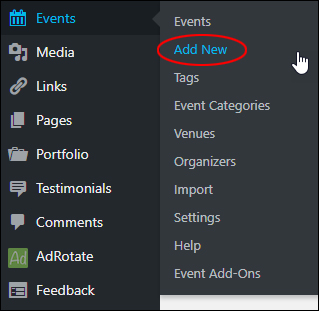
(Events – Add New menu)
Note: You can also add a new event by clicking the ‘Add New’ button in the ‘Events’ area …
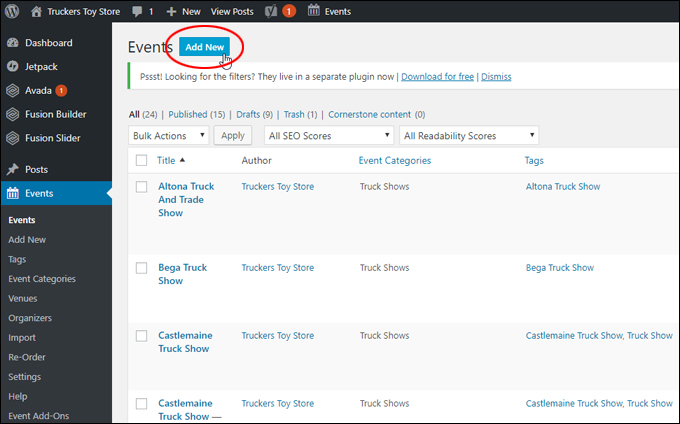
(Events – Add New)
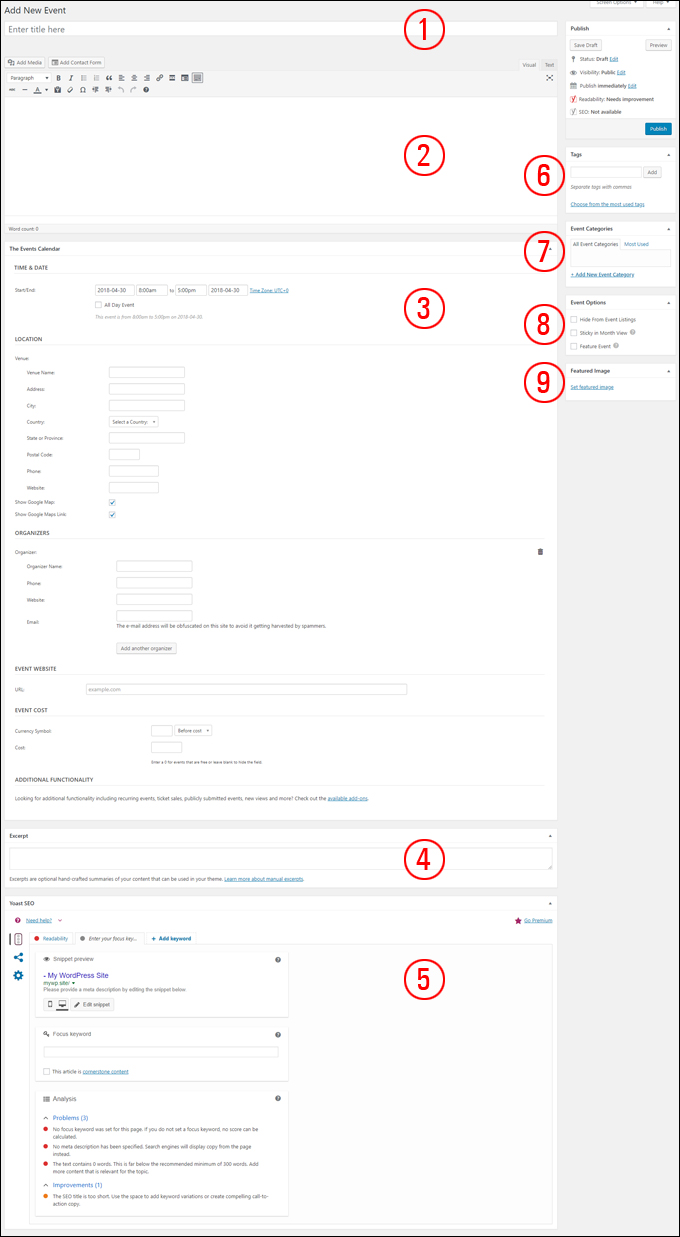
This brings up the ‘Add New Event’ screen …
(‘Add New Event’ screen)
Enter the following details into this screen:
(1) Event Title – Add the title of your event here.
(2) Event Listing content – Add a description of your event here (including content or placeholder images). See section below for useful tips on adding content to this section.
(3) Events Calendar fields – Add your event details here like time & date, location, event organizers, event website, cost, select whether to display Google map, etc. …
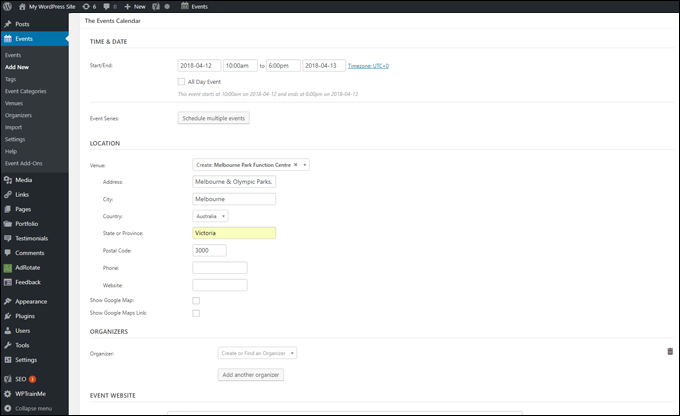
(4) Excerpt – Copy and paste an excerpt from your main content’s event description into the Excerpt field …

(Event excerpt)
(5) SEO Details – If you have configured your site for automated traffic generation and installed an SEO plugin (e.g. Yoast SEO), add your event excerpt or description and a ‘focus’ keyword into your SEO section …
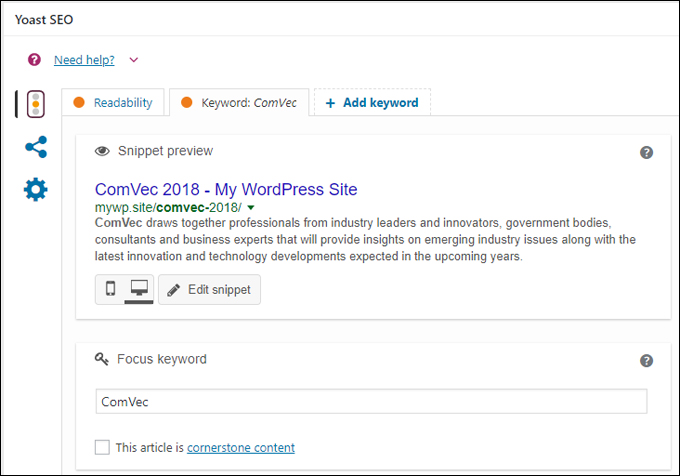
(Add SEO details)
(6) Tags – Add tags just like you would if creating a post (see our tutorial on how to use post tags if you need help).
(7) Event Categories – Select your event category(ies).
(8) Event Options – Here, you can select options for your listing like Hide From Event Listings, Sticky in Month View (sticky events display first in your list of events), and/or Feature Event (highlights the event on your site).
(9) Featured Image – Add a featured image for your event listing here …
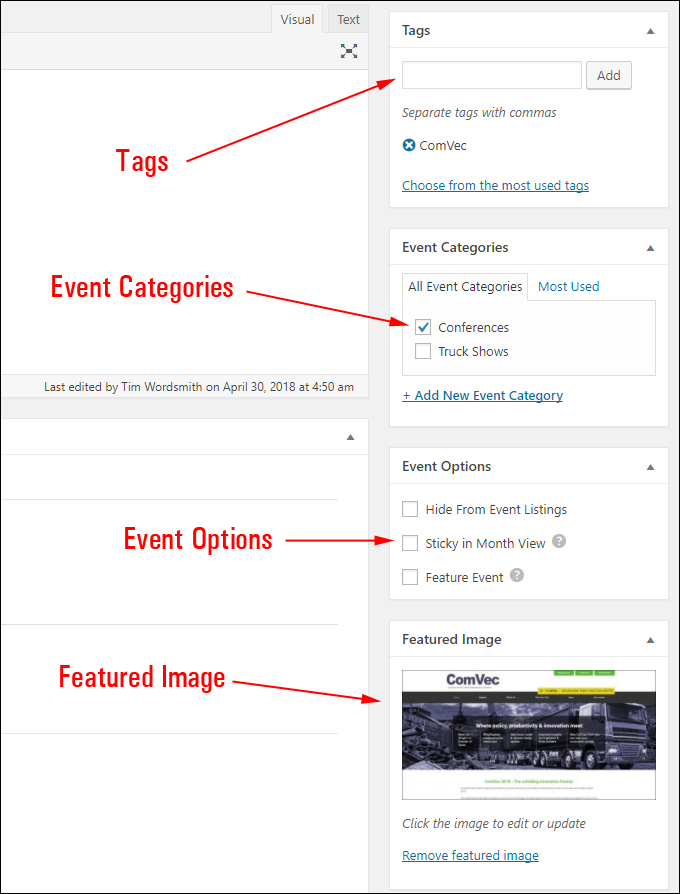
(Set event listing options)
![]()
To help speed up the process when adding similar future event listings, we recommend creating event templates using your WordPress content editor. You can add the main elements as ‘search and replace’ tags and even add rotating advertising banner shortcodes in your template.
Create the template in the WordPress visual editor, then switch to the ‘text’ tab, select all content, paste it into into a plain text file, and save it to your hard drive …
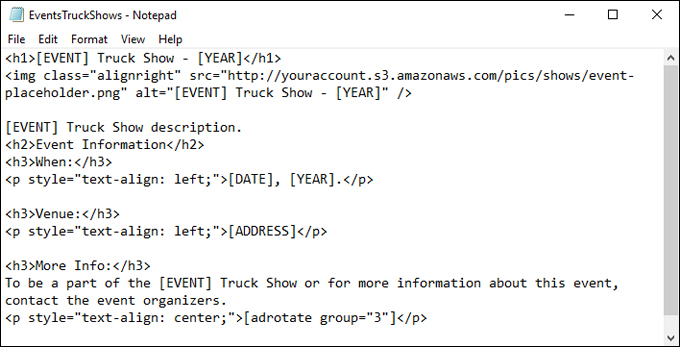
(Create event templates)
This way, to create a new events listing, just:
- Open your events template and copy everything t your clipboard,
- Select the ‘Text’ tab in the WordPress content editor and paste the content from your clipboard,
- Switching back to the ‘Visual’ tab to view and edit the content …
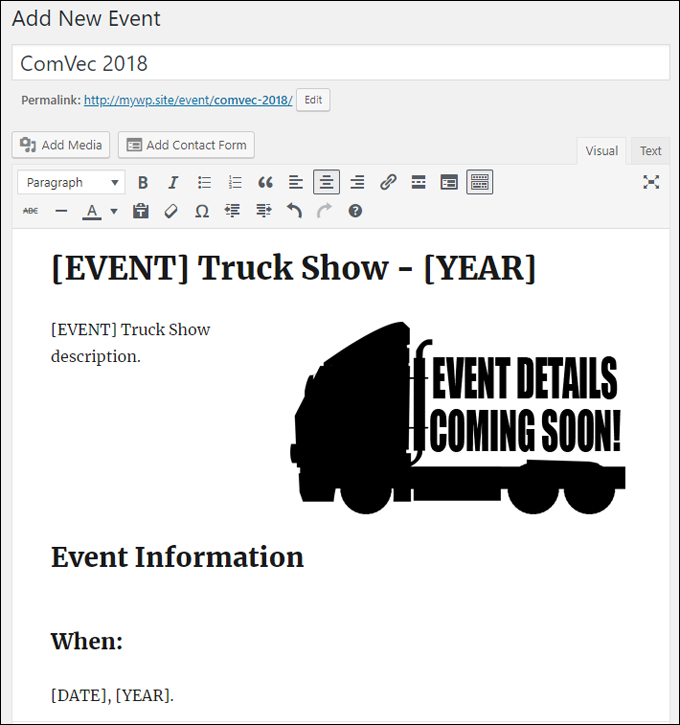
(Save time with an events template …)
To finish creating the event listing, replace the placeholder image with your event (i.e. content) image …
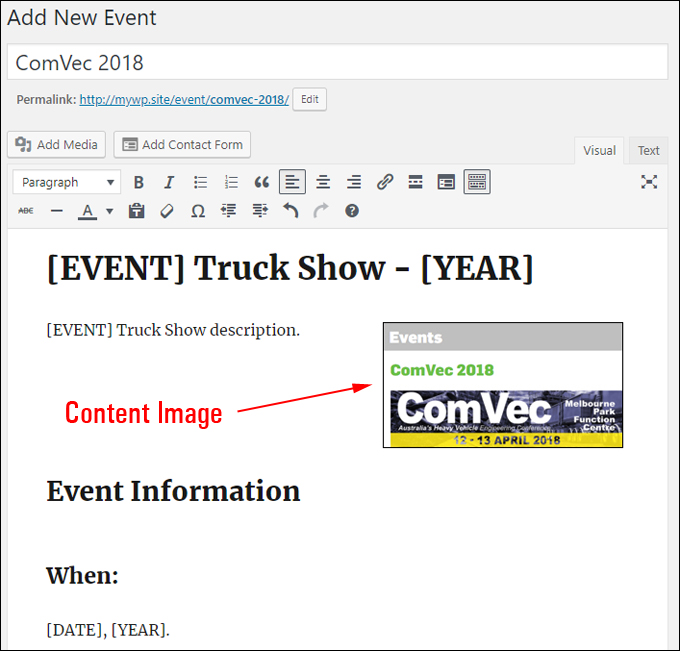
(Add your event image)
Continue editing the rest of your content to create your event listing and remember to keep saving as you go …
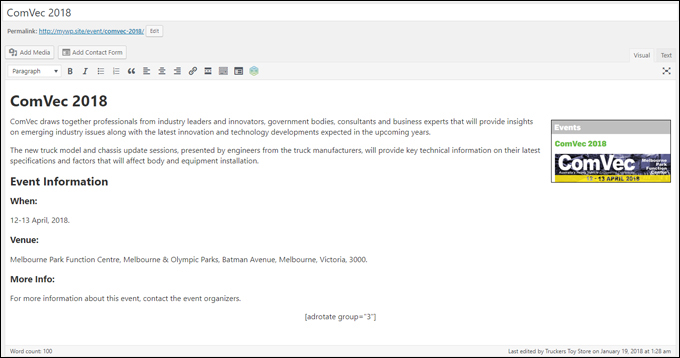
(Edit your event template to create your listing)
Check that all event details and event settings are correct, then click ‘Save Draft’ or ‘Publish’ …
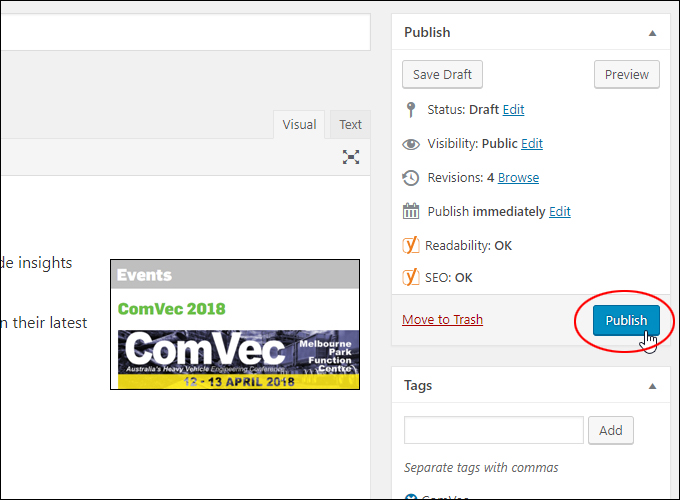
(Publish your event listing)
After publishing, preview your event listing to make sure that everything looks ok …
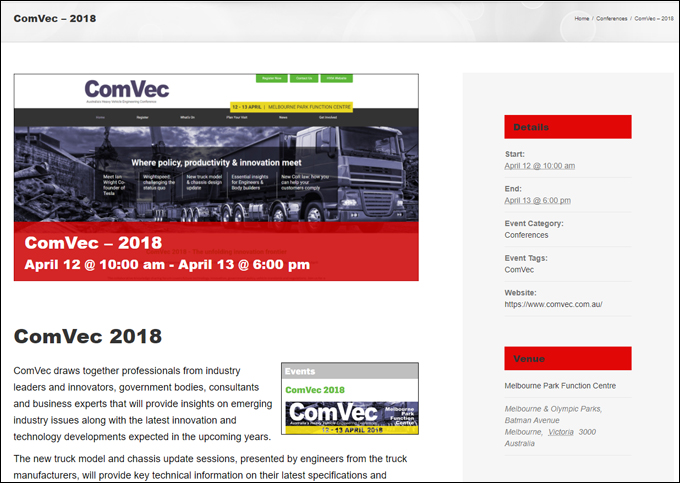
(Preview your event listing)
Also, go to your events section from your main menu …

Make sure that everything displays correctly (also check your event dates) …
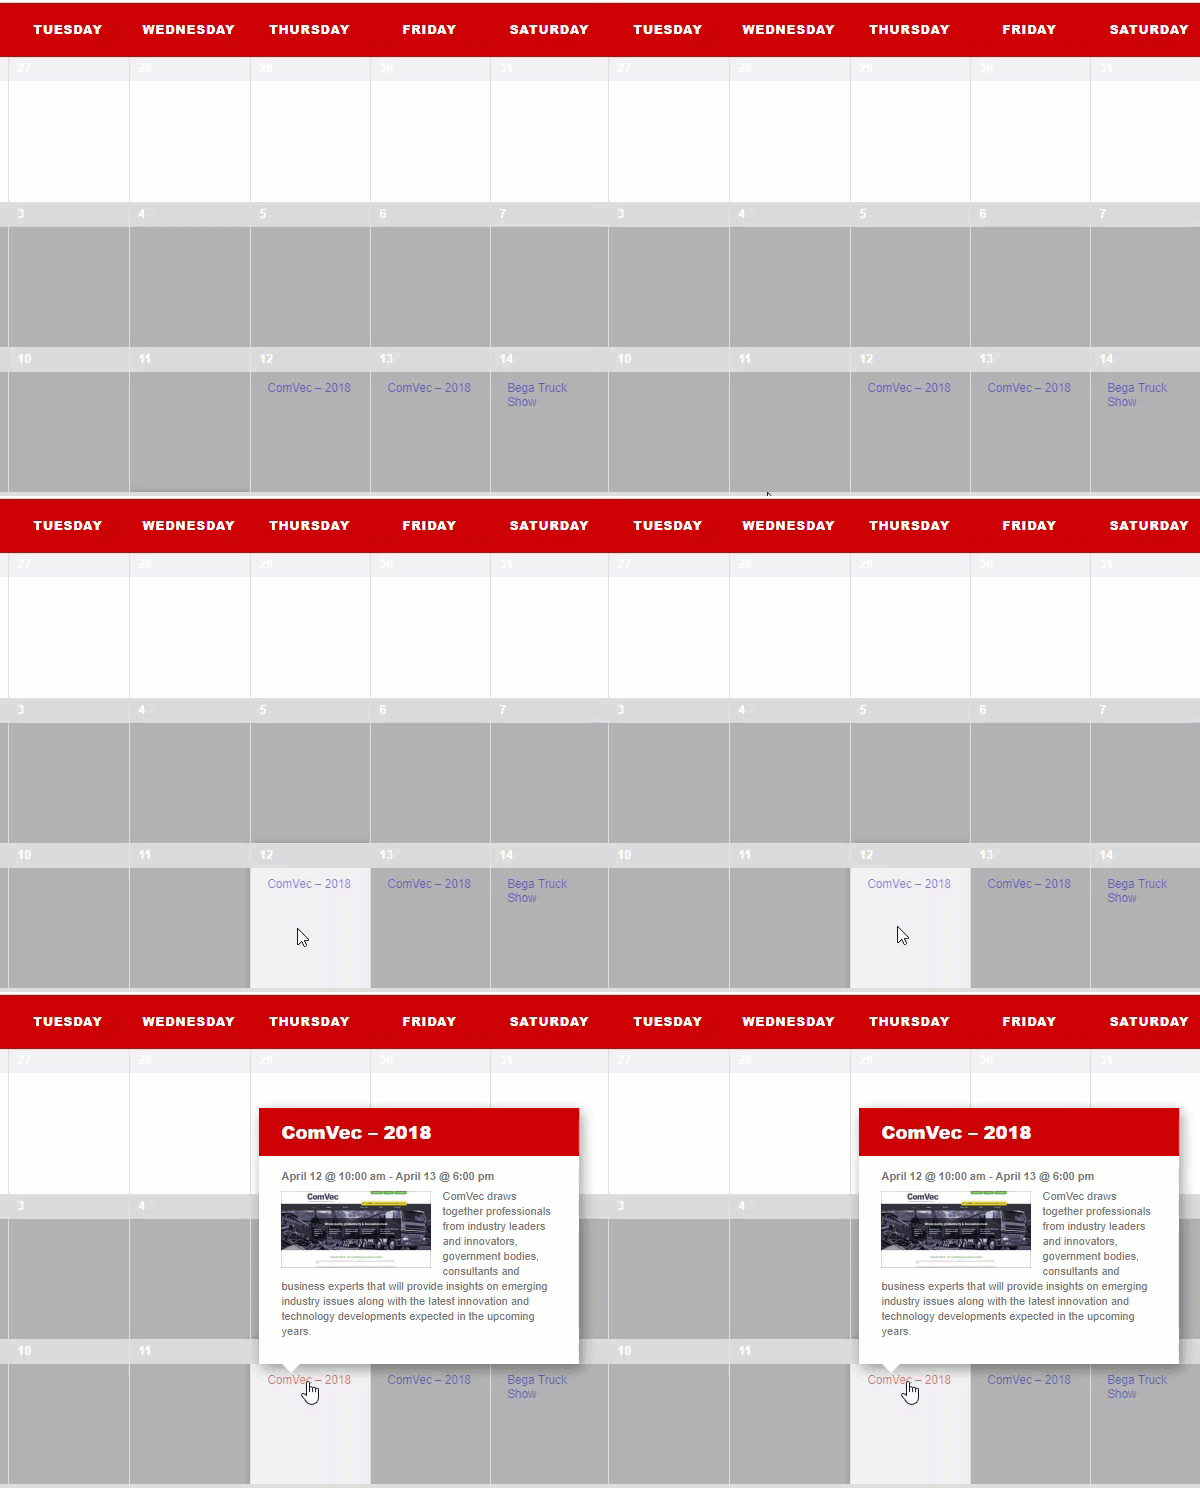
(Check your event listings)
Your event listing has now been added to your events calendar and can be promoted in your email newsletters, social media, etc.
![]()
Copy and use the event listing’s URL to promote an individual event, or refer visitors to the events calendar on your site to view upcoming events.

Events Calendar – Additional Features
The Events Calendar plugin lets you store a list of all event venues.
Go to Events > Venues …
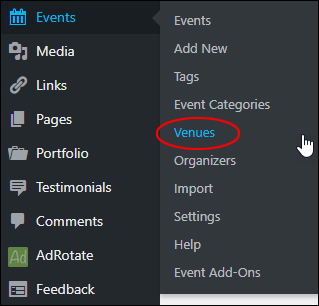
(Events – Venues menu)
This brings up the Venues screen with a table of all your event venues …
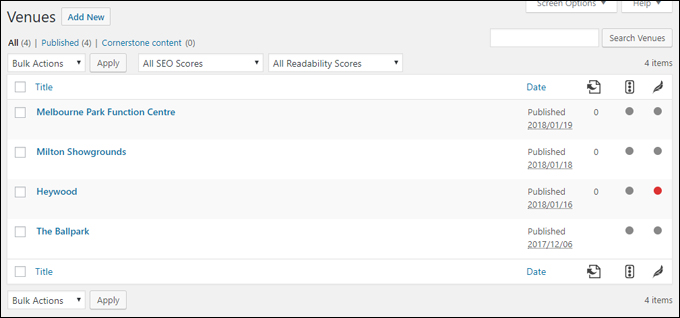
(Venues screen – Table of venues)
Click on an item to edit venue details …
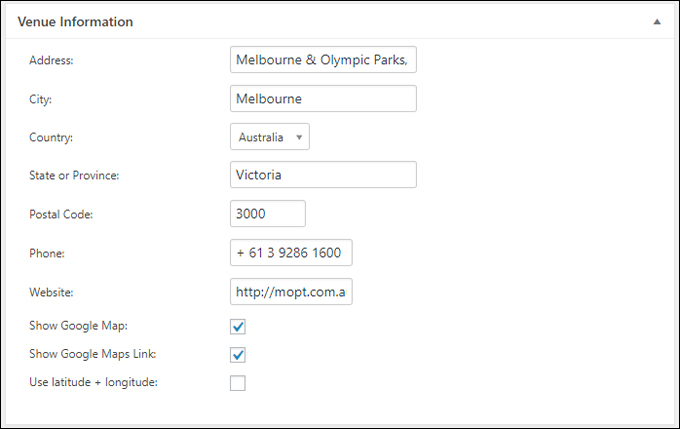
(Venue information screen)
This lets you set up future event listings or edit existing items by selecting the venue from a drop-down menu …
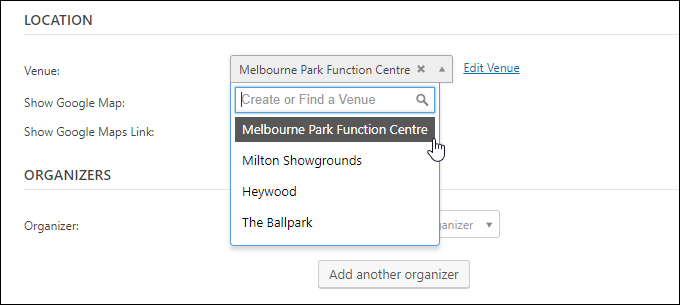
(Venue drop-down menu)
Similarly, you can store information about event organizers in the Organizers section (Events > Organizers) …
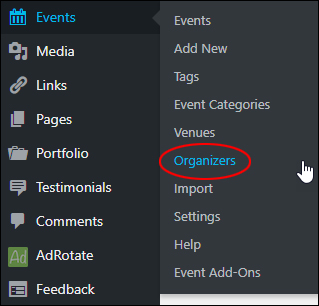
(Events – Organizers menu)
You can also use the premium Events Import feature to import events from Facebook, Google Calendar, iCalendar, etc. …
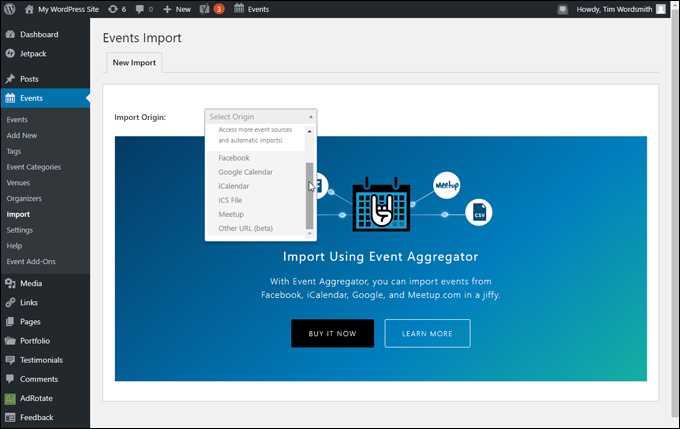
(Events Import)
Note: The plugin also lets your users and site visitors import your event listings into their calendars …
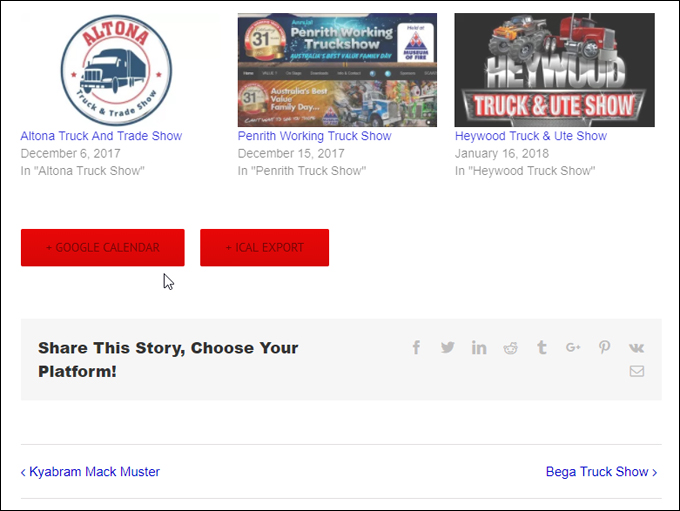
(Users can import your event listings into their calendars)
The plugin also includes an Events Calendar widget …
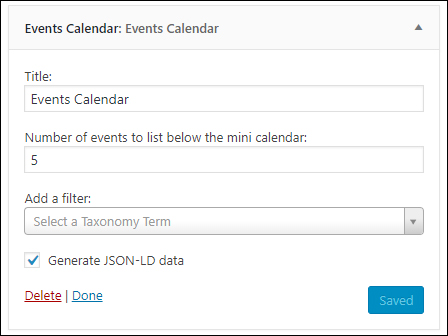
(Events Calendar widget)
Use the widget to display a mini calendar on your sidebar …
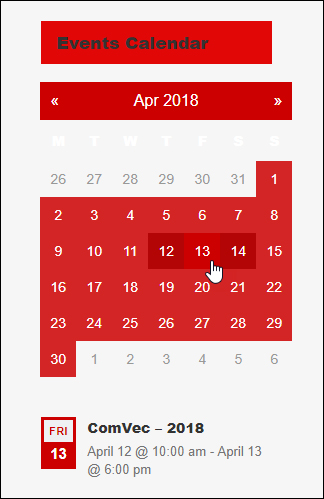
(Display a mini calendar on your sidebar)
![]()
As you can see, this is a comprehensive events listing plugin. If you need help using The Events Calendar features, see the Events Calendar Knowledgebase.
For more information about the plugin, check out the video below, or go here: The Events Calendar
(The Events Calendar – Plugin Overview)
You can also check out the plugin’s premium features by going to Events > Event Add-Ons or visiting the plugin’s main website …
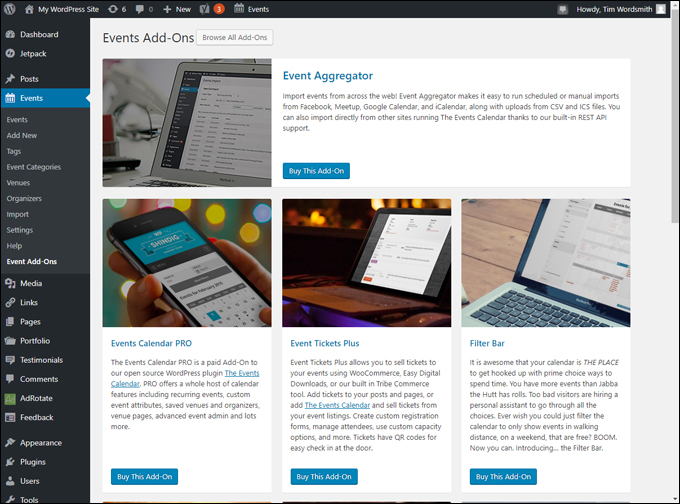
(The plugin provides a number of event add-ons with additional features)
Other WordPress Events Calendar Plugins
We have also written about other WordPress plugins that allow you to add event listings on your site or turn your entire website into an event listing directory, run event registrations, etc. here:
- How To Create An Event Listing Website With WordPress
- Event Espresso – WordPress Event Management Plugin
Additionally, if you need help with general WordPress features used to create event listings, see our detailed tutorials below:
- Ultimate WordPress Guide For Beginners
- How To Create A New WordPress Post
- How To Use WordPress Post Excerpts
- How To Use WordPress Tags
- How To Use WordPress Categories
- How To Add Featured Images To WordPress Posts
- WordPress SEO
Adding an events calendar to WordPress is a powerful enhancement you can make to your website. We hope that you have found the above information useful.
Some images sourced from Pixabay.
***
"This is AMAZING! I had learnt about how to use WordPress previously, but this covers absolutely everything and more!! Incredible value! Thank you!" - Monique, Warrior Forum