 This tutorial was created using an earlier version of this WordPress plugin. To be notified of content updates, subscribe to our updates list (see sidebar), or Like our Facebook page.
***
How To Optimize Your WordPress Site For Search Engines With Yoast SEO Plugin
As an online marketing tool, WordPress is probably the best platform available for publishing search engine optimized content and getting your site indexed quickly in search engines like Google.
WordPress not only offers a number of powerful search engine-friendly features such as the ability to configure permalinks, notify update services and add an xml sitemap, but you can also use SEO plugins that will boost your site’s performance in the search engines even further.
If you are currently using an “out of the box” WordPress installation, then consider adding an SEO plugin in addition to the above. A WordPress SEO plugin like Yoast SEO (formerly WordPress SEO by Yoast) lets you control how Google displays your posts and pages on its search results and helps your web pages get indexed faster …

(Yoast SEO lets you control how Google displays your pages on its search results and helps your web pages get indexed faster!)
In this tutorial, you are going to learn how to install, configure and use Yoast SEO, a powerful SEO plugin that offers you a complete WordPress SEO configuration package.
![]()
Yoast SEO is a powerful, comprehensive and fully-configurable plugin with professional-level SEO capabilities. WordPress is a very good platform for SEO, and the Yoast SEO plugin can help you maximize your SEO benefits. If you would prefer to use a simpler, less technical and more automated SEO plugin that does not require configuring as many settings, then consider using the All-In-One SEO Pack plugin or a similar plugin instead.
Yoast SEO: Plugin Overview & Installation
Yoast SEO – WordPress SEO Plugin

(Yoast SEO – WordPress Plugin)
Plugin URL
https://wordpress.org/plugins/wordpress-seo
Plugin Description
Yoast SEO (formerly WordPress SEO by Yoast) is a free SEO plugin for WordPress, and one of the most comprehensive WordPress SEO plugins available.
This plugin provides a complete SEO solution for your WordPress blog and covers all areas of site optimization you will want for your site, from providing a snippet preview that helps you optimize your page titles, meta descriptions and keywords (and shows you exactly how your listing will appear in search engines like Google – see screenshot below), to integration with XML sitemaps, RSS feeds and a host of other built-in optimization options …

(Yoast SEO – A powerful WordPress SEO plugin)
This WordPress SEO plugin is an important component of the WordPress SEO & Traffic strategies described in many of our tutorials.
Yoast SEO was written from the ground up by WordPress SEO consultant and WordPress developer Joost de Valk to improve your site’s SEO on all needed aspects.
By configuring this plugin as shown in this tutorial, you will be helping to optimize key areas of your site and drive significantly more targeted visitors to your site with organic (i.e. “Free”) search engine traffic.
You can significantly boost traffic by:
- Improving your WordPress site or blog’s SEO (Search Engine Optimization)
- Posting search engine optimized content on your site.
While the Yoast SEO plugin goes the extra mile to take care of all the technical aspects of optimizing your site for search engines, it first and foremost helps you write better content. Yoast SEO forces you to choose a focus keyword when you’re writing your posts, and then helps to make sure that you get the maximum benefit from your chosen keyword.
![]()
Notes:
- If you are currently using an SEO plugin like All-In-One SEO or another similar SEO plugin, Yoast SEO can import all of your existing metadata (i.e. post titles, descriptions, keywords, etc …). See the ‘Importing Data From Other SEO Plugins’ section at the end of this tutorial.
- Yoast SEO is continually being updated. As new plugin updates are released, some of the plugin’s settings and features described in this tutorial may look different in the plugin version that you have downloaded. Additionally, when new features get added, some of the plugin’s built-in functions may replace other plugins recommended in these tutorials. For example, Yoast SEO now includes its own built-in Sitemap and RSS feed configurations that previously required other plugins to be installed. Make sure you remain subscribed to receive our updates, so we can notify you when updates to plugin tutorials are made.
- If you feel that your site requires specific settings to be configured differently than the ones recommended in this tutorial, then we suggest you visit the plugin developer’s website and read through their own documentation and tutorials.
Plugin Installation
From your WordPress admin area, choose Plugins > Add New …

(Plugins Menu – Add New)
Type “yoast seo” into the Add Plugins > Search field to bring up the plugin details in the search results …

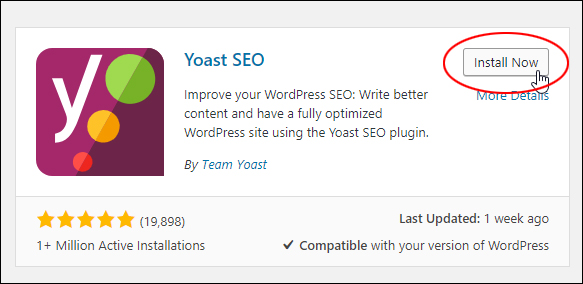
The plugin installs just like all other WordPress plugins. Locate the plugin in the search results and click Install Now …
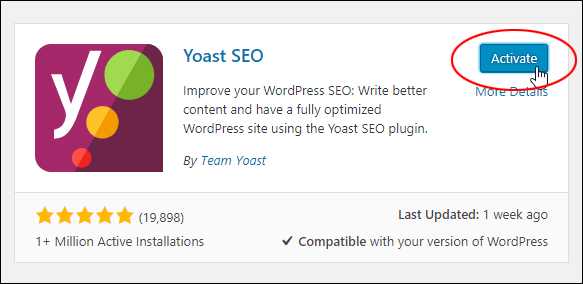
After the plugin has been installed, click ‘Activate’ …
After the plugin has been installed and activated, you will see a new menu item for Yoast SEO in the main menu …
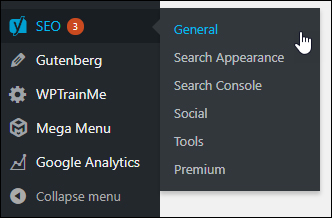
(Yoast SEO plugin – menu)
This will bring you to the General Settings page …
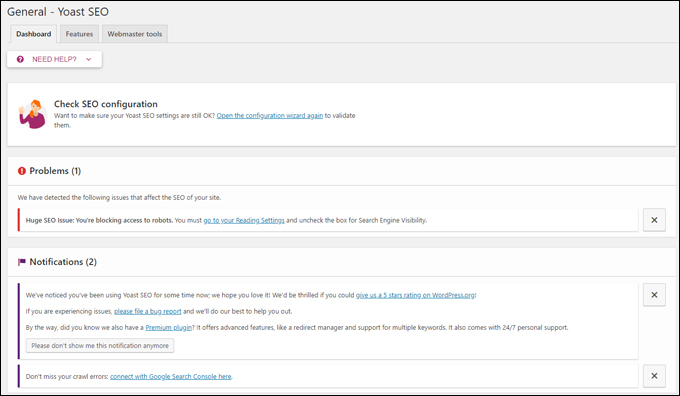
(Yoast SEO – General Settings)
![]()
When you first install the plugin, a notice may appear asking you for permission to collect usage stats. This data is collected anonymously and can help to improve the plugin. Click Allow Tracking to give the developers permission to access your plugin’s usage stats, or Do not allow tracking to deny access permission …

Also, if you have blocked your site from being accessed by search engines, you will see a warning on your Plugins screen asking you to uncheck the box for Search Engine Visibility in your Reading Settings …

Note: If you are installing Yoast SEO to help improve your site’s performance in the search engines, then it doesn’t really make much sense to try and do things that prevent search engines from being able to access your site. Unless you have a specific reason to block access to search engines, therefore, follow the warning’s recommendation and change your settings.
Once your plugin has been activated, click on Settings …

You can also get to the plugin’s settings screen by clicking on the SEO menu icon from your dashboard …
Now that you have installed the Yoast SEO plugin, let’s begin to configure it.
Yoast SEO: General Settings
Plugin Configuration
The Yoast SEO plugin is very well supported and constantly updated. In recent versions of the plugin, an installation wizard has been added, which makes the process of installing and configuring the plugin really easy, simple, and fast …
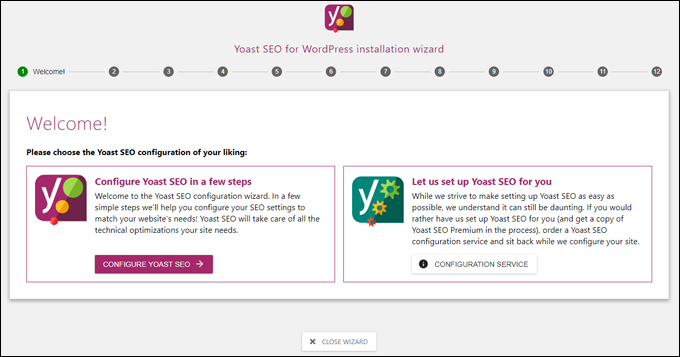
(Yoast SEO for WordPress Installation Wizard)
All you have to do to configure the Yoast SEO plugin is complete a few simple steps using the plugin’s built-in wizard and all of the technical optimizations will be automatically configured for you …
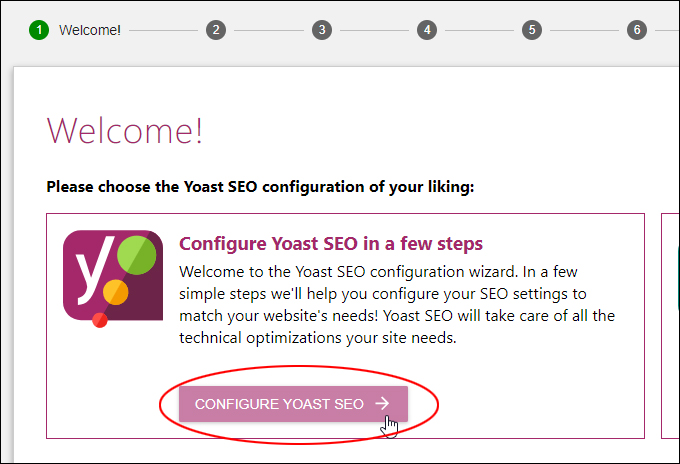
(Configure Yoast SEO plugin using the wizard)
![]()
The information below was created using an earlier version of the plugin. Many of the settings and options shown in the sections below remain the same, but some will have been removed or updated and improved.
If you haven’t already activated the plugin, scroll down your WP admin sidebar menu and click on “Plugins” …

Activate the Yoast SEO plugin …

Yoast SEO: General Settings
Once the plugin has been activated, choose SEO > Dashboard from your WP admin navigation menu …

This brings up the ‘Yoast WordPress SEO: General Settings’ section …

The ‘General Settings’ screen contains the following sections:
General
This section includes an “introduction tour” to the plugin, and the option to restore your site to the default Yoast SEO plugin settings. Configure the settings in this section according to your needs and preferences.
General > Introduction Tour
When you first install the plugin, you are offered an “introduction tour” to Yoast SEO. Click on Start Tour to learn more about using the main features of this plugin …

Either skip or start the tour, then close the tour screen when finished to return to the plugin settings screen …

General > Default Settings
If you need to restore the plugin’s default settings on your site, then click on the Reset Default Settings button …

Tracking
This section helps the plugin developers to improve the Yoast SEO plugin (all data is tracked without accessing any of your details) …

Tick or untick the checkbox in this section to allow Yoast SEO to collect usage data about the plugin anonymously.
Note: If you previously selected Allow Tracking when the plugin was first installed the “Help improve Yoast SEO” window appeared on your screen, then the ‘Tracking’ section will be enabled. If you denied access permission to usage data, then the box in this section will be unticked …
Security
This section allows you to disable the ‘Advanced’ tab in the Yoast SEO meta box, preventing users assigned the roles of authors and editors from doing certain actions when editing posts, like redirecting posts and disabling indexing settings …

How this setting works:
When you install the Yoast SEO plugin, a meta box displays below your Posts, allowing you to optimize key areas of your post for search engines, such as the post title, post description, etc …

Note that in the above screenshot, the meta box includes an ‘Advanced’ tab that allows users to configure various settings and perform a number of advanced functions …

If you tick the ‘Security’ checkbox (Disable the Advanced part of the Yoast SEO meta box), then the ‘Advanced’ tab will be hidden for any users assigned the role of Editor, or Author (the Administrator will still be able to view this tab and edit its settings) …

To learn more about managing user roles in WordPress, see the tutorial below:
Webmaster Tools
Yoast SEO provides a convenient method of adding site verification code for search engines that does not require you to edit your theme templates or upload files to your server.
You simply copy the site verification code from your webmaster accounts …

Then go to the ‘Webmaster Tools’ section and paste in the code for:
- Google Webmaster Tools
- Bing Webmaster Tools
- Alexa
into the verify meta value fields …

Yoast SEO will take care of the rest, adding the code to your theme template, exactly where it needs to go …

![]()
Note: To obtain the site verification codes required for the ‘Webmaster Tools’ section, you will first need to set up a Webmaster Account for Google and Bing search (see links below).
As well as setting up Webmaster accounts with Google and Bing, Yoast SEO also lets you enter your account information for Alexa.com …

Alexa monitors millions of websites worldwide and provides information about websites including Top Sites, Internet Traffic Stats and Metrics, Related Links, Online Reviews Contact Information and Search Analytics for SEM and SEO optimization.
To set up an account with Alexa.com, click on the link in the ‘Webmaster Tools’ section …

We have created a separate tutorial that shows you how to set up an account with Alexa. Go through the tutorial (see link to Alexa tutorial below), then come back to your Yoast SEO plugin settings page and paste the code into the ‘Alexa Verification ID’ field …
![]()
To learn more about setting up Webmaster Accounts, see the tutorials below:
After adding the verification code to the ‘Webmaster Tools’ section, it’s time to configure the next section of the plugin.
Remember to click the Save Settings button when finished before continuing …

After configuring the General Settings section, the next step is to configure the ‘Titles & Metas’ section.
Yoast SEO: Titles & Metas
From the SEO menu, choose SEO > Titles & Metas …

This brings up the ‘Yoast SEO: Titles & Metas’ section …

This section allows you to specify all of your site’s title templates and meta data descriptions. Don’t worry if you don’t understand what all of this means – just follow the tutorial below to configure this section, and refer to the plugin’s website if you want more detailed information about the settings and features in this section.
Basically, this is where you set the templates for your titles and descriptions for all the different types of pages on your site, such as your homepage, posts & pages (under post types), category or tag archives (under taxonomy archives), or even custom post type archives and custom posts. Everything is done from here.
The ‘Titles & Metas’ area is divided into the following sections:
- General
- Home
- Post Types
- Taxonomies
- Other
Let’s go through each of these sections and configure its settings:
Titles & Metas > General

The Titles & Metas > General tab area contains three sections:
General > Title Settings

The first thing you need to do is to make sure that the Yoast SEO plugin can change the title tag of your installed theme so that it can modify it as per your settings. The plugin will auto-detect whether it needs to force-rewrite the titles for your pages and enable or disable the ‘Force rewrite titles’ option for you automatically.
The alternative to letting the plugin do this for you automatically, is to edit your theme’s header.php file and make sure that the title section of your site looks like this:

If you don’t want to modify your theme or are concerned that you might cause errors, then simply leave the “Force rewrite titles” option as recommended by the plugin. This is typically enabled in most cases …

General > Sitewide meta settings

This section lets you configure the meta settings below that apply throughout your site:
- Noindex subpages of archives – If you enable this setting, any pages belonging to your site archives below the first page (e.g. page 2) will not show up in the search results. We recommend checking this option, however, as it will help your homepage to retain its importance.
- Use meta keywords tag? – According to many SEO experts, search engines like Google do not use the keywords meta tag anymore when ranking web sites. Other search engines, however, may use this information. Check this box or leave it unchecked depending on your personal preference. ***
- Add noodp meta robots tag sitewide – This option prevents search engines from using the DMOZ description for pages from your site in the search results. Unless your site is listed in DMOZ (the Open Directory Project), enabling/disabling this option will probably make no difference to your results.
- Add noydir meta robots tag sitewide – Prevents search engines from using the Yahoo! directory description for pages from this site in the search results. Unless your site is listed in the Yahoo! Directory, enabling/disabling this option will probably make no difference to your results.
If you choose top use the options we recommend in this tutorial, then the ‘Sitewide meta settings’ section of your site should look like the screenshot below …

![]()
*** Note: If you enable the ‘Use meta keywords tag?’ option, the “Meta Keywords” field will display in the Yoast SEO meta box below your Post content. Disabling this option in the settings will keep the field hidden …

General > Clean up the <head>

By default, a lot of stuff gets added to your site’s head section that might not be necessary for every WordPress site owner. Unless you are using remote editors or Windows Live Writer, you can hide RSD links and WLW Manifest links.
In this section, therefore, we suggest setting the options as follows:
- Hide RSD Links – Check this box unless you or other people on your site use remote editors.
- Hide WLW Manifest Links – Check this box unless you or other people on your site use Windows Live Writer
- Hide Shortlink for posts – Enable this option to hide the shortlink for the current post. ***
- Hide RSS Links – Leave this option unchecked. In other tutorials, we show you how to promote your site using RSS feeds with this option unchecked.

![]()
*** Note: Just so you know what happens when you enable or disable ‘hide Shortlink for posts’ in the plugin settings, here is a screenshot of the source code of a WordPress post with the option to hide shortlinks disabled …

When you enable this option in the settings, the shortlink will not display in the source code of your posts. This means that search engines won’t index your page using the shortlink URL (they will use the search engine friendly URL instead if you have configured your permalink settings correctly) …

If you need help configuring your permalinks, see the tutorial below:
Scroll down the page and click “Save Indexation Settings” button when finished …

After configuring and saving your changes for the ‘Titles & Metas: General’ settings section, scroll to the top of the screen and click on the ‘Home’ tab …

Titles & Metas > Home
This section lets you set up templates for your home page title, meta description, and meta keywords …

Yoast SEO plugin lets you use variables when constructing meta data templates. Variables are tags that get replaced with content you have entered into other fields.
For example, if you use the variable %%sitename%% in your template, then Yoast SEO will replace every instance of %%sitename%% in the meta data templates with your site title (specified in the General Settings > Site Title field) …

We cover the Yoast SEO variables used in the plugin settings further below.
This section will show different configuration options depending on whether you have specified a fixed home page for your site, or are using your latest posts as your home page.
If you want the meta title, description, and keywords to show for your home page when your latest posts are displayed, then type whatever you want to set as the default into these fields. You can use words, variables, or a combination of the two …

Your meta data settings will then display the template content above for your home page, as shown in the example screenshot below …
![]()
If you leave all fields blank in this section and WordPress is using the default Reading Settings (latest posts display as your home page), then the only metadata that will display for your home page will be the site name and tagline specified in your site’s General Settings.
If you have specified a fixed home page for your site, then the plugin instructs you to set the title and description for the front page and blog page by editing these pages directly …

To learn how to set any page on your site as the home page, or create a blog page, see the tutorials below:
- How To Set Any WordPress Page As The Home Page Of Your Site
- How To Create A Blog Page To Display Your Posts
Leave the plugin default settings or enter any changes you want to make into the fields in this section, and click Save Changes to continue …

After you have finished configuring your settings and saving your changes, click on the ‘Post Types’ tab …

Titles & Metas > Post Types
This section lets you configure default on-page SEO elements for your posts, pages, media files, custom post formats, and post format archives.
Yoast SEO will use the settings you specify in this section to display meta data for your posts, pages and media on your site if you do not set these individually when creating or editing your content …

Before configuring the settings for this section, let’s go over some of the important concepts and components that are relevant to this section and the tabs that follow in this section:
Variables
Here are some of the main variables you can use when configuring the Yoast SEO plugin settings, and a description of the content these will replace:
- %%sitename%% – Your site’s name.
- %%sitedesc%% – Your site’s description.
- %%title%% – The title of your post/page.
- %%excerpt%% – Post/page excerpt (or auto-generated if no excerpt exists).
- %%focuskw%% – Your post’s main keyword.
- %%term_title%% – The name of your item (e.g. category or tag)
- %%tag%% – Current tag(s).
- %%tag_description%% – Current tag description(s).
- %%category%% – Post category.
- %%category_description%% – Post category description(s).
- %%caption%% – Caption
- %%name%% – Author name
- %%sep%% – Separator.
- %%page%% – Page.
- %%date%% – Date of publishing
- %%searchphrase%% – Search phrase.
Variables And Templates
In this section, you are being asked to define the structure you want for how title templates will display for your site’s posts, pages, and attachments.
The difference between a “title” and a “title template” is that a “title template” specifies how your “title” will look.
For example, in the previous section, we suggested specifying a fixed (i.e. unchanging) title template, description, and keywords for your home page. For your posts and pages, however, since each post and page title will be different, you will need to define how your post and pages title and other meta information will be pulled, organized and displayed to search engines and user browsers. This is done using a title template.
So … let’s say that you have three blog posts called:
- Natural Hair Cleansing Ingredients
- How To Straighten Curly Hair
- Creating A Stylish Cut On A Budget
And your Site Name is called “Hair To Stay Salon“,
Creating a title template that looks like this:
%%title%% – %%sitename%%
Will display your blog posts to search engines and visitor web browsers like this:
- Natural Hair Cleansing Ingredients – Hair To Stay Salon
- How To Straighten Curly Hair – Hair To Stay Salon
- Creating A Stylish Cut On A Budget – Hair To Stay Salon
Alternatively, creating a title template that looks like this:
Hair Tips: %%title%% By %%sitename%%
Will display your blog posts like this to search engines and visitor web browsers:
- Hair Tips: Natural Hair Cleansing Ingredients By Hair To Stay Salon
- Hair Tips: How To Straighten Curly Hair By Hair To Stay Salon
- Hair Tips: Creating A Stylish Cut On A Budget By Hair To Stay Salon
Additional Parameters
Additional settings in this section include:
Meta Robots: Enabling this section will prevent search engines from indexing your content.
Authorship: Enabling this link will prevent Google from displaying authorship of your content.
Yoast SEO adds the rel=”author” attribute to the header with your Google+ profile link. This displays your thumbnail with your content in Google’s search results, which helps to increase your entry’s visibility and increases the number of clicks you will get …

Date in Snippet Preview: Google often displays dates on snippets in its search results …

If your theme supports the date tag then Google may choose to include it in its search results.
As stated at the beginning of this tutorial, the Yoast SEO plugin lets you specify how your post snippets will display in Google’s search results, using the plugin’s Snippet Preview feature …

You can display the date in the Snippet Preview by enabling this option in your settings …

With the ‘Date in Snippet Preview’ option enabled, you will see the date displayed in your snippet previews when constructing your post meta data for the search engines …

Yoast SEO Meta Data Box: As mentioned earlier, when you enable the Yoast SEO plugin, a “Meta Data” box will display below each of your posts and pages, allowing you to set and manage SEO settings for your content …
noindex
Some of the settings in this section are specifically aimed at helping you avoid duplicate content in the search engines, by specifying which parts of your site you don’t want the search engines to index (called “noindex”).
Please note that “noindex” does not mean “nofollow”. Search engines will still crawl your pages and follow all links. They will not index those pages, however, and this will prevent any duplicate content issues or indexing of unnecessary pages (for example, the Yoast SEO plugin specifies by default that functions like site search queries and pages like your login, registration and ‘page not found’ error pages should not be indexed.)
Also, as stated in the plugin notes, if you own a one-person site (e.g. a single-author blog), then it is recommended that you set certain pages like author archives and date-based archives to “noindex”, because those pages will contain exactly the same content as your main blog page. You can still have date-based archives made available to help your site users find your content, they just don’t need to be indexed.
When configuring category and tag archives, we recommend choosing not to index these pages, as this will enable search engines to give more importance to areas like your post titles.
nofollow
In SEO terms, “nofollow” is used to prevent search engines from diluting your page strength on links that do not deserve the “link juice” (another SEO term that refers to the quality of your web site’s link power).
For example, there is no need for your login and registration links to get page rank (i.e. you are not trying to get your site to rank higher in the search engines for those pages, so why waste “link juice”?) It’s better to pass the juice to the other pages on your site that you DO want to rank higher in the search engines for. The Yoast SEO plugin helps to prevent useless links that appear on many or all of your site pages from diluting your page strength.
Additionally, many WordPress themes are designed in such a way that links point to the comment section, login link, WordPress.org site, etc. Yoast SEO automatically configures internal “nofollow” settings” to prevent search engines from following these links.
Now that you understand the function of these elements, let’s take a look at how to configure your meta settings for this section.
![]()
Note: Unless you specifically want to set up your title templates differently, just follow the recommended settings shown below.
Remember too, that for maximum SEO benefit, you should manually enter a title and description for each item. Otherwise, the plugin will automatically insert a title and description to your posts and pages using the default settings as specified in this section.
Post Types > Posts

Configure this section as shown in the screenshot above:
- Title Template: %%title%%
- Meta description template: %%excerpt%%
- Meta keywords template: %%focuskw%%, %%tag%%, %%category%%
- Meta Robots: Leave this box unchecked if you want search engines to index your posts.
- Authorship: Leave this box unchecked if you want search engines to display Google authorship information on your posts.
- Date in Snippet Preview: Check the box to display the date in your snippet previews, or leave it unchecked – it’s up to you.
- Yoast SEO Meta Box: Leave the box unchecked to display the Yoast SEO Meta Box below your post editor screen.
Post Types > Pages

Configure this section as shown in the screenshot above:
- Title Template: %%title%% – %%sitename%%
- Meta description template: %%excerpt%%
- Meta keywords template: %%focuskw%%
- Meta Robots: Leave this box unchecked if you want search engines to index your pages.
- Authorship: Leave this box unchecked if you want search engines to display Google authorship information on your pages.
- Date in Snippet Preview: Check the box to display the date in your snippet previews, or leave it unchecked – it’s up to you.
- Yoast SEO Meta Box: Leave the box unchecked to display the Yoast SEO Meta Box below your page editor screen.
Post Types > Media

Configure this section as shown in the screenshot above:
- Title Template: %%title%% – %%sitename%%
- Meta description template: %%caption%% – %%title%% – %%sitename%%
- Meta keywords template: %%focuskw%%, %%tag%%
- Meta Robots: Check this box to prevent search engines from indexing your media files.
- Authorship: Leave this box unchecked if you want search engines to display Google authorship information.
- Date in Snippet Preview: Check the box to display the date in your snippet previews, or leave it unchecked – it’s up to you.
- Yoast SEO Meta Box: Leave the box unchecked to display the Yoast SEO Meta Box below your media editor screen.
![]()
Note: Depending on what other applications you have installed on your site, you may see additional fields displayed in this section, such as custom post types and custom post type archives …

To learn more about using custom fields in WordPress, see the tutorial below:
When you have finished configuring the setting in this section, click Save Changes to update your settings …
After you have finished configuring your settings and saving your changes, click on the ‘Taxonomies’ tab …

Titles & Metas > Taxonomies
This section lets you configure the default titles and meta data for your Categories, Tags, and any custom taxonomies you may have …

Yoast SEO will use the default template variables you specify in this section. It will also use any descriptions you add to your categories and tags …

If you don’t have any description for terms in your categories, tags, or custom taxonomies, then Yoast SEO will not add meta description data in archives for these terms.
To learn more about using Categories and Tags in WordPress and their differences, see the tutorials below:
Configure the settings in this section as shown below:
Taxonomies > Categories

Configure this section as shown in the screenshot above:
- Title Template: %%term_title%% – %%sitename%%
- Meta description template: %%term_title%% – %%category_description%%
- Meta keywords template: %%term_title%%
- Meta Robots: Check this box to prevent search engines from indexing your categories. This way, search engines give more importance to your post titles than your categories.
- Yoast SEO Meta Box: Leave the box unchecked to display the Yoast SEO Meta Box below your Category screen.
Taxonomies > Tags

Configure this section as shown in the screenshot above:
- Title Template: %%term_title%% – %%sitename%%
- Meta description template: %%term_title%% – %%tag_description%%
- Meta keywords template: %%term_title%%
- Meta Robots: Check this box to prevent search engines from indexing your tags. This way, search engines give more importance to your post titles than your tags.
- Yoast SEO Meta Box: Leave the box unchecked to display the Yoast SEO Meta Box below your Tags screen.
Taxonomies > Format

Configure this section as shown in the screenshot above:
- Title Template: Leave the default plugin settings, or use others variables (e.g. %%term_title%%)
- Meta description template: Leave the default plugin settings, or use others variables (e.g. %%term_title%%)
- Meta keywords template: Leave the default plugin settings, or use others variables (e.g. %%term_title%%)
- Meta Robots: Check this box to prevent search engines from indexing your Format taxonomies.
- Yoast SEO Meta Box: Leave the box unchecked to display the Yoast SEO Meta Box for your format taxonomies.
![]()
Note: Depending on what other applications you have installed on your site, you may see additional fields displayed in this section …

When you have finished configuring the setting in this section, click Save Changes to update your settings …
After you have finished configuring your settings and saving your changes, click on the ‘Other’ tab …

Titles & Metas > Other This section lets you configure the default titles and meta data for your Author and Date archives and other Special pages, such as your Search and 404 error pages …

Configure the settings in this section as shown below:
Other > Author Archives

Configure this section as shown in the screenshot above:
- Title Template: %%name%%: %%sitename%% author.
- Meta description template: Author profile of %%name%% at %%sitename%%.
- Meta keywords template: %%name%%
- Meta Robots: Check this box to prevent search engines from indexing your author archive pages, or leave it unchecked
- Disable the author archives: As the plugin developer (Joost de Valk) states for this setting …
If you’re running a one author blog, the author archive will always look exactly the same as your homepage. And even though you may not link to it, others might, to do you harm. Disabling them here will make sure any link to those archives will be 301 redirected to the homepage.
If you manage a single authored blog, use the recommended plugin settings as explained above for your author archives.
If you run a multi-authored WordPress site (i.e. many authors contribute to your site content), then we recommend that you leave the ‘Disable the author archives’ option unchecked.
Other > Date Archives

Configure this section as shown in the screenshot above:
- Title Template: %%date%% – %%sitename%%
- Meta description template: %%date%% – %%sitename%%
- Meta Robots: Check this box (and the one below) to prevent search engines from indexing your date archive pages and avoid potential duplicate content penalties.
- Disable the date-based archives: Check this box. As the plugin developer states for this setting …
For the date based archives, the same applies: they probably look a lot like your homepage, and could thus be seen as duplicate content.
Disabling date-based archives is a matter for individual discretion. Unless you have a reason for leaving the ‘Disable the date-based archives’ option unchecked, we recommend following the plugin author’s recommendations.
Other > Special Pages

Configure this section as shown in the screenshot above:
- Search Pages> Title template: %%searchphrase%% – %%sitename%%
- 404 pages > Title template: Page Not Found – %%sitename%%
When you have finished configuring the setting in this section, click Save Changes to update your settings …
After configuring ‘Titles & Metas’ settings, the next step is to configure the plugin’s ‘Social’ settings.
Yoast SEO: Social Settings
From the SEO menu, choose SEO > Social …

This brings up the ‘Yoast SEO: Social’ settings section …

As well as being a very powerful SEO plugin, Yoast SEO also integrates your site with Facebook, Twitter, and the Google+ social media platforms.
This section lets you configure your site’s “Social SEO” settings for the following social media platforms:
- Google+
Let’s go through and configure each of these sections:
Social > Facebook
Click on the Facebook tab to configure your Yoast SEO settings for Facebook …

Facebook > Open Graph
This section lets you add Facebook Open Graph meta data to your site’s <head> section. This will help prevent issues with Facebook thumbnails not showing, or a different title or description from displaying to Facebook users when your posts get shared on Facebook.
Check the ‘Add Open Graph meta data’ option …

Facebook > Insights and Admins
The next step is to associate your WordPress site with a Facebook Admin.
Adding a Facebook admin to this section will give you access to Facebook Insights for your site. Insights provides measurements on the performance of your Facebook Pages and Apps …

You can choose a user profile as the ‘Admin’, or specify a Facebook app. (see link to Facebook App tutorial below).
Make sure you are logged into your Facebook account, and then click on Add Facebook Admin …

If you are already logged into Facebook, Yoast SEO will immediately add you as a Facebook Admin.
Click Save Changes to continue …

![]()
Note: if you are not logged into Facebook when you click on Add Facebook Admin button, you will be taken to the Facebook login page …

Log in to Facebook and the plugin will automatically add your details.
Also, if you need to remove your details from the plugin’s settings, click on the “X” next to your admin name, or the Clear all Facebook Data button …

Yoast SEO will automatically remove all admins from the plugin settings …

The next step is to enter your Facebook page URL into the ‘Facebook Page URL’ field …

If you need help setting up a Facebook page, or to learn more about Facebook Open Graph and creating Facebook Apps, see the tutorial below:
After you have done the above steps, configure the following settings to complete this section:
Facebook > Frontpage settings
- Image URL: Enter a thumbnail location for your home page (e.g. your logo).
- Description: Enter a description for your site.
The image and description you enter here will be used when someone shares the home page of your site on Facebook.
Facebook > Default settings
- Image URL: Enter a default thumbnail image URL. This image can be the same as the one you have specified earlier, or any image that you want Facebook to use when content on your site that does not have a thumbnail or any other image associated with it gets posted to Facebook.
Remember to click the Save Changes button when you have completed configuring the settings and options for this section …

Social > Twitter
Click on the Twitter tab to configure your Yoast SEO settings for Twitter …

In this section, you will learn how to add Twitter card meta data to your site’s <head> section …

About Twitter Cards
Twitter cards make it possible for you to attach media experiences to tweets that link to your content. Once your site is set up to use Twitter meta cards, users who Tweet links to your content will have a “card” added to the Tweet that is visible to all of their followers …

(image source: twitter.com)
Twitter Cards are similar to Facebook Status. When you tweet a link to a site that has twitter cards enabled, it adds a preview with title, summary, and thumbnail of your page content. When a user clicks on the tweet, they will see this summary.
Twitter cards can help increase the number of people following your twitter account through content attribution. With twitter cards, the author gets credit from every tweet or retweet that mentions their post.
Yoast SEO provides an easy way to integrate Twitter cards on your site.
To enable this feature, check the box next to ‘Add Twitter Card meta data’ in this section, and enter your twitter username into the ‘Site Twitter Username’ field. Click Save Changes when finished …

After enabling this setting, go to your user profile page. Click on the Howdy, Username > Edit My Profile link in the top right-hand corner of your screen …

You will see a new field under Contact Info for your Twitter username. Enter your twitter username in this field and update your settings …

Note: If your site allows multiple authors to contribute posts, make sure they know to enter their twitter details in their profile. This will allow each author to receive credit for his/her contribution.
After adding support for twitter cards on your site, you will need to have your site be approved and activated by Twitter, for this feature to work on your Twitter website …

To learn how to integrate your WordPress site with Twitter, including how to apply for the Twitter card program, see the tutorial below:
Social > Google+
Click on the Google+ tab to configure your Yoast SEO settings for Google+ …

In this section, you will integrate Google Authorship with your site:
- Author for homepage: Choose an author for your site’s home page from the drop down menu.
- Google Publisher Page: Enter your Google+ publisher page into this field, and then link it to your Google+ page’s “About” page.
Click Save Changes when finished …

![]()
Note: The Yoast SEO plugin also adds a Google+ URL field to your profile page.
Go to Users > User Profile and enter your Google+ profile URL into this field …

Make sure that you (and all other authors) add their Google+ URL into their profile pages and verify their authorship.
To learn how to integrate your WordPress site with Google+, see the tutorial below:
After configuring Social settings, the next step is to configure the plugin’s ‘XML Sitemap’ settings.
Yoast SEO: XML Sitemaps
From the SEO menu, choose SEO > XML Sitemaps …

This brings up the ‘Yoast SEO: XML Sitemaps’ section …

An XML (Extensible Markup Language) sitemap is different than an HTML site map.
While a site map is useful for helping human readers find their way around your site, a sitemap is essential for getting your WordPress site indexed fast by the search engines and for telling search engines how to prioritize your content.
To learn how to create a site map for human visitors and how to configure another powerful XML sitemap plugin, see the tutorials below:
If the XML Sitemap section is unchecked when you visit this page, check the box to enable XML sitemap functionality …

Once you check the box, all of the configurable options and settings in this section will display on your screen …

Configure the settings in this section as follows:
- User sitemap: If you are running a single user site, then check this box to disable author/user sitemaps.
- General settings: Check the boxes to automatically notify search engines like Yahoo! and Ask.com in addition to Google and Bing.
- Exclude Post Types: Check any boxes in this section if there is a post type that you do not want to include in your sitemap.
- Exclude taxonomies: Check any boxes in this section if there are taxonomies that you do not want to include in your sitemap.
- Entries per page: Enter a maximum number of entries per sitemap page here.
Yoast SEO creates an XML sitemap for your site and keeps it automatically updated.
To view you sitemap, click on the XML Sitemap button …

This brings up a new page containing the main XML Sitemap created by the plugin, which provides links to additional sitemaps of your site to the search engines …

You can view each of these specific sitemaps by clicking on their links. This opens up the individual sitemap containing detailed information that search engine spiders need in order to index your content …

Click on Save Changes when you have finished configuring the settings in this section …
After configuring XML Sitemap settings, the next step is to configure the plugin’s ‘Permalinks’ settings.
Yoast SEO: Permalinks
From the SEO menu, choose SEO > Permalinks …

This brings up the ‘Yoast SEO: Permalinks’ section …

![]()
Don’t confuse the Permalink settings in the Yoast SEO plugin with the WordPress permalink configuration settings (Settings > Permalink).
Yoast SEO optimizes the function of the built-in WordPress permalinks, but it does not allow you to create search engine friendly URLs. You should already have configured these.
If you need help configuring WordPress permalinks, see the tutorial below:
The Permalinks section is divided into the following:
- Permalink Settings
- Canonical Settings

Permalinks > Permalink Settings
Configure the settings for this section as follows:

Strip the category base (usually /category/) from the category URL
By default, WordPress adds a category base to your Category urls as shown in the screenshot below …

If you check the box in this section, WordPress will remove the word “category” from your category URLs …

Note: This only affects your Category URLs, not your Post URLs. You can enable this option if you want, or leave it unchecked if you think that your category URLs and page URLs would conflict. This would happen if, for example, you choose to strip the category base, then have a category labelled “travel-tips” and create a page called “travel-tips” (i.e. both have the same name, and would, therefore, have the same URL).
Enforce a trailing slash on all category and tag URL’s
If you leave this option unchecked, your category and tag URLs will look like this (no trailing slash at the end of the URL) …
Checking this option adds the trailing slash at the end of the category or tag URL as shown below …

We recommend enabling this option, unless your posts end in .html.
Remove stop words from slugs
“Stop words” are words like a, and, to, etc.
Typically, if you have configured search engine friendly URLs for your site, then your slug will include all the words in the title when you publish a new post, e.g. …

The screenshot below shows an example of a post slug with stop words removed …

Generally we recommend leaving this option disabled. However, it’s up to you if you want to shorten your URLs by removing stop words.
Note: Enabling this option does not change the slug for existing posts on your site, only new posts that you create. This is to prevent visitors from seeing ‘page not found’ errors when clicking on existing links.
Redirect attachment URL’s to parent post URL.
WordPress attaches images and other media to posts. All of those attachments, however, get their own URLs, which, in most cases, is quite unnecessary. By enabling this option, all attachment page URLs will be redirected to the original post URL.
Remove the ?replytocom variables.
We recommend enabling this option. This option not only disables comment reply links for users that have disabled javascript in their browsers, but it also prevents search engines like Google from indexing links that do not need to be indexed and can actually harm your results. If you are running a site that has a large number of comments, then enabling this option also helps to improve crawl efficiency for search engines.
Redirect ugly URL’s to clean permalinks
As the plugin developer states in the notes for this option:
People make mistakes in their links towards you sometimes, or unwanted parameters are added to the end of your URLs, this allows you to redirect them all away. Please note that while this is a feature that is actively maintained, it is known to break several plugins, and should for that reason be the first feature you disable when you encounter issues after installing this plugin.
By checking the ‘Redirect Ugly URLs’ box, you will be cleaning all “ugly” URLs pointing to your site by turning them into clean permalinks. Most users don’t need to use this option.
Clicking on the checkbox …

Opens up a new screen called ‘Clean Permalink Settings’ containing advanced settings for this option …

Leave the “Redirect Ugly URLs” option unchecked, unless the following applies to your situation:
- Other sites are linking to your short URL, or other ugly URLs (e.g. Feedburner links). If so, then it’s good to keep those links clean.
- You want to use this option, but you are also using Google Site Search on your WordPress site. This can add other parameters that you do not want to clean. If so, then check the box to prevent cleaning out Google Site Search URLs in the ‘Clean Permalink Settings’ section.
- You want to use this option, but you are also using Google Analytics to track specific campaigns. This requires adding tracking variables to the end of your URL. If so, you will want to prevent cleaning out your Google Analytics Campaign Parameters in the ‘Clean Permalink Settings’ section.
- You want to use this option, but you are also using extra variables in links that you do not want cleaned from your URLs. If so, then enter those variables (comma-separated) into the ‘Other variables not to clean’ field.
Permalinks > Canonical Settings

Canonical settings can force the web site to be served normally over http, or, over https if you have an SSL certificate.We recommend leaving the default settings in this section, unless you know what you are doing.
After you have finished configuring the options in this section, click Save Changes to update your settings …
After configuring Permalinks settings, the next step is to configure the plugin’s ‘Internal Links’ settings.
Yoast SEO: Internal Links
From the SEO menu, choose SEO > Internal Links …

This brings up the ‘Yoast SEO: Internal Links’ section …

The Internal Links options available in this section relate to using “breadcrumbs” …

Breadcrumbs provide a way for users to navigate more easily up and down your site, from post to category, to the next post, or from child page, to parent page etc. It also allows search engines to better understand the structure of your site …

Many WordPress themes now come with built-in ‘breadcrumb’ settings, allowing to set up breadcrumbs in various locations and areas of your site (e.g. before or after main content sections), and also choose from a variety of styles and designs.
The Yoast SEO plugin allows you to add and configure breadcrumbs for your WordPress site.
![]()
Adding breadcrumbs to your site using Yoast SEO requires editing code in your template files. We recommend, therefore, skipping this section, unless, of course, you want to add breadcrumbs to your site and are comfortable editing php code.
For the sake of completeness, we will go through the process of configuring this section of the plugin in this tutorial. For more information about how and where to edit code to make the breadcrumbs work, however, please see the plugin website here: Yoast SEO Breadcrumbs.
***
Configure your settings for this section as shown below:

- Enable Breadcrumbs by selecting the check box.
- Separator between breadcrumbs – Specify which separator you would like to use between breadcrumbs. In the screenshot above, we are choosing to separate breadcrumbs with ‘chevrons’, or right double angle quotes (double arrows) like ». To use symbols like chevrons, you will need to enter the codes for the HTML entities that correspond to the symbols. For example, the HTML code for a chevron symbol is ‘»’ (without the single quotes), You can use any symbol you want, e.g. /, commas, ~, | (pipes), etc. For a list of entity codes, go here: HTML Entities
- Anchor text for the Homepage: Choose something like “Home”.
- Prefix for the breadcrumb path: This is not necessary, but it is good practice to let your user know that the breadcrumb is a convenient navigational tool for visitors. In our example, we are using the phrase “You are here:”
- Prefix for Archive breadcrumbs: In our example, we use “Archives for”. When someone visits the archives page, it will show up as “Archives for December 2013”, or whatever date the post has been archived under.
- Prefix for Search page breadcrumbs: This works in a similar way as the Archives breadcrumbs above. Visitors will see “Search for keyword”.
- Breadcrumb for 404 page: In our example, we have used “Page not found …”.
- Remove Blog page from Breadcrumbs – If you are using WordPress as a CMS with a separate blog section, you have the option to remove the Blog Page from your breadcrumbs.
- Taxonomy to show in breadcrumbs for: Yoast SEO gives you an option to select how you want to categorize your ‘Posts’ (e.g. by categories or tags), and your Gallery (e.g. gallery categories). Depending on what other applications you have running, you may see additional custom taxonomies and menu options displayed in this section (e.g. listing categories, event tags, etc.). Configure this section according to your own needs and preferences.
- Post type archive to show in breadcrumbs for: Depending on what other applications you have running, you may see additional custom post types and menu options displayed in this section (e.g. listings, events, etc.). Configure this section according to your own needs and preferences.
- You also have an option to Bold the last page in the breadcrumb.
![]()
Breadcrumbs do not automatically show up on your pages. After configuring the settings in this section, you will need to add the code below into your theme:

The plugin also provides links to advance usage instructions for adding code to your templates.
After you have finished configuring the options in this section, click Save Changes to update your settings …
After configuring Internal Link settings, the next step is to configure the plugin’s ‘RSS’ settings.
Yoast SEO: RSS Settings
From the SEO menu in your WP Admin area, choose SEO > RSS …

This brings up the ‘Yoast SEO: RSS’ section …

This section allows you to control the content of your RSS Feed and add backlinks to your own site in your feed content. This is useful, because there are a lot of content scraping software scripts online that steal your content using your site’s feeds.
By adding a link back to your site with every post, not only will you get backlinks from scraped content, but search engines like Google and others will know that you are the original source of your content.
The settings in the RSS section give you options to add your author link, post link, blog link, and blog description using variables. You can also add your content before the post in the feed, or after the post in your feed, and you can use HTML to format your content (e.g. bold hyperlinks) …

You can use the following variables in your text:
- %%AUTHORLINK%% – This adds a link to the archive for the post author with the authors name as anchor text.
- %%POSTLINK%% – This adds a link to the post with the title as anchor text.
- %%BLOGLINK%% – This adds a link to your site with your site’s name as anchor text.
- %%BLOGDESCLINK%% – This adds a link to your site with your site’s name and description as anchor text.
In the example below, we will add the following text to display after each post feed:

Go to SEO > RSS, and type in, or paste the above code it into the ‘Content to put after each post’ area …

Save the above and then open up your site’s RSS feed page in a new browser …

This is how the settings you have configured in Yoast SEO will display for each entry in your site’s RSS feed …

Adding a hyperlinked text in your RSS feeds will help drive more traffic to your site from visitors and search engines, and also help give your content proper attribution if your feed gets displayed on other sites.
After you have finished configuring the options in this section, click Save Changes to update your settings …
Congratulations! You have finished configuring the Yoast SEO plugin.
The next sections of the plugin allow you to perform administrative functions, such as importing and exporting data, and editing files.
Yoast SEO: Import & Export
From the SEO menu in your WP Admin area, choose SEO > Import & Export …

This brings up the ‘Yoast SEO: Import’ section …

This section allows you to import data and settings from other SEO plugins, and export your existing settings for safe backup, or to reimport into another site …

Yoast SEO > Import
If you have been using another WordPress SEO plugin (e.g. All-In-One SEO) prior to discovering Yoast SEO, then we recommend that you consider importing all of the existing SEO data from your previous SEO plugin into Yoast SEO.
Yoast SEO has a built-in importing facility that allows you to easily import your existing metadata (post titles, descriptions, tags, etc …) from previous SEO plugins, and migrate this information to Yoast SEO.
Here is how to import data from other SEO plugins:
If you are currently using one of the plugins shown in the ‘Import’ list (e.g. All-In-One SEO), then select both the checkbox next to its name, and the checkbox next to ‘delete the old data after import?’ and click on the Import button …

Your data will be imported from the old plugin into Yoast SEO and the old plugin data will be deleted …

If you are using am SEO plugin that is not on the ‘Import’ list, then install the SEO Data Transporter plugin to move your data into Yoast SEO.
SEO Data Transporter

(SEO Data Transporter WP Plugin)
Plugin URL
https://wordpress.org/plugins/seo-data-transporter/
Plugin Description
If you have been using another SEO plugin (like Platinum SEO) or a theme that has its own built in SEO custom settings (like Genesis or Thesis), the SEO Data Transporter plugin allows you to easily move your data from other platforms into Yoast SEO.
This plugin allows you to transfer your inputs SEO data from one theme/plugin to another. We all know how difficult it can be to switch themes or dump plugins. The fact that themes and plugins store their inputs SEO data differently makes it even harder. This plugin remedies that.
Plugin Installation
Go to Plugins > Add New and search for “seo data transporter” using the ‘Search’ tab, or upload the plugin file using the ‘Upload’ tab …

Install and activate the plugin …

After installing and activating the plugin, click on Tools > SEO Data Transport …

This brings you to the SEO Data Transporter page.
Plugin Usage
Select your source platform (theme or plugin) from the ‘Convert inpost SEO data from:’ dropdown menu (for this example, we’re choosing a plugin called Platinum SEO) …

Next, select Yoast SEO from the ‘to:’ drop-down menu …

After selecting your ‘from’ and ‘to’ options, click Analyze to see how many records will be imported …

The plugin analyzes the number of compatible records that will be converted from the old plugin to Yoast SEO and displays the results …

After completing the analysis, click Convert …

The data will be converted and imported into Yoast SEO …

![]()
Tip: Once the conversion has successfully completed and the data has been migrated over to Yoast SEO, feel free to delete both the old SEO plugin and the SEO Data Transporter plugin from your site if these are no longer required.
***
Yoast SEO > Import settings from other plugins
Over time, the Yoast SEO plugin has incorporated the features of previously separate Yoast plugin. This section lets you import settings from those earlier plugins into Yoast SEO …

Yoast SEO > Export & Import SEO Settings
Export
This section lets you export your Yoast SEO settings to your hard drive. This way, if anything happens you can easily and quickly re-import your plugin settings back into your site. Additionally, you can use your exported settings file to instantly configure the Yoast SEO plugin settings on another site.
Click on Export settings to generate a downloadable export file …

Save the settings.zip file to your hard drive, or download it to an external drive …

Import
This section lets you import your saved settings file. Locate and load your settings.zip file to the uploader using the “Browse” button, then click Import settings …

You will see a message displayed when your plugin settings have been successfully imported …

The last item in the plugin menu is the ‘Edit Files’ section.
Yoast SEO: Edit Files
From the SEO menu in your WordPress Admin area, choose SEO > Edit Files …

This brings up the ‘Yoast SEO: Files’ section …

Like the WordPress Theme Editor, this section allows you to modify your robots.txt and your .htaccess files directly from your WordPress admin area, without having to edit and upload these files to your server …

![]()
Tip: You can add a link to the sitemap file created by Google XML Sitemap Generator or the sitemap file created by Yoast SEO plugin to your robots.txt file using the editor.
To change sitemaps, just paste the URL of the sitemap you want to use into the robots.txt file editor and click the Save changes to Robots.txt button.
Change the robots.txt sitemap.xml URL from this …

To this …

![]()
Important: Always back up your files before making any changes. If you are not sure about what you are doing, ask a professional to help you.
If you have completed all of the previous tutorials for this module, then your Yoast SEO plugin should be fully configured.
The next step is to learn how to use the Yoast SEO plugin to improve your search engine results.
How To Use Yoast SEO
Plugin Usage Instructions
The previous sections of this tutorial show you how to configure the Yoast SEO plugin. In this section, you will learn how to use it.
Simply installing and setting up the Yoast SEO plugin is not enough. In order to maximize the SEO benefits of this powerful plugin, you also need to understand how to use it.
Yoast SEO gives you complete control over how you want search engines to display your posts and pages in their search results …

If you don’t customize your titles, descriptions, etc …, the templates you set up in the plugin settings will make sure that your content is still optimized for search engines.
Writing your own titles and descriptions, however, can help to improve your site’s performance in terms of getting people who find your site in search engine listings to click through to your website.
Here’s what Joost de Valk, SEO expert and Yoast SEO plugin creator has to say about letting the plugin generate automated descriptions for your site …
In my opinion, auto generating descriptions is a load of bull, most plugins pick the first sentence, which might be an introductory sentence which has hardly anything to do with the subject, or another sentence with a keyword in it, which might be completely wrong to pick as description. Thus, the only well written description is a hand written one, and if you’re thinking of auto generating the meta description, you might as well not do anything and let the search engine control the snippet …
If you don’t use the meta description, the search engine will find the keyword searched for in your document, and automatically pick a string around that, which gives you a bolded word or two in the results page. Auto generating a snippet is a “shortcut”, and there are no real shortcuts in (WordPress) SEO (none that work anyway).
It is best, therefore, to develop the habit of manually generating titles and descriptions for all of your WordPress blog posts and pages. When you do this, keep in mind that you are trying to “sell” visitors into clicking through to your site, so the better you become at writing compelling copy, the better your titles and descriptions will convert “search viewers” into “web visitors”.
Using Yoast SEO
Below your content editor screens (posts, pages, categories, tags, media, etc.) you will see the Yoast SEO Meta Box.
The Yoast SEO Meta Box is divided into the following sections:
- General – This section lets you configure your SEO meta data.
- Page Analysis – This section offers recommendations for improving your content SEO.
- Advanced – This section lets you specify individual settings for indexing, breadcrumbs, sitemaps and redirections.
- Social – This section lets you specify descriptions and images for content shared by others on social media sites …
Let’s go through each of these sections:
General Tab
This section allows you to craft optimized and unique meta data for your content …

As mentioned previously, it’s recommended that you write the title and meta description for each post and page on your site to maximize the benefit of this powerful plugin, rather than letting the plugin auto-generate this content for you.
Snippet Preview
This section will dynamically change as you enter or edit information into the fields listed below, so you can see exactly how your item will display in Google’s search engine results.
Focus Keyword
Make sure you select a focus keyword, so you can get an analysis on how strong your page is for that keyword.
SEO Title
Depending on your strategy, you may not want the post title that your visitors see and the post title that search engines see to be the same. You can create a different SEO title in this section.
Meta Description
You should write a custom meta description every time, because the excerpt generator will only select the first paragraph of your content, which might not be the most important, compelling or ideal portion of your content to “sell” to your visitors.
What you enter here is what will show in your search engine listings. We recommend that you stick to the 156 character maximum, since this is all that search engines like Google display in their results listing, and make it interesting or compelling enough for visitors to want to click on and come to your site.
Meta Keywords
Enter your primary keyword first in this section, followed by 3-4 more related keywords, separated by commas. Use keywords that appear in your content.
Page Analysis Tab
The Page Analysis tab gives you insights about specific aspects or elements of your post or page, and a visual display of whether or not these are helping your content to be more or less optimized …

The information below will help you analyze, review and improve your content for SEO:
- Entries tagged with green are good to go and need no further improvement.
- Entries tagged with yellow are good, but need some work.
- Entries tagged with red need immediate attention.
- Follow the recommendations beside each entry to better optimize your content.
Note: The analyses and recommendations in this section are only suggested guidelines for improvement. Don’t go overboard trying to create ‘perfectly optimized’ content, as this is completely unnecessary and can waste a lot of your valuable time.
Advanced Tab
This section lets you specify individual settings for indexing, breadcrumbs, sitemaps and redirections that override your default settings …

You don’t have to configure the settings in this section for every post and page on your site. Below are some suggested settings if you decide to use this tab:
Home Page
- Set Meta Robots Index to “Index”.
- Set Meta Robots Follow to “Follow”
- Set Meta Robots Advanced to “NO ODP” and “NO YDIR”
- Set Include in Sitemap to “Auto detect”
- Set Sitemap Priority to “Automatic prioritization”
- Leave other fields blank unless you know what you are doing.
Update/publish your page.
Utility Pages
For pages like Disclaimer, Privacy, Site Map and Terms And Conditions pages, we recommend the following settings:
- Set Meta Robots Index to “No Index”
- Set Meta Robots Follow to “Follow”
- Set Include in Sitemap to “Auto detect”
- Set Sitemap Priority to “0.1 – Lowest priority”
Update/publish your page.
Note: for pages like product pages, about us and other pages that you want search engines to index, use the same settings as the ones used for configuring your home page.
Posts
Using the same principles described above to optimize your home page, optimize any posts that you deem to be very important as follows:
- Set Meta Robots Index to “Index”
- Set Meta Robots Follow to “Follow”
- Set Meta Robots Advanced to “NO ODP” and “NO YDIR”
- Set Include in Sitemap to “Auto detect”
- Set Sitemap Priority to “0.6 – Default for second tier posts and pages”
Update/publish your post(s) (if necessary).
Social Tab
This section lets you specify descriptions and images for content shared by others on social media sites …

Yoast SEO Plugin – Additional Information
In addition to configuring medat data for Posts and Pages, you can configure Meta data for:
Categories …

Tags …

Media …

Also, custom post formats, galleries, and user profiles …

As you can see, the Yoast SEO plugin a powerful WordPress plugin that allows you to have an amazing degree of control over your site’s SEO. We strongly recommend installing and using this plugin to optimize your WordPress site for search engines and improve your traffic.
Congratulations! Now you know how to configure and use the Yoast SEO plugin.

***
"This is an awesome training series. I have a pretty good understanding of WordPress already, but this is helping me to move somewhere from intermediate to advanced user!" - Kim Lednum
***