 One of the worst predicaments you can find yourself in as a website owner is to break the law.
Your internet presence needs to comply with numerous laws and regulations, some of which you may probably not even be aware of.
Being non-compliant puts you at risk of suffering serious financial losses and the cost to your reputation. Why risk your money and your good reputation, when you can protect yourself so easily and inexpensively?
In this post, we review a simple and easy-to-use solution for WordPress users that can help make your site compliant just minutes.

Does Your Site Comply With All Legal Requirements?
As the digital realm continues to grow at breakneck speed and the rules of the game keep changing, it’s vital to stay on top of what’s happening and to make sure that your website or blog remains legal, especially if your web presence is an essential part of your overall business strategy.
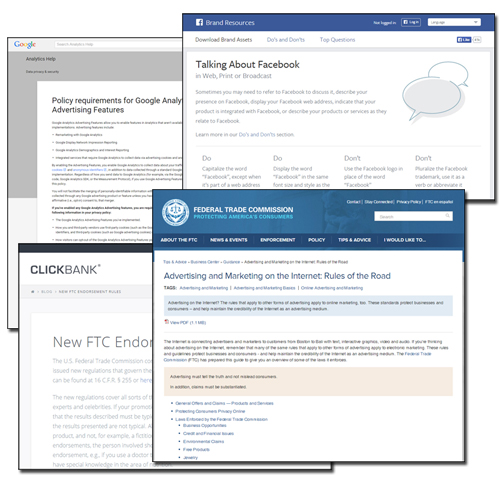
If there are no legal pages on your website (e.g. terms and conditions of use, privacy policy, legal disclaimers, etc.), many sites such as Google won’t let you advertise, digital marketplaces like ClickBank will not approve your digital products for sale, PayPal could shut down your account and withhold payment of your funds, Facebook will suspend your applications, and you won’t be allowed into many leading advertising or affiliate marketing networks.
If your online business is not compliant, you could face a whole range of penalties, including fines, having your website shut down, even jail time!
At the very least, if your business online is not compliant, expect visitor trust and confidence in your business to be seriously damaged.
(In addition to legal and regulatory compliance, almost all 3rd-party services require you to comply with their terms of use and policies!)
![]()
Legal Disclaimer: Please note that we are not lawyers and we cannot offer legal advice on this website.
The purpose of this post is to make you aware that:
- Your website could be subject to a number of legal requirements in accordance with mandatory laws and regulations that govern your business,
- The importance of being compliant with the terms of service of third-party providers whose products or services you are offering or using in your website, and
- There are plugin-based solutions for WordPress users that can help your site become compliant, such as the plugin that we discuss in this article.
If you suspect that your website lacks in aspects of compliance, there is a simple plugin for WordPress users you may be very interested in using.
Let’s Review …
Compliance Bar Plugin – Compliance Plugin For WordPress
Plugin Description
Compliance Bar Plugin is a complete compliance & disclaimer solution for your digital presence …

For more details go here: Compliance Bar Plugin
Benefits
Below are just some of the many benefits and advantages of using Compliance Bar to instantly make your website or blog legally compliant:
Quick And Simple To Install And Implement. Ready To Start Using In No Time.
Compliance Bar Plugin installs just like any regular plugin. Just upload it to your Plugins folder via your administrator section and activate.
Legal Page Templates Are Very Easy To Edit
You can easily modify the built-in legal page templates inside Compliance Bar from the settings menu with the WordPress WYSIWYG editor.
Dedicated 24/7 Plugin Support Team
The plugin develop provides a dedicated support team to help users with anything they need.
Additional plugin benefits include:
- Customized Templates: The plugin will create your legal pages in seconds and customizes them to your business and website.
- Video Training Manuals: Compliance Bar is not complicated to use - a full library of training videos is provided.
- Use Anywhere In The World: As long as you consult someone who is qualified to give you legal advice to ascertain if the default templates provided in the plugin are suitable and satisfactory for your business, country and website, you can use the plugin anywhere in the world.
- Can Be Used For All Website Purposes: As long as your website is powered by WordPress, you can use the plugin for all website purposes. Just select the pages you want to add to your site and leave out any unnecessary pages.
Plugin Features
Compliance Bar Plugin offers many unique features to WP users. Here are just some of these features:
- Fast and easy to install and implement. Ready to go to work in minutes.
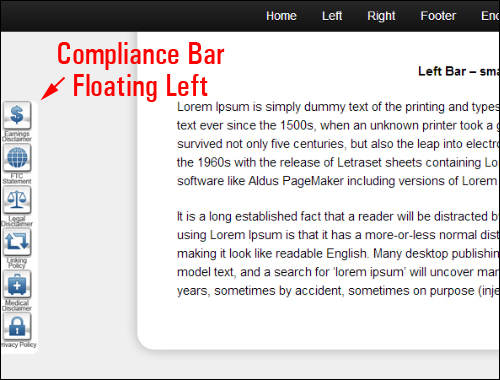
- Display Attractive Icon Bar – Compliance Bar displays links to your legal pages in the form of attractive icons that can be placed anywhere in your page. You can also upload icons of your choice.
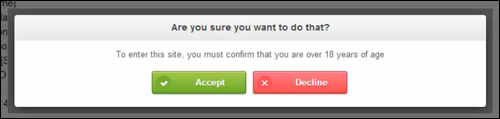
- Show Restricted Information – If your website contains content that needs to be restricted to certain age groups (e.g. information related to alcohol, ecigs, adult content, etc.), the plugin can display pop-ups that force users to accept your terms or disclaimers.
- EU Cookie Compliance – If you do business in the EU or display your content to visitors in the EU, you must be aware of EU compliance requirements. Compliance Bar displays an attractive bar notifying your visitors and covering your website from non-compliance issues.
- Record And Store IP Acceptance – The plugin records and stores your visitors’ IP address for reference, just in case a visitor accepts your terms or disclaimers and then claims they didn’t.
- Shortcode Driven – Compliance Bar is integrated with shortcodes that populate templates with your personal information. These shortcodes also allow you to place information anywhere on your site or blog, (even in the pop-ups).
- Compatible With Mobile Devices – Compliance Bar has individual settings for displaying on mobile devices or tablets and displays mobile optimized icons automatically depending on visitor mobile browsers.
Features – Details
After installing and activating the plugin, the plugin’s “Settings” section gets added to your WordPress backend.
Let’s review these settings briefly …
User Profile
There are a number of default categories in this area where you can input your information into input (e.g. “Contact Name,” “Business Address,” “Company Phone Number,” “Market Niche,” etc.). Not all categories are required, but some are (e.g. “Website URL,” “Registered Business Address,” etc.)
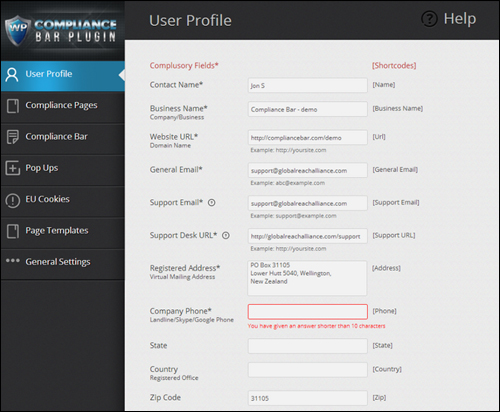
(Compliance Bar Plugin User Profile Screen – Image source: plugin documentation)
The plugin uses shortcodes to populate the information from your User Profile fields into your legal pages …
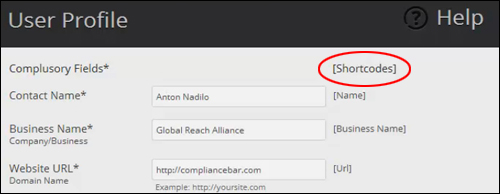
(Compliance Bar Plugin User Profile Screen: Shortcodes – Image sourced from plugin documentation)
Once the minimum required information has been input into the profile fields, you can then access the other sections of the plugin.
Compliance Pages
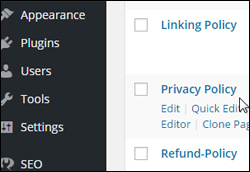
The “Compliance Pages” area contains all of the page templates …
(Compliance Bar: Legal Page Templates – Image sourced from plugin documentation)
When we last checked the Compliance Bar plugin website, there were over 20 compliance page templates available to plugin users:
- About Us
- AdSense Disclaimer
- Affiliate Agreements
- Affiliate Disclosure Statement
- Amazon Affiliate Disclaimer
- Anti-Spam Policy
- Contact Us
- Copyright/DCMA Notice
- Disclaimer
- Double Dart Cookies
- Earnings Disclaimer
- External Links Policy
- FTC Statement
- Legal Disclaimer
- Linking Policy
- Medical Disclaimer
- Privacy Policy
- Returns/Refund Policy
- Support
- Terms
- Terms & Conditions
- Testimonial Disclosure
- Adult Content Disclosure
Creating compliance pages for your blog or website can be easily done. Just select the checkboxes next to the pages you want to create and click ”Save” in the “Create Pages” section …
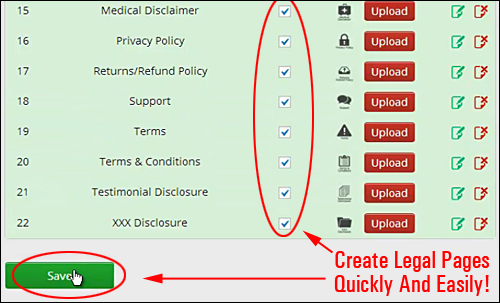
(Compliance Bar: Compliance Pages – Image sourced from plugin documentation)
Your legal pages will then be created and added under the “Pages” section of your site.
Compliance Bar Icons
The plugin comes with a default set of attractive icons for referencing your legal pages …

The icons are customizable. You can purchase an additional set of icons from the plugin developer, or create/upload your own to match the style of your theme …

(Compliance Bar: Compliance Template Icons – Image sourced from plugin documentation)
Edit / Delete Legal Pages
You can easily modify and delete the legal page templates from the “Compliance Pages” section, just like any typical WordPress page …
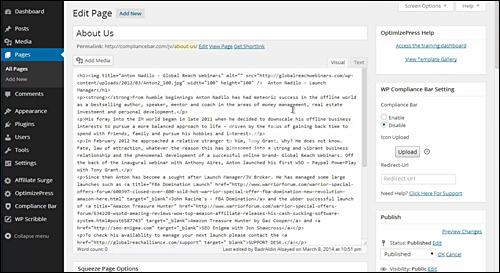
(Compliance Bar Plugin: Edit Legal Page Templates – Image source: plugin documentation)
![]()
Tips
- Customizing is recommended, as the pages contain generic content.
- The plugin indicates if it detects existing similar pages on your site (e.g. legal pages created before installing the plugin).
Compliance Bar
The plugin settings area provides many options to customize the Compliance Bar, including where to position the bar, displaying links or icon images, background colors and images, image size, selecting which pages to include an icon for in the Compliance Bar, whether or not to display the Compliance bar on your main page, which pages the Compliance Bar will display in, mobile settings, and offset distance …
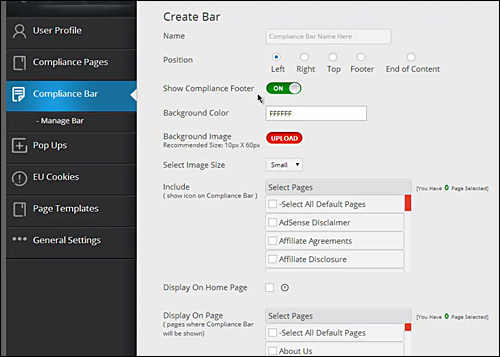
(Compliance Bar Screen: Create Bar – Image sourced from plugin documentation)
Notes:
- You can create unlimited Compliance Bars to show different icons on different pages, or to cover a multitude of uses throughout your website.
- The plugin lets you display the Compliance Bar on the front page of your site, even if you are using particular themes (e.g. Genesis, Thesis or Woo), where the home page is specifically configured through the theme itself as a built-in template, and not as a normal “static” page.
- Due to the smaller size of mobile devices, you can only select up to a certain number of page icons to display if you turn Mobile Settings “on.”
Once you have specified your Compliance Bar settings, it will display links to your compliance pages using dynamic icon bar on your site …

You have full control over the location on your pages where you would like to feature the compliance icons …
PopUps
If your website has content that should be restricted to certain age groups (e.g. content related to alcohol, ecigs, adult-related, etc.), the plugin can display popups that blocks access to visitors who do not accept your website’s terms and disclaimers.
The “Create Pop Up” screen lets you fully customize your pop ups …
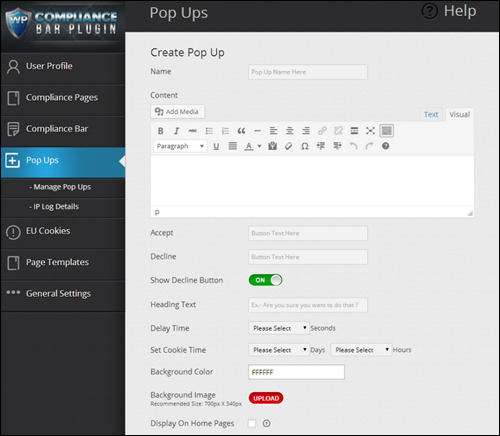
(Pop Ups Screen: Create Pop Up – Image source: plugin documentation)
You can create unlimited customized Pop Ups displaying on different pages, or to cover different uses throughout your website …
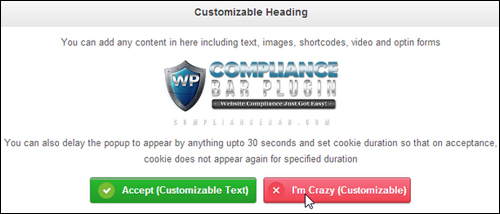
You can also set a delay time if you don’t want the Pop Ups to display as soon as visitors arrive, set cookie durations to prevent Pop Ups from appearing again within a specific time period, and capture the IP addresses of visitors who accept your terms and disclaimers for future reference …
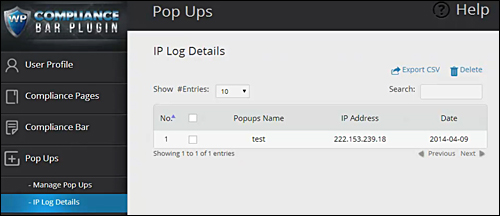
(Pop Ups Section: IP Log Details – Screenshot source: plugin documentation)
EU Cookies
If you are based in the EU or display your content to visitors in the EU, you need to make users aware of your user cookies and notify them of how you use them …

The Compliance Bar plugin lets you customize the settings for compliance with EU Cookies requirements, including the wording of your notification message and link text in the “EU Cookies” section …
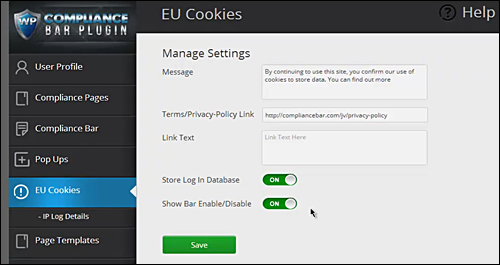
(EU Cookies Screen: Manage Settings – Image source: plugin documentation)
Compliance Bar has a non-intrusive way of notifying your visitors and covering you from non-compliance.
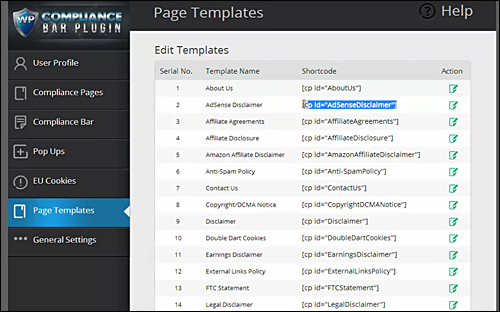
Page Templates
The “Page Templates” section, lists all of your legal page templates and shortcodes, and lets you modify the page content …
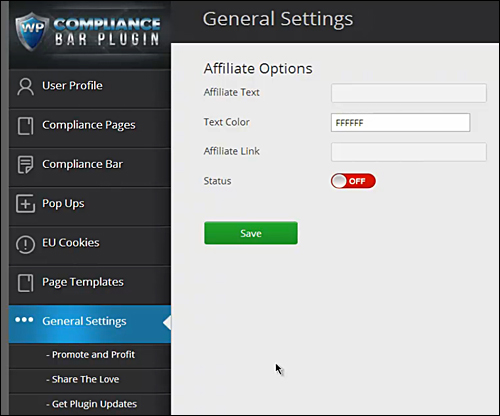
General Settings
The “General Settings” area, lets you access general information, such as promoting and sharing the plugin and getting plugin update notifications …
User Testimonials
Below are some of the testimonials and feedback users have submitted regarding the Compliance Bar Plugin plugin:
”When I got my hands on Compliance Bar, I knew I needed help to be compliant, but I had no idea how much danger I was in, nor did I know all of the different things I needed to be compliant. Once I installed Compliance Bar, I was able to very quickly add all the items I needed to ensure I didn’t end up getting fined by various agencies, or have my site pulled from Google. The best part is that getting it all set up took only minutes, and I know that I am far safer than I was. Compliance Bar is one of the best plugins I have used in a long time.” Ray Lane – (The Video Guy)
***
”If you are like me, you maybe have quite a few WordPress sites, all needing attention and most importantly, all needing to be on the right side of the law! I’ve tried several legal pages plugins and in pretty much every case, they let me down. They simply cause more work than they solve.To me, the answer should be simple. It should work and it should let me get on with building my site. After all, I know I NEED to do this stuff, but hey, I don’t really WANT to! So, for me, I don’t want those plugins that cause more work than they solve. Simple eh? Well now it is because Anton & John have just created this baby that is the answer to my needs. The Compliance Bar Plugin does what I need it to do then lets me get on with my empire building…Perfect!” Tony Grant (Portfolio Sports)
Compliance Bar Plugin Tips
Below are a few extra ways you can use The Compliance Bar Plugin:
- Protecting against content theft by spelling out terms of use of your website.
- Display compliance icons on specific pages of your website only.
- Minimize refund disputes by clearly spelling out your refund terms before purchase.
- If your website includes adult content, you can force visitors to click to confirm that they are of legal age to access your content.
Compliance Bar Plugin Product Support
Plugin Developers provide users with a dedicated support team to help users if they experience any issues. Plugin users also have access to an entire set of training videos.
Additionally, your purchase is backed by a risk-free, 30 day, 200% refund guarantee. If your edition of Compliance Bar does not work within 30 days of purchase and it cannot be fixed within 48 hrs (Monday to Friday), your money will be refunded in double.
Plugin Pricing
- Single User Licensing – Can be installed on 1 of your own domains. Cost = $37 (Normally $127)
- Business Licensing – Can be installed on up to twenty-five sites that you own. Price = $67.00 (Normally $197).
- Professional – Install the plugin on all of your own domains. Can be installed on any client site for payment or part of a paid service. Price = $97.00.
Please Note: The cost to purchase this product depends on whether there are any promotions or limited-time special offers. The pricing above was current when this article was written. This may or may not be the actual pricing charged by the product developer when you visit the website and you may be shown additional upsells or one-time offers after your purchase.
Check the plugin’s website for the latest price here: Compliance Bar Plugin – WordPress Compliance Plugin
Compliance Bar Plugin – Additional Information
Legal Templates Reviewed By Lawyers – The plugin developers assert on their website that all legal templates have been reviewed and approved by a leading lawyer. Nonetheless, we strongly recommend that you get professional advice from a qualified legal expert in your area for your own peace of mind.
For ”how to” videos showing how the software works, including help documentation and tutorials, FAQs, support help desk, contact details and more, visit the Compliance Bar Plugin website.
Install The Plugin
Compliance Bar is an easy-to-use, simple and cost-effective solution for WordPress-driven websites and blogs. We recommend installing this plugin for WordPress users if you want immediate peace of mind and legal protection.
To learn more, visit the plugin website: Compliance Bar – Compliance Bar – Compliance Plugin For WordPress
![]()
Important: Once again, we are not lawyers and we are not offering legal advice on this website. Do your own due diligence and consult a legal expert about the best way of ensuring that your website fully complies with the law in your country or region.
***