 Does your organization currently run or plan to run events that require registrations, such as seminars, training courses, not-for-profit fundraisers, social events, or even a big event like a dance party, a sporting or religious event, or any kind of event where people need to register to attend?
Co-ordinating event bookings can be a time-consuming process. You will probably need to manage calendar schedules, date availability, attendee numbers, data administration, payments and sending invoices, confirmations and reservations, reminders, refunds and cancellations … perhaps even accommodating special requests and providing tickets to event participants.
There are a number of advantages to setting up an online event registration system. It can make your business more efficient, save time and reduce expenses, help you easily duplicate previous events, give event managers more control, improve client experience and increase your sales.
The problem is that this can be very expensive.
Fortunately, if you own a WordPress-powered digital presence, you can download and install a very inexpensive and professional online event registration solution.
Presenting …
Event Espresso

Plugin Description
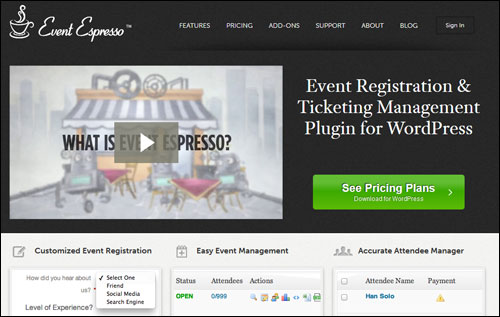
The Event Espresso online event registration software enables you to easily set up multiple events and start receiving online registrations in just minutes.
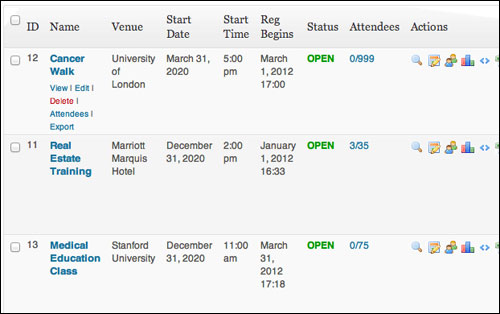
(Set up multiple events and take online bookings with Event Espresso)
Event Espresso is a flexible and feature-packed software that gives you complete control over the event registration management process.
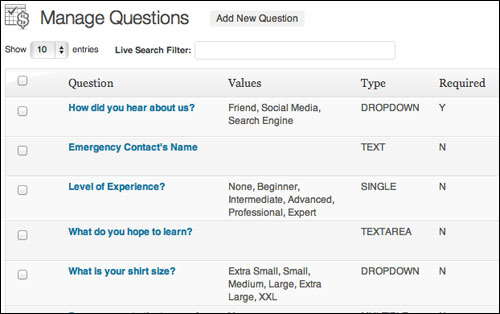
Customize registration forms
You can use a range of event registration strategies, from simple online enrollments and straight up ticket sales, to creating custom registration forms for collecting detailed information about your event participants, or integrating your event bookings with social media and autoresponders.
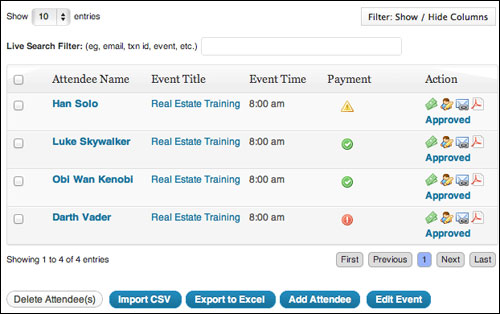
View detailed information about event attendees
Please Note: Currently, Event Espresso offers two different versions of their plugin: EE 3 and Event Espresso 4. The new EE 4 is impressively different than the older Event Espresso 3, as the plugin is being revamped using a different structure to enable future expansion. The Event Espresso 4 plugin software has different features, user interface, data structure, coding method and pricing. The company plans to eventually retire Event Espresso 3, so keep this in mind as you read more about this plugin.
To learn more about the plugin go here:
Plugin Benefits
Here are just some of the many benefits of using Event Espresso to manage event registrations on your website or blog:
Hands-Free Event Registration Management And Ticketing System
Event Espresso provides you with everything you need to turn your current web site into a feature-rich and professional event management website … from custom registration forms and automated emails, to maximum seating limits, multiple price options and discount codes, to printable tickets and seating charts.
Increased Business Productivity
By using an online event registration solution like Event Espresso, you save time and improve your business productivity by virtually doing away with the need to process registrations and bookings manually.
Essentially, you are enabling participants to perform the registration themselves.
Allowing your participants to do the data entry frees you up from doing administration and lets you spend more of your energy on delivering a more unique event.
Complete Control Over The User Experience
As you will see in a moment, Event Espresso gives you full control over the event management and registration process that you want your participants to experience.
Additional benefits of the plugin include the following:
- Significantly Lower Costs: Event Espresso gives you an inexpensive online event registration management solution compared to developing your own software or using a 3rd party service provider. The cost is kept low through a model where you purchase the core plugin (which suits the requirements of most users) and buy optional add ons when you need added features.
- Increased Sales: With Event Espresso you can accept new event sign-ups 24/7. Not only that, but, Event Espresso social sharing features and addons (see below) let people who are interested in registering for your event share your information with others who may also be interested in attending.
- Green Event Sign Up Process: With Event Espresso, the event sign up process can be kept entirely in digital form, eliminating typical paper waste from tasks related to administration.
- Own Your Information. You control all the information acquired from your event participants.
Features
Event Espresso delivers functionality to its customers through built-in features (these are included with the software) and additional features that users can buy for an additional cost, called add-ons.
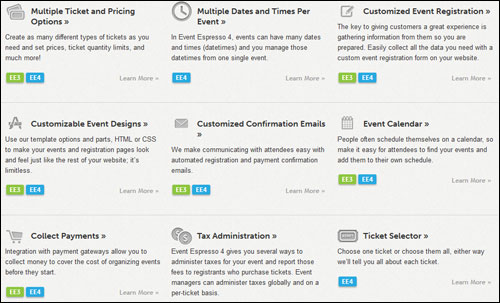
Event Espresso offers a number of great built-in to WP users. Here are just some of these:
- Fast and simple to install and use. Ready to start accepting registrations in minutes.
- Customized Event Registration Form. With Event Espresso you can gather unique information using a custom event registration form on your website to plan a great experience for your attendees.
- Custom Confirmation Emails. Set up automatic registration and payment notification email messages to communicate with event customers.
- Ticket Selector. Present multiple ticket options to registrants and let them choose the ticket(s) that best suits their needs.
- Google Maps. Google Maps integration enables you to configure the look and control settings of Google Maps on your event listing and event details pages.
- Default Prices. Set up events fast with pre-configured default ticket pricing.
- Discount & Promotional Codes. Provide promotion and discount codes to incentivize people to make a decision now, or make your offers more appealing for others. This is also practical for helping to increase sales of events close to timelines.
- Event Check-In List. Generate a list of event registrants and confirm everyone who has attended.
- No Ticket Events. You can list events without making it necessary for registrants to book tickets. Event Espresso can be used for all types of events, not only those that accept tickets.
- Private Contact Commenting. Keep comments about a contact on their profile and how you have interacted with your contacts. Private commenting enables you to keep records of when event attendees contacted you, your internal observations, and how you’ve interacted with them.
- Draft Events. Draft events let you develop your event in your own time frame without displaying it live on your website. You can continue developing your events until you are ready to publish it on your site, or schedule to publish your event at a later date and time.
- Country Settings. Event managers can configure the country and currency settings that will be used when running events, including currency, currency symbols, decimal characters and places, country codes, regions, etc.
- Exportable Information. You can export all the information gathered from your event participants into Excel or CSV format for producing reports, devising new marketing strategies, reviewing attendee statistics, etc..
- Register Multiple Event Participants. Event Espresso 4 allows an individual or a group to book multiple attendees simultaneously. You control how many attendees are able to enrol in a single registration by specifying either a limit on ticket purchases per order, or per-ticket minimums and maximums.
- 1-Click Upgrades. Event Espresso offers simple one-click plugin installation upgrades to make sure that you have the newest features and to keep your installation compatible with the latest version of WordPress.
- Invoice Payment Reminders. Follow-up potential registrants who have not paid yet for their admission with a standard but personalized PDF invoice with one click. Your invoices will address registered participants who have not paid their registration in full by name, display the balance owing, and include a link to the event details, a payment link and a link to download a PDF invoice.
- Event Reports. Event reports gives you data of all of your registrations and transactions, enabling you to measure the performance of your events with the aggregate number of registrations and amount of revenue you’ve collected.
Extra features include:
- Define Extra Meta Information. This feature allows web developers to have more control and options over your event page content and how the information displays to prospective customers.
- Full Logging & Remote Logging. Event Espresso 4 allows you to output a log file with debugging data which can be helpful for web developers who are troubleshooting.
- Autonomy, Flexibility & Value: Event Espresso states on their website that their mission is to “empower business and organization leaders with the event registration, ticketing and management tools that maximize the success of events.” To achieve their goals, the software has been built using a modular and effective model that provides users with great autonomy and flexibility and delivers value for money as a result.
The premium version of Event Espresso also comes with over 40 added features, including:
- Live-filtering when searching for events in the Event Espresso admin.
- Default surcharge (the same as applying a service fee to every ticket).
- Default payment status.
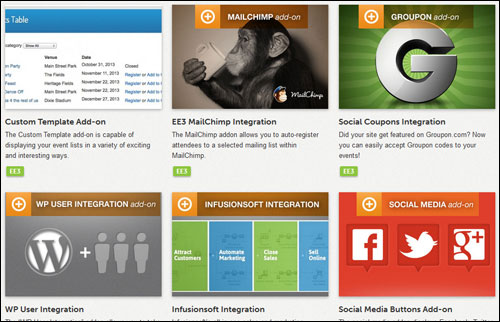
Add ons
As mentioned previously, Event Espresso provides “add ons”, which allow plugin users to significantly expand the capabilities of your event management system.
Some of these add-ons include:
- EE4 Events Grid Template Addon: Displays events in a pure CSS grid-like structure using the featured image. Hovering over the image will display further information. If an event does not have a featured image, it will use a default image.
- Recurring Events Drop-down Custom Template Add-on: The Recurring Events Drop-down custom template lets you organize the events with many datetimes into a dropdown list.
- Events Calendar Table Template Addon: The Calendar Table template is a list template with a bold date and customizable “register now” button. The template can also be customized to display an event thumbnail instead of a date.
- Events Social Sharing Add on: Add social sharing features to the end of your Event Espresso “thank you” page that allows your registrants to post a message about their event registration on Twitter and Facebook after registration.
- Custom Files Addon: The Custom Files add-on allows you to bypass certain aspects of the Event Espresso plugin.
- Roles And Permissions Basic & Pro Add on Versions: This add on lets you involve other staff in the event management process and give new users permission to create events or regional managers permission to manage events. The Roles and Permissions Basic add-on allows you to manage & customize the WordPress users roles and allow them different permissions with different capabilities, so others can help you manage your events or the events that others create. You can customize roles so that a user does not have access to certain sections of your WordPress dashboard and/or certain sections of your Event Espresso settings. If you’d like to allow users to control factors geographically for events and users, use the Roles and Permissions Pro addon.
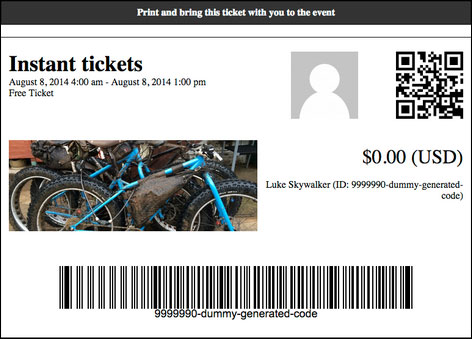
- EE4 Event Ticketing And Bar Scanning Add-on: The Ticketing add on gives you the capacity to create tickets with bar codes. The Bar Scanning add on adds the capacity to scan ticket bar codes. The ticketing addon includes the ability to customize event tickets. Multiple bar code types are included for handling check-in scans at the venue door. Customers can either print out their tickets or display them on their mobile devices. The mobile app can be used for checking in or checking out registrants and to validate tickets.
- EE4 Events Table View Template Add-on: The Events Table Template add on provides you with an easy-to-use system that lets you modify the look and feel of your event lists. It comes with a simple table template with category filters, table search, table paging and more. It also allows developers to build custom templates using one of the included templates as a source template.
- EE4 Infusionsoft Integration Add on: With the Event Espresso 4 Infusionsoft App and Merchant Account integration all-in-one sales and marketing plugin add-on, you can easily automate your customer relations and email marketing campaigns to seamlessly capture customer data, track enrollments, and accept payments from your website.
Note: The Event Espresso development team is continually adding new features and improvements to its software, including new add-ons.
For more information about the newest Event Espreso features and add ons, visit the plugin website here:
Plugin Users – Testimonials
Below are some of the testimonials that users have posted about Event Espresso:
”EventEspresso saves us money, saves our secretary 16-24 hours and looks so professionally done that people ask us how we do it; which we happily tell them, “Event Espresso, and be sure to get the ticketing add-on.”” David, House of Prayer
”Probably the best event management plugin available.” Materia Inspiration Centre
”You guys have done an AWESOME job with this system…promise me to keep up the excellent work you guys are doing, for as long as you can… Respect!” Robert Jarnroth, Jarnroth Digital Productions

Event Espresso Tips
Whether you are a gym owner, teacher, conference planner, or event consultant, there are simply countless possibilities of what you can do with the Event Espresso plugin.
After purchasing your copy of the plugin and becoming a registered user, visit the user forum for tips and practical suggestions to improve your event management process and improve the experience of your event participants.

Product Support
Event Espresso is fully compatible with most WP plugins and WP themes that follow WP coding standards. If you experience issues with the plugin, however, you will find that Event Espresso provides great technical support, as many of its clients attest:
”Thank you Seth for being so responsive and going above and beyond the call of duty with your app! I highly recommend Event Espresso for its functionality and for the stellar support. Seth has a deep knowledge and understanding of WordPress and has built a tool that is seamless to use for both organizer and attendee alike! After looking at a bunch of alternatives, Event Espresso far surpasses the other apps that are available.” Wendy Troupe, ICS North Pole Express
Event Espresso provides incredible support that includes access to a support forum, comprehensive online documentation with faqs, knowledgebase and how tos, priority support and even a monthly VIP member pass that gives you access to community of developers, designers, event managers, publishers and webmasters that use Event Espresso tools, plus faster support response times.
In addition, Event Espresso boasts a well-staffed team of experienced WordPress developers with a solid track record of support, so this is definitely a solution you can count on to manage your events.
Software Price
Event Espresso is available in a range of editions, including a FREE basic edition (named Event Espresso Decaf). For support and advanced plugin features, however, you should consider downloading one of the paid plugin editions below:
- Personal Licensing – This lets you install Event Espresso on 1 domain only. Pricing includes 51+ Premium features, (add-ons sold separately) and one year of upgrades and support. Cost = $69.95.
- Everything Licensing – This option allows you to set up Event Espresso on one site only. Cost includes 51+ Premium features, 29 Premium add-ons and 1 year of upgrades and support. Price = $279.95.
- Developer License – This lets you install Event Espresso on 5 domains. Includes 51+ Premium features, (add-ons sold separately) and 1 year of upgrades and support. Price = $249.95.
The cost of purchasing the Event Espresso plugin can vary, depending on whether there are any promotions or limited-time special offers. When we last checked, the software is selling for the prices shown above. Check the plugin’s website for current pricing details: Event Espresso – Event Manager And Ticket Registration System For WordPress
Please Note: The above reflects the pricing when this review was written. This may not be the actual pricing charged by the plugin seller when you visit the site.
Additional Information
Event Espresso regularly adds new features and improvements to the plugin. Make sure to remain subscribed to their customer update list to receive the latest information and updates.
Use the plugin’s documentation tools to find answers to common questions about setting up and using Event Espresso, and visit the support forums if you have questions related to a specific situation, or to report errors and give feedback.
For detailed installation and support documentation, demos, downloads, videos, tutorials, FAQ and more, visit the Event Espresso website.
We Recommend
Event Espresso is the leading WordPress event registration and ticketing manager software, used by thousands of people.
If you are a WordPress user and you currently run an event that involves scheduling dates and venues, registering participants, and reserving tickets or seating, then you will probably not find a more suitable software for your needs than Event Espresso.

For more information, visit the plugin website here: Event Espresso – Event Management And Ticketing Registration Plugin For WordPress
***