 WordPress has evolved from being just a simple blogging tool to a tool that can be used to create all types of web sites.
Whatever you can imagine, someone is bound to be already building it using WordPress!
This article will help you learn how to create stunning content faster and design beautiful web page layouts with drag & drop ease in WordPress.
Drag And Drop Content Editors For WordPress
Is The Default WordPress WYSIWYG Editor Meeting All Of Your Page Design Needs?
With all the rapid advancements that the WordPress platform has undergone in recent years, many WordPress users feel that the WordPress editor is more suitable for performing conventional content editing than creating or changing page elements within more complex layouts.
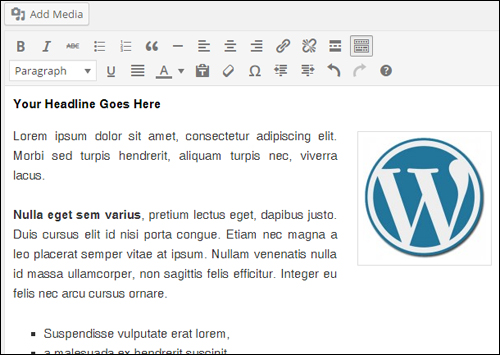
(The WordPress WYSIWYG editor is great for adding, formatting and editing “linear” text and images, but adding more complex page elements can be challenging!)
For example, let’s say you want to create something like the layout shown below …
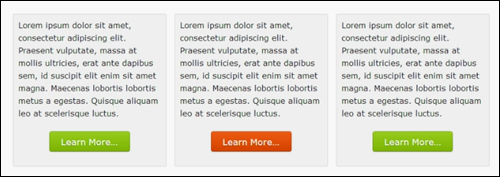
To create the above boxes with text and buttons, you would need to insert short codes into the content for each of the page elements you want to display to visitors …
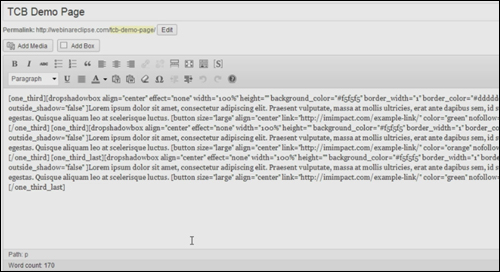
Typically, this is not really an issue … until you have to reconfigure the layout (for example, move part of the content from box 1 into box 2, or replace the background color inside a box from bright red to orange. Then, you’re stuck having to mess around with code inside the content editor.
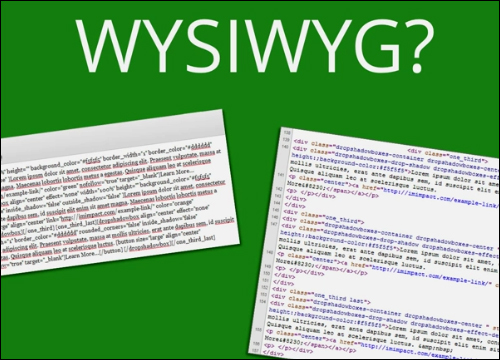
The WordPress visual editor is supposed to provide users with an easy-to-use WYSIWYG (What You See Is What You Get) editor, but as you can see, if you are working with more complex page elements, often what you see may not be what you get …
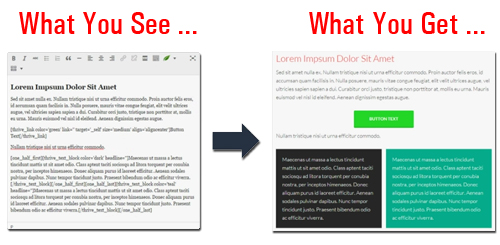
(“What You See” isn’t always “What You Get” … unless you can visualize code!)
In some cases, you would probably be better off working directly inside the WordPress html editor tab instead of the WordPress visual editor when trying to create complex page elements …
Even though WordPress is the most user-friendly CMS platform available, this makes it hard for WordPress users without coding skills to fully manage their own content.
The fundamental challenge of using shortcodes and HTML to create content in the default WordPress WYSIWYG editor can be summarized as follows:
1) Speed – How long does it take to create a web page using this editor?
2) Abstraction – How closely does the content in the editor match the content in the “front end” when you are creating or editing a page?
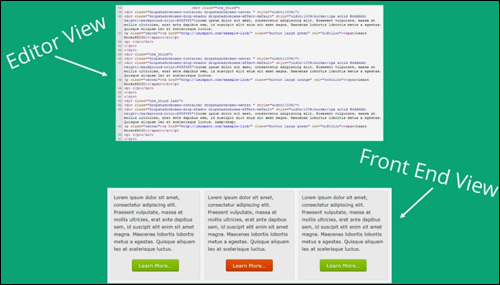
As you can see from the above screenshot, what you see in the back end doesn’t look even remotely similar to what you see in the front end. This means that users need to translate mentally what the content will look like when working with complex layouts. Other solutions require taking several steps before you can start configuring your page layout, or endlessly going back and forth between browser tabs and performing tweaks and updates to see how your content is coming along, which can affect how fast you can create your content, as you wait for the page to reload.
A number of WordPress developers have tried to come up with a range of solutions to try to address this issue. These range from standalone plugins you can install on your site that add new functionality to the editor, to themes that come with built-in features like drag and drop editing …
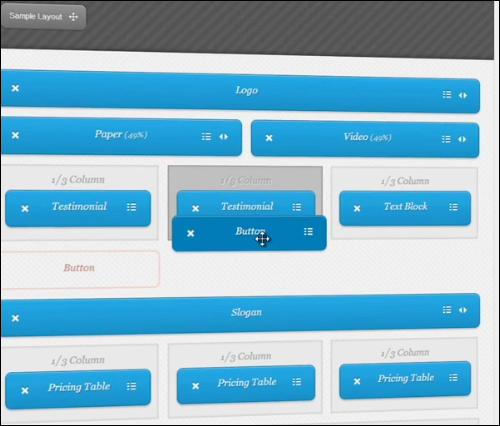
(WordPress “drag and drop” editors aim to make creating complex content easier!)
Some solutions require so many complex page design features, that users end up with complicated-looking front end editors …
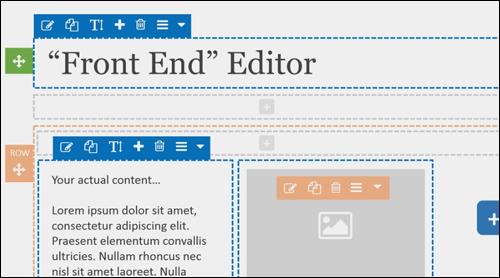
Many of these editors work, but they fail to address the fundamental challenge of using shortcodes and HTML as described earlier. Adding and editing sophisticated content elements on a web page becomes overly complicated, involves multiple steps and doesn’t match what users expect to see on the “front end.”
If you want your page content to look “just right” quickly, this can start to become very frustrating after a while.
Ask yourself this …
If there were no technical constraints, how would you like to build and edit your content?
Now, imagine the following …
- You look at your content and if you see something that needs changing, simply click on the content and start typing. Your content is instantly changed.
- You simply drag and drop elements around the page, and see them exactly as they will display on the front end without having to mentally abstract from shortcodes or HTML.
- You have an idea for a specific piece of content that you would like to create, so you simply start typing, and you build your web page as you go, without delays, without tab switching, and without waiting for new pages to refresh.
Would this not be the ideal way to create content for your web site? A true WYSIWYG editor where all you have to do is click-to-edit and drag and drop elements around your pages and posts?
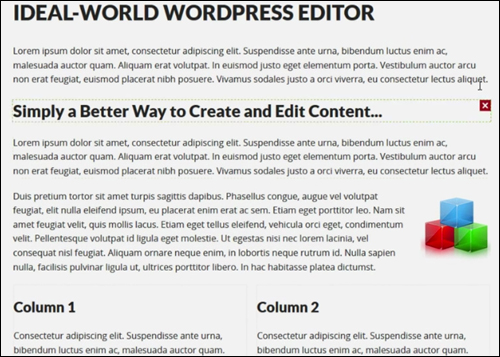
(Imagine being able to create complex web page layouts quickly for your web content with no technical constraints!)
If you are ready to change the way you create content in WordPress site, then here is a plugin that you may want to consider using …
Thrive Content Builder – Create Stunning Content Faster With Drag & Drop Ease In WordPress Sites
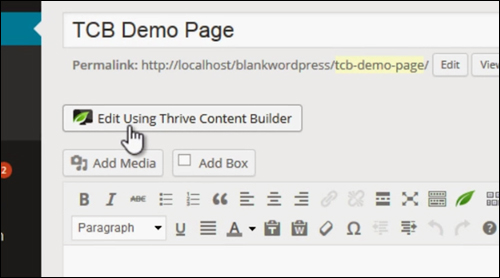
Plugin Description
Thrive Content Builder is a truly intuitive WordPress click-to-edit drag and drop content creator.
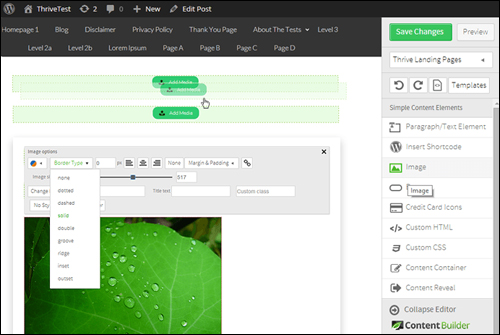
Thrive Content Builder is a new and incredibly easy way to speed up the process of creating great content on your WordPress website.
Once installed, Thrive Content Builder adds a visual content editor and a menu that lets you drag and drop elements on your web page …
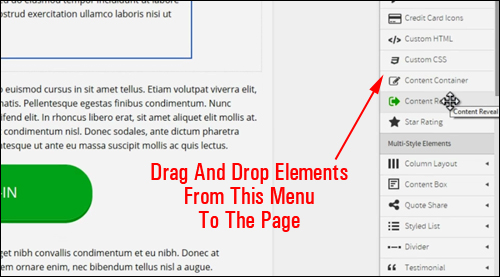
(Thrive Content Builder adds a new editor to your WordPress site)
Thrive Landing Pages And Content Builder is actually a combination of the Thrive Content Builder and Thrive Landing Pages plugins combined into one, plus an additional plugin feature called Thrive Lightbox.

We will discuss all of the above and how these powerful features work together to help you easily transform and improve your web site and create amazing marketing pages and engaging content.
Thrive Content Builder
This plugin lets you easily add content to your web pages and build complex page layouts using drag and drop elements …
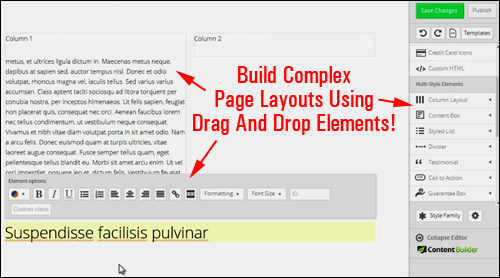
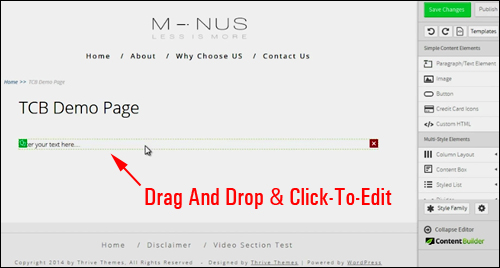
Every element of your page can be created by dragging and dropping things around the page and then clicking to edit them …
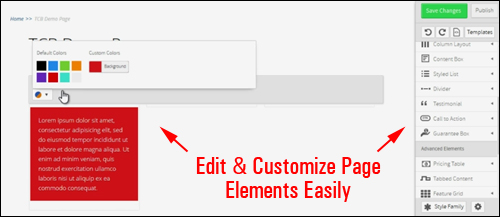
Once you have placed elements on a page, you can then customize these without having to go through multiple steps or complicated option screens …
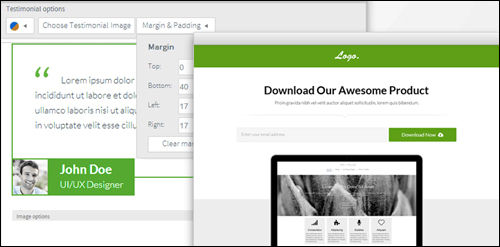
You can also build stunning landing pages that can just as easily be edited or customized …
Thrive Landing Pages and Content Builder is simple, easy to use, and ideal for all WordPress users at all levels. In fact, working on content with the plugin installed is so amazingly easy, that the developers warn that you will never look back once you start using it
Learn more about this plugin here: Thrive Content Builder

Thrive Content Builder and Thrive Landing Pages were created by the same team that developed Thrive Leads, another terrific plugin for WordPress that we have written about on this site.
For more information about using this plugin, see this article:
Benefits Of Using Thrive Content And Landing Page Builder Plugin
Here are just some of the benefits and advantages of using Thrive Content Builder to speed up content creation:
Installation Is Easy And Simple
Thrive Content Builder is quite easy to install. Simply upload it to your Plugins folder via your WP dashboard and activate.
Real-Time Content Building And Editing
Thrive Content Builder is really simple and intuitive to use and lets you edit and add content right inside your web pages in real-time.
A Truly Visual Editor
With Thrive Content Builder installed, what you see as you work within the content editor – typefaces, visual elements, layouts, etc. is exactly what you get in the front end of your site.
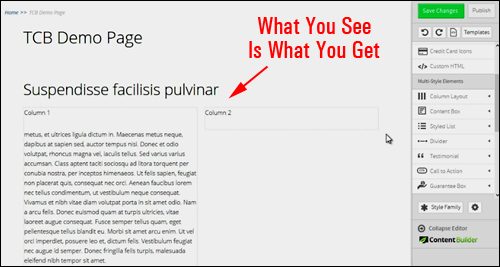
Some additional benefits and advantages include:
- Beautiful Page Layouts With Drag And Drop Ease: Create any layout you can imagine with intuitive drag-and-drop functionality.
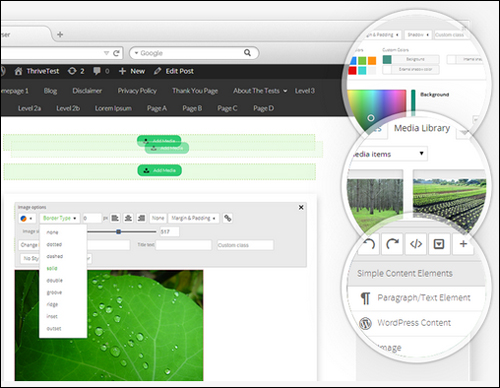
- Design Elements Included: With Thrive Content Builder you not only get a click-to-edit WordPress content builder, but the plugin also includes a collection of functional and eye-catching design elements that you can customizable and insert into your web pages without using shortcodes, such as columns, styled lists, dividers, responsive maps, etc.
- More Enjoyable Content Creation: Not having to deal with technical stuff, or wait for your page to load frees up your attention and allows you to build the pages your business needs, quickly and without having to edit code or click through multiple layers of menus to get what you need done.
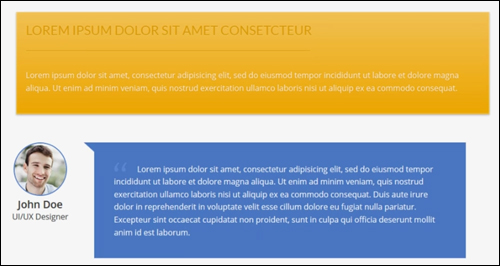
(Insert, edit and customize web page elements like testimonials, flat design elements, borderless content, call to action buttons, countdown timers, etc.)
Plugin Features
Thrive Content Builder offers WP users many great features. Here are just some of those:
- All Editor Functionality Is Preserved: You have access to all of the regular WordPress editing options that you are used to (e.g. underline, paragraph formatting, font styles, etc.),
- Drag And Drop Elements: The plugin adds a “drag and drop” list of elements to your post or page screen when creating and editing content.
- Conversion-Boosting Elements: The plugin provides you with a range of attention-grabbing and customizable elements that will help increase your sales conversions, including buttons and call-to-action elements, testimonial boxes, and guarantees. In addition to being customizable, multiple design options are also available for various elements.
- Responsive Design: Add responsive elements like column layouts, guarantee boxes, content section dividers, e.g. which will display great on different screens.
- Add Animation Events To Web Pages: Thrive Content Builder’s Event Manager feature lets you add animations, trigger lightboxes and more!
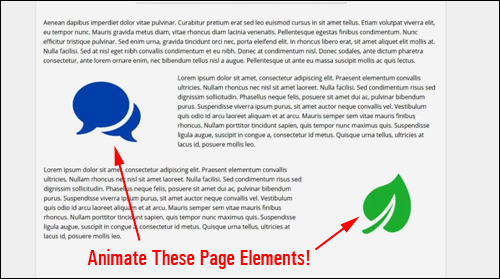
(Add Animated Elements To Your Pages)
Thrive Landing Pages Plugin – Landing Page Templates
Thrive Landing Pages provides sets of templates that work together logically and use the same conversion-optimized design language to take your visitors all the way from signup to purchase, product download and more.
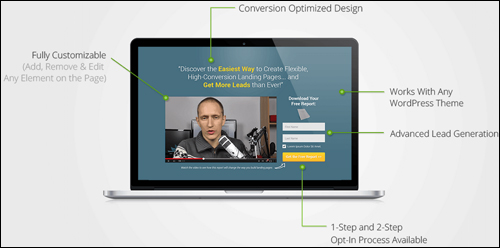
(Thrive Landing Pages plugin lets you add conversion-optimized pages to your site)
Thrive Landing Pages Plugin – Benefits
- Hosted on your own WordPress site
- Save time and money building and customizing pages
- 100% conversion-optimized web page templates
- No web coding skills required
- Works with all WordPress themes
Thrive Landing Pages and Content Builder not only can be used to create beautiful-looking content in your WordPress posts and pages, but you can also choose from dozens of beautifully designed, conversion optimized landing page templates and fully customizable …
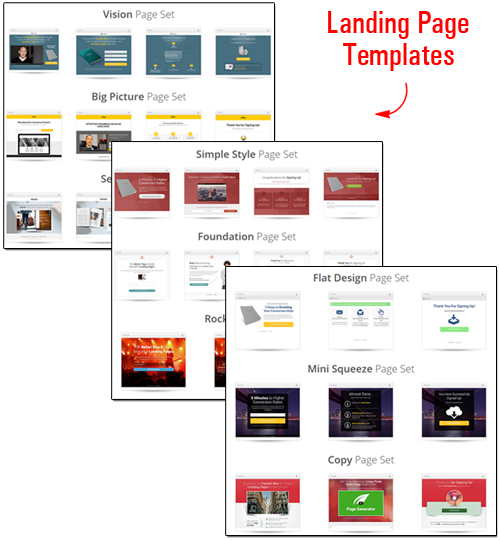
(Thrive Landing Pages provides sets of templates that work together logically and use the same conversion-optimized design language)
There are over 30 templates available, with more templates being worked on. In addition to the available templates, the developers plan to release new web page templates for email lead generation, sales pages, training pages, personal branding pages, webinar pages and more.
Customizable Landing Page Template Sets
Typically, in order to have completely customizable landing page templates, you would need to either pay a web site developer to do the work, or learn web coding languages like HTML and CSS and figure out how to edit the page code yourself.
As Shane Melaugh, co-founder of Thrive Themes says …
“There are many ways to get a pre-designed page published quickly, but the problem comes with customization. Total design freedom requires either hiring web developers to do the work for you, or learn how to do it yourself, which involves learning how to code or use overly complicated editors. Customizable usually means complicated, expensive or time-consuming. So, you can either have something that is fast and easy to set up, or something that is customizable and flexible. But you couldn’t have both … until now! With Thrive Landing Pages you get the best of both worlds for building conversion-optimized web pages.”
Thrive Landing Pages gives you stunning pre-designed web pages that are fully optimized and ready to go, and complete design freedom that allows you to change and edit anything on the page …
With the landing page templates included with this plugin, you can:
- Edit text in any button, bullet point, headline, etc.
- Delete text, images or any other part of your landing page
- Change all background images and edit colors
- Edit the color of text, links, buttons, etc.
- Use your own fonts
- Select your own images and graphics
- Change content area size
- Change the order of elements on the pages
- Translate pages into a different language
- Add any kind of custom content anywhere in any of the pages
- Start with a blank page and create your own templates, or even build your own library of custom landing page templates.
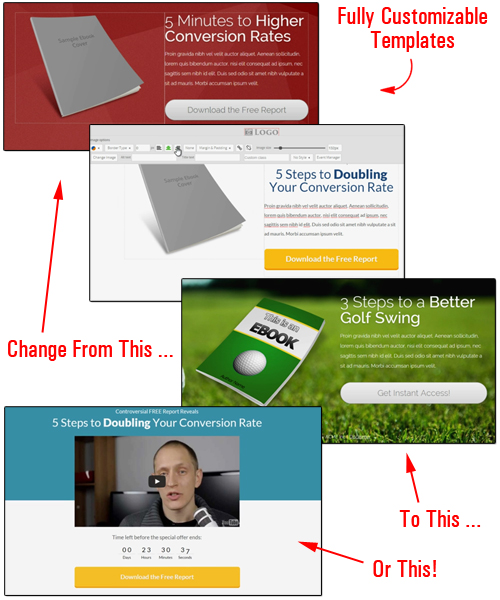
(Change or edit any aspect of the page)
Transform Your WordPress Site Into A Powerful Marketing Machine With Thrive Lightbox
The Thrive plugin combo includes the Thrive Lightbox plugin, which lets you add fully editable 2-step opt-in forms and animated objects to your site …
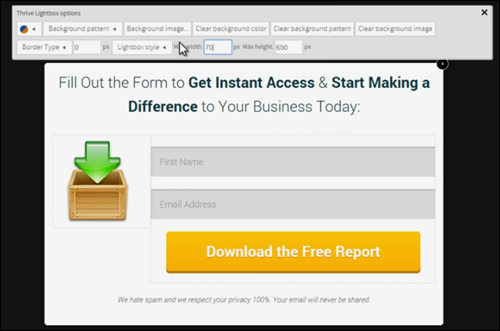
(Add lead capture forms and animated elements to your pages with the Thrive Lightbox plugin)
Thrive Lighbox Two-Step Opt-in Forms
A 2-step opt-in process helps improve your conversion rates. When visitors click on an image or button they are presented with your opt-in form …
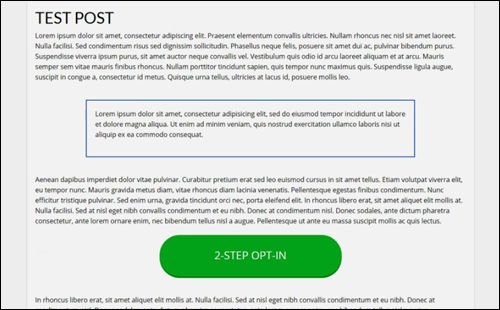
(Capture more leads and subscribers with a 2-step opt-in process)
Thrive Lightbox Event Manager
An “event” consists of a trigger and an action. You can make opt-in forms appear when your visitor clicks or hovers over a button or an image, or when someone reaches a certain point on the page. You can also use the Event Manager to animate attention-getting elements on your page, using various effects (e.g. zoom in from the page center, slide in from top to bottom, roll out, etc.
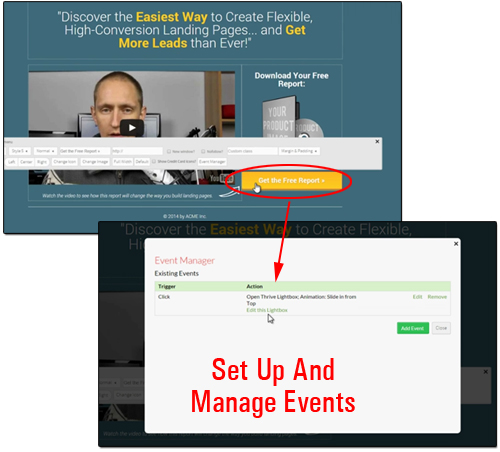
(Set up and manage events on your sales pages with Thrive Lightbox)
Lightboxes and events are created automatically for your landing pages, but you also have complete control over all events, triggers and design.
Feedback From Plugin Users
Below are just some testimonials and comments plugin customers have written about Thrive Content Builder:
”You guys are simply awesome I am loving everything you are doing at the moment. Keep up the great work you really are making such a big difference in this field. Jule Fuller”
***
”Your stuff is beautifully designed, fast and has great options for marketers that you just don’t see with other themes. Great, great job! Absolutely love Thrive! David Coleman”
Plugin Tips
Thrive Content Builder works with any WordPress theme, not just with the Thrive Landing Pages plugin. Note, however, that you cannot use Thrive Content Builder to edit content on existing pages or posts that were not created using the plugin.
You can add WordPress shortcodes inside Thrive Content Builder or Thrive Landing Pages and they will display correctly when published.
Thrive Lightbox works with any content you build using Thrive Content Builder.
Support
Thrive Content Builder and Landing Pages Plugin provides free updates, new landing templates and upcoming features. The Thrive team is constantly working on adding new features and improving existing ones.
Thrive software is really well-supported, and users get lifetime upgrades, and 1 year unlimited support with their purchase, backed by a no-risk, thirty day, 100% money-back guarantee.
This is an exciting product that will just keep getting better.
Product Pricing
At the time of writing, the pricing information shown below includes all three components described above (Thrive Content Builder, Thrive Landing Pages & Thrive Lightbox):
- Single Site Licensing – This edition allows you to run the plugin on 1 domain only. It includes full feature set, unlimited updates and one year of unlimited support. Cost = $59.00.
- Unlimited Sites License – This option enables you to install the plugin on all of your personal domains. It includes full feature set, unlimited updates and 1 year of unlimited support. Cost = $87.00.
- Agency Edition – This edition enables you to set up the plugin on all of your own domains and any client websites. Includes access to Thrive Content Builder, plus all Thrive Themes & Thrive Plugins. Price = $247.00 per year.
Note: Pricing for Thrive Content Builder can vary, depending on whether there are any promotions or limited-time specials being offered. Currently, the software is selling for the pricing shown above. This may or may not be the actual price set by the plugin seller when you visit the product site and there may be additional upsells or one-time offers after purchasing.
Check the plugin’s website for current pricing details:
Additional Info
The Thrive Content Builder and Landing Pages plugin developers emphatically assert that the plugin’s architecture gives you the “best of both worlds,” and help bring back the “joy of creating content.”
On the one hand, you have the time-saving benefits of ready-made web page elements and beautiful, conversion-optimized templates that help to speed up your content creation, and on the other hand, you have 100% control over the design process and the ability to change anything and everything on your web page, using the plugin’s click-to-edit and drag and drop features, that lets you work unhindered by overly complicated options.
For a demo video of the plugin in action, including help documentation and tutorials, FAQs, support help desk, contact details and more, visit the Thrive website.
Download This Plugin …
If you want to edit something, you just click on the element and start editing. If you want to change something, do it, and you’ll see the change happen instantly. If you want to move something, all you have to do is drag it and drop it into its new location. There are no complicated steps involved.
If you want to transform and improve your business online and create amazing marketing pages and engaging content, Thrive Content Builder and Landing Pages delivers an incredible conversion-boosting package with a single, inexpensive plugin.
To learn more, check out the plugin here:
***