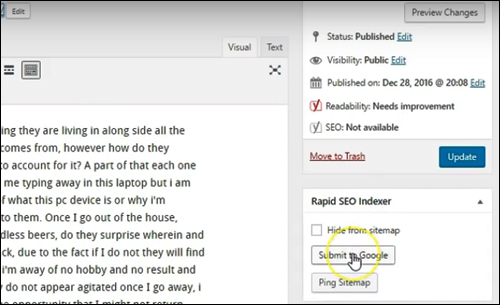
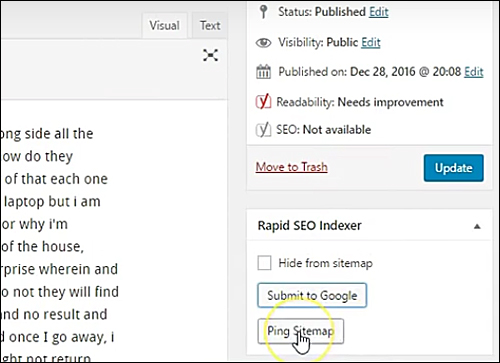
 This tutorial is part of the WordPress Traffic Automation Blueprint series where we show you step-by-step how to set up WordPress to automatically notify search engines and your social media pages when new content is published on your site, driving more traffic to your website or blog.
To review our step-by-step tutorials on how to automate traffic to your WordPress website or blog, go here:
- WordPress Traffic Automation Blueprint Part 1 – Overview
- WordPress Traffic Automation Blueprint Part 2 – Setup
- WordPress Traffic Automation Blueprint Part 3 – Configuration
- WordPress Traffic Automation Blueprint Part 4 – Automation
- WordPress Traffic Automation Blueprint Part 5 – Optimization
![]()
If your WordPress site has not been configured to drive traffic using the leverage and automation described in our tutorials, then do one of the following:
- Go through our step-by-step tutorials and learn how to expertly configure your own site,
- Refer your web developer or web designer to our step-by-step tutorials and ask them to do it for you, or
- Contact us to discuss your needs and request a quote for our Done For You Installation & Expert Configuration Service.
What You Should Have Already Set Up On Your WordPress Site
If you have been following our WordPress Traffic Automation tutorials, you should already have set up the following on your site:
Ping Services List
As soon as you publish a new post, WordPress automatically notifies all the services listed in the ‘Update Services’ section (WordPress Settings > Writing > Update Services) …

(WordPress Blog Ping Services List)
For a comprehensive list of ping services that you can download for FREE, see the tutorial below:
Add Your Sitemap To Search Engines
You should have also added your site’s RSS feed and XML sitemap to your webmaster accounts (e.g. Google, Bing) …
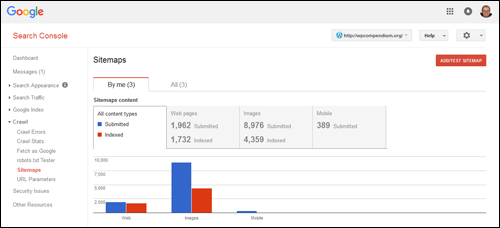
(Google Search Console – Sitemaps)
To learn more about setting up Webmaster accounts and adding sitemaps and feeds to notify search engines, see the tutorial below:
Automatically Syndicate Content From WordPress To Social Media
There are many plugins, tools, and services you can use to integrate WordPress with social media. We cover a number of these in our tutorials.
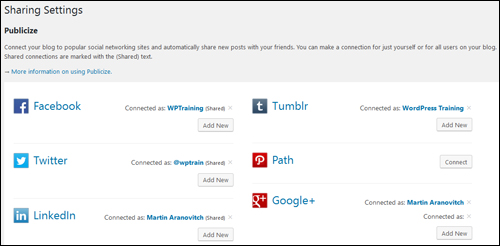
A simple way to integrate WordPress with your social media accounts is using the Jetpack plugin …
(Jetpack’s Publicize feature automatically syndicates your content to social media)
Installing Jetpack and configuring its Publicize settings allows you to automatically syndicate your posts to social media accounts like Facebook, Twitter, LinkedIn, etc.
To learn how to install and configure Jetpack to automate traffic, see the tutorial below:
Additional Notification Plugins
As discussed in our tutorials, there are many traffic generation and automation plugins, tools, and services you can use. This is one of the reasons why WordPress is such a powerful business marketing platform.
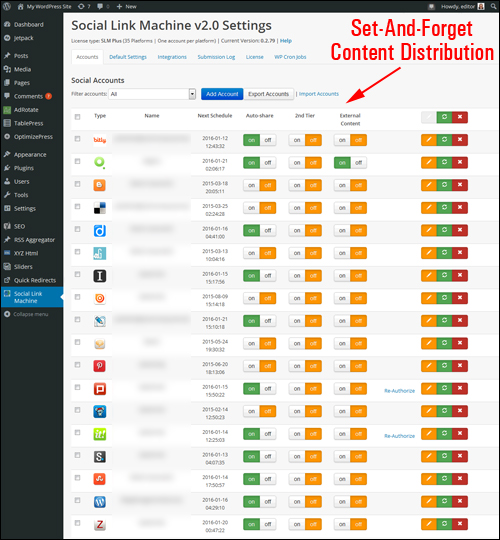
In addition to instantly notifying social media accounts like Facebook, Twitter, LinkedIn, etc. when new content is published on your site, you can also set up your WordPress site to automatically post links to your content on many other social networks and social bookmarking sites using plugins like Social Link Machine …
(SocialLinkMachine – drip-feed your content automatically to many authority websites)
To learn more about additional traffic generation plugins and automation tools, see the tutorial below:
How To Kickstart Traffic To Your WordPress Website Or Blog
Once you have set up and configured all of the above plugins and services, the next step is to kickstart the process of generating ongoing traffic to your site.
You could just start publishing content to your site. If you want to supercharge and speed up the process, however, here are some additional steps we recommend you take:
- Rapid Site Indexing
- Supercharge Your Site Ranking & Authority Building
- Methodically Establish Your Online Presence
Let’s go through each of these steps in more detail.
Rapid WordPress Site Indexing
Adding sitemaps to your webmaster accounts and posting content on your WordPress site as described in our tutorials will help get search engines going. You can boost the process using external blog pinging services.
Once your site is fully configured and ready to start driving traffic, select and copy your RSS feed or XML sitemap link …
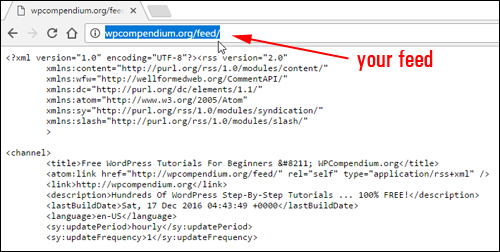
(Select and copy your RSS feed)
Head over to one of the following sites:
Ping.In

(Ping.in)
Ping.in is a service that pings (notifies) a number of services including blog search engines and blog directories. By pinging these services, you let them know that your site has been updated and these services will then crawl and index your site content, allowing a larger audience to discover your site.
Ping.in is free to use and when we last checked requires no registration. Just head over to the site and type in your Site Name, Site URL and XML feed into the fields …
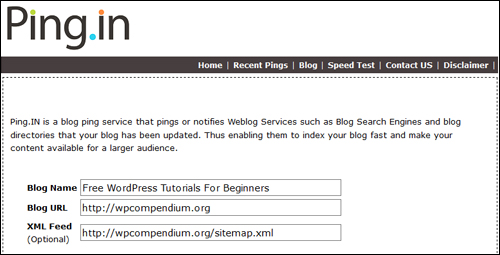
(Enter your site details into Ping.in)
Next, select the services you want to notify or just click on ‘Check All’ to select all services, then click on the ‘Ping’ button at the bottom of the screen …
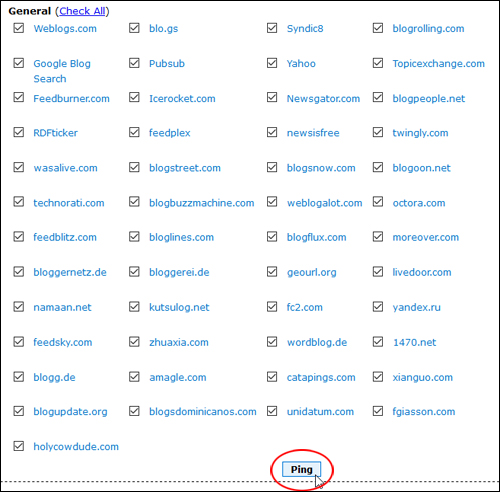
(Select services to ping)
Ping.in will immediately begin to notify the services about your site …

(Ping.in notifies services immediately)
Once all pings are sent, Ping.in displays a list of all services that have been notified about your site …
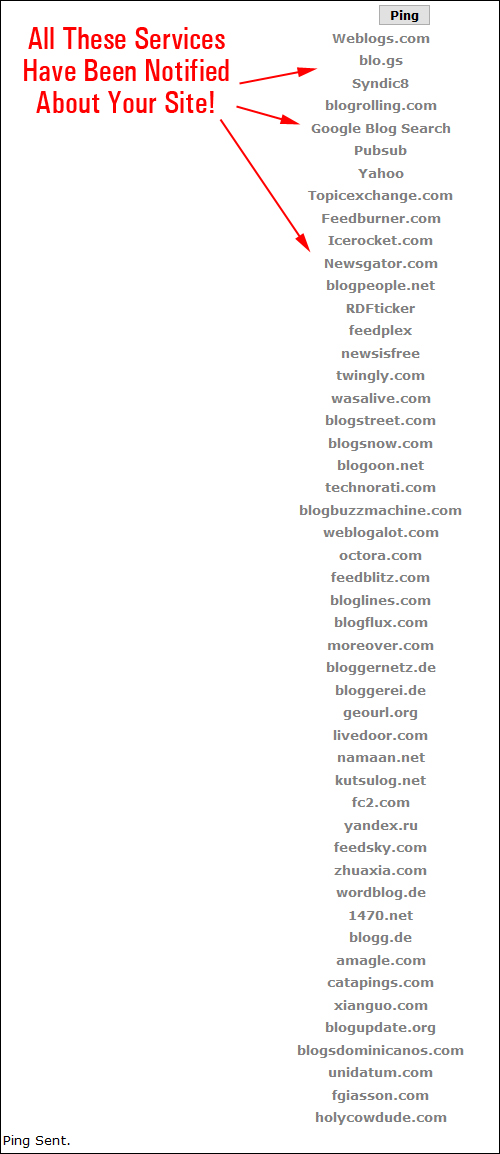
(Pings sent)
Go here to use Ping.in:
Pingoat
(Pingoat)
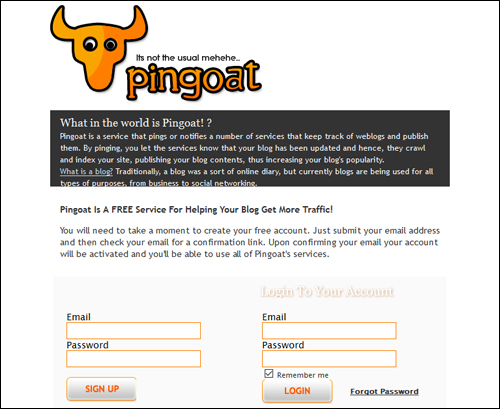
Pingoat is another service like Ping.in that pings (notifies) blog directories and gets them to crawl and index your site content.
To use Pingoat, create a free account, then log in after confirming your new account, enter your site details (including your RSS feed or XML sitemap feed), select all of the services to notify and click go.
Pingoat will notify all the services you have selected.
Go here to use Pingoat:
![]()
We recommend using either Ping.in or Pingoat to notify blog directories about your site but not both in short succession. Your site could be blacklisted if you ping services too often.
Rapid WordPress Page/Post SEO Indexing
In addition to the setup already presented in the tutorials, you can also get a new WordPress post or page indexed very quickly in Google using the method described below.
![]()
This method is in 2 parts and is also good for getting Google to crawl/reindex: old posts or pages with new or updated content.
Fetch As Google
After creating a new post or page, log into your Google Search Console area, and go to Search Console > Crawl > Fetch As Google. Enter the URL of your post or page into the field and click the ‘Fetch’ button …
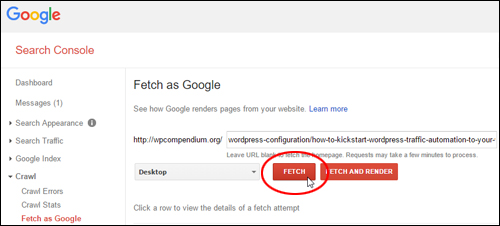
(Fetch as Google)
Next, click on ‘Request indexing’ …
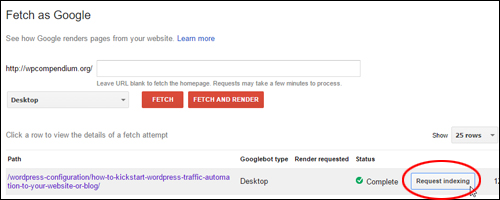
(Request indexing)
Click the Google reCAPTCHA checkbox to verify that you are human …
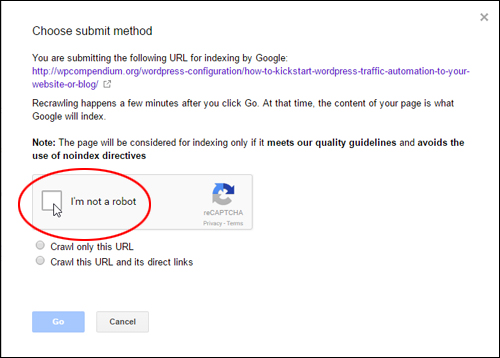
(Google reCAPTCHA)
Proceed with the verification process …
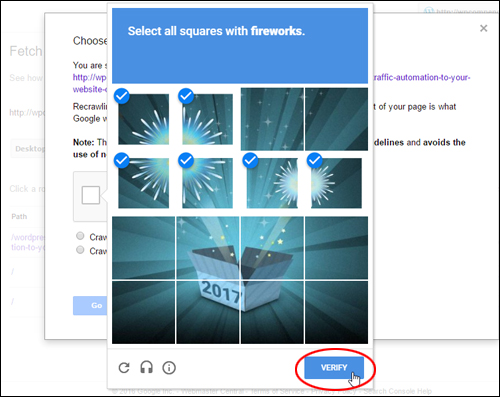
(Google reCAPTCHA Verify Button)
Once you have verified that you are not a robot, select the ‘Crawl only this URL’ radio button and click ‘GO’ …
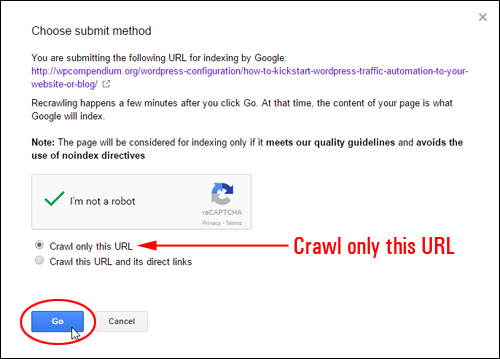
(Crawl only this URL)
Your new post/page indexing has been requested …
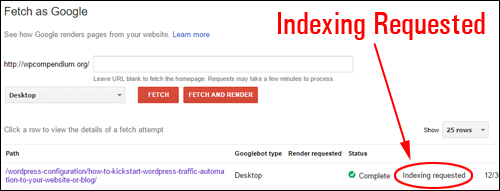
(Indexing requested)
Ping Sitemap
After indexing of your post or page has been requested, the next step is to ‘ping’ your XML sitemap.
We recommend using a plugin like Yoast SEO to automatically generate and keep your XML sitemap updated …
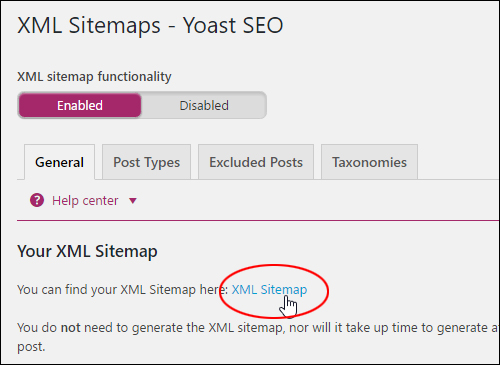
(XML Sitemaps – Yoast SEO)
Select and copy your XML sitemap address to your clipboard …

(Copy your XML sitemap URL)
Once you have the XML sitemap URL, it only takes a simple ping to Google to update any post or page you need indexed. Open a new window on your web browser, and paste the URL below in the address bar, then hit enter to submit the ping to Google:
http://www.google.com/webmasters/sitemaps/ping?sitemap=http://yoursite.com/sitemap.xml
![]()
(How To Ping Your Sitemap To Google)
Alternatively, you can use an online tool like the one shown below to submit your sitemap to Google (and Bing) …
PingSitemap

(PingSitemap)
With PingSitemap, simply enter the URL of your sitemap into the XML sitemap URL field and click the ‘Submit’ button.
The tool with ping (notify) Google and Bing about your sitemap (the other services no longer exist) …
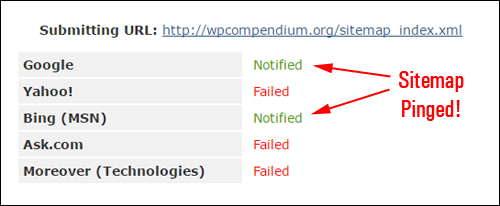
(Sitemap Pinged)
Your new post or page will be indexed very quickly using the above method …

(Google has indexed your new post or page!)
Note: Google recommends that you resubmit a sitemap no more than once per hour.
![]()
You can also automate the entire process described above using a simple and very inexpensive plugin called Rapid SEO Indexer.
Rapid SEO Indexer
(Rapid SEO Indexer WordPress Plugin)
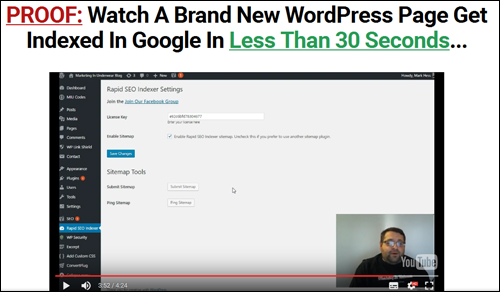
Rapid SEO Indexer automates the ‘Fetch as Google’ and ‘Sitemap Pinging’ process and can get a brand new WordPress page or post indexed in Google in less than 30 seconds …
(Index new WordPress posts or pages in Google fast with Rapid SEO Indexer)
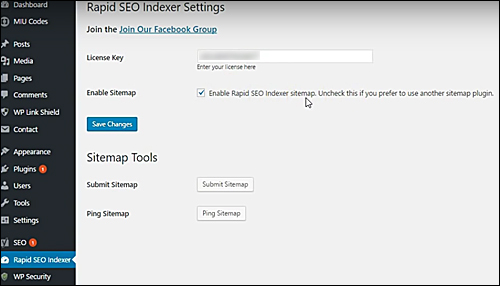
The plugin features a built-in real time XML sitemap generator. After the plugin has been installed and activated on your site, you can create and submit an XML sitemap to Google using the built-in XML sitemap generator, or use an existing XML sitemap (e.g. from Yoast SEO plugin) …
(Rapid SEO Indexer Settings)
The plugin adds a new options box to your page, allowing you to submit the new page or post to Google …
(Click to submit your post/page to Google)
And ping the sitemap …
(Click to ping your sitemap)
Getting your WordPress page or post indexed is the first step to getting free targeted SEO traffic. Rapid SEO Indexer helps you get more traffic easily and quickly with 2-click indexing functionality. The plugin is well supported, installs in seconds and works right out of the box. You can use this plugin to index unlimited pages and posts on your site(s) and the plugin comes with .
Go here to view a demo video and to download this plugin:
Supercharge Your Site Ranking And Authority Building
Another highly recommended step you can take to kickstart traffic to your WordPress site or blog is to send out press releases on a regular (i.e. monthly) basis.
Press releases are a powerful and fast way to create significant exposure online, boost your search engine rankings, drive traffic and build authority for your site.
DistributionPress.com
(DistributionPress.com – Get more traffic to your site using news/press releases)
DistributionPress.com provides a very cost-effective ‘done-for-you’ news/press release writing and distribution service that can help boost your traffic.
They will create a professional news/press release about your business and distribute it to 220+ authority news, TV, radio, and media sites …
(DistributionPress.com submits your press release to over 220 authority sites)
DistributionPress.com can fully manage your press release campaign, leaving you free to focus on other areas of your business/website.
We recommend sending out an initial press release to announce the launch of your business/website, new products and services, company news, etc. (see this article about press release topics) to kickstart your traffic and then begin running a regular PR campaign where you send out a new release each month to boost your rankings and authority online, which will continue to grow your traffic.
![]()
We use DistributionPress.com’s services to help boost WPCompendium.org search rankings and grow traffic …
(Using press releases has helped to boost our rankings and grow our traffic!)
To learn more about the benefits of using a service like DistributionPress.com to drive more traffic to your site using press releases, go here:
Methodically Establish Your Online Presence
Using a done-for-you service like DistributionPress to create and distribute monthly news releases on your behalf allows you to quickly establish your online presence and begin driving traffic to your site. It also allows you to methodically boost your rankings and authority by building hundreds or even thousands of external links on trusted sites that will direct visitors to your site. This is a great way to automate traffic, especially if you lack the time to write content.
Ideally, you should be growing your traffic and increasing your rankings by consistently using external services like distributing press releases and internal methods such as publishing great content on your site. Unlike paid traffic generation methods that disappear if you stop paying for the service (e.g. Google AdWords, Facebook Ads, etc.) distributing press releases and publishing content on your site actually builds you an asset with long-term traffic links.
Our WordPress Traffic Automation Blueprint tutorials describe exactly how to set up your site to grow traffic using content marketing. Once your site is indexed in the search engines, integrated with your social media accounts and set up to automatically ping dozens of services as soon as new content is published on your site, all you have to do is create and publish new content on a regular basis.
If you need help coming up with great content ideas for your site or how to plan, develop, and implement a content marketing strategy for your business, we have created a comprehensive and completely FREE 120-part email training content creation course (value = $300) that will help you.
If you haven’t already subscribed to our Infinite Content Creation series, we recommend you do so now using the form below:
In order to build a successful digital presence for your business, you need regular traffic. Hopefully, our WordPress Traffic Automation Blueprint tutorials have given you all the information you need to automate the traffic generation process and drive an endless stream of new visitors to your WordPress website or blog.
We wish you great success online and lots of new traffic!

***
"I am beyond impressed with what you have put together. I can tell that you put a ton of hard work into building what you have. You have the absolute best content on WordPress I have ever seen!" - Robert T. Jillie
***
